A multi-vendor website is an online store that enables multiple vendors to sell their products on a single platform. In this model, the vendors manage their seller accounts and inventory. Also, they pay a commission to the eCommerce storefront owner for facilitating their sales on the marketplace.
For both the vendor and the store owner, this arrangement is mutually beneficial as it allows for increased customer traffic and expanded reach. Vendors can also collaborate and seek support from the community in the event of any technical challenges on the website.
Benefits Of Marketplaces
A multi-vendor marketplace provides some advantages for its operators. Its core function is to serve as a reliable platform that connects buyers with suppliers, facilitating secure and trustworthy transactions. The marketplace earns its revenue through commissions charged on each transaction. This business model is designed to benefit all parties involved – including buyers, sellers, and the operator.
Marketplace Design: Meeting the Needs of Sellers and Buyers
Marketplace websites are designed to cater to two types of users – sellers, and buyers. Therefore, the design of the website should be intuitive and user-friendly for both parties. Here are some essential design features that can help meet the needs of both groups:
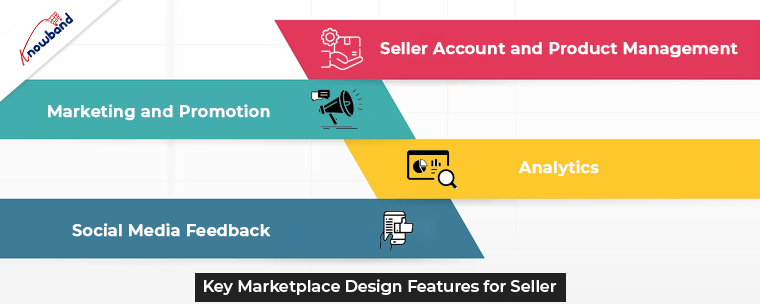
Key Marketplace Design Features for Seller
For a multi-seller marketplace to succeed, it is critical to have an engaged group of sellers. Additionally, it is important to provide them with the necessary tools for efficient management. Here are some essential features that can boost vendors’ capabilities and ensure the success of your marketplace.
Seller Account and Product Management
To manage their products effectively, vendors require access to a personal account that contains data on their products, warehouses, notifications, and more. To provide additional security and flexibility, you can also grant different permission levels to vendors enabling multiple user roles.
Marketing and Promotion
Promotions, discounts, and coupon codes play a vital role in marketing campaigns. They significantly increase revenue and boost customer loyalty. Further, to empower vendors to manage their personalized and customizable marketing tools, they must use these features.
Analytics
Custom dashboards that display essential information, deliver reports, and update statistics are essential to vendors. They need to track key metrics related to their sales, customer session time, and more. Data visualization can help them instantly obtain and perceive this information.
Social Media Feedback
Social media integrations can be used to collect and deliver customer feedback. This helps in allowing vendors to gather opinions about your multi-seller marketplace and increase its popularity. Social networks are an excellent tool to engage customers and increase your platform’s visibility.
Overall, these key features can help sellers manage their products and drive the success of your marketplace. By providing vendors with the right tools, you can create a thriving ecosystem that benefits both sellers and buyers.
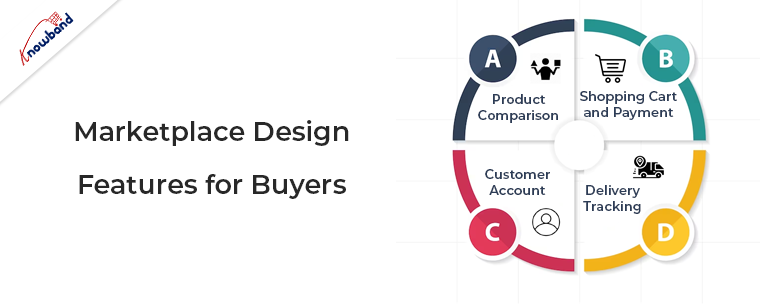
Marketplace Design Features for Buyers
Attracting more customers and ensuring a seamless user experience is the ultimate goal of any marketplace. To achieve this, it is essential to include features that help buyers navigate through the platform and make informed decisions.
Product Comparison
One of the essential features for buyers is the ability to compare similar products and choose the best option based on specific characteristics. Implementing an automated comparison feature will save buyers time and effort, reducing the need to visit multiple online stores to find what they need.
Shopping Cart and Payment
A clear shopping cart that allows buyers to adjust the number of items, choose shipping options, and add notes is necessary. Providing multiple payment methods such as PayPal, Stripe, and Braintree enhances convenience and ensures that the payment system works smoothly.
Customer Account
Customers should be able to sign up and manage their accounts to view their order history. Additionally, creating shopping lists, and streamlining the sale and order tracking process. However, simplifying the signup process or making it optional can be beneficial for first-time buyers.
Delivery Tracking
To improve customer service, providing timely order status updates and sending notifications is crucial. Allowing buyers to track their delivery, and see the estimated arrival time builds trust. If they can monitor changes then it will enhance their experience and build trust in your marketplace.
In the End
In this article, we have been discussing the various features to be provided to sellers and buyers. Moreover, in case you are looking forward to setting up a multivendor marketplace then you can have our plugins for the same. In case of any concerns or issues regarding the same, you can connect with us at support@knowband.com.
Apart from that in case you need mobile apps for your business then we are here to assist you for the same. Also, we can provide you with custom developments that are specific to your business needs. Further, we can assist you with module modification too.
Due to the marketplace’s dynamic nature, it is necessary to continuously improve and update your marketing plan. Your brand might acquire a competitive edge by looking for ways to enhance your marketplace approach. The most popular locations for today’s online shoppers are still online marketplaces like eBay, Etsy, and many others. Online marketplaces are now used by around half of US businesses and European ones to sell their products.
Making the proper online marketplace decisions is crucial for brands all around the world. To be sure you’re on the right path, we have listed 2 the Advantages of two Marketplaces to enhance your online marketplace approach.
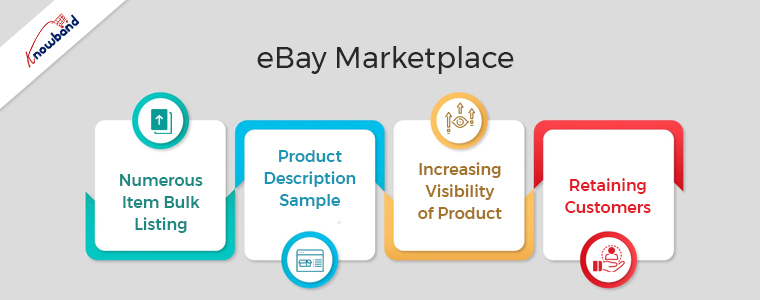
eBay Marketplace
One of the most popular online marketplaces in the world is eBay Marketplace thanks to its huge user base. Concurrently operating eBay businesses and internet stores may be challenging. The handling of orders and inventory on the eBay Marketplace takes a lot of time and effort. For owners of e-commerce businesses, this eBay plugin is an excellent option. Owners of online stores can easily link them with eBay storefronts by using eBay Integration. To manage both your eBay store and your offline business, use eBay integration.
The following are the benefits of using eBay:
Numerous Item Bulk Listing
The bulk product listing feature of the eBay Integration plugin is very beneficial. The admin can also link the shop category to the eBay Marketplace category. The eBay Marketplace will never run out of the shop class products in that particular eBay category. Furthermore, a single eBay category connection to the administrator is possible with several courses.
Product Description Sample
To reflect the presence of the HTML layout, the shop administrator might apply this plugin. The API Integrator for eBay works with HTML layouts. Shop owners may track eBay product descriptions more easily with the help of this plugin.
Increasing Visibility of Product
By subscribing to an eBay store, more people can see your stuff. You can draw in more customers by being subjected to more crowds. Sales for sellers who switched to eBay store subscriptions significantly increases over the period.
Retaining Customers
When you stock your store with standout goods, people will return to you because they will remember you. They’ll contact you again the next time they need that thing. You can successfully improve your client experience and service if you operate an eBay store. One of the most important elements that affect customer retention is excellent customer service.
Etsy Marketplace
Utilizing the Etsy marketplace is essential for companies offering handmade goods, antique goods, and creative supplies. The US’s fourth-most popular eCommerce site is Etsy. Even though it has a limited user base, there are several advantages for merchants using Etsy Marketplace.
To sell their goods, effectively manage inventory, and process orders, Etsy offers retailers APIs. The Etsy Marketplace Integration module utilizes these APIs, which eliminates the requirement for a store administrator. The Etsy Marketplace is not required for sellers who have separate listings for their products on each platform. Your products need only be present in your store for the Etsy Integration module to immediately list them on the Etsy Marketplace.
Following are the advantages of Etsy Marketplace:
Little to No Listing Fees
You can get access to a variety of tools and the knowledge of a seller community by opening an Etsy shop, which is free to do. When you list items, a small fee of $0.20 per listing applies. It is less expensive to open a shop because there are no ongoing expenses, unlike other possibilities. A minor commission fee and a standard payment processing fee are there for the completion of a sale. To encourage the success of small businesses, Etsy generally maintains moderate fees.
Broad Buyer Pool
One of the main benefits of the website is that it is widely known. This shows that you already have a market for your products. Compared to larger eCommerce sites, Etsy is more frequently visited by customers looking for authentic goods. Etsy has distinct products rather than a product with numerous entries that are comparable.
If your company shares Etsy’s mission of offering customers unique, handcrafted, vintage items, then this is the place for you. This helps you attract visitors who are currently spending time on the website.
Wrapping Up
In this article, we have explained the advantages of two marketplaces and why they are useful for eCommerce businesses. If you want our help with the same, please contact us at support@knowband.com. For specific developments for your company also you can get in touch with us. We will also help you to add additional functionality to the plugins. Kindly let us know in case you need our help regarding any concerns or issues related to our modules.
The possible benefits to be obtained by entering an online marketplace can differ between industries and firms, and between buyers and sellers. If you are looking for the advantages and the downside of the online marketplace before starting one then you have landed on the right page.
The marketplace model is booming in the business industry and the growth rate is out of the blue. Companies like Amazon, Flipkart, Myntra, ETSY are operating for years and are now at the top.
There are many types of online marketplaces and websites where you can sell your goods to customers who would not otherwise find you, in addition to having your own physical and e-commerce shop. An online marketplace has various advantages for the admin, seller, and buyers.
Benefits of Online Marketplace for your businesses
An online marketplace is a platform for small businesses to bring it on the web. Sellers and merchants are benefited but the customers get the most advantage. Some of the potential advantages are summarised below:
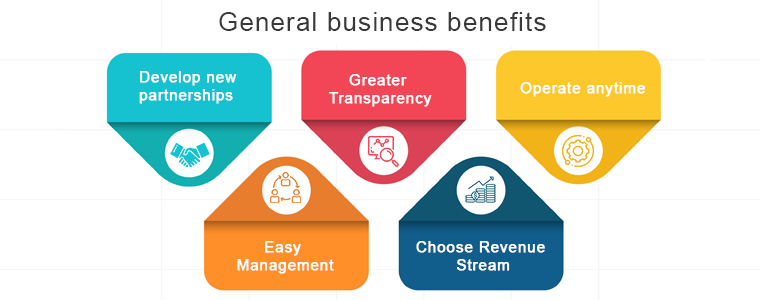
General business benefits
Develop new partnerships:
There are greater opportunities, either within their supply chain or through supply chains, for sellers and buyers to develop new trading relationships. The radar of a marketplace is anytime greater than an individual eCommerce website because many sellers and buyers from different niches come to the same platform for their needs.
Greater Transparency:
Because the availability, rates and stock levels are all available in an open environment; e-marketplaces can provide greater transparency in the buying process.
Operate anytime:
Time restrictions and concerns with various working hours for foreign trade are avoided when round-the-clock operations are feasible. No one has to wait for the shop to open as these marketplaces can be operated anytime from anywhere. The online Marketplace is highly convenient for both sellers and buyers.
Easy Management:
Product Information Management software that automates the bulk upload to your marketplaces of product information. This way, at the same time, you can be sure that the catalog and stock details are standardized in all your networks.
Choose Revenue Stream:
There are two ways the marketplaces earn income, one is commission based and another is by charging subscription or membership fees. Some of the e-marketplaces find commission the best choice as it is easier to operate and is a sustained source of income. While the online marketplaces like OLX make money through premium subscription plans.
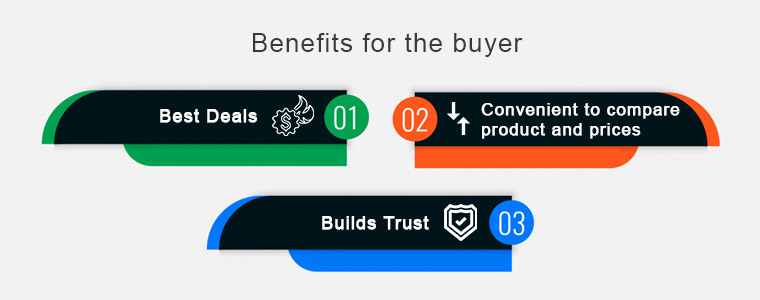
Benefits of the online marketplace for the buyer
Best Deals:
Buyers can secure the best deals due to updated information on the availability and price of the product. An online marketplace brings the right buyers in touch with the right sellers with much greater precision than it could ever happen in a simple web search.
Convenient to compare product and prices:
Instead of wasting time calling individual suppliers, e-marketplaces provide an easy way to compare rates and products on a single platform. One of the key benefits of an online marketplace is that it puts together all deals from different vendors or service providers. Customers are more likely to use an app with a wide variety of choices so that they can select exactly what they want without restricting a single provider to their preference.
Builds Trust:
Developed e-marketplaces provide the customer with a degree of confidence as they exclusively work with vendors who are members. This builds trust and looks convincing when a new customer visits the eCommerce marketplace. A significant number of buyers feel intimidated by sharing card details for financial transactions when they operate on a new website.
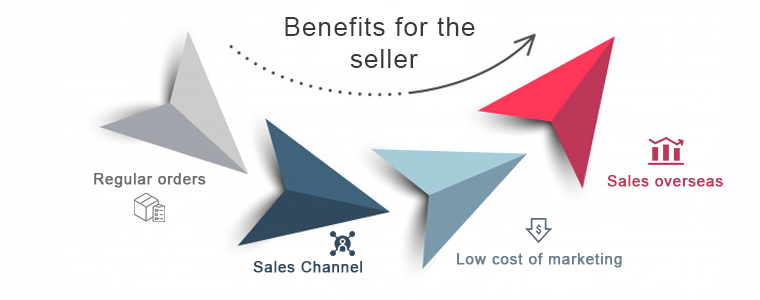
Benefits of the online marketplace for the seller
Regular orders
Sellers get daily requests from both new and existing customers for quotes and products. An e-marketplace increases business opportunities. You could meet customers with whom you’ve never crossed paths before, or pursue new demographic niches and find new prospects for sales.
Sales Channel
You provide multiple touchpoints for clients to connect with your brand when you sell through multiple platforms, online, offline, and everywhere in between. To advertise and sell products, the online marketplace creates an alternative distribution channel.
Low cost of marketing
When compared to other distribution platforms, e-marketplaces may deliver reduced marketing costs. The seller can reach a potential customer with little effort. You can sell right there where potential customers are found without investing either extra time or money. Marketplaces have the benefit that they have their resources, target groups, and customers.
Sales overseas
The global e-marketplaces will provide opportunities that you would not be aware of for overseas sales. Through online marketplaces, overseas sales are incredibly easy. In particular, foreign operators, such as Amazon or eBay, typically provide assistance and rights to retailers. In the face of high inventory levels, an enticing price will persuade foreign customers most of all. Provide multiple payment gateways according to customer demands.
Final Words:
These were the major advantages of the online marketplace but never forget the fact that there is a risk involved in every new business. Different types of online marketplaces are classified considering several parameters like their focus, niche, revenue-generating system, etc. If you want to start your marketplace or sell on an e-marketplace then you should study both advantages and disadvantages. An online marketplace might be the ticket to building a big, profitable business with a lasting impact if you can resolve the challenges.
The OpenCart-based eCommerce store owners can now create an online marketplace like Etsy and eBay with Knowband’s OpenCart Marketplace plugin. Further, just install the OpenCart Multi vendor Marketplace plugin in your store. Moreover, this will enable multi-seller functionality at your site. Third-party sellers can easily register and list their products on the site. The various aspects of the store management rest in the hands of the site admin. Thus, the seller’s profile, category request, products, and review approval happen from the back-end of the OpenCart Multi seller marketplace extension.
1.1 Admin Benefits of OpenCart Marketplace Extension
The various admin benefits of Knowband’s OpenCart Multi-vendor marketplace plugin are mentioned below:
The store admin can easily convert their single-vendor eCommerce site into a whole new and fully-functional marketplace with the help of Etsy clone for OpenCart.
The OpenCart Multi vendor Marketplace plugin supports all types of products including simple, configurable, and bundled.
The OpenCart multi-seller marketplace plugin enables the admin to set the global as well as the category-based commission to be charged to the sellers.
The store owner can easily monitor the seller’s profile and products being posted at the site. They can easily approve/disapprove the seller’s profile from the admin interface of the OpenCart Multi-vendor Marketplace plugin.
The admin can even assign the categories to the sellers. Additionally, the vendors can send a category request to the admin. These requests are processed by the store admin from the back-end of the OpenCart Multi seller Marketplace extension.
The OpenCart Marketplace Module allows the store admin to enable/disable the review/rating option from the site. If enabled, the customers can give reviews for the products as well as the sellers.
OpenCart Multi-vendor Marketplace plugin offers custom shipping options. If this feature is enabled, the sellers can add their own shipping methods.
The OpenCart Marketplace Plugin offers easy tracking of sales report and overall transaction of the site.
The store admin gets 24 default email templates to keep the sellers notified about the various aspects.
1.2 Seller Benefits of OpenCart Multi-Vendor Marketplace Extension
The third-party vendors can easily register as a seller at the site just by filling out a form.
Once the account approves, the sellers can list their products at the site from their dashboard.
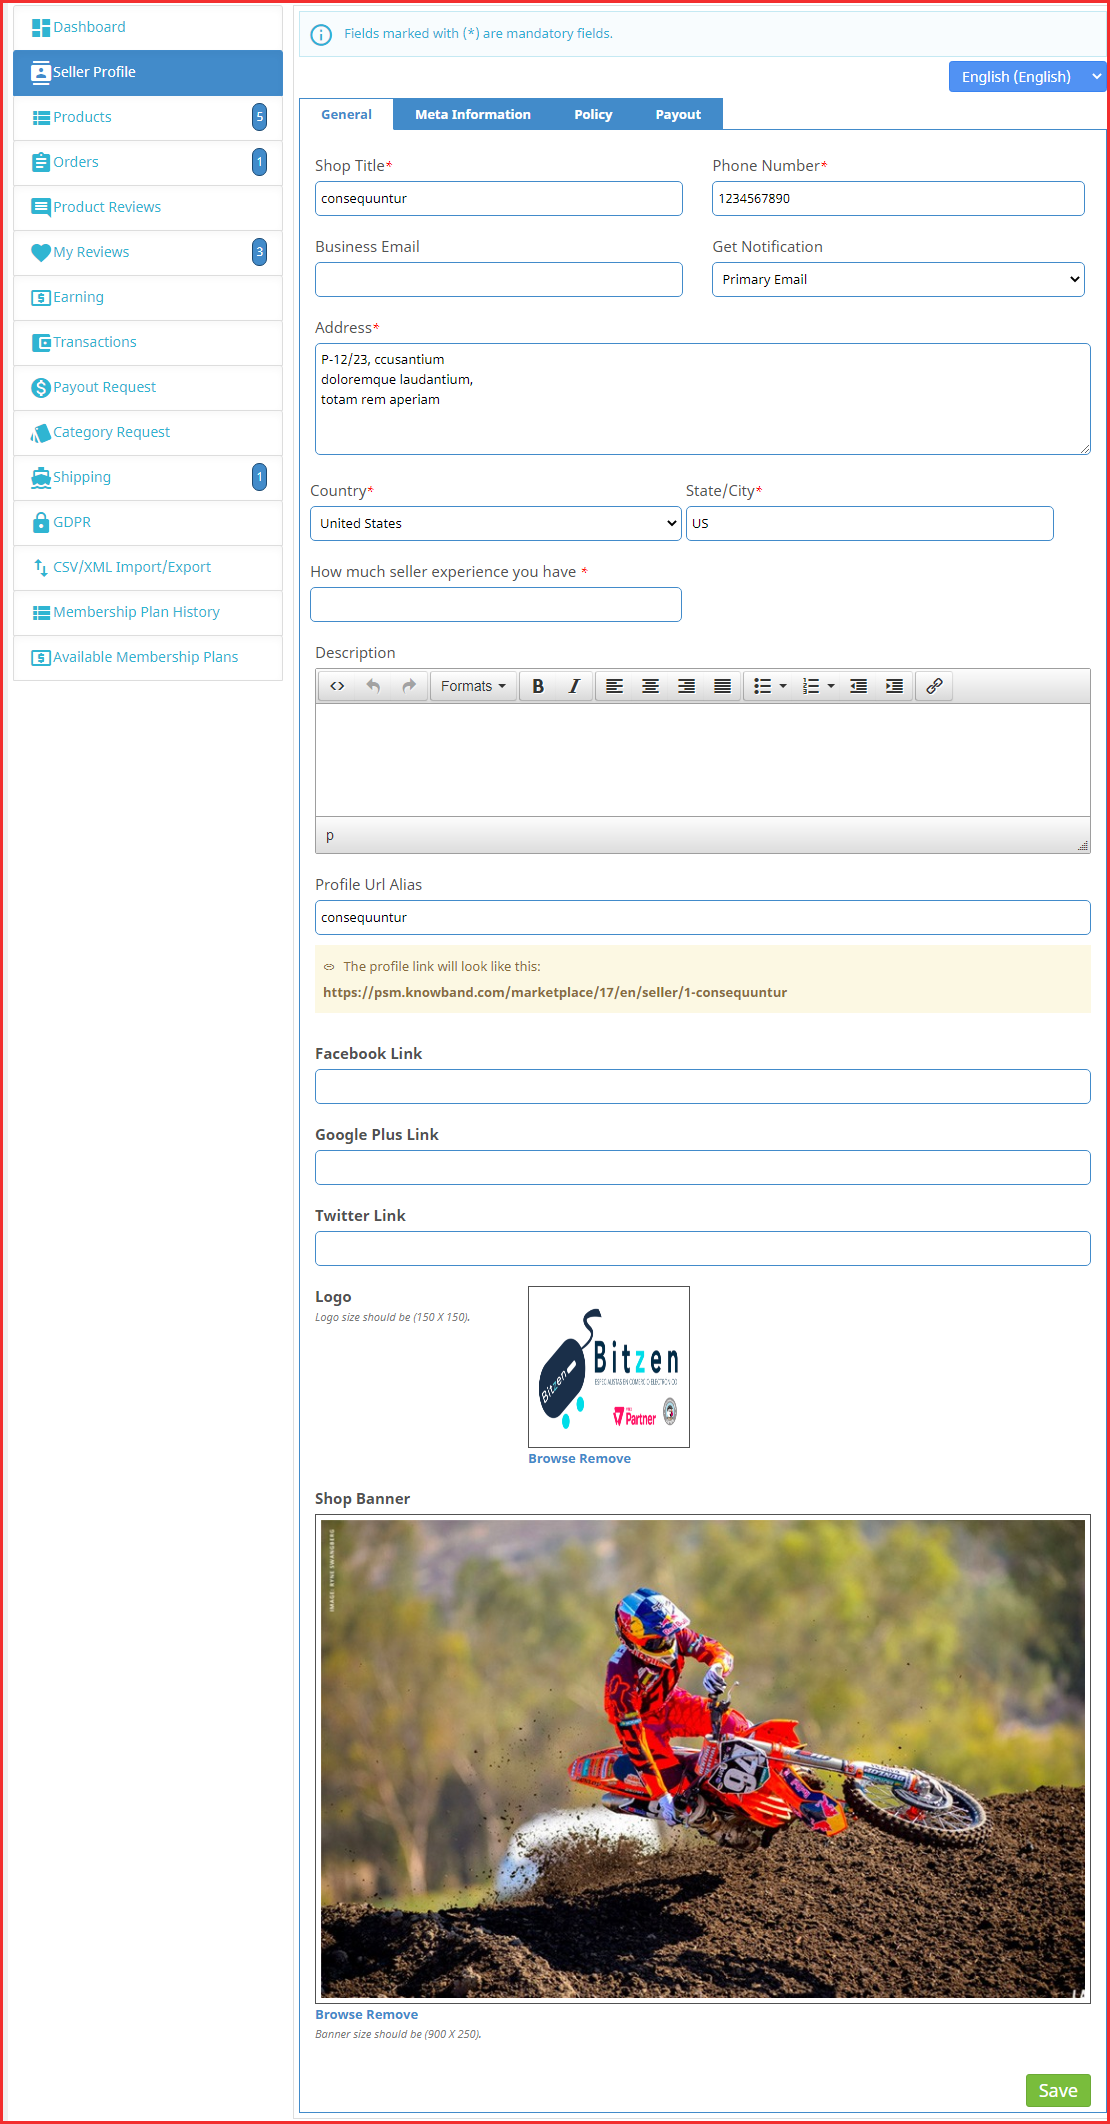
The sellers can add banners, shop logos, and metadata from their dashboards. The vendors can easily make an SEO-friendly URL for their shop.
The sellers even get an option to track the overall transaction and sales report from the dashboard with ease.
The sellers get an option to add category requests. The admin can approve/disapprove their request from the back-end of the OpenCart Marketplace Extension.
If enabled from the admin panel of the OpenCart Multi seller Marketplace module, the sellers can even add their own shipping methods.
1.3 Customer Benefits of OpenCart Multi-seller Marketplace Extension
The store visitors can now choose the ideal products from a wider range of product options.
The online shoppers can view the seller’s profile on the products page. Further, only if the admin allows it.
The customers even get an option to give their reviews for the products as well as the seller.
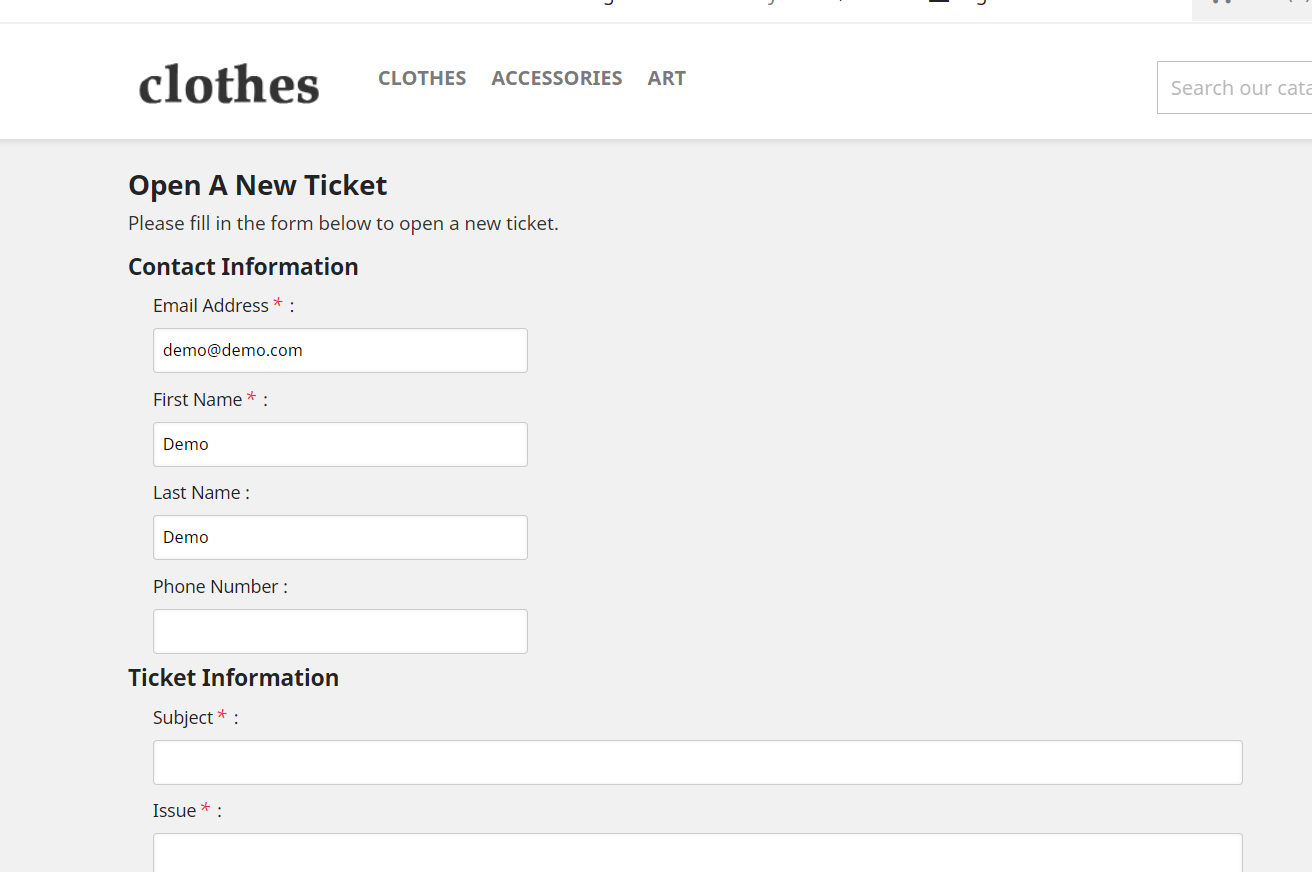
Customers can easily contact the sellers of the product from the seller account page and raise a ticket for their queries and issues.
1.4 New Features in OpenCart Multi vendor Marketplace plugin:
Improved Admin UI: It has a dynamic and functional new admin UI for effortless management.
A new Seller Custom Form: A new custom field is available to the backend of the Multi vendor marketplace. It allows the admin to create a separate registration form for the sellers.
Now admin can allow sellers to display the seller and admin details on the invoice.
To choose the order status for which commission/earning will be calculated a field in the admin panel is now available. Previous earning was being calculated on all the order status i.e. Cancelled, Returned, etc.
Admin can decide order status options for sellers which they can use for the customer orders.
An option is now available in the admin panel to enable/ disable the sellers. All the products will be removed automatically from OpenCart Marketplace if a seller is disabled by the admin.
Admin assigns the products to the individual seller.
OpenCart Marketplace extension allows the admin to register any customer as a seller.
OpenCart Marketplace Product page and admin UI
2. Installation of OpenCart Marketplace Plugin
Purchase the OpenCart Multi-vendor Marketplace Module from the Knowband store. You’ll get the following files:
Zipped File containing the source code of the module
User Manual
Follow the steps mentioned below in order to install the open cart Multi vendor Marketplace plugin in your store:
Unzip the zipped file. The vqmod must be installed, otherwise, the plugin will not work. You’ll get the folders as shown in the image below:
Copy all the files and folders of the zip file in the Root Directory of the site.
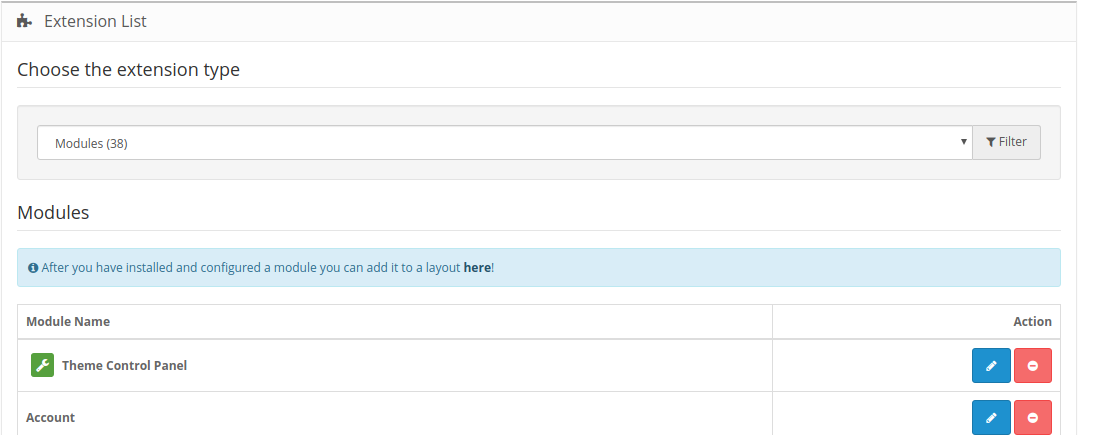
The admin can find the OpenCart Multi-Seller Marketplace extension at the path Admin Panel -> Extensions. Install the module by clicking on the ‘Install’ button corresponding to the module.
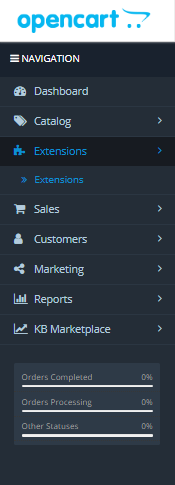
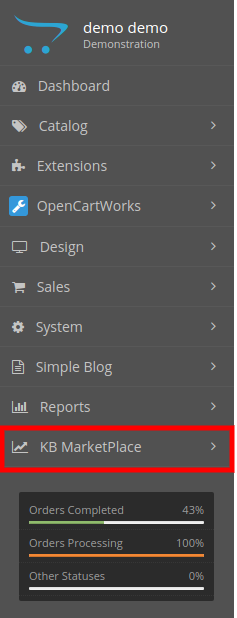
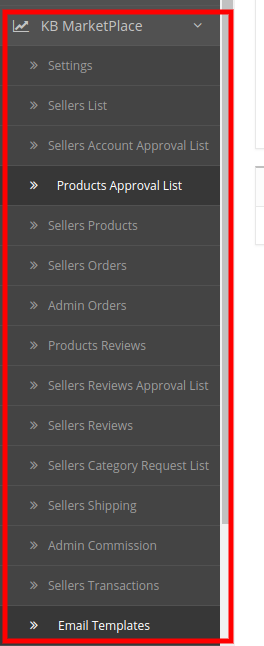
The OpenCart Marketplace plugin is now installed and is ready to use. Go to Admin -> Main Menu -> KB MarketPlace as shown in the image below:
3. Admin Panel
The OpenCart Multi-vendor Marketplace plugin offers multiple options for the configuration and management of the online marketplace.
After that, click on the edit option of the KnowBand Marketplace.
There are 6 main menus in the configuration settings:
3.1 Setting
3.2 Sellers
3.3 Products
3.4 Orders
3.5 Commissions
3.6 Support
All the six main menus are discussed below in detail:
3.1 Settings
The various fields of this menu of the OpenCart Multi-vendor Marketplace plugin are discussed below:
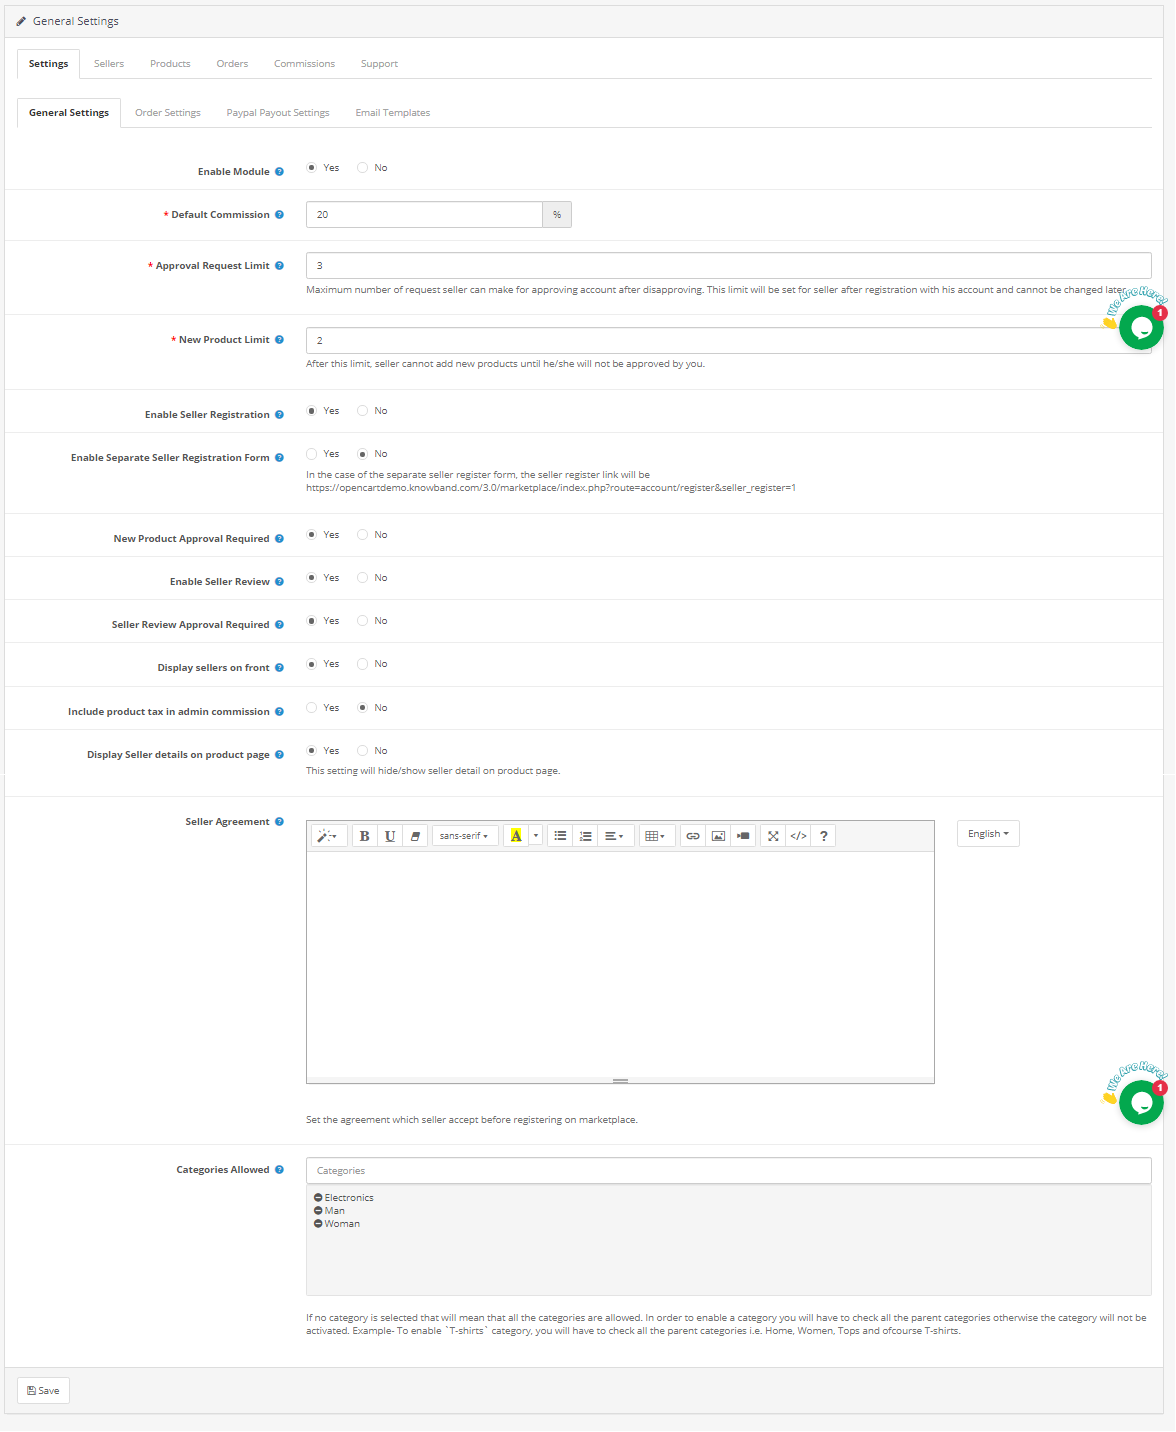
3.1.1 General settings
Enable Module: Toggle the button to “enable” the module on the website.
Default Commission: Set the commission to be charged to the sellers here. The percentage amount as specified by the admin here will be applicable to all the marketplace sellers by default.
Approval Request Limit: The store admin can approve/disapprove the seller’s account from the back-end of the OpenCart Multi vendor Marketplace plugin. The sellers can send a request for account approval. The admin can set the maximum number of requests that the seller can send in this section.
New Product Limit: Fix the maximum number of new products that a seller can list in the marketplace.
Enable Seller Registration: Select ‘yes’ in order to enable the third-party seller registration.
Enable Separate seller registration form: Select ‘yes’ in order to enable the separate seller registration form.
New Product Approval Required: If he selects ‘Yes’, then, the approval of the admin will be required to list the product at the site.
Enable Seller Review: Select ‘Yes’ if you want to enable the seller review option in the front-end.
Seller Review Approval Required: If this feature is enabled, then, the review will be posted in the front-end only after the approval of the store admin.
Display Sellers on the front: Enable to display the list of the sellers in the front-end of the website.
Include Product Tax in Admin Commission: If he selects ‘Yes ’, then, product tax will be included in the admin commission.
Display Seller Details on Product Page: Enable this option to display the seller’s details on the product page of the website.
Seller Agreement: Specify the terms and conditions for the sellers in this section. The agreement details as mentioned here display in the front-end of OpenCart Multi-seller Marketplace.
Categories that the admin allows: The admin can select the category that they want to assign to the sellers in this section.
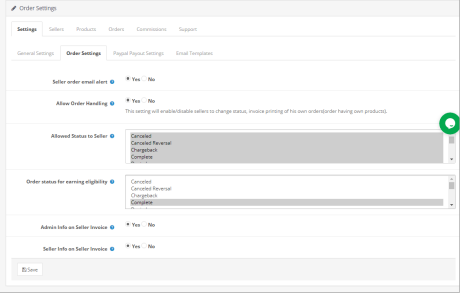
3.1.2 Order Settings:
Seller order email alert: If he selects ‘Yes’, then, an automated email will be sent to the vendors every time the order of their product is received.
Allow Order Handling: If he selects ‘Yes’, then, the sellers can handle the orders received on their products. They can process the orders and change the order status.
Allowed Status to Seller: Order statuses that are okay for sellers to update the order. It includes Cancelled, Cancelled Reversal, Chargeback, Complete, denied, processing, failed, expired, etc.
Order Status for Earning Eligibility: Order status assigned to the sellers only for which they will receive the Payouts or they will get the earnings only for the assigned order status such as complete, shipped, voided, etc. Admin can choose from the options mentioned in dropbox.
Admin Info on seller invoice: Select yes or no for sending a system-generated email to the seller on the new order.
Seller Info on seller invoice: Select yes or no for sending a system-generated email to the seller on the new order.
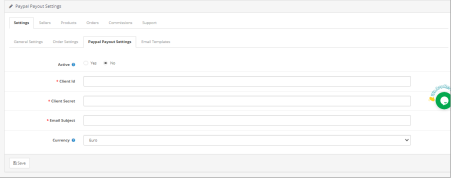
3.1.3 PayPal Payout Settings
Opencart Multi-Vendor Marketplace plugin offers admin access to set the PayPal Payout Settings from the backend of the store. Admin needs to activate the setting and fill the Client ID, Client Secret key, Paypal Email Subject, and Paypal Currency in the backend of the store.
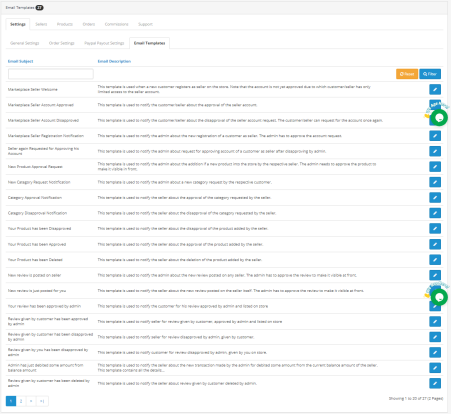
3.1.4 Email Templates
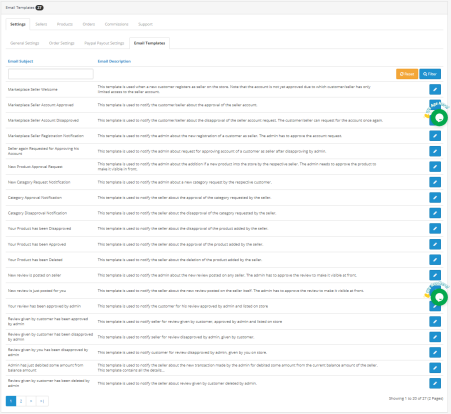
The OpenCart Multi seller marketplace plugin offers 24 pre-designed email templates for various scenarios. The store admin can even edit the templates if required by clicking on the Edit button.
3.2 Sellers
3.2.1 Sellers Setting
This page of the OpenCart Multi-vendor Marketplace extension has a list of all the sellers that the store owner approves. The admin can view the list of the sellers whose accounts he approves from the Seller Account Approval List tab of the OpenCart Multi seller Marketplace extension.
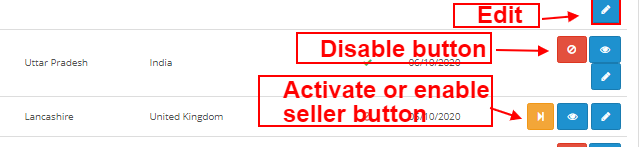
Admin can enable/disable the seller from the buttons shown below.
How to Edit Seller’s Account?
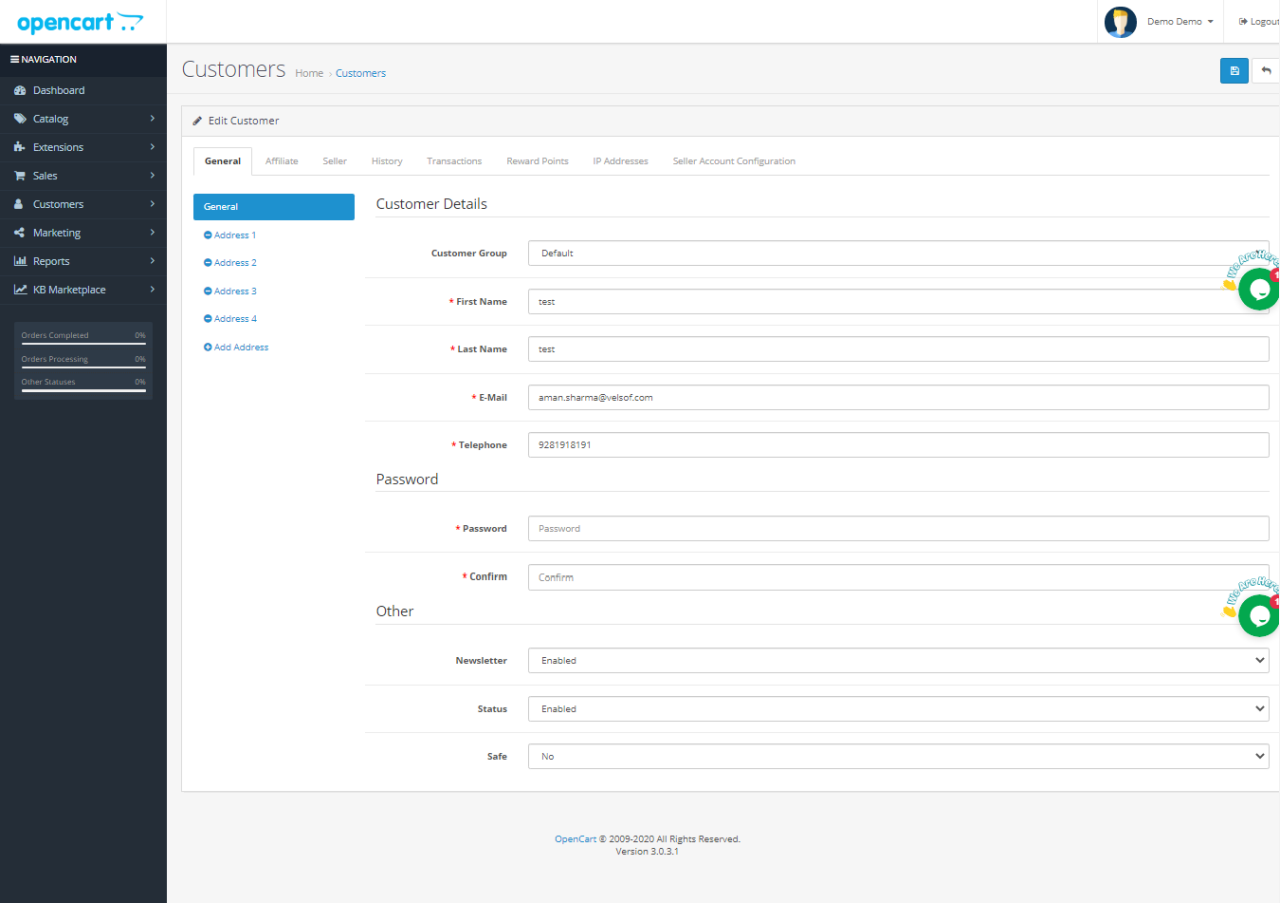
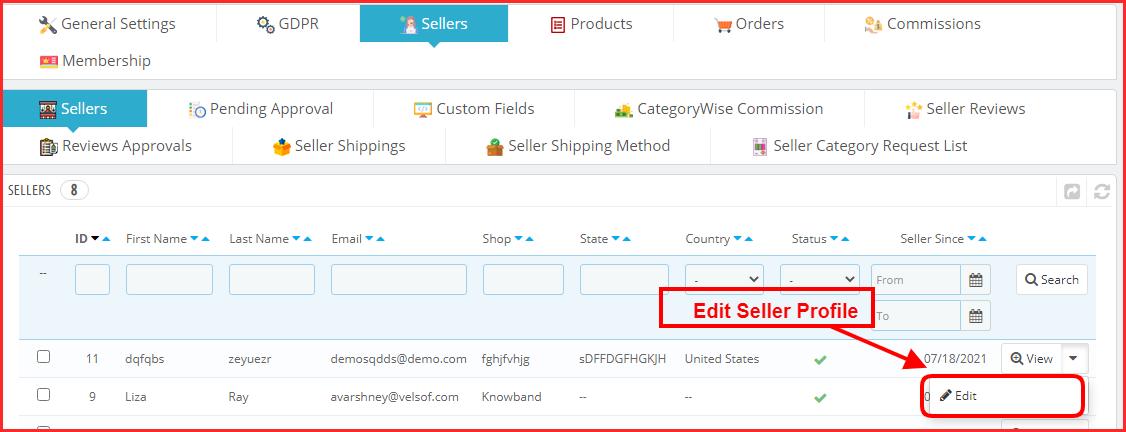
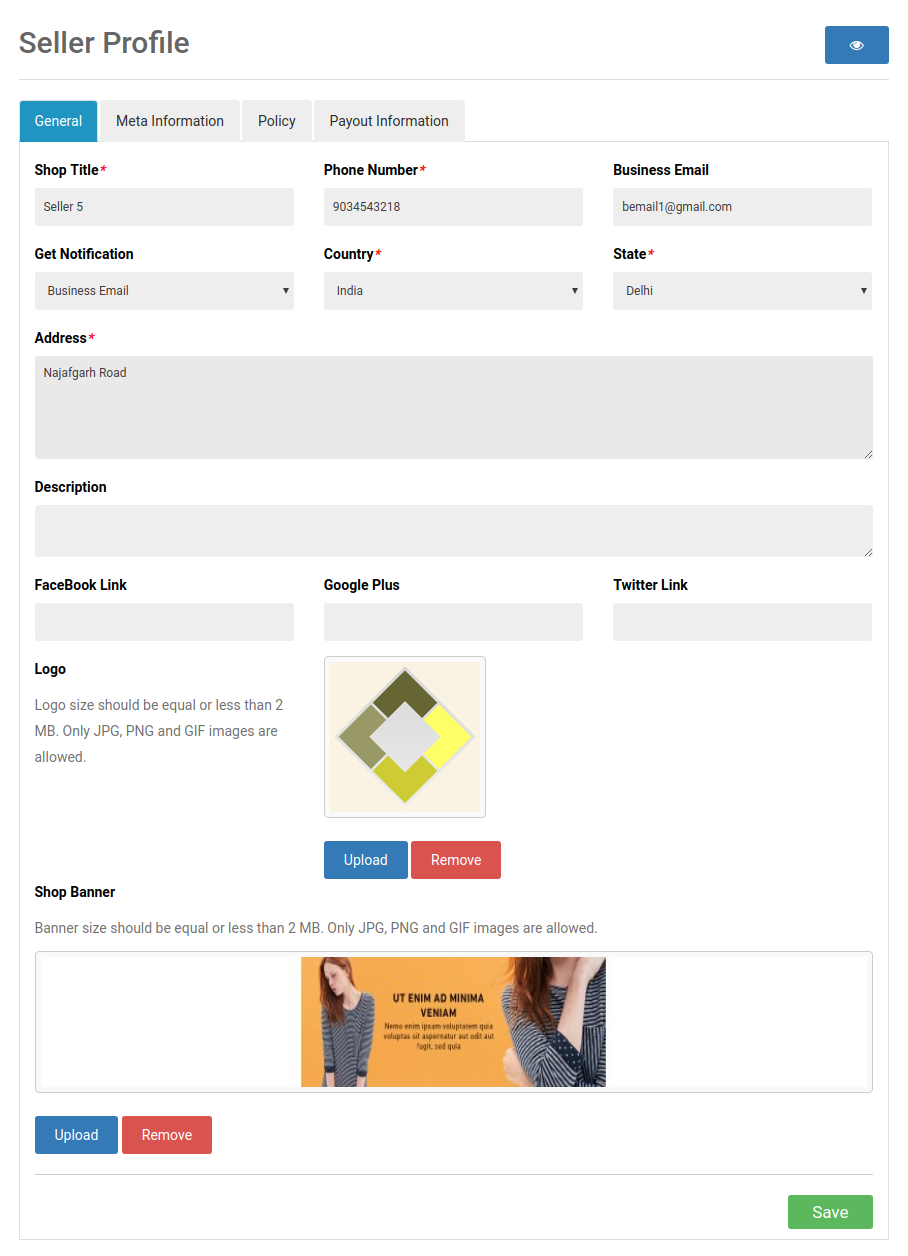
The admin can even edit the profile of the vendors from the back-end of the OpenCart Multi vendor Marketplace plugin. In order to edit the same, click on the Edit button. This will redirect you to an interface of the OpenCart multi-seller marketplace extension where you can make the required changes.
3.2.1.1 General
Customer Detail: Admin can edit all the basic details of sellers on the Customers Setting Page. This includes Customer group, Name, email address, contact information, etc.
Password: Admin can set the password for the seller.
Other: It includes more settings for Newsletter subscription, Enable/Disable the seller, and categorizing the seller as safe.
Multiple Addresses: the OpenCart Multi-Vendor Marketplace allows the admin to add one or more addresses to the seller’s account.
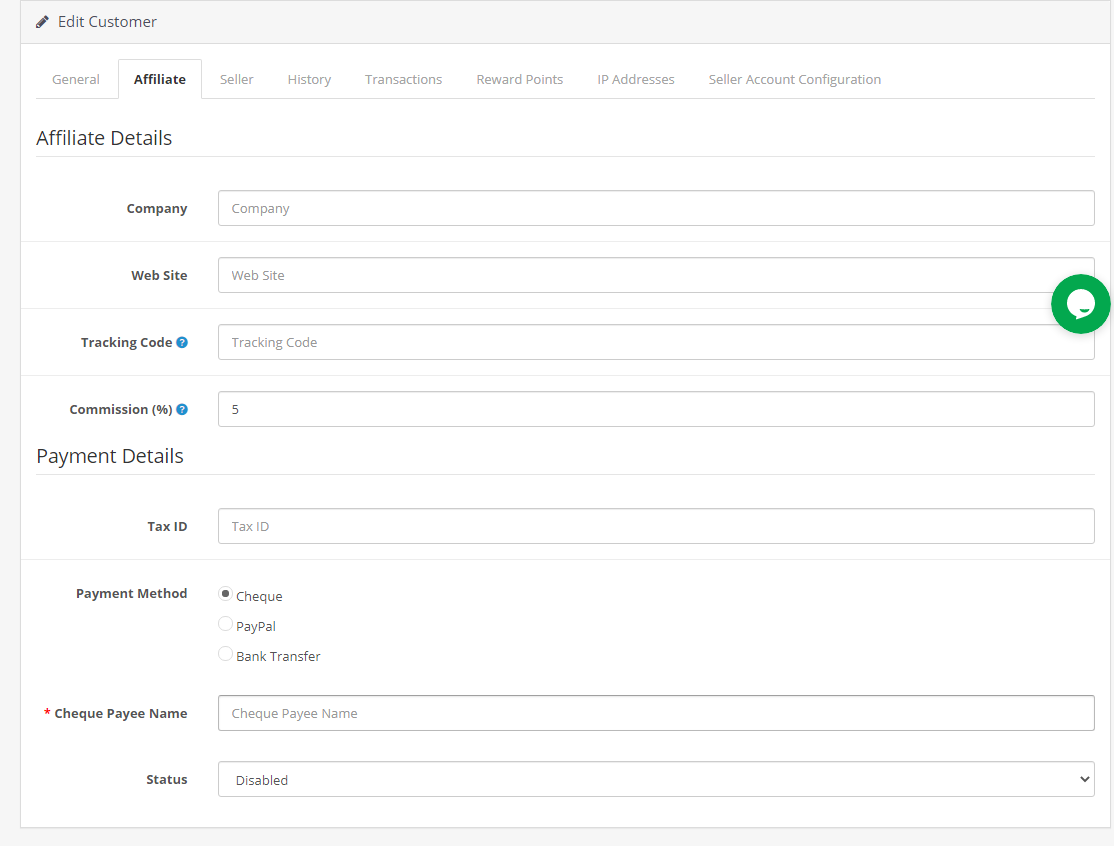
3.2.1.2 Affiliate
Admin can add affiliate Details in the Affiliate setting.
Affiliate Details: All the information such as Company Name, Website, Tracking code, Commission Percentage.
Payment Details: The admin can add or select the tax ID and Payment Methods. In fact, the payment methods that are indexed in the extension are Cheque, PayPal, and bank transfer.
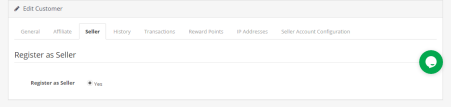
3.2.1.3 Seller
Admin can register the company as a seller by selecting the Yes button.
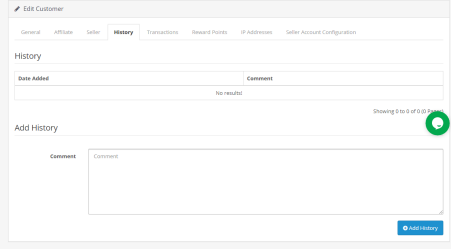
3.2.1.4 History
History: Seller history and comments will display here.
Add History: Admin can add comments for the seller in the History section which will display on History Table.
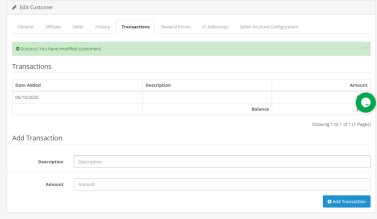
3.2.1.5 Transaction
Transactions: All the transactions will be shown here for the particular seller.
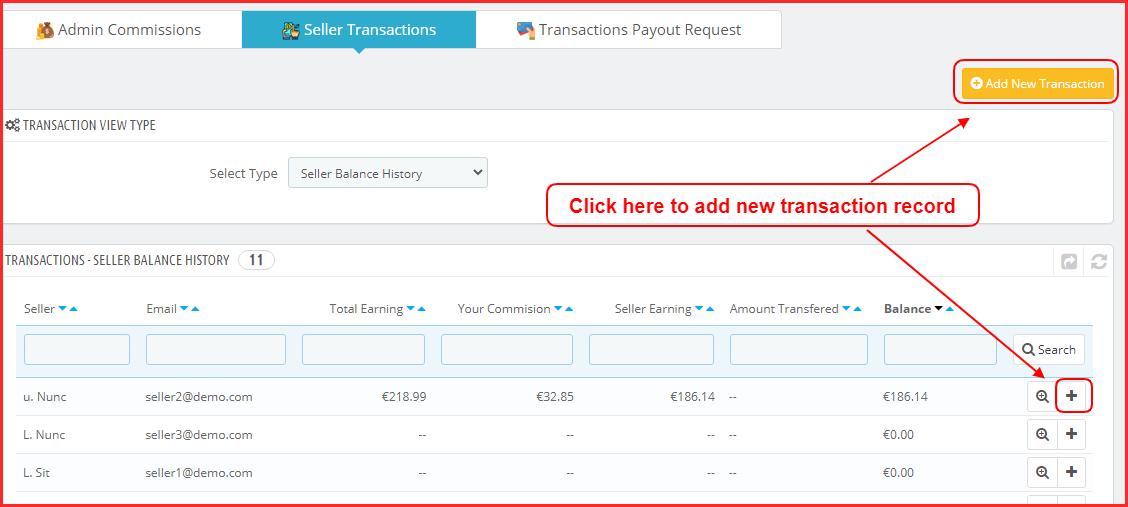
Add Transaction: The store owner even gets an option to add a transaction by clicking on the ‘Add New Transaction’.
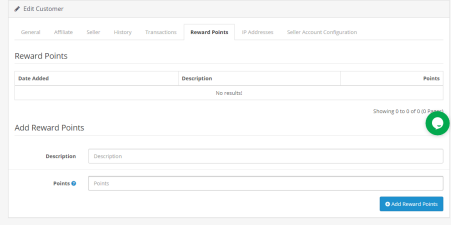
3.2.1.6 Reward Points
If the admin wants to reward the seller then he/she can add the reward description and points in this section of the Sellers setting.
Reward Points: A table showing all the reward points given to the seller by the admin will display here.
Add Reward Points: Admin can add new reward points by clicking on the ‘Add Reward Points’ button.
The window will display as shown below:
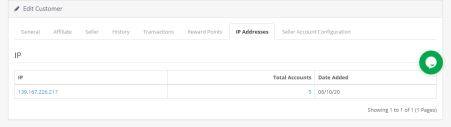
3.2.1.7 IP Address
The IP address of the seller and the number of accounts registered will display here.
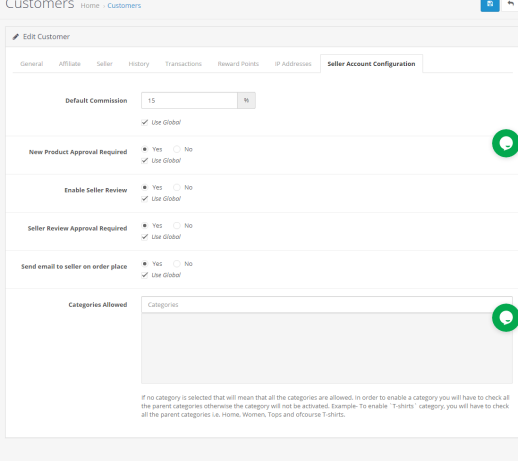
3.2.1.8 Seller Account configuration
OpenCart Multi-vendor Marketplace extension allows admin to set the commission amount for individual sellers.
Default commission: Admin can add the commission details in the Seller Account Configuration setting.
New Product Approval required: Select Yes if the admin wants to approve the new product and select no otherwise.
Enable Seller Review: Yes/No buttons are given to enable/disable seller reviews.
Seller Review Approval Required: If this feature is enabled, then, the review will be posted in the front-end only after the approval of the store admin.
Send email to seller on order place: If enabled then an auto-trigger mail will be sent to admin with the default email template.
Categories that the admin allows: Admin can assign categories to the seller. Sellers can only sell products from the allotted categories.
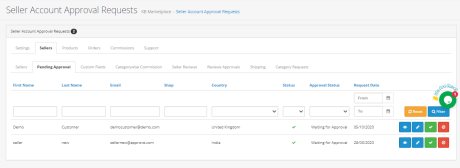
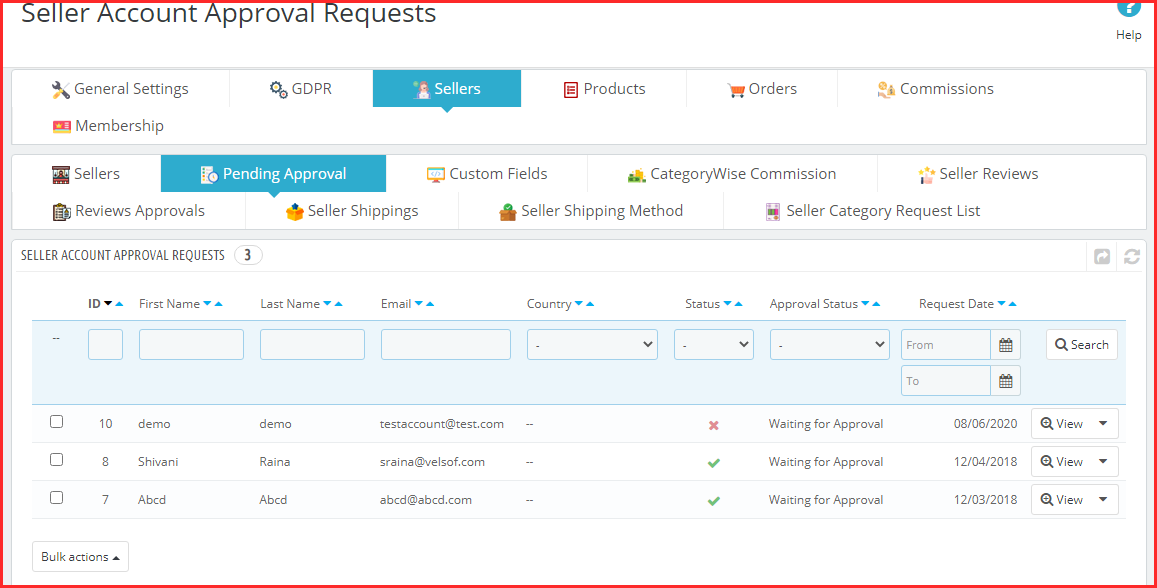
3.2.2 Pending Approval
The third-party vendors can fill up the form in order to create a seller account at the site. The seller’s profile will list in this tab of the OpenCart Multi-vendor Marketplace Plugin for approval as shown in the image below:
How to Approve/Disapprove the Seller’s Account?
The admin can approve the seller’s account at a button click from the back-end of the OpenCart Marketplace module.
Just click on the approve or disapprove button corresponding to each seller account. On clicking on the Approve button, a pop-up will display asking for permission to approve or disapprove the seller account.
Once the seller’s profile approves, the same will list in the ‘Seller List’ tab of the OpenCart Multi-vendor Marketplace module.
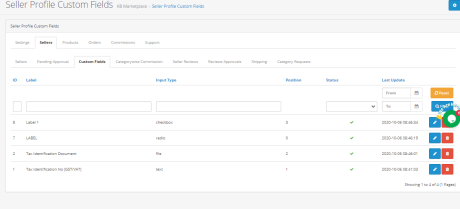
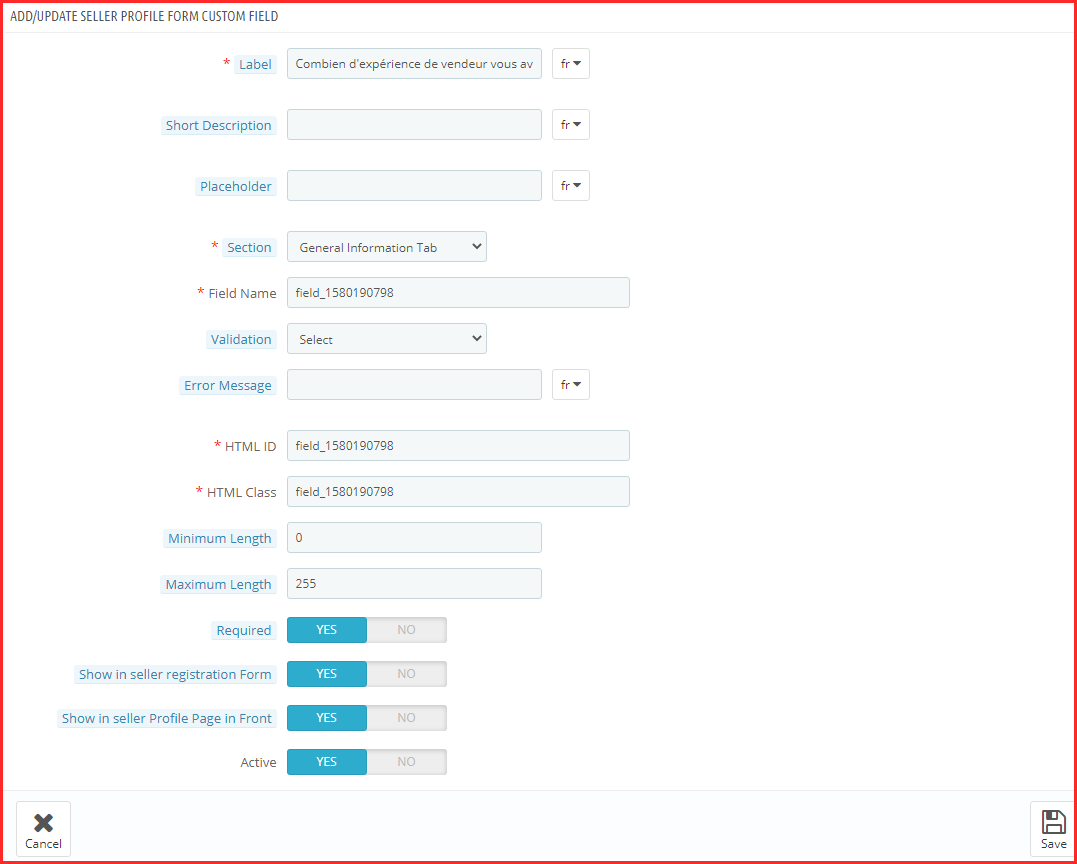
3.2.3 Custom Fields
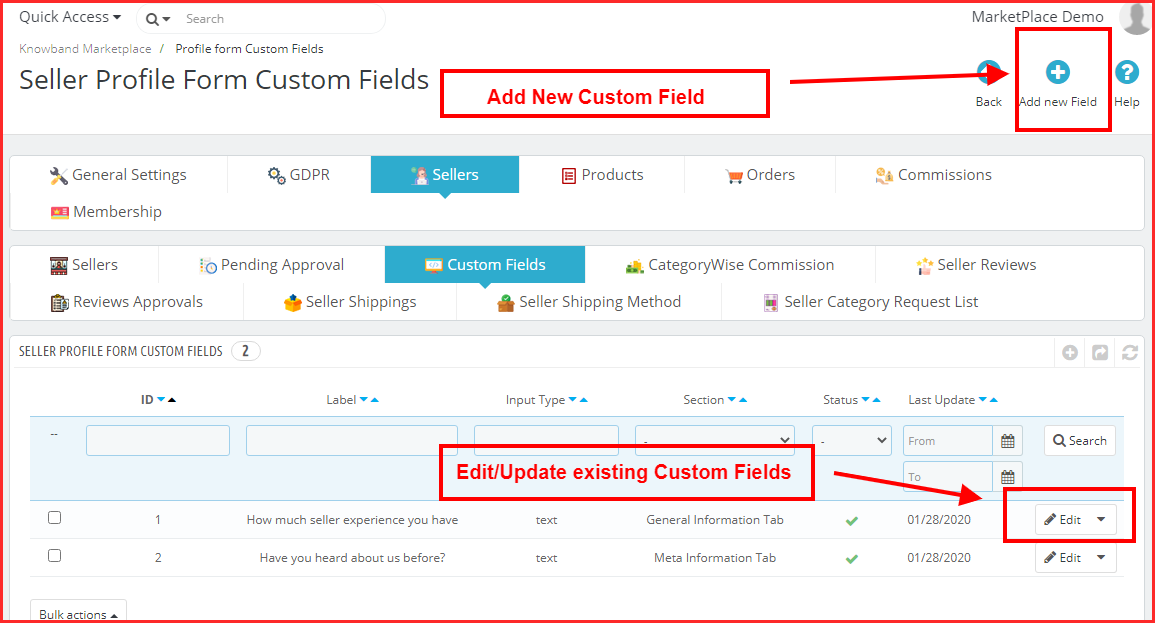
(New)Admin can add a custom field for seller profile. This setting allows the admin to add one or more fields on the seller page to collect extra information from the seller.
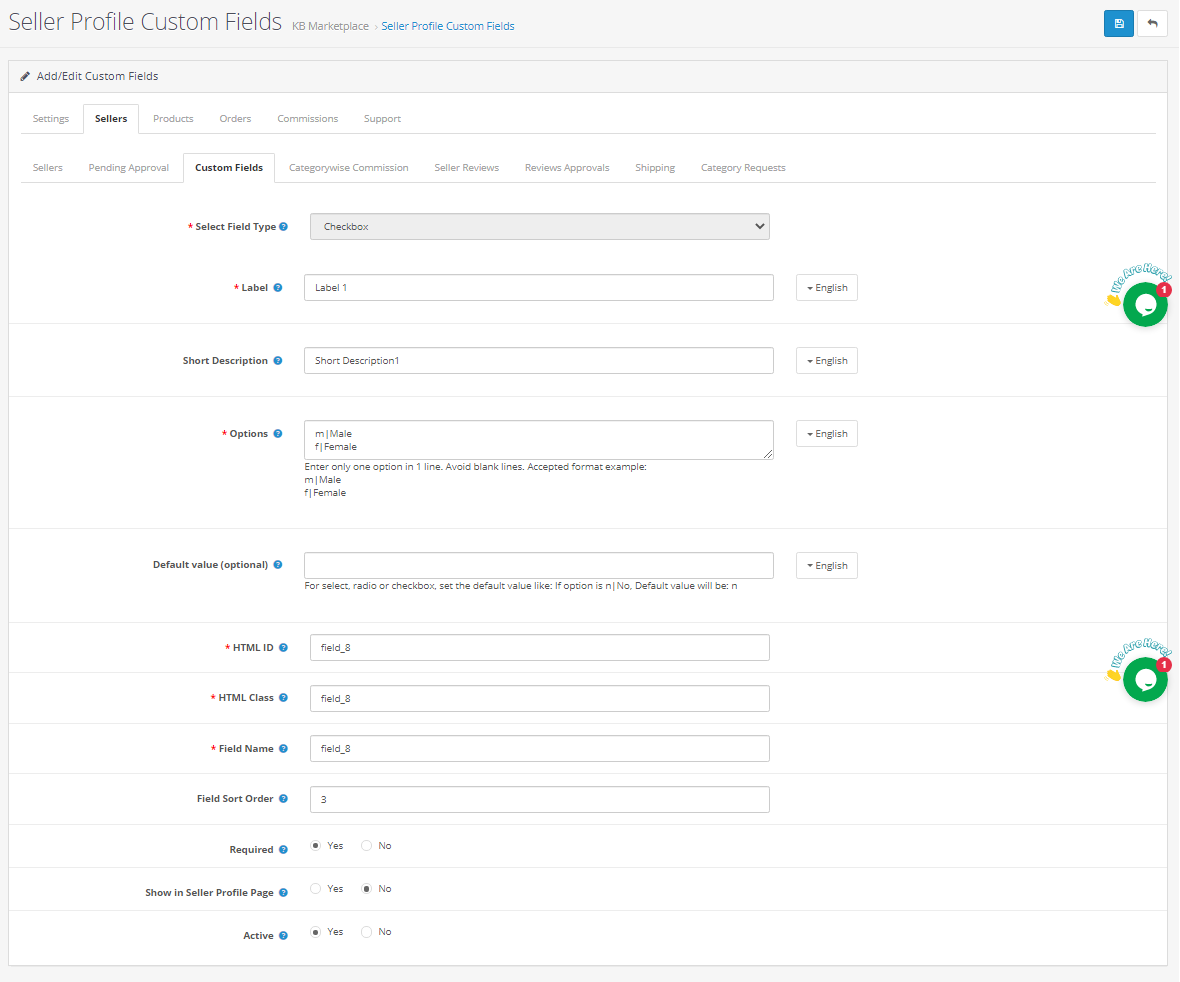
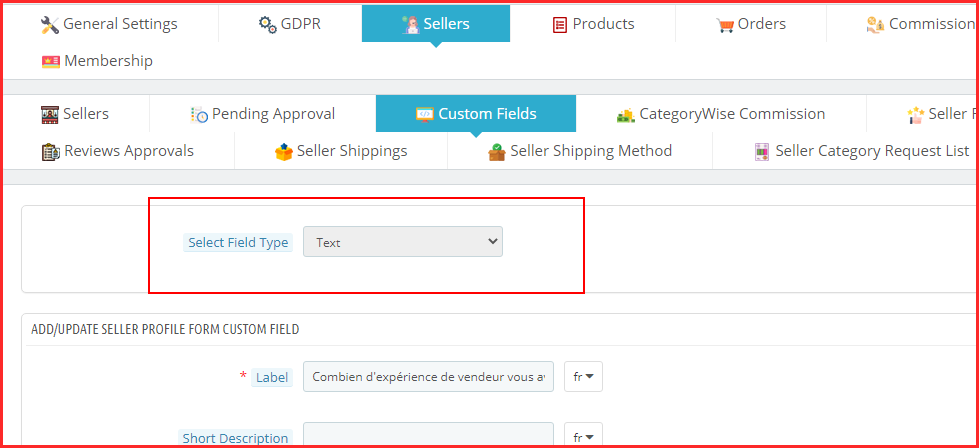
Click on the edit button for adding or updating the custom fields. On clicking the ‘edit button’, the following window will appear:
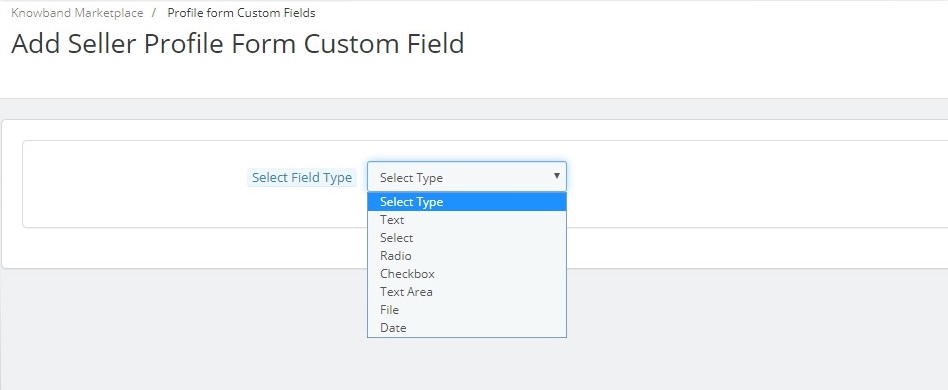
Select Field Type: Select the field type as a checkbox
Label: Add the field name which will display on the front end of the seller dashboard.
Short Description: Add the short description for the field
Options: Add the options for the field like Male, female, or Yes, No as the accepted format mentioned in the field.
HTML Details: Add HTML ID and HTML class here.
Add New Field Details: like field name, field sort order etc.
Required: Set the field as optional or mandatory
Show in seller profile page: Select Yes if the field is to display on Seller Profile Page otherwise select no.
Active: Activate or deactivate the field by selecting yes or no options.
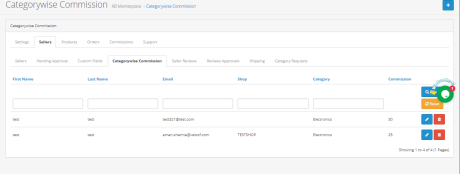
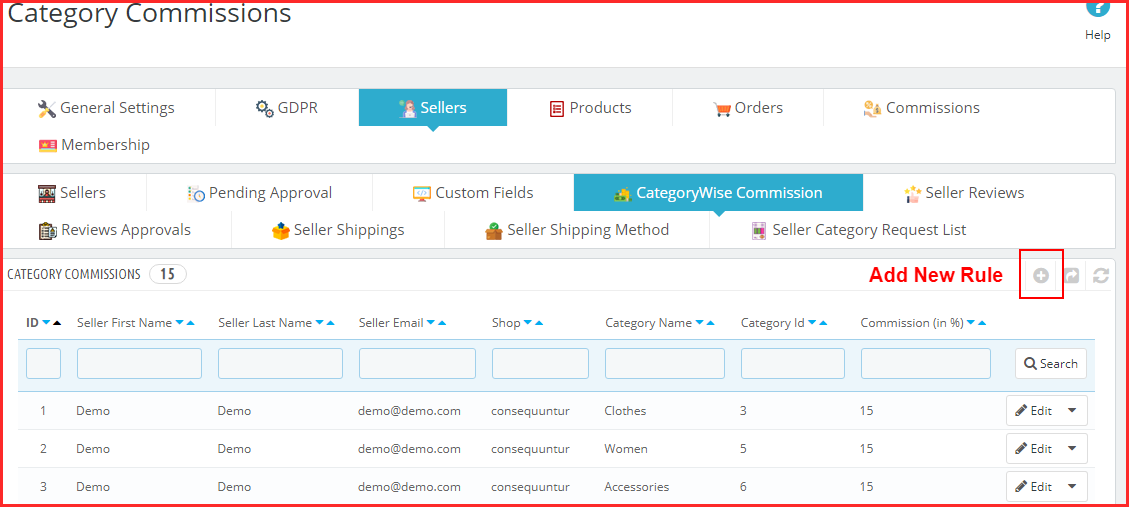
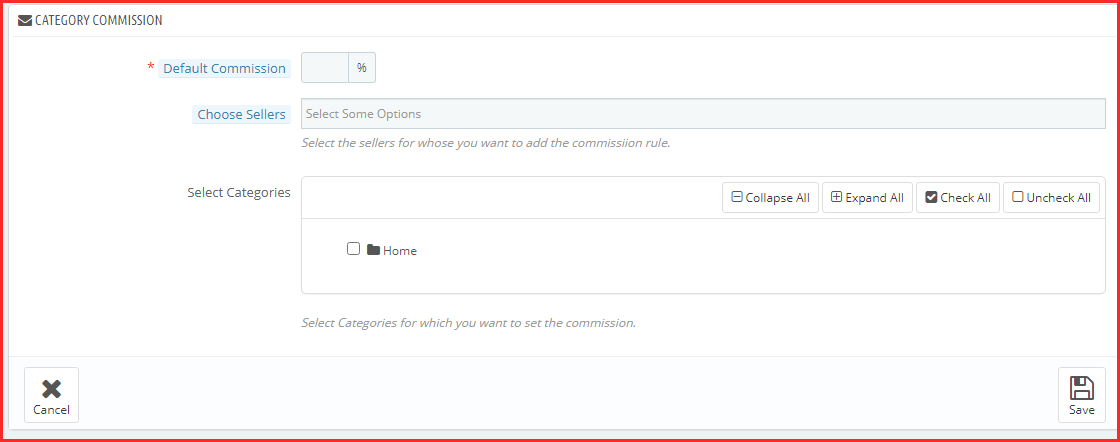
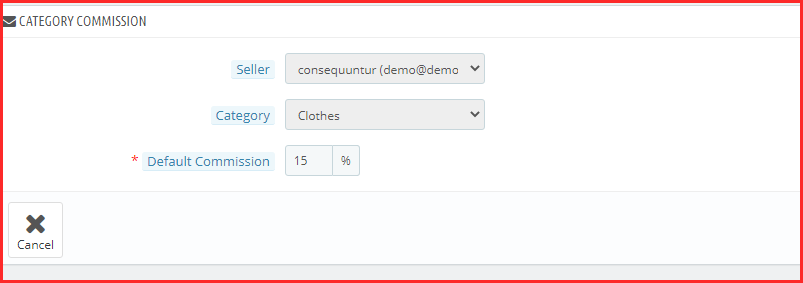
3.2.4 Category wise commission
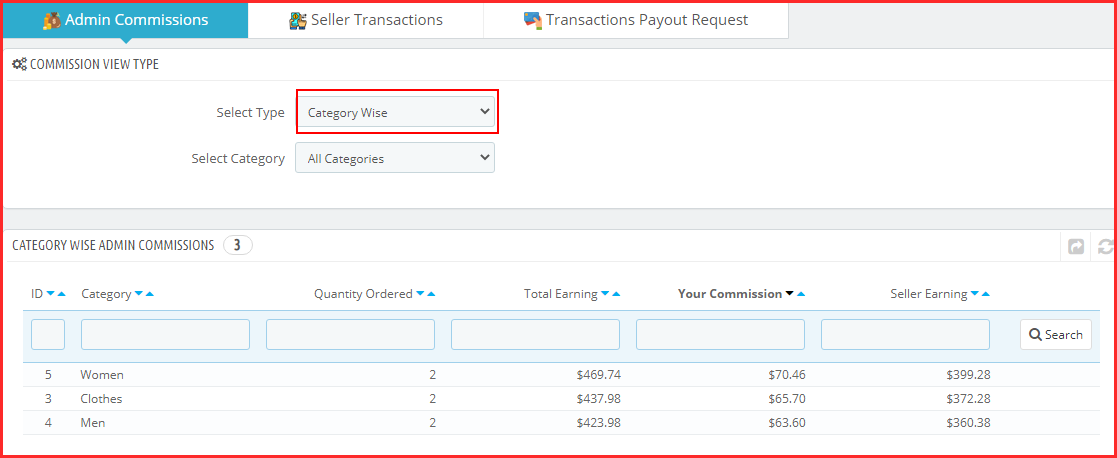
With the Opencart Multi-Seller Marketplace plugin, the store admin gets access to set the commission category-wise. Admin can easily view the total earning, total commission for a particular category in Category Wise Commission. Category wise commission for the particular seller will display here as shown below:
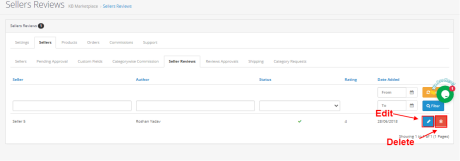
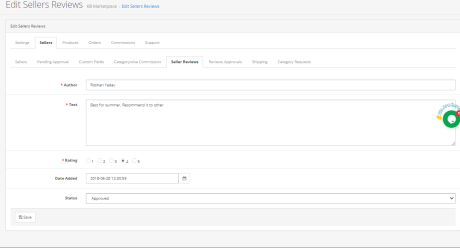
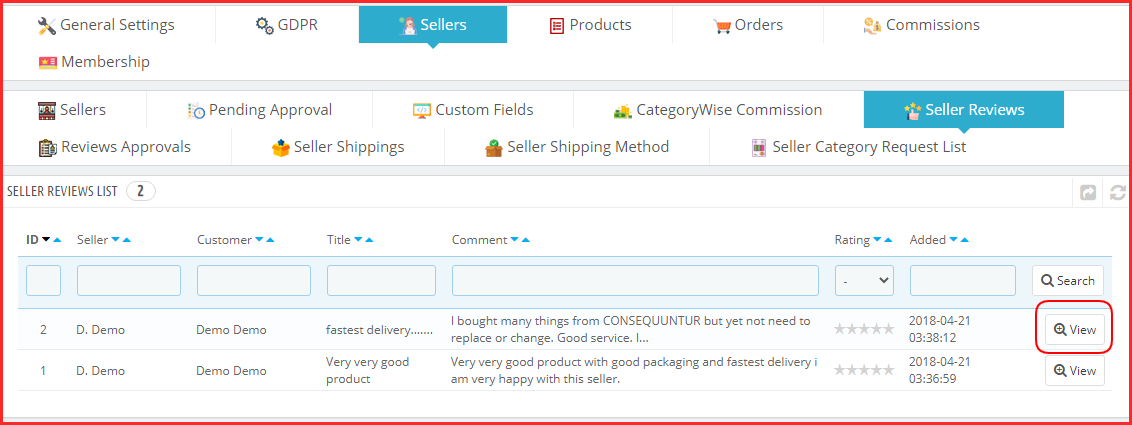
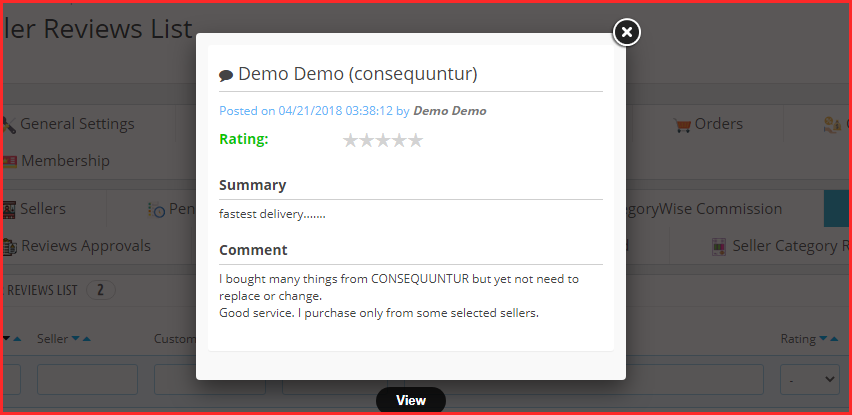
3.2.5 Seller Review
Admin can see the seller reviews and edit them from the backend if required.
The admin can add the author details, Text, update ratings, change the date of the review.
Admin can approve or disapprove the review from the status field.
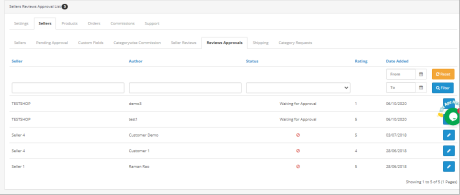
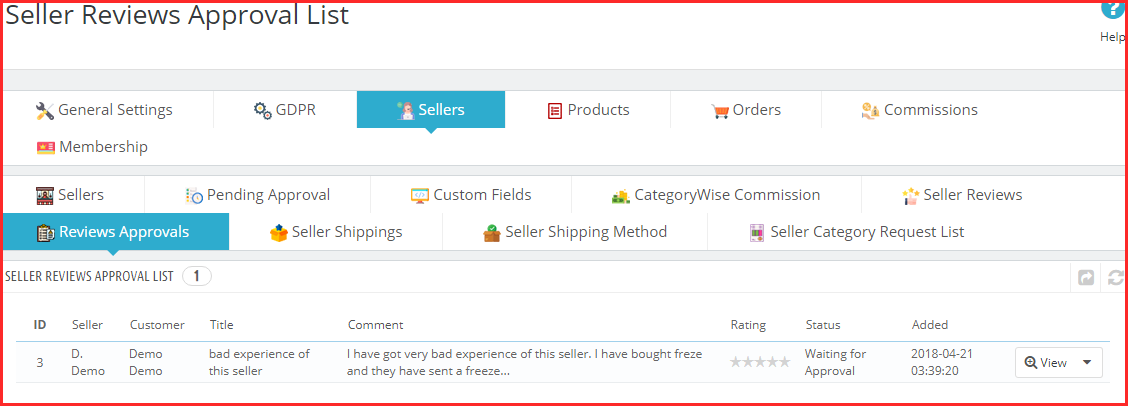
3.2.6 Reviews Approval
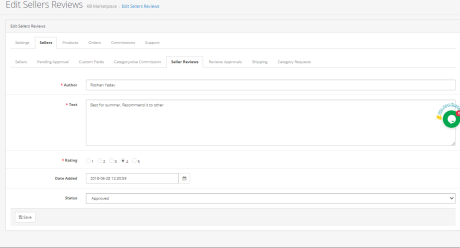
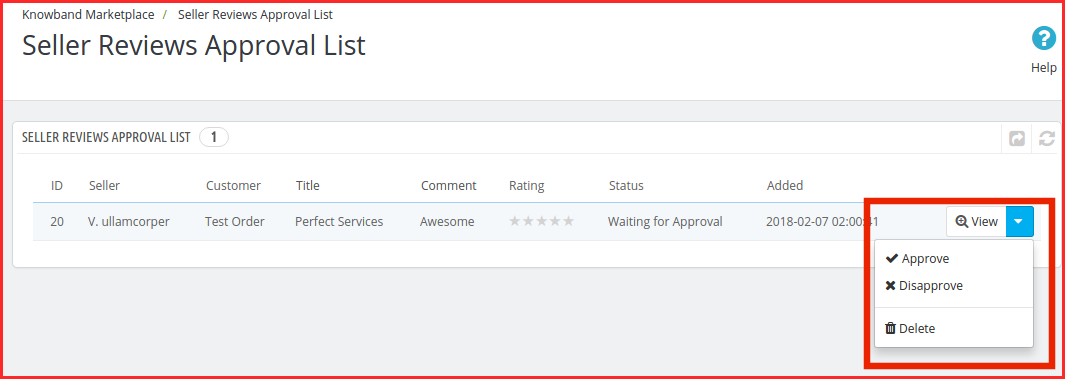
The list of approved and disapproved seller reviews will display here. If the admin click on the edit button then he will be directed to a new page.
Store Admin can add the author details, Text, update ratings, change the date of the review.
Status: Admin can approve or disapprove the review.
The various fields of this interface are discussed below:
Author: The name of the reviewer will be shown here. The admin can change the name if required.
Text: The review entered by the customer will be shown here. The store owner can edit the review if required.
Rating: This section will by default show the rating given by the customer. The admin can even change the rating.
Review Date is available: The date when the review is available will display here.
Status: Enable or disable the review from here. If the admin enables it, the review will display on the product page.
3.2.7 Shipping
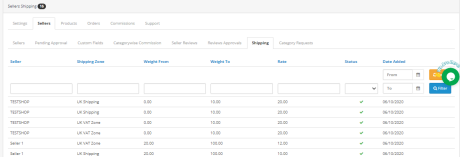
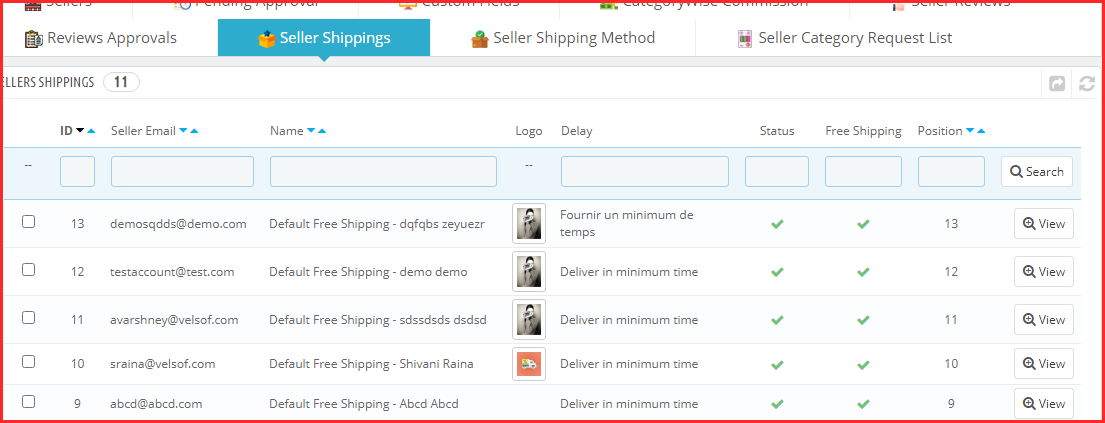
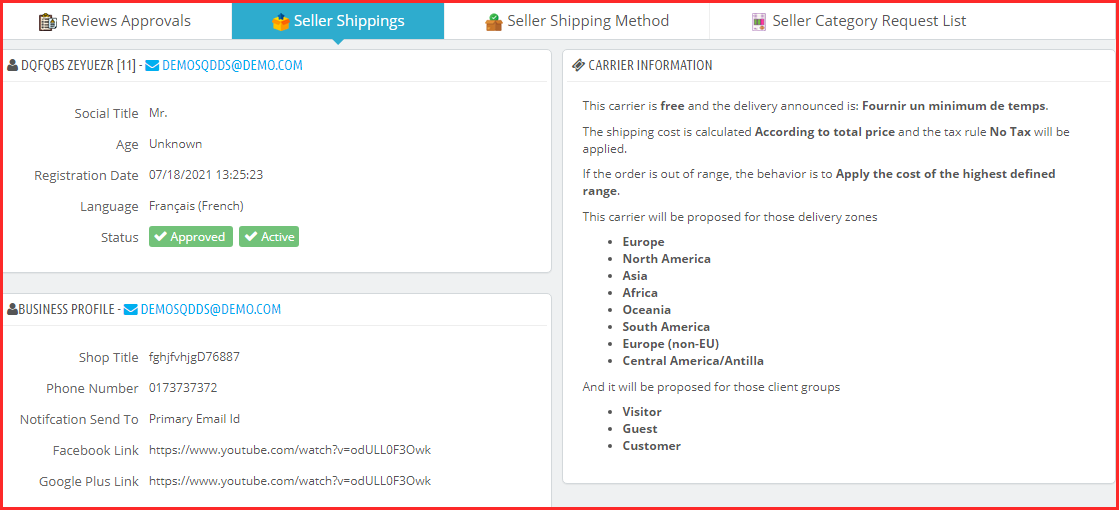
Seller’s shipping information can be reviewed by the admin from the backend of the OpenCart Multi-vendor Marketplace. The OpenCart Multi-seller Marketplace extension comes with custom shipping options wherein the sellers can add their own shipping methods. If this feature is enabled by the store admin from the Settings Tab of the OpenCart Multi-vendor Marketplace module, then, the sellers can add their shipping methods.
The shipping templates available by the sellers will list in the Sellers Shipping tab of the OpenCart Multi vendor Marketplace plugin. All the orders shipping details like shipping zone, weight, Rate, and status will display on this page as shown below:
3.2.8 Category Requests
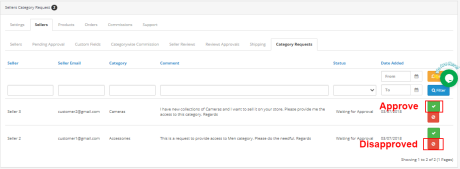
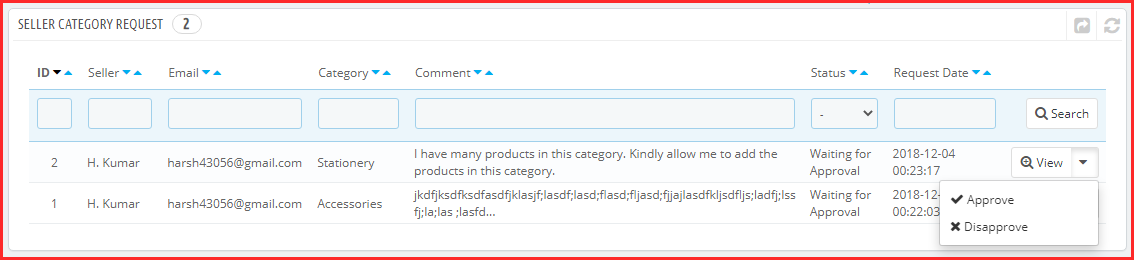
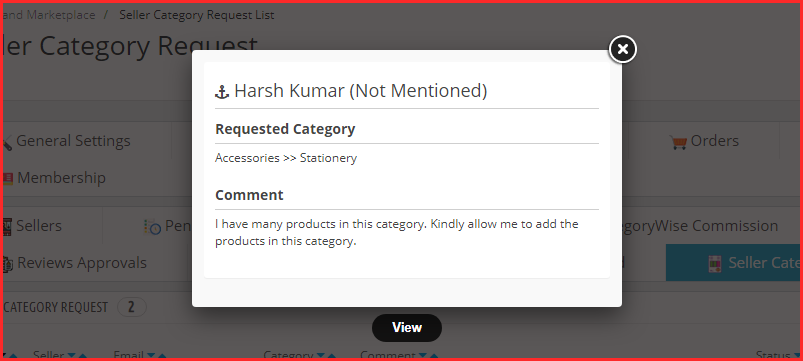
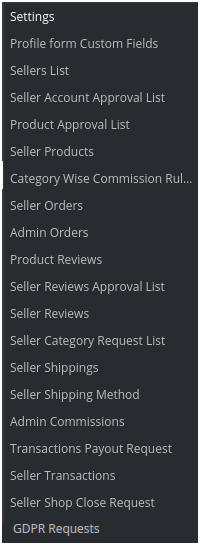
The admin assigns the category to the third-party seller for listing the products. The sellers can even request the admin to add a new category from their Dashboard. The category requests sent by the sellers will list in the Seller Category Request tab of the OpenCart Multi-Vendor Marketplace extension as shown in the image below:
3.3 Products
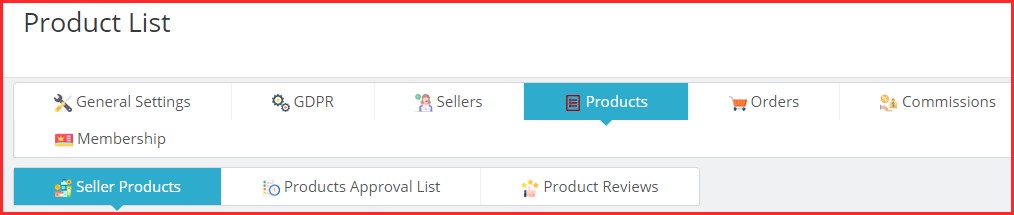
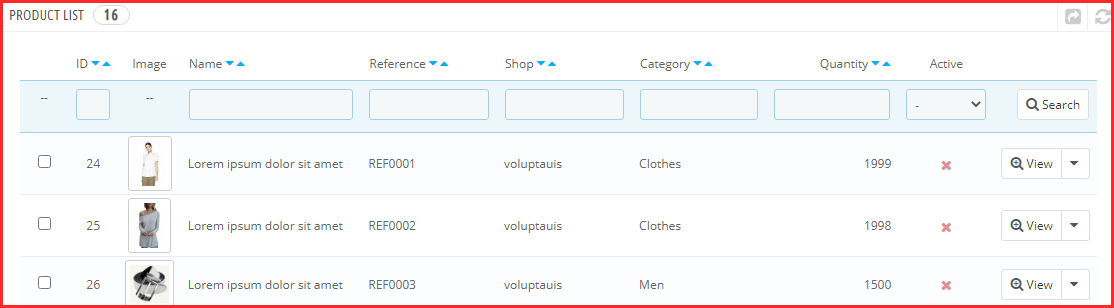
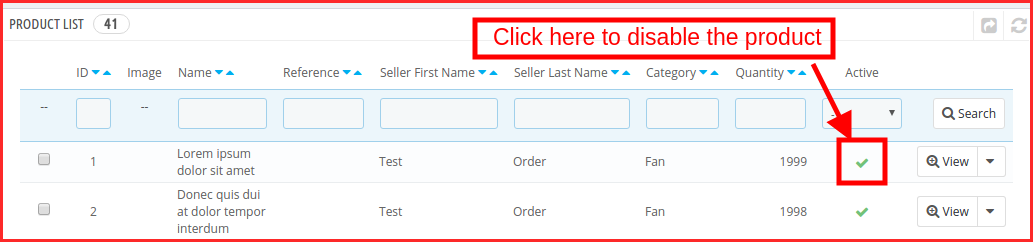
3.3.1 Seller Products
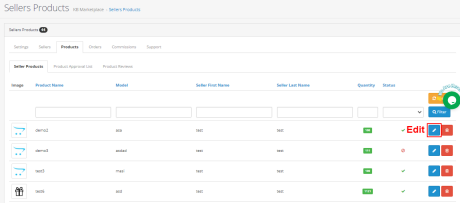
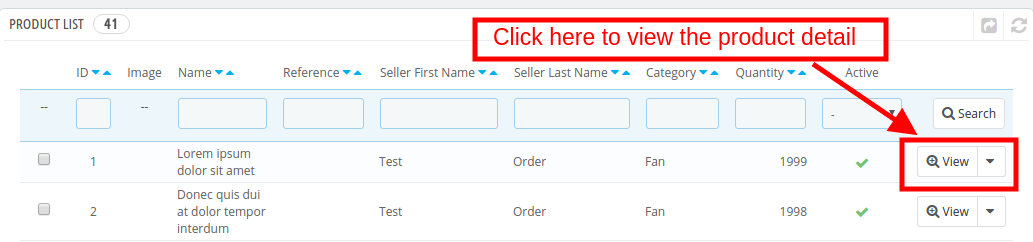
The admin approves the products from the back-end of the OpenCart Multi-vendor Marketplace extension. Further, they will list in the Sellers Products tab.
OpenCart Multi vendor Marketplace plugin- Sellers products
3.5.1 How to edit/remove the details of the products?
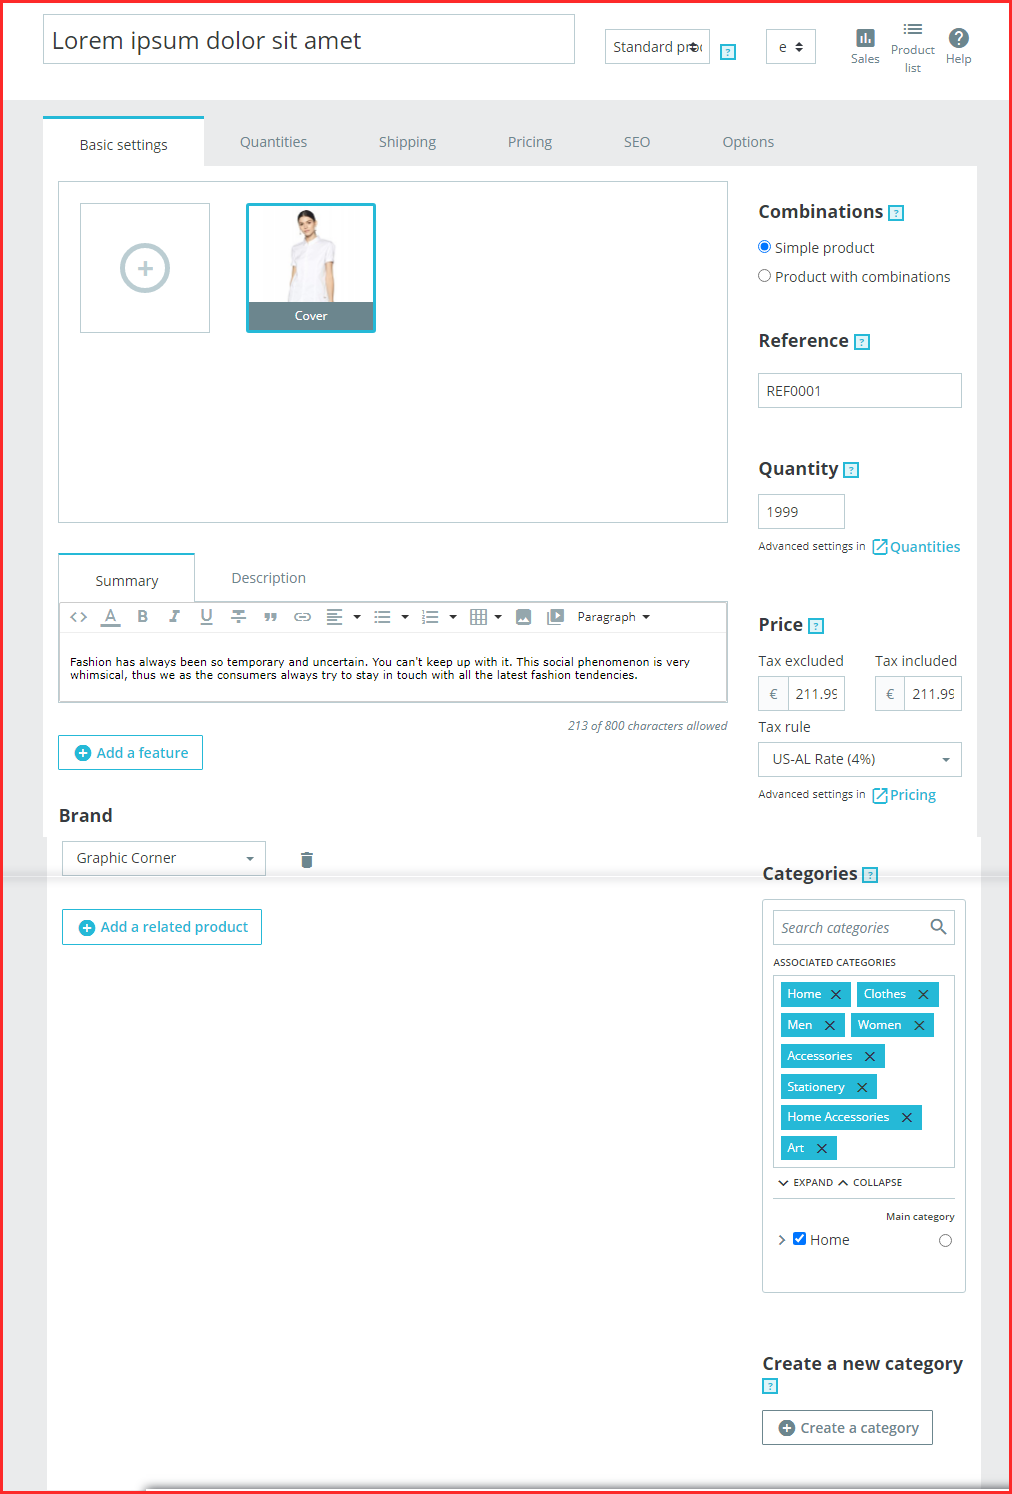
The store owner can edit or delete the product details of the sellers if required. Click on the ‘Edit’ or ‘Delete’ button respectively.
3.3.1.1 General
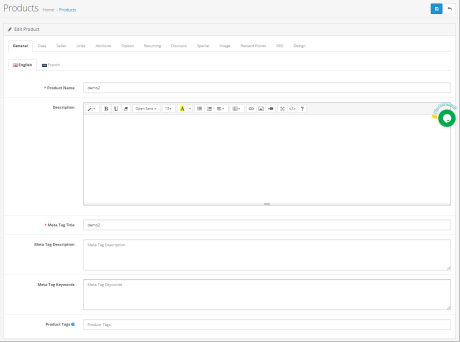
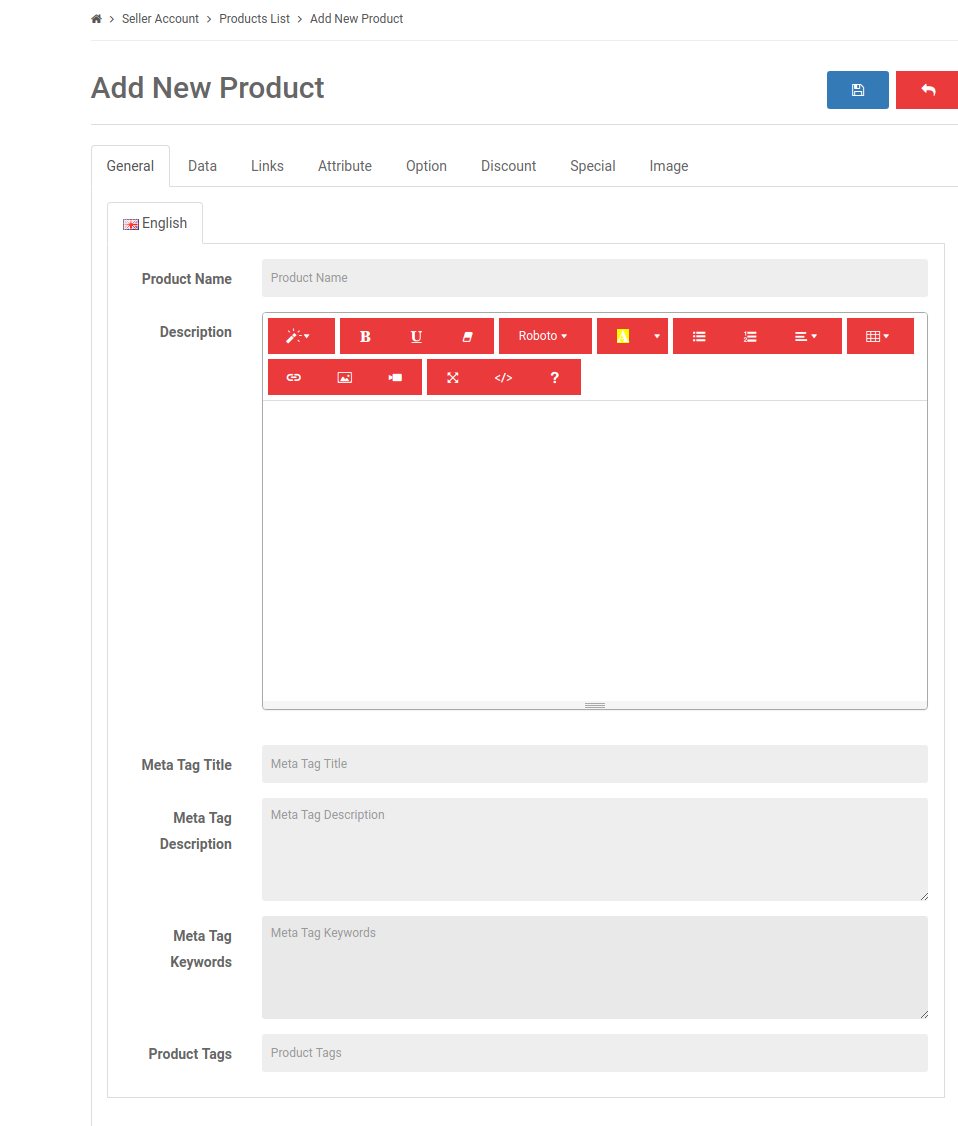
Add a general product description in the General setting tab of the product.
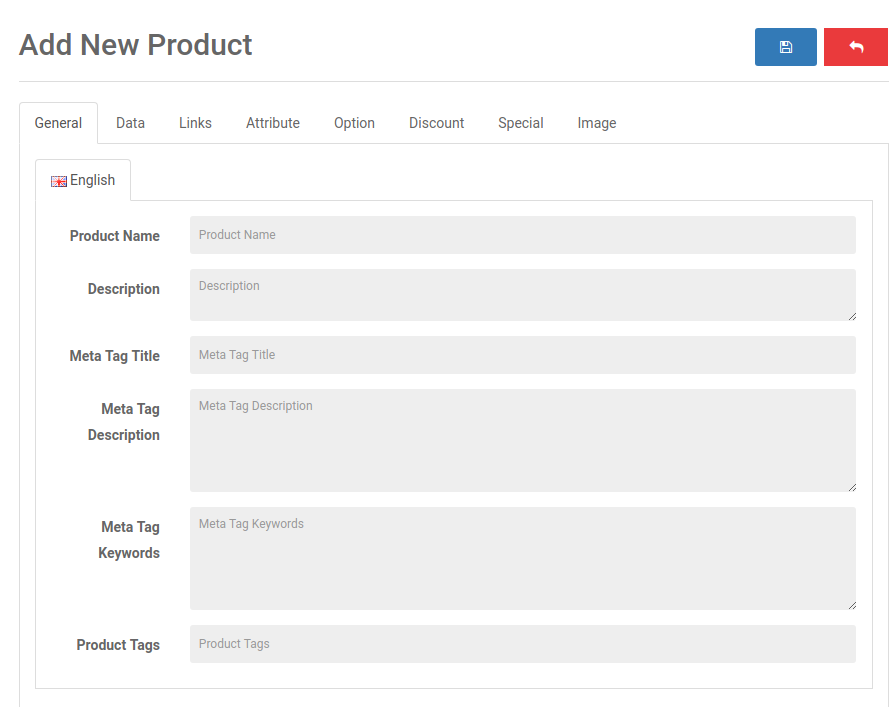
Product Name: Add product Name in this field.
Product Description: Add the product description in the description field.
Meta Tag Title: Enter the Meta tag here.
Listing Meta Description: Enter the Meta description of the website here.
Meta tag Keywords: Enter the meta keywords in this section. Enter the tags and separate them with comma.
Product Tags: Add all the product tags here.
3.3.1.2 Data
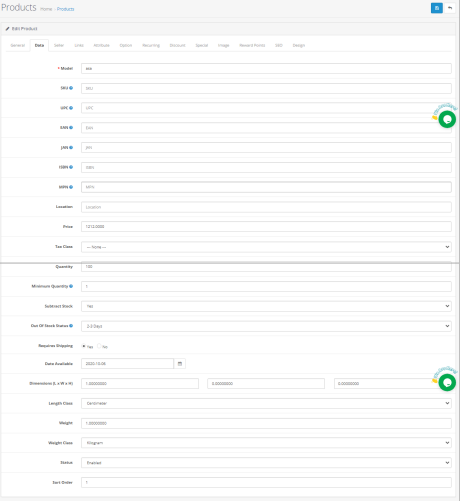
In the data section of Product description, the admin have to fill the details like Model, Product codes like SKU, UPC, EAN number, JAN, ISBN and MPN, Location details, Product price, Tax class, Quantity, Minimum quantity, Stock status, Shopping charges requirements, dimensions, weight etc.
3.3.1.3 Seller
Select the seller from the given seller’s list.
3.3.1.4 Links
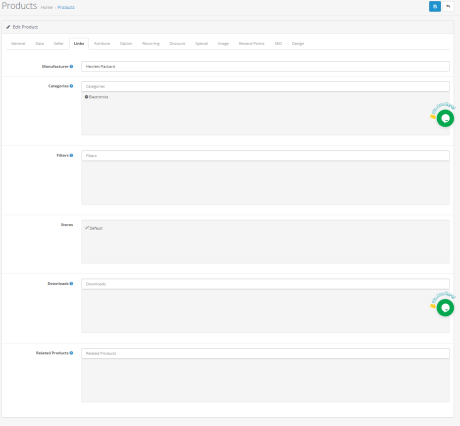
Add details like manufacturers, categories, filters, stores, related product, etc.
3.3.1.5 Attributes
Admin can add product attributes in English and French.
3.3.1.6 Option
If required then a product option will be available from this section.
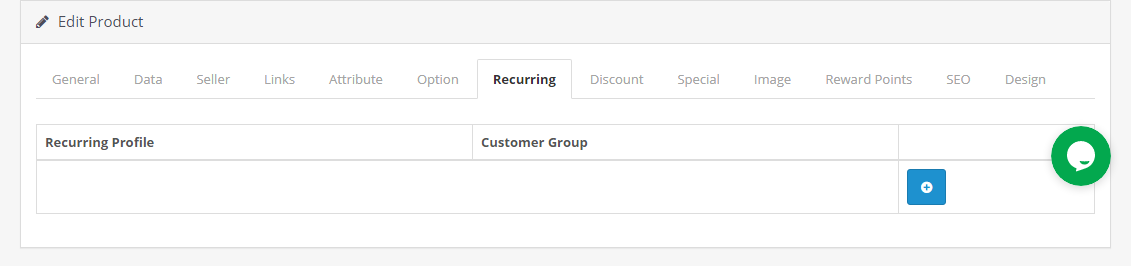
3.3.1.7 Recurring
From this section, addition of recurring profiles will happen.
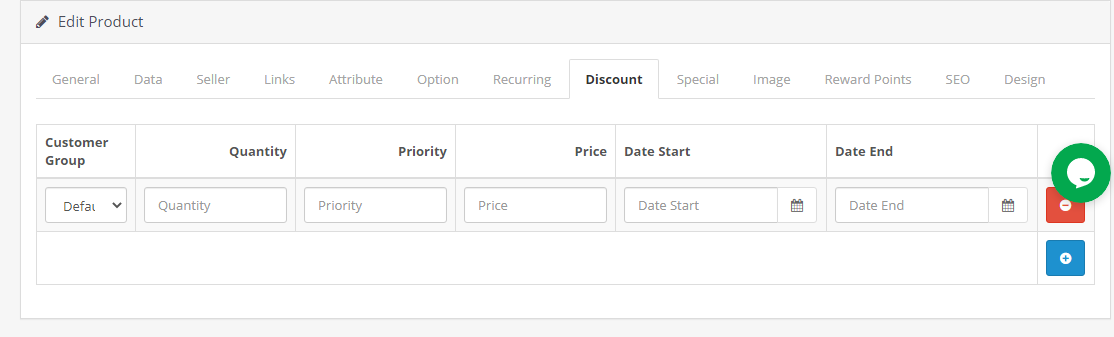
3.3.1.8 Discount
The discount details on the particular product will display here.
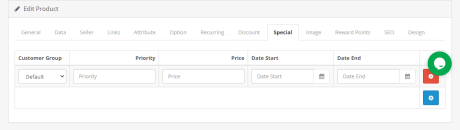
3.3.1.9 Special
Admin can set the product on priority for a period by adding start date and end date.
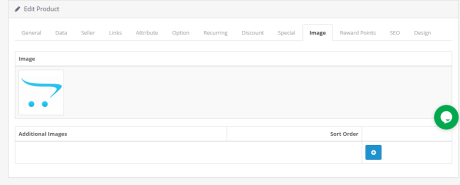
3.3.1.10 Image
Upload the Image of the product here. Addition of one or more images can happen with order to display.
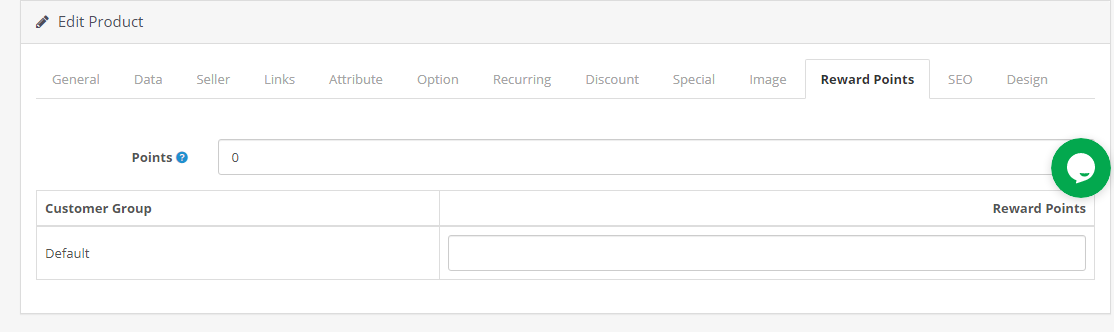
3.3.1.11 Reward Points
Admin can add a minimum number of points needed to buy this product.
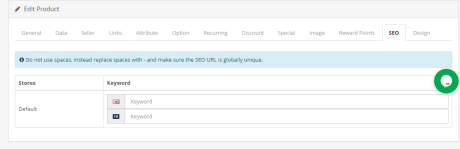
3.3.1.12 SEO
Add SEO for the product here.
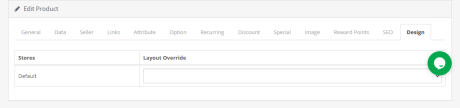
3.3.1.13 Design
From this design section, sellers can choose the layout design.
3.3.2 Product Approval List
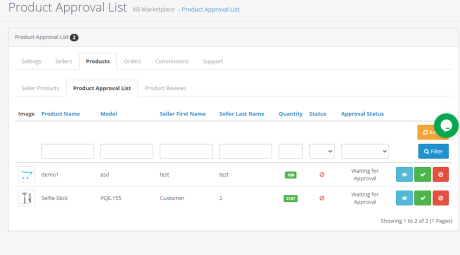
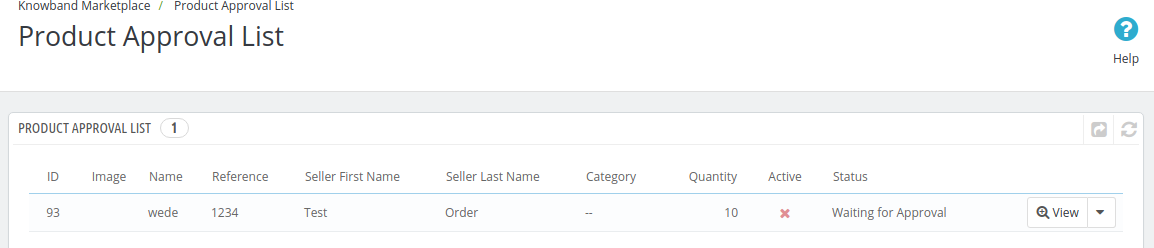
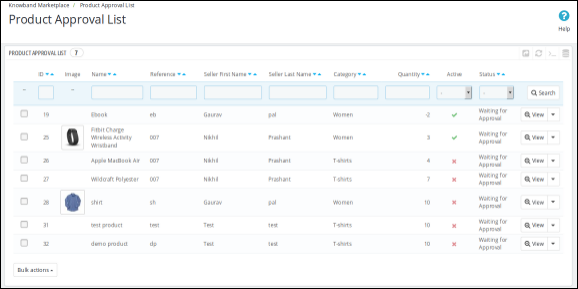
The third-party vendors can list their product from the dashboard of their profile. The products put in from the dashboard list in this tab of the OpenCart Multi-vendor marketplace module for approval. Admin approval is required only if this feature is enabled. The store admin can, then, approve or disapprove the product at a button click.
The products put in by the sellers will list in the Product Approval List tab of the OpenCart Multi seller Marketplace module as shown in the image below:
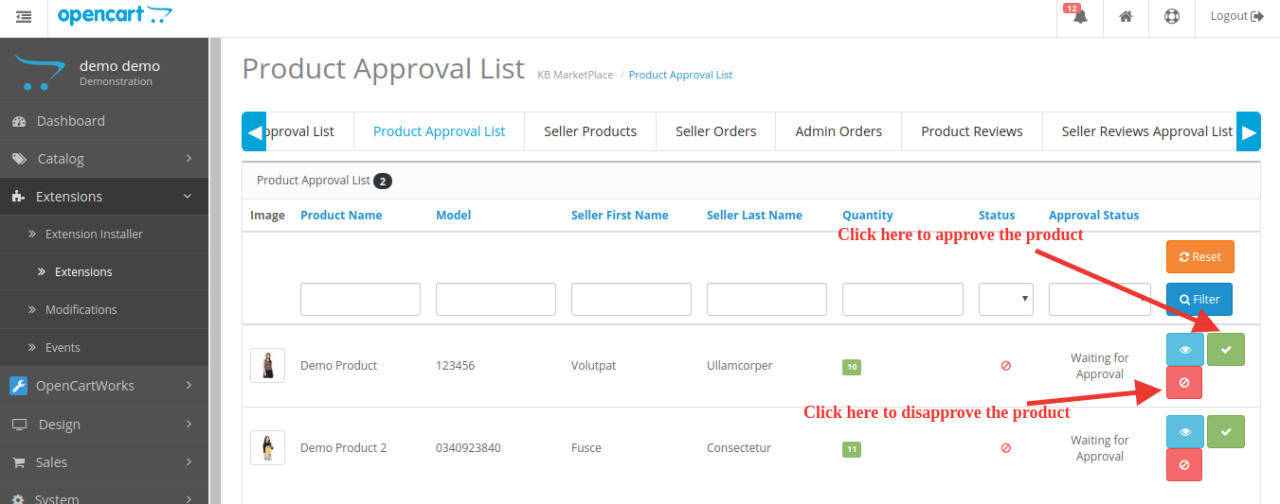
The admin can approve or disapprove of the products by clicking on the respective button corresponding to each product. Refer to the image below:
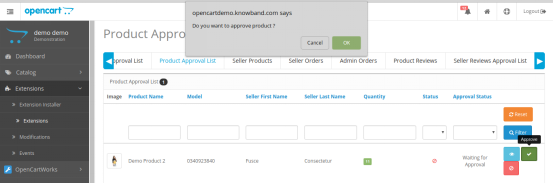
Once the Approve or Disapprove button is clicked, a pop-up will display with the message “Do you want to approve product?”
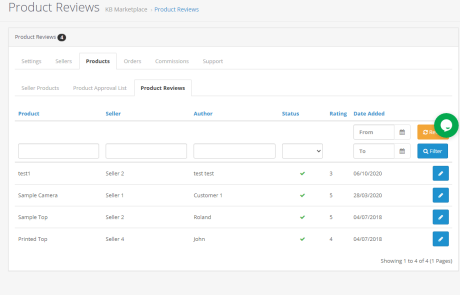
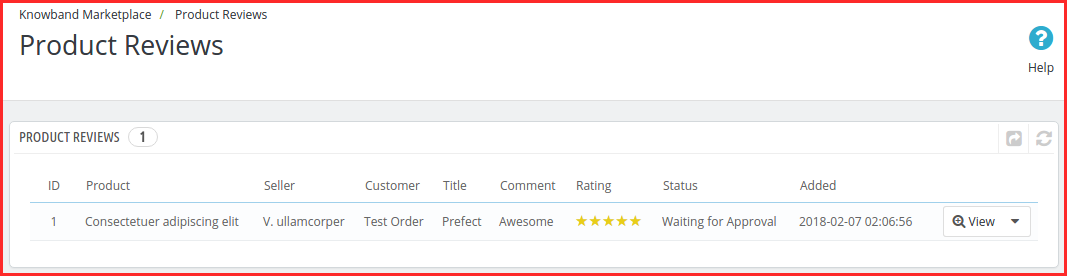
3.3.3 Product Reviews
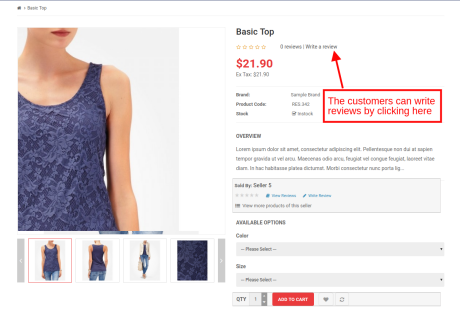
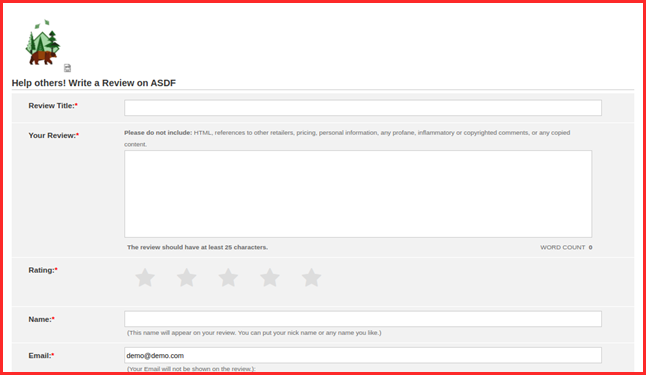
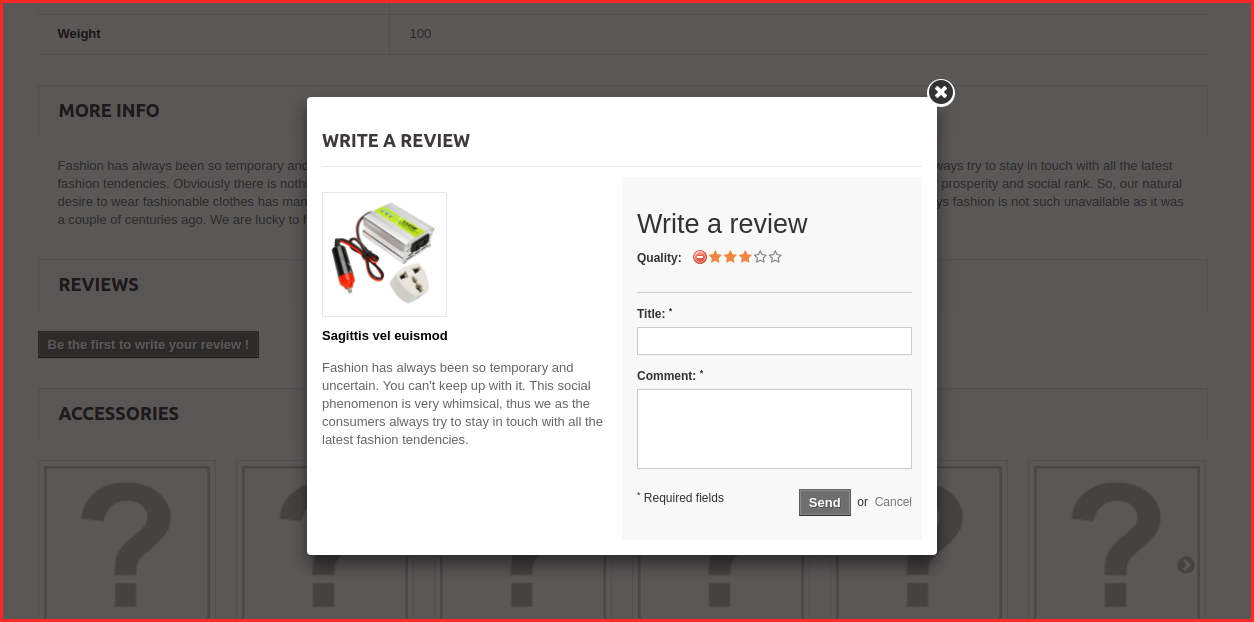
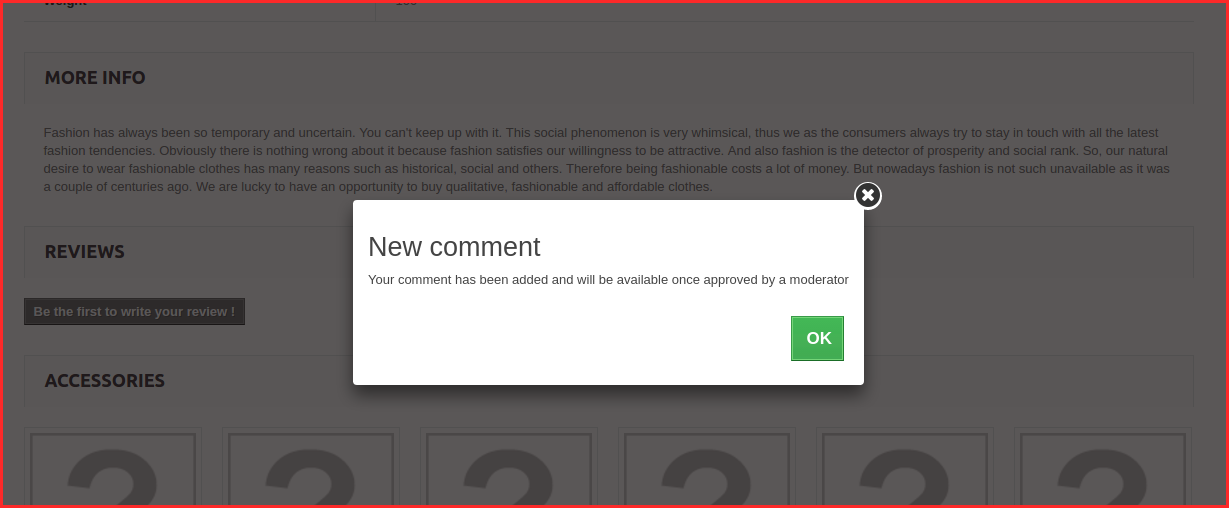
The customers can give ratings and write reviews for the products if this feature is enabled from the back-end of the OpenCart marketplace plugin. If enabled, the customers can leave their reviews by clicking on ‘Write a Review’.
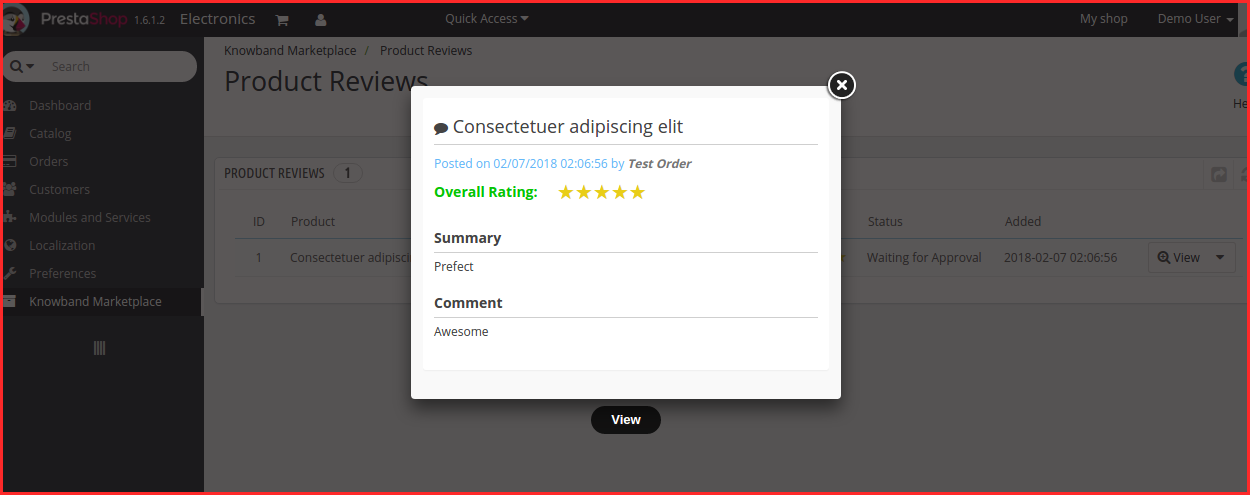
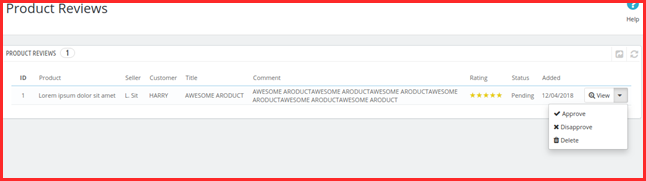
The reviews written in the front-end will list in the back-end of the OpenCart Multi-vendor Marketplace plugin as shown in the image below:
Click on the ‘Edit’ button to edit or approve the product reviews. This will redirect you to the review edition page of the OpenCart Multi-vendor Marketplace module.
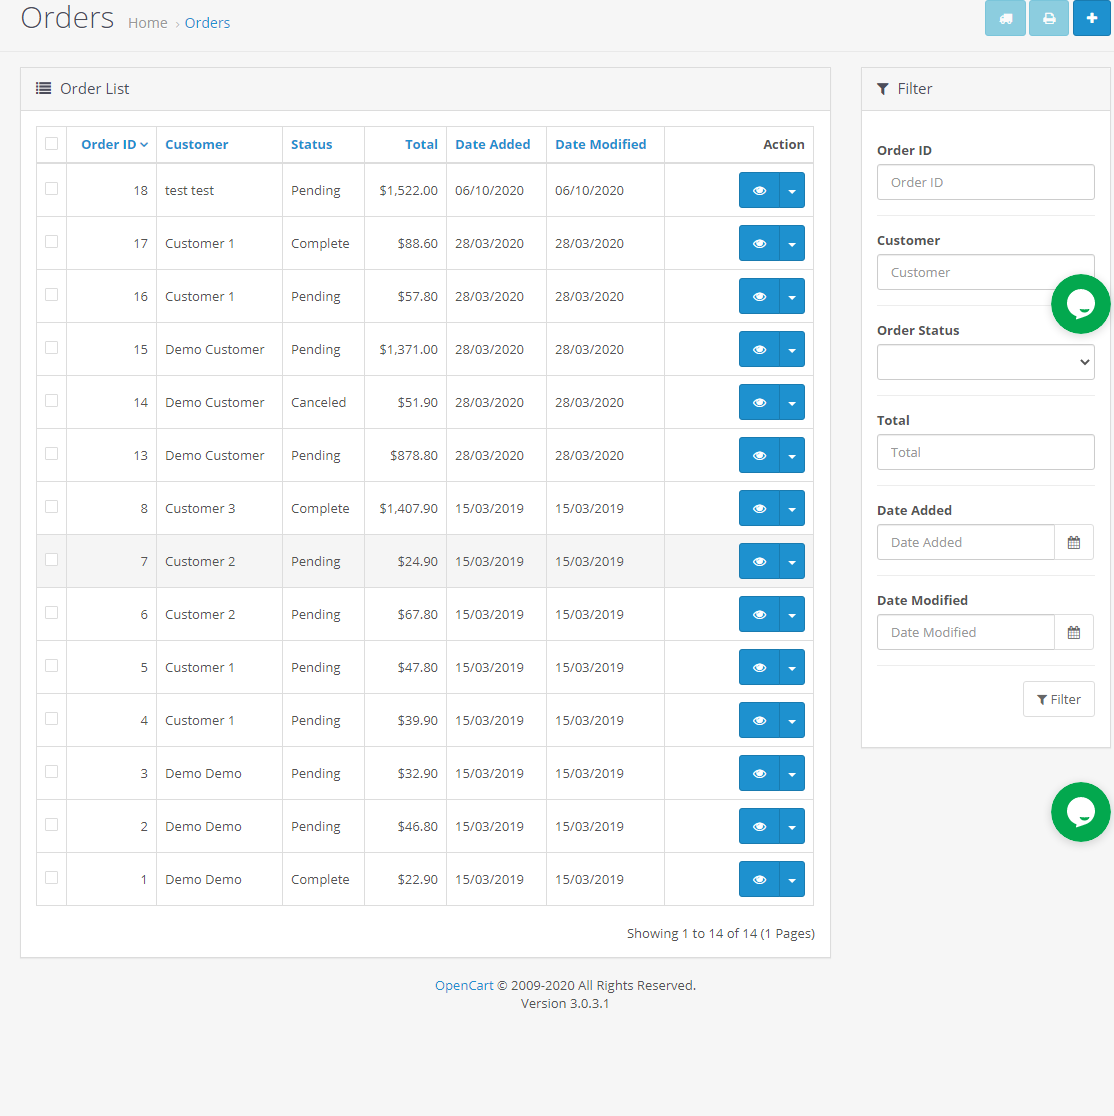
3.4 Orders
OpenCart store admin can view the list of all the orders here.
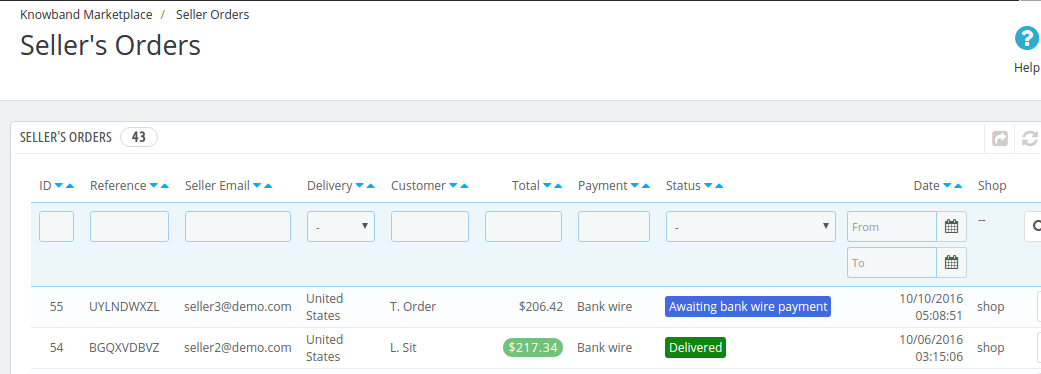
3.4.1 Seller Orders
The orders received on the seller’s product will list in the tab of the OpenCart Multi seller marketplace plugin. The store admin can view or edit the orders by clicking on the View and Edit buttons respectively.
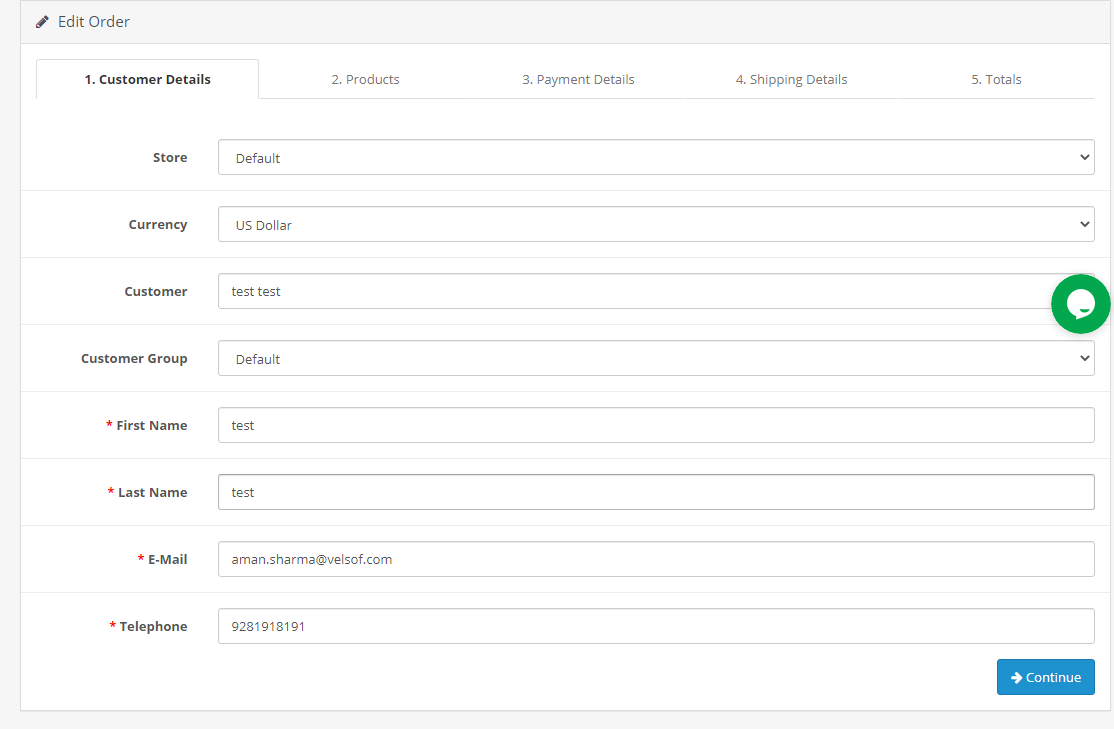
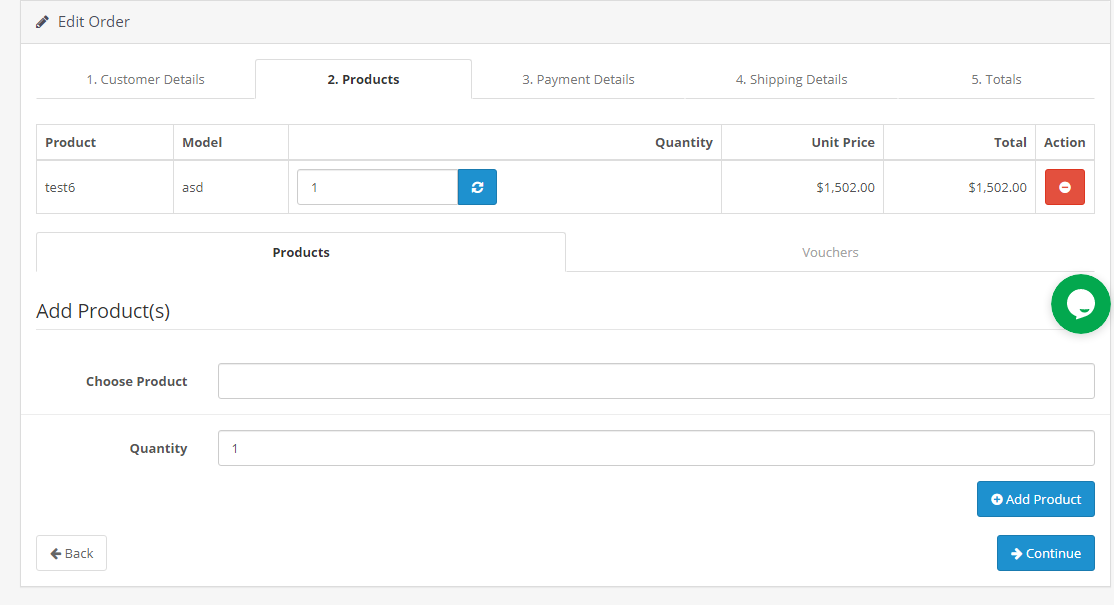
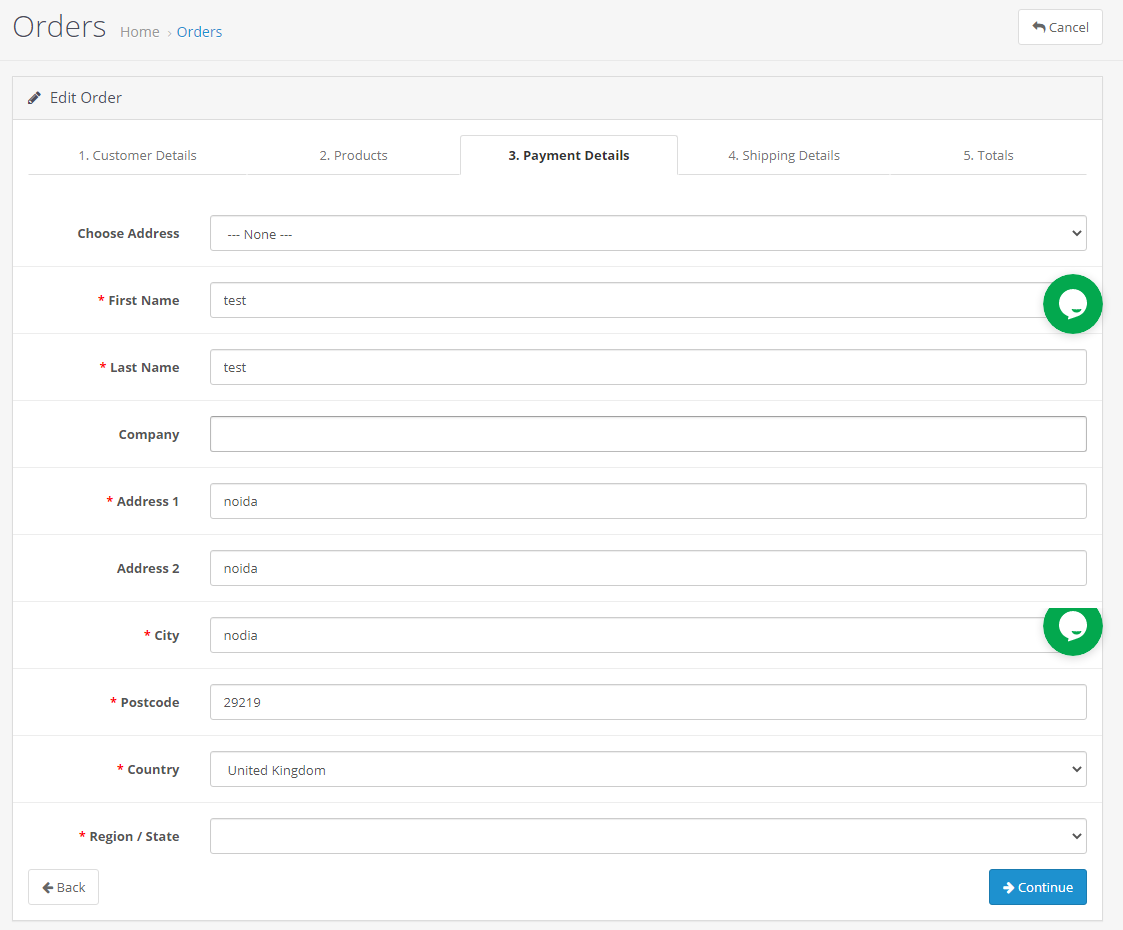
The following window will display if admin clicks the edit button. Admin can make the changes in all the fields as required.
3.6.1 Customer Details
From this section, admin can add their customer’s details.
3.6.2 Products
From this section, admin can add their products details.
3.6.3 Payment Details
From this section, admin can add their payment details.
3.6.4 Shipping Details
From this section, the admin can add their shipping details.
3.6.5 Totals
From this section, the admin can add the details of their total.
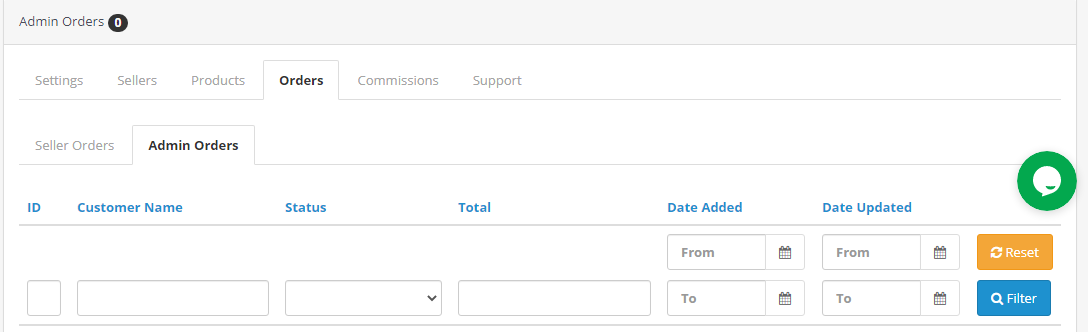
3.4.2 Admin Orders
The admin can track the order details of their products in the Admin Order tab of the OpenCart Multi seller marketplace extension.
3.5 Commissions
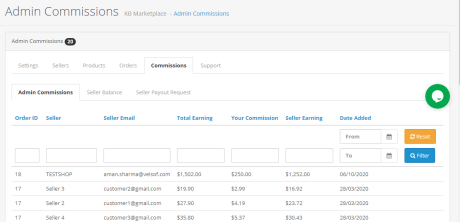
3.5.1 Admin commission
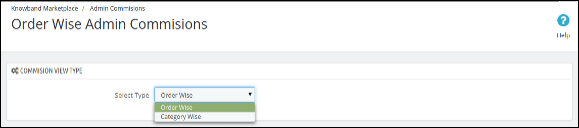
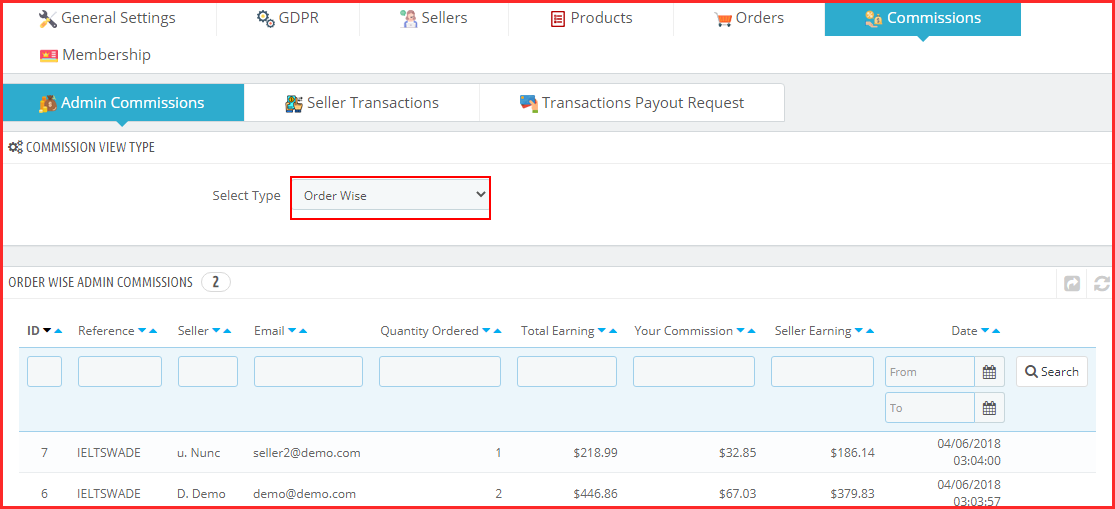
The admin can view the commission earned from the marketplace in this tab of the OpenCart Multi-vendor Marketplace Plugin. The store owner gets an option to view the earnings of the seller and total earnings.
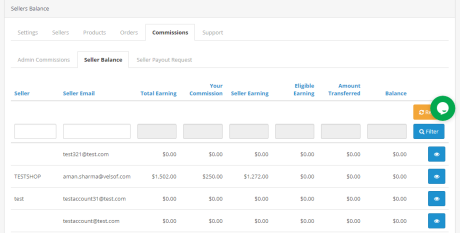
3.5.2 Seller Balance
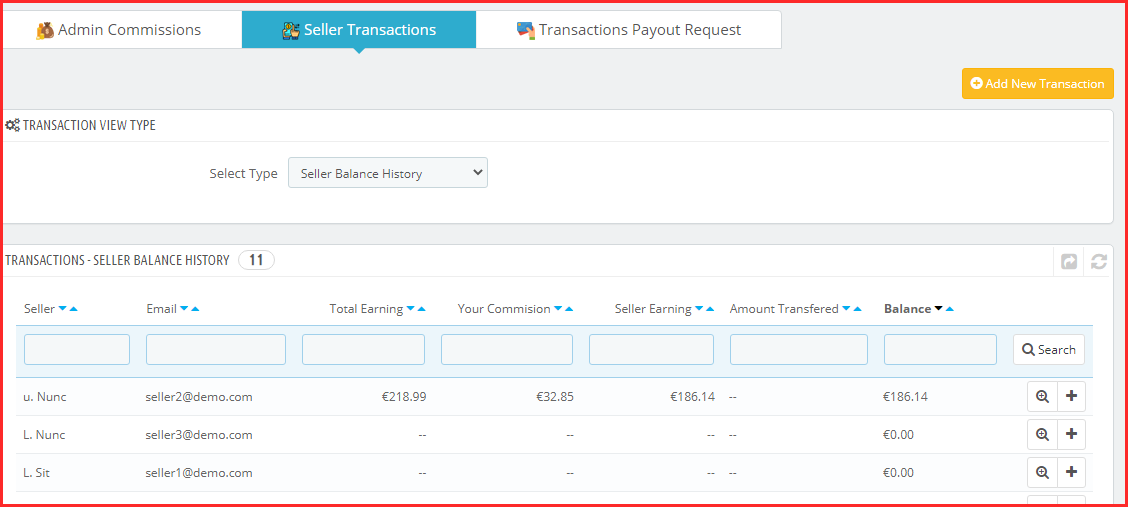
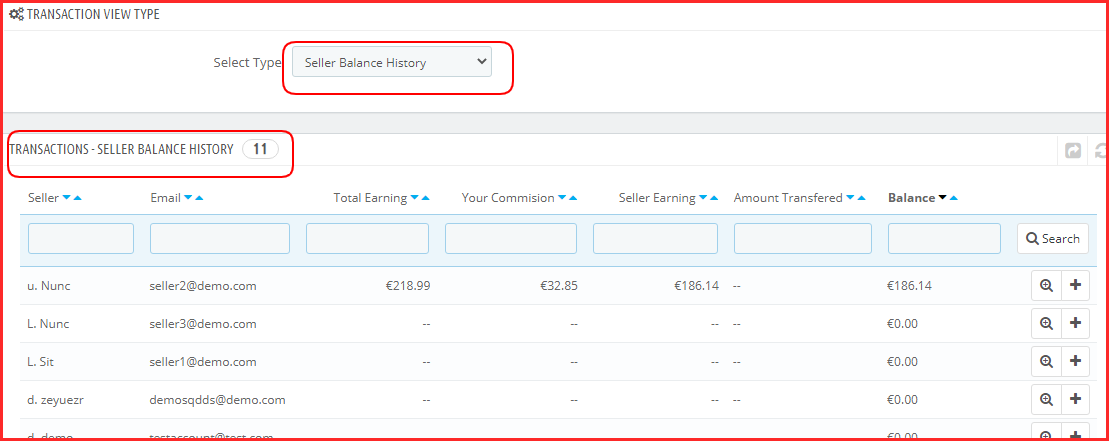
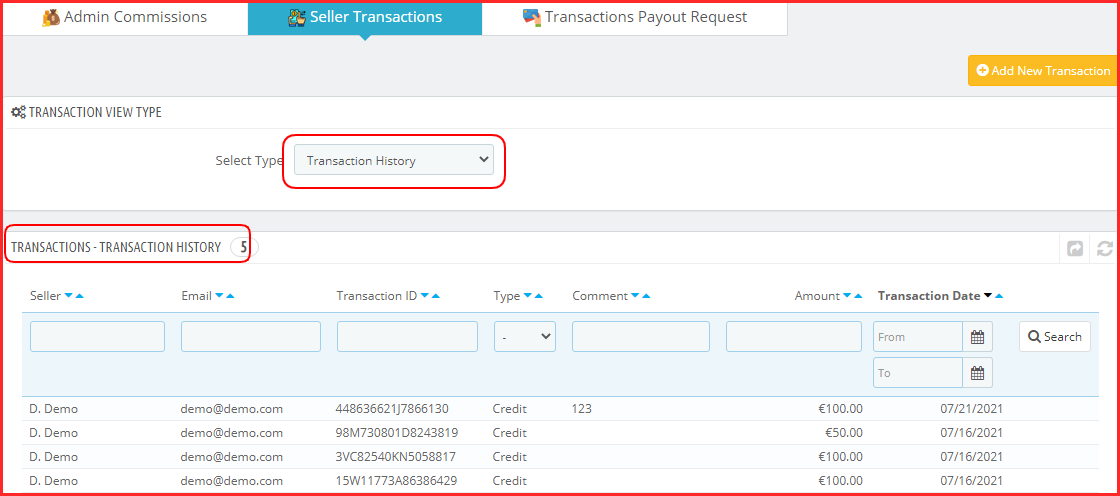
The store admin even gets an option to view the transaction of the sellers. The admin can see the Seller Balance History as well as Transaction History in this tab of the OpenCart Multi seller Marketplace plugin.
3.5.3 Seller Payout Request
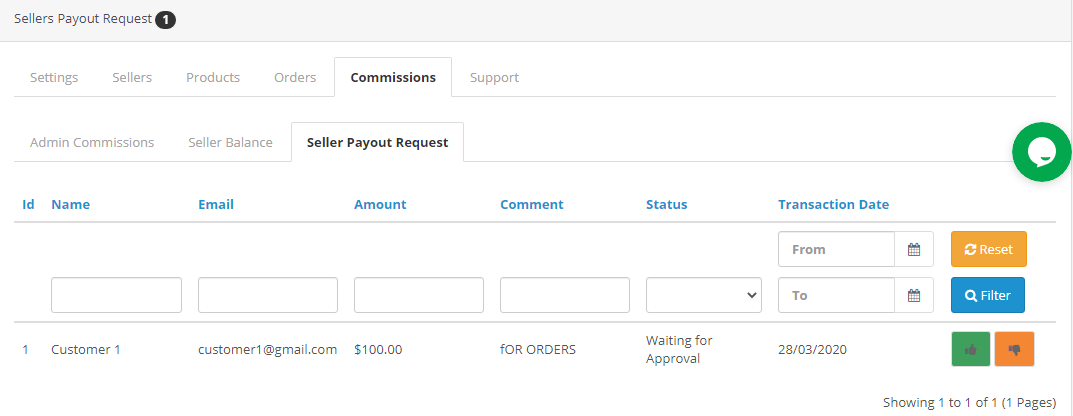
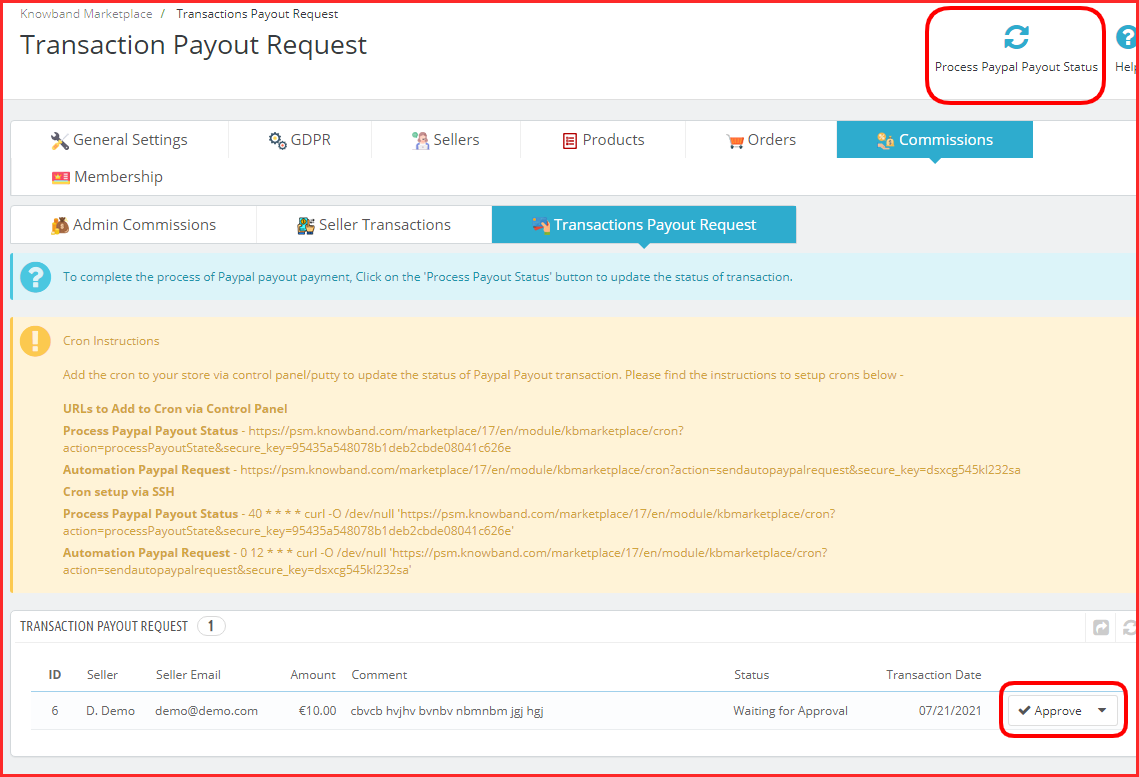
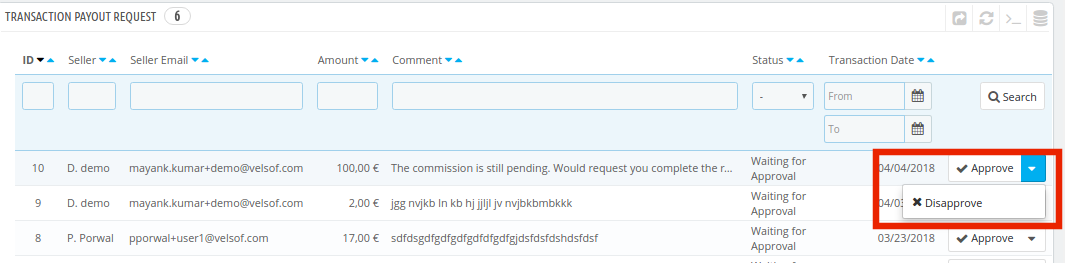
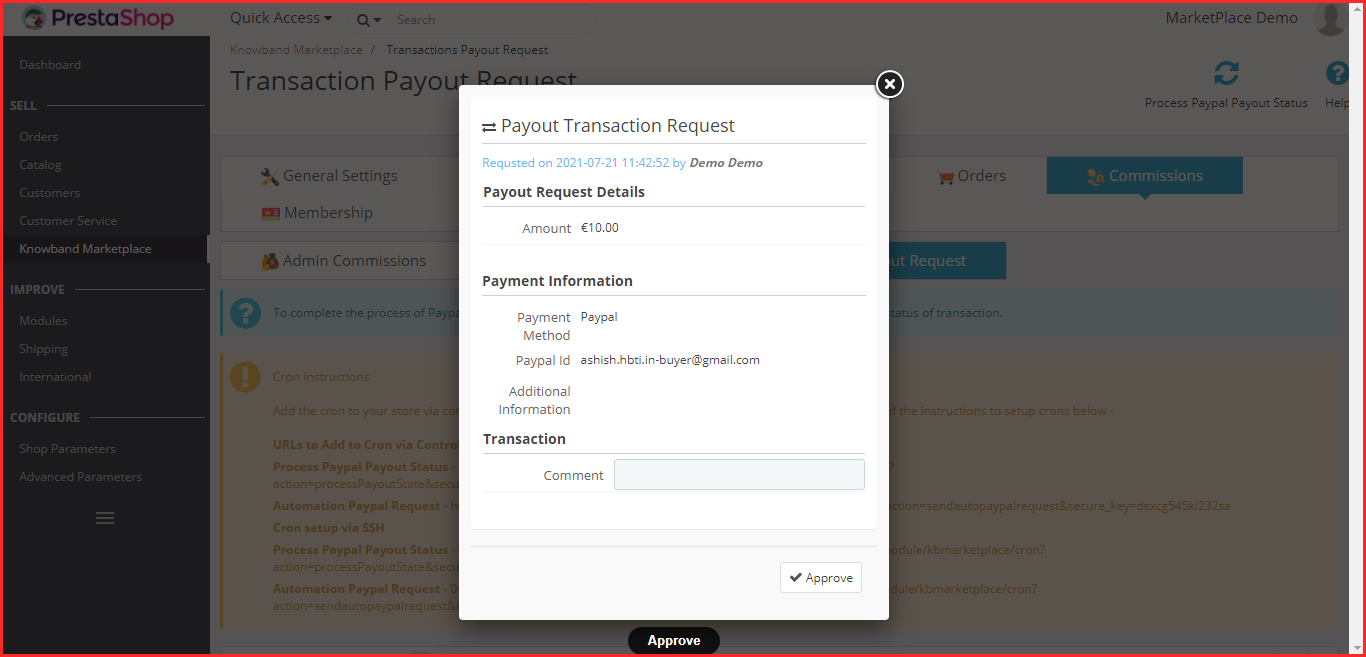
Payout Request sent by the sellers can be viewed by the admin from the backend of the Sellers Payout Request. Admin can approve/ disapprove the payout request with a few clicks. Once the admin clicks on the “Approve” button a pop window as shown in the figure will appear.
When the admin will click on the “Disapprove” button, a dialog box with a comment field will appear. Once the admin clicks the submit button after filling the comment fields, the request will disapprove.
3.6 Support
This tab is used to find the user manual of the Opencart multi-seller Marketplace Module and also to raise a support ticket for any kind of queries and issues.
4.0 Front-end UI
Once the OpenCart Multi vendor Marketplace plugin is successfully installed at the OpenCart store, third-party vendors can fill a simple form and open-up their online shop. For easy management of the shop, the seller gets access to their dashboard.
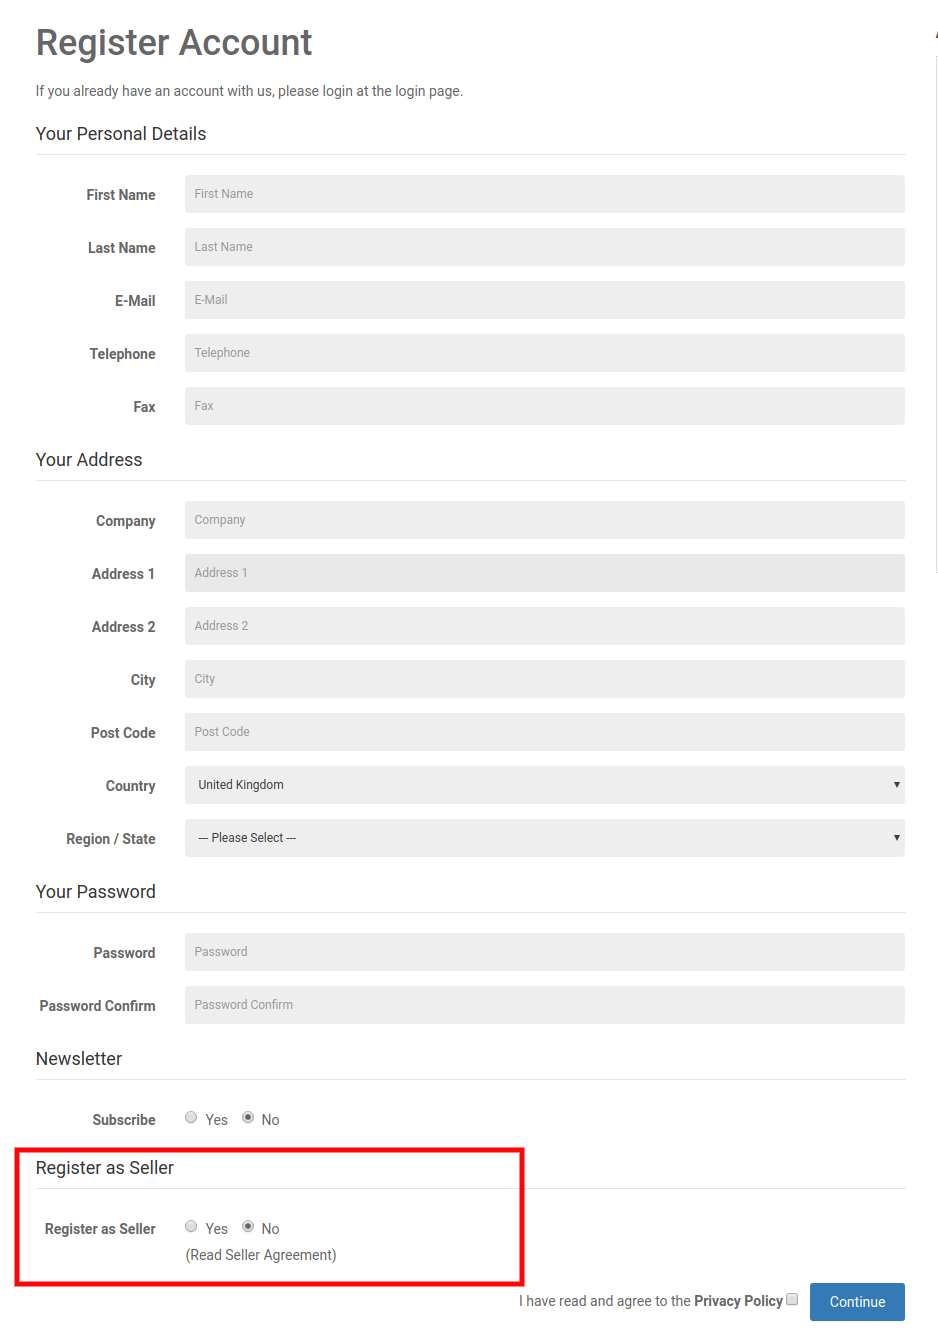
4.1 Seller Registration
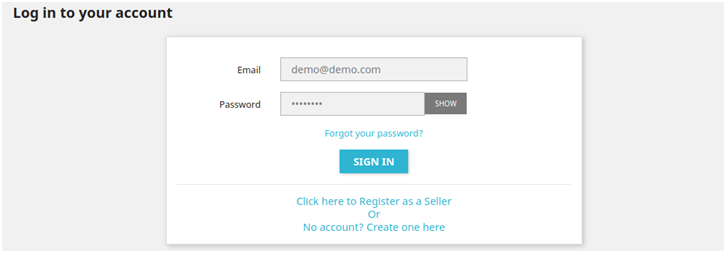
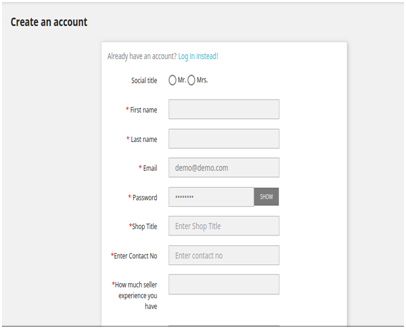
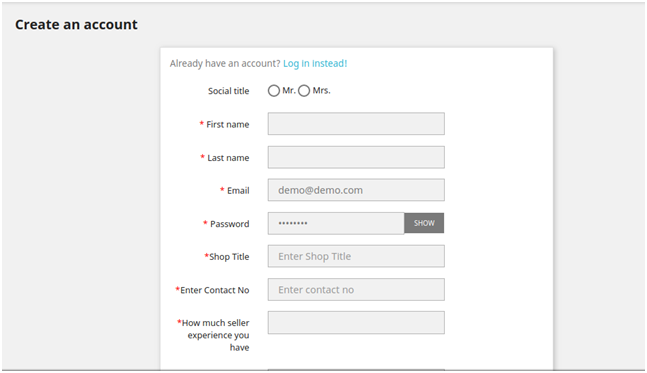
The third-party vendors can easily register as a seller of the site by filling a simple registration form. In order to register as a seller, select ‘Yes’ in the Register as Seller section of the form.
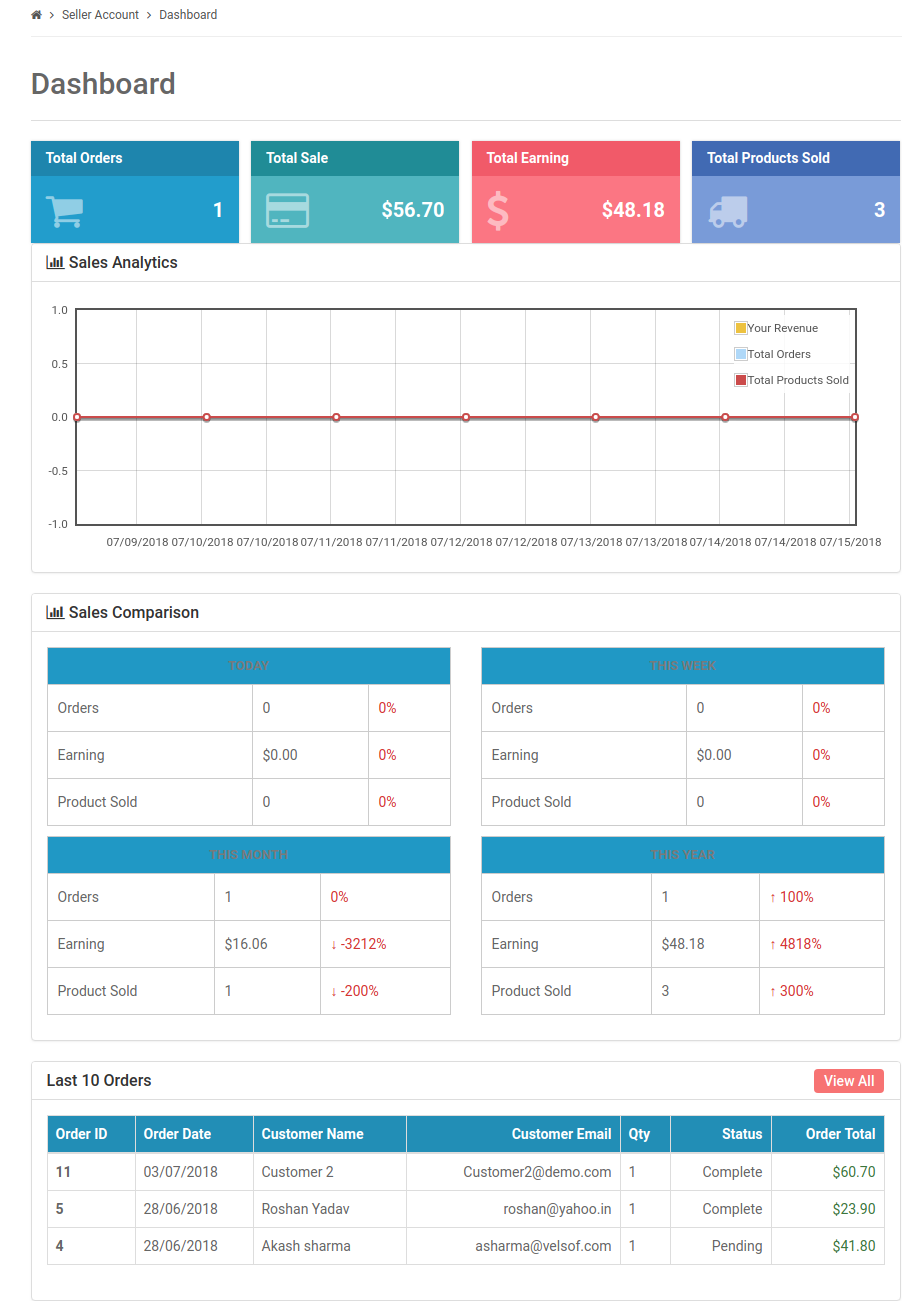
4.2 Seller Dashboard
Once the registration is complete and the seller’s account approves from the back-end of the OpenCart multi-seller Marketplace plugin, the seller gets access to the Dashboard.
They can view the entire sales report and order details.
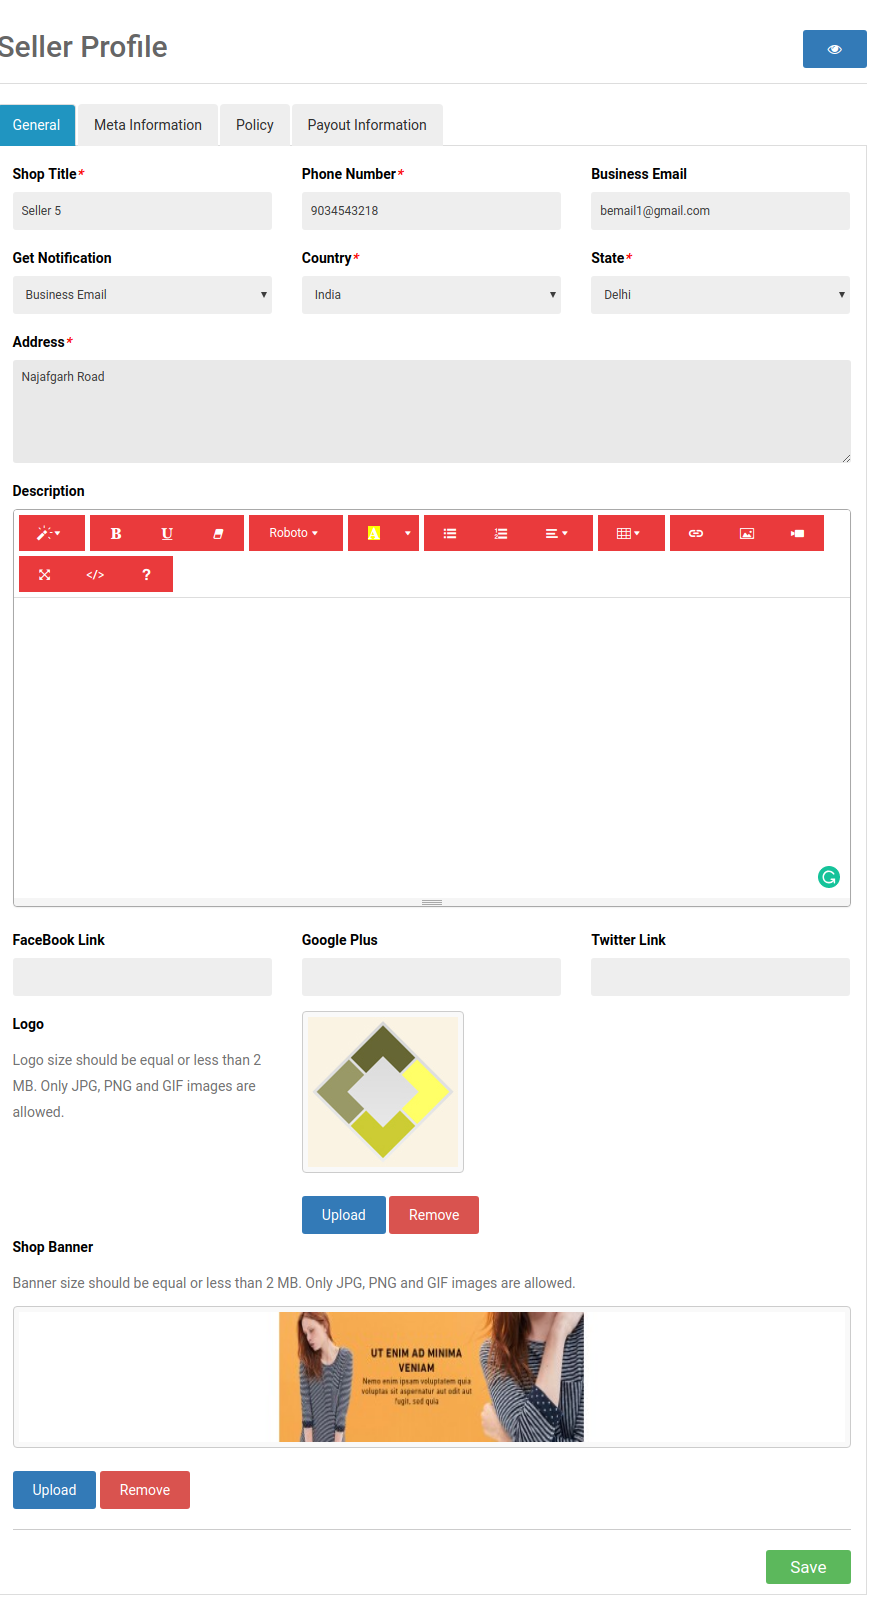
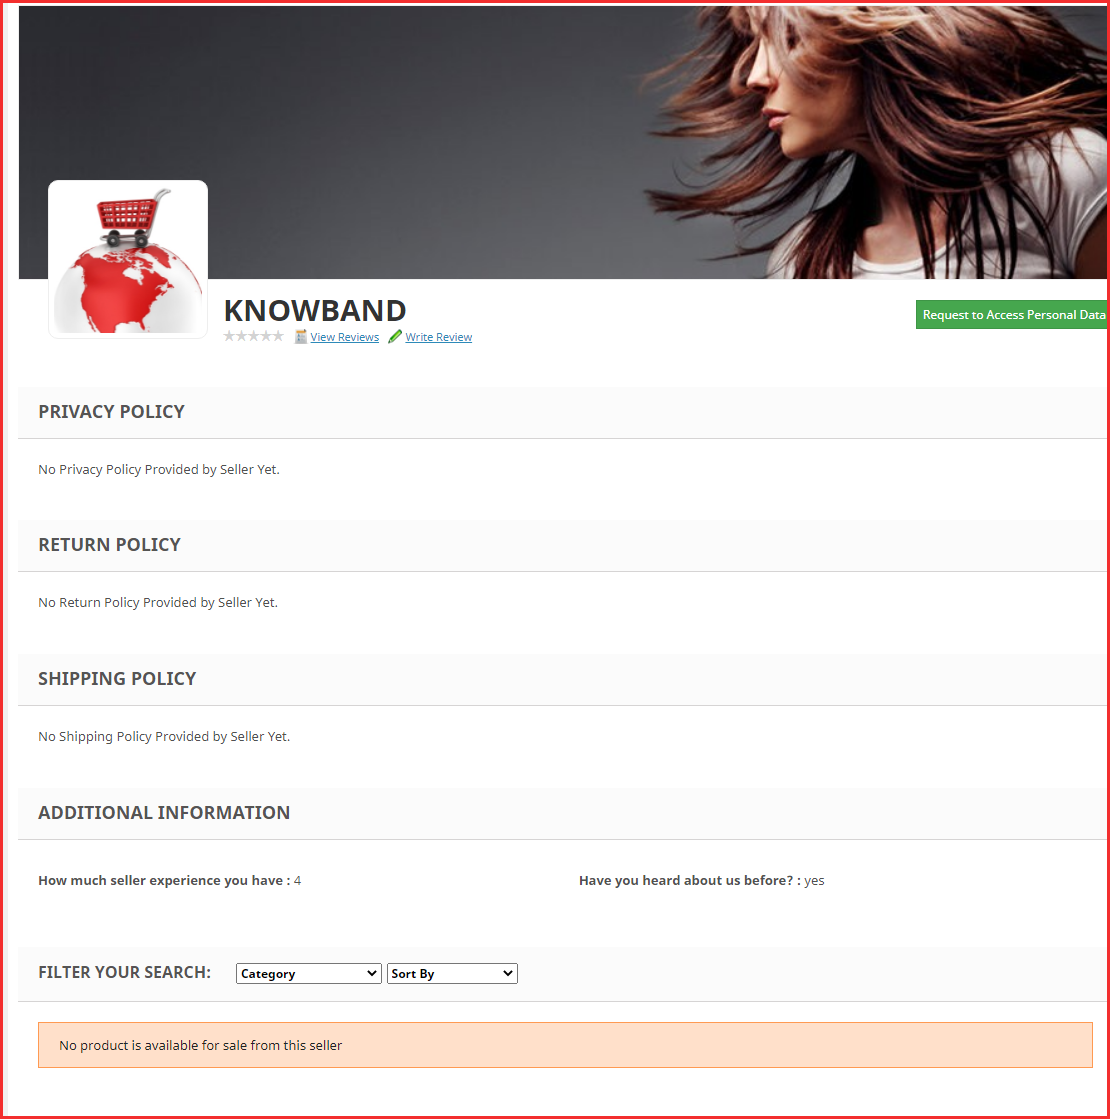
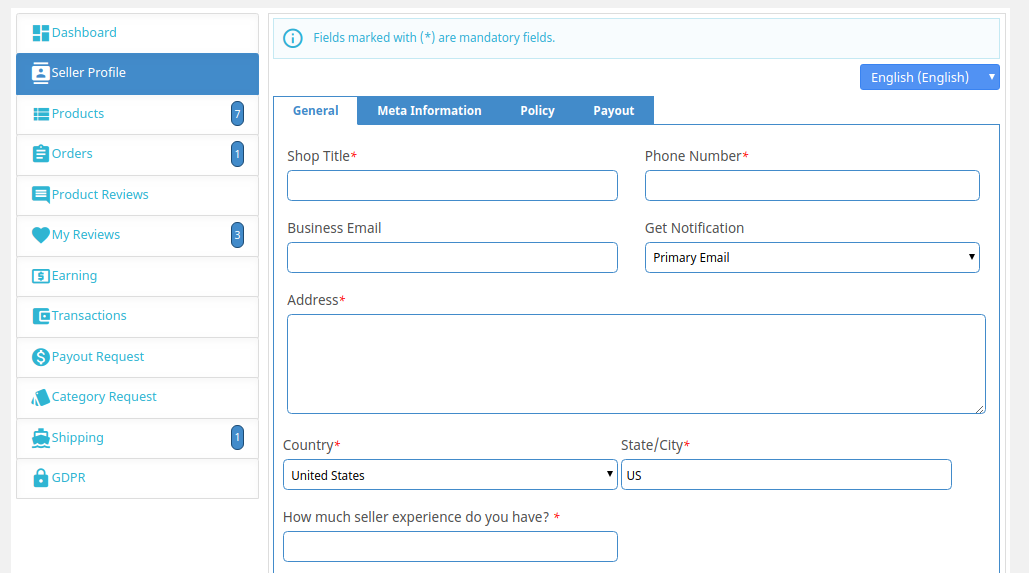
4.2.1 Seller’s Profile
The sellers can edit their profile and personalize their shop from this tab of the dashboard.
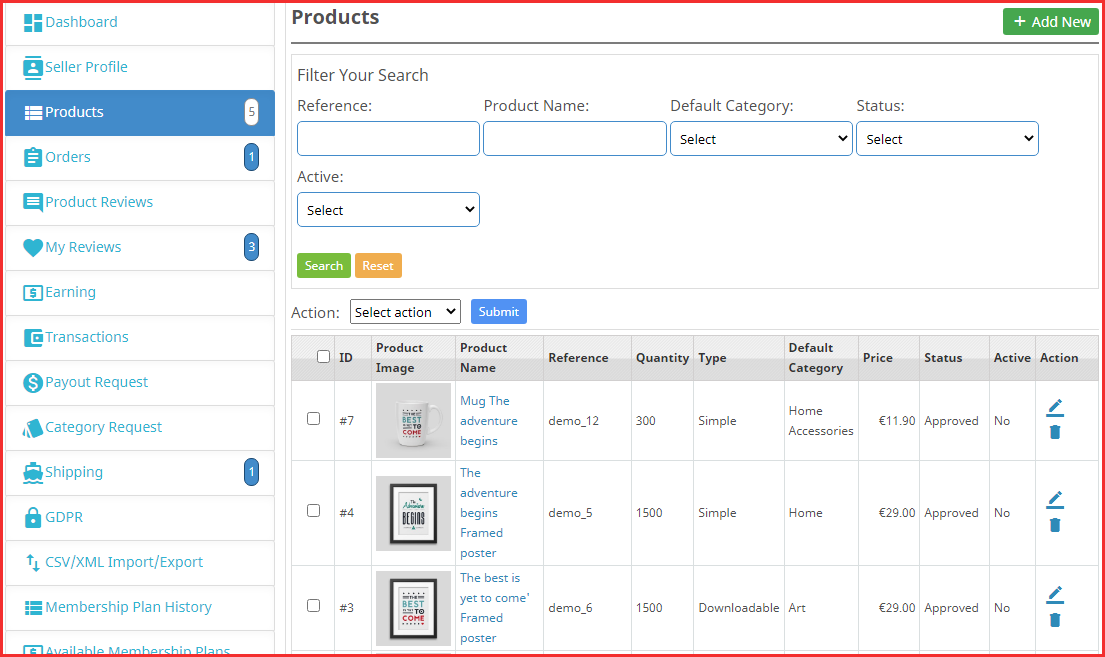
4.2.2 Seller’s Product
The sellers can follow the path mentioned below in order to add a new product.
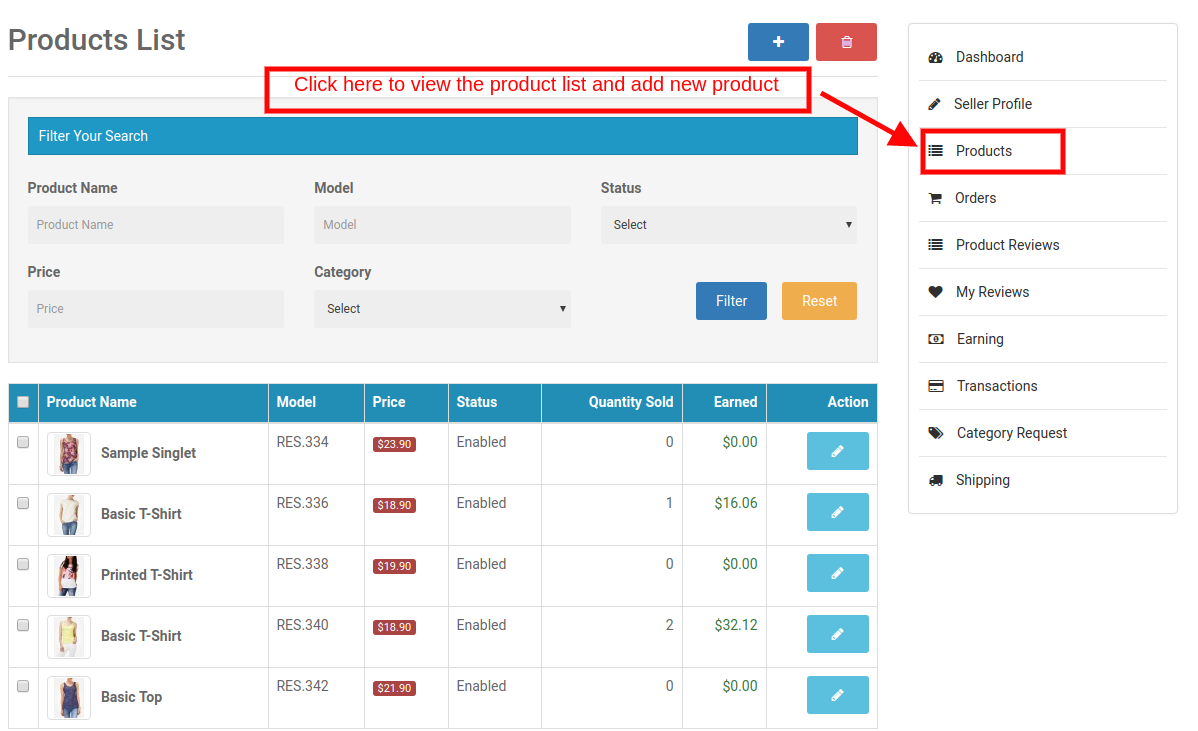
Go to My Account -> Dashboard -> Products
The list products display in this tab of the seller’s Dashboard.
In order to add a new product click on the ‘+’ sign at the top right portion.
This will redirect you to the ‘Add New Product’ page. Fill up the required detail in order to add the product.
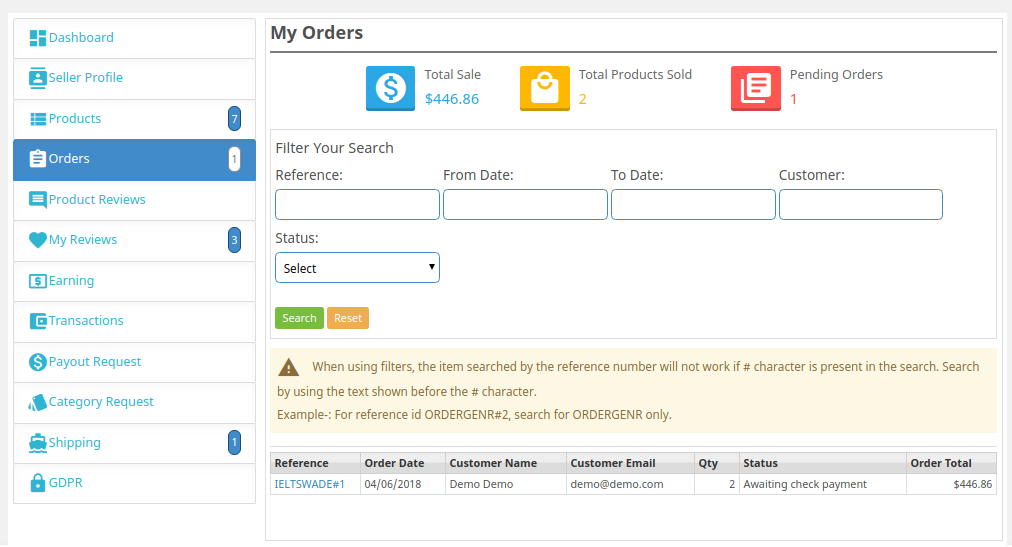
4.2.3 Order
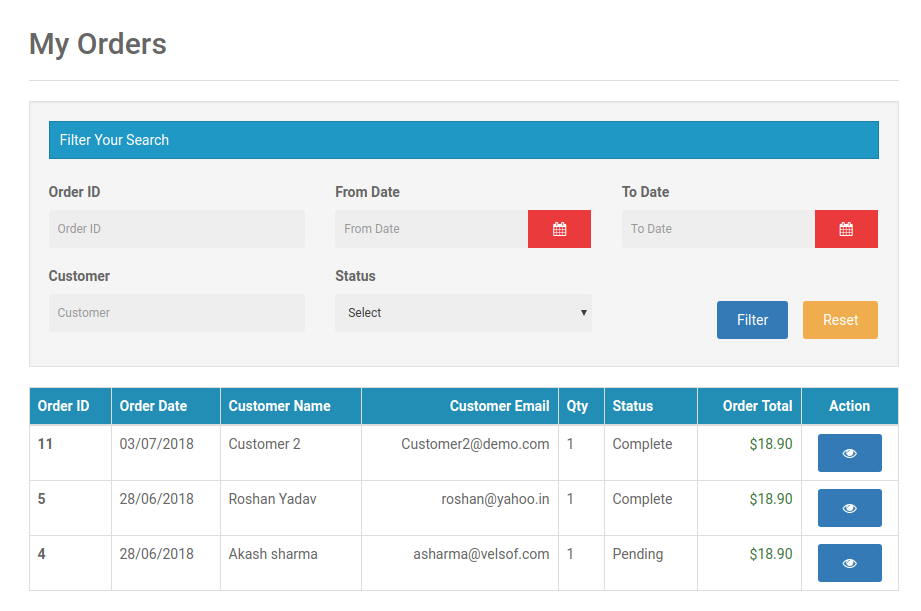
The sellers can view their orders and related details in this tab of the Dashboard.
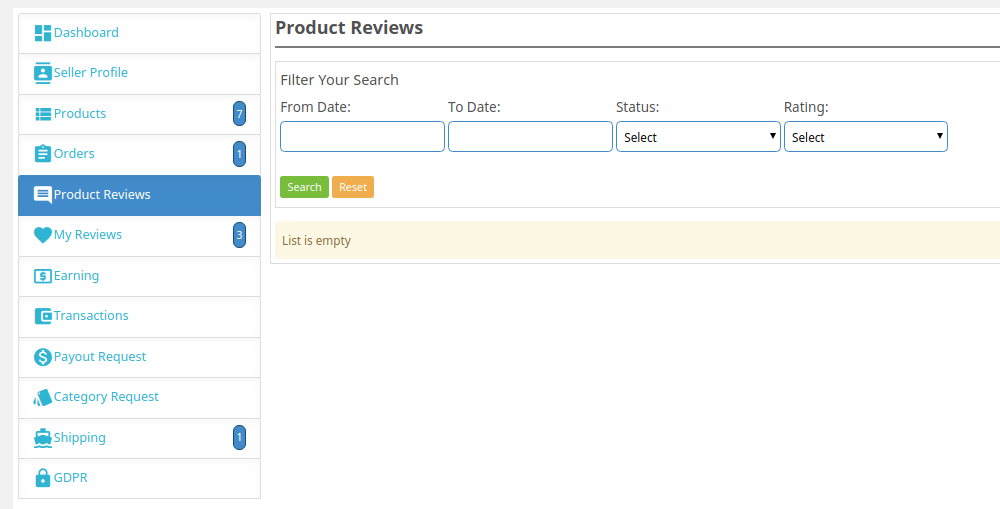
4.2.4 Product Reviews
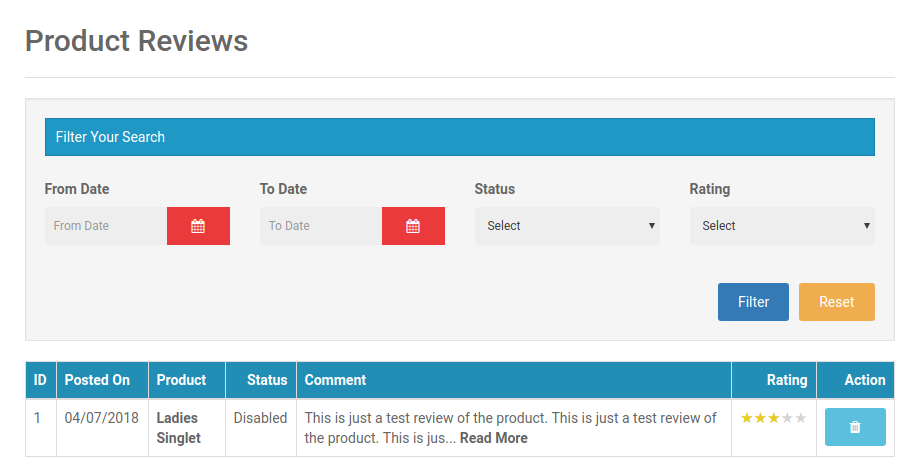
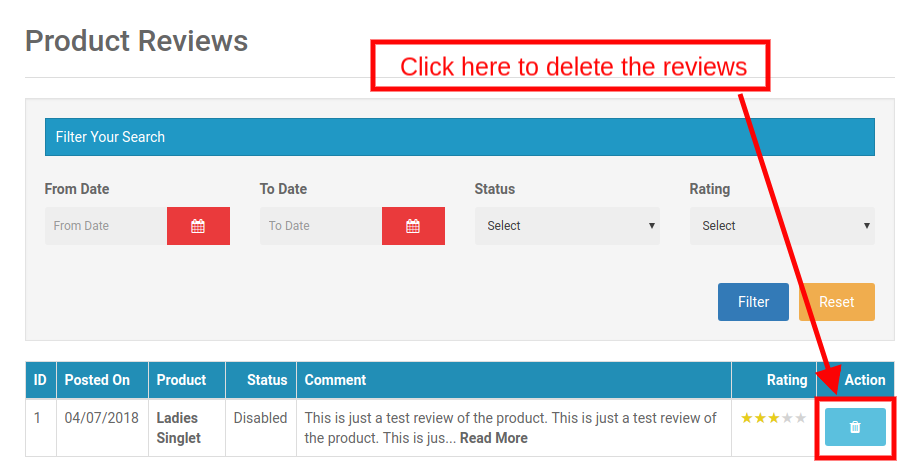
The sellers can view the review received on their product in the Product Review Tab of their Dashboard. All the reviews received will list as shown in the image below:
4.2.4.1 How can the sellers delete the Product Reviews?
Even the sellers get an option to delete the reviews. This happens by clicking on the ‘Delete’ button corresponding to each review.
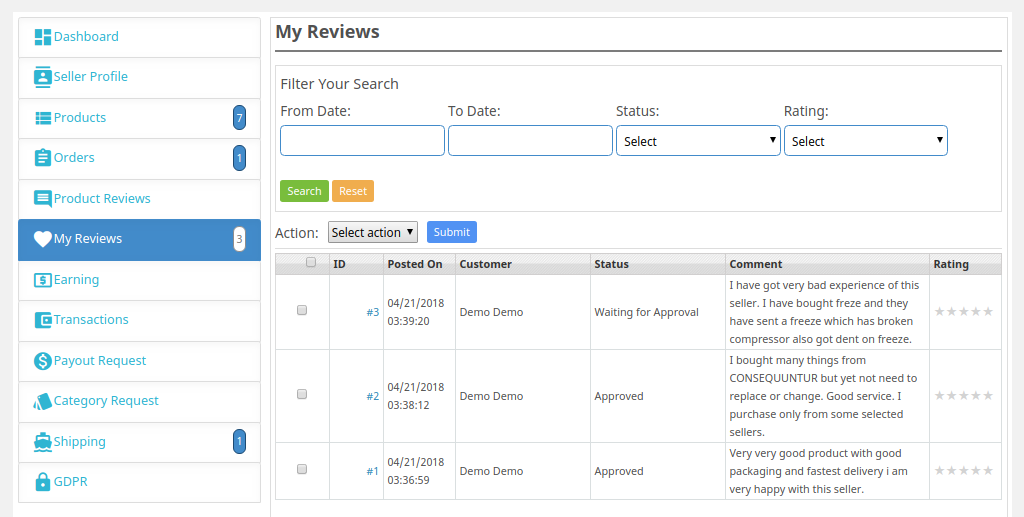
4.2.5 My Reviews
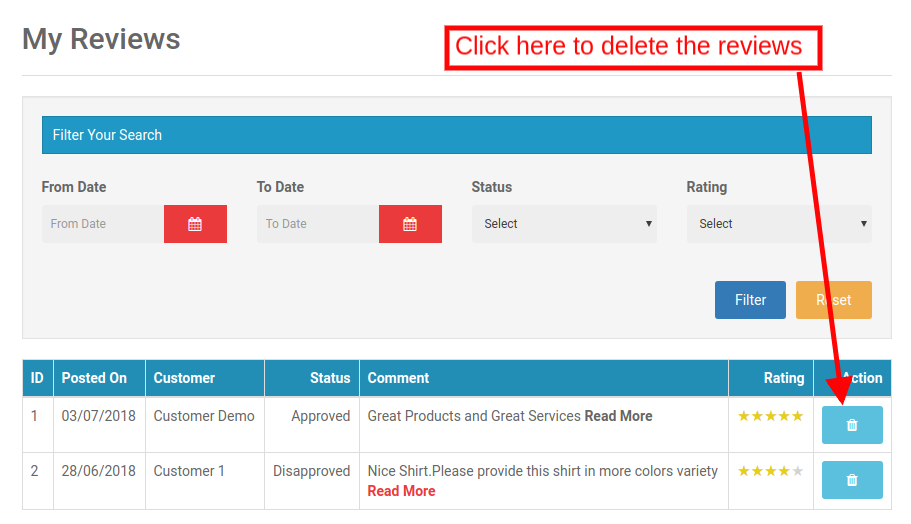
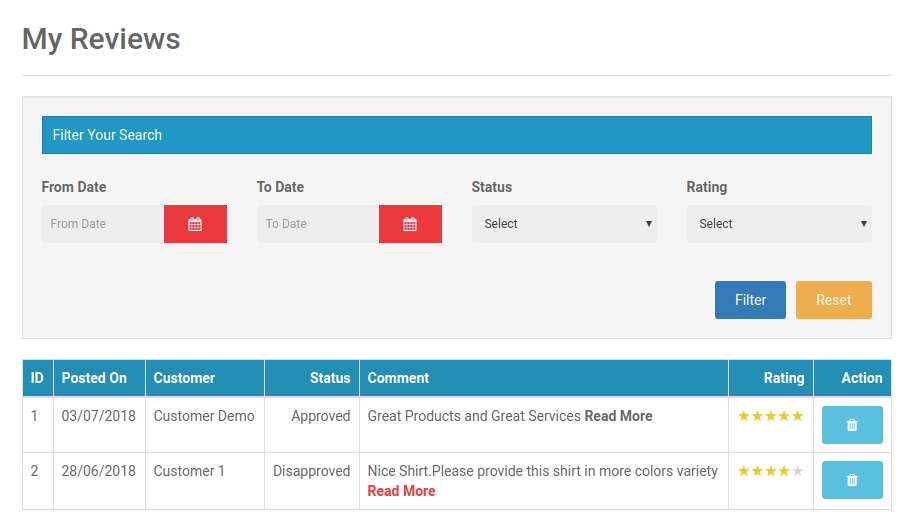
The tab of the seller’s dashboard lists out the reviews received on their profile.
OpenCart Multi vendor Marketplace plugin- My reviews
4.2.5.1 How can the Sellers Delete the Reviews on their Profile?
The sellers can even delete their profile reviews if required. This happens by clicking on the ‘Delete’ button corresponding to each review.
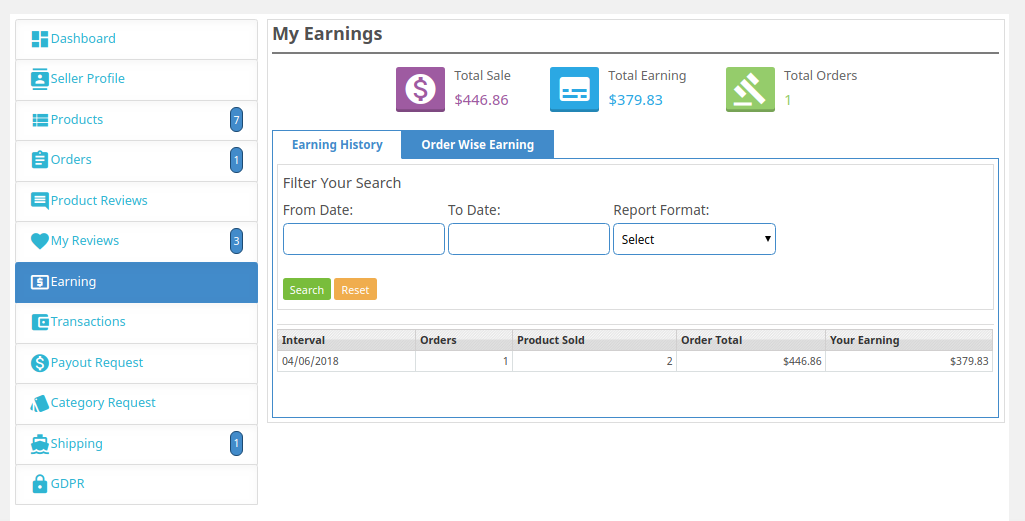
4.2.6 Earnings
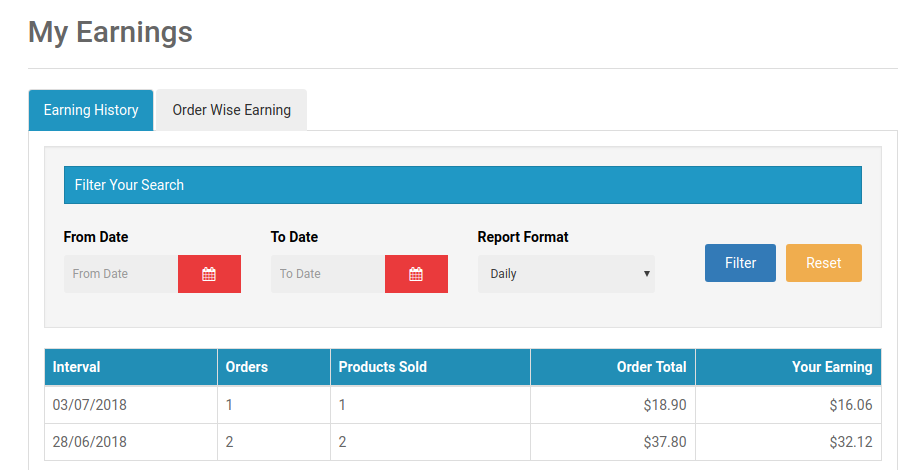
The total earnings of the seller can be viewed in this tab. The vendors can filter the results as per requirement.
The total earning history will display as shown below:
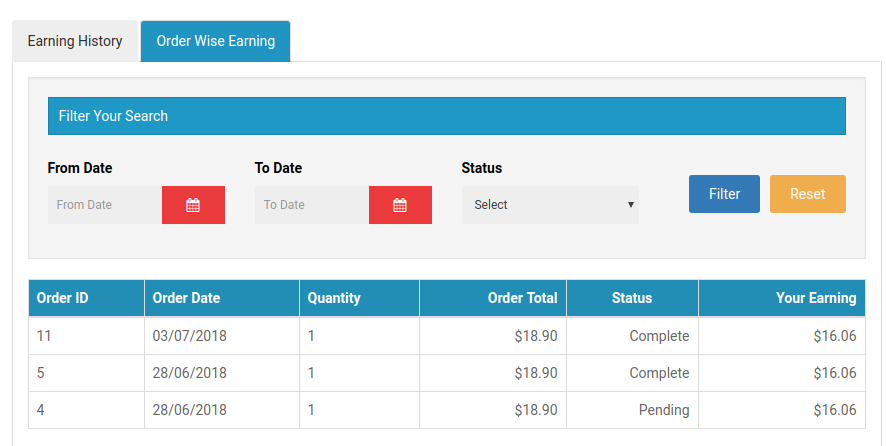
The sellers can even view the order-wise earning as shown below:
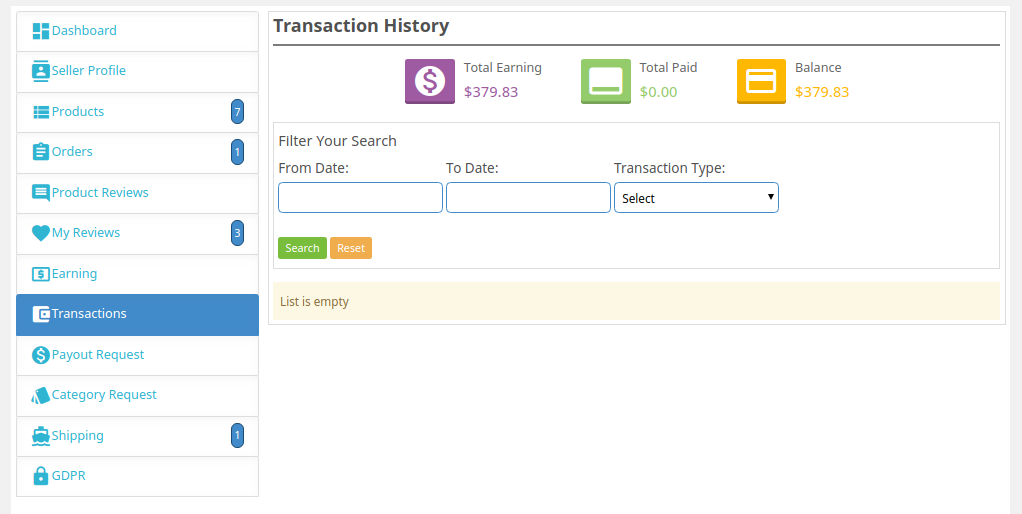
4.2.6 Transactions
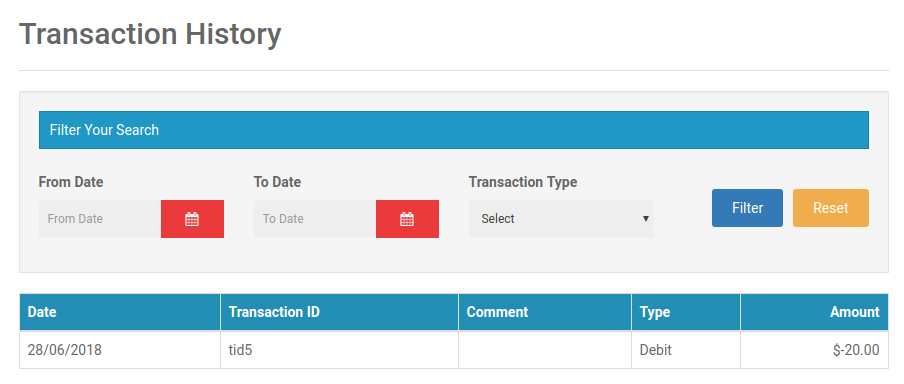
The seller can view their entire transaction history in this tab. The amount debited or credited in their account can be viewed here.
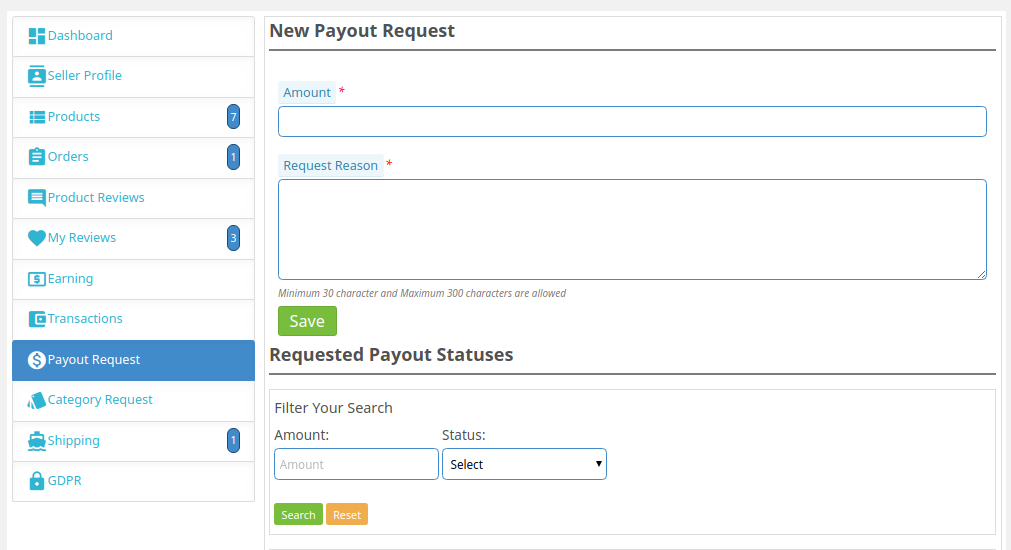
4.2.7 Payout Request
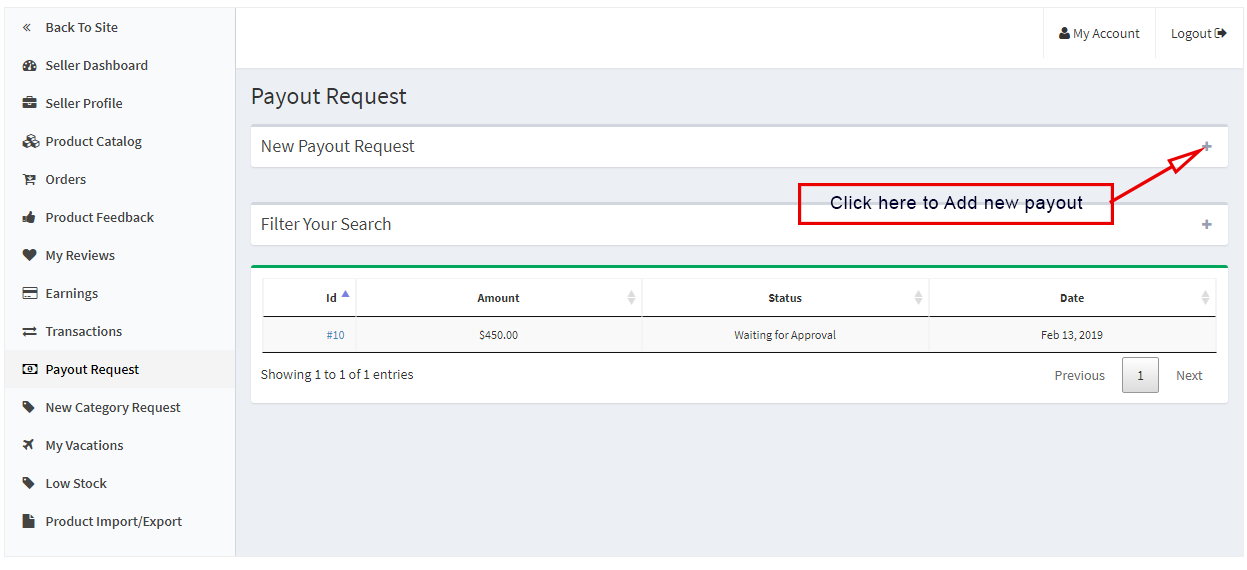
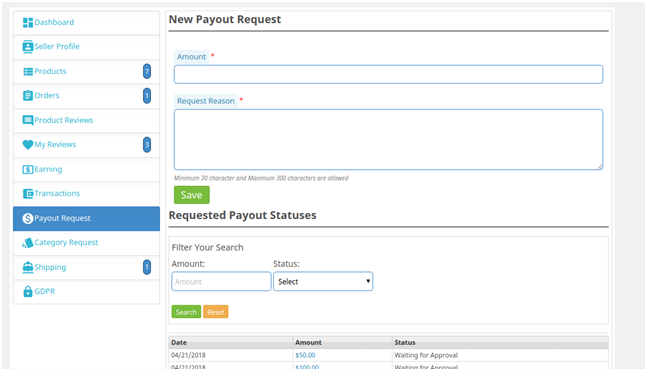
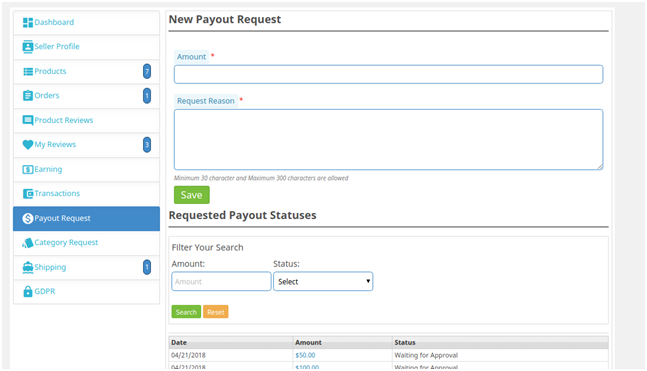
Sellers can view the list of payout request sent to the admin from the Payout Request tab. For a new payout request sellers need to fill the payout amount and reason and send it to the admin for approval.
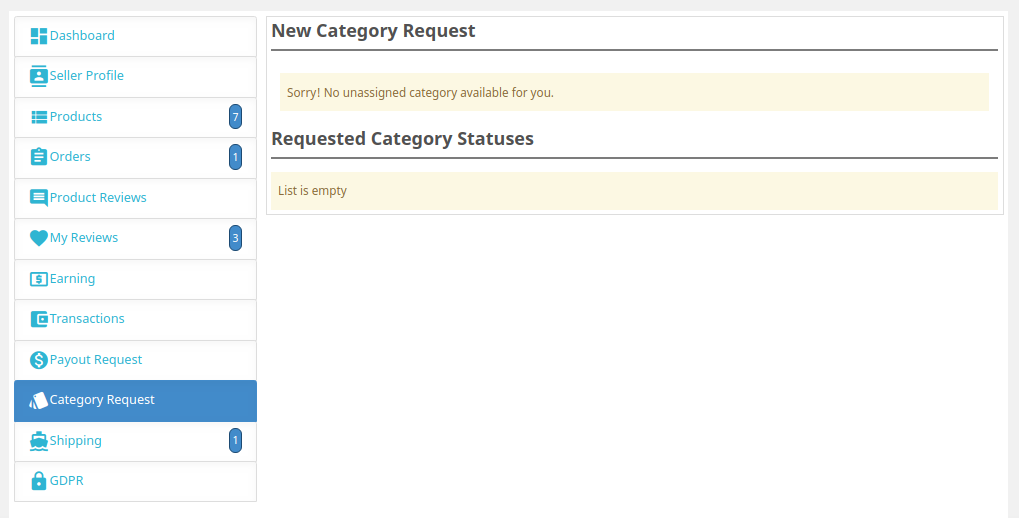
4.2.8 Category Request
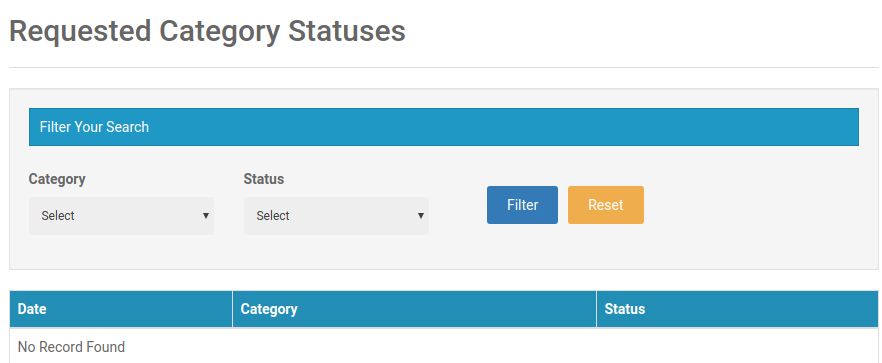
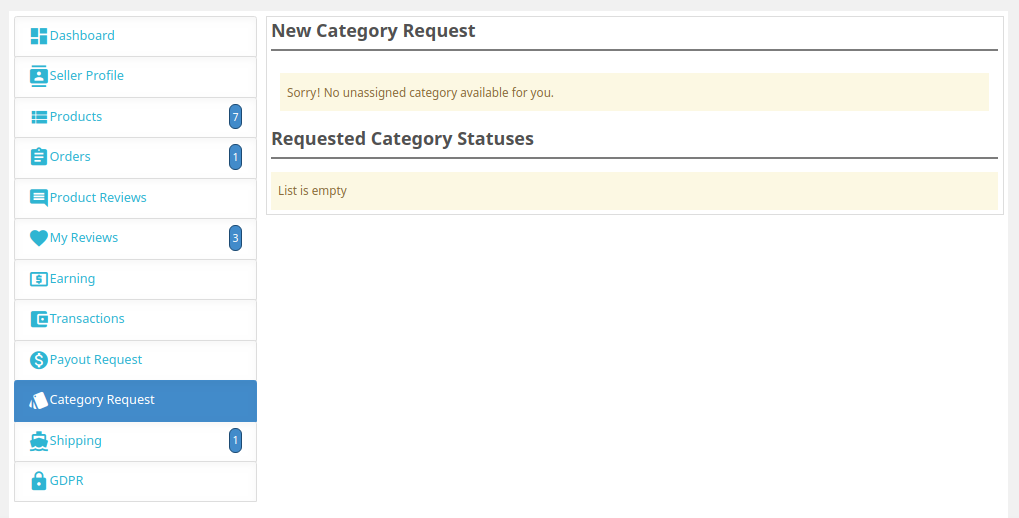
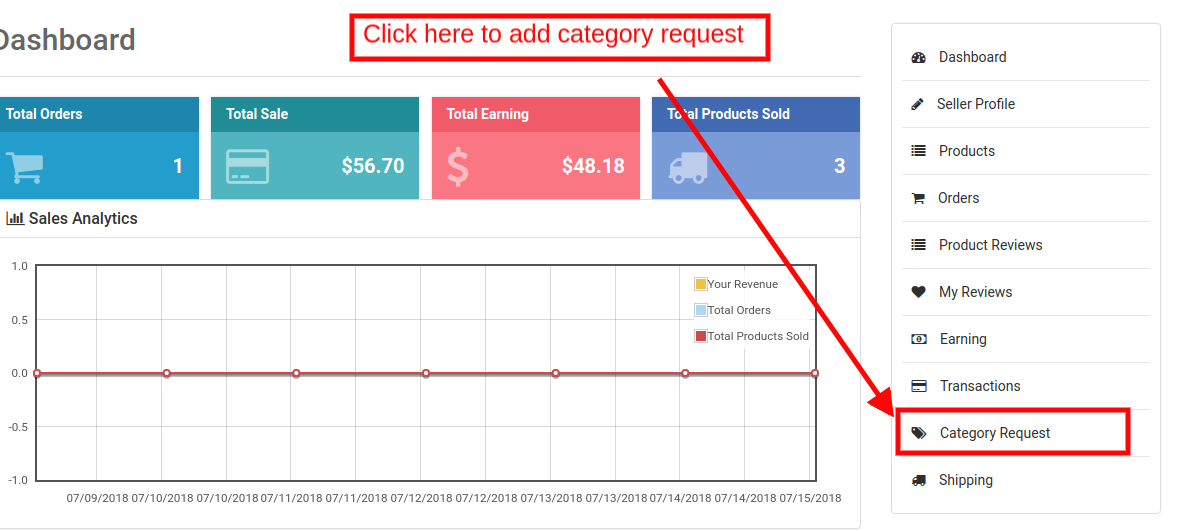
The sellers can view the categories assigned to them. Additionally, they can even send a category request to the store admin. In order to send category request, go to the Dashboard -> Category Request
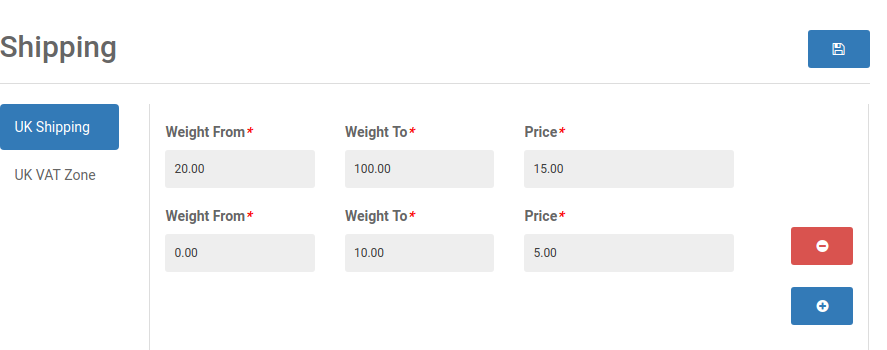
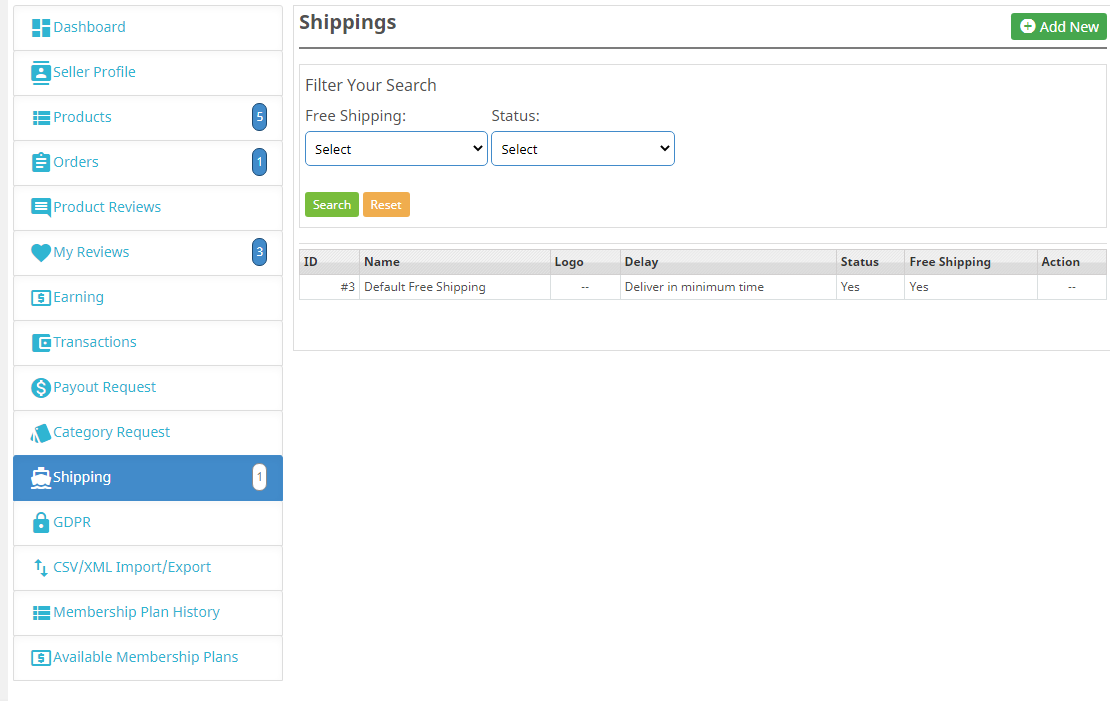
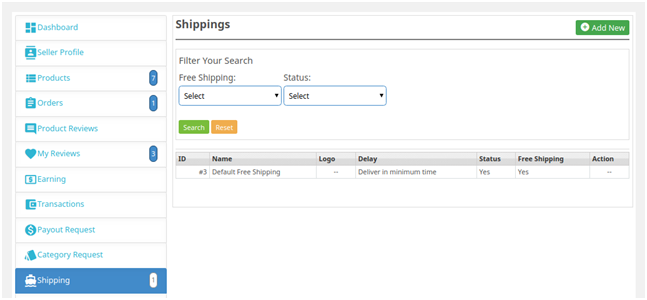
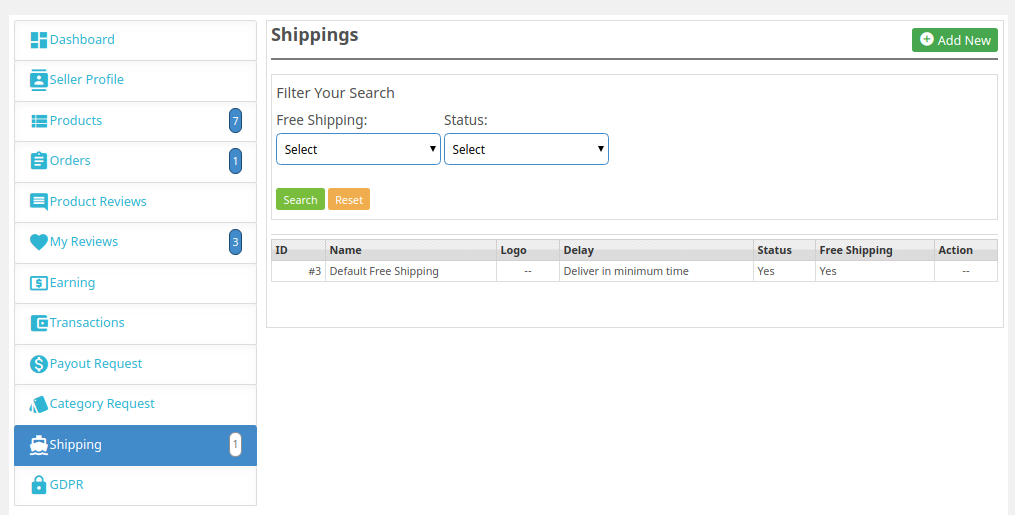
4.2.9 Shipping
The sellers can view the shipping process as in the screenshot below:
4.2.10 Product Import
With the help of the product import feature, sellers can add products in bulk. They have to download the template for products upload and just fill in the information of their products and upload again to list the products in bulk.
Product Return:
The seller can see the product return list here. The seller can add a filter to search for the product returned or requested for the product return.
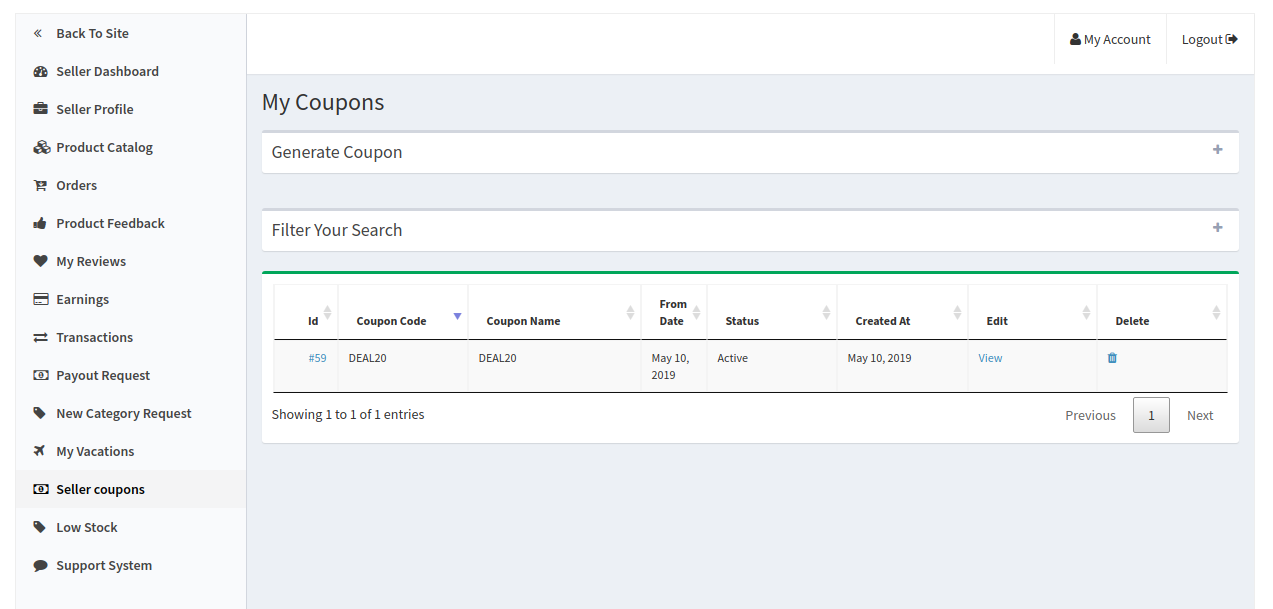
4.2.11 Seller Coupons
Using this feature seller’s can generate coupons for their customers. Sellers can use different variations for creating their coupons like users per coupon, coupon type etc.
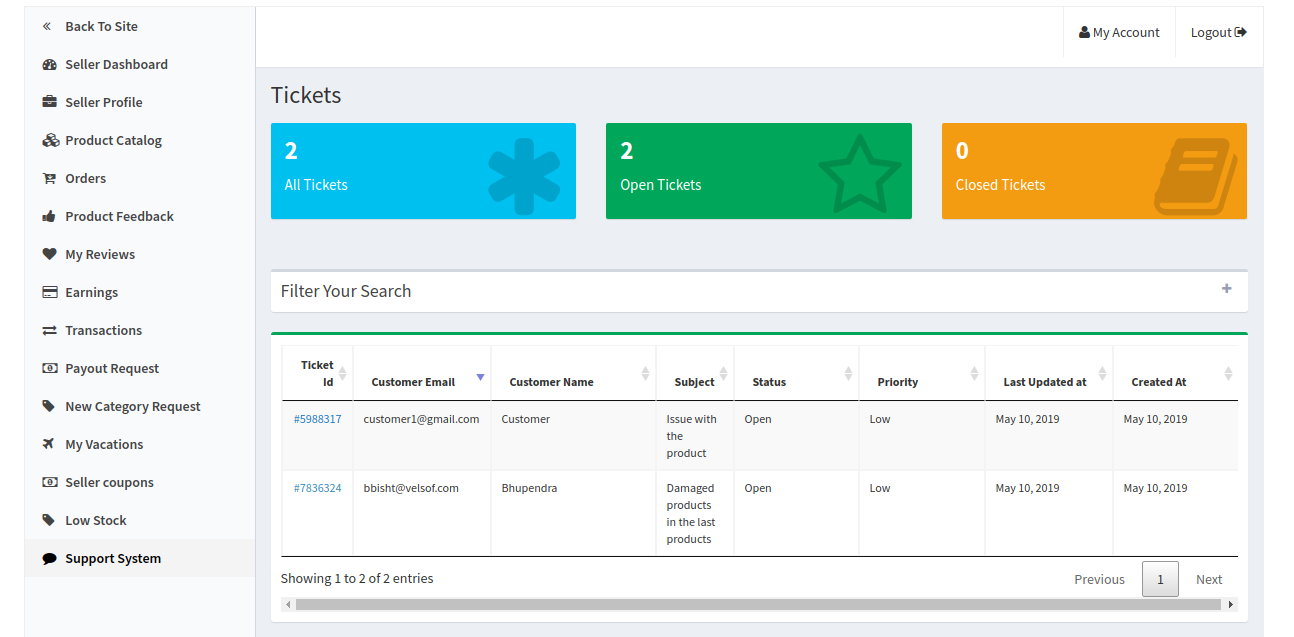
4.2.12 Support System
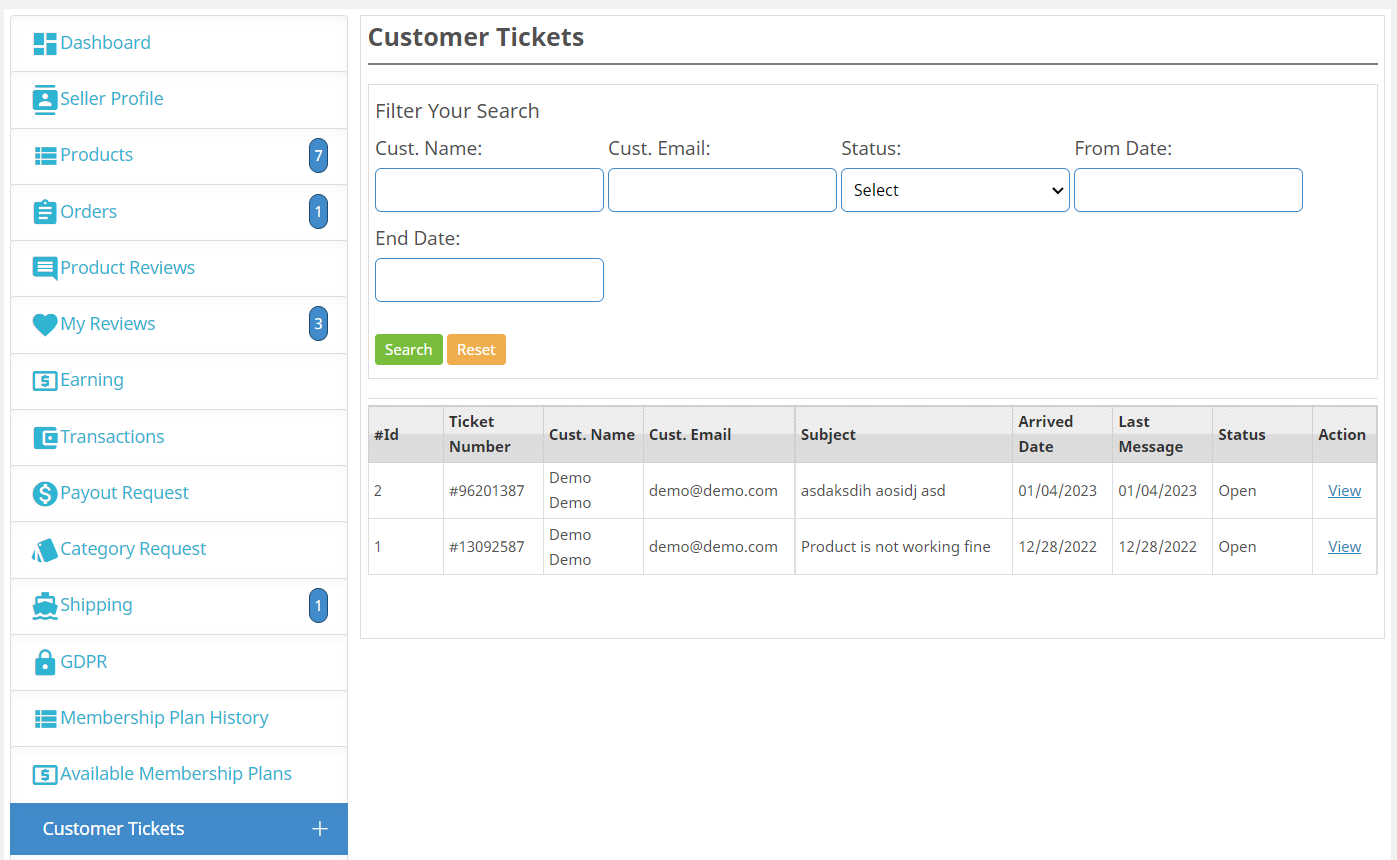
This feature allows the sellers to view the queries of their customers in the form of tickets. When the seller clicks on the Ticket ID they are able to see the full detail about the query and even reply and change the status of the query.
The virtual multi-vendor marketplace is one of the most prominent trends in the eCommerce industry. The ease of expanding inventory and product range makes it an inevitable upgrade for the eCommerce sites. While the complexity in making the code changes and marketplace management have been intimidating the store owners for a long, but not anymore. The Multi-vendor Marketplace Extension is a handy solution that converts your single vendor eCommerce store into an online multi-vendor marketplace site.
Are you facing the same problem? Even though this marketplace is an effortless platform to reach out to a wider range of audiences, convincing the seller to indulge in them is still a task. Just like it was difficult to convince the consumers to shop from online stores instead of the shopping malls, convincing the vendors to sell their products in the marketplace is strenuous.
Ways to encourage the sellers to register a shop account at your marketplace
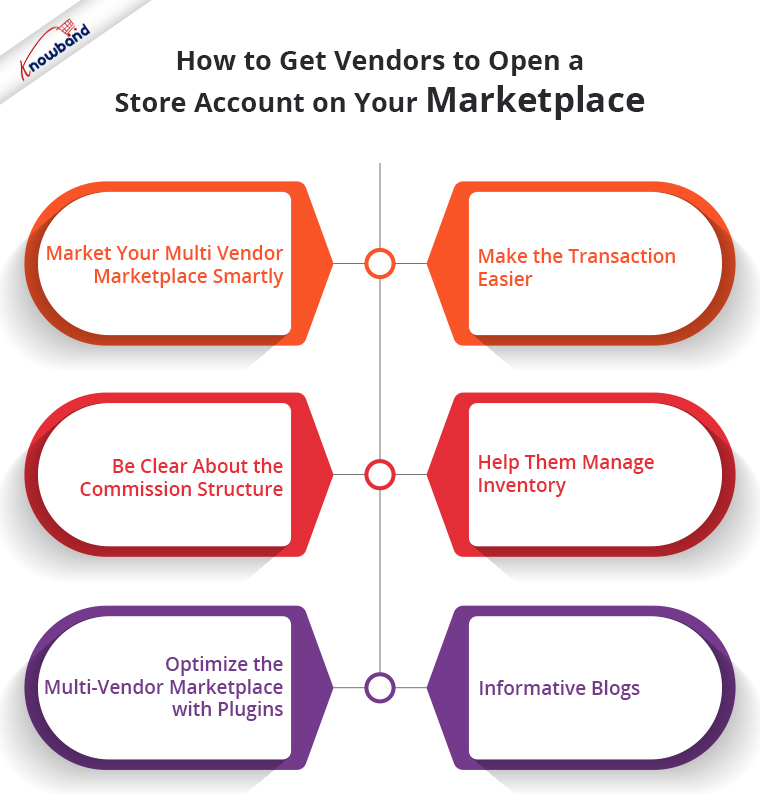
1. Market your multi-vendor marketplace smartly
Marketing is the stepping stone of all business structures. Whether the idea is to attract the end-user or the vendors themselves, nothing but a smart marketing strategy is a foundation for the pillar of the future. Listed below are some of the ways to market your business idea appropriately.
While the internet and social media platforms are a handy way to reach out to a larger audience in one go, offline marketing is a must when it comes to attracting sellers. Along with the hoardings and TV ads, you need to visit the vendors in person. There are a lot of sellers who may not be technically sound but can add a lot of value to your business.
Proper Placement
Strategic placement of the ads and banner is a must. The delivery trucks of logistic services are one of the best places to start your campaign. Place the hoardings in wholesale markets, distribute pamphlets in trade fairs and place them where it comes in merchants’ notice.
Regardless of the target audience, the social media platform is the most effective place to get noticed. Create an account on social networks where you expect to find your target niche. Create an online buzz with affiliate marketing.
Use the social media channel
Join groups & communities of merchants across different social media channels. This will help you connect directly with them. Share information on these platforms and keep the merchants updated about the latest progression.
2. Make the transaction easier
The lack of technical knowledge is the biggest turn-off for merchants across the market. So, you need to educate the seller about the entire idea of the marketplace and make things simpler for them while attracting a larger customer base.
The user modules and training sessions can help them get an idea of how the entire business structure works. The Prestashop marketplace is one such platform that may prove a boon for the vendors.
The unlimited features for Marketplace can make the sellers feel like they are using their website. Easy inventory management, payment options, and order management can make the entire business transaction smooth for the sellers.
Optimize your marketplace according to the need of the vendors and convincing the vendors will become easier.
The commission and the payment structure are another big concern of the vendors.
Whether you structuring the commission as per the category of the product or the quantity. Everything should be explained.
Install the modules at your marketplace that automatically break down the cost and ROI. It should be assigned at the payment gateway itself. Any delay in this may leave the vendors in suspicion.
The General followed strategy is payment at the end of every week. This keeps the books clean and liquidity maintained at the sellers’ end.
4. Help them manage inventory
Inventory management is the biggest heck for all online merchants. This is another reason that makes them hesitant to delve into the multi-vendor marketplace.
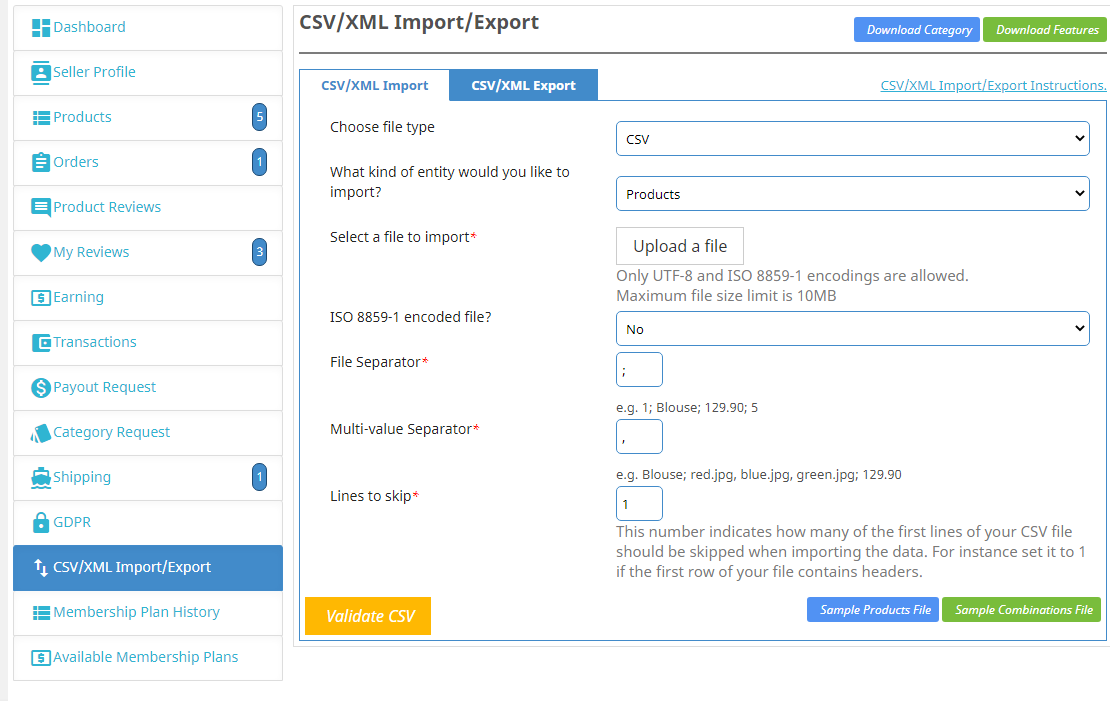
Prestashop Marketplace CSV Import/Export Addon is one such module that can help import the products and their combinations via CSV. Thus, it becomes easier for the vendors to enter data and keep track of the products.
Other than that the Prestashop store owners can manage the low stock problem with the help of the Prestashop Marketplace Low Stock Alert Addon. It keeps a track of the inventory of the sellers and provides an alert message when the stock is below a certain limit.
5. Optimize the Multi-vendor marketplace with plugins
Even if the marketplace is easy to handle and requires no technical supervision, there are still a lot of factors that may fail to convince the vendors.
The language barriers, currency conversions, invoice generations, and customer support are some of these issues. Convince them about the changes that are in the marketplace can bring to their overall business scenario by installing plugins and extensions.
Prestashop deal manager, Low stock manager, and other such add-ons can help you optimize and customize your marketplace integration accordingly. Find out the loopholes and the pain points of your vendors and update the marketplace.
6. Informative blogs
Feel free to write about the success stories and reviews of your vendors. An informative blog with some Marketing data will tempt the sellers and bring them close to your store. Moreover, Google indexes blogs quickly thus will help the admin in catching the attention of multiple sellers across the globe in a short time.
Additionally, the multi-vendor marketplace extensions developed by Knowband offer a lot of other features that make it even easier for the store admin delves into the multi-vendor scenario.
Some of the admin features are discussed below:
The multi-vendor marketplace extension enables the multi-vendor feature in your eCommerce. The store upgrade is done without actually making any code changes.
The automates the entire process of store tracking and management.
The admin can approve/disapprove the seller’s profile if they want to from the back-end.
The multi-vendor marketplace module for Magento, Prestashop, Magneto 2, and OpenCart even allows the admin to track, add or remove the products/category from the site.
The plugin allows the store admin to fix the global/individual and order-wise commissions and manage the dues easily from the back-end interface.
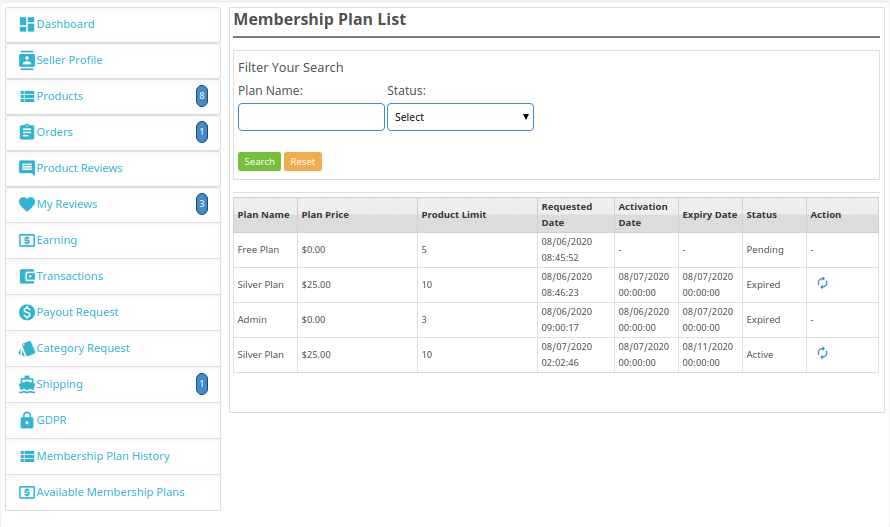
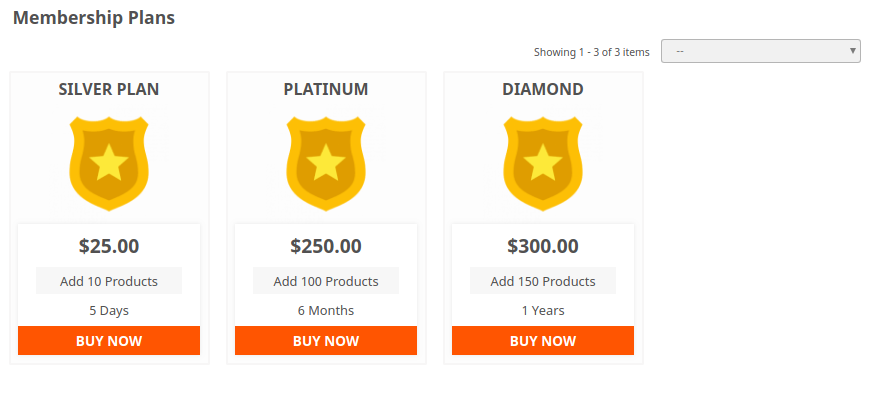
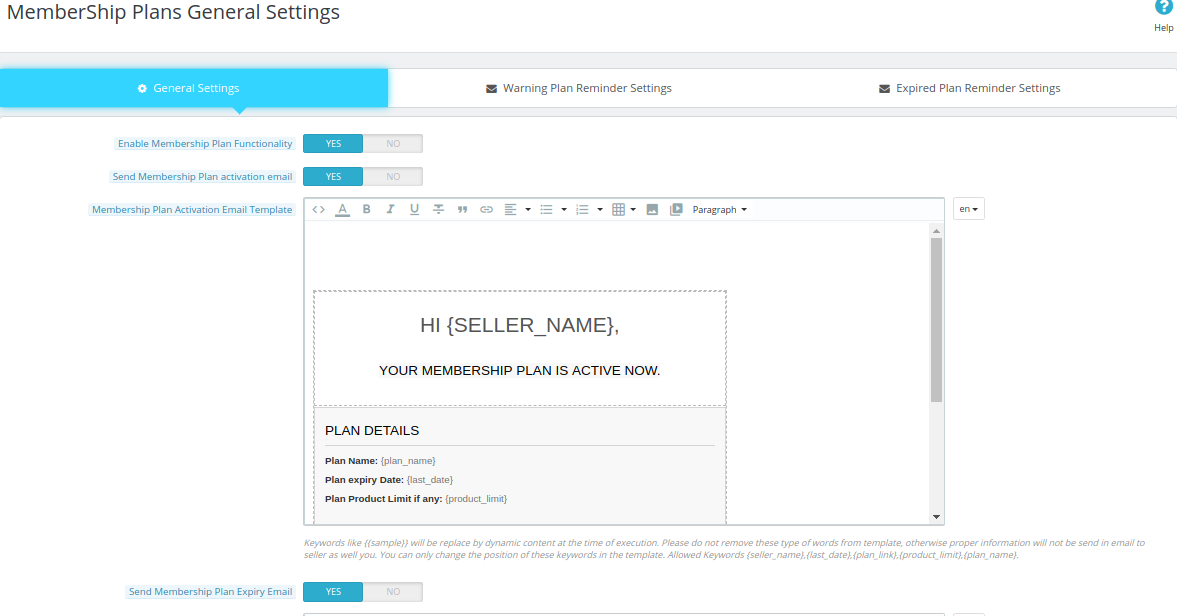
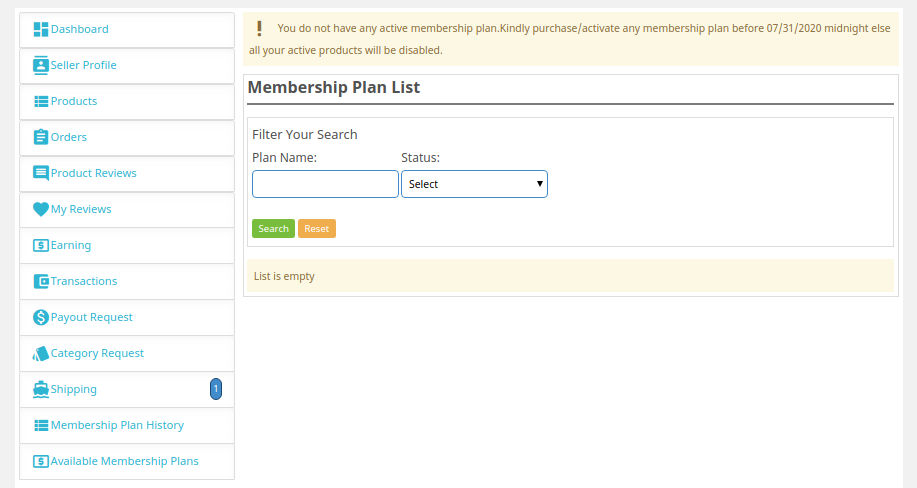
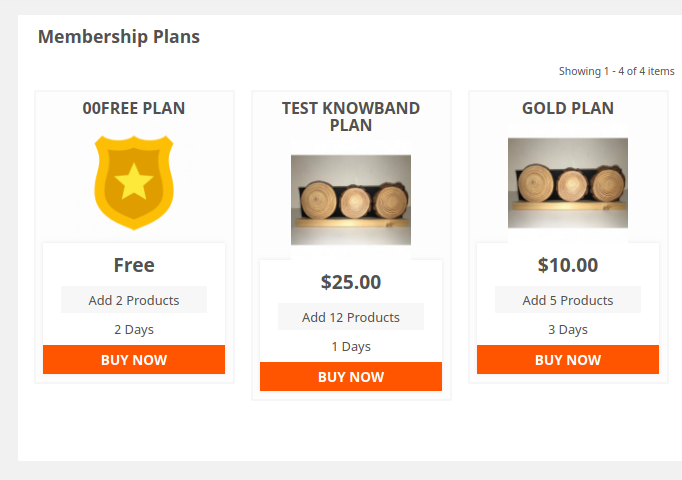
The store admin can create various membership plans for the sellers as per their requirements.
The admin can even view the performance of the individual sellers and can even track the transaction in the marketplace.
The admin can send email notifications to the sellers via a multi-vendor marketplace module.
The sellers get a separate dashboard to keep track of their products as well as sales.
They can view the orders and manage the same from their dashboard.
Conclusion
The various tips and techniques discussed in this post are just the first step to taking your business model forward. However, the process of convincing the vendors is ongoing and should be improvised according to the needs and requirements. The prominent chicken-and-egg problem of the marketplaces is something that you need to ponder.
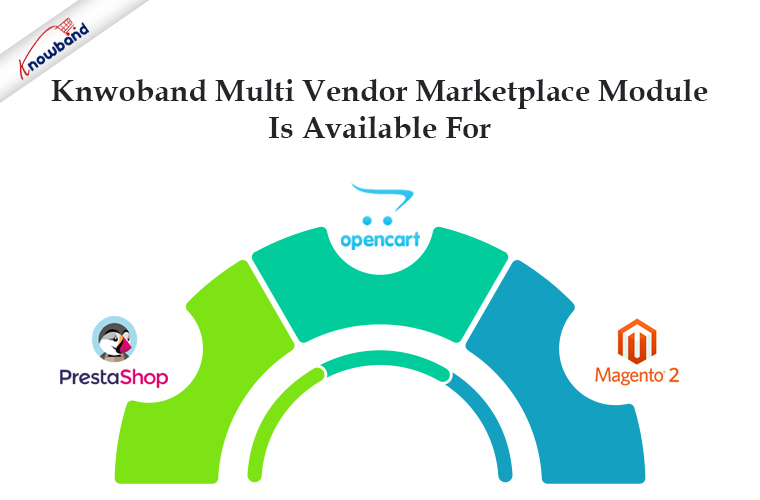
Knowband, the eCommerce plugin development company, offers a multi-seller marketplace module for platforms like Magento 2, PrestaShop and OpenCart Module. 3 months of full free assistance will be provided on each module. With the simple installation and configuration process, Knowband offers the smartest way for the store admin to transform their online shop into a fully-functional Marketplace in a few simple clicks. For any query, feel free to contact support@Knowband.com
What’s your ultimate objective with your multi-vendor marketplaces website? It’s selling more and more, or earning more and more?
Sounds weird? Let me explain
The line asks a simple question that what is more important to you- generating more sales or generating more revenue from your online marketplace site?
It seems pretty obvious that you can generate revenue only if you are selling. So, is selling more important because it automatically generates the revenue?
Maybe! Perhaps! Etc.
What if I tell you that your marketplace site does not depend on sales alone to generate revenue. There are other revenue generation models that can act as an integral part of your business model. They can operate in parallel to the sales by monetizing the services that your marketplace site can offer in addition to the marketplace products.
Here is a list of 5 monetization mechanisms or revenue generation models that you can use on your marketplace site to generate some extra revenue from your business:
1. Advertising Revenue Model
Advertising is one of the most popular and oldest revenue generation models. You can generate revenue by renting out advertising space on your site. The websites showing their Ads will pay you based on the respective advertising model. Here you can adopt two different models of advertisement:
Cost per Mille (CPM): CPM, which is also called as Cost per Thousand impressions is an advertising model that allows you to charge in proportion to the number of Ads displayed to the site visitors.
Cost Per Click(CPC): CPC model generates the revenue based on the number of clicks a particular Ad is receiving by your site visitors.
You can use any of the two advertising models to generate revenue on your marketplace site by simply showing ads to your visitors. While doing this, make sure your website design is optimized enough to place the Ads where it does not overshadow your main revenue generation model that is selling your products.
You have to be cautious about the website design to make sufficient white spaces for showing the ads. Otherwise, contact a web designer who would tweak the design as per your requirement for advertising.
2. Sponsored Site Channel model
Typically a site that wants to promote its contents on another site would have to pay for showing its Ads. This revenue model is not exactly the revenue generation model but a cost-saving model.
Here the companies or two sites enter into a ‘contra-deal’ agreement where neither of the two sites needs to pay for advertising. They commit to promoting each other’s content as a ‘give and take’ format.
3. Freemium revenue model
Many web services and marketplaces use this model to generate pretty decent revenue. The central idea behind the freemium model is to provide as many users with the free services and encourage them to upgrade to the paid version of the same.
In one of the approaches, you provide your users with a free trial with limited access and give an option for upgrading to the paid service to acquire the full advanced features and access.
PS: Here the access to the service or features is limited, but is given for an unlimited period.
Another example could be Dropbox which provides free 2 GB could data storage to the free users.
There is another approach in the same model where a fully-fledged trial of the full product or services is offered to the users for a limited period of time. The users are given an option to either stop using the services after the trial period or pay for it to keep using.
PS: Here the access to the service of product features is full but the time period for trial is restricted or limited.
For example, Amazon offers full access to its “Amazon Prime” service for free one month. After that, you can either stop using it or subscribe to the monthly subscription to use it for more time.
You can use these models to offer some premium services and generate extra revenue. You can adopt a similar approach like Amazon Prime which provides free same-day shipping to the Prime members.
4. Subscription or membership model
Subscription-based revenue generation is one of the oldest models, and it is still in full-fledged today.
A marketplace site has uncountable ways to leverage this model to generate some extra revenue from the business:
Membership for sellers: Asking sellers/vendors/merchants to subscribe to a membership for registering a seller/merchant account on your marketplace.
Membership for customers: Asking customers to subscribe to a membership for availing benefits like free shipping, same-day delivery, Shipping package insurance, early access to flash sales, etc.
Membership for customers part-2: There is another kind of membership for customers that marketplaces selling virtual products like MP3s, Videos, Software, etc can use. Here, basically, your main revenue generation would be through the premium members only.
For example, Netflix videos library allows only the subscribed users to see the videos. It primarily follows a subscription-based revenue model.
5. Sales commission Revenue model
Of course, I had to include this point. Taking commission from the seller/vendors/merchants on their sales is the primary revenue generation model on which a large number of marketplaces are surviving.
The entire community of sellers and retailers follow this model. There are a number of online marketplaces that allow the e-merchants to sell their products to a larger chunk of customers. The only difference is how and how much commission sellers need to pay for selling on a marketplace. Earlier the complexities of dealing with the inventory management and order processing of the two stores intimidated the e-sellers to go for multi-channel selling. However, the work has become easier now. Knowband offers a line of feature-rich marketplace integrators to the eCommerce sites that are based on the CMS platforms like Prestashop, Magento, OpenCart, Magento 2, and others. With the help of these intuitive integration solutions, you can keep your marketplace shop in sync with your online shopping sites.
Here are some examples of the online marketplaces that allow multi-channel selling:
eBay: eBay charges an insertion fee for listing a product on its site. Moreover, it also charges the Final value fee as a commission on the pre-sale of the product. The eBay marketplace integration extension for the various platforms such as Prestashop, Magento, and OpenCart eBay Integrator can help you integrate your store with ebay.com.
The sales commission revenue model is not that simple as it seems. Different marketplaces use different approaches to earn the commission. You need to first decide the commission model that you want to use and then customize your Seller management panel to handle the commissions as per your requirement.
Similarly, if you own an online marketplace, charging the commission and managing multiple vendors becomes even more difficult. However, managing the commission model becomes effortless with the help of the various CMS plugins like Magento multi-vendor marketplace, Prestashop multi vendor marketplace addon, or OpenCart marketplace module.
You need to be also aware that most of the multi-vendor marketplace extensions support only the per-product-sale commission. If you want to use any other commission model, then you might need to use an extension or get the requirements developed by an expert eCommerce development company.
Prestashop Multi-vendor Marketplace addon by Knowband is an effective way to convert your PrestaShop eCommerce store into a fully functional online marketplace. PrestaShop Marketplace Module provides store admin with the opportunity to enhance the reach of their store and offer a variety of items and services to customers. The PrestaShop Multi-Seller Marketplace module can turn your eCommerce site into a complete marketplace. The store admin can manage the inventories, orders, products, and shipping methods at the Marketplace from the backend of the PrestaShop Multi-seller Marketplace Module. The PrestaShop marketplace owner can charge a commission to the sellers/vendors on the products they sell. Sellers will get the chance to promote their brand and serve the audience of Marketplace in return for the commission they are paying to the admin.
Prestashop Multi-Seller Marketplace is now GDPR compliant.
1.1 Admin Benefits of Prestashop Multi-vendor Marketplace Module:
The store admin can convert their eCommerce store into a marketplace with a few button clicks.
The store admin can now make their marketplace compliant with the GDPR EU laws. The compliance enables by toggling a button in the admin interface of the Etsy clone for PrestaShop.
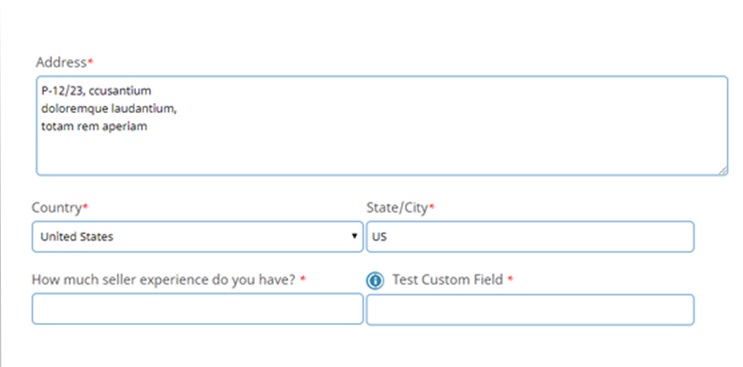
Admin can add custom fields for the seller’s profile. moreover, the admin can add new custom fields or remove already added fields.
Admin can show custom fields in the seller’s front profile page using Multivendor Marketplace Module.
The admin can also add a separate seller registration form under the general settings tab.
Admin can select the custom field type which he wants to add like a radio button, checkbox, etc.
Admin can make these custom fields required using the “Required” tab button.
The store owner can map any custom field under a particular section in which he wants to show that custom field.
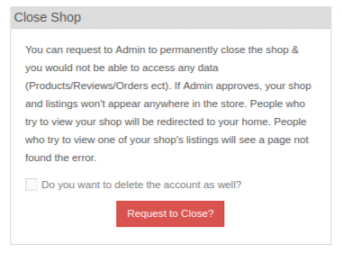
The admin can even disallow the seller to view the email ID of the customers. If the admin enables it, the sellers can request to close their shop from the marketplace.
Also, the admin can fix the commission that he wants to charge to the sellers from the back-end of the PrestaShop Multi-vendor Marketplace extension.
The admin gets complete access to approve/disapprove the products available on the marketplace. Moreover, can even fix the quantity of the new products that a seller can add to the marketplace with the help of this PrestaShop Marketplace plugin.
The admin can even auto-approve functionality just at a button toggle from the back-end of the PrestaShop Seller Marketplace extension.
Admin gets an option to approve/disapprove the seller’s profile at a button click.
The PrestaShop Multi-seller Marketplace add-on allows the store admin to track and manage the sellers operating in the marketplace easily.
The PrestaShop admin can add/remove the product or category as per the requirement from the admin interface of the PrestaShop Multi-vendor Marketplace extension.
When sellers request to add a new category to the front-end of the marketplace, the admin can view and accept/reject them accordingly.
The admin can see the seller transaction from a single tab of the PrestaShop Seller Marketplace addon. Thus, the performance of the sellers are traceable.
Store admin can view the report of the commission earned from the PrestaShop marketplace plugin.
The admin can accept/reject the reviews on the products or sellers with the help of the PrestaShop Marketplace extension.
Additionally, the PrestaShop marketplace module offers an option to create custom shipping methods.
The seller can either select the default shipping method or create custom methods from their dashboard.
The PrestaShop multi-seller marketplace addon allows the sellers to initiate payout requests from their dashboard. The admin can approve or disapprove the payout request from the back-end of the PrestaShop addon.
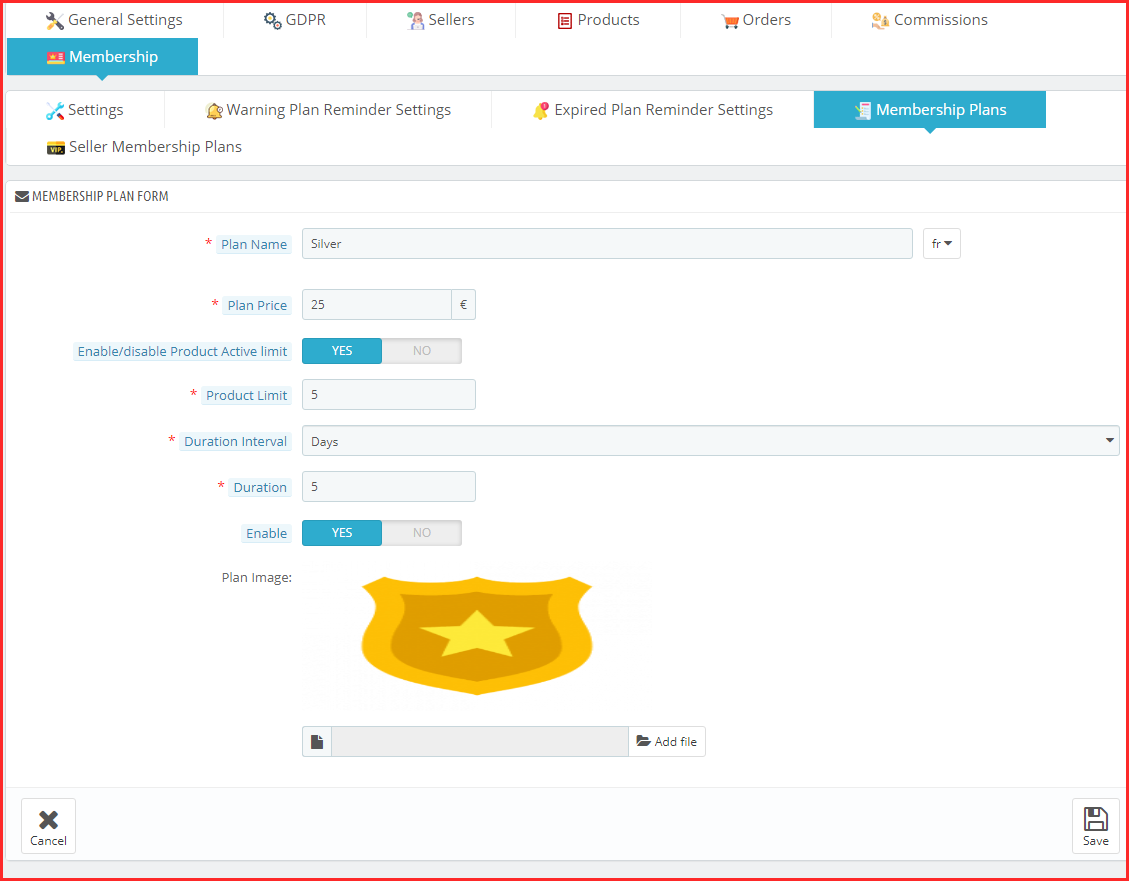
Admin can create various membership plans for the sellers.
Admin can also enable a free membership plan feature for the sellers for one-time use.
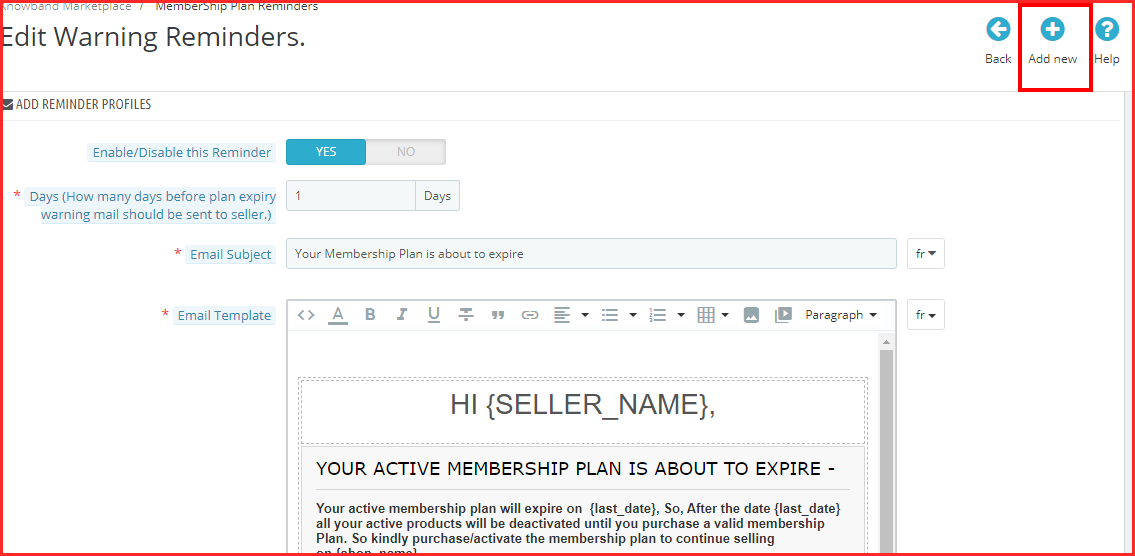
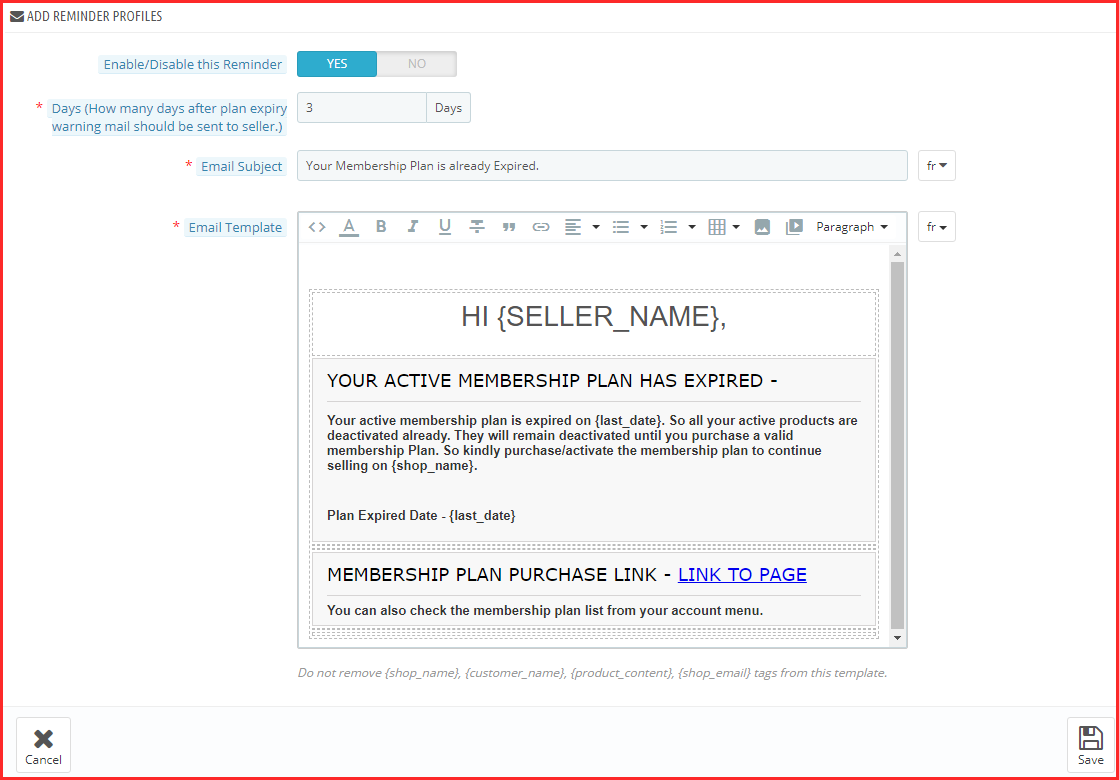
Store admin can send warning emails to the sellers from upgrading their membership plans.
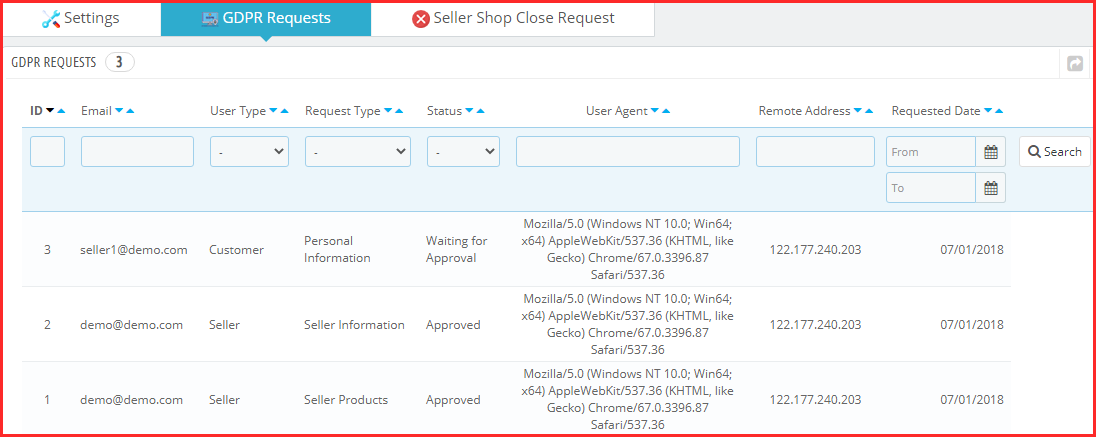
The GDPR requests raised by the sellers are available from the back-end of the PrestaShop Multi-Seller marketplace addon.
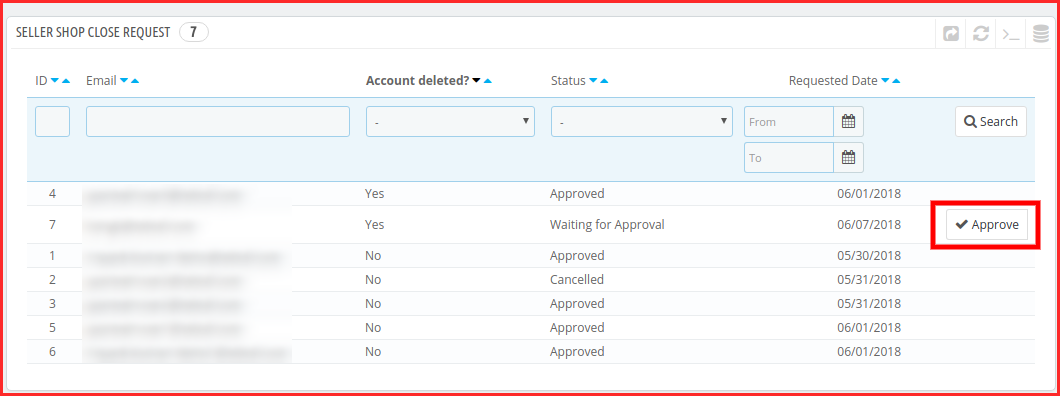
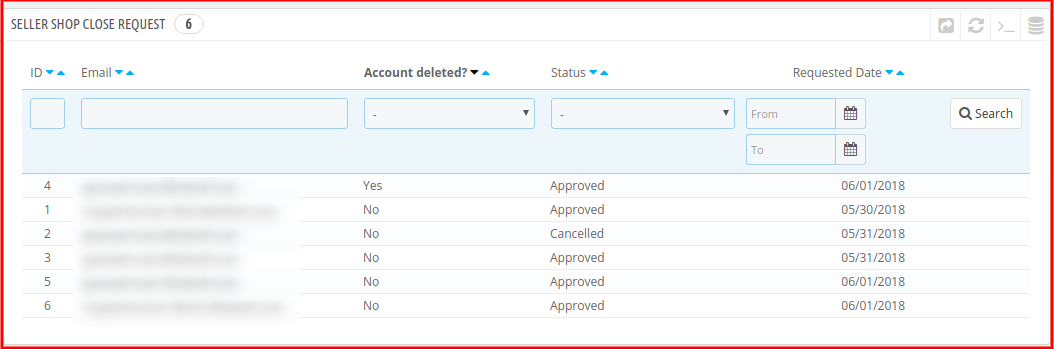
The shop closure request of the sellers is approvable/disapproval from the admin interface of the PrestaShop marketplace extension.
Admin gets an option to automate the transaction payout request process which helps the admin to automate all the payment requests of the sellers.
Admin can add a particular amount from the panel which will always be kept on hold for the sellers.
Now, the Knowband Customer seller Ticketing System module is by default available in the PrestaShop Multi-Vendor Marketplace module.
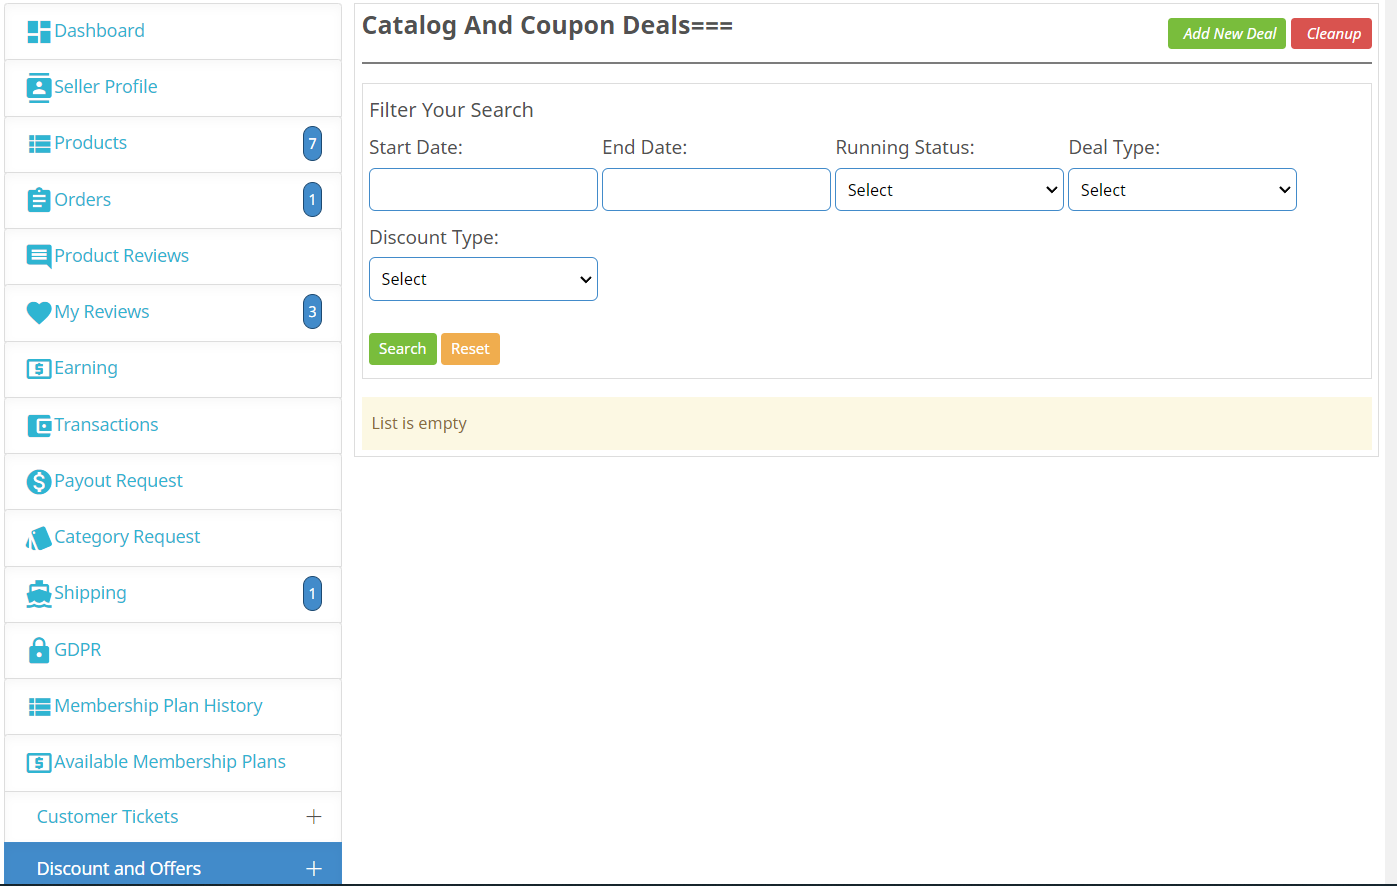
Seller Deal Management at ease with Knowband Deal Manager Addon (available by default in PrestaShop Multi-Seller Marketplace).
The admin can choose whether free shipping is created at the time of seller registration or any other admin carrier clone is created.
1.2 Seller Benefits of the Prestashop Multi-Seller Marketplace Module:
Sellers can add any type of product to the marketplace. PrestaShop Multi-seller Marketplace extension supports all types of products, right from the simple, configurable to the virtual and bundled products.
The sellers can even request the admin to add new categories.
Also, the commission charges are fixed, so, the entire transaction is transparent.
The PrestaShop Multi-Vendor Marketplace module makes it easier for sellers to sell their products to a larger customer base.
The dashboard allows the vendors to view their profiles, products, and orders.
A separate seller’s page makes it easier for the vendors to promote their business.
Sellers can choose from various membership plans as per the requirements.
The seller can import the CSV file for products and inventory from the seller interface
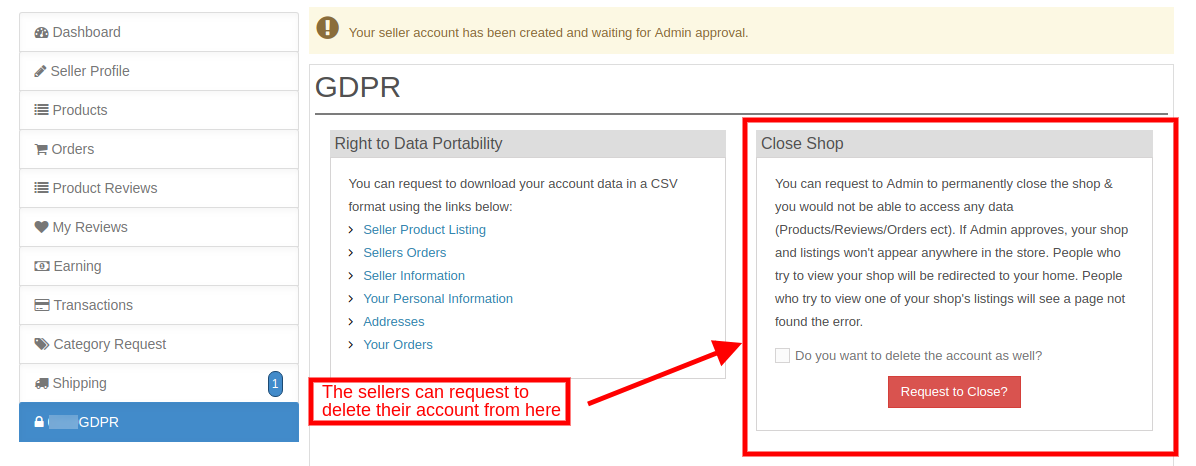
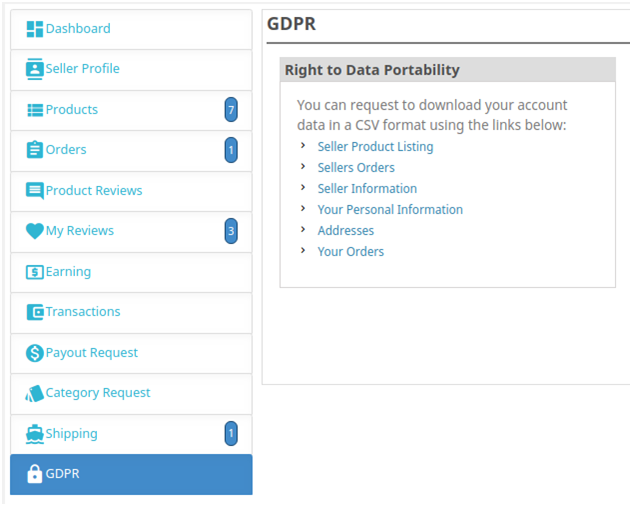
Under GDPR compliance, the sellers get an option to download their details in CSV format by clicking a button.
The sellers can even request the admin to remove their shop from the marketplace. This request is processed from the back-end of the PrestaShop marketplace addon.
Now the sellers can save the images while adding the products to their shops.
1.3 Buyer Benefits
The store visitors can now choose the ideal products from a wider range of product options.
Customers get an option to review the sellers. Customers can also review the products by using our Product Review Reminder or Default Product Comment Addon.
The seller reviews aid them in their purchase decision.
Online shoppers can select the product by visiting the seller’s page.
Buyers can also become a seller in PrestaShop Multi-Seller Marketplace. They can also register as sellers.
2.0 Installation
Follow the following steps for installing the Prestashop Marketplace module:
1. Download the Prestashop Multi-vendor Marketplace add-on package.
2. Unzip the package in /modules directory of your Prestashop store via FTP manager (like Filezilla or WinSCP – download here: https://filezilla-project.org/). The folder structure for the Prestashop Marketplace addon is shown in the image below:
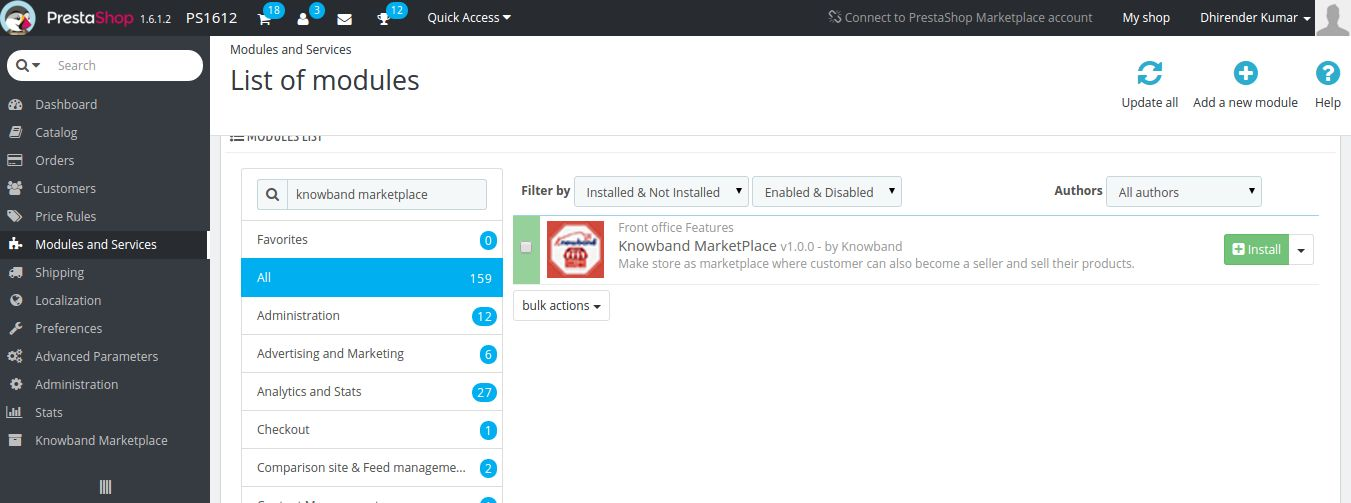
3. You will be able to find the Prestashop Marketplace addon, which is, ready to be installed in the Modules List in your PrestaShop store as shown below.
4. Click on the Install link to install. Once the Prestashop Multi-Seller Marketplace module is set up properly the Install button will convert to Configure.
3.0 Module Configuration of Admin Interface
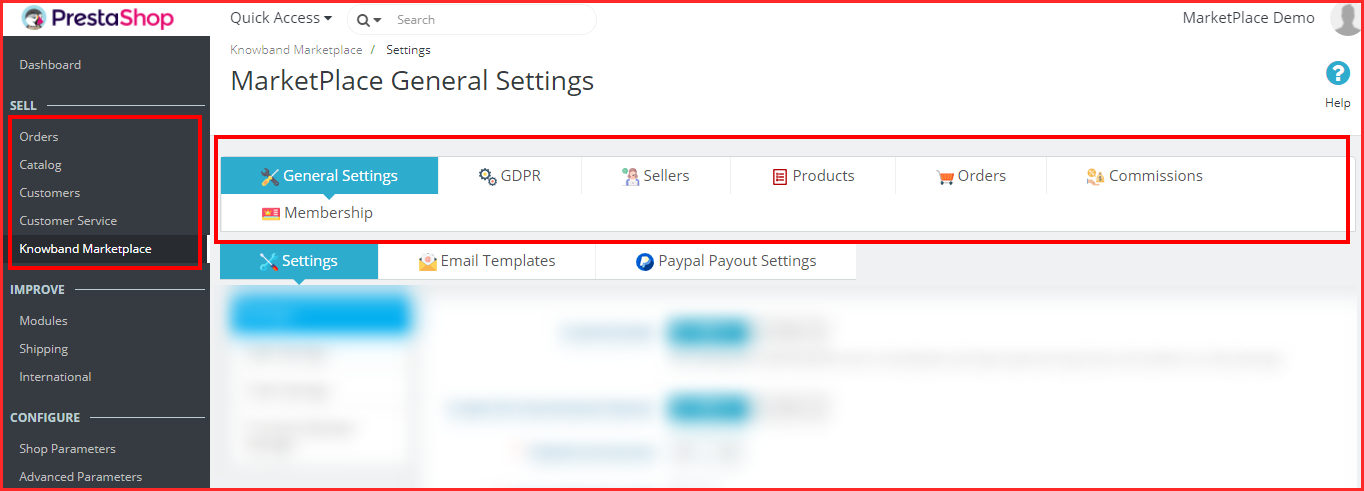
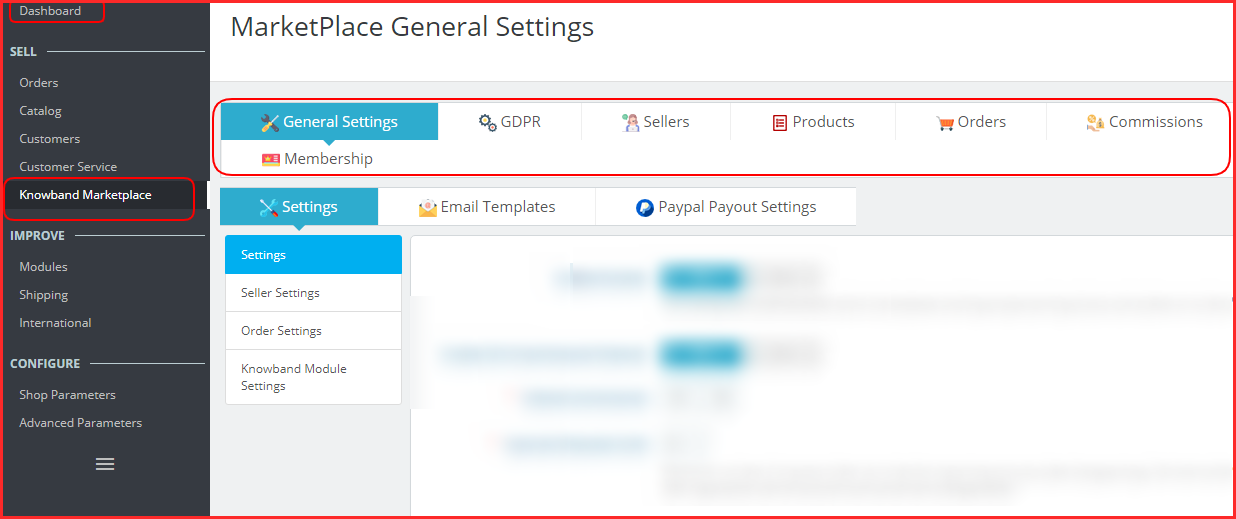
In the admin panel of the PrestaShop Marketplace module, you’ll find a separate menu (named Knowband Marketplace) at the end of the menu as shown below.
3.1 How to Add Seller from the back-end of the Prestashop Marketplace?
The PrestaShop store admin can even add new sellers from the back end just by following these simple steps:
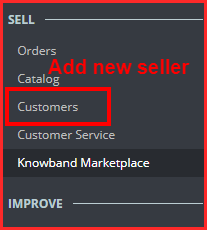
In the Main Menu of the PrestaShop store
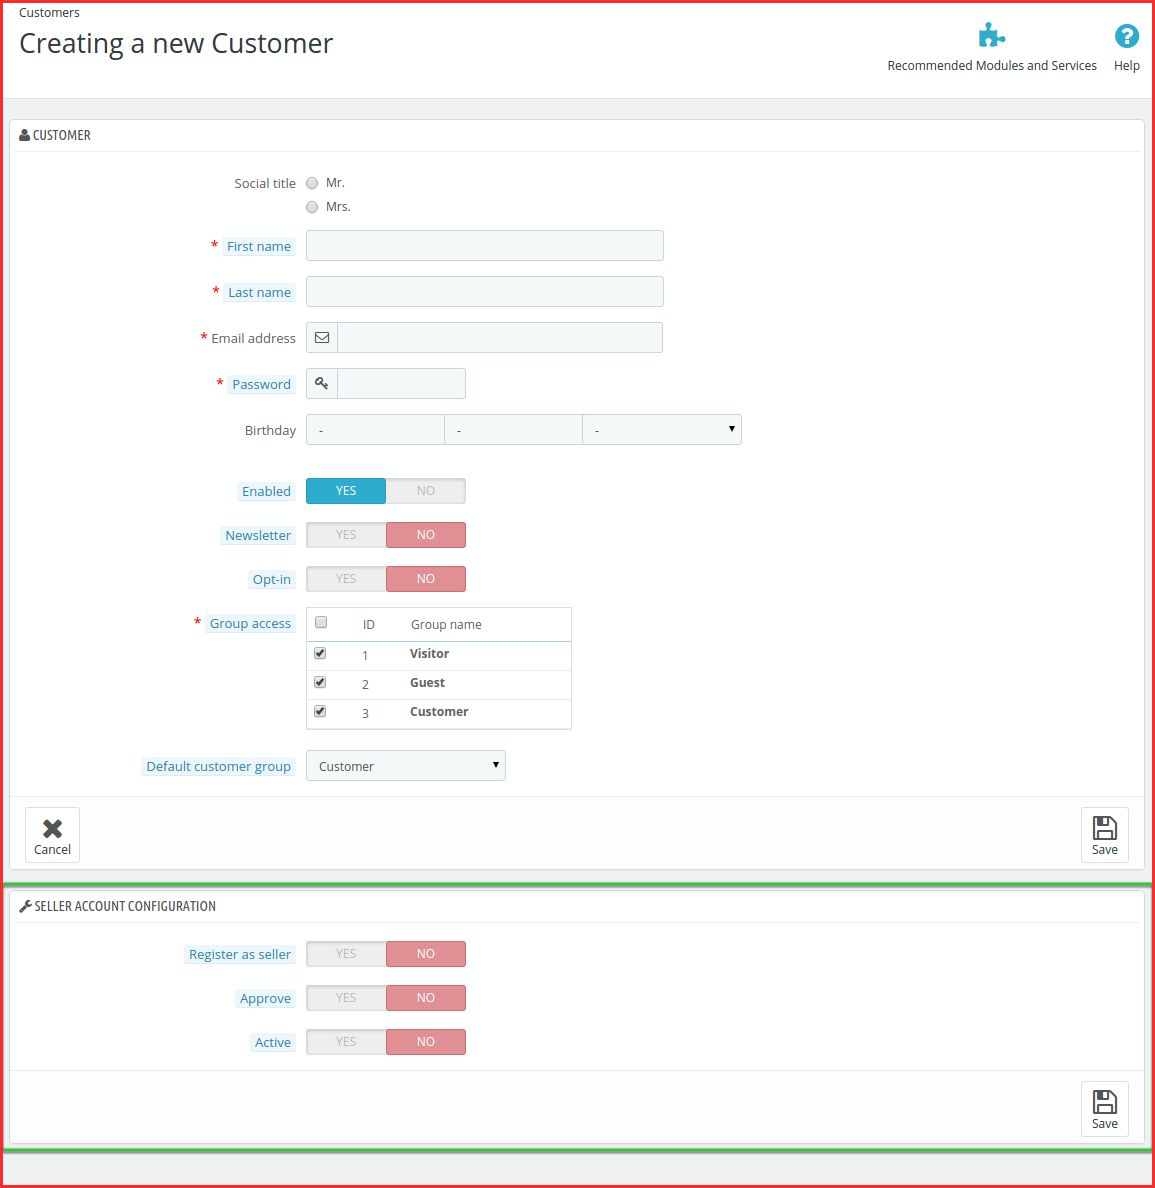
Go to Customers -> Go to Add New Customer on the right side of the page or click on the ‘+’ sign on the top right side of the page as shown below.
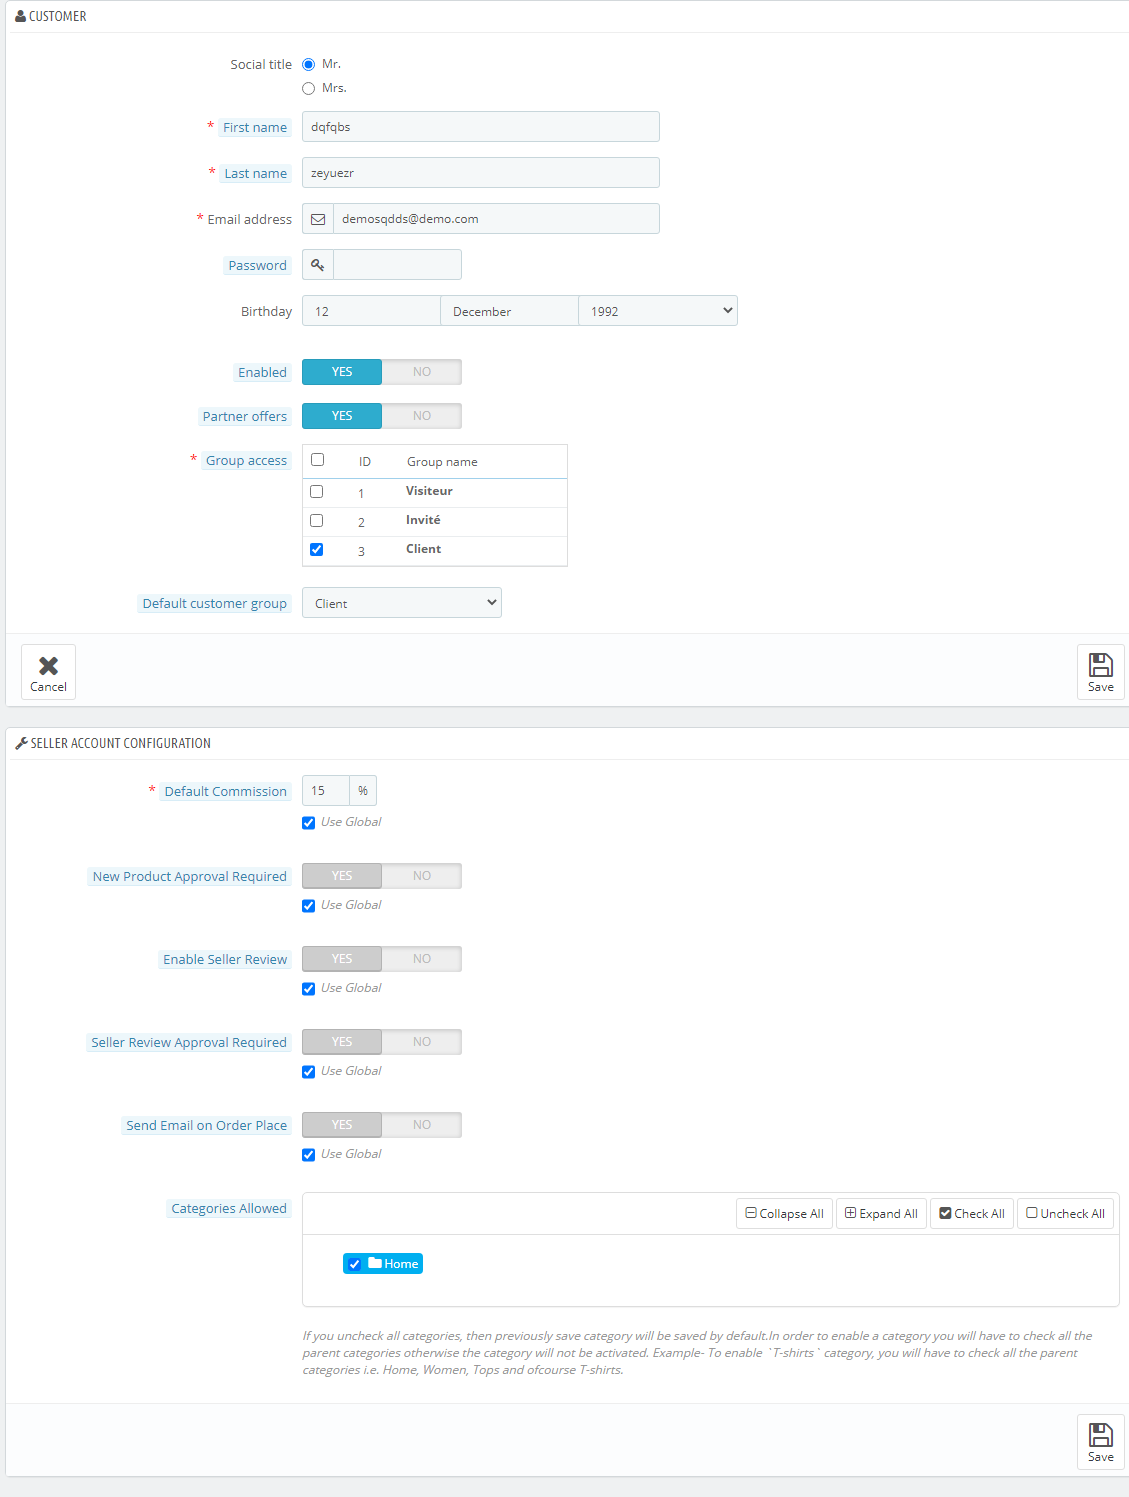
You’ll go to the Customer creation page. A new block will appear at the bottom asking for the Seller Account Configuration.
The admin can add a new seller by filling up the form and a new information block that appears right below. From here a new customer can register as a seller as shown in the image below.
Prestashop Marketplace Menu
The PrestaShop Multi-vendor Marketplace Menu consists of several sub-menu options that direct the users to several pages in the PrestaShopMulti-Seller Marketplace Addon. Here is the list of sub-menus options shown in the image below: All the configuration options are available below in detail:
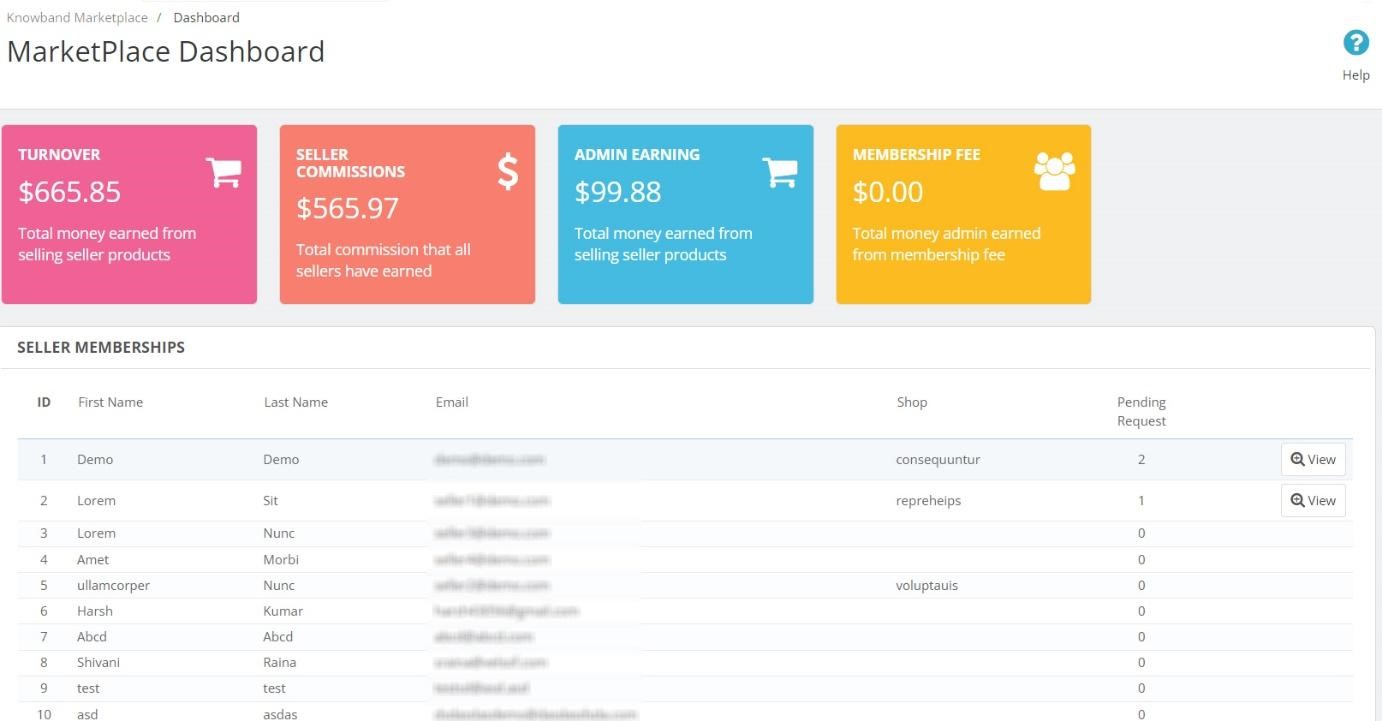
Marketplace Dashboard:
We have recently added the dashboard section in the PrestaShop Multi-Seller Marketplace addon. In the following section, the PrestaShop admins can track all sales, orders, commissions, and much more.
Instance, the PrestaShop store admins can have a glance at total sellers’ earnings, admin commissions, and other details.
4.0 General Settings
The PrestaShop Multi-seller Marketplace Module’s Settings tab divides into 2 levels i.e. Seller Level Settings and Global Level Settings. This page below only controls the Global level settings for the PrestaShop Marketplace Module.
4.1Settings
This page has all the common settings that control the PrestaShop Multi-seller Marketplace extension and its several other features.
4.1.1 Settings
The general settings page consists of the following fields:
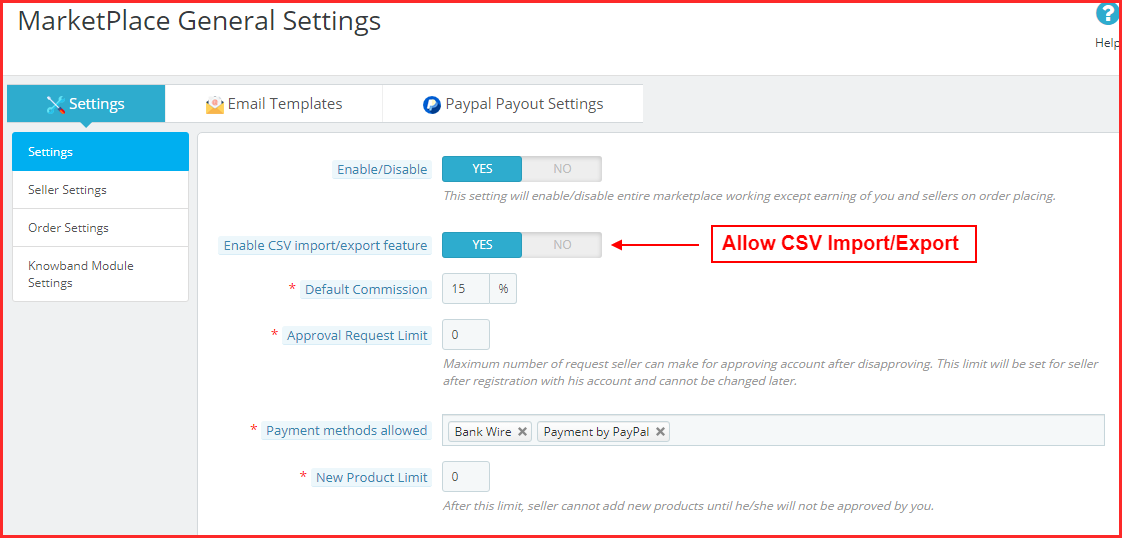
Firstly, the admin can Enable/Disable the module.
Enable CSV Import/Export– Allow sellers to import/export the CSV files for the products and combination.
Default Commission: The PrestaShop Multi-vendor Marketplace Extension allows the admin to fix and change the commission being charged to the sellers. This section sets the default commission percentage that will charge from the sellers from the total sales made by them.
Enable/Disable Seller Registration Message: The following setting will enable/disable the seller registration message (welcome message at the time of registration).
Approval Request Limit: It is the maximum number of requests that a seller can make to get a new seller account. This limit will be set for each seller after registration with his account and cannot be changed later.
Payment Methods Available: Select the payment methods you want to allow for transactions.
New Product Limit: Here admin can enter the maximum number of new products that a seller can add. After this limit, the seller cannot add any new product without the approval of the admin.
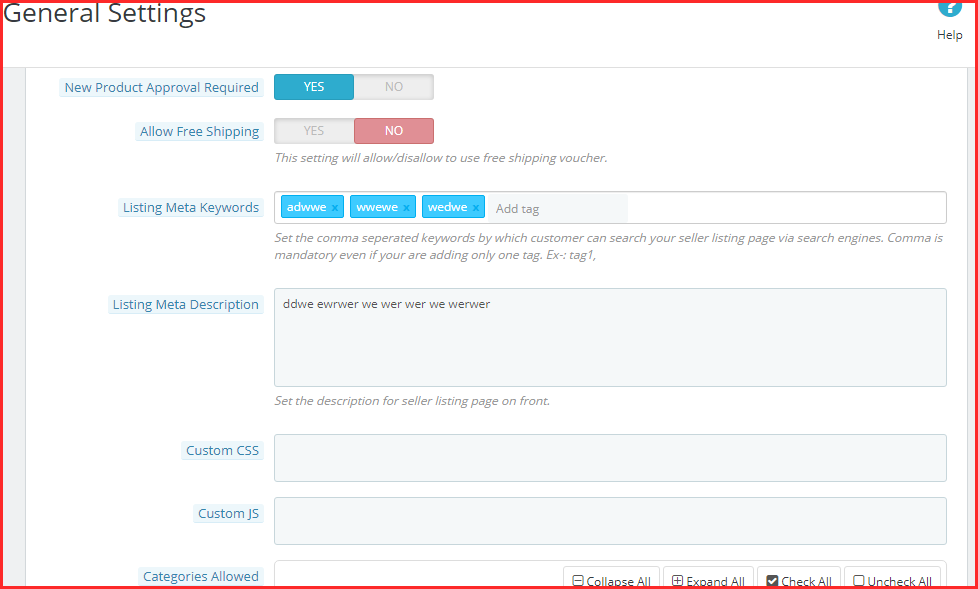
Allow Free Shipping: This setting will allow/disallow to use of a free shipping voucher.
Listing Meta Keywords: Add all the meta tags (separated by comma) by which your customers can search the Seller Listing Page via Search Engines.
Listing Meta Description: Add the description to the meta tags added in the above field.
Custom CSS:
In the following text field, the admins can add the customized CSS they want to show on the front end.
Custom JS:
The Custom JS text field offers the admin to add Java Script Manually for the front end.
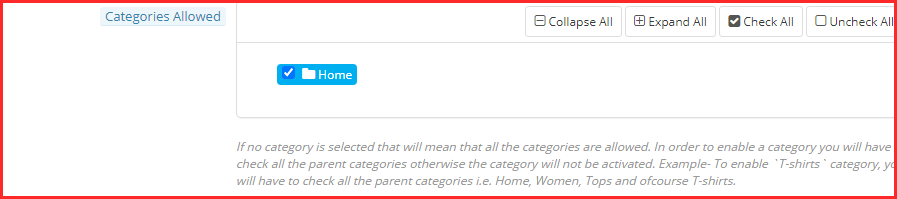
Categories Available: This option shows the categories that the admin allows for the sellers to add products. If the admin selects no category, all the categories are there. In addition, if he selects some of the categories, it means that only those categories are there.
4.1.2 Seller Settings
Admin can control many features for the seller profile.
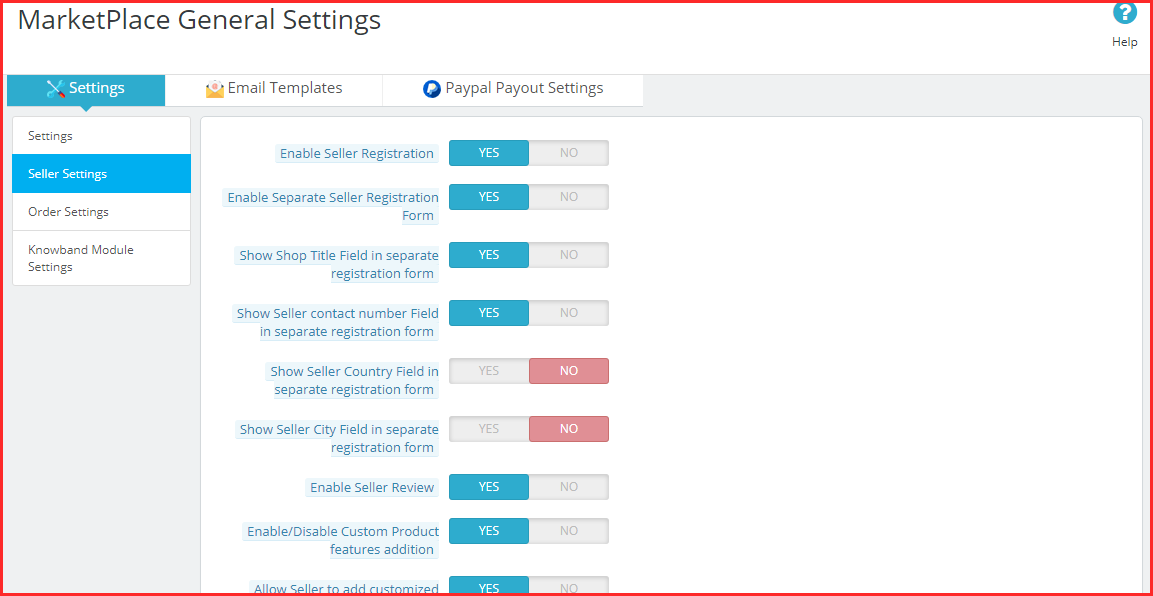
Enable Seller Registration: By enabling this button, the admin can allow the new or existing customer who is not a seller to register as a seller. The same ‘Register as Seller’ option is available in the Customer Tab of the PrestaShop store as well as in the front-end of the marketplace.
Separate Seller Registration Form:
Admin can add a separate seller registration form under the “General Setting” tab of the PrestaShop Multivendor Marketplace. By allowing this functionality admin is also able to add more custom fields in the seller registration form like shop title, seller contact details, seller country, etc.
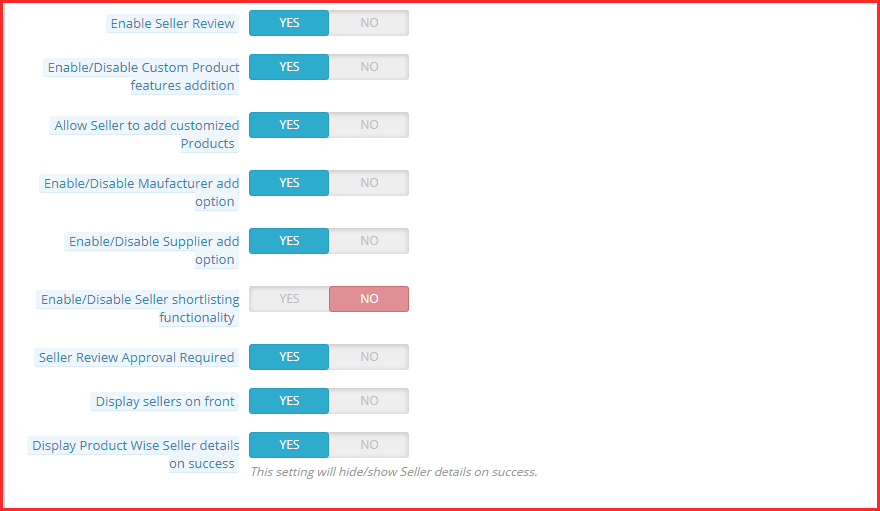
Enable Seller Review: Enable this field, in case you want the customers to review the seller.
Enable/Disable Custom Product features addition: Enable this field, in case you want to add custom product features.
Allow Seller to add customized Products: Enable this field, in case you want to allow sellers to add customized products.
Enable/Disable Manufacturer add option: Enable this field, in case you want to add the manufacturer option.
Activate/Disable Supplier add option: Enable this field, in case you want to add the supplier option.
Enable/Disable Seller shortlisting functionality: Enable this field, in case you want to add seller shortlisting functionality.
Seller Review Approval Required: Enable this field in case you want the seller review to approve before it becomes visible on the storefront.
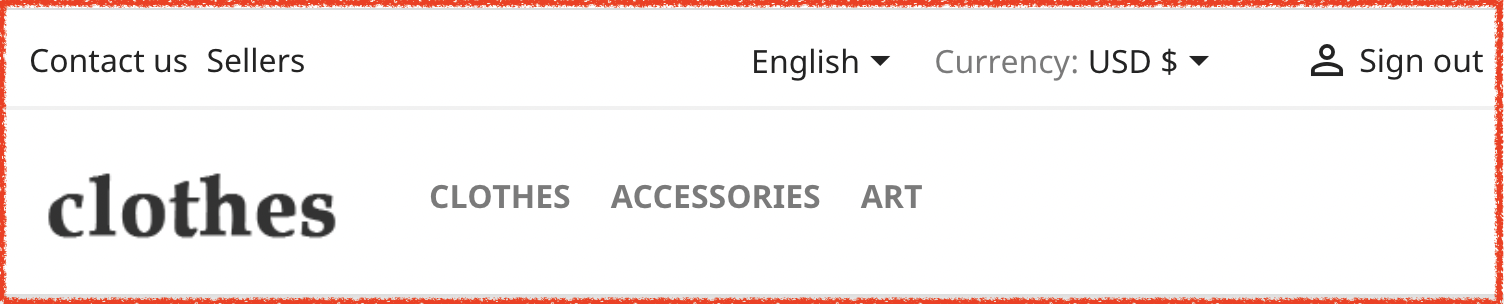
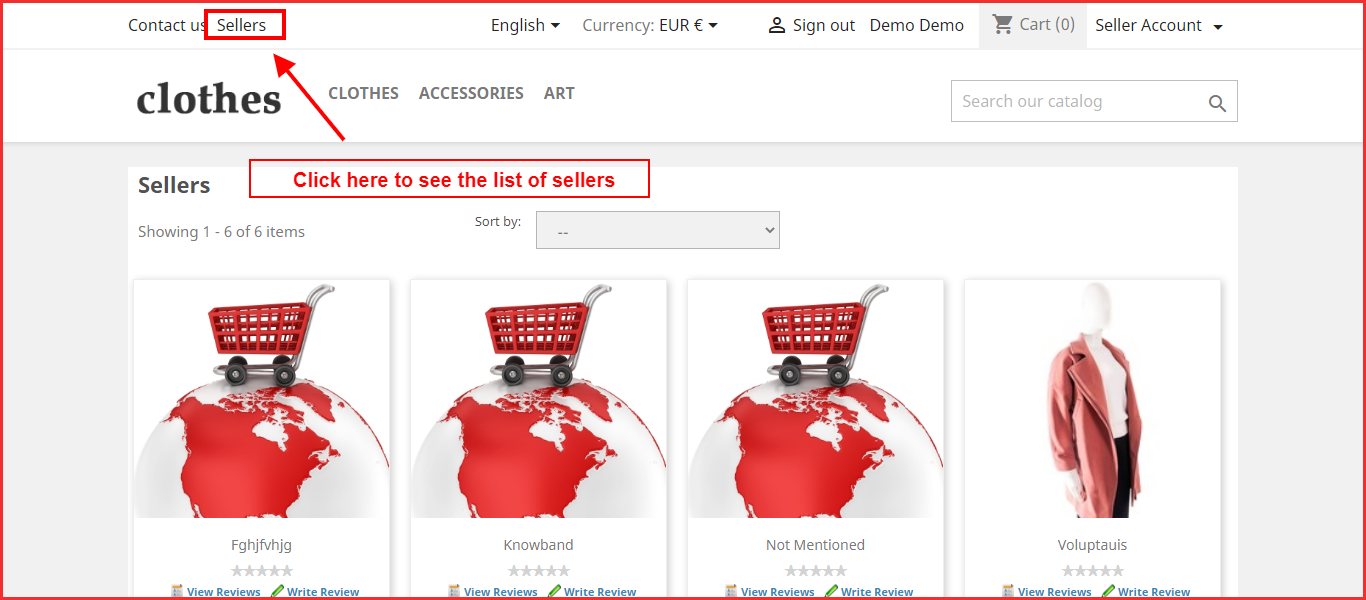
Display sellers on the front: Enable this field in case you want to show a link in the header of the PrestaShop marketplace front-end about the seller’s listing page. If this setting is on disable then the seller listing page. In fact, the Sellers listing options will display in the front-end as below:
Display Product Wise Seller Details on Success: If the admin enables this feature, the seller details will be shown on the order confirmation page.
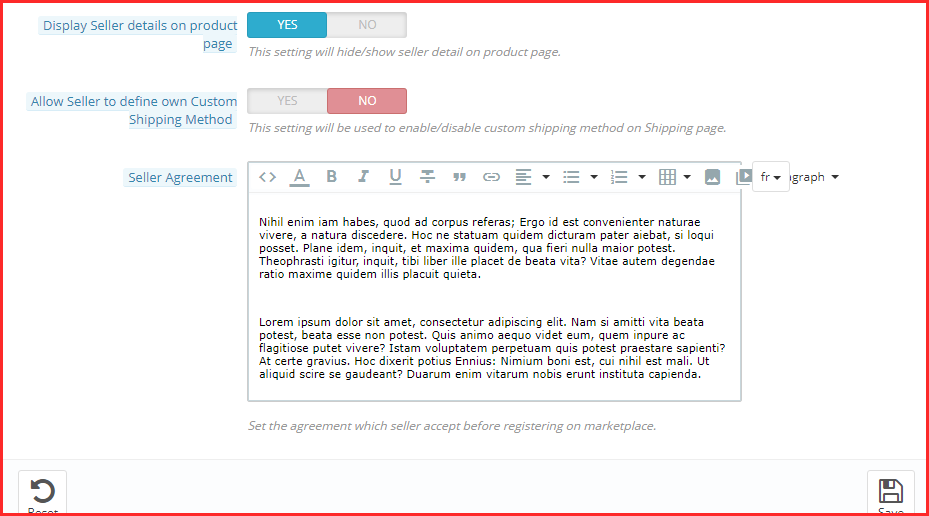
Display Seller Details on Product Page: When the option is on enable, the seller’s detail displays on the product page.
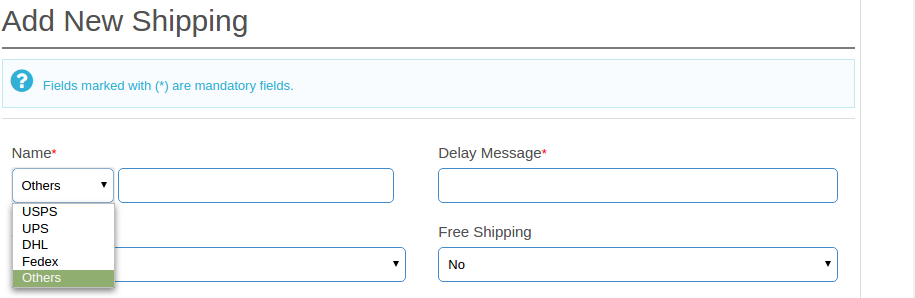
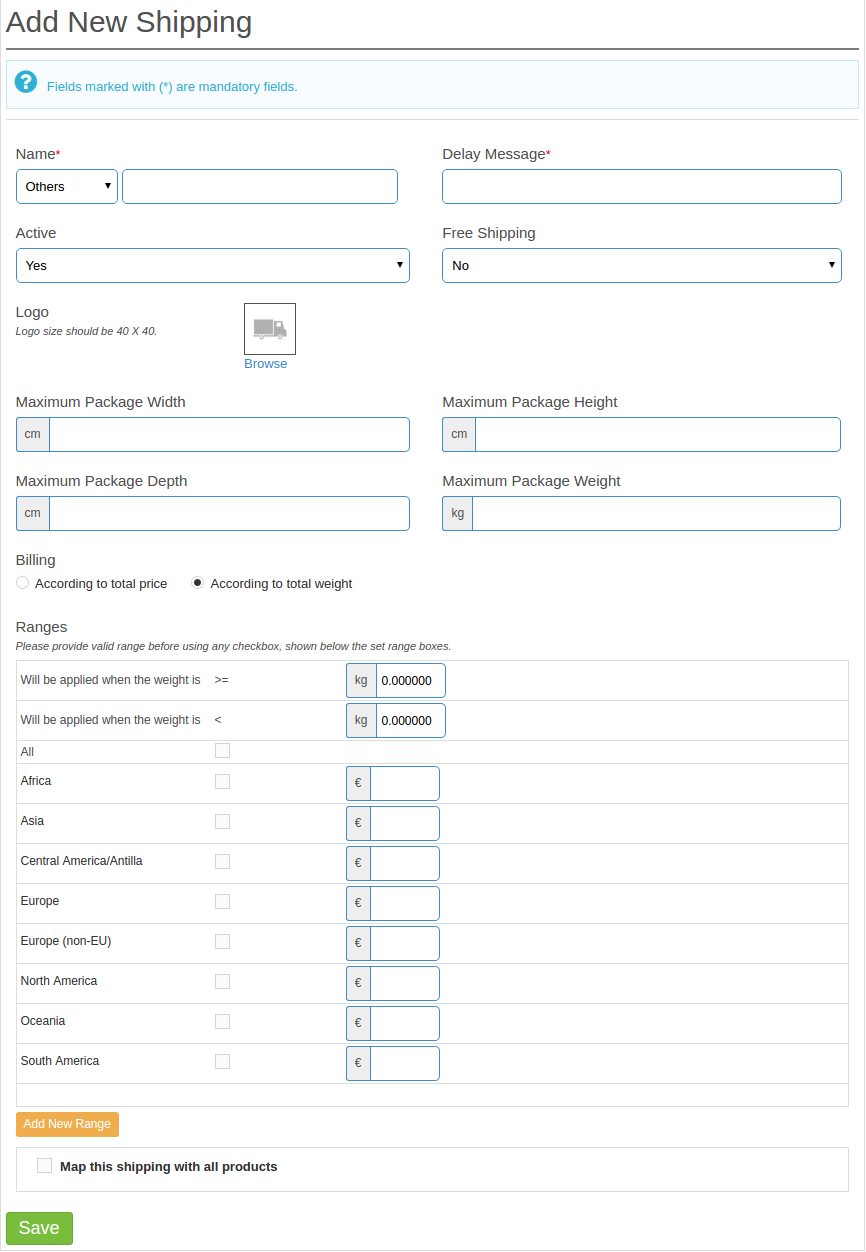
Allow Seller to define own Custom Shipping Method: Enable this functionality to allow the sellers to define their shipping methods. In case, this feature is off, then, only the default shipping methods defined by the admin be shown in the Shipping tab of the seller’s dashboard.
In case, this feature is on, then, the seller will get an ‘Others’ option in the front-end as shown in the image below:
The seller can select ‘Others’ to add his custom shipping methods.
Seller Agreement: The seller agreement is customizable from this section of the PrestaShop Multi-vendor Marketplace plugin. The same agreement is visible to the sellers once they register themselves in the PrestaShopMulti-Seller Marketplace.
Enable/Disable Product Type Selection:
This setting will allow the admin to enable/disable the product type selection functionality for seller on the front.
Use Admin Career as Seller Default Career:
This setting will allow using the admin carrier as the seller’s default carrier which was automatically created for the seller.
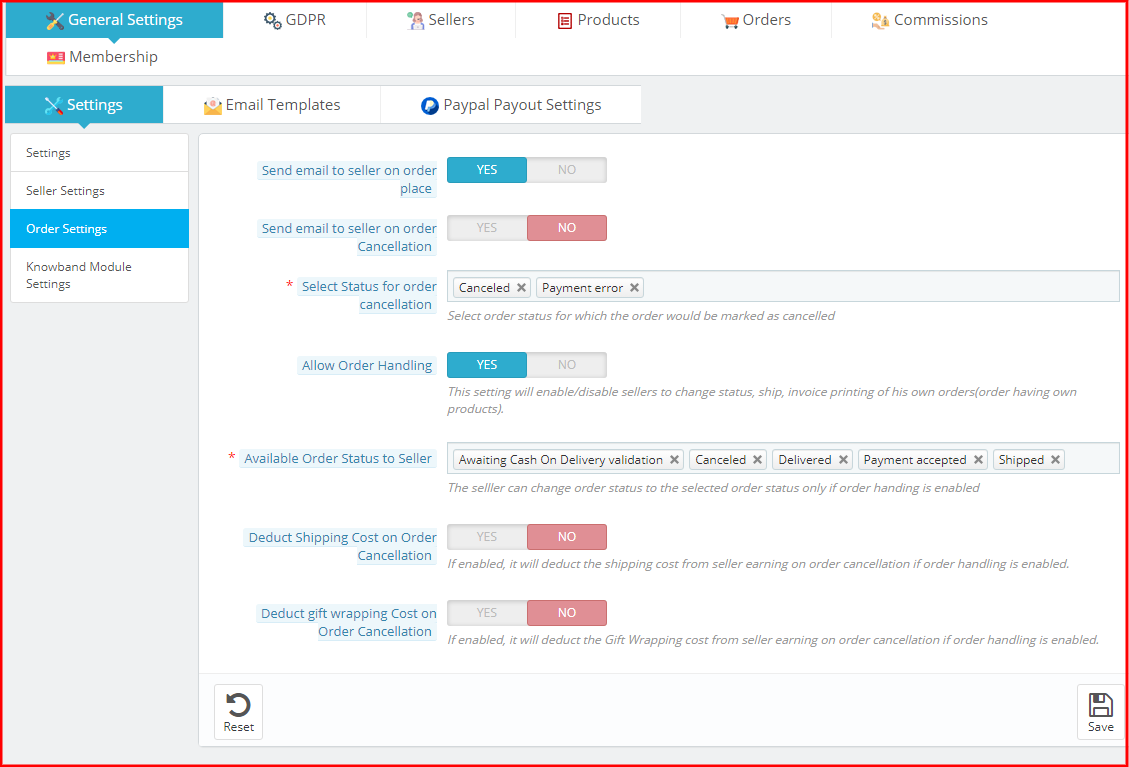
4.1.3 Order Settings
Admin can configure the order setting, email alert options for orders, and many more.
Send Email to Seller on Order Place: Enable this field to send an email to the seller in case an order comes for the seller’s product(s).
Send Email to Seller on Order Cancellation: Enable this field to send an email to the seller in case an order cancels for the seller’s product(s).
Select Status for order cancellation: Select the order status for which the order marks as canceled.
Allow Order Handling: This setting will enable/disable the sellers to manage and change the order status, manage the shipment of the orders and generate the invoice for their products.
Available Order Status to Seller: The seller can change the order status to the selected order status only if order handling enables.
Deduct Shipping Cost on Order Cancellation: If the admin enables this feature, it will deduct the shipping cost from the seller earnings on order cancellation if order handling enables.
Deduct gift wrapping Cost on Order Cancellation: If the admin enables this feature, it will deduct the Gift Wrapping cost from the seller’s earnings on order cancellation if order handling enables.
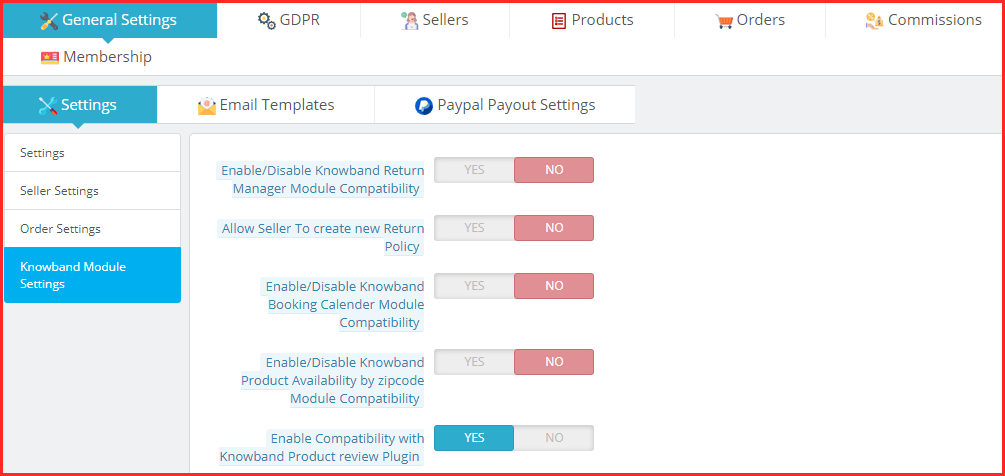
4.1.4 KnowBand Module Settings
Here, the admin can enable/disable the Knowband modules.
Enable/Disable Knowband Return Manager Module Compatibility: Enable this field, in case you want to add Knowband Return Manager Module Compatibility.
Allow Seller to create a new Return Policy: Enable this field, in case you want to allow the seller to create a new return policy.
Enable/Disable Knowband Booking Calendar Module Compatibility: Enable this field, in case you want to add Knowband Booking Calendar Module Compatibility.
Enable/Disable Knowband Product Availability by zipcode Module Compatibility: Enable this field, in case you want to allow zipcode module compatibility.
Enable Compatibility with Knowband Product review Plugin: Enable this field, in case you want to allow compatibility with the product review plugin.
Enable Seller Ticket System: Knowband Multi-vendor marketplace now have an option for enabling/disabling the seller customer ticketing system. You can turn on the module by choosing the yes or no option.
Enable Deal Manager: Likewise, seller ticketing system, we have also added Knowband Deal Manager Module with the Knowband Multi-Vendor Marketplace module. You can enable/disable the same from the yes/no buttons provided in the general setting panel.
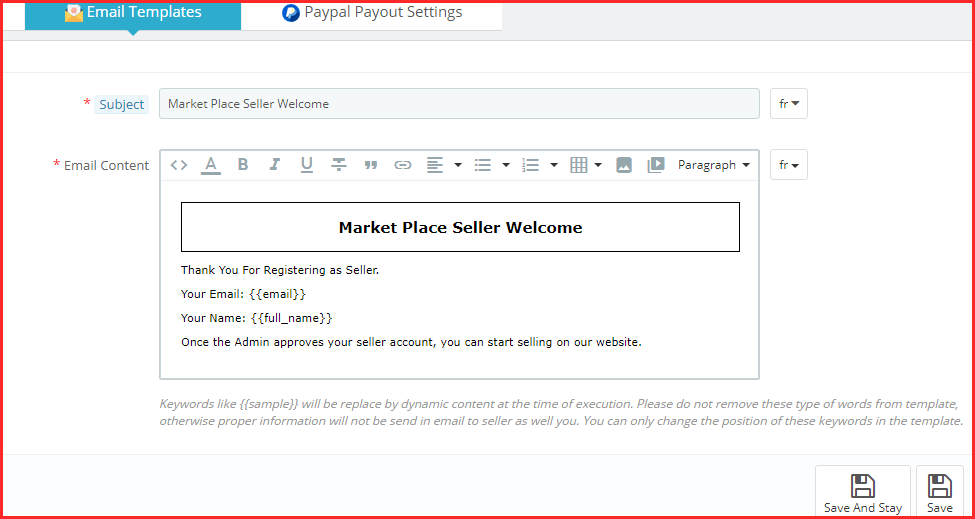
4.2 Email Templates
Various email templates are available for multiple actions. There is a total of 30+ default email templates which include subjects like welcome email, seller account approval, approval notifications, transaction emails, order status templates, etc.
Edit the email template
Admin can edit the default email templates.
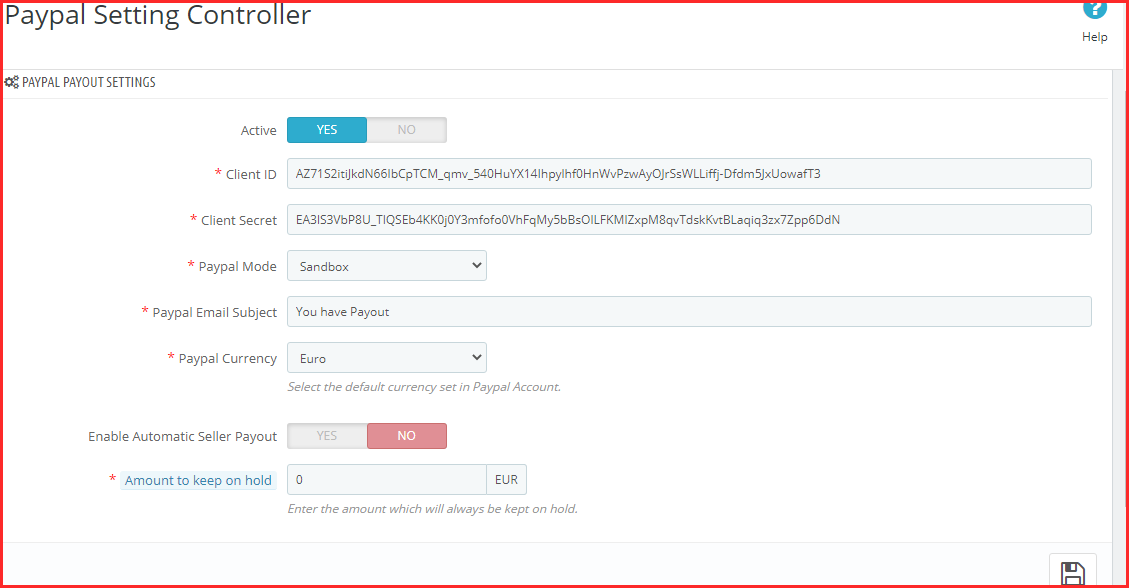
4.3 PayPal Payout settings
The admin can use PayPal if sellers opt for this payment method.
Admin has to add the PayPal details in PayPal Payout Settings.
Enter the API details of the PayPal details as shown in the image below:
Active: Toggle the button to activate the PayPal payout settings.
Client ID: Enter the Client ID of your PayPal account here.
Client Secret: Enter the secret key here.
PayPal Mode: Select the mode, that is, Sandbox or Live from the options drop-down menu.
The PayPal Email Subject: Enter the email subject for PayPal here.
PayPal Currency: Select the default currency set in your PayPal account.
Enable Automatic Seller Payout: Toggle the button to activate automatic seller payout.
Amount to keep on hold: Enter the amount which will always be kept on hold for sellers.
5.0 GDPR
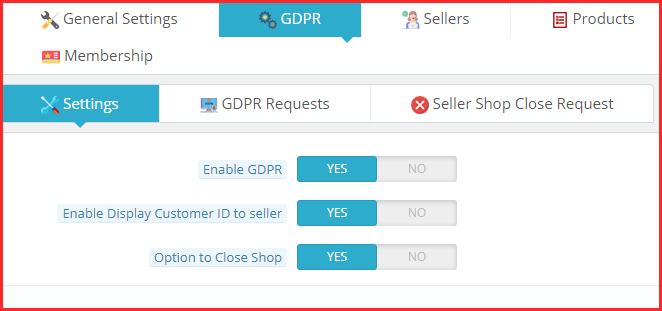
Since GDPR is mandatory in many countries, the admin can configure the PrestaShop marketplace module with GDPR.
5.1 GDPR Settings
The store admin can enable the GDPR settings by clicking a few buttons in this section of the Prestashop marketplace addon. The various fields are visible below:
Enable GDPR: Toggle this button enables GDPR compliance.
Enable Display Customer ID to seller: Enable this feature if you want to display the customers’ ID to the third-party sellers.
Option to close Shop: If this feature enables, then, the sellers will get options to request for the shop closure. It displays a section in the tab in the dashboard of the sellers from where the request raises.
5.2 GDPR Requests
The sellers can download their data in CSV format just by clicking the links provided in the GDPR section of the dashboard.
The admin can view the GDPR requests initiated from this section in the back-end of the Prestashop multi-vendor marketplace module as shown in the image below:
5.3 Seller Shop Close request
Ifthe admin enables this feature from the back-end of the Prestashop multi-vendor Marketplace plugin, the sellers can request the admin to close their shop.
The request to delete the sellers’ account initiates by just clicking a couple of buttons from the dashboard. The image of the front-end interface is shown below:
Once the request is sent, the admin can view the same from the Seller Shop CloseRequest tab of the Prestashop multi-seller marketplace extension.
The confirmation mail is sent to the seller. Once the sellers provide the confirmation, an ‘Approve’ button displays corresponding to the request. The admin can click the same and complete the request.
The entire list of the shop closure request and their status is displayed in this section of the Prestashop multi-seller marketplace plugin as shown in the image below:
6.0 Sellers
6.1 List of Sellers
This page of the Prestashop Multi-seller Marketplace extension has a list of all the sellers that the store owner approves.
There are several filters as well to filter the list of sellers as shown in the above screenshot.
The above figure consists of a list of all the sellers that clear the approval.
The admin can also enable or disable a seller in this list using the bulk actions of the grid.
If a seller disables, then, all the products of that seller also disable. Moreover, will not be visible on the storefront.
When you click on the view button, a new page opens up consisting of information about the seller.
6.1.1 How can the admin edit the Sellers Profile from the backend?
To edit the seller’s profile, follow the below-mentioned profile:
Go to Customers -> Select a Customer who is also a seller -> Click on Edit link on the Customer Information Page
In case, the store admin can edit a seller’s profile just by clicking on the Edit button corresponding to the profile. The admin can edit the profile just as they edit the customer’s profile.
When this page loads for the first time the fields have the default settings that are pre-defined for the addon.
6.2 Pending Seller Approval
Seller Account Approval Request
When a seller registers or any customer registers as a seller on the Prestashop marketplace, then, it first appears in this tab of the Prestashop Multi seller Marketplace module. The store admin can approve or disapprove of the seller account request.
Approve Seller Account: To approve a seller’s account, you have to click on the “Cross” button corresponding to that seller on the list from the backend.
Once the Seller account approves it directly moves to the Sellers List. Moreover, all the limits to the seller account release.
A mail will be sent to the seller to notify him about the approval of the seller account.
Note:- The Seller Accounts that the store owner approves cannot be undone. Please use this feature carefully.
Disapprove Seller Account: To disapprove of a seller account, you have to click on the “tick” button in front of that seller on the list.
A pop-up will appear asking for the reason for disapproval of the seller account. Fill out the reason and then submit the form to complete the action.
A mail will be sent to the seller notifying the disapproval of the seller’s account. The reason provided in the pop-up will also be sent in this mail.
Note:- Once a seller request disapproval then he can again apply for the seller account. In addition, whenever a seller does this the store owner gets a notification email.
6.3 Custom Fields
Now admin can add custom fields for the seller profile page and even make them required for the sellers to fill out.
Custom Fields Type Selection:
Admin can select the custom field type that he wants to add on the seller profile page. Further, the admin gets lots of options. For instance, checkbox, radio button, text box, etc.
6.3.1 How to Add New Custom Fields for Seller Profile in PrestaShop Multi-vendor marketplace?
Custom Fields for Seller Profile:
Admin can add new custom fields for the seller’s profile under the “Profile Form Custom Fields” tab. In fact, with the help of this tab, the admin can add new custom fields or delete already added custom fields for sellers’ profiles using PrestaShop Multivendor Marketplace.
Custom Fields Type Selection:
Admin can select the custom fields type which he wants to add on the seller profile page. Further, the admin gets lots of options. For instance, checkbox, radio button, text box, etc.
Category-wise Custom Fields:
Admin can map the custom fields in a particular category using the “Section” tab under Profile Form Custom Fields. Thus, with the help of this admin can map the custom fields category-wise.
Make Custom Fields Required:
Admin can make these custom fields required using the “Required” tab.
Show Custom Fields on Seller Front Page:
With the help of the PrestaShop Multivendor Marketplace, the admin can show the custom fields on the seller’s profile page. Further, the admin can allow this functionality under the “Profile Form Custom Fields” tab.
6.4 Category Wise Commission
Now, the admin can easily divide the commission according to the product category. Thus, the admin can make new categories too accordingly.
In the above screenshot, the admin can set a new category by entering a default commission. In fact, this enables the admin to charge different commission rates for different product categories.
Admin can edit the commission rule by clicking the edit option at any point in time.
6.5 Seller Review
This seller Reviews tab of the Prestashop Multi-seller Marketplace extension contains a list of all the Sellers Reviews done by customers in the store.
If the admin disables the setting (i.e. Seller Review Approval Required), then a seller review approves directly. Further, when the customer adds. In addition, appears on this list. Otherwise, the review first appears in the Seller Review Approval list.
Note:- The Seller Reviews that the store owner disapproves of also appear in this list.
View Seller Review: To view all the details of a seller review you have to click on the View button in front of that review in the list.
On clicking the View button, a Pop-up will appear having all the details of the corresponding seller review.
6.6 Seller Reviews Approval
This tab of the Prestashop Multi-vendor Marketplace extension contains all the Seller Reviews. Furthermore, the ones that the customers post. In addition, no action is happening about them.
If the admin enables these settings (i.e. Seller Review Approval Required), then, only any seller review posted by any customer appears in this list otherwise, it directly appears in the Seller Reviews list.
The reviews that are pending approval are showcased as in the image below:
View Seller Review: To view all the details of a seller review you have to click on the View button in front of that review in the list.
On clicking the View button, a Pop-up will appear having all the details of the corresponding seller review.
Approve Seller Review: To approve a seller review, you have to click on the Approve button in front of that review on the list.
Once a seller review approves from the backend, it becomes visible on the front end. In addition, is transferrable to the seller review list.
Note:- This action cannot be undone. Please use it carefully.
Disapprove Seller Review: To disapprove a seller review, you have to click on the Disapprove button in front of that review on the list.
A pop-up will appear asking for the reason for disapproval of the seller’s review. Fill in the reason and then submit the form to complete the action.
Once a seller review disapproves, it is transferable to the seller reviews list and cannot be found anywhere else.
Note:- This action cannot be undone. Please use it carefully.
Delete Seller Review: To delete a seller review, you have to click on the Delete button in front of that review on the list.
A pop-up will appear asking for the reason for the deletion of the seller review. Fill the reason and then submit the form to complete the action.
Once a seller review deletes, it is completely removed from everywhere.
Note:- This action cannot be undone. Please use it carefully.
All this can happen with a button click with the help of the Prestashop Marketplace extension.
6.7 Seller Shipping
Whenever a new seller adds to the system, a default shipping method is also available that applies to all the products by default. Moreover, it is free as well.
The seller can add a new shipping policy and can map products to it as well, but until then, all the products are mappable to the default shipping policy only.
The Seller Shipping tab of the Prestashop Multi-vendor Marketplace addon page contains a list of all the shipping methods. Furthermore, the ones that the admin creates for the sellers are present in the system.
View Shipping: To view the details of a seller shipping, you have to click on the View button in front of that entry.
On clicking the button, a new page opens up having details of the respective shipping method.
The page will display Profile Status, Business Profile, Carrier Information and payment information (bank wire details)
Note:-
The admin will not be able to delete or edit any shipping method for any seller. In fact, if tries he/she will redirect to the Carrier Listing page with the corresponding error.
By default, all the products for a seller will be mappable to the Default shipping method for the respective seller. Thus, the default shipping methods are identifiable with the name Default Free Shipping – Seller Name.
6.8 Seller Shipping Method
Prestashop multivendor marketplace extension allows the sellers to define their shipping methods. For this, the ‘Allow Seller to define own Custom Shipping Method’ feature enables from the Setting tab of the Prestashop marketplace module.
6.8.1 How can the admin add Shipping Methods?
The admin can add custom shipping methods in this tab. To add custom shipping methods, click on the ‘Add New Shipping Methods’ link or the ‘+’ sign in the top-right position.
This will redirect you to the shipping methods creation page of the Prestashop marketplace addon.
Shipping Method Name: Enter the name of the shipping methods.
Active: Toggle the button to activate or deactivate the shipping method.
The shipping methods will be available as shown below. The admin can edit or remove them by clicking on the Edit or Delete button corresponding to each shipping method.
6.8.2 How can the Seller add custom Shipping Methods that they want to allow the customers to select?
The seller can create their shipping methods from their dashboard. Go to the Dashboard -> Shipping tab.
The various shipping methods that the seller creates are available in this tab.
To add new methods, click on the ‘Add New’ link as shown in the image below:
You’ll redirect to the shipping methods creation page. Further, the various field required to be filled are shown below:
The various shipping methods will list in the drop-down menu. To create a new one, select ‘Others‘. Enter the name of the shipping method.
The sellers can create the shipping methods by entering the required fields as shown in the image below.
6.9 Seller category Request list
A seller can add products only to those categories that the admin allows to him/her. However, if the seller needs to add a product to a category that is not he does not allow, then the seller can request for the category. All those category requests appear on this list. A mail is also sent to the store owner to notify them about the Request for Category. Then, it is up to the store owner to approve or disapprove the request.
View Category Request: To view the details of a category request, you have to click on the View button in front of that category request on the list.
On clicking the View button a Pop-up will appear having all the details of the corresponding category request.
Approve Category Request: To approve a category request, you have to click on the Approve button in front of that category request on the list.
Note:- This action cannot be undone. Please use it carefully.
Disapprove Category Request: To disapprove of a category request, you have to click on the Disapprove button in front of that category request on the list.
A pop-up will appear asking for the reason for disapproving the category request. Fill out the reason and then submit the form to complete the action.
Note:- This action cannot be undone. Please use it carefully.
7.0 Products
Product setting includes the seller product configuration, product approval list, and product review.
7.1 Seller Products
The Seller Products page of the Prestashop Multi-vendor Marketplace add-on consists of all the approved products added by the seller(s) on the store.
If the admin disables the settings (i.e. New Product Approval Required) in the Setting tab of the Prestashop Marketplace module, then a product approves directly when it is added by the seller and appears in this list. Otherwise, the product first appears in the Product Approval list.
Delete Product: To delete a product, you have to click on the Delete button corresponding to each product as shown in the image below.
A pop-up will appear asking for the reason for the deletion of the product. To complete the action, fill in the reason. Further, click on the submit button.
A mail will be sent to the seller to notify the deletion of the product. The mail also contains the reason you have provided for the deletion of the product.
Note: The product delete action cannot be undone. Please use this feature carefully.
Enable/Disable Product: To change the status of any product, you have to use the Bulk Action feature of the Grid. To enable/disable any product, select the product(s) and choose the action (i.e. Enable or Disable) to complete the action.
Note: Once a product is disabled, it will not be visible at the front. To avoid disabling products and only disable a product if it is very necessary.
View or Edit Product: There is also an option to view the details of any product on the list. To do that you have to click on the View button in front of that product and it will take you to the edit page of the respective product. Further, on clicking the view button, you’ll redirect to the products detail page as shown below:
Admin can update the product settings. Knowband’s PrestaShop Marketplace Module provides options for updating the quantity, and shipping options like delivery time, date, shipping fees, etc. Moreover, the admin can update the pricing of the product.
For Google rankings, the product SEO can be updated.
7.2 Products Approval List
When a seller adds a product, then, first of all, it appears in this tab of the Prestashop Multi-vendor Marketplace extension. The store owner is also notified of the same through the mail. Then, it is up to the store owner to approve or disapprove of the product.
If the setting (i.e. New Product Approval Required) enables only then, a new product appears on this list. Otherwise, it directly appears in the Product List and approves automatically and is visible.
Disapprove Seller Product: To disapprove of a product, you have to click on the Disapprove button corresponding to that product on the list.
A pop-up will appear asking for the reason for the disapproval of the product. Fill out the reason and then submit the form to complete the action.
Once a product disapproves, a mail will be sent to the seller notifying disapproval of the product with the reason provided in the above form. The products that don’t get approval also appear on the same list. The Store admin can approve them at any point in time.
Approve Seller Product: To approve a product, you have to click on the Approve button in front of that product in the Product Approval list.
After approval, the product is moved from the Product Approval list to the Sellers Products list.
Note:- This action cannot be undone. Please use it carefully.
7.3 Product Reviews
The Product Reviews page of the Prestashop Marketplace plugin consists of a list of all the product reviews sent by customers on the seller’s products.
The online buyers can add a review on any of the seller’s products as shown below:
Once the review is posted by the customer, he’ll get a message saying that “Your comment has been added and will be available once the moderator approves them.”
These reviews are then listed in the Product Review tab of the Prestashop Multi seller Marketplace plugin.
View Product Review: Most of the details of the product reviews are already mentioned in the grid but some of them are not. To view all the details of any Product Review, click on View Button in front of that review. A pop-up will appear having all the details of the product review.
As you click, you can see the complete review as shown in the image below:
Delete Product Review: To delete a product review, you have to click on the delete button in front of that product review on the list.
Note:- The product review deletes action cannot be undone. Please use this feature carefully.
Approve Product Review: The product reviews that are added by the customers for the seller’s products will appear in the list here with the status Waiting for Approval and it will not be shown on the storefront to other customers until the approval. To approve it, you have to click on the Approve button in front of the product review.
8.0 Orders
Admin can view, edit and update the order status for both seller and admin orders.
8.1 Sellers Orders
The Seller Order Tab of the Prestashop Multi-vendor Marketplace Addon consists of all the orders that are placed by customers for products added by sellers in the store. The orders shown in this list are split based on sellers which means, if there are products by different sellers in the same order then they will appear separately in this list.
View Order: There is also an option to view the details of any order on the list. To do that, you have to click on the View button in front of that order, it will take you to the order details page of the respective order. This view page is the same as when you edit any order.
As you click on the View button, you’ll redirect to the order page as shown below:
8.2 Admin Order
The Prestashop Marketplace module allows the store admin to sell more and more products without maintaining their inventory. However, the admin can even sell their products in the marketplace. The orders received for the products of the admin can be viewed in the Admin Order tab of the Prestashop Multi-seller Marketplace addon. The orders will be displayed as shown below. To see the details of the order, click on the View button corresponding to each order.
The order details page is shown in the image below:
9.0 Commissions
The PrestaShop Multi-seller Marketplace module makes it easier for the store admin to manage the commission structure of the marketplace.
9.1 Admin Commission
The Admin Commissions tab of the PrestaShop Multi seller Marketplace extension contains a filter through which the admin can filter the commissions earned in the form of Order Wise or Category Wise selection. By default, the page shows Order Wise Admin Commissions.
9.1.1 Order Wise Admin Commissions
This list contains all the commissions earned by the store owner on every order placed for any seller’s product. This list is split based on orders placed for selling products.
9.1.2 Category wise commissions
This list shows the total commission earned by the store owner from a seller. The store owner can also use filters to filter the commission reports category-wise.
It helps the store owner to identify commissions from different categories and which category has produced how much commission.
9.2 Seller Transaction
The system does not automatically transfer the amount in the seller’s account, hence the store owner has to keep records of the balance for all the sellers and manually transfer money to the seller and later on, enter the details of the transaction to keep a record of the same.
The Prestashop Marketplace module allows the admin to view two types of transactions of the sellers, that is, Seller Balance History and Transaction History.
The Seller Transactions page of the Prestashop Multi-vendor Marketplace plugin keeps the track of the seller transactions and the remaining balance of sellers.
9.2.1 Seller Balance History
This list of the Prestashop Multi-seller Marketplace plugin contains all the balance variations for all the sellers in the system. The list shows the total sales of the seller, seller’s earnings, and your commission. This list helps the store owner to identify the earnings and categorize them seller-wise.
View Transactions Details
To view the details of the transactions done for a particular seller, you have to click on the View button in front of that seller.
On clicking on the View button in front of any seller, a new page will open up having a list of all the transactions done for the corresponding seller.
You can also add a new transaction for the current seller by clicking on the Add New Transaction button on the top right-hand side of the below page.
9.2.2 Create New Transaction from the back-end of the Prestashop Multi-vendor Marketplace Module
To add a new transaction detail for any seller, you have to either click on the Make New button in front of the seller or you can also click on the Make New Transaction button on the top right-hand side of the page.
9.2.3 Transactions History
This page contains a list of all the transactions done to date to all the sellers available in the system.
You can also add a new transaction for any seller by clicking on the Add New Transaction button on the top right-hand side of the above page.
9.3 Transaction Payout Request
With this additional feature, the sellers can request the store admin for any payout. Earlier, the admin was in charge of any of the payment that was to be made to the sellers. However, the sellers can now initiate a payout request from their dashboard. The admin can approve or deny the payout request of the sellers from this tab of the PrestaShop multi-vendor marketplace addon.
Three payment methods are provided, that is, Bank Wire, Pay by Check, and PayPal.
The admin can use PayPal if this payment method is opted by the sellers.
Admin can enable automatic seller payout which helps the admin to automate the payout request process. Further, the admin can either use cron URL’s for this setup or use the “Process Paypal Payout Status” cron directly.
Admin can also add a particular amount which will always be kept on hold for sellers.
Note: Refer General Settings section for PayPal Payout Settings
How can the seller create a Transaction Payout Request?
To create the payout request, the seller is required to click on the Payout Request tab of the dashboard of their account.
The various fields required to be filled by the seller are discussed below:
Amount: Enter the amount that you are requesting for the payout.
Request Reason: Specify the reason for which the payout request has been initiated.
As the Save button is clicked, the payout request will list as shown in the image below:
The same payout request will list in the admin interface of the Prestashop multi-seller marketplace extension.
9.3.1 How can the admin approve/disapprove the Transaction Payout Request?
The admin can approve or reject the payout request by clicking on the Approve or Disapprove button corresponding to each request.
In case, the admin approves the payout, then, a popup will be displayed as shown in the image below:
If the payment methods are Bank wire or Pay by Check, then, the admin will have to enter the Transaction ID.
Once the request is successfully approved, the transaction will be saved in the Transaction Table.
In the case of the PayPal payment method, a request will be sent to PayPal and based on the response, success or error message will be displayed. If the request is successfully approved, it is added to the Transaction table.
10.0 Membership
Prestashop multi-vendor marketplace admin can create and update multiple membership plans for the sellers.
10.1 Settings
This page contains all the settings which the Store admin needs to control the membership plans. Enable membership plan functionality: By enabling this button store admin allows all the new and existing sellers to purchase a membership plan.
Send membership plan activation email: If the admin enables this feature, an email is sent to those sellers whose membership plan is activated.
Membership plan activation email template: Update the email template as required.
Send membership plan expiry email: If the admin enables this feature, an email is sent to those sellers whose membership plan is expired.
Membership Plan Expiry Email Template: Update the email template as required.
Show warning message: Store admin can use this feature to show a warning message to those sellers whose membership plan is about to expire.
Number of days left to upgrade plan: Store admin can also adjust the number of days to upgrade the membership plan. A warning message will be shown to the sellers during this time period for upgrading their plans.
Enable disable free membership plan: If the admin enables this feature, a free membership plan will be added to the seller’s membership plans.
Enable disable product active limit under the free membership plan: Store admin can enable and disable the product listing limit under the free membership plan
Product limit: Store admin can adjust the product listing limit using this tab.
Duration interval: The admin can adjust the duration interval of the free membership plan. For example: days, months, and years.
Duration: The admin can set the duration of the free membership plan after which this plan is deactivated.
Select the order state in which the membership plan will be marked as paid: Admin can select the order state on which free membership plan orders will be marked as paid.
Show membership plans select box during seller registration: If the admin enables this feature then sellers can select the membership plan at the time of registration.
10.2 Warning Plan Reminder settings
Admin can enable this functionality to send a warning email to the sellers whose plan is about to expire. Admin can set the number of days before plan expiry warning mail should be sent to the seller.
10.3 Expired Plan Reminder Settings
Admin can enable this functionality to send an email to those sellers whose membership plan
Admin can also set the number of days after the plan expiry warning email should be sent to the seller.
Moreover, the admin can customize the reminder email template.
10.4 Membership Plans
Store admin can create a new membership plan under the membership plans tab. After clicking on the add new button, a new membership plan form will be open with the following fields:
Plan name: Admin can set the Plan name which is displayed to the sellers.
Plan price: Admin can set the plan price using this tab.
Enable/disable product active limit: Using this feature admin can enable the product listing limit for that particular membership plan.
Plan duration interval: Store admin can set the plan duration interval using this tab.
Duration: The admin can set the duration for which the plan remained active.
Enable: Using this tab admin can enable or disable the membership plan.
Plan image: Admin can choose the plan image that he wants to show to the sellers.
10.5 Seller Membership Plans
From this tab, the admin can check the seller’s plan details like their first name, last name, email, shop name etc.
From the add new option, the store admin can add new seller plan details by filling in the following details:
Choose sellers: Admin can choose the seller for which the admin wants to add plan details.
Add customized plan: Admin can also customize the plan details by filing the plan name, product active limit, duration interval, and duration details.
Mark plan as approved: If the admin enables this feature then the seller plan will approve.
Activate plan: The store admin can activate the seller’s plan by enabling this button.
Seller Deals: In the following tab, the PrestaShop store admins can keep the track of the seller’s deals. Moreover, here we have provided various details such as deal type, reduction type, reduction, starting date, and deal ending date.
11.0 Seller Interface of PrestaShop Marketplace Module
Any seller has access to several pages that are designed for handling the functionality of a seller account. The link for all these pages is there on the My Account page of a customer who is also a seller.
Another way sellers can access the dashboard is displayed in the image below:
11.1 Seller Dashboard
The seller dashboard displays the analytics data of the sales, earnings, and total orders along with the number of products sold.
The seller can see the sales statistics, compare the sales data and check out the last order details as well.
Register As Seller Field (Register Page)
If a new customer is registering on the Store then simply enter your mail id according to the screenshot given below.
After clicking on “Create an Account”, you have to enter your information as given in the screenshot below.
Once the merchant becomes a seller of the marketplace, he can avail of all the functionality of the module and boost his sales effortlessly.
The Dashboard of the sellers includes a GDPR section. The customers can download their data and can even delete their accounts with ease.
11.2 Seller Profile
The sellers can edit their profile and personalize their shop from this tab of the dashboard.
From the seller profile section, a seller can update the general setting for their seller page view, add meta descriptions, create policies, and request payouts to the store admin.
11.2.1 How does Seller Profile Appears to customers?
Customers can visit the seller profile and shop from a particular seller too.
11.2.2 Customer can buy products from an individual seller
For visiting the seller page, the customer has to click on the seller’s profile then they will redirect to the seller’s shop.
11.3 Seller’s Product
The sellers can follow the path mentioned below in order to add a new product.
Go to My Account -> Dashboard -> Products
The already listed products are displayed in this tab of the seller’s Dashboard.
In order to add a new product click on the ‘+’ sign at the top right portion.
This will redirect you to the ‘Add New Product’ page. Fill up the required detail in order to add the product.
11.4 Order
The sellers can view their orders and related details in this tab of the Dashboard.
11.5 Product Reviews
The sellers can view the review received on their product in the Product Review Tab of their Dashboard. All the reviews received will be listed as shown in the image below:
11.6 My Reviews
The tab of the seller’s dashboard lists the reviews received on their profile.
11.7 Earnings
The total earnings of the seller are visible in this tab. The vendors can filter the results as per requirement.
The total earning history is visible as shown below:
11.8 Transactions
The seller can view their entire transaction history in this tab. The amount debits or credits in their account are visible here.
11.9 Payout Request
Sellers can view the list of payout requests sent to the admin from the Payout Request tab. For a new payout request, sellers need to fill in the payout amount and reason and send it to the admin for approval.
11.10 Category Request
The sellers can view the categories assigned to them. Additionally, they can even send a category request to the store admin. In order to send a category request, go to the Dashboard -> Category Request
11.11 Shipping
The sellers can view the shipping process as in the screenshot below:
11.12 CSV and XML
Also, the admin can import/export the products and combinations in CSV and XML formats.
11.13Membership plan history
Sellers can check their membership plan history by applying filters. Under the filters, sellers have to fill in the plan name and the status of the membership plan for checking the history of the membership plans.
11.14Available membership plans
Using this tab sellers can buy membership plans by checking the plan details.
Seller Customer Ticket System:
Knowband PrestaShop multi-seller marketplace provides a separate tab for managing tickets between customers and sellers. In the following tab, the sellers can find all the ticket details such as customer email address, last updated date, ticket number, etc. Moreover, we have also provided an option to search the tickets based on the filter options (customer name, customer email, status, from date, end date).
Seller-Customer-Ticket System: Front End Preview:
The customers will get an option on the seller’s products pages for “contact the seller”. After clicking on the same, they will be redirected to the above-mentioned page.
Here, the customers can fill out the details such as email, name, phone number, ticket subject, and issues regarding the tickets.
After submitting the details, the sellers can check the tickets on their personalized dashboard.
Discounts and Offers:
In the discount and offers tab, the sellers can create their own coupons and offers (applicable only to the seller’s products).
Here, we have provided the options for choosing a start date, offer end date, running status, deal type, and discount type (percentage/fix).
For more information on the Prestashop Multi seller Marketplace extension, refer to the following links: