PrestaShop Product Video Module – User Manual

Introduction

In the Present time, customers are demanding more details and specific information about the product that they want to purchase. Showing more and more details is also used as the selling point of view. This is one of the most important factors to provide the look and feel of the product to the customers. Knowband offers Prestashop Product Video module for the Prestashop store admin that allows him/her to add the product videos on their store’s product pages. This PrestaShop extension allows the sellers to present their products confidently that make the customers sure about their products.

This PrestaShop addon will provide an interface and functionality to the Prestashop eCommerce website admin to show their product pages with high-quality product videos from YouTube, Vimeo, and Daily Motion. The Prestashop Product Video addon  is basically an plugin for PrestaShop eCommerce sites. As we know that, Product details are the very crucial part of any product page on the eCommerce stores. Products details significantly affect the sales of any items on an eCommerce store. That is why we have implemented this Product Video addon for PrestaShop sites where the site admins can add product videos on their product pages. This Prestashop extension will provide an interface and functionality to the site admins to embed their product pages with high-quality product videos from YouTube, Vimeo, and Daily Motion.

Here are some basic features of the Prestashop product video module:

  • It is very simple to install and configure this PrestaShop addon.
  • The eCommerce store admin can easily enable/disable this Prestashop product video addon.
  • The Prestashop youtube addon offers a simple and user-friendly interface.
  • No coding is required for uploading product videos.
  • The Prestashop product video upload module offers a hassle-free implementation.
  • This adding video extension is highly customizable.
  • The Prestashop Dailymotion addon offers multiple layouts and positions for showing product videos.
  • The e-merchant can add custom CSS and JS codes to customize the look and feel.
  • The Prestashop product video upload addon allows adding multiple videos on the product page.
  • The e-merchant can add videos from multiple platforms like YouTube, DailyMotion, and Vimeo.
  • This Prestashop Vimeo addon module is multi-store compatible.
  • The Prestashop video upload addon is compatible with SSL enabled stores.
  • The eCommerce store owner can show display controls also.
  • The Prestashop adding video plugin allows showing related videos also.
  • The admin can enable/disable auto-play video option anytime.
  • The store admin can insert the video link for showing the product video.
  • This Prestashop product video addon is mobile responsive also.

Here are some of the benefits which need to be highlighted:

  • Easy to implement: The best part of Prestashop product video addon is that it has simple and easy-to-use admin interface.
  • Confidence building: Product video creates more confidence about store’s products in the buyers.
  • Detailed Information: Customer gets specified information about that particular product.
  • Product reviews videos: eCommerce store admin can also include product review videos to provide product description details.
  • Customer engagement: With the help of product videos store admin can enhance customer engagement on the store.
  • Multiple Layouts: This Prestashop Product Video addon has a variety of layouts to select for the video.
  • Position Selection: Admin can select the position where he/she wants to show video. The position can be product footer or in product right column.
  • Auto-play option: Admin can Select whether to auto-play video on page load or not.
  • Real life view: Customer gets a real-life view and it clear all the confusion of customer about the product.

Steps for Installation

To install this Prestashop product video addon, please follow the following steps:

  • Add the Prestashop adding video folder under modules folder of your system.
  • After adding this addon folder, system will list the addon on module page under “front office feature”category as given below:

Configure The Module

After installation of the Prestashop youtube addon, you need to configure it for the first use on your site.

  • Find out the Prestashop vimeo addon in the list of modules installed on your site.
  • Select “Configure” option given on the right side of the extension list.
  • After clicking the Configure option you will see a window like the one mentioned below:
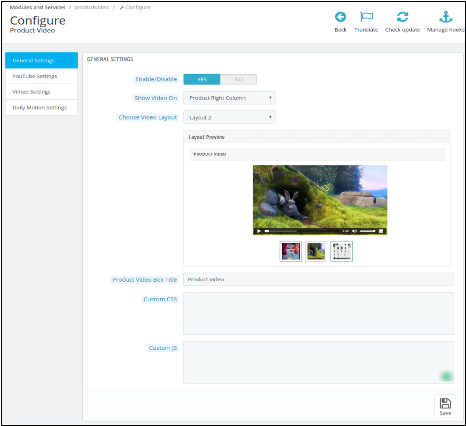
Admin interfaces- Configure the module | Knowband

Enable/Disable:  Click “Enable” to use the Prestashop Dailymotion addon on your site.

Show Video on: You can Select the position of the video.

Product Footer: Select this option if you want to show your product video in the footer of your product(s) page.

Product Right Column: Select this option if you want to show your product video in the Right Column of the product(s) page.

Choose Video Layout: Select the type of the layout or interface you want to show for your product video. Once you select any of the layout options, you will be able to see the preview of the layout.

Product Video Box Title: Give a title for your product video box.

Custom CSS and Custom JS: Modify the Look and feel of the product video on the product page by giving your custom CSS and custom JavaScript.

You can do further configurations of the three video sharing platforms that are implemented on this module.

YouTube Settings:

Click on the YouTube Setting. You will be able to see a window like the image below:
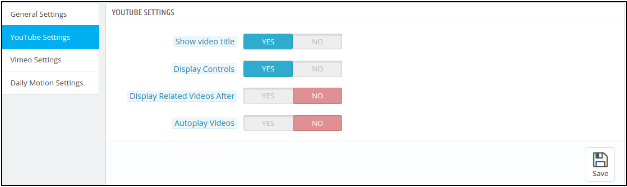
Show Video Title: You can show the video title on the product page by clicking yes.

Display Controls: Choose yes, if you want to show the playback controls on the product video.

Display Related videos: Admin can control whether to show related videos on product page after one video or not.

Auto-play Videos: Select yes to auto-play the video once the product page is visited by a customer.

Vimeo Settings:

Click on Vimeo Setting. You will be able to see a window like the image below:
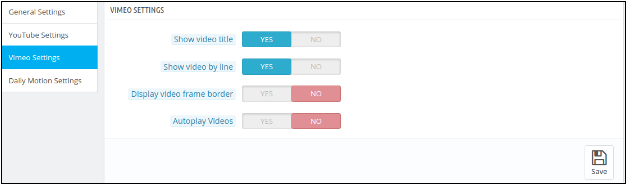
Show Video Title: You can show the video title on the product page by clicking yes.

Show Video By Line: Choose yes, if you want to show all your videos from the particular product line by line.

Display Video Frame Border: Select yes in order to show the border of the video frame.

Auto-play Videos: Select yes to auto-play the video once the product page is visited by a customer.

Configure Daily Motion:

Click on Daily Motion Setting. You will be able to see a window like the image below:
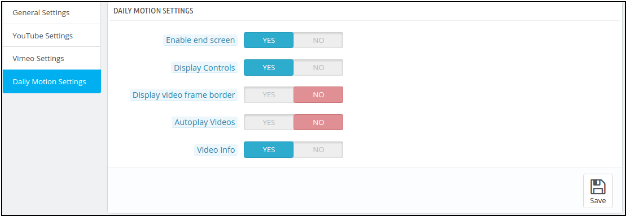
Enable end screen: Select yes to enable the end screen option.

Display Controls: Choose yes to show the playback controls on the video.

Display Video Frame Border: Choose yes, if you want to show the border of the video frame.

Auto-play Videos: Select yes to auto-play the video once the product page is visited by a customer.

Video Info: Choose yes to show the video information on the product video.

What will be the changes on Product Menu?

After the addon installation, a sub menu for the Product Video will be displayed in each product upload or product edit page as shown in the image below:
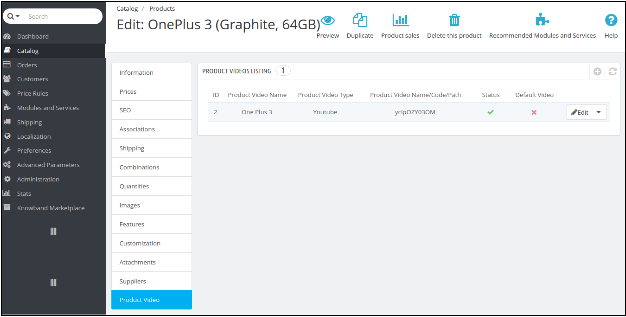
When the admin will go to the “catalog”, select “the products” option on Prestashop admin side and click “Edit” on any product listed there, then the system will open this window. Here the admin can:

1. Edit the already Added product Video(s).

OR

2. Add a video to a new product.

1. When Admin wants to Edit the already Added product Video(s):

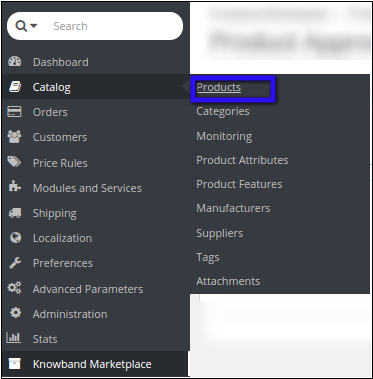
  • Go to the “Catalog”, then select “Products” using the PrestaShop menu tab.
  •  When you click the Products, a new window will open with the list of products.
  • Select the product in which you want to update or add a new video.
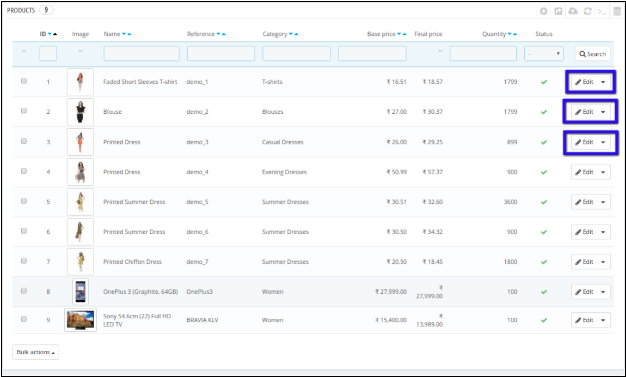
  • Select the Edit option and click on Product Video option given at the bottom of the menu. A list of products will appear. Here, you have to click on the “edit” option to get to the product video upload page.
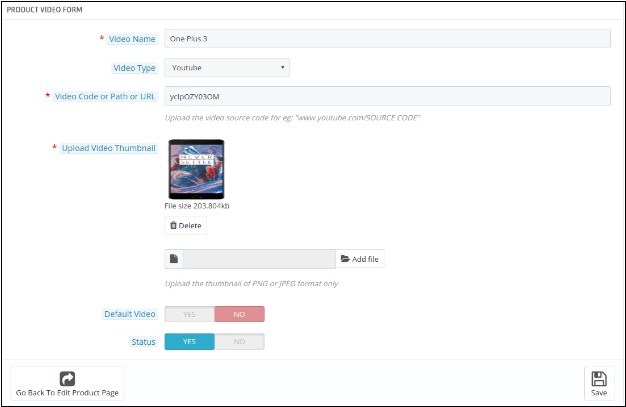
Video Name: Give a name to your product video.

Video Type: Select the type of video you want to attach. (YouTube, Vimeo, or Daily Motion)

Video Code or Path or URL: Give the URL of the video. You can give the YouTube, Vimeo, or Daily Motion link of the video.

Upload Video Thumbnail: Upload a thumbnail that will be shown on the video link on the product page.

Default: You can select the particular by default video which you want to show in case of more than one product videos.

Status: Here, you can enable or disable the video respectively.

NOTE: THIS MODULE IS ALSO COMPATIBLE WITH KNOWEBAND MARKETPLACE MODULE (v1.0.4) TO EDIT OR ADD NEW VIDEOS OF SELLER ADMIN CAN FOLLOW THE FOLLOEING STEPS.

1. Edit the already Added product Video(s).

OR

2. Add a video to a new product.

1. When Admin wants to add a new Video to a new product:

Follow all the steps as in the above section except in Step IV, you have to click on the Add new icon as given below in this screenshot below.

The similar window appears as in Step IV. Fill all the details as specified in the previous section. Refer to the screenshot below for better understanding.
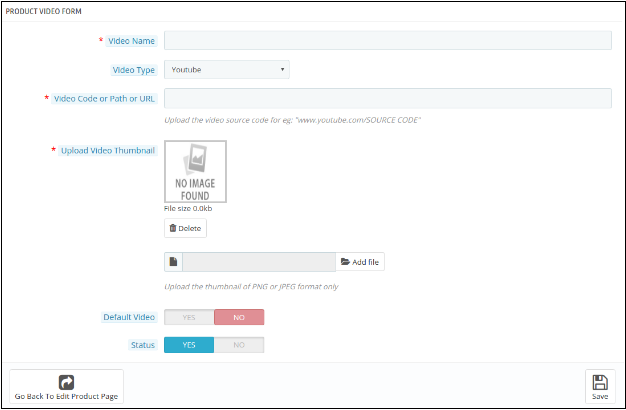
Fill all the details and click Save to save your settings.

2. When Admin wants to Edit the already Added product Video(s):

I. Navigate to Sellers products using the Knowband menu tab
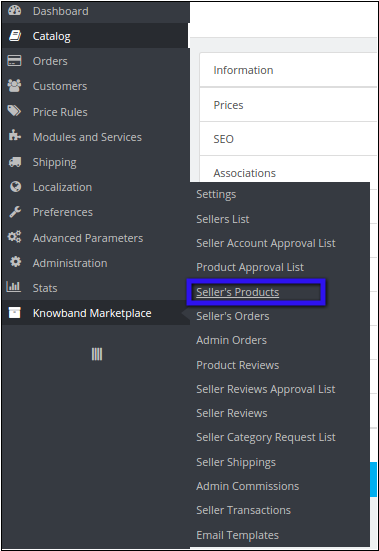
II. After clicking Sellers Products, a new window appears with the list of sellers products.

III. Select the product in which you want to update or add a new video. Click on View menu on the right side of the product listing.

IV. A new window appears where you have to click on Product Video option given at the bottom of the menu. A list of products appears. Here you have to click on “edit” option to get to the product video upload page.

Menu Location

After installation, a menu will be displayed to the seller in the product upload or product edit page as shown in below screen:
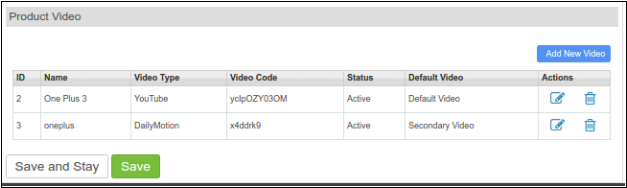
To add a new video the seller has to click on “Add New Video” option. A new Pop-up window appears as given below.
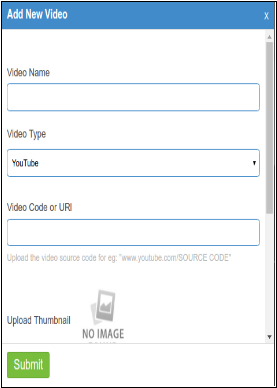
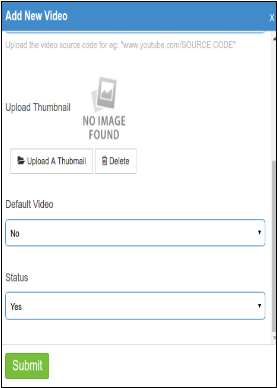
Video Name: The seller needs to give a name to the Product Video.

Video Type: Select the type of video is YouTube, Vimeo, or Daily Motion.

Video Code or URL: Give the link of the product video.

Upload Thumbnail: Upload Thumbnail image to show on the product page.

Default Video: If you are giving multiple Videos on a product, then you need to specify if your current video is to be shown as default video on the product page.

Status: Select the status as YES or NO to enable or disable the video.

Submit: Click submit to save your settings.

Front End Module

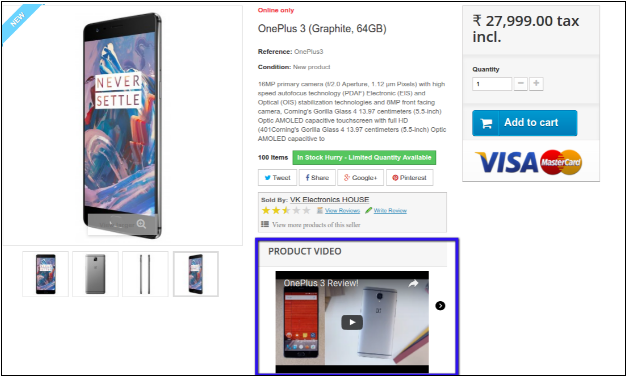
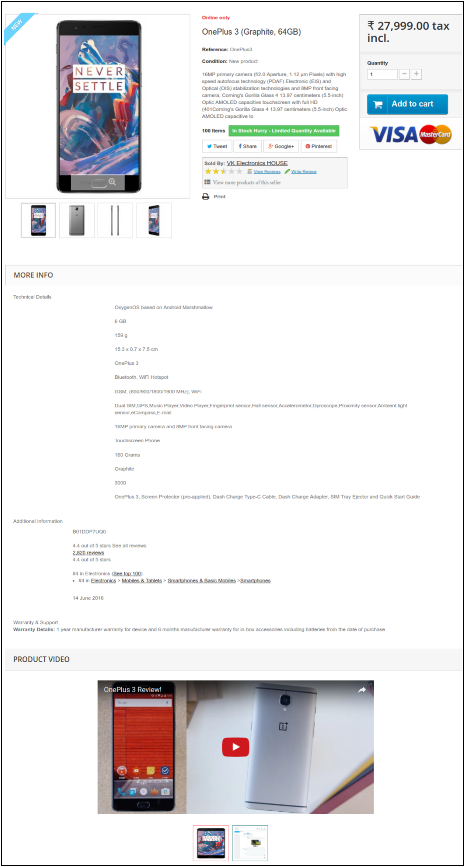
The Product video is shown to customer on a product page in two ways:

1. At the Footer, as shown in the screenshot below.
2. At the Right column of the product page as shown in the screenshot below:
For more Prestashop Addons please visit Knowband.

For more details about this Prestashop video upload Plugin:

Knowband Prestashop product video addon Module Link: https://www.knowband.com/prestashop-product-video

Knowband Prestashop adding video Admin Demo Link: https://ps.knowband.com/demo4/16/admin1/index.php?controller=AdminLogin&token=ffa17b0c72ff8c0ab7cf3e344c5ae4fc&redirect=AdminModules&demo_lang=en

Prestashop youtube addon Front Demo: https://ps.knowband.com/demo4/16/en/blouses/47-celis-mollis-faucibus.html

Prestashop Dailymotion addon Youtube video: https://youtu.be/aAi9ZVUdoxs

Prestashop product video upload Addon Store Link: https://addons.prestashop.com/en/videos-music/23877-knowband-product-video.html

Please contact us at support@knowband.com for any query or custom change request as per your business requirement.

Liked This? You’ll Like These Too


Reduce Shopping Cart Abandonment by Embracing Prestashop Addon

An increase in shopping cart abandonment is certainly giving jitters to numerous e-commerce organizations around the world. They are not only affecting product sales but are also affecting the global reputation of the business organizations. Online shoppers are leaving their shopping cart orders in the middle and are not making a product purchase due to several reasons.

Some of the most common reasons for these shopping cart abandonments are the complex checkout process, insecure online payment method, the appearance of the hidden charges during the final payment option, and other such factors. But, this grave situation is going to change soon due to the emergence of this Prestashop Abandoned Cart plugin. Here are a few reasons that can explain why it is making so much noise in the e-commerce business segment. Additionally, it will help you reduce shopping cart abandonment.

Send manual and auto-triggered reminders

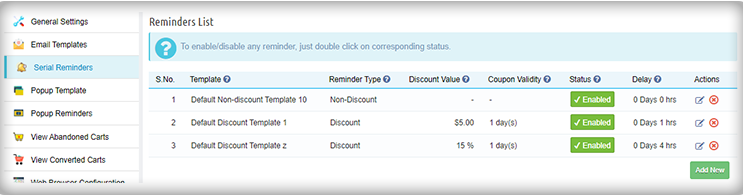
The plugin is capable to send manual as well as auto-triggered reminder emails to customers who have abandoned shopping carts. With the reminder email, you can inform them about the left-out cart including the previous purchases. It is a very useful feature as there are numerous store admins that are not comfortable with CRON configuration, hence they can use the manual email reminder option.

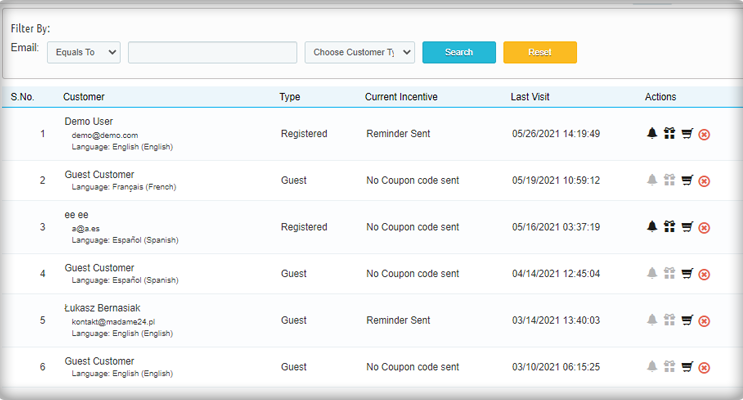
Track abandoned carts of guest customers and existing customers

The Prestashop Abandoned Cart module has a feature through which you can easily capture the email IDs of the guest shoppers from the checkout page. Now you can send reminder emails to guest customers to reduce shopping cart abandonment. So, the module is capable to handle both, guest shopping cart abandonments besides the regular logged-in customers’ shopping cart abandonment.

Customize abandoned cart reminder emails

With this plugin, store admins can easily target their abandoned shopping cart customers effectively by sending personalized reminder email messages in the native language of the customers. Further, selecting different email templates, using email translation features, the addition of dynamic content, and other such tailored email tactics can increase the effectiveness and readability of your reminder emails to a great extent.

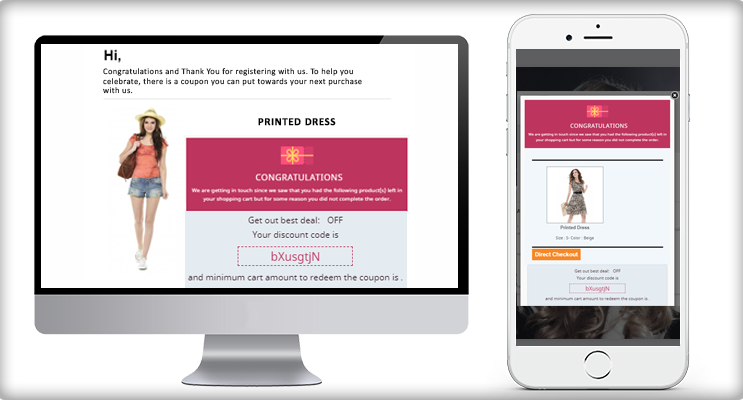
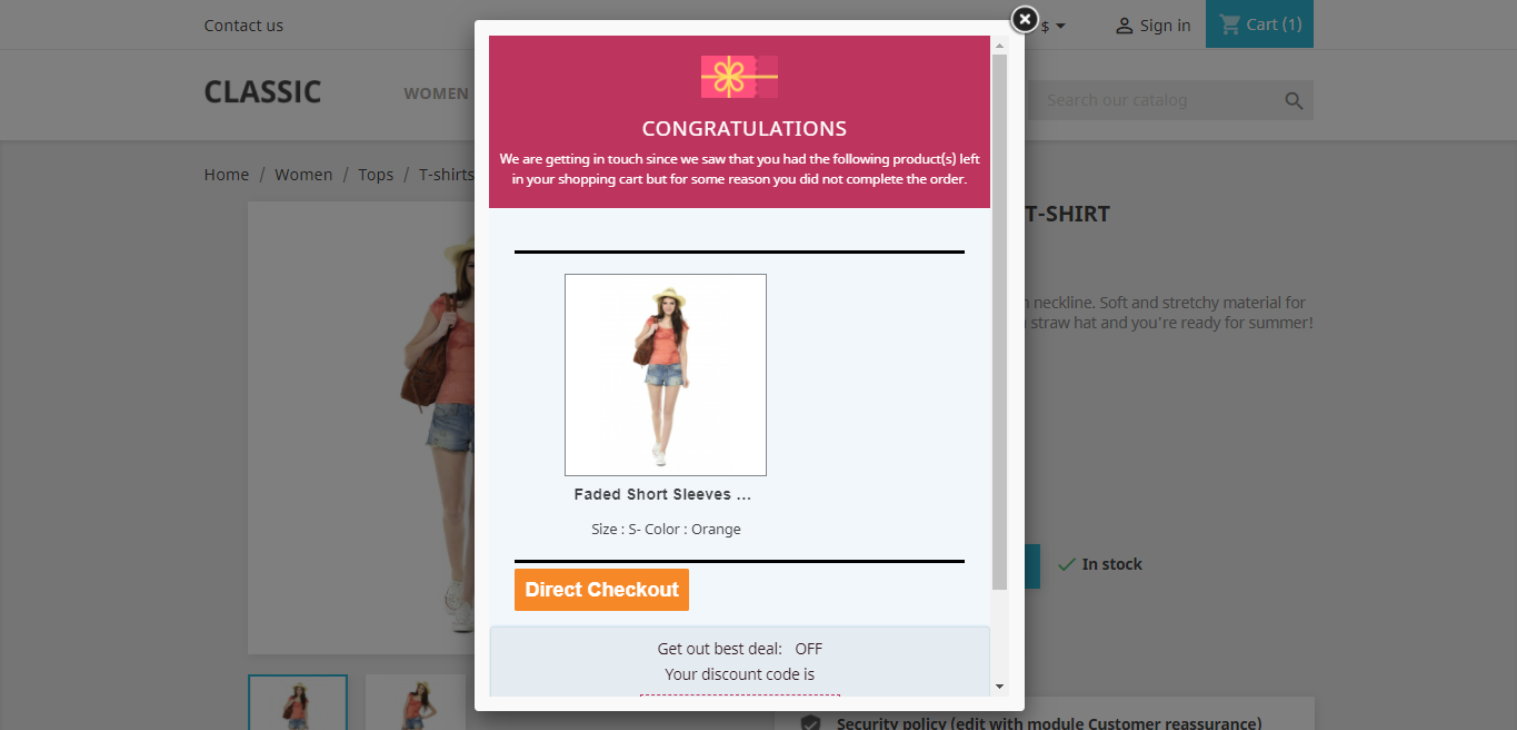
Show abandoned cart pop-ups and send Push notifications

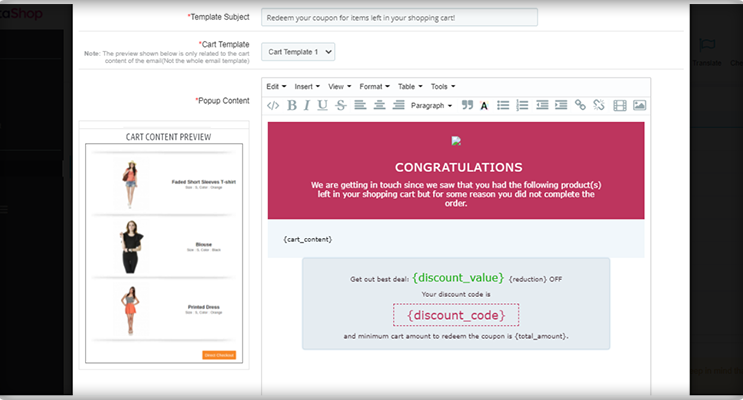
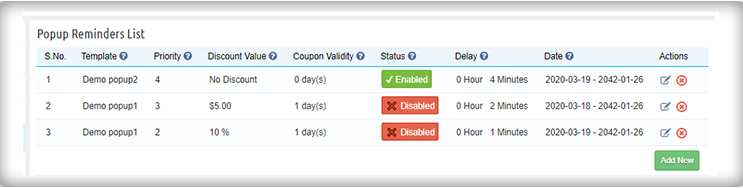
The popup provides a list of abandoned cart items as well as a discount coupon code that consumers can use to save money. You can build and change as many reminder popup templates as you like with the PrestaShop Cart Abandoned Addon. The popup’s content can also be customized by the administrator. The PrestaShop Abandoned Cart module shows a popup to alert customers about the things they left in their carts but did not purchase. When customers are not logged into your store, the PrestaShop admin will give them a web browser alert notification. They can also track whether or not customers have clicked on the notification.

Easy recovery of the abandoned shopping cart

Now, the customers can easily recover their abandoned shopping carts by clicking on a checkout button on reminder emails. Further, any available shopping coupon on the email will automatically be added to the checkout process for increasing the completion rate of the pending abandoned shopping cart orders.

Provides detailed information about the shopping cart abandonment rate

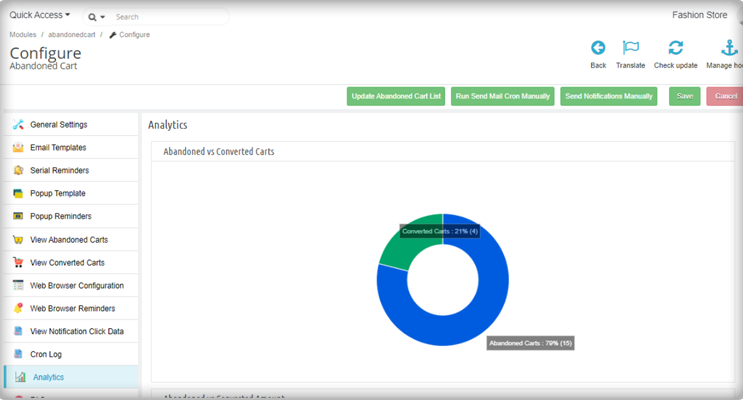
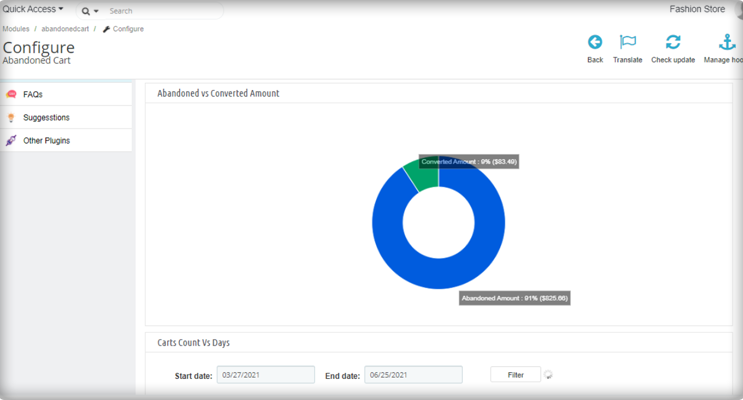
This Prestashop module provides detailed abandoned shopping cart information to store owners in the form of graphs and statistical data. By studying this information, business organizations can easily decide if their efforts are paying desired results or not. They can make necessary changes in their business strategies to reduce the number of shopping cart abandonments.

This Prestashop Abandoned Cart plugin is definitely the true worth of its price and can reduce shopping cart abandonment on your e-commerce store. So, order this great plugin from our e-commerce store www.knowband.com now and improve your conversion rates to a great extent. You would not be disappointed with your purchase at all.

Related Stories:

Ensure Swift and Easy Product Returns with this Prestashop Return Manager Addon

Receiving a product return request from a customer appears like a cumbersome task due to the numerous formalities and complications involved in the whole process. This whole experience becomes an unforgettable nightmare if there are no easy provisions regarding the efficient product return policy.

Due to this increasing problem in the returning policy, customers, as well as the e-commerce organizations, are paying a heavy price and the trust deficit between them is brewing at a faster pace. To simplify the whole return policy and to streamline the return process e-commerce organizations are increasingly adopting Prestashop Return Manager Addon. Here are the few reasons that explain the unlimited fan frenzy about this Prestashop addon.

Easy user-friendly interface-

The module is equally a delight for customers as well due to its easy, user-friendly interface. The updated version of the PrestaShop Return Manager addon has easy to access options. The seller can directly configure the module from the left menu of the admin panel. Also, the product listing details can be checked on the dashboard itself and can be accessed with a single click.

It provides three options to the customers during the product return process which are namely- Get Credit, Replace and Refund. Additionally, order cancellation is also possible with the updated version of the PrestaShop Return Manager addon. Moreover, it provides added functionality to its customers to check the status and history of their product return requests. Customers can choose a reason for their product return request and to show the damaged goods, it allows them to upload the image in the return request form.

Seamless product return policy-

This Prestashop Addon has redefined the whole process of product return to a new level. It is now easier to make a product return request or order cancellation request for any item without involving any terms and conditions and complications. The store owner has the freedom to set the return policy and reasons.

Due to this simplified process, the site admin can easily process the product return request for even a single product or partial order out of a completely given order. Moreover, it has provided the freedom to the admin to approve or deny any product return request if the return request is found to be illegitimate in nature.

In the latest version of PrestaShop Return Manager, the policy time can be calculated after a defined product status. It can be ‘Delivered’, ‘Shipped’, ‘In Process’ etc.

Effective handling of the return product database-

With the help of this Prestashop Return Manager Addon, managing the record of every product return request has become a cakewalk. Every product return request is effectively stored in the store database and is available even after the uninstallation of the module.

The store manager can filter various product listings by sorting them with the customer ID, Return ID, or date. Moreover, the module provides the facility of exporting the completed return request in CSV format. In order to facilitate faster searching of the records, a filter option is provided in the archive list.

Enhanced power to the site admin-

The module has unleashed new powers and flexibility to the site admins and has made them a focal point of the whole product return policy. Merchants can easily process a product return request from the back end of their module on the behalf of their customers.

With PrestaShop Return Manager addon, features like email translation and email template customization are possible so as to make the product return process more simplified and less time-consuming. Now the seller can send a test email, add a customized text message with the order status that can be used in email templates.

In conclusion

So, Prestashop Return Manager Addon has reduced loads of formalities, paperwork, and complications that used to come uninvited with the product return request. It is time to take a long breathe and ease your tensions by purchasing this Prestashop addon from the Knowband store to provide a seamless user experience to customers.

You Might Also Like:

Prestashop Abandoned Cart Email Addon to Notify Customers

Looking for a module to send abandoned cart emails to your customers? Keeping the conversion rate at desired level has become more complex with the grown-up rate of cart abandonment. Where everyone in the B2B eCommerce market is looking for ways to curb the abandoned carts on their sites, optimizing conversion rates seems to be a mega task. Experience drop-down in abandoned cart with Prestashop Abandoned Cart email Addon. This tool is thumb-stopping and will uplift your sales.

Introduction to Prestashop Abandoned Cart email Addon

By sending reminders through emails, push notifications, or a pop-up, you will be able to follow up on lost sales. It will be easier to track prospects who failed to complete the purchase and left their cart abandoned.

PrestaShop Abandoned Cart email addon allows you to send customized discounted and non-discounted follow-up emails. In order to entice customers, the store owners can even craft a promotional discount reminder email.

Show your customers how concerned you are by sending personalized abandoned cart emails, which will help you build strong trust and customer loyalty for your business. Customers will feel appreciated by the fact that you value them.  Trying to resolve things with them will make them feel privileged. With this feeling, they might make a move to return to the cart and purchase from your store.

Top-notch Features of Prestashop Abandoned Cart Email Addon

  • Easy to send recovery emails to bring customers back:

Just a couple of seconds can bring change to your business. The addon has automated cron functionality that auto triggers email and helps you in recovering the sale.

  • Display a pop-up on the screen when they visit the store

With PrestaShop Abandoned Cart email Addon it is now easy to display a reminder pop-up to your visitors who have left something in their cart.

  • Send unlimited push notifications about the abandoned cart

Another way you can send reminders is by push notifications. Send unlimited push notifications to your customers and consider reminding them about the abandoned cart.

  • Enable customers to automatically recover their carts

One-click auto-recovery is another feature that makes the PrestaShop abandoned cart reminder email module unique.

Include shopping cart details in the reminder emailsHow effective will this become when you can send abandoned cart details in your email. A reminder email with cart details increases the chances of conversion.

How to send a reminder email with Prestashop Abandoned Cart email Addon?

From installation to configuration, the PrestaShop abandoned cart plugin is easy to operate. It has end-less features for the admin and gives complete freedom to configure from the back-end. You can restrict the carts to enter the abandoned cart flow for the guest users. The store owner has the option to disable the abandoned cart flow for the guest customers.

Three ways to notify:

  1. Send abandoned cart reminder emails
  2. Display pop-up reminder, and
  3. Send unlimited push notifications

1.      Create Custom email templates

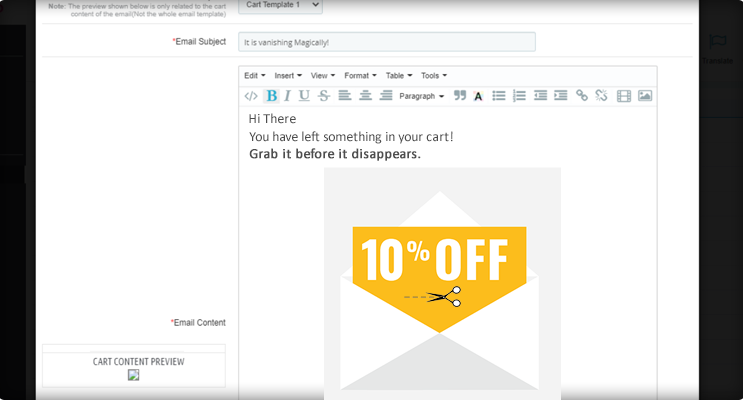
Use PrestaShop abandoned cart email addon to create your own email template by using text, images, HTML, etc. You can add coupon codes for every email and send discounted emails. Option to customize email template by adding customized variables. This includes customer name, product information, discount, and offers.

2.      Personalize abandoned cart pop up

Why lose any chance when you have an option to send an abandoned cart Pop-up? Do it with PrestaShop abandoned cart reminder addon.

3.      Push notifications to recover abandoned carts

Send unlimited push notifications to shoppers who have left their carts after adding products to them.

4.      Track the abandoned carts

You can easily get access to information on abandoned orders and order number.

5.      Decide when to send an alert

Send an alert manually or automatically! You will have full control over reminders, i.e he can decide after how much time delay he wants to send an alert to the customer.

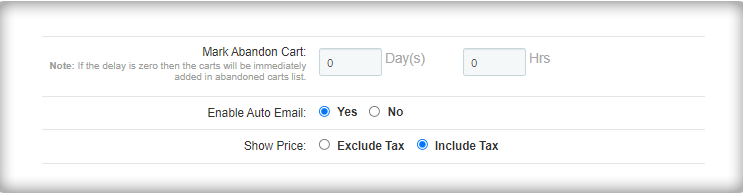
A shopping cart will be assumed as an abandoned cart after a decided time. You can set a time to send emails automatically.

  • Easily manage and view all abandoned cart entries with PrestaShop abandoned cart email addon. You can monitor the performance based on the total number of carts that have been converted to sales and orders.

8. Which platform is working well for the campaign?

  • With the new feature, every customer’s UTM parameter data will be available and can be used to track the email campaign’s progress. Google analytics reports will help you plan your future campaigns.

Why Your Business needs Prestashop Abandoned Cart email Addon?

Prestashop Abandoned Cart module allows you to attract visitors back to your store to complete the checkout process. An abandoned cart alert email is sent to the customer’s account that gives him/her detailed information about pending orders. The functionality of this addon allows you to recover sales from orders that stepped away before checking out.

Benefits of PrestaShop Abandoned Cart email module

  • Increase conversions by effectively recovering lost sales
  • 3-in-1 addon that sends reminder email, push alerts, and pop-up
  • Increase customer loyalty
  • Increase ROI for your business
  • Provides insight into visitor’s shop behavior

With the collected information about the customers, you can implement exceptional marketing strategies to gain profits in your business. Install this module to bring down cart abandonment rates on your store by implementing a strong shopping cart recovery strategy.

Customer Benefits of PrestaShop Abandoned Cart email Addon

  • Customers abandoned their cart when they are in hurry. This causes you a potential seller and they lose their wishlist products. Receiving an email with abandoned cart details reminds them about the left-out cart.
  • As a customer, they get happy when they receive a discounted email. Sometimes they get a bonus after cart abandonment.

Finally,

With PrestaShop abandoned cart email addon, you cannot just optimize your conversion rate, but can also create a strategy to grab lost sales of your eCommerce website. Sending reminder emails to your customers is something that can play for you in the whole game of conversion acquisition, in order to get some serious advantages against your rival sites.

Live Demo (links)

Admin Panel (Back end)

Front end

Buy Product on KnowBand

Buy Product in PrestaShop Addon store

Related Stories:

Prestashop Custom JS And CSS Module- User Manual

Introduction:

Prestashop custom CSS and JS module is a simple module that allows you to style the pages individually. The module allows the site owners to add more features to CSS and JS of the website. You don’t require any FTP access to edit the existing code files. The addon helps you to add the CSS and JS code from the admin panel. The module helps in eliminating the dependency on the developer for making small custom changes and you can simply do that on your own using backend panel of the module.

The Prestashop Custom CSS & JS module allows the Prestashop store admin to change the user interface of any page of the Prestashop website. The Prestashop plugin offers the admin to do the same for mobile devices or desktops or both.

Steps For Installation of Prestashop Custom JS And CSS Addon:

To install this custom CSS and JS Prestashop plugin addon, please follow the following steps:

1. Add addon folder under modules folder of your system.

2. After adding this addon folder, system will list the Prestashop addon on module page under front office feature category as given below:

3. Click on install to install the Prestashop Custom JS And CSS plugin.

Admin Interface

Following features will be provided to admin in this custom CSS Prestashop module:

1. General Settings

2. Advance Settings

General Settings of the custom JS Prestashop module:

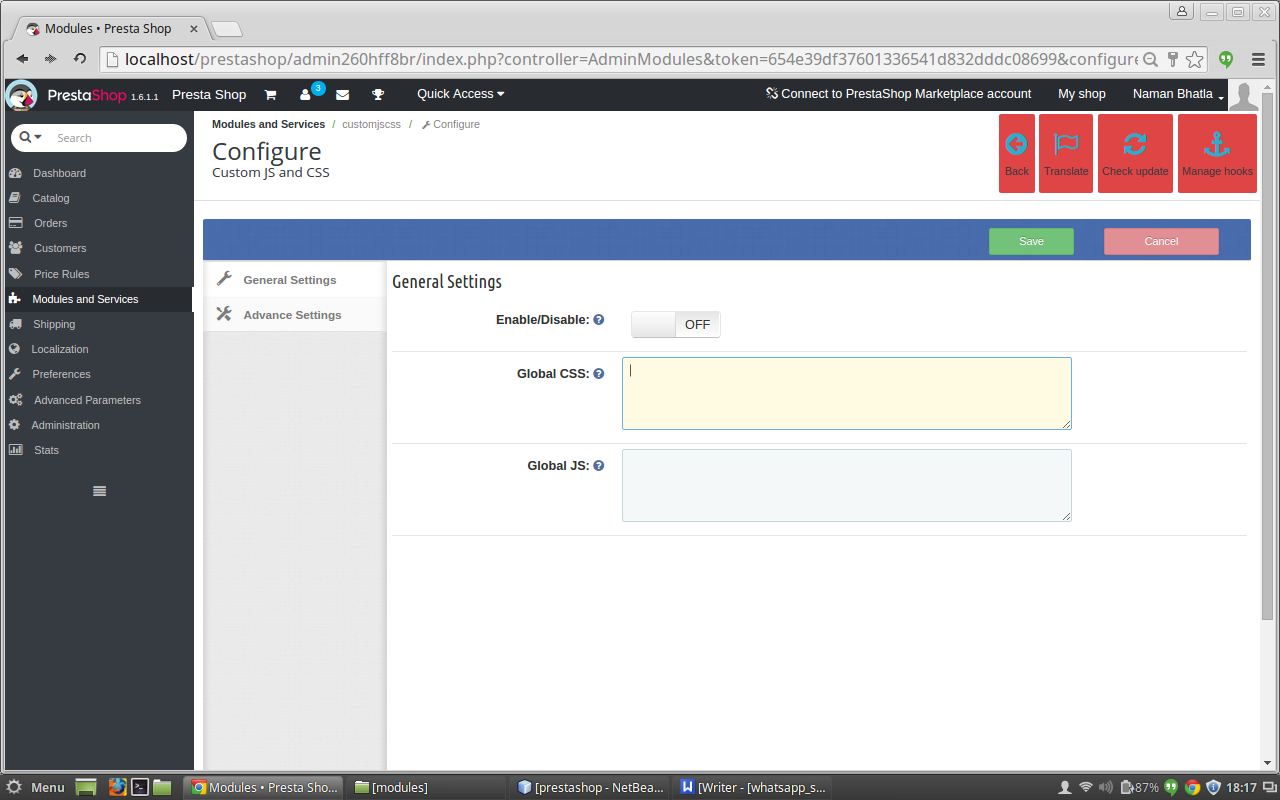
After clicking on configure link of Custom JS and CSS addon on module listing page, system will open general settings tabs by default as shown in screen below:

Fields listed will be filled with some default values

GENERAL SETTINGS TAB DETAILS:

1. Enable/Disable: Initially, this field of custom CSS Prestashop module will be OFF. The admin can enable/disable addon functionality by turning this ON/OFF.
2. Custom CSS: The CSS content which needs to be displayed on every page of the website has to be entered in the text area of custom CSS and JS Prestashop plugin given with field named Custom CSS.
3. Custom JS: The JS content which needs to be displayed on every page of the website has to be entered in the text area of custom JS Prestashop module given with field named Custom JS.

Advance Settings of the custom CSS and JS Prestashop plugin:

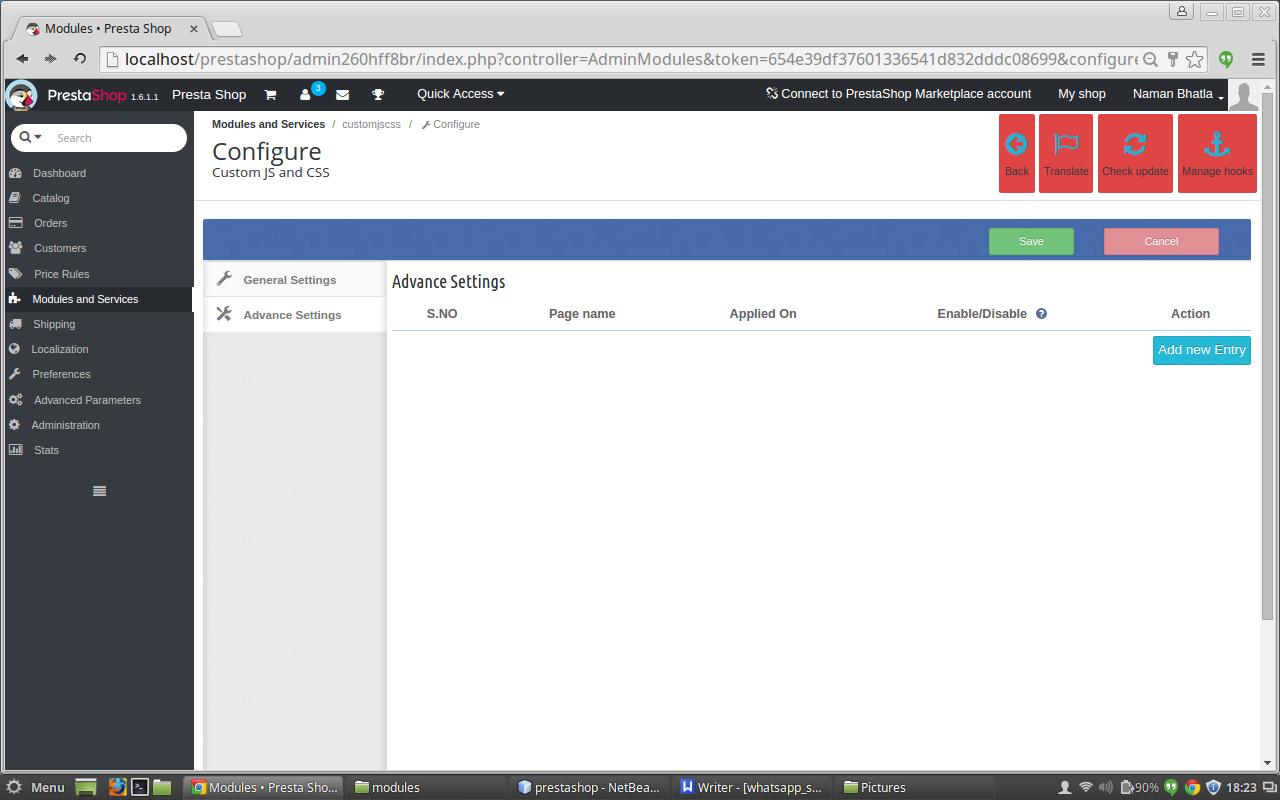
After clicking on the advance settings tab of the custom CSS and JS Prestashop plugin, the below screen appears.

ADVANCE SETTINGS TAB DETAILS:

  • Add new entry: Initially, there will be no entry in the advance tab table of the Prestashop Custom JS module, so click on new entry button to add on the details of the CSS and JS file with the page name and device type on it.
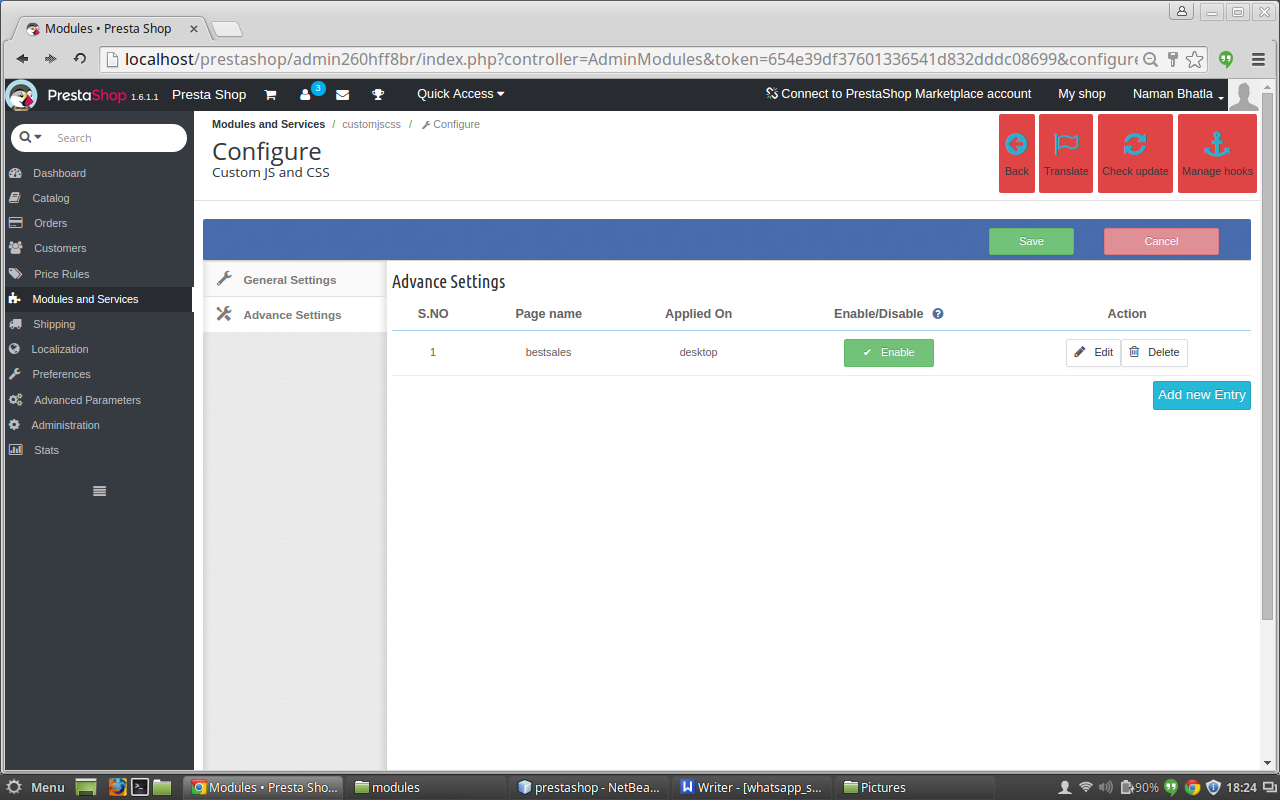
  • Table : When the entry is done then the row is added to the table of the Prestashop custom CSS module with details of the entry such as page name device type enable or disable button and edit and delete button.
  • Enable or Disable button : When the entry is done in the custom CSS Prestashop module, then the user can enable the file added by clicking on the enable button once which changes to the disable button after the user clicks on the enable button now the user can disable the entry by clicking on the disable button which is appearing in the table and the opposite happens .
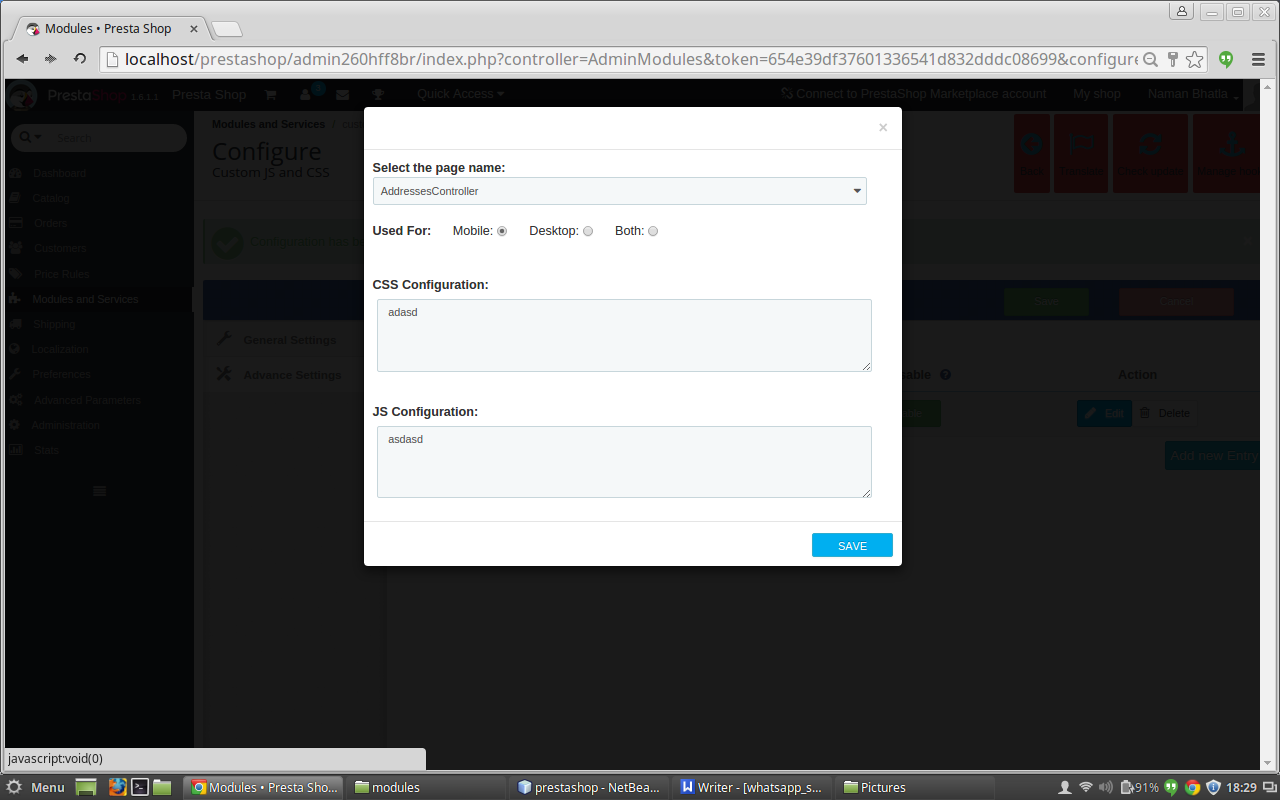
  • Edit : In the action column of the table, there is edit button on clicking on it a pop up appears which is same as the one which appears after we click on the add new entry button. But, the difference is that now the fields of the custom JS Prestashop module are filled with all the details which were entered earlier by the user in that row. Now the user can edit the entries of the custom CSS and JS Prestashop plugin which were done in the files or can change the device type or can add the entry to the page name.
  • Delete : In the action column of the table, there is delete button on clicking on this button of the Prestashop Custom JS module, we can delete the entry which were made in that row.
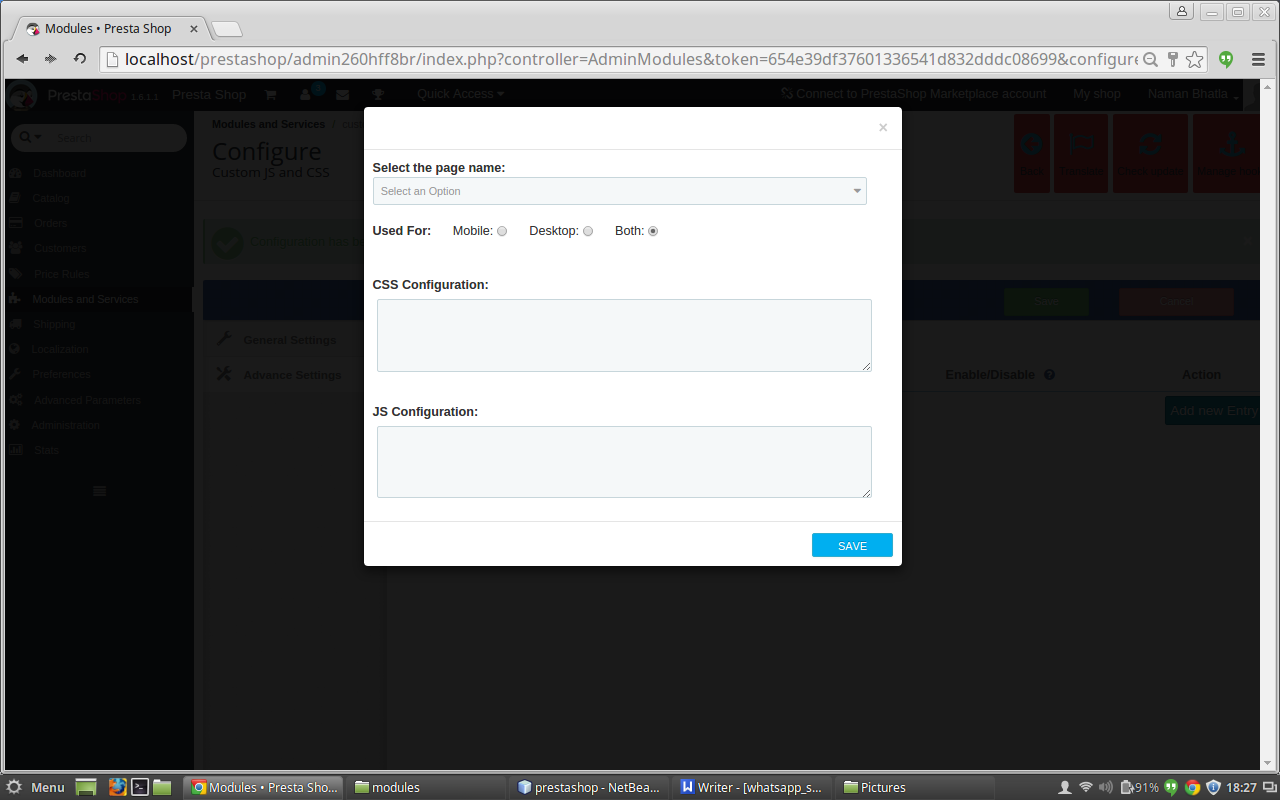
  • Interface box: This is the box which will appear after clicking on the add new button if we have to add a new entry to the advance settings table. It will also appear if we will click on the edit button after the entry is done but the difference is that now the fields in thepop up box will be field with the details of that particular row to which the edit button belongs. Fields in the Pop up box are :

A. Select the page drop down: The first field of the ‘Add New’ field is a drop down menu which has all the names of the pages which are currently available in Prestashop. You can select the page in which the entry is to be done.
B. Choose Device Type: This field of Prestashop custom CSS contains of three radio buttons Mobile, Desktop and both. You can select the type of device for which you are going to add the css and js.
C. CSS configuration: In this text area of the Prestashop plugin by Knowband, you have to add the css code which has to added on the page which you have selected earlier.
D. JS configuration: In this text area of the custom CSS Prestashop module, you have to add the js code which has to added on the page which you have selected earlier.

INTERFACE AFTER CLICKING ON ADD NEW ENTRY

AFTER ADDING THE ENTRY

INTERFACE AFTER CLICKING ON EDIT BUTTON

Front End Module

After enabling the Prestashop Custom JS plugin by Knowband, the front-end user will see the CSS and JS which are added globally to the website and the user will also see the CSS and JS which is added to that particular page only in the advance settings tab.

The CUSTOM CSS and JS at the front-end appears as follows:

Recommendations

Refresh home page of your store every time you enable/disable plugin. If plugin is not working after installation then please check permissions on modules folder. The folder should be writable. Please make the folder permission to 755.

We hope that we have covered all the concerns regarding the installation and product guide of this Prestashop Addon. You should also check our blog on Give Multiple Reasons to your Customers for Completing their Online Payment Process – Here

Watch the Video Tutorial here:

Module Link: https://www.knowband.com/prestashop-custom-css-and-js
User Manual: https://www.knowband.com/blog/user-manual/prestashop-custom-js-and-css/
Admin Demo: https://ps.knowband.com/demo1/16/admin1/index.php?controller=AdminLogin&token=aea1bb3fb1bab860c86c4db00ce5949e&redirect=AdminModules&demo_lang=en
Front Demo: https://ps.knowband.com/demo1/16/en/

Buy this addon now >> Knowband – Custom CSS and JS – PrestaShop Addons