How to Improve eCommerce Site Search?

One of the important areas in an eCommerce website as far as the user experience is concerned is the site search. Any visitor who lands on your website and wants to buy a product will simply go the search bar, type his search query and get to the result.

This is why the search bar is designed so that a user does not have to take the long route (Going to the category, subcategories, brand type, etc). A search bar makes the task effortless.

To make the search experience better on your website, consider the following site search best practices.

1. Make the Search Bar visible

Whether a user is on the home page, product page or any page, the search box should probably follow users all the way throughout their journey (for most of the pages if not for all) so that they do not have to return to the home page to conduct the search and can make it from the page they are present on.

Secondly, make the search bar visible so that it is easy to spot at once. The navigation bar area is considered to be the perfect place for a search bar. Moreover, it should have a good design and good color. It shouldn’t look untidy.

2. Use Auto-suggest
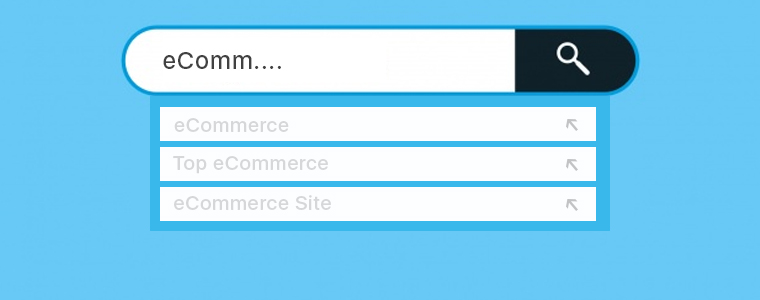
This might seem obvious but is the most important one. Auto-suggest is one of the essential features of a perfectly optimized search bar, and is also referred to as “search as you type.”

Your search box should be smart enough to understand a user’s search query as soon as they start typing and hence should suggest the relevant results. It would be even better if the search results display the product thumbnail as well.

Auto-complete save a user’s time by reducing their efforts.

3. A good length search bar

The search bar should not be too long and not too short either. It should have a decent length such that it is able to cover a visitor’s long search query as well. If the search bar is short, the query would not be visible and can often lead to an incorrect search.

Allow users to check what they have typed so that typing errors do not occur.

4. Let users know what they can search for

It is seen on many websites that search results are displayed only for searches made under specific categories. I was once on a website that provides HD wallpapers, so while I was about to search the wallpaper I needed, the search box had a text that said “Search your device or resolution” which had cleared that the search bar is optimized to search only for the device and the resolution, and not anything else.

So put a text on your search bar to inform users what types of searches they can make. The text should disappear as soon as the user starts typing.

5. Search bar should understand Synonyms

A product can be called by many names, for example, earphones, headphones, headset, people usually call them the same. Same is the case with blazer, coat, and suit. So, if a user is searching with any of these terms, they should get the results that they are expecting.

6. Search bar should understand Abbreviations and Misspellings

A product can have an abbreviation and it is very likely that the customers would search for that product with its abbreviation instead of typing the whole search query.

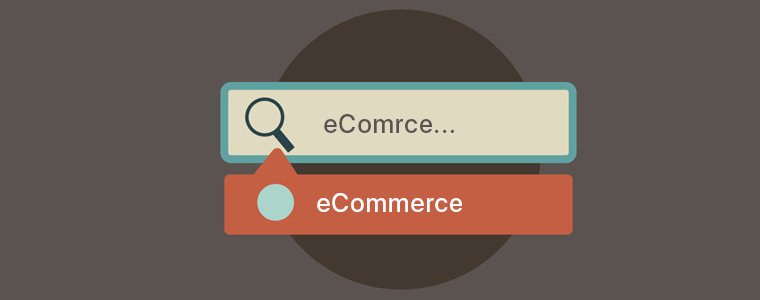
Besides, make your search bar understand misspellings as well. It can happen very often that the user makes a mistake while typing his search query. The search bar mechanism should be able to understand what that query meant and what results should be displayed to the user based on it.
7. Let customers choose the way results are displayed

The job of the search bar is just to provide relevant results to the users. Once the results are displayed, it should be left to the user how he wants to organize the results. This is where the role of Sorting and Filtering comes into play.

Sorting allows the users to arrange results in the sequence they want, which can be based on the product price (low to high and high to low), popularity, freshness, etc.

Filtering, on the other hand, lets users filter the search results based on many things such as brand, color, ratings, etc.

8. Do not display Zero Results Pages

As they say, something is better than nothing, it applies in this case too. If the search bar is not able to understand the query, avoid displaying zero results.

You can create a text for such happenings, for example, you can display a message that says- “Oops, we could not search what you were looking for”.

But along with this message, you can display some of your bestsellers or the recently launched items just to avoid the blank page.

9. Add the option of Image Search

Many eCommerce websites including the eCommerce giant Amazon allow users to conduct image search. This comes as a very helpful feature for the users as it helps them look for the exact desired product. For example, if a user sees a photo of a shirt which he liked a lot and wants a similar item, he can simply make an image search on the store to check if that product is available on your website.

You can add an image search option on your website with the help of Image search module which is available for PrestaShop and OpenCart.

10. Voice Search

Another way to improve your eCommerce website search is by adding the voice search option on your website. With the growing popularity of Alexa, Siri, Google Assistant, people have got used to of voice-search.

Providing your store visitors with the option to make voice-based search not only enhances the user experience but also makes their shopping journey convenient as it helps them to get to the desired product much quicker.

Get the voice search module for PrestaShop and Magento.

Final Thoughts

These are some of the common and popular eCommerce site search best practices. Site search is important not only from the point of improving user experience but has a significant impact on your conversions.

If you are able to guide your users to the right product, purchasing would be easy for them.

PrestaShop and OpenCart store merchants can try out Search Auto Suggest and Search more module respectively, to enhance the search functionality on their website.

Different Types of Payment Methods in eCommerce

Any type of payment that is done online using an electronic medium is what we call as an eCommerce payment system or online payment system.

When starting your online business, it is important to know what kind of payment options you are going to set up on your website/store.

You will have a number of options to choose from, but what’s suited best for your business, for your region, what are the trending payment options, is where you will have to smartly consider your choice.

Today, customers also demand multiple payment options on an eCommerce website so that they can choose their desired payment mode.

Let’s take a look at the different types of payment methods in eCommerce. The list will consider some popular eCommerce payment system (apart from COD) and help you in identifying what would be ideal for your business.

1. Credit Cards

Credit Card is the most popular form of online transactions and is considered a global payment solution.

It is the default payment option on a majority of eCommerce websites. Besides, it is very convenient. A customer just needs to enter some card details like the card number, card expiry date and the card verification value; abbreviated as CVV.

This payment option is supported by every eCommerce platform.

2. Debit Cards

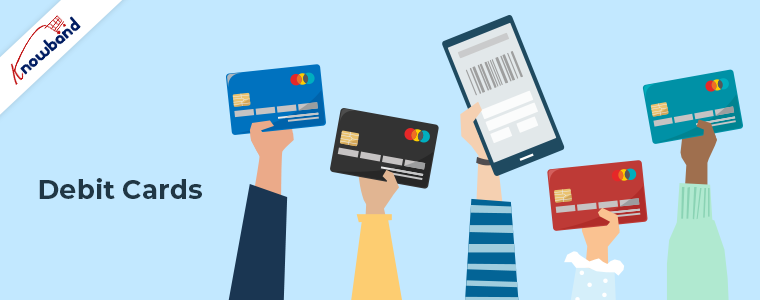
Similar to Credit Card, Debit Card is also a widely accepted online payment method and highly popular in India. This payment mode is ideal for those customers who prefer to spend within their financial limits.

A debit card allows customers to pay with their saved money in their bank account, unlike a credit card where the amount is billed and need to be paid at the end of the billing cycle.

3. Netbanking

Netbanking, also referred to as Internet Banking and Online Banking, is also amongst the widely used eCommerce payment methods.

The process of payment is similar to a debit card where the amount debits instantly from the customer’s bank account.

The only difference is that the customers do not require entering their card details. They just need to register for the netbanking facility with their bank.

Once registered, they can choose the netbanking option on the payment page and make the payment by specifying the netbanking id/customer id and the pin.

4. Digital Wallets

Digital wallets or e-wallets allow customers to pay without having to carry their card. A customer just needs to link his/her bank account to the e-wallet once, following which the details are stored and remain secure inside that wallet.

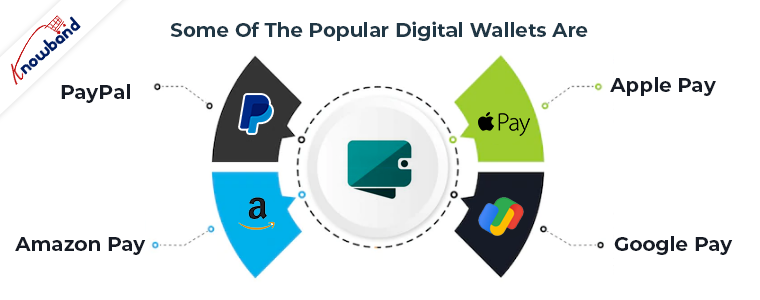
This eliminates the need to enter the card details every single time, hence encouraging a quick checkout. Some of the popular digital wallets are-

A. PayPal

Having nearly 325 million active accounts worldwide as of the first quarter of 2020, PayPal is one of the biggest digital wallets. It is reported that over 17 million businesses have integrated PayPal on their payment page and has over 80% higher conversion rate than other digital wallets.

B. Amazon Pay

Amazon launched its own online payment service called Amazon Pay to compete against the other digital wallets. This allows Amazon customers to pay on the platform using the Amazon pay wallet.

Many offline and online merchants have linked their business with Amazon Pay.

C. Apple Pay

Similar to Amazon Pay, Apple also has its own payment portal called Apple Pay that allows iOS users to conduct transactions on eCommerce websites accepting Apple Pay.

There were approximately 441 million Apple Pay users worldwide as of September 2019, reports Statista.

D. Google Pay

Another online payment and digital wallet in the competition race is Google Pay. It is expected to cross the 100 million users mark in 2020.

Google Pay is a highly secure and convenient online payment platform with some exciting rewards for both the merchants and customers on transactions.

5. Mobile Payment

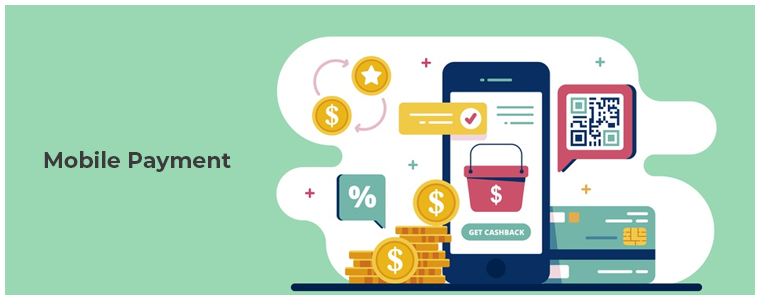
Mobile payment offers an easy and quick solution for customers to make a payment via their smartphones. All a customer needs is a mobile payment app, like Paytm which can be downloaded from the play store.

After that, they need to link their bank account with that app, following which they can add money to their wallet and pay, or make the payment directly from their bank account.

When a customer chooses to pay using that app on an eCommerce website, a payment request is sent to that app after approval of which, the payment is made.

E-commerce Payment Gateways

To make these payment methods work, you will have to set up some eCommerce payment gateways on your website.

A payment gateway is required to process the online transactions, i.e. allowing merchants to accept payments on their platform.

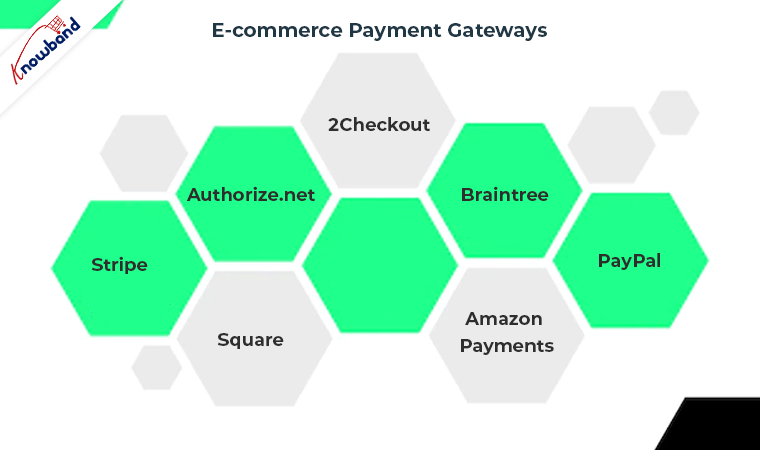
Some of the best eCommerce payment gateways are-

1. Stripe

2. PayPal

3. Authorize.net

4. Square

5. 2Checkout

6. Braintree

7. Amazon Payments

The more payment options you have on your website, the more comfortable customers feel while checking out. Besides, the cart abandonment rate also drops by a significant margin.

And with the popularity of mobile apps, mobile payments and the role of digital wallets becomes vital.

We, at Knowband, offer the One Page Checkout module and the Mobile App Builder that allow you to integrate multiple eCommerce payment methods on the website as well as the mobile app.

Know more about One page checkout here:


The list of the supported payment methods includes PayPal, Advanced Paypal, Authorize.net, Boleto, PayU, Stripe, Sage Pay, Mobilpay, Ogone, Pago Facil, ePay, ccAvenue, Quickpay, Firstdata, Paysera, Braintree, Moneybookers, Mercado Pago, Redsys, 2Checkout.

Final Thoughts

The list of eCommerce payment methods is long. Find out which are beneficial for your business and then integrate them on your website.

Having multiple payment options on your checkout page is a great away to boost your eCommerce sales.

For any assistance regarding the module, you can contact us at support@knowband.com

8 Things that make a Perfect Mobile Product Page

A perfect mobile website requires much more than just responsive design. From your home page to the checkout page, every step needs to be optimized so that your mobile visitors find the best of experience on your eCommerce website.

In this write-up, our focus would be on product pages. What makes a perfect mobile product page? Let’s find out.

Essentials for a Perfect Mobile Product Page

To get the best results from your mobile product page, which means getting more clicks and leading customers towards the checkout page, consider the following points.

1. Product Images

Starting with the most obvious ones, photos hold the highest importance on a product page as far as the conversions are concerned.

But when browsing through mobile, photos are either not arranged properly or take too much time to load. I know it is important to use high-quality pictures but if the picture size is too heavy, loading will take time and mobile users will have to be patient to view all photos, especially when the Internet connection is poor. So, ensure that images are quick to load in mobile devices.

Secondly, add a swipe left/right gesture to allow customers to view all the related pictures. This is indicated by the dots below the main picture.

You can also choose whether you want to display the product name first and then the product image or vice-versa. In my opinion, you should go with the latter.

2. Flexible Zoom Functionality

Many eCommerce websites have “Tap to zoom” feature on product pages, represented by a magnifying glass with +/- symbol inside. This allows shoppers to zoom in and zoom out the image by tapping on the microscope.

You find also find the option where you can pinch-in and pinch-out for the zooming purpose. In some websites, you can zoom by double-tapping the product image.

So, if you want to design a perfect mobile product page, these sorts of zooming features can enhance your product pages.

3. Short and crisp Product Description

You do not get much space on the mobile to display the complete product description. I mean you can but it will look cluttered. So try to keep the product description as short as possible but at the same time, it should highlight the important points of the product.

Try to keep it within 200 words.

4. Display Product Ratings right below the product name

When visitors land on a product page, they should be straight away presented with the product ratings. It is the best way to introduce people to the product quality before they get to know the complete product information.

E-commerce giant Amazon displays the product ratings right below the product name. In fact, not only on the product page, but they highlight the ratings on the product listing page as well.

5. Q&A Section

A mobile product page should have a Q&A section to help shoppers with their concerns regarding the product. This section consists of questions that are being asked previously by the people who thought to purchase this. So if a visitor has some questions, he or she can visit the Q&A section and they would probably find their query already being asked by someone else.

This saves a prospect’s time as he/she would not have to reach out to the customer support to get their queries resolved. And if the visitor doesn’t find the answer they were looking for, they can add a new question to be answered by the seller.

6. Reviews

Product reviews should be properly organized on mobile devices otherwise they will look cluttered. When a visitor scrolls down on the product page, he should be presented with product reviews so that he can know the experience of the past customers and identify the pros and cons of the product. By default, you should display the positive reviews first.

7. Product Availability Check

One of the important points to consider for a perfect mobile product page is to have a product availability checker option near the “Add to Cart” button so that the potential customers can confirm whether the product is available for delivery at their location or not before they head towards the checkout page.

Knowband also provides the product availability checker module for PrestaShop, OpenCart, and Magento platform.

8. Similar Products

At the end of a product page, there should be a “Related Products” section to encourage cross-selling and Upselling. And it since it would take up too much space to display related products vertically; you can display them in the carousel mode.

Final Thoughts

A perfect mobile product page requires everything to be smooth, organized and perfectly optimized. Your product pages play a crucial role in your mobile conversions.

Taking a quick look at the mentioned points for an optimized mobile product page, you should use quality images, zooming flexibility, short product description, product ratings, product reviews, Q&A section, product availability checker and related products section.

One thing to pay attention to mobile product pages is the back button functionality. It should bring a user to the previous page and not cancel the entire session.

Benefits of Having Live Chat Option on Your eCommerce Website

“This write-up primarily covers the benefits of offering live chat support option to your customers. Alongside, I have also discussed the importance of having outstanding customer service and the different types of customer services that online businesses offer.”

Customers support is the backbone of a business. If it breaks, the business will collapse. Any eCommerce business that has made it to the top today, its excellent customer service is amongst those key factors that led to their rise and popularity in the market.

The importance of customer service can be understood by the fact that 90% of the Americans consider customer service a strong point to decide whether they want to do business with a company or not, reports American Express. The same source reports that consumers are willing to spend 17% more on a company that offers outstanding customer service.

Another report by the HubSpot Research says that 93% of customers are likely to make repeat purchases with companies that offer excellent customer service.

Different Types of Customer Service

Online businesses provide customers with multiple options to get their queries revolved. Some of the common and widely used customer service options offered by eCommerce businesses to address customers’ concerns are-

1. Email Support

From a small scale business to large scale business, all provide email support. It is the most basic form of customer support that you will find not only on eCommerce websites but traditional retail businesses also have their official email address where customers can send their query.

2. Call Support

Most of the businesses have a customer support number through which users can call the customer service representatives and get the resolutions for their concerns over the call.

When choosing between email and call support, customers usually opt for the latter as it is the best way to make the representative understand your query as well as your emotions. Moreover, it’s faster to express a problem verbally than writing it in long paragraphs in an email. Customers do not have that much time and patience.

3. Live Chat Support

If there is anything that customers are more likely to prefer over email and call, it is the live chat support option, the reason being, it allows them to communicate with the customer support staff in real-time. Besides, the communication over live chat is quick and provides a friendly feeling.

Today, it has become an integral part of a successful eCommerce website.

4. Social Media Support

Social media is not just an entertainment platform anymore, it has become a medium for customers to get their queries resolved. The reason why people raise their query on social media is social media platforms like Facebook and Twitter have a huge user count. So if any customer points out a mistake committed by a brand or if they are unsatisfied with something, they are quick to take out their frustration in the comment section or by tweeting about it.

That is why many businesses have hired social media executives specifically to track customer queries on social media platforms.

5. FAQ Pages

You may or may not call this exactly a customer support option, but the truth is, FAQ pages are very helpful in solving your website visitors’ queries. FAQ pages contain some of the obvious and expected questions (along with the answers) that can arise in a user’s mind. Thus, they are created so that the doubts which a user wants to clear over the call or email or live chat are cleared beforehand, on the FAQ page.

Benefits of offering Live Chat Support

Among all the customer support options, live chat currently beats the rest and is the demand of customers today. The first thing that the website visitors look for when they have any query is the live chat option. You would have also noticed that a live chat popup appears as soon as you navigate to some pages. This is to limit a visitor’s efforts in searching for the chat option and hence it prompts automatically after some time.

In many eCommerce websites, you will generally find the live chat option visible all the time at the extreme bottom right of the screen.

Let’s now take a look at the benefits of having the live chat support option on your website and how useful can it be for your business.

1. Cost-Effective

Live chat is comparatively less expensive than having telephone support. Data collected by Forrester Research shows that live chat is around 17 to 30% cheaper than a phone call.

Another reason for this is that you can talk to multiple customers at a time which, in the case of a phone call, is not possible. Phone support allows addressing only one customer at a time.

2. Increases Conversions

The best thing about implementing a live chat option on your website is that it can boost up your conversions. When customers are on the checkout page, they can get stuck in some step and may require some help with it.

With the live chat option, your prospects can get a quick resolution to their query and complete the purchase right at that moment. This could, otherwise, led to cart abandonment.

Studies suggest that live chat can 3x more conversions.

3. Live Chat is Convenient

On one hand, where you would be required to explain everything on a single email or reach out to the customer care executive via call, live chat, on the other hand, is time-saving and can be initiated quickly with a single “Hi”.

Moreover, live chat encourages multi-tasking means customers can do some other work while they wait for the chat support representative to reply.

4. Improves Customer Loyalty

A report suggests that around 73% of the customers are loyal to a brand because of the friendly customer service representatives. It is also one of the major reasons for their liking towards that part.

There is nothing better than a happy and satisfied customer. If you help customers with the exact resolution they need, their loyalty towards your brand will increase automatically. Customers feel appreciated when you understand their query and are quick to address their concerns.

Related: 8 Ways to Build Customer Trust and Loyalty

5. Competitive Edge

The concept of live chat is still new to many businesses. You would not find the live chat option on every second website. 3/10 eCommerce websites would be providing the live chat option to their customers.

So, live chat gives you a competitive advantage and provides you with an opportunity to be ahead of your competitors and excel at a better rate than them. Use this to your benefit. Offer a live chat experience to your customers and focus their shift from your competitors towards your brand.

6. Live Chat Encourages Friendly Communication

Live chat feels like you are talking to a friend, and hence it creates a friendly environment. Emails or calls seem a bit professional, and there is a bit of seriousness involved.

With customers being familiar with chatting on WhatsApp and Facebook Messenger, the live chat option gives a similar feel. You can even use emojis to develop a friendly feeling.

Final Thoughts

Setting up a live chat support option on your eCommerce website will not only make a quick and convenient medium to address the concerns of your customers but will also give you an edge over your competitors.

I have compiled a list of some of the best live chat support software. The list includes Olark, SnapEngage, tawk.to, Chatra, PureChat, Userlike and Zendesk. Choose your desired software and start offering the live chat option.

Are you satisfied with the information that has been provided in this write-up? If you enjoyed reading the benefits of live chat, do drop a comment below.

5 Key Elements for a Perfect eCommerce UI Design

User Interface or the UI is an important aspect in the eCommerce space. It speaks about the design and performance of your website and has a major role to play in attracting more visitors and improving user experience.

What is the User Interface? Which things contribute to a perfect eCommerce UI design? What are eCommerce UI best practices? How do I improve the UI of my website? If you have these sorts of questions running through your mind, I will try to make sure that you have a clear answer to them by the time you reach the end of this post.

What is eCommerce UI?

In simple terms, the User Interface, denoted by UI, is the visual appearance of a website or the mobile app.  It illustrates how the information is displayed to the users and how they interact with it.

The process of creating interfaces to enhance usability is what we call as eCommerce UI design. And this is what the eCommerce UI designers do. They keep the focus on the looks and style and ensure that the user experience (UX) is not compromised.

UI and UX are correlated. As I said, the primary purpose of a great UI is to improve the user experience so better the UI, better the UX.

When it comes to eCommerce UI, it’s all about providing visitors with a user-friendly layout, intuitive navigation bar, optimized product pages and checkout page, or whatever it may require to offer them a pleasant online shopping experience.

eCommerce UI Best Practices

The design of your web pages is an invaluable asset to improve your website’s performance and has a significant impact on eCommerce conversions. An appealing UI design is the first step towards achieving higher sales.

I mean you cannot turn a user into a customer straight away. No user will purchase in the very first time he or she enters your website. Initially, the UI will play the part and it will be the first thing that will draw their attention. How your website behaves, how easy it is to navigate, how efficient it is, these things will decide their interest towards your website or brand.

When the UI gets better, customer satisfaction highly increases. Let’s take a look at the 5 key elements that will help you achieve a perfect eCommerce UI design.

1. Site Navigation

The first thing to consider when you are thinking of a better user interface is to offer easy navigation throughout your website. No matter at which page the user is present, there should not be any hindrance while browsing through different web pages. He/she should be able to reach the desired page without any hassle. The menu bar should function properly will all the options well organized.

Besides, you should have a clean and appealing navigation bar with your important categories and an easy to spot search bar. Include sub-categories in the drop-down list and they should be displayed automatically as soon as the cursor hovers over the category.

2. Informative Home Page

The home page of a website is probably the most looked area for an eCommerce UI designer. It is the first thing that will be displayed to the users when they land on your website. This can either create curiosity about your brand or make them bounce off instantly.

Your home page should immediately highlight what your brand is about. It should highlight the services that you provide, business goals, your brand partners, testimonials, link to social media channels, your best sellers, etc.

3. Make Your Product Pages Stand Out

A well-designed product page highly attracts users. If it looks amazing, it will not only remove uncertainties regarding the product but will create higher chances of the user making a purchase.

How to improve the UI of your product pages?

First of all, it should not be cluttered. Secondly, you should enable the pinch-in and pinch-out functionality to zoom in and zoom out the product images, respectively. Alongside, you should add product videos, banners, size chart and a product reviews section. Displaying product images in carousel mode is also an ideal option.

4. Call-To-Action

E-commerce websites have different call-to-action button at different web pages, for example, “Add to Cart” on the product page, “Buy Now” or “Place Order” on the checkout page. The CTAs should be persuasive. They should encourage users to take action. The font and the color of the CTA button matter a lot from the user interface point of view.

5. User-Friendly Checkout

The checkout page is arguably the most important page on an eCommerce website. If this isn’t designed well, this will hamper the checkout experience of the users and will eventually lead to cart abandonment.

Try making the checkout process as simplified as you can. Reduce the number of steps. You can also go for One Page Checkout.

Final Thoughts

A great UI design not only ensures a good user experience but also reduces the bounce rate to a significant level. People spend more time on your website, they interact more with your products which ultimately builds customer loyalty.

What are your thoughts on a perfect eCommerce UI design?

Magento 2 Loyalty Points | Reward Points Extension

Magento 2 Loyalty Points is a loyalty program extension that lets you reward users with some loyalty points on successful signups and order placement (if they match the conditions defined). The loyalty points can be used as a discount voucher by the customers on their next purchase.

Overview

1. Offer Loyalty points on sign-up

2. Loyalty points on purchases

3. Loyalty points on various product and cart factors

4. Add points manually or through CSV upload

5. Set up loyalty points expiry

6. Exclusive rewards on birthdays

7. Track loyalty points history of customers

8. Customize loyalty points related emails

9. Notify users about loyalty points expiration

10. Specify the minimum points required for redemption

Description

1. Magento 2 Loyalty Points extension offers exciting rewards to users in the form of loyalty points.

2. Magento 2 Reward Points extension provides you with the option to offer loyalty points only if the user follows your defined conditions or say the loyalty points rule.

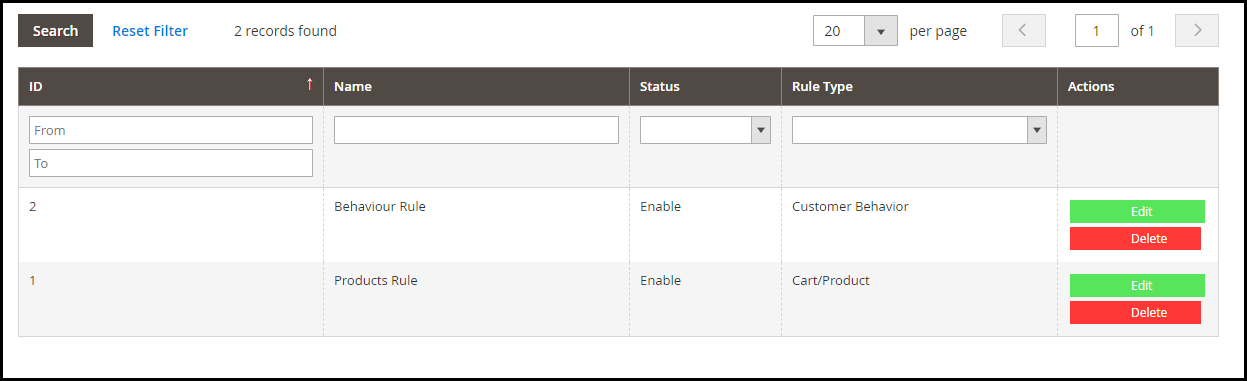
Loyalty points rules are classified into two parts- Behaviour Rule and Product/Cart Rule.

As per the first rule, the points will be distributed when a user does a successful registration on your website or places his/her first order. The latter involves loyalty points offering on a number of factors such as when a user chooses a shipping service or the payment method for which loyalty points exist or shops above the amount set from the back end.

3. You can specify the value of 1 loyalty point.

4. Magento loyalty program extension also lets you provide loyalty points to customers on their birthdays to make their day more special and gain their loyalty towards your brand.

5. You can specify the minimum points a customer needs to have to redeem them and generate a voucher.

6. You can set the validity of the generated voucher.

7. Magento 2 Loyalty Points extension allows you to reward loyalty points to some specific customers. You can either add the points manually or through CSV upload.

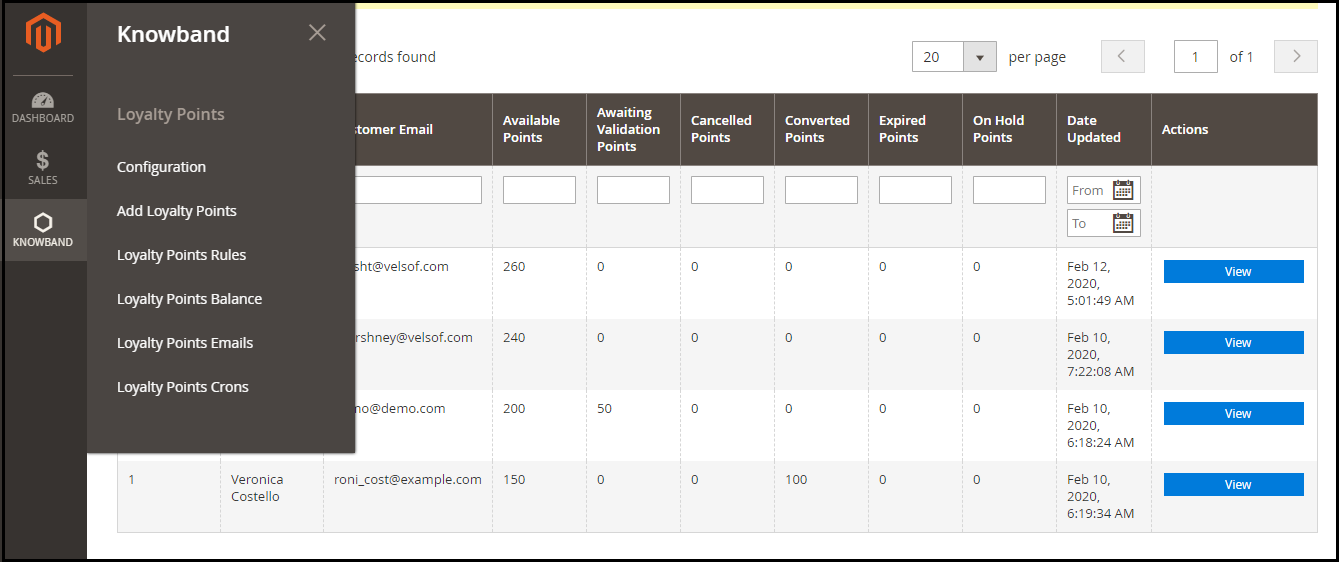
8. You can track the loyalty points acquired by the customer under “Loyalty Points Balance”. This displays the complete history of the loyalty points earned by the user along with some other related information.

From here, the admin can update loyalty points for some specific users.

9. Magento 2 Loyalty Points extension offers pre-existing email templates that can be customized the way you want.

10. The module has cron functionality that allows you to run cron for certain tasks such as sending loyalty points to customers on their birthday.

11. You can also specify the customer groups for which you want to offer loyalty points. There are three customer groups basically- General, Wholesaler, Retailer.

Benefits of Magento 2 Loyalty Points Extension

1. Improve Customer Retention

2. Increase user sign-ups on your website

3. Acquire new customers

4. Ensure repeat purchases and boost your sales

5. Build Customer loyalty

For any queries or assistance with this module, you can reach out to us at support@knowband.com

Related:

Benefits of Customer Loyalty Programs for your Online Business

Why Trust Badges are Important for your eCommerce Website?

“Among the elements that build trust in an eCommerce website, trust badges probably top the list.”

The eCommerce market has vastly expanded over a decade or so. But with more and more people shifting towards online shopping, security concerns have also been raised.

Anything that is put online cannot be trusted easily as the Internet is full of the hoax. And especially if you are a new brand which only a very few people have heard of, people are bound to have trust issues.

It is obvious for customers to be worried about sharing their card details online. And this is why placing trust badges on your website is important to address the security concerns.

In this write-up, we will be discussing the role of trust badges on your website; why they are important and how to use them. We will further discuss the types of trust badges that you can consider using on your eCommerce website.

What are Trust Badges?

Trust badges also referred to as trust seals, are logos that confirm your website’s authenticity. They ensure that visitors feel safe to share their information and can comfortably put their trust on your website and need not worry about their personal details getting stolen.

17% of the Abandoned Carts take place due to payment-related concerns.

A study by the Baymard Institute suggests that around 17% of the abandoned carts occur because people did not trust the site with their credit card information.

This certainly cannot be overlooked if you want to reduce cart abandonment and increase the conversion rate on your website, and trust seals can prove to be beneficial in this matter.

Impact of Trust Badges

Do trust badges help in improving conversions or increasing your sales? Well yes, they do. Buyers are more likely to purchase from a website on which they can place their trust.

Econsultancy/Toluna conducted a survey asking people about the factors that make them trust a website and 48% of the people said that trust badges are the primary factor to decide whether a website is trustworthy or not, followed by the website look and the brand popularity.

This makes it clear that websites that display trust logos are far more trustworthy than the ones without it.

Different Types of Trust Badges

Trust seals come in different forms. Let’s take a look at the different kinds of trust badges you can implement on your website, primarily on the checkout page, to build customer trust.

1. Website Security

When we talk about website security, we mean adding an SSL certificate to your website. Visitors find it tough to trust a website that is not SSL enabled. If you land on such websites, on the left of the URL, you will see something written as “Not secure” clicking on which you will see a message that says “Your connection to this site is not secure”.

This concerns visitors and they doubt the website’s reliability, however, if you add a security layer, they would be more comfortable in browsing your website.

So by getting an SSL certificate and having the related trust badge, you assure customers that their information is secured and any transmission of data remains totally private.

2. Payment Security Trust Badges

When buyers are on the checkout page and on the verge of making a payment, they hesitate to enter their card details. By displaying them the trust logos related to the payment options that you are providing, you can eliminate that insecurity and make them confident to go for the purchase.

In this case, trust badges like Visa MasterCard, PayPal verified work very well.

3. Anti-Virus Trust Badges

Trust seals like Norton Secured, McAfee Secure are highly popular. The former is something that you will witness on a majority of eCommerce websites.

This ensures that your website prevents malicious activities and removes malware.

Popular Trust Badges

There are multiple trust badges available, however, only a few have a major impact on customers when it comes to website security. So you need to choose the ones which your customers are most familiar with.

Trust badges that would work the best for you are-

Norton Secured (Powered by VeriSign)

McAfee Secure

PayPal Verified, Visa and MasterCard

TRUSTe

Final Thoughts

If you are not displaying a trust seal on your website, you are missing out on the opportunity to scale-up your conversions. Your prospects or potential customers might drop the purchase idea if they do not see trust badges on your website.

Where to place trust badges? Well, mostly trust badges are placed on the checkout page as that is the most important page to convert a visitor into a customer. You do not want to distract your customers due to security thoughts right? And that is why the checkout page is the ideal page to display trust seals.

Do whatever it takes to win customers’ trust. Once you have won their trust, they will never hesitate about anything.

You May Also Like:

Benefits of Having Multiple Payment Options on the Checkout Page

One Page Checkout vs Multi-Page Checkout

All you need to know about PrestaShop Advanced One Page Checkout

If your checkout page is not optimized, you are probably going to face a lot of abandoned carts, and this can severely affect your conversions.

What’s needed? An uncluttered, simplified and a user-friendly checkout! If you are a PrestaShop store merchant looking for the same, PrestaShop Advanced One Page Checkout will most likely put an end to your search.

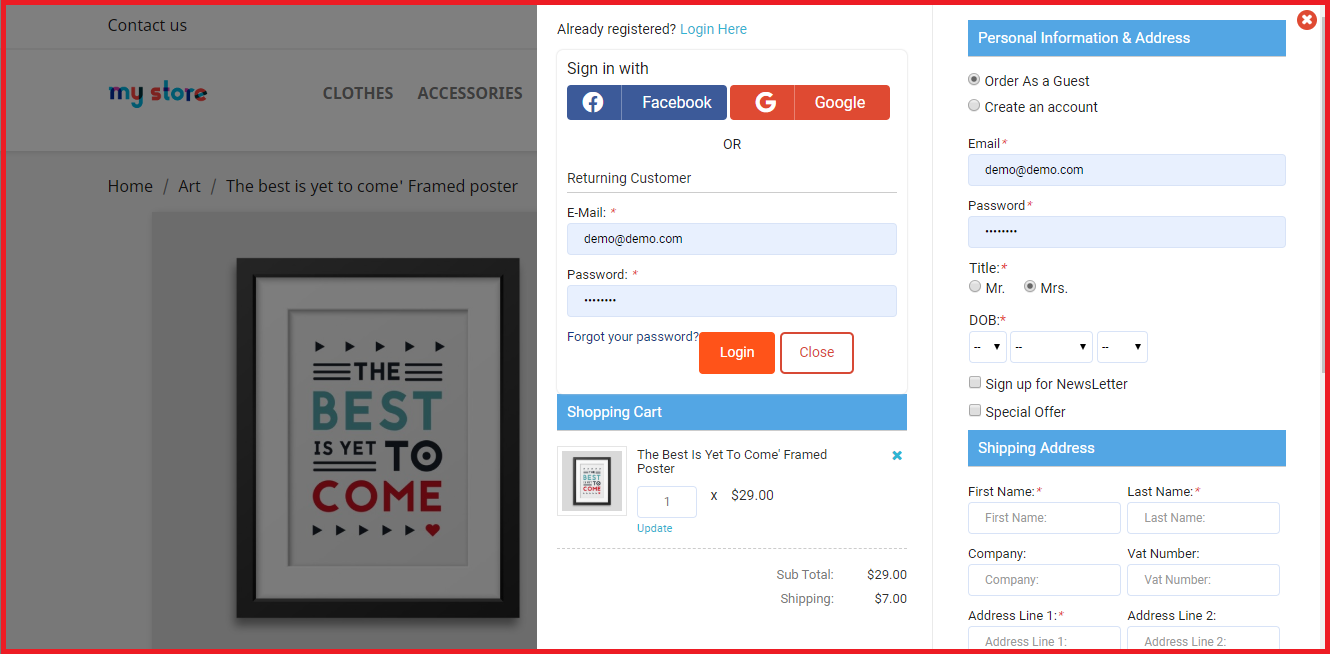
PrestaShop Smart One Page Checkout replaces the default checkout of your website with a responsive checkout popup. Unlike the usual One Page Checkout where all the checkout fields are visible on a single page, the advanced checkout creates a checkout popup where the fields remain on the same page (under the same URL) but are split into a number of steps.

Overview

1. Responsive Ajax-based Checkout popup

2. Guest Checkout and Social Login

3. Arrange Checkout fields through Drag and Drop functionality

4. Hide unnecessary fields from the checkout page

5. Mark Important fields as Mandatory

6. Auto-fill address functionality

7. Support for multiple payment methods and shipping services

8. Custom checkout fields

9. Cart customization available

10. GDPR compatible

Description

1. PrestaShop Advanced One Page Checkout is a responsive Ajax-based checkout popup that loads all the checkout steps on a single page. You would be presented with the next fields step by step but all will be under a single URL. So do not confuse this with a multi-page checkout.

2. PrestaShop Smart Checkout module offers Guest Checkout and Social login functionality to encourage quick checkout. Visitors can register as a guest if they do not want to create an account on your website.

Social login allows customers to log in/sign-up through their Google or Facebook account. If you want to provide more social login options, consider our PrestaShop Social Loginizer module.

3. The module provides you with the option to arrange checkout fields in an order of your choice through Drag and Drop functionality. Choose a field, drag and drop it to the desired position.

4. With PrestaShop Fast Checkout addon, you can decide which fields you want to keep mandatory and which as optional. You can also select fields that you do not want to display on the checkout page. The settings can be modified separately for both Guest and Registered users.

5. PrestaShop Simplified Checkout addon provides the auto-detect country and auto-fill address functionality, which helps users to fill their address information in a quick span. Besides, it offers Inline Validation that verifies whether the entered inputs are correct or not.

6. PrestaShop Advanced One Page Checkout addon provides support for multiple shipping services and payment methods. Using the “Ship2Pay” feature, you can choose which payment methods should be applicable on a particular shipping type.

7. With the help of the PrestaShop Single Page Checkout, you can add more fields on your checkout page.

8. The responsive checkout popup module also lets you customize the cart settings. You can select which options you want to display on the cart page.

9. This quick checkout module offers email synchronization into MailChimp, SendinBlue, and Klaviyo account. Well, you can ask users to subscribe to your newsletters on the checkout page and if they tick-mark that field, their information will be sent to the respective accounts.

10. PrestaShop Advanced One Page Checkout is GDPR compatible. Some other features that it provides are the test mode functionality; to check the module functionality, enabling this checkout for selected IP addresses, and option to customize the “Place order” button. It also offers multi-lingual support and has multi-store compatibility.

Benefits of PrestaShop Advanced One Page Checkout

1. User-friendly Checkout

2. Encourage Quick Checkout

3. Increase email subscription and grow your email list

4. Reduce cart abandonment rate

5. Boost Conversions

For any kind of assistance, reach out to us at support@knowband.com

You May Also Like:

One Page Checkout vs Multi-Page Checkout

11 Checkout Page Optimization Practices to Increase Conversions

Reduce Checkout Friction with Magento 2 One Page Checkout

Everything You Need to Know About OpenCart Exit Pop up Extension

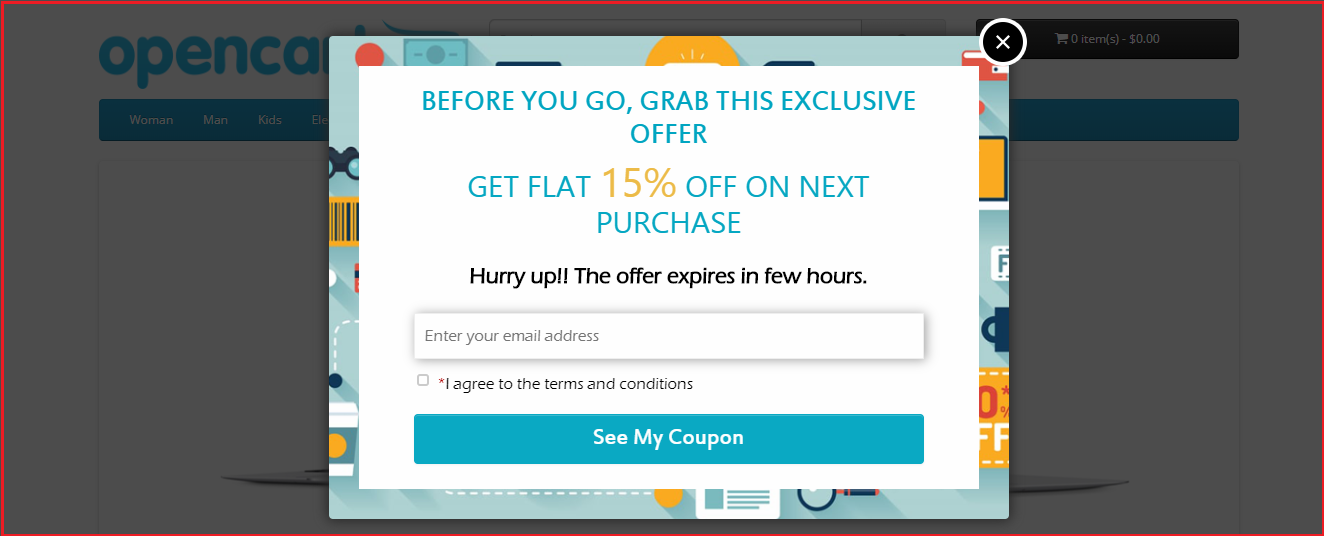
OpenCart Exit Pop up also known as OpenCart Exit Intent Pop up is a powerful extension that helps you draw visitors’ attention when they are about to leave your website.

A pop up appears promptly as soon as it is noticed that the visitor is trying to take an exit. The extension provides you with an opportunity to stop your visitors at the very last moment from leaving your website. It is up to you how you make the best use of the pop up to make visitors stay on your website.

Overview

1. Works as both Entry and Exit Pop up

2. Design Popup | Adjust the look and feel

3. Multiple Popup themes

4. Customize the Popup Display Settings

5. Set up discount coupon value

6. Email Recheck

7. Email Synchronization through MailChimp and Constant Contact

8. Multi-lingual Support

Description

1. OpenCart Exit Intent Pop up offers pre-existing appealing popup themes. You can choose the desired one from the drop-down list.

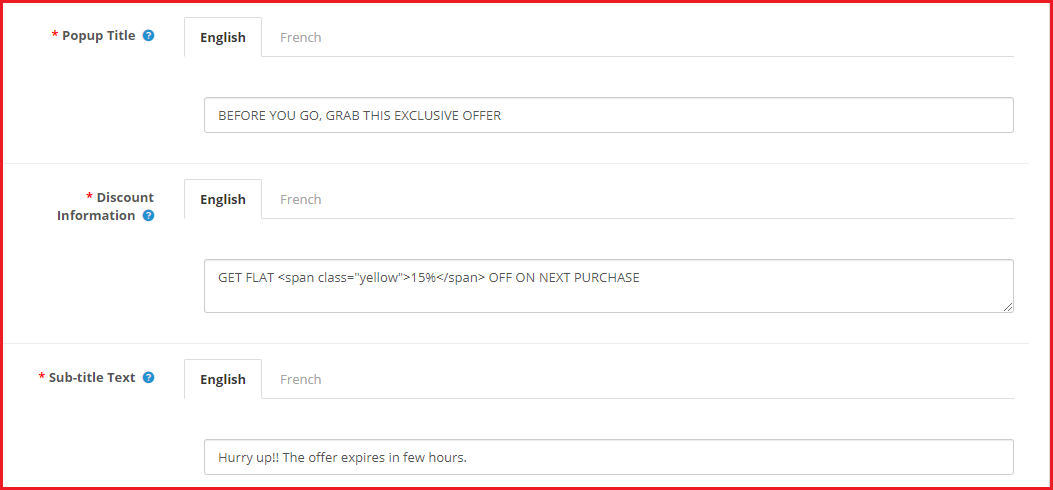
2. OpenCart Exit Pop up allows admin to modify the popup content according to the goals they want to achieve through that popup. The extension offers three sections to specify the popup content.

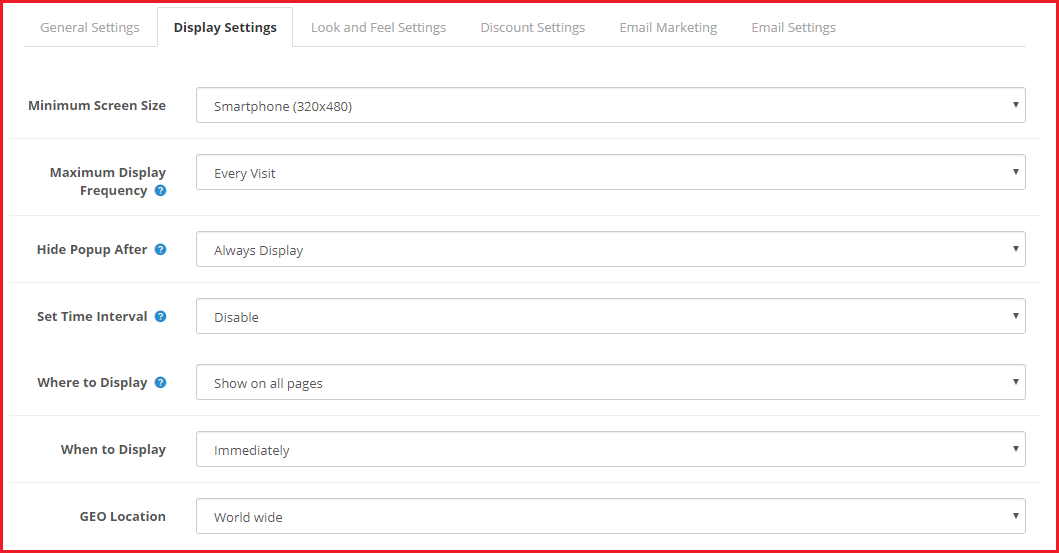
OpenCart Exit Popup comes up with various options to configure the popup display settings.

3. The extension lets you specify the minimum screen size on which the popup will be displayed.

4. You can set the display frequency of the popup which can be: on every visit, one visit per hour, one visit per day, one visit per week or one visit per month.

5. You can set a duration (in seconds) after which the popup disappears automatically. The duration can be 10 seconds, 20 seconds, 30 seconds or 40 seconds.

6. The exit pop up extension also lets you enable the popup functionality for a certain time period only. For example, if you are running any campaign or providing a limited time offer and want to promote it through the popup, you can set the start and end date of the exit popup accordingly.

7. With OpenCart Exit Popup Email Subscription extension, you can select the pages where you want to display or where you do not want to display the popup.

8. OpenCart Exit-Intent Pop up extension also provides you with the option to display the pop up immediately, after a few seconds, after a visitor has scrolled down to some percentage or when the user is trying to exit.

9. You can also limit the popup display for selected countries. You can either show to visitors coming from worldwide or select the countries where you want to display or hide the popup.

10. OpenCart Exit Pop up extension has the email recheck functionality which, if enabled, would not allow a user to claim the coupon code twice. It simply means that a single email address cannot be used again.

11. You can set the pop-up display interval (in days). The defined period will be the number of days after which the pop up will be displayed to the same user again.

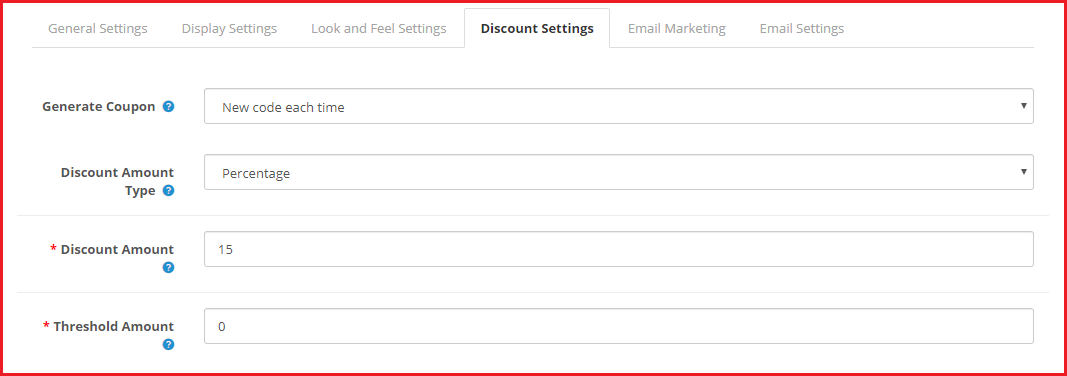
12. You can set the popup functionality to either generate a fixed coupon code or generate a new coupon code every time.

13. The coupon code can be set to provide a flat discount value or a percentage discount. You can also set a threshold cart amount to redeem the coupon code at the checkout.

14. OpenCart Exit Popup also offers MailChimp and Constant Contact Integrator, enabling which the email address of the visitor would be captured in the respective amount.

15. With OpenCart Exit-intent Popup, the admin can customize the email that would be sent to the user when they submit their email address. You can also test the email to check how it will deliver to the users.

16. The extension also displays the coupon statistics in the form of line graphs. The email address of the user, coupon code and the status of the coupon code is displayed inside the statistics section.

17. The module provides multi-lingual support.

Benefits of OpenCart Exit Pop up Extension

1. Make a last-minute effort to convince users to stay on your website.

2. Increase email subscriptions and grow your email list

3. Encourage users to purchase by providing them with a coupon code and boost your conversions

4. Reduce the bounce rate of your website.

5. Reduce shopping cart abandonment

For any queries or assistance, you can contact us at support@knowband.com

You May Also Like:

Exit Popup: What is it? How it works? Example, Best Practices and Benefits

8 Email Popup Best Practices to Grow Email List and Boost Conversions

Trigger Impulse Buying with PrestaShop Exit Popup Addon

How to Get Customer Feedback?

One thing that helps you in becoming better every day in your business is Customer Feedback.

Customer is the king they say and it is indeed very true. They are the ones who can take your business to the peak or bring it down drastically.

Be it any business, they aim to provide the best of services to their customers. If your customers are not satisfied with you, it will not help you in the long run. And this is where customer feedback plays a crucial role.

Customer feedback is important to know what your customers think about your products or services. How has been their experience on your website? Are they happy with your services or not? Is there something that they would like to get changed or anything that’s troubling them on your website? You should always welcome your customers’ opinions and suggestions.

When you get honest feedback and look at things from a customer’s point of view, you can identify what’s lacking in your business and which are the areas that you can improve on, in a better way.

So how do you get customer feedback? How do you encourage customers to share their views about your brand or products?

In this write-up, I have shared a few tips to get customer feedback.

6 ways to ask for Customer Feedback

There are many ways to collect customer feedback. However, I have filtered out a few from my list that I find to be the most useful.

1. Collect Feedback on the Order Confirmation Page

Your order confirmation page or the thank you page is one of the best sources to know about your customer’s shopping experience and can provide you with some invaluable customer feedback.

Ask them if they faced any difficulty while navigating on your website or any particular page that hampered their experience. Was it easy to find what they were looking for? These sorts of questions are beneficial to improve your website’s performance.

You can ask such questions in the form of multiple-choice questions that let customers select the quality of service they experienced on your website. Customers usually do not wait even for a second on the order confirmation page. So try to get the feedback in a simple and clear way.

Besides, you can also place a comment box on this page to allow customers to leave any other suggestions.

2. Live Chat Support

Another way to collect customer feedback is through live chat support. If you provide a live chat support option on your website, it would be easy for you to know what sort of issues or challenges your customers are facing.

Moreover, the live chat option is accessible and provides customers with an easy way to communicate with your support team and get their concerns addressed right away. It also tends to make your customers stay for a longer duration on your website since the response from the support is mostly instantaneous.

Many businesses are offering live chat support through WhatsApp as well.

After you have finished addressing their concerns, you should ask for your personal feedback as well, like if you were able to resolve their queries or are they satisfied with your help. Although this seems to be very obvious, it’s a good practice to follow.

3. Be Active on Social Media

Today, customers find social media a better option to contact a business than email or any other form. And when customers are disappointed or frustrated over a matter, they tweet about it or leave negative comments on your Facebook or Instagram posts.

This is why it is important that your social media team gives a prompt response to customer queries. Whether they tweet, leave a comment or DM you personally, try to be as quick as possible in providing a solution.

Criticism or I would say constructive criticism is sometimes very helpful to understand the flaws in your business or services.

Engage with your customers. Reply to their comments/queries or tweets and most importantly, be very polite while dealing with their issues. Social listening highly matters in an eCommerce business.

4. Exit Popup

Though an Exit Popup is majorly used to entice customers with some attractive offers at the last minute, they can be used to collect customer feedback as well.

Exit Popups are popups that appear when a user tries to exit your website. By having an exit-intent popup, you can ask customers for some suggestions to improve while they try to leave. It can prove to be a useful tool to know the opinion of your visitors, primarily the new ones.

Make sure that the popup does not appear if a user is trying to exit within a very few seconds. Let them spend some time on your website. Let them go through some of the pages so that they get an idea about your brand. Then you can ask them for their opinion like if they felt anything missing while browsing your website or how helpful it is as far as the user experience is concerned.

5. Obtain Customer Feedback through Surveys

You would have often received survey emails from brands or seen it on social media. Surveys are an important asset when it comes to getting customer feedback.

Create a survey form and send the survey link to your loyal and existing customers on their email address. Since a survey can be a long-form, you need to be very impactful with your choice of words when you are asking a customer to fill the survey. Make them feel that their feedback matters a lot in the success of your business.

You should run surveys on social media platforms as well. To make people participate in the survey, you can reward them with an offer or anything that persuades them to fill the survey form. Survey forms give you detailed feedback.

Alongside surveys, you should conduct polls at regular intervals to identify which particular elements on your website your users find to be the most and least helpful.

6. Create a Forum

Having a forum on your website helps your customers to discuss and share their queries or concerns and ask the forum community for a solution. Basically, it forms a community where a person can raise any kind of question and the other members can answer if they know it.

You can take a look at your online forum and see what kind of discussions your audience is having or if there is an issue that has arisen lately that you are unaware of.

Final Thoughts

Some of the other ways to collect customer feedback are calling your customers at regular intervals. Though this can be a challenging task for large eCommerce businesses but can be very helpful for those businesses that are on a small scale.

You can reach out to customers when they abandon their cart and ask them what went wrong during their purchase.

When you receive positive feedback from your customers, it gives you a push to make the experience of your customers even better than before. And do not get upset with negative feedback. Negative reviews are more helpful as they provide you with every minute detail that you can work upon to improve the customer experience.

I hope you liked this information on how to get customer feedback. Feel free to add any further points in the comments below. What are your strategies to collect customer feedback?