

A PrestaShop social login module can be used to integrate a Google login to your eCommerce site. Social login module constitutes of several other social login options such as Facebook social login, Twitter social login, Drop box social login, etc. When webmasters implemented a social login for the first time, it was believed that most of the customers have an account on at least one of the social sites. So, the webmasters can effectively utilize the customers’ information in these sites to create a user account on their websites, and that too without asking the customers to fill a lengthy registration form.
Why has Google Login been a success?
Google is one of the most used, search engine, email services, and a social network. In parallel to other social sites like Facebook and Twitter, most of the customers have a Google account. So, why not utilize this platform for optimizing the user experience on the websites.
Considering the PrestaShop websites, they are one of the most popular eCommerce platforms today. Everyday, a large number of new PrestaShop websites are coming live and one thing they lack is the Social login option. So, we have found a way to make this platform even more strong in terms of usability and optimization. The PrestaShop Social loginizer module allows a perfect combination of Google login and PrestaShop to be implemented on your eCommerce site. With the availability of other 12 social login options in the same PrestaShop module, this PrestaShop social login module is a wise choice for your pocket.
How does Google login work?
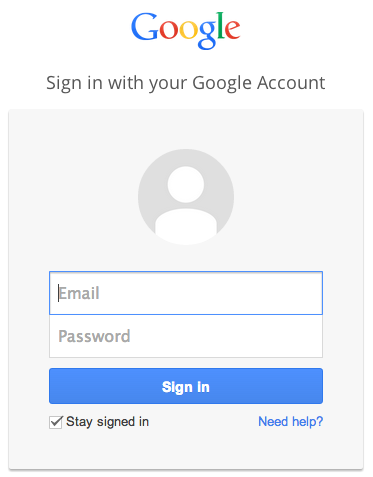
One thing is clear here, you don’t have to worry about the user authentication. Google will handle that for you. When you set up a Google login on your website, the users will see a link to Google page at the Sign in and Sign up page. Something like this:

When the user clicks on the link, if he is already registered on your site, he will be directly logged into the website’s user account page.
If he is there on your website for the first time (User not registered already), he will be asked to provide his Google login credentials in the following pop up:
After providing the details, just give the authorization to Google in the next step.
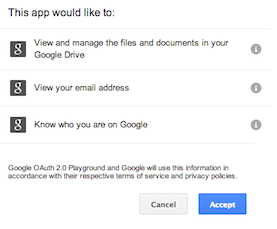
After that, the user will be directed to your website’s user page or any page that you choose. In this way, you will retrieve his/her data that will be used on your website.
Setting up PrestaShop Google login in Social login module
Step 1: You can use any PrestaShop Google login module. However, here I am using the Social Loginizer module here. So, you need to first download and install the PrestaShop social loginizer module (Or any PrestaShop Google login you have ).
Step 2: After you install the module, go to configuration panel from the modules listing page.

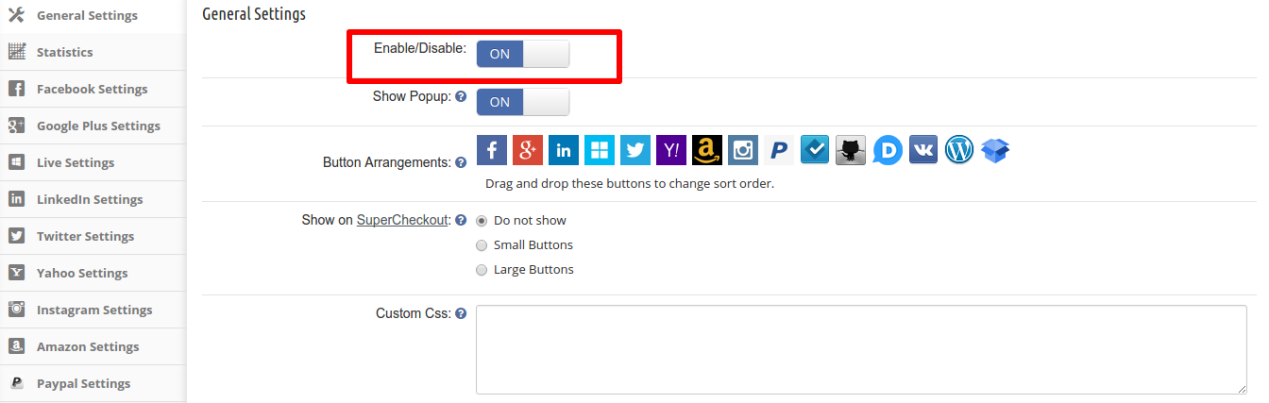
Step 3: Enable the module in the General settings Tab
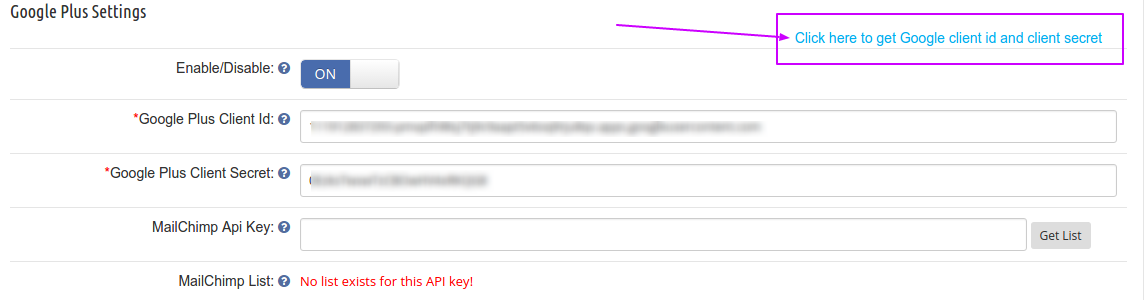
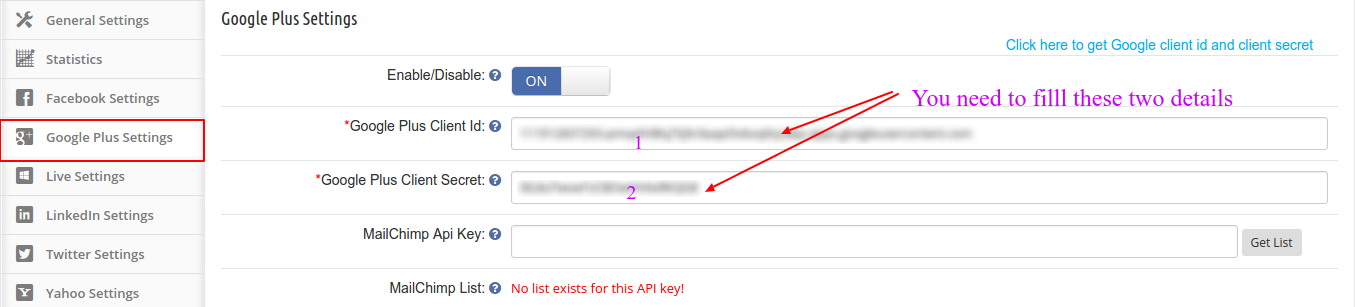
Step 4: Next, navigate to Google Plus Settings, you will find the following interface to setup the Google Login.

To setup the Google Plus login, you need two important details. Google Plus Client Id and Google Plus Client Secret.
How to get the Google Plus Client Id and Google Plus Client Secret?
You can follow these steps to get the Google Plus Client Id and Google Plus Client Secret:
- Click on the highlighted link if you are using the Social loginizer module. Otherwise you can directly visit the below URL:
https://console.developers.google.com/project
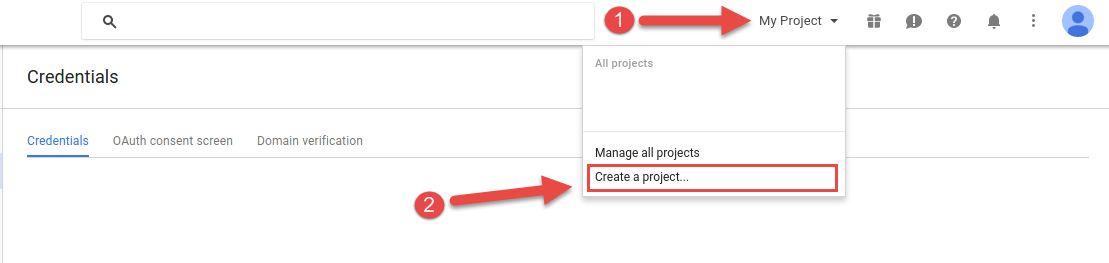
2. Now, Click on My Project and then Create a project
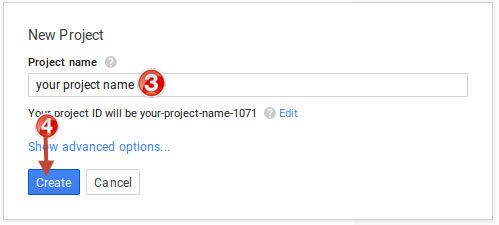
3. Give a Name to your Project and then click Create
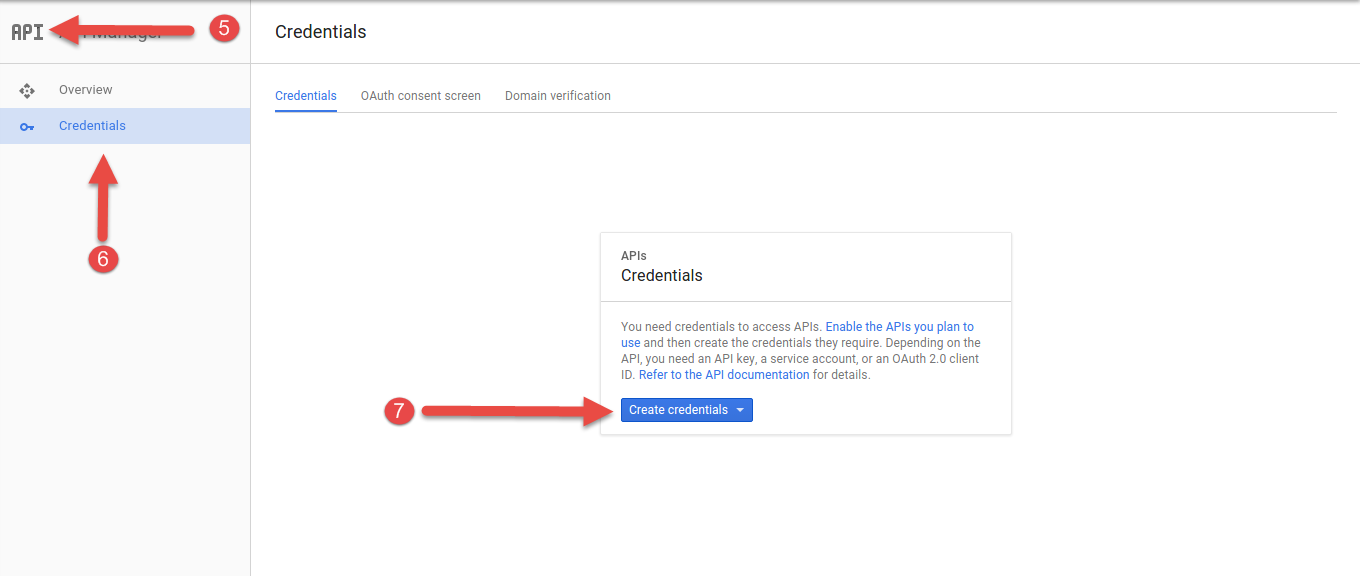
4.In API Setting, go to Credentials and click on Create credentials button.
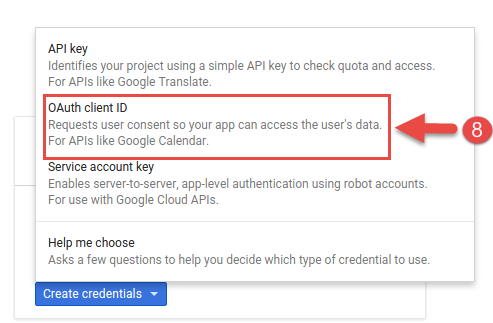
5. In the next step, you will see a pop-up. Click on OAuth client ID
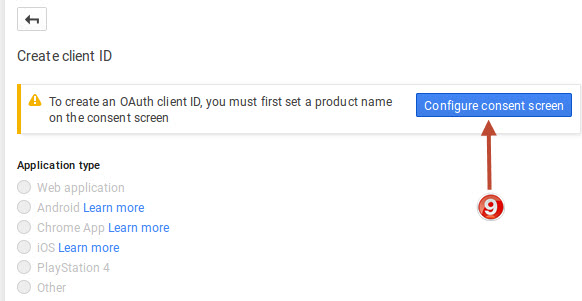
6. To configure the OAuth client ID, you have to first set a product name on the consent screen. So, now, Click on Configure consent screen for the next step.
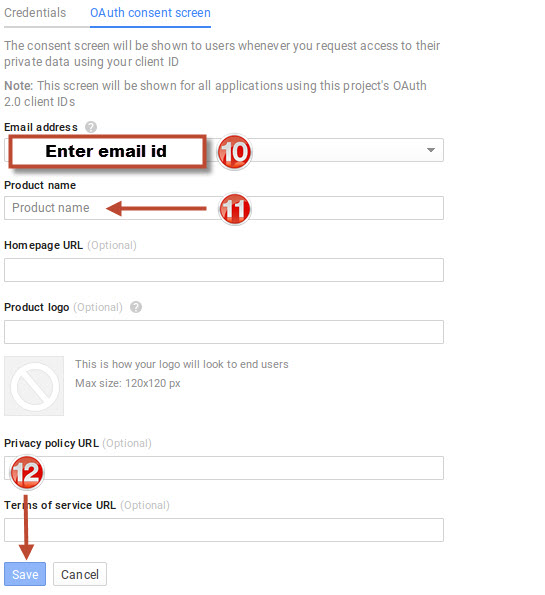
7. Enter the details as asked in the image below and click Save
8. In the next screen select Web application. Then provide the App name (say Social login) and enter the URLs as shown in the image below:
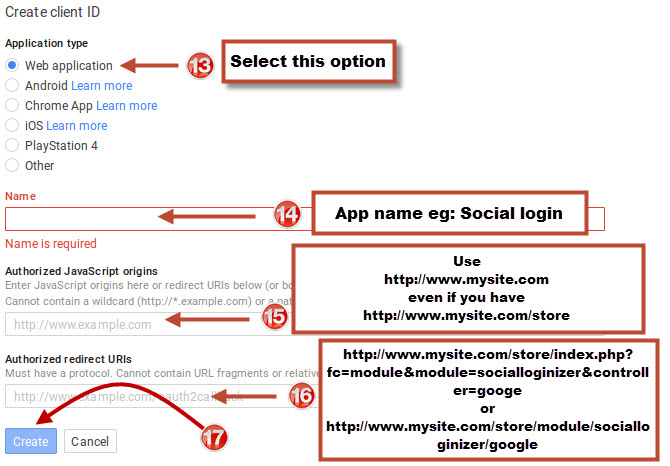
Please note:
- If you have SEO URL enabled on your site then use below redirect URL
https://www. yourstore.com/module/socialloginizer/google
- If you don’t have SEO URL enabled on your site then use below redirect URL
https://www.yourstore.com/index.php?fc=module&module=socialloginizer&controller=google
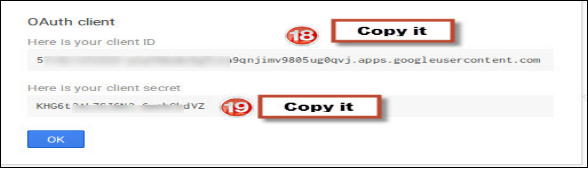
9. Now, your Google Plus Client Id and Google Plus Client Secret are ready. You need to copy and paste these details in the correct field in the module setting.
Finally,
The above-explained method is one of the easiest ways to start accepting the Google plus login on your PrestaShop site. Social login using Google plus can prove to be a milestone in your store’s conversion optimization. In today’s era of huge competition among the eCommerce sites, a site without social login option will not survive. So, you need to adopt a social login for your website from the very beginning itself. PrestaShop social loginizer module could be a wise choice as it has multiple social login options that can be configured very easily. So, start a PrestaShop Google login on your eCommerce site now to tackle your rival sites with a competent weapon.
This Would Also Interest You:

