How to Get Google API Keys from Google Developer Console

In the digital world, integrating Google services into web applications has become commonplace. Google APIs offer a wide range of functionalities, from Maps to Analytics, that can enhance the user experience. However, to use these APIs, developers need to obtain API keys. In this guide, we’ll walk you through the process of obtaining Google API keys from the Google Developer Console, step by step.

What are Google API Keys?

Google API keys are unique identifiers that allow access to various Google services and APIs (Application Programming Interfaces). These keys are used to authenticate and authorize requests made to Google’s APIs, such as Google Maps API, Google Places API, API Constant console, and many others.

With a Google API key, developers can integrate Google services into their applications, websites, or software products, enabling functionalities like displaying maps, retrieving location data, accessing user information, and interacting with Google’s cloud services.

API keys help Google track and manage usage, enforce usage limits, and provide security by allowing control over which services and resources can be accessed. Developers typically obtain API keys by registering their projects with the Google Cloud Platform Console and enabling the specific APIs they intend to use.

Step 1: Sign in to Google Cloud Console

To get API keys, you need to sign in to the Google Cloud Console.


If you don’t have an account, you’ll need to create one.

Step 2: Create a new project or select an existing one.

Once signed in, click on the project drop-down menu at the top of the page.


Select the existing project or create a new project by clicking on “New Project.”


Enter a name for your project and click “Create.”


Step 3: Enable APIs for your project

With your project selected, navigate to the “APIs & Services” by clicking on the  “APIs & Services”  as shown in the image.


Here, you have to click on “ENABLE APIS AND SERVICES” to enable the API you want to use.


The Search page will be open. Here, you can search for the APIs you want to use, such as Maps JavaScript API or Google Analytics API.


Click on the API you want to enable and then click the “Enable” button.

Step 4: How to Create Credentials

After enabling the APIs, go to the “Credentials” section in the left sidebar under “APIs & Services.” 


Click on the “Create credentials” button and select “API key” or “OAuth Client ID” from the dropdown menu.


On clicking on “API Key” you can create an API key Whereas on clicking “OAuth Client ID” you can create a Client ID and Client secret.

Step 5: Restrict the API Key (Optional but Recommended)

For security purposes, it’s recommended to restrict the usage of your API key. Click on the “Restrict Key” button and set restrictions based on your needs. You can restrict the key by IP address, referrer, or even by API.

Conclusion:

Obtaining Google API keys from the Search Console is a straightforward process that involves creating a project, enabling APIs, and creating credentials. By following these steps, you can easily integrate Google services into your web applications, enhancing their functionality and user experience.

Remember to keep your API keys secure and to follow Google’s best practices for API usage to avoid any issues with quota limits or security.

NOTE: 

Apart from that, the API key has different uses for different purposes for Google Shopping, We need to enable different sets of the Library(Content API for Shopping). Similarly for the Google Maps, We need to enable a different set(Maps). For the Google Login, We don’t need to enable anything.

By following these steps, you can effectively access and utilize the Google Search Console API to extract essential data and gain deeper insights into your website’s search performance. Remember to stay updated with the Search Console API documentation for any changes or updates to the API’s functionality.

Do You Know?

You can explore and purchase Knowband’s wide range of marketplace integrators directly through their site. Check out our Multi-vendor Marketplace Module for PrestaShop, OpenCart, Magento 2, and WooCommerce to start expanding your shop’s reach on one of the world’s most unique marketplaces.

Additionally, to optimize your online store’s visibility and enhance sales, consider integrating the Google Shopping module by Knowband. This plugin enables you to effectively manage and sync your products with Google Shopping, boosting your marketing efforts.



What Are Core Web Vitals and How to Improve Them?

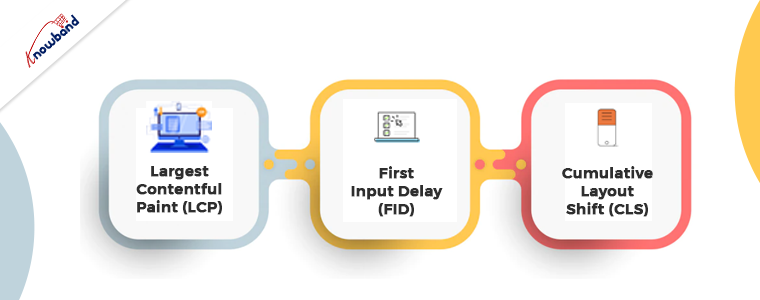
A group of specified elements known as Core Web Vitals is one that Google believes to be crucial to the general usability of a website. Below are the three measurements that makeup Core Web Vitals, which are metrics for page speed and user engagement.

  • Largest Contentful Paint (LCP)
  • First Input Delay (FID)
  • Cumulative Layout Shift (CLS)

Core Web Vitals, in essence, are a subset of elements that makeup Google’s “page experience” score. In addition, they serve as Google’s primary method of evaluating the entire user experience of your web page.

Largest Contentful Paint (LCP)

The measure of a web page’s ability to load quickly is LCP. The largest visible picture or text block within the view is used to calculate scores.

First Input Delay (FID)

When a user interacts with a page for the first time, this time interval is used to gauge how interactive a page is. It measures how long it takes the browser to start processing event handlers in response to the user’s interaction.

Cumulative Layout Shift (CLS)

By analyzing layout changes, this analyses the visual stability of a webpage. When a visible element relocates itself from one rendered frame to the next, this is referred to as a layout shift. It is more like how mobile and desktop interfaces change.

How to Improve the Core Web Vitals?

We have included some advice on how to optimize your site for the essential aspects of the page experience to help you make sure it’s ready for this transition.

Caching Solution

Your server will work less hard if you cache your content. It is unnecessary to load static HTML versions of your pages each time a visitor views your website because a caching tool stores them.

You may be able to take use of server-level caching depending on your web host. On some WordPress plans, for instance, DreamHost provides server-side caching. To raise your FID score, putting into practice a premium caching solution can be beneficial.

Reduce The Size of Your Pictures and Videos

We are all aware of how important videos and photos are to eCommerce sites. Your buyers want to learn as much as they can about your items.

Large graphics may seem good on computers and tablets, but they can drastically slow down your mobile site and have a detrimental influence on how your users interact with the page. Additionally, they significantly lower your Core Web Vitals ratings.

Choose the ideal picture sizes for your site in collaboration with your developer, then start using that standard throughout your website. After giving the largest photos priority, you might be able to use an image scaling plugin or you could need to perform individual page modifications.

Allow Images to Load Into a Specific Space

Cumulative Layout Shift (CLS), the third Core Web Vitals statistic, examines how much the visual layout of a page moves as it loads. This is to gauge a user experience (UX) that we have all likely had:

When a user attempts to click a specific link, the website unexpectedly repositions itself, causing them to unintentionally click on another section of the page. Failure to reserve space for images and embedded resources to load into is one of the most frequent causes of a high CLS score and consequently bad UX.

Font Optimization of Website

Your website’s fonts, like its photos, can affect how quickly users can access it. This is because they demand that the font family, together with each variant of its weight combinations, be downloaded and loaded by the browser.

You can enhance the functionality of your website by optimizing the web fonts. Due to their reduced file sizes and quicker delivery, optimized web fonts are the reason for this.

Additionally, if a text element’s associated web font hasn’t yet loaded, a browser might not automatically render that text element. Fallback font usage, on the other hand, can result in layout changes that lower your CLS rating.

Being selective about the fonts you use on your website is something very important. As a result, you can be sure that only the fonts you require for the text will be downloaded.

In the End

In this write-up, we have been discussing the core web vitals and how to enhance them. Kindly let us know in case you want to improve your ranking on the Google SERPs and also let us know if you have queries regarding the same. Moreover, if you have any concerns or issues related to our module then kindly let us know and we will be happy to assist you. Furthermore, in case of a demand for custom development for business-specific requirements also we can assist you. You can use our SEO Optimizer and SEO wizard to improve the SEO of your website. To improve the other aspects also we can help so please connect with us at support@knowband.com for the same.

How to Use the Newly Launched Instagram Reels for Business Marketing

Instagram Stories have already marked a significant shift in the way we create, share, and interact with content on social media. This style of content is fun, casual, and quick-fire and it’s being rolled out on a massive scale.

People are already using Instagram for marketing purposes and many are running their businesses on Instagram itself. It is important to have followers for increasing engagement on your product page. We already know how important is #hashtag when it comes to social media especially Instagram. After the launch of Instagram Reels, the business marketer got another opportunity to display their products and portfolios.

In this blog, I am going to discuss how Instagram reels work. Firstly, what is this new feature? Secondly, how Instagram reel can benefit business marketing? Lastly, How to create an interesting reel? Let’s get started:

What is Instagram Reel?

It’s been a month when Instagram introduced reels in the year 2020, no doubt they snagged this interesting idea from the popular competent app TikTok. From a survey, 9 out of 10 Americans think Instagram Reels is similar to TikTok.

The Instagram reel allows the user to make captivative, fun, and short video clips that can be posted as a reel, a story, or in the news feed. Reels in the Explore section will showcase Instagram’s best trending culture. Discover an entertaining customized selection of reels made by anyone on Instagram.   You can easily like, comment, or share a reel with your friends if you love it.

Instagram Reels in Business Marketing

I will be giving you 7 ways how you can use the reels for your business marketing? But before explaining that I would like you to explore the trending reels and learn how others are doing it. It is always good to learn from others when you are jumping into something you never did before.

Make a Tutorial Clip

If you are into education not the real lecture or whiteboard tutor, instead you’re doing tutorials or step-by-step videos for products or tips in your industry, certainly, Reels can create videos of a similar style.

Give some Pro Tips

Are you already into digital marketing or an expert in your field? Then, Instagram reels can be a good platform for giving some pro tips and advice to the world. Make a short clip and do not forget to put Call-to-Action message clearly into your content.

A DIY on Reel

A “Do It Yourself” video clip can be made with Instagram Reel. DIY’s are most watched and people like exploring new ideas of building, modifying, or repairing things without the direct aid of experts or professionals.

Best way to Display Outfits

A fashion influencer or a Merchant business owner can display as many outfits as possible in one short clip. Keep the device in one place and divide the clip into multiple parts. This will create an appealing display video for your outfits.
Why not a Behind the Scenes Clip?

It is fun watching behind the scenes videos. You can make one for your IGTV tutorial which you have recently posted or for a YouTube video of your food channel. this is a great idea!

Product Demo

Are you an Influencer who promotes other products? Is your company launching a new product? Take the advantage of Instagram Reels. Make the product demo and let people explore it in their feeds.

Product Assembly

If you own a furniture business then make a reel for the product assembly. Not just furniture but a product assembly reel can be made for any object which appears as a Jig-Sa to the people.

How to Create Your First Reel on Instagram?

It’s easy to create your Reels on Instagram App but it only supports the mobile device.

You need to follow these basic steps:

  • Record your video with reels or use a pre-recorded video clip or a sequence of clips not more than 15sec
  • If you record without audio, choose a popular song or borrow the audio of someone else’s video but do not prejudice the Copywrite rights.
  • Edit your video using the built-in Instagram editing tools, like time-synced captions, filters and transition overlay.
  • Let the world see your reel as stories or news feeds!

Final Thoughts

Marketers and businesses must adopt a new strategy. In the era of digital marketing, platforms are constantly changing. Social media managers and marketers need to be flexible and willing to learn constantly. I can’t say this is the best possible option but you can give it a try with your old video clips or a bunch of photos to test the results.

As I said earlier, explore more before making one for your own business. It does have some limitations for business accounts like the audio functionality is not available but you can figure out a way to make your video more interesting and engaging.

If you have any tips and advice and you are going to try it after reading this then please write a comment below and let me know how it went? Make a film, edit, upload, and have fun!

Recommended reads:

Case-insensitive array sorting in the Php

Problem:

$data = array(“A”,”M”,”X”,”b”,”d”,”E”,”l”);

I need to sort the data base on value. When I use asort($data), got the following:

[0] => A
[5] => E
[1] => M
[2] => X
[3] => b
[4] => d
[6] => l

In the above example, “b”,”d” and “l” starts with a lower case but ends after “X” which has an upper case.

How can we sorts it where it ignores whether the words start with upper case or lower case?

I was expecting this

[0] => A
[3] => b
[4] => d
[5] => E
[6] => l
[1] => M
[2] => X

Solution:

Use natcasesort($data); and you will get the exact same result.

Notes:

We can use this function to sort our arrays using a case insensitive “natural array” algorithm. natcasesort() is a case insensitive version of the natsort().

Syntax:

bool natcasesort ( array &$array );

Returns

Returns true in case of success and false for failure.

To know more about natural array” algorithm or natcasesort() : https://www.w3schools.com/php/func_array_natcasesort.asp

How to save data to Firebase in Android?

Objectives:

The purpose of this blog is to inform readers on how to save data in Android’s Firebase Realtime database. Simple data kinds, such as strings, can be written to this database, as well as more complicated data types, like Java objects.

Pre-Requisites:

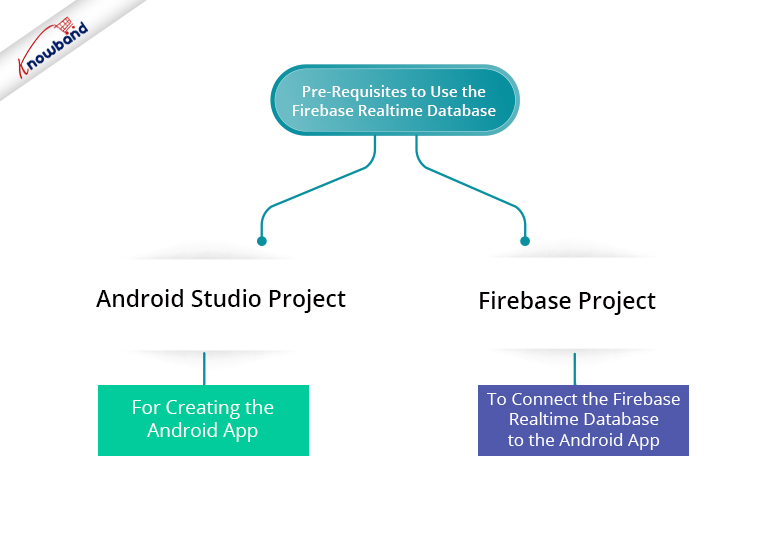
To use the Firebase Realtime Database in Android, we need to have an Android Studio project for creating the android app. Besides that, we need a Firebase project to connect the Firebase real-time database to the Android app.

To create a new Firebase project, follow the below-mentioned steps:-  

1. Open the URL – https://console.firebase.google.com

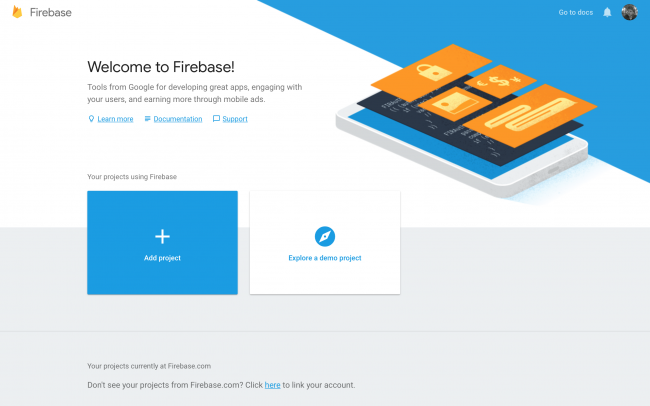
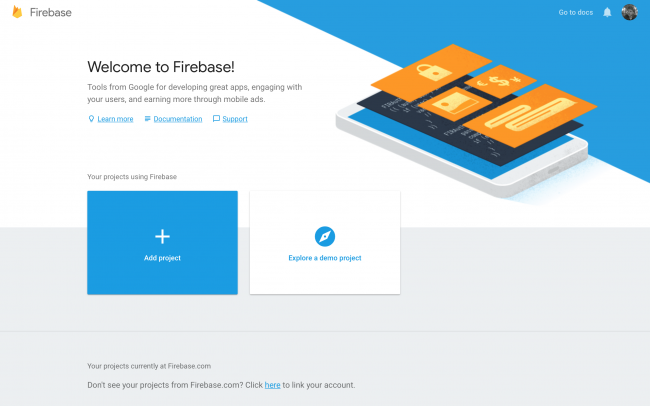
2. Then click on “Add Project”.

3. Next, enter the Firebase Project name and accept the conditions. After that, proceed by clicking on the “Continue” button.

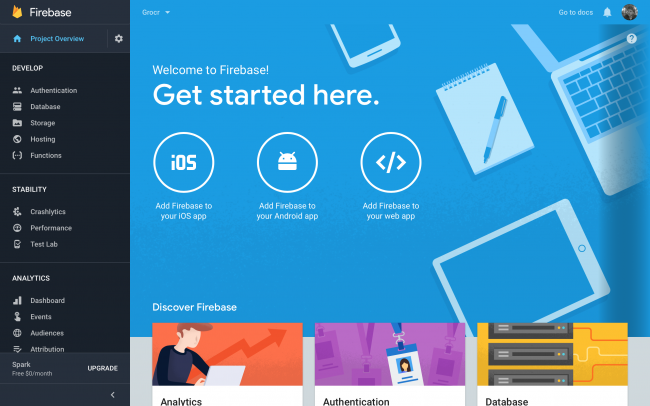
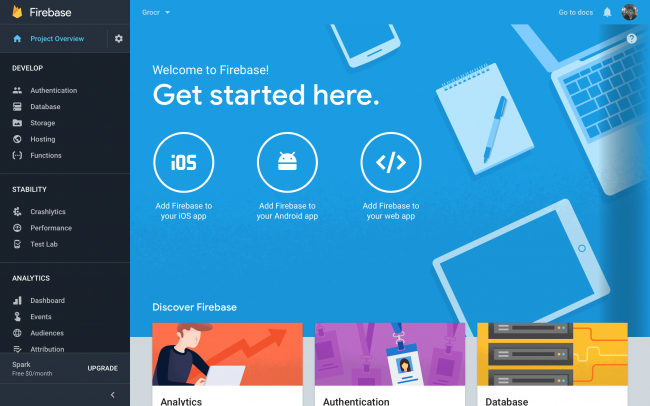
4. Then, on the next Welcome screen, click on “Add Firebase to your Android app“. In the same manner, enter the package name and click on Next.

5. Now, download the google-services.json file to your local system. Then, copy this file to the location in the Android Studio project as specified.

6. Follow the small process in the next step to add 3 lines of code to the build. Gradle files at project-level and app-level.

7. Then, finish adding the Android app to the Firebase project.

8. Open the Database section by clicking on the “Database” option in the left menu. Then, click on the “Create Database” link.

9. Now the process of creating the Firebase project is finished.

Recommended Read: How to fetch data from Firebase in Android?

Add the following line in the app-level build. gradle file to add the library to start using the Firebase Realtime Database.

implementation 'com.google.firebase:firebase-database:16.0.6'

Code Implementation

Before proceeding further, let us understand what is a Firebase reference?

In the Firebase database, the data is stored at a location. Hence, the pointer to that location is known as a Firebase reference. Multiple references point to the same location if they are initiated with the same path.

Create an instance of Firebase Database by writing the following line of code:

private FirebaseDatabase mDatabase = FirebaseDatabase.getInstance();

Now create references of the paths where the data would be stored in the Realtime Database. As the data is stored in the JSON format in the Firebase database, the paths specified in the references are the keys of the JSON object.

Recommended Read: How to fetch data from Firebase in Swift Language (iOS)?

The following line of code has to be added to create a reference to the root node in the database:

private DatabaseReference mDatabaseReference = mDatabase.getReference();

Next, create a child under the root node in the database and use this child key to add the corresponding data. After that, a string can be added to the database by following the below-mentioned lines of code:

mDatabaseReference = mDatabase.getReference().child("name");
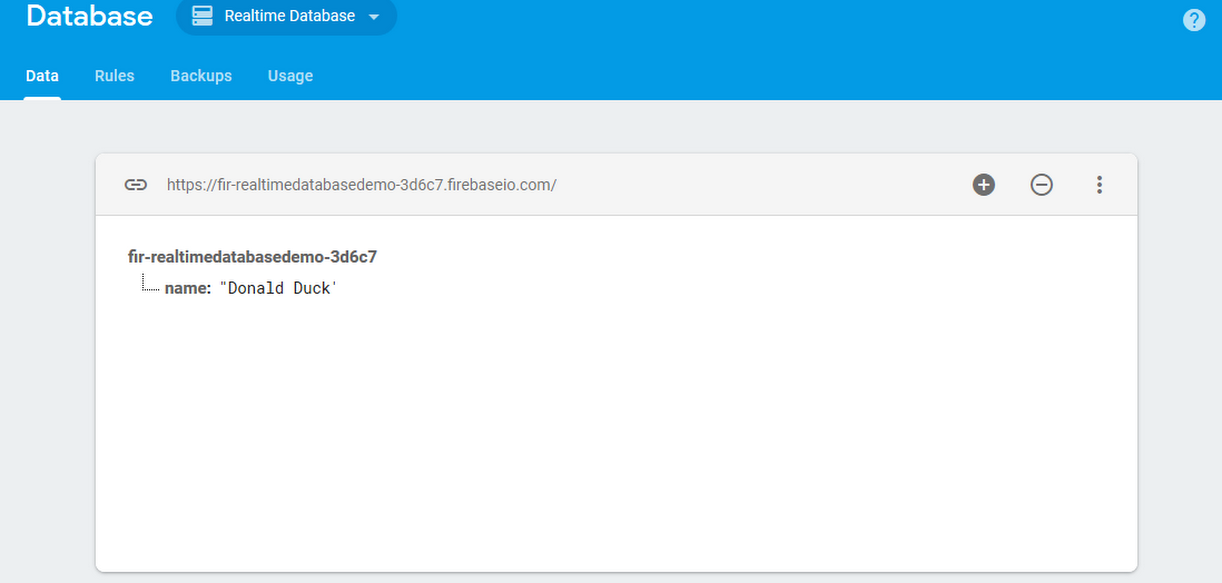
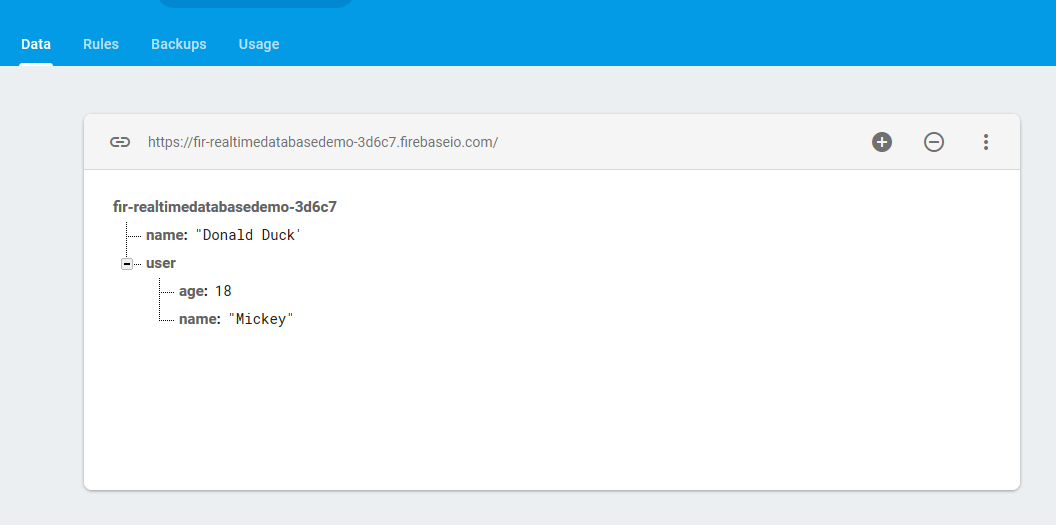
mDatabaseReference.setValue("Donald Duck");

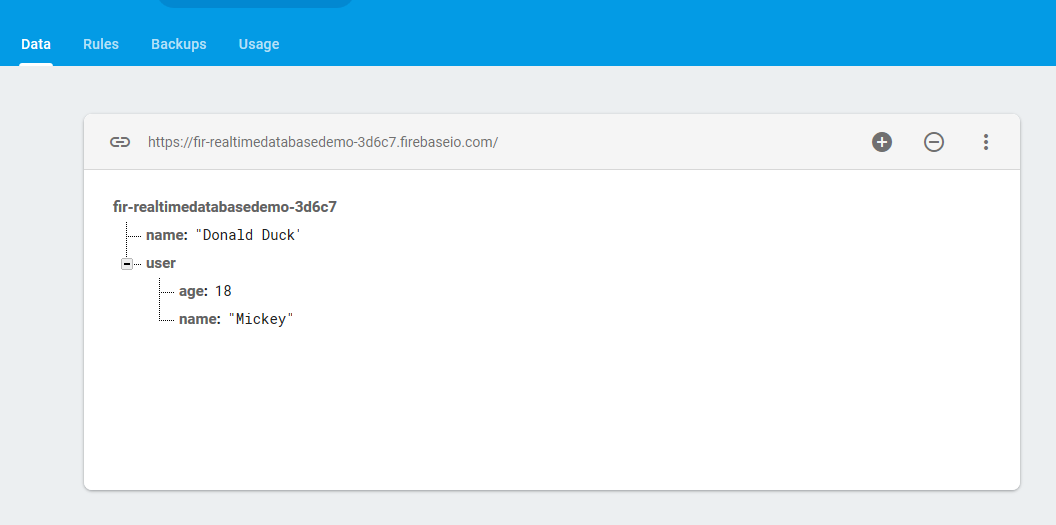
The above lines of code would insert the data into the database. The database in the Firebase project will look as follows:

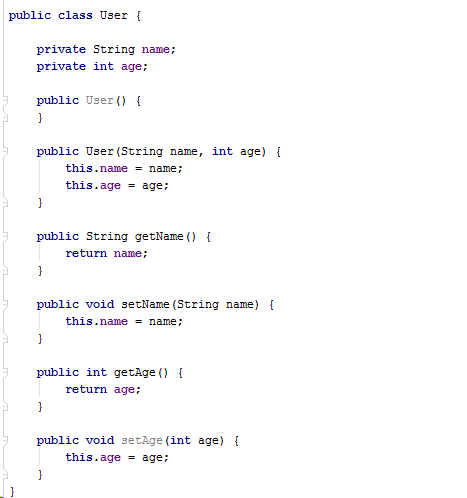
Firebase Realtime database also supports saving complex Java objects. Hence, a model class needs to be created first for saving the Java objects. Also, make sure to add an empty constructor and each attribute’s getters in the class.

Following is the code for a demo model class:

Following is the code to save an object of this class to the Firebase database:

User user = new User("Mickey", 18);
mDatabaseReference = mDatabase.getReference().child("user");
mDatabaseReference.setValue(user);

The above-mentioned code would insert the object data in the  Firebase database as follows:

Recommended Read: How to save data to Firebase in Swift Language (iOS)?

Conclusion:

Now you are knowing how to save data into the Firebase Realtime Database. Also, Knowband offers an eCommerce Mobile App Builder module for online Store owners. So, the mobile app Maker plugin is available for platforms like PrestaShop, OpenCart, WooCommerce and Magento 2. Thus, With just a few clicks and no difficulty, you can create your native, responsive app for smartphones and tablets.

How to fetch data from Firebase in Android?

Objectives of the blog

After reading this blog we will be able to fetch data from Firebase Realtime Database. This data may include simple data types, such as Strings, or complex data types such as Java objects.

Pre-requisites

We need to have a Android Studio project and Firebase project ready in order to use the Firebase Realtime Database. Create a new Android Studio project (or use any existing project). This Android Studio project will be used for working with the realtime database.

Follow the steps given below to create the Firebase project –

1. Go to https://console.firebase.google.com

2. Click on “Add Project” button.

3. Enter the Project name and accept the conditions and click on “Continue” button.


4. Then add Android app to your project. It requires entering the package name of the app. Click on Next.

5. Download the google-services.json file, and move this file to the location in the Android project in Android Studio as specified on the screen.

6. In the next step, there would be a small tutorial to add 3 lines of code in the project-level and app-level build.gradle files. Add them accordingly.

7. Then finish this process of adding the Android app to the project.

8. Then click on “Database” option from the left menu, and click on “Create Database” button.


9. Firebase setup is completed

Now add the Firebase library for using the Firebase Realtime Database in the app-level build.gradle file. This can be done by adding the following line:

implementation 'com.google.firebase:firebase-database:16.0.6'

Code Implementation

A Firebase reference points to a location in Firebase Database where data is stored. Even if you create multiple references, they all share the same connection provided you used the same path while creating the reference from the database instance.

Firstly we need to have an instance of the Firebase Database in order to use it. The instance can be created by the following line of code.


private FirebaseDatabase mDatabase = FirebaseDatabase.getInstance();


Now there is need to create references of the paths where the data is stored in the database. As the data in the Firebase database is stored in the JSON format, the keys of the JSON object are the paths specified in the references.

The reference to the root node can be created by the following line of code:


private DatabaseReference mGetReference = mDatabase.getReference();


After getting the reference of the database, an asynchronous listener has to be attached to the database reference which actively listens to any change done in the database. This listener returns a data snapshot of the database initially for the first time when it is attached. Then the data snapshot is returned when any change is done at the path where the database reference is pointing to.

Usually, the database contains same type of data, but suppose the database contains some data of different types. Below find the screenshot of the database containing some dummy data:


To fetch the database from this database, attach the ValueEventListener to the database reference. The listener can be added by the following code:


mGetReference.addValueEventListener(new ValueEventListener() {
   @Override
   public void onDataChange(@NonNull DataSnapshot dataSnapshot) {
 
       if (dataSnapshot.exists()){
           HashMap<String, Object> dataMap = (HashMap<String, Object>) dataSnapshot.getValue();
 
           for (String key : dataMap.keySet()){
 
               Object data = dataMap.get(key);
 
               try{
                   HashMap<String, Object> userData = (HashMap<String, Object>) data;
 
                   User mUser = new User((String) userData.get("name"), (int) (long) userData.get("age"));
                   addTextToView(mUser.getName() + " - " + Integer.toString(mUser.getAge()));
 
               }catch (ClassCastException cce){
 
// If the object can’t be casted into HashMap, it means that it is of type String.  
 
                   try{
 
                       String mString = String.valueOf(dataMap.get(key));
                       addTextToView(mString);
 
                   }catch (ClassCastException cce2){
 
                   }
               }
 
           }
       }
   }
 
   @Override
   public void onCancelled(@NonNull DatabaseError databaseError) {
 
   }
});

After attaching the listener, it is executed first initially returning all the data in the database at that time. This listener will be later invoked at the time when any change takes place in the database at the path pointed by the reference the listener is attached to.

Summary

After following the above procedure, you will be able to fetch data from the Firebase Realtime database in Android.

If you face any issues, please feel free to reach us at support@knowband.com.  We also provide custom development and modules for major CMS platforms like Prestashop, Opencart, Magento, Magento 2 and Woocommerce.

Take a look at our most popular Woocommerce No Code Mobile App builder:


How to calculate Free Shipping based on final Total Price in Prestashop ?

After reading this blog we will be able to calculate Free Shipping based on the final Total Price of the Cart.

Problem Statement

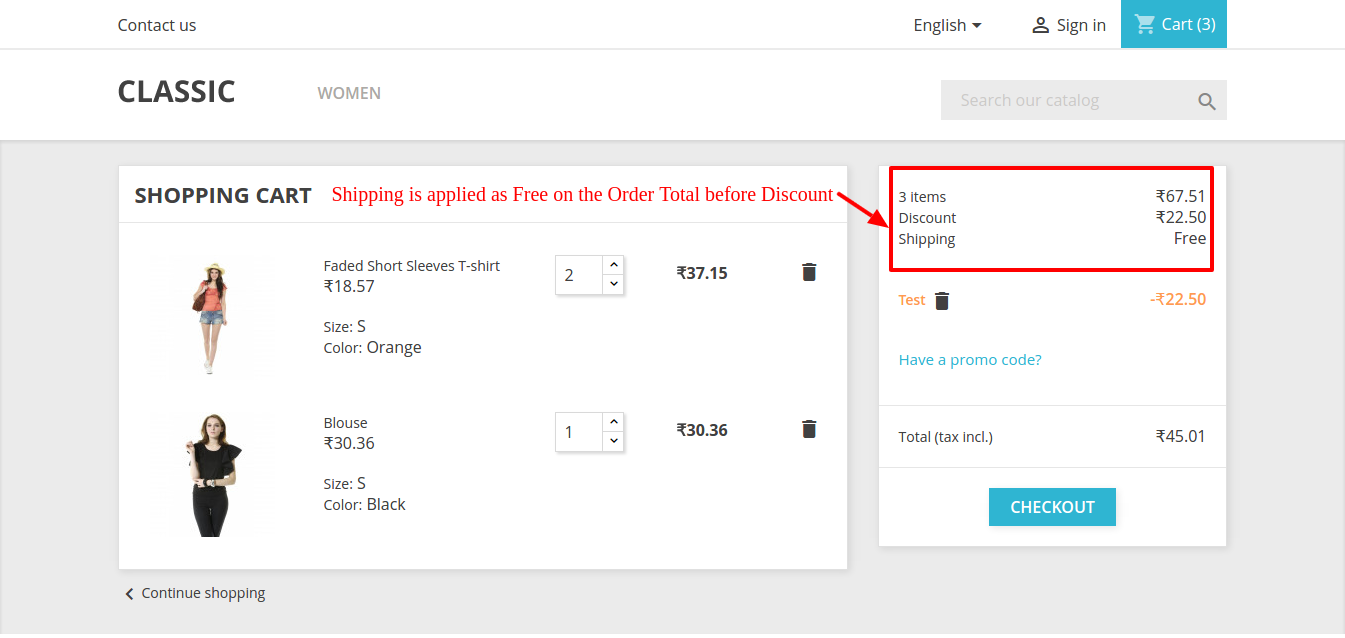
Presently, when we add products into the cart and move to the checkout section to avail of discount and shipping then we see that the discount applies after shipping.
Let’s say,

  • Cart total amount is $100 which avail Free Shipping and some discount of 5% is also added
  • Then after the discount Total Amount of the cart is set to below $100 but still, Free Shipping applies which should not happen. Free Shipping must apply to the Final Total amount of the cart after the discount.
  • This is the default process of Prestashop. Refer to the screenshot below where shipping must be Free if Order Total is > 50 but it has applied Free Shipping while Order Total is < 50 after discount –

Recommended Read: Free Shipping Strategies: Why to Offer? How to Offer? When to Offer?

Why the current issue is there?

The current issue is there because the shipping amount is being calculated on the Order Total amount which is set into the Cart before applying the discount. You can check the lines of code below where Order Total without discount amount is being used to calculate shipping –

$shipping_cost += $carrier->getDeliveryPriceByPrice($the_total_price, $id_zone, (int)$this->id_currency);

Requirement

We need to modify the below-mentioned file to fix the same. We will be overriding the corresponding lines of the class file to avoid any changes in Core files.

Below is the list of class files which will be overridden-

1. Root dir\classes\Cart.PHP

Procedure to Solve the issue-

Follow the below-mentioned steps –

1. Rewrite function getPackageShippingCost

2. After the line given below –

// Order total in default currency without fees $order_total = $this->getOrderTotal(true, Cart::BOTH_WITHOUT_SHIPPING, $product_list);

3. Add the following statement –

$listeDiscounts = $this-&gt;getCartRules();
$total_discounts = 0;
if (is_array($listeDiscounts)) {
if (isset($listeDiscounts[0]['value_real']))
$total_discounts = $listeDiscounts[0]['value_real'];
}
$price_to_apply_shipment = floatval($order_total) - floatval($total_discounts);

<strong>Recommended Read: </strong><a href="https://www.knowband.com/blog/opencart-blog/best-free-shipping-manager-extension-opencart-store/">Best Free Shipping Manager Extension for OpenCart Store</a>

4. Replace the lines mentioned below –

Replace this line

$check_delivery_price_by_price = Carrier::checkDeliveryPriceByPrice($row['id_carrier'], $total_order, (int)$id_zone, (int)$this->id_currency);

With

$check_delivery_price_by_price = Carrier::checkDeliveryPriceByPrice($row['id_carrier'], $price_to_apply_shipment, (int)$id_zone, (int)$this->id_currency);

————AND—————–

Replace this line

$shipping_cost += $carrier->getDeliveryPriceByPrice($the_total_price, $id_zone, (int)$this->id_currency);

With

$shipping_cost += $carrier->getDeliveryPriceByPrice($price_to_apply_shipment, $id_zone, (int)$this->id_currency);

5. Clear the cache and run.

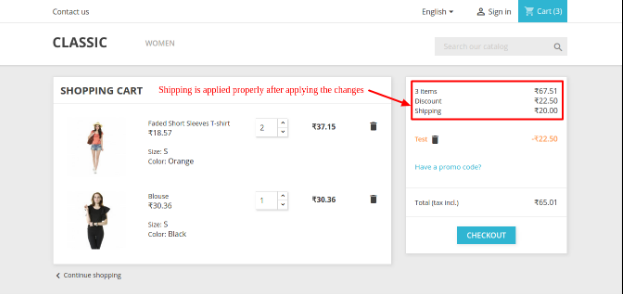
Refer to the screenshot below after applying changes to the code –

After following the above procedure, you will be able to calculate Shipping on the Final Total amount of the Cart.

Conclusion

When it comes to online buying, the whole pricing structure plays a crucial role for the customers. One of the factors that might make or break your conversions is the availability of free shipping. One method for determining the shipping options and costs on an eCommerce website is the Free shipping Manager Addon by Knowband. One of the most important requirements for increasing average sales is providing openness in the transaction.

The shops that used this free shipping module boosted site traffic, revenue, and conversion rates. With the help of this free shipping plugin, store administrators can define the guidelines and conditions for shipping costs. Even better, this feature can be added or removed from the website by the store administrator.

The threshold over which free shipping is offered can be set by online retailers. As a result, it even encourages customers to make larger purchases in order to qualify for free shipping. To know further about the functionality of the Free Shipping Module, feel free to contact us at support@knowband.com

How to generate Prestashop Invoice by Customer name?

Objective of the blog

After reading this blog we will be able to generate the invoice PDF by customer name.

Problem Statement

Currently,  the invoice is generated using the date on which invoice is first created.  So, we can replace the date to the customer’s name before generating the invoice.

Requirement

We need to modify the below files to fix the same. We will be overriding the corresponding function and definition of class file to avoid any changes in Core files.
Below are the list of class files which will be overrided-

root/classes/pdf/HTMLTemplateInvoice.php

Procedure to Solve the issue-

1. Create file HTMLTemplateInvoice.php file on path override\classes\pdf and put below code in it. This will save generate the filename of the invoice.

<?php
/**
* @override HTMLTemplateInvoice.php
*/

class HTMLTemplateInvoice extends HTMLTemplateInvoiceCore
{
/**
* Returns the template filename
*
* @return string filename
*/
public function getFilename()
{
$id_lang = Context::getContext()->language->id;
$id_shop = (int)$this->order->id_shop;
$format = '%1$s%2$06d';

if (Configuration::get('PS_INVOICE_USE_YEAR')) {
$format = Configuration::get('PS_INVOICE_YEAR_POS') ? '%1$s%3$s-%2$06d' : '%1$s%2$06d-%3$s';
}

/* changes started
* to add the customer name
*/
$customer = new Customer((int)$this->order->id_customer);
return sprintf(
$format,
Configuration::get('PS_INVOICE_PREFIX', $id_lang, null, $id_shop),
$this->order_invoice->number,
date('Y', strtotime($this->order_invoice->date_add))
).’_’.$customer->firstname.'_'.$customer->lastname.'.pdf';

/* changes end*/
}
}


2. After creating the php file in the override folder. Clear the cache from the Back-office-> Advance Parameter -> Performance.

3. Now, generate the invoice by navigating to the Back-office-> Orders.

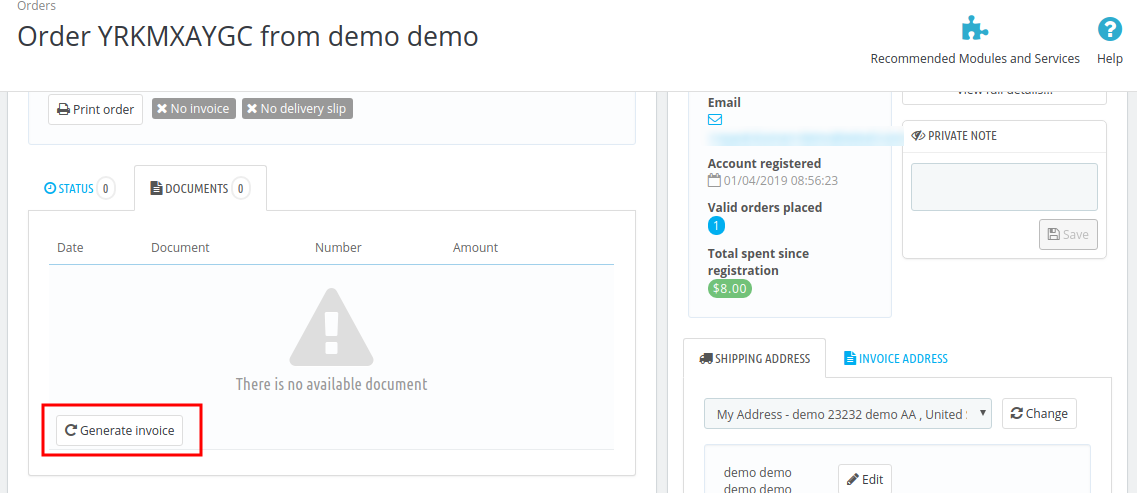
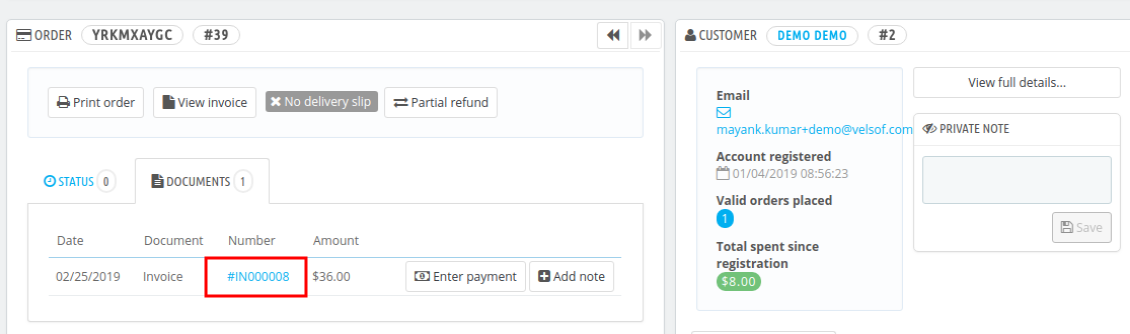
Refer below screenshots


Click here to download the complete project.

Summary

After following the above procedure, you will be able to modify the invoice name.