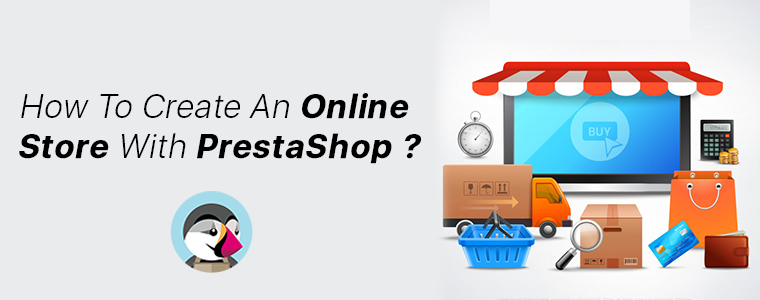
How To Create An Online Store With PrestaShop?

As more & more businesses are coming online, the competition among eCommerce companies is ever-increasing. To stand out among them while providing the most efficient online shopping experience to the online shoppers, having a professional functioning eCommerce website is a must. The PrestaShop eCommerce platform fits perfectly with that requirement.

Building an eCommerce website isn’t a piece of cake for everyone. A proper functioning store with appealing design doubles the audience and conversions for the business. PrestaShop is an open-source eCommerce solution with all the possible features that an eCommerce business (Start-up or Enterprise) would need. No need to indulge in coding or hiring a developer. Stick to the end of the write-up and you’ll be aware of the best possible way to achieve that.

The first thing that comes in the mind of someone willing to build/ design a PrestaShop website is the hosting space or localhost platform where the PrestaShop website can be installed. The rest is just designing & configuring the site. The options with PrestaShop are endless.

Where Can A PrestaShop Site Be Installed & Hosted?

You can either buy a domain & choose a hosting plan of your choice (shared/ VPS/ dedicated/ cloud hosting etc.). In the alternative, you can install your PrestaShop website on a web server solution stack package (like XAMPP, WAMP, MAMP) to design your PrestaShop website offline on your local computer. It can later be transferred & hosted to your choice of domain & server.

Websites Types To Build Using PrestaShop Platform:

You can opt to build an eCommerce PrestaShop website (with all the payments & shipment configurations set in place) or you can also make a catalog website to simply display your brick & mortar shop (with no payment & shipment options). Being a brick & mortar shop owner, if you also sell on sites like Amazon, you can also equip your catalog site with your products’ affiliate links.

This article will give you a deep insight into efficiently making an eCommerce PrestaShop website. Follow along until the end of this article for step-by-step guidance.

Main Steps For Building A PrestaShop eCommerce Website:

Step 1: Download PrestaShop from the official PrestaShop website.
Step 2: Name your store & choose from a pre-existing theme template or create your own.
Step 3: Upload your website logo or a sample image for your logo.
Step 4: Add products to your catalog & add a relevant product description.
Step 5: For your PrestaShop eCommerce site, set up the payment methods of your choice.
Step 6: Set up the shipment configuration.
Step 7: Activate your PrestaShop website & it will be live on your domain.
Step 8: Start to sell online. You can manage the orders, customers’ data & even edit your site later on whenever needed.

How To Design A PrestaShop eCommerce Website?

1. Choose A Customizable Theme:

You can choose a PrestaShop theme that fits your needs but make sure that it is customizable to a good extent as well. Design an elegant & professional looking PrestaShop website aligning with business model & customers’ needs. You can customize your theme colors, change fonts, layouts & typography. If you plan to design your theme, ensure that it is responsive on mobile devices too.

2. Set Up Your Product Catalog:

On the website backend, in the catalog section, add & list the products on your website. If you are a bit experienced with the eCommerce industry, you must be aware that products can be easily bulk uploaded using mediums like ‘.csv’ files. PrestaShop allows that & makes cataloging convenient. Make sure to use a unique product ID for each product because when the same ids are encountered, the older products get overwritten.

3. Set Up Payment Methods:
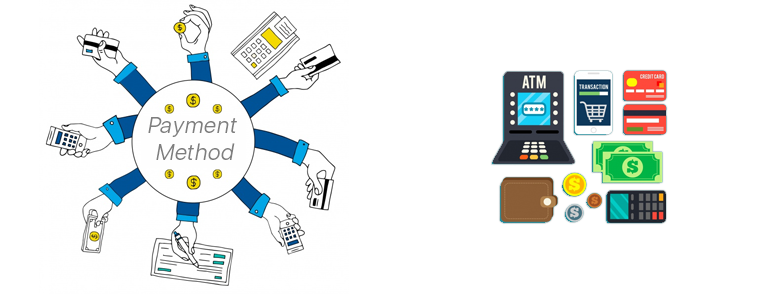

The easiest payment option to configure on PrestaShop is PayPal. You can add more such as debit/ credit cards, e-Wallets, Net Banking/ Mobile Banking, Pay-On-Delivery, etc. to make it easier for website visitors to use their preferred method of payment. You can also configure multiple currencies if you are serving in multiple countries. Make sure to have secure payment gateways. Keep your whole PrestaShop website secure by installing an SSL certificate.

4. Shipment & Order Delivery:

Based on the location of your business & the location of the potential customers you are serving, choose the right shipment company. Some of the worldwide popular ones are FedEx, DHL, etc.

These are the basic things to get your PrestaShop site up and running. Later on, you can add more customization, add admins & editors with selective privileges, add support for multiple languages, add CMS pages for information like the ‘about us’ page, ‘contact-us’ page, etc. Install 3rd party modules to add more functionalities to your website, transform your site into a Mobile App, & a lot more.

If you need any expert assistance while PrestaShop development and designing, reach out to us at support@knowband.com. Our experts at KnowBand, a leading eCommerce Solutions Company, would be more than happy to assist you.

We, at KnowBand, offers everything for PrestaShop Stores along with development services. Check our best-in-class extensions and add more functionalities on your website:

That’s not all. Here are 500+ such amazing plugins. Check all of them from here.

Best Tips To Customize A PrestaShop Website

Selling products on an eCommerce website rely on the presentation & personalization of the products. In simple words, the functionalities, products, features, etc. should be matching to front-end client requirements. PrestaShop online store customization is all about adding new features and functionalities. While doing so, you must be taking some precautionary measures which will help in branding a unique image to the website without cluttering in any possible way.

The majority of the PrestaShop e-retailers happen to make at least some sort of custom change in their e-store. This is, in fact, a necessity for e-businesses to have a distinctive & unique touch to their eCommerce website. Most businesses opt for this to keep the look & feel of their website in-line with their own unique theme of their business. These customizations not only enhance the graphical design of a website but also contribute to adding more functionalities & improve the shopping experience.

Here are few such factors discussed below that can help you with customizing your eCommerce PrestaShop website.

#1. Customization Using Hooks:

Hooks are basically images that can be used for displaying informative images & also act like CTA sources. We can categorize them into two basic options:

A) Action Hooks:

These hooks are clickable & hence can be used to redirect the site visitor to a relevant page. These kinds of hooks require strategic configuration as their CTR would influence more engagement and sales.

B) Display Hooks:

These hooks are plain images simply for the purpose of displaying various things. Some common areas where hooks are placed:

a) Multiple positions on the homepage.
c) Left/ Right-aligned hooks.
d) Footer’s bottom area.

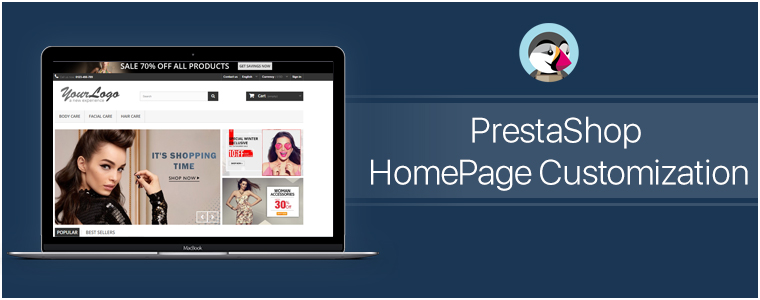
#2. PrestaShop HomePage Customization:

Generally, on the home-page, the area ‘above the fold’ is what gets the first view on a website. Similar to newspapers, websites also have the most important news highlights on the top half of their home page, such an approach to design & customize the PrestaShop homepage helps to engage customers in a more productive way. Some of the home-page designs that can be customized include:

● Sticky Navigation Menu/ Bar with Company Logo, Signup link, search box, etc.
● Slider Images with hyperlinks to relevant topics.
● Banner Images of selected categories of the products being sold on the e-store.
● Hyperlinked Infographic for sale, lotteries, offers, coupons, time-based flash-sale, new arrivals, brand launches.
● Widgets/ add-ons for social accounts like a Facebook block with like/share/follow buttons.
● Static/ dynamic chatbots.
● Gamified CTA (Call to Action) like ‘spin & win’ discount wheels or gamified newsletter/ notification subscriptions.
● Banners for top-seller/ top-brand.
By now, you would have probably realized how these additions would not only make such an e-store stand out for looks & functionalities but also serve the purpose of growing conversions.

A lot of these modifications can be made using the PrestaShop Modules. And because PrestaShop is an open-source eCommerce platform even more edits can be made by manually coding the required functionalities. So the eCommerce businesses on PrestaShop automatically get an additional advantage here to build their site according to their own unique business needs.

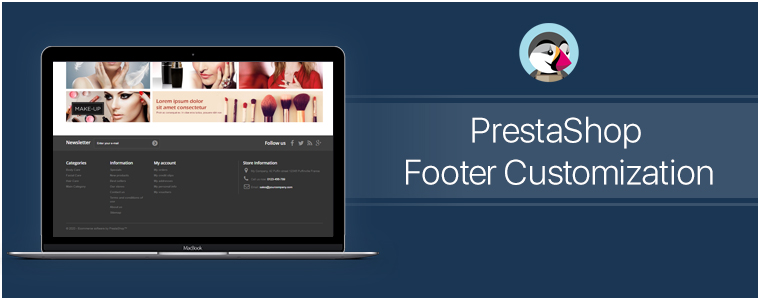
#3. PrestaShop Footer Customization:

The footer of the PrestaShop website enables the e-store admins to showcase various widgets & functionalities. Some can be added via PrestaShop Add-on Modules while some come pre-installed. Even more, can be added via coding or customization.

Footer, for all the webpages, is mostly kept common. So, it is crucial to have all the important things available in it. It offers instant access to your customers for all necessary links & information no matter where they’re displayed on the Prestashop website.

Few common footer customizations are listed below:
● Newsletter Signup Segment
● Social Channel Icons
● Sitemap (HTML Sitemap)
● Company Certifications & Payment Methods
● Quick Navigation Links
● Sign-in /Sign-up Links / ‘My Account’ section
● Contact details of the Company

#4. Other Customizations:

A) CMS Icons:

To display extra information about your PrestaShop store such as payment options, refund policies, etc, admin can use the CMS icons. Clicking them takes the user to the relevant page.

B) Top Side Banner:

This is a default feature that admins can enable/disable. This adds a thin banner on the extreme top of the page with the purpose to show the special offers, discounts, limited-time shipping, etc.

C) Social Sharing Icons/ Links:

With these icons, your e-shoppers can share the link of their choice of products with their friends, family & acquaintances. Prefer to add the links for Facebook, Pinterest, Whatsapp, etc.

Conclusion:

As they say, often little things make the biggest impact. Adding more customized functionalities to your store would help in the growth of the business. These just are a few examples of how PrestaShop Customization can be utilized. Apart from these, there are unlimited numbers of customizations that can be implemented. Feel free to discuss with us on support@knowband.com and get a quote for the required customizations.

Visit KnowBand Plugins to get eCommerce plugins for all platforms.

PrestaShop Mobile App Builder Installation – Using FTP Details

If you are a PrestaShop website owner & module installation is hectic for you. Here’s is the simple & easy way to do the installation using your PrestaShop FTP details. Read the article for complete information.

Step 1: Get PrestaShop Mobile App Builder

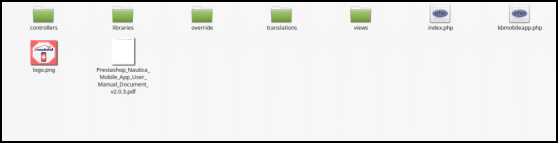
Purchase PrestaShop Mobile App Builder module from KnowBand store. You would get a zipped file containing the source code of the module. Unzip the file. You would get a file named “kbmobileapp”.

This folder contains the complete source code of the PrestaShop Mobile App Builder module as shown in the snapshot below:

Step 2: Move Source Code into Website Directory

Copy “kbmobileapp” folder into your store “modules” directory on the path – Root Directory/modules/.

Step 3: Install the Module

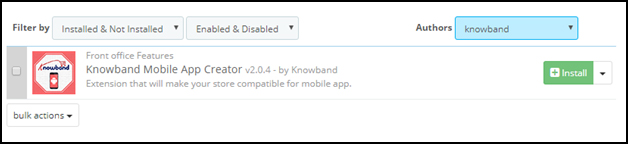
Now, the Prestashop mobile app builder addon is ready to be installed on your store and you can find that in Store Admin -> Modules and Services. It would be shown as below –

Step 4: Configure Module

Clicking on the “Install” button would display a confirmation pop-up. Tap “Proceed with the installation” & your module is installed successfully. Click configure & start using the backend of PrestaShop Mobile App Builder.

Thus, using your FTP details, you can install the module on your PrestaShop website with facile. Now, you can start using PrestaShop Mobile App Maker module. Hope this document proves helpful to you.

So, What’s Next?

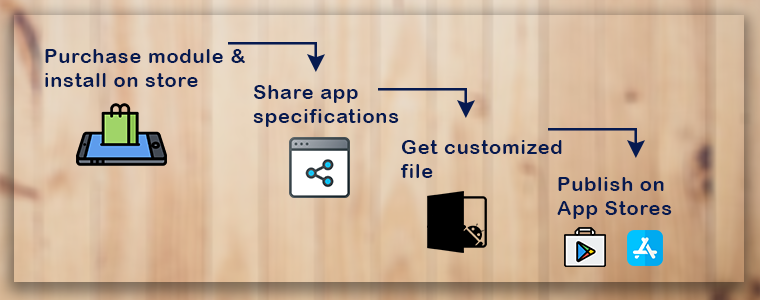
You have purchased the PrestaShop Mobile App Builder module & install the same on your website with the above-discussed process. Now, share the app requirements & specifications with our pre-requisites form & we would build & provide your apps in 1-2 days.

Proved helpful? There is another way as well to install the module. Have a look at the same:

PrestaShop Mobile App Builder Installation – Using Admin Details

PrestaShop Mobile App Builder Installation – Using Admin Credentials

This tutorial is intended with KnowBand’s PrestaShop Mobile App Builder installation on your website. All the e-merchants having their website on PrestaShop v1.6 & v1.7.

Well, installation of KnowBand’s PrestaShop Mobile App Builder on your PrestaShop website is just a matter of a few simple steps. Using your website back office admin details, you can install the module in a few minutes. Move on with the steps listed below:

Step 1: Login Using Backend Details

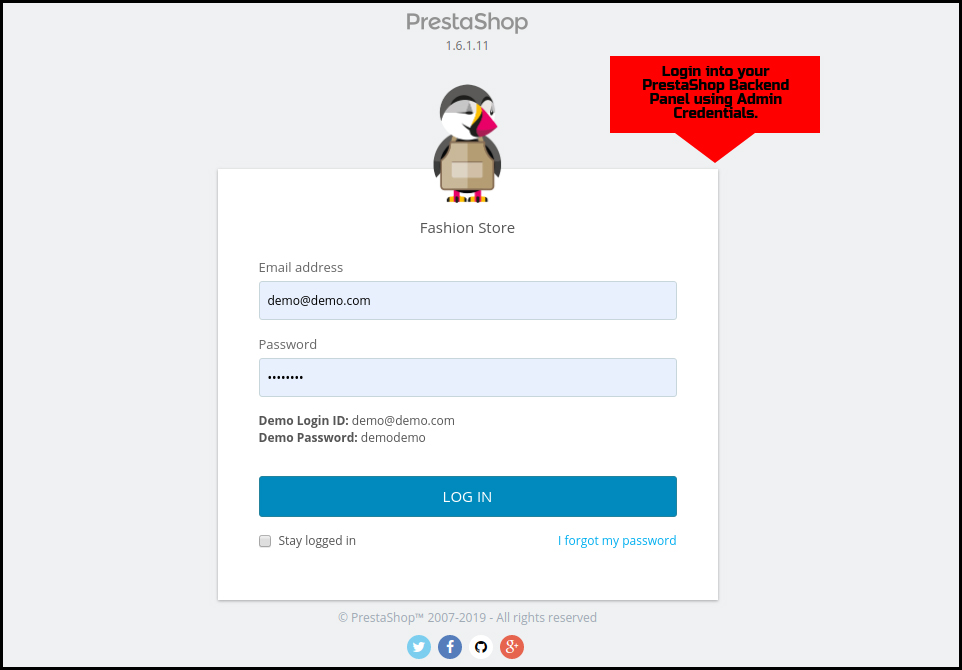
Login to your PrestaShop website backend panel using your login details.

Step 2: Add Source Code on your Website

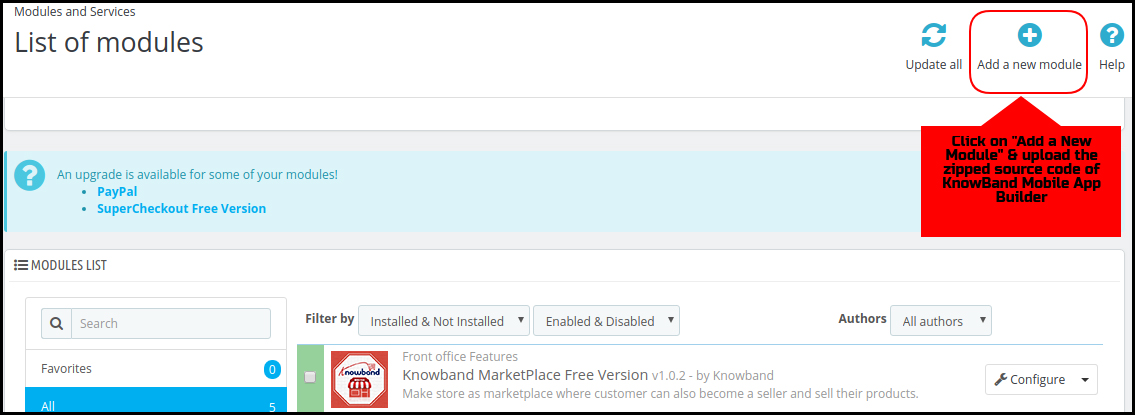
On the top-right corner, there is an option to “Add New Module”. Click & install the zipped source code of PrestaShop Mobile App Builder. You will get the required zip file once the module is purchased.

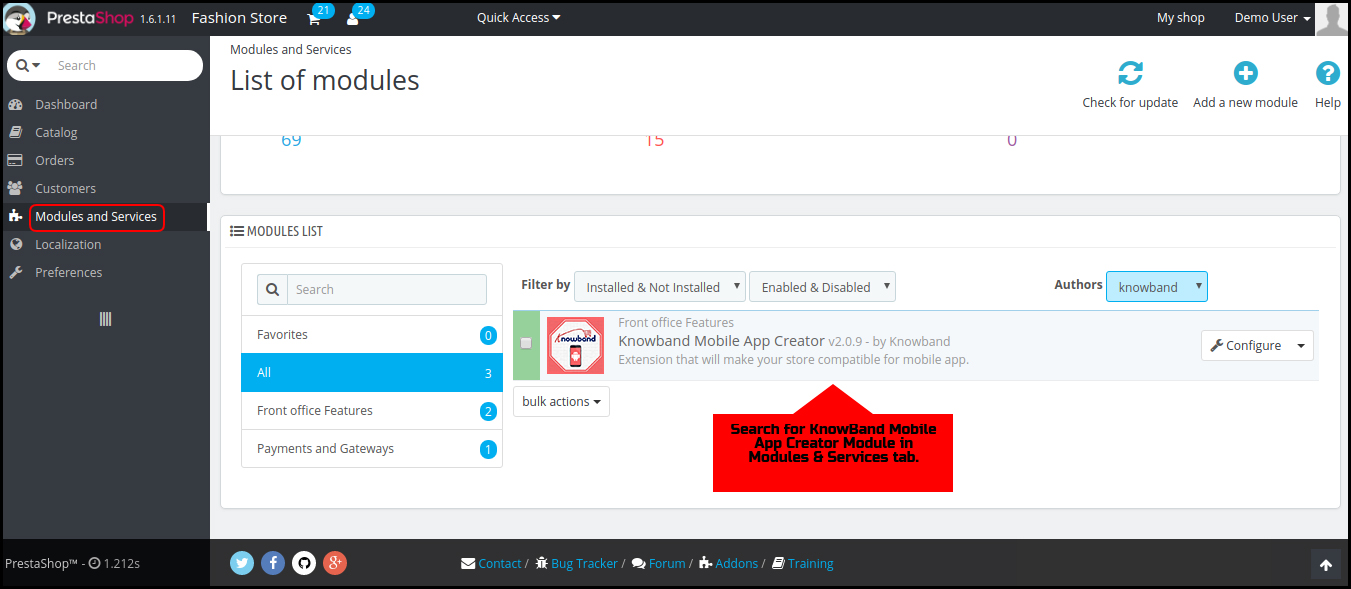
Step 3: Search for the Installed Module

Go to Modules & Services tab and search for KnowBand Mobile App Creator module.

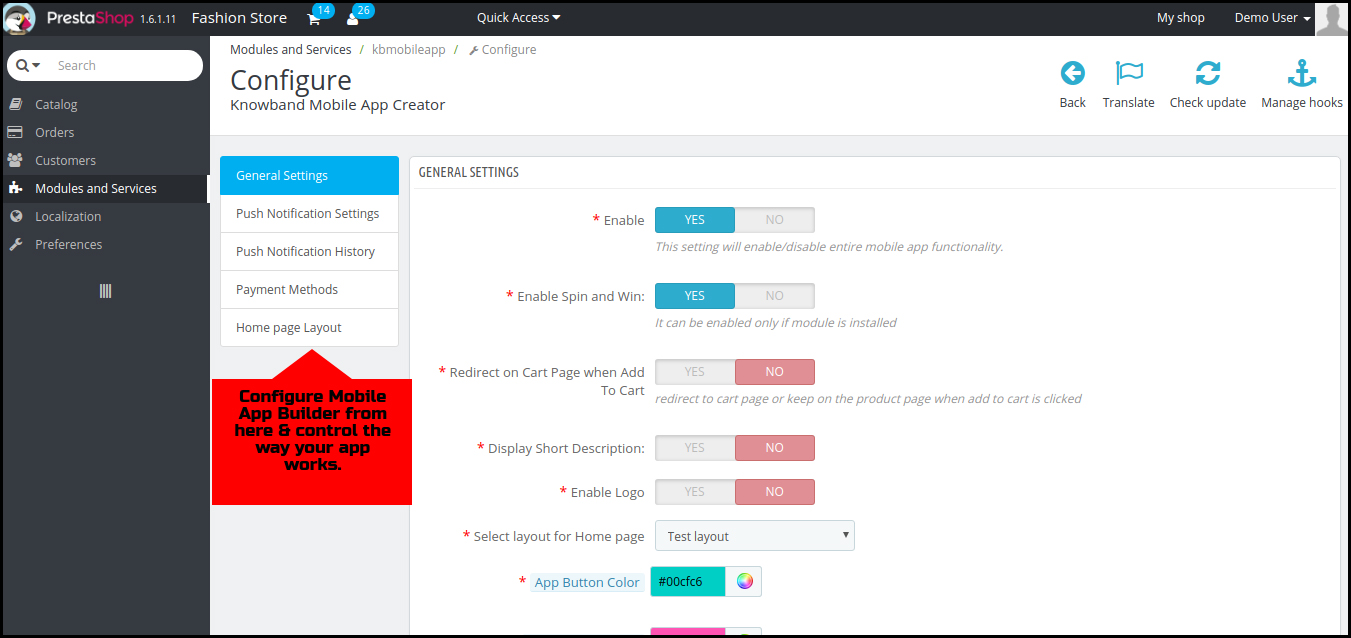
Step 4: Configure the Module

Click “Configure” & next screen would be of KnowBand Mobile App Builder.

That’s it! You have successfully installed the PrestaShop Mobile App Builder plugin on your store & ready to configure the same. Hope, this tutorial proves helpful to you.

Done! What’s Next?

Once you have successfully installed the PrestaShop Mobile App Builder plugin on your website, we would share a pre-requisites form with you. This form would gather all the specifications & requirements of your app for a better understanding of our developers. That’s it! Now, sit back & relax. We would get back to you with your app.

Liked Article? You can opt for module installation using PrestaShop website FTP details. Here is the link to the same:

PrestaShop Mobile App Builder Installation – Using FTP Details

Prestashop Previous Next Buttons Addon by Knowband – User Manual

Introduction of Prestashop Previous Next Buttons Addon:

Make an easier navigation for your customers with the help of the Prestashop Previous Next button addon by Knowband. The Prestashop plugin allows the customer’s to view the previous or next products just by clicking on the respective buttons.

Steps For Installation of Prestashop Navigation Addon

To install this Prestashop Navigation addon, please follow the following steps:

1. Add addon folder under modules folder of your system.

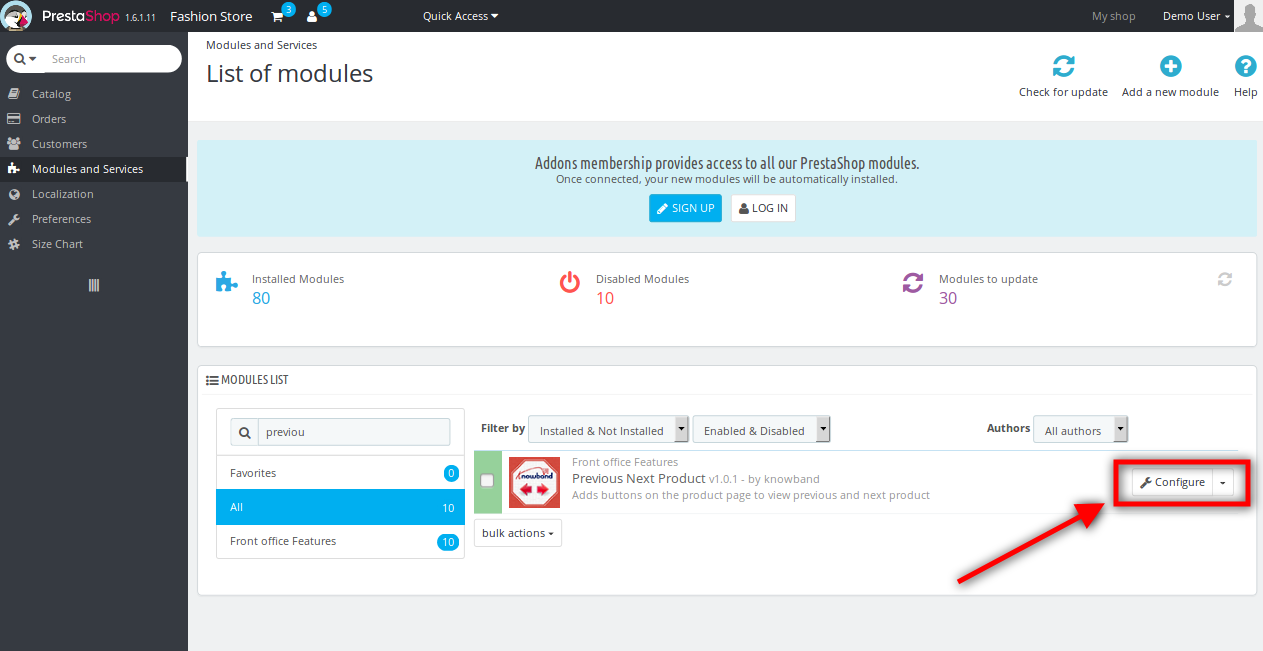
2. After adding this addon folder, system will list the addon on module page under front office feature category as given below:

3. Click on install to install the Prestashop paginator plugin. After installing the Prestashop product scrolling addon, you’ll see the ‘configure’ option at the place of install. (See the image above)

Admin Interface of Prestashop Paginator Addon:

Following features will be provided to the admin interface of this Prestashop Previous Next addon:

1. General Settings

General Settings of Prestashop Navigation Addon:

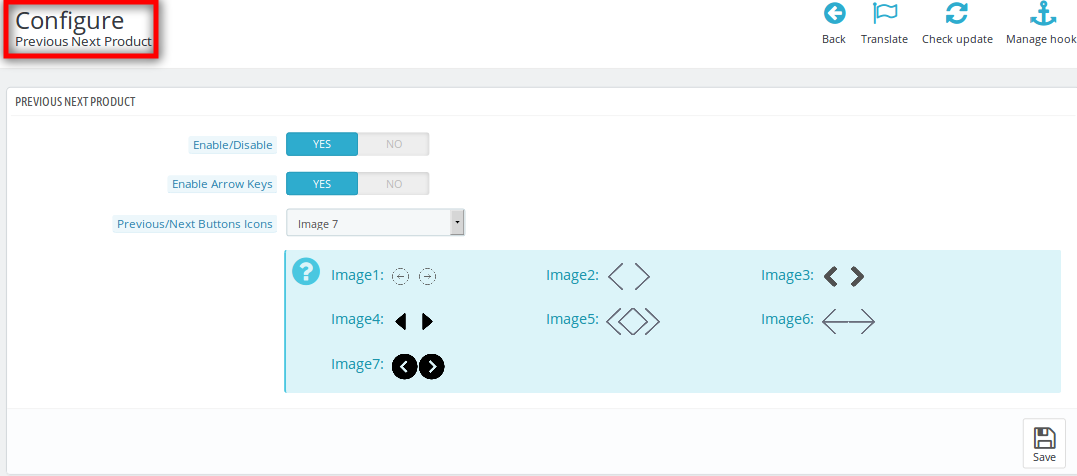
After clicking on configure link of prev next product page module General settings tab will open.

Fields listed will be filled with some default values

GENERAL SETTINGS TAB DETAILS:

  • Enable/Disable: Initially, this field of Prestashop navigation module will be OFF. User can enable/disable this Prestashop addon functionality by turning this ON/OFF.
  • Enable Arrow Keys: This button of the Prestashop product scrolling module lets the the admin to enable or disable the arrow keys navigating feature of the addon. Enabling this feature allows the customers to navigate the products using the arrow keys on the keyboard.
  • Previous Next Button Icons: Here, the admin can select the button images that would be displayed in the front end as the Previous/Next product buttons.

Front End Module:

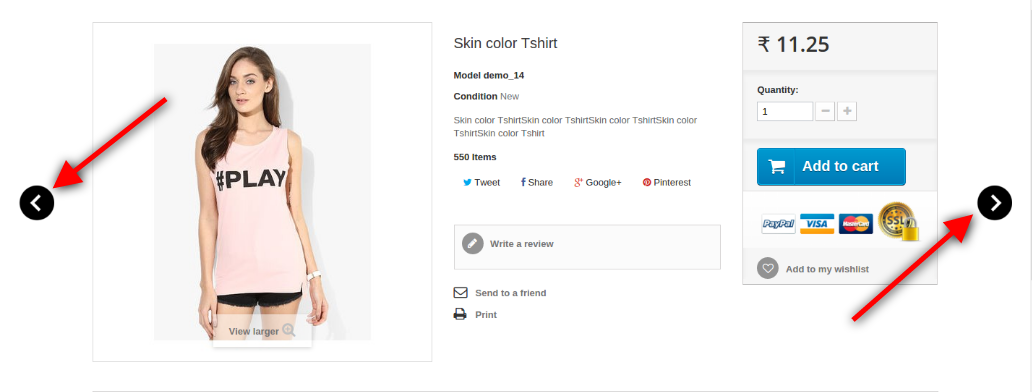
After enabling this Prestashop previous product plugin, the product page in the front of the shop will change a bit as the two buttons will be added in the side of the product.

The previous next button Prestashop module at the front-end appears as follows:

Watch the video tutorial here:

Are you looking to create simple previous/next button navigation on the product pages of your store? Use this customizable addon by Knowband to save the time of your customers and add more convenience to their shopping. Decide the look and feel of the button as per your choices to make it simple and attractive for the users. Buy this module from addon store and give an ultimate shopping experience to your customers.
Click here for Admin Demo and Front Demo as well.

Entice your E- commerce Customers with this Prestashop Scratch Coupon Module

Online customers are always eager to hear about new exciting deals to satisfy their shopping craze. They are always looking for excellent shopping schemes to splurge their money and to go on a shopping spree. But, often they are not able to satiate their fondness for shopping due to unexciting shopping offers and deals. But, with this Prestashop Scratch Coupon, business organizations can easily attract shopaholics towards their e- commerce store to increase their conversion rates. Some of the excellent features of this scratch coupon module that has made it a huge worldwide rage among the numerous e- commerce organizations are as follows:

Wonderful feature rich admin panel-

The scratch coupon module provides great power to the site admin regarding the overall appearance of your site. With the great features of the scratch coupon, site admin can make necessary changes in the design, content and layout of their web page. The scratch coupon provides great control to the site admin who can decide how their website needs to appear to their targeted customers.

Easy installation and configuration facility-

The customers do not require the assistance of any external help while installing this scratch coupon module on their site. It can be easily installed through administration area or can be installed automatically by using the hosted directory of the Prestashop. Further, the scratch coupon module can be installed manually through FTP or can also be uploaded from the server site.

Effective targeting of the mobile customers-

The scratch coupon module is specifically designed to target the mobile based customers as more and more people are doing online shopping through mobile devices. The scratch coupon module has a responsive design that makes it ideal to be used on multiple platforms like desktop, laptop, mobile phones and tablets. This Prestashop Scratch Coupon Addon is truly made for mobile customers.

Support for multiple languages-

The developers have tried to increase the global appeal and usability of the scratch coupon module by providing support to multiple languages. With this feature of the scratch coupon module, more and more people belonging to different geographical areas and linguistic regions can use this Prestashop scratch coupon module to increase the conversion rates of their e- commerce store. The scratch coupon module is made for a wide range of global audience that speaks multiple languages.

Helps in improving conversion rates-

By providing attractive scratch coupons to your targeted customers, business organizations can easily increase chances of business growth. With these scratch coupons, e- commerce organizations can encourage their customers to complete their pending shopping orders and can increase their product sales and conversion rates.

So, explore the rich features of this Scratch Coupon Prestashop Addon and improve your business growth drastically among your rivals. Further, the scratch coupon module is a wonderful way to attract more customers towards your e- commerce store and helps in encouraging them to make online purchase through your site.

You Might Also Like: