
1.0 Wprowadzenie
SOCZEWKI Prestashop Maintenance Page Customizer by Knowband został zaprojektowany w celu dostosowania strony "Nie do konserwacji" w sklepie Prestashop. Addon pozwala administratorowi sklepu wprowadzać zmiany koloru czcionki, koloru tła, rozmiaru tekstu i innych elementów z zaplecza. Właściciel sklepu może również mieć konfigurację Cron, aby automatycznie włączyć tryb konserwacji w swoim sklepie.
2.0 Kroki do instalacji
Instrukcja użytkownika prowadzi użytkownika do łatwej instalacji i konfiguracji modułu dostosowywania strony Prestashop Maintenance przez Knowband.
Możesz wykonać kroki wymienione poniżej, aby zainstalować dodatek Prestashop w swoim sklepie.
- Skopiuj niestandardowy folder modułu stron serwisowych w katalogu root_directory / modules / twojego sklepu przez FTP lub użyj prestashop interfejs do załadowania wtyczki.
- Po skopiowaniu moduł Prestashop pojawi się na stronie z listą modułów w panelu administracyjnym, jak pokazano poniżej.
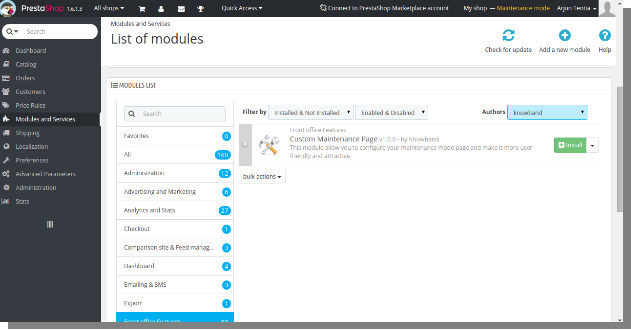
- Jeśli moduł strony konserwacji Prestashop nie wyświetla się na stronie z listą modułów, przeszukaj ją, filtrując moduł z następującymi szczegółami:
słowo kluczowe:?customamaintenancepage
Autor:?Knowband
Kategoria:?front-office feature
Przefiltrować przez:?Installed & Not Installed/Enabled & Disabled
Uwaga:
- Po kliknięciu przycisku instalacji pojawi się wyskakujące okienko z komunikatami ostrzegawczymi. Możesz zignorować te wiadomości i iść naprzód. Nie będzie negatywnego wpływu tego komunikatu ostrzegawczego na Twój sklep.
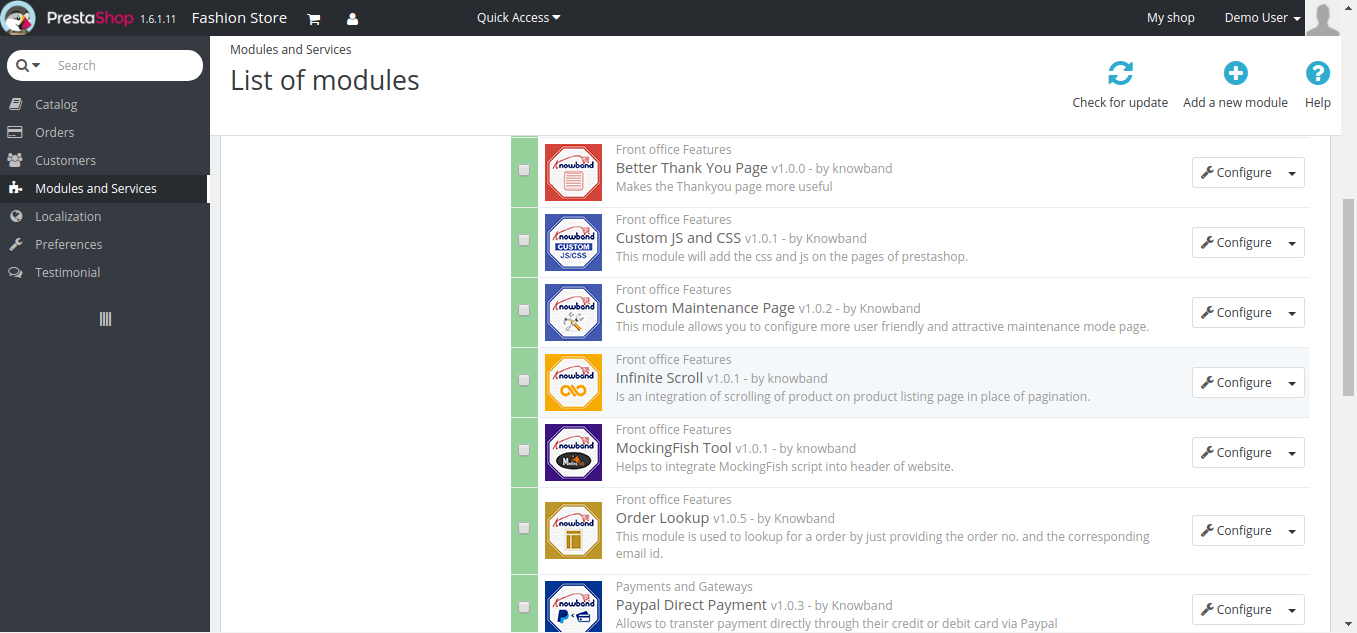
- Po zainstalowaniu modułu modyfikacji strony modyfikacji Prestashop, przycisk konfiguracji będzie znajdował się przed tą wtyczką na stronie z listą modułów, jak pokazano na poniższym ekranie:
Moduł administracyjny 3.0
Ustawienia konfiguracji 3.0.1
To?access?this?Prestashop?error?page?modification?module,?Click?on?configure?button?of?custom?maintenance?page?module.?On?clicking,?module?interface?will?be?open?and?following?screen?will?be?displayed?as?given?below:
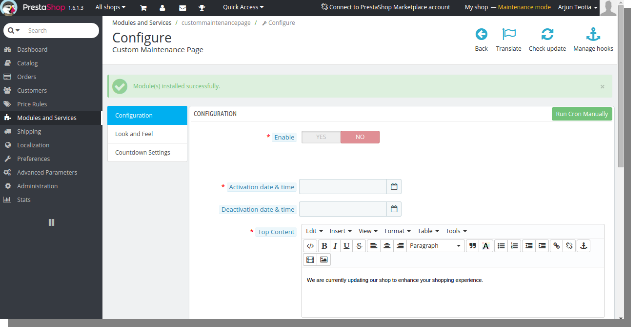
- Włącz / wyłącz:?To enable the plugin, switch the enable button from OFF to ON. The default value will be OFF.
Activation date and time:?This is the activation date and time when your module will go into maintenance mode. The default value will be Null - Data i godzina dezaktywacji:?This is the deactivation date and time when you want your shop to go live and turn off maintenance mode. The default value will be Null.
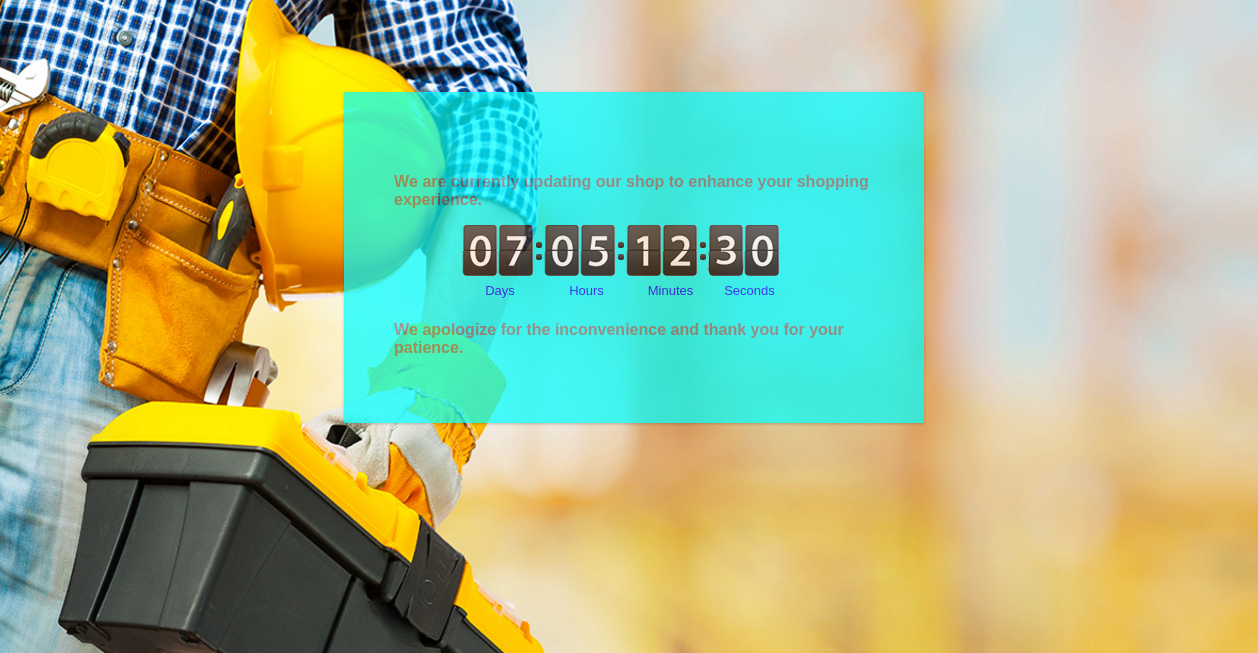
- Najlepsza treść:?This is the main message that will display on your maintenance page after maintenance mode is enabled. We have added a The default text in this field. The default data will be We are currently updating our shop to enhance your shopping experience.
- Bottom Content:?This is another text message that will display on your maintenance page below top content after maintenance mode is enabled.We have added a The default text in this field. The default data will be We apologize for the inconvenience and thank you for your patience.
3.0.2 Look and Feel Tab
Ta zakładka zasadniczo zawiera wygląd strony obsługi. Te ustawienia dotyczą naszego interfejsu użytkownika na stronie konserwacji.
- Zdjęcie w tle: You can change the background image for your maintenance page here. There is a given The default image for maintenance page background. You can easily upload a beautiful image for your background on maintenance page’s front-end.
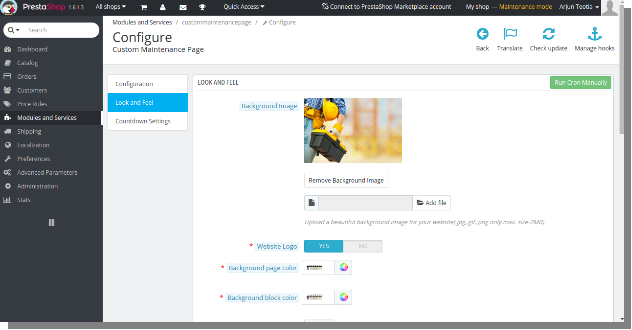
- Website Logo:?You can also have an option to show your website logo on maintenance page. The default value of this field will be YES.
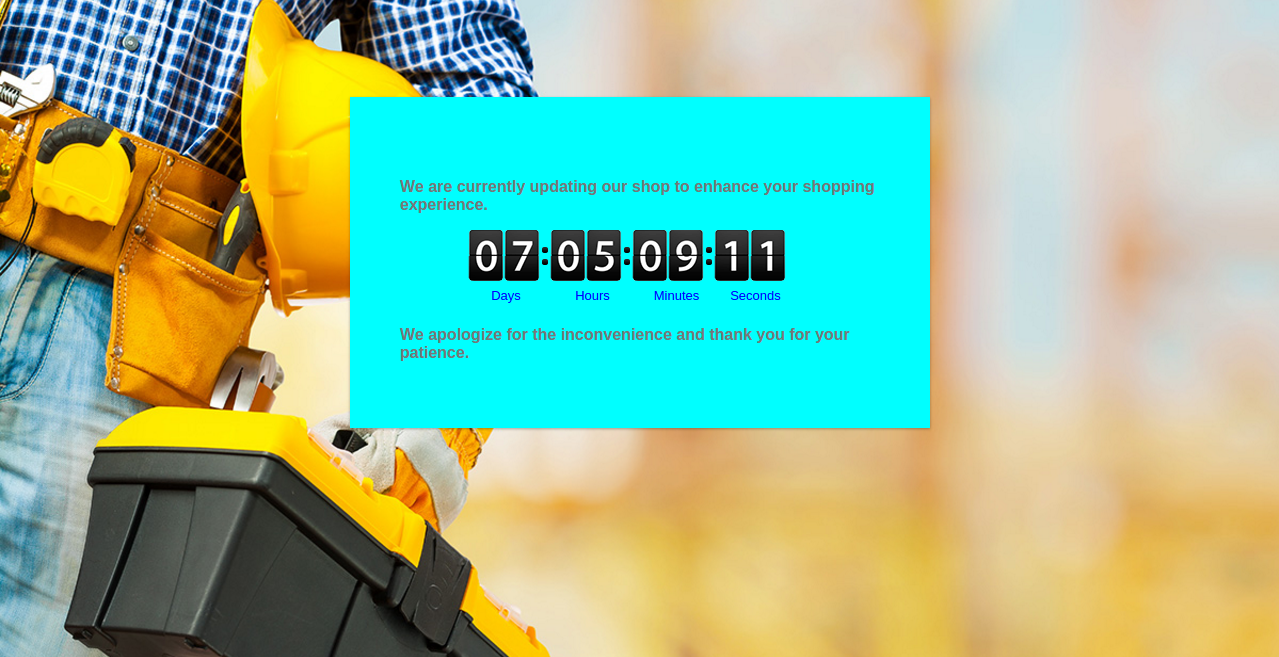
- Background Page Color:?This is the background color of maintenance page. The default background color will be white #ffffff.
- Background Block Color:?This is the background color of the rectangular content block on which your message is printed on maintenance page. The default color will be white #ffffff.
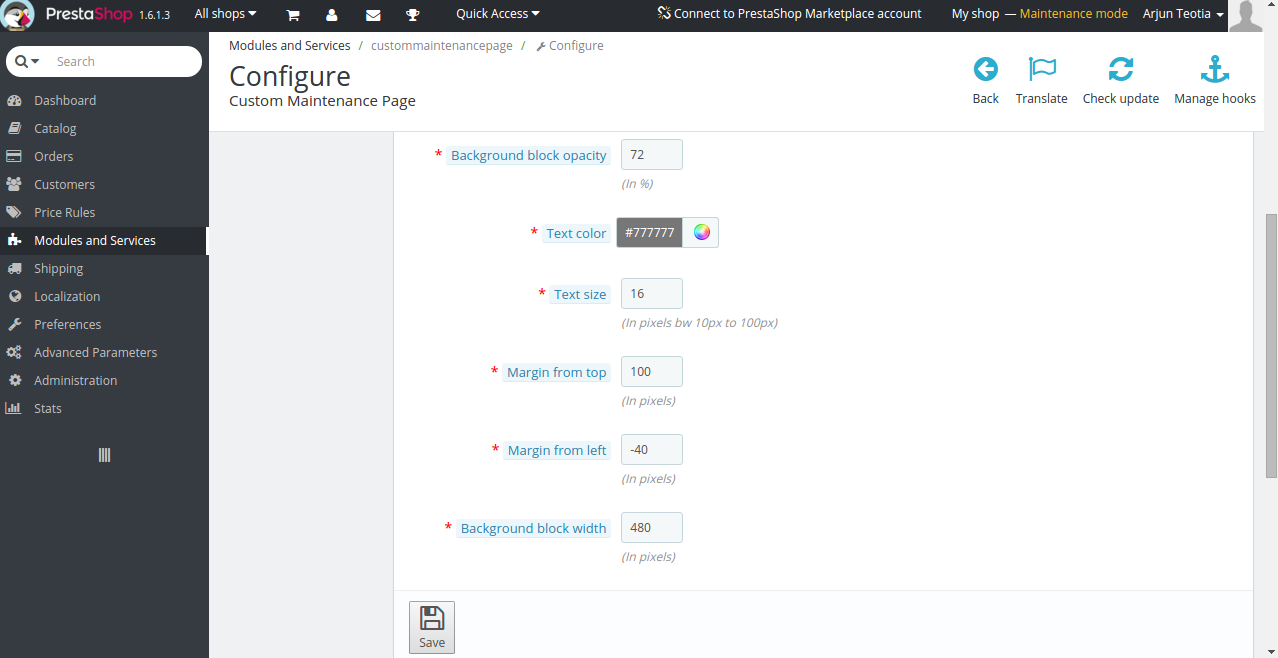
- Background block opacity:?This is the opacity in the percentage of the rectangular content block on your maintenance page. The default value will be 72.
- Kolor tekstu:?This is the color of the text message on maintenance page. The default color will be #777777.
- Rozmiar czcionki:?This is the font size of the text message on maintenance page. The default size will be 16pixels.
- Margin From Top:?This is the margin between your content block and top of the window. This helps to move downward or upward your content block on the maintenance page. The default margin will be 100pixels tested well on Prestashop v1.6.1.3.
- Margin From Left:?This is the margin between your content block and left of the window. This helps to move left or right your content block on maintenance page. The default margin will be -40pixels suitable for Prestashop v1.6.1.3. For the different version of Prestashop, you will need to change this setting according to your shop.
- Background Block width:?This is the width of the content block on maintenance page. You can stretch your background block accordingly with ease. The default value will be 480pixels.
3.0.3 Countdown Settings
This tab of the Prestashop error page modification addon is for the configuration setting of the countdown timer on maintenance page. You can change the background color of your timer with the content block and you can even move left, right on the content block. You can also select from 4 different sizes of countdown timer according to your need.
- Timer Size:?You can change the size of your countdown timer which is shown on maintenance page. There are 4 different sizes of countdown timer available Middle size, Small size, Extra small size and Large size. The default value will be Middle Size.

- Countdown Background Color:?This is the background color of the countdown timer. The default data will be white color #ffffff.
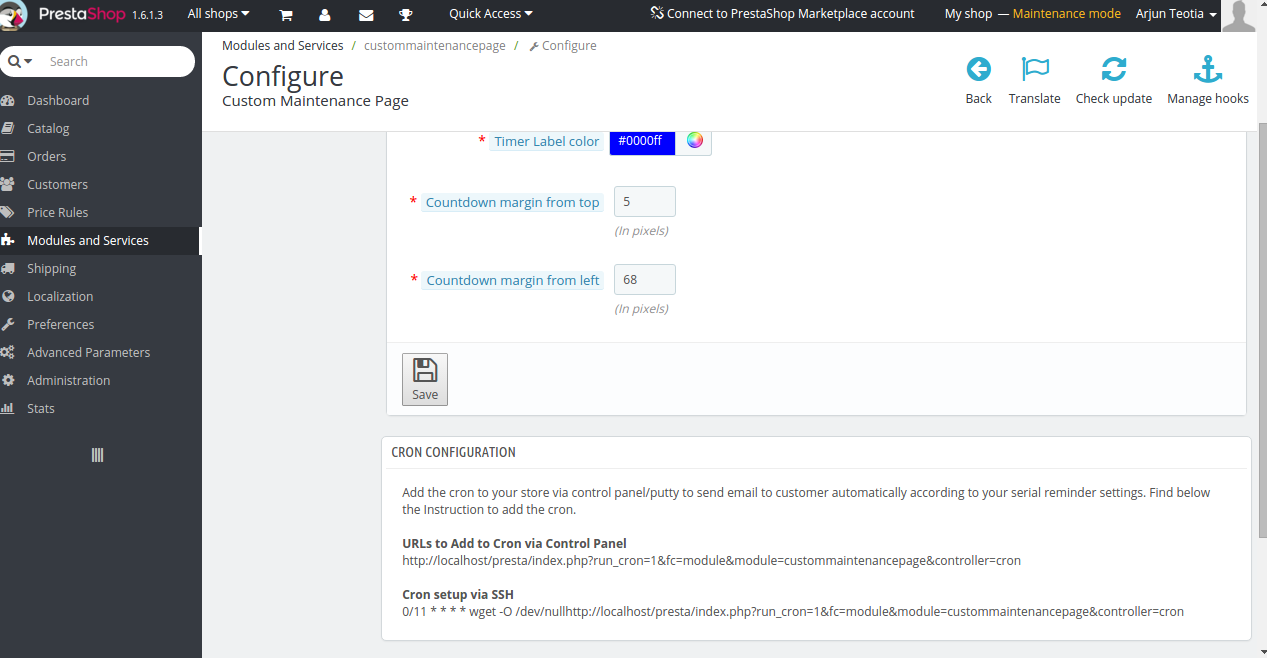
- Timer Label Color:?This is the font color of labels for hours, minutes, seconds. The default color will be blue #0000ff.
Countdown margin from top:?This is the margin of the countdown timer from the top of your text message on the content block on maintenance page. The default value will be 5pixels. - Countdown margin from left:?This is the margin of the countdown timer from the left of your content block on maintenance page. The default value will be 68pixels.
3.0.3.1 Cron Instructions
This is instruction on how to run your cron function of maintenance tab. There is a button to run cron manually on the left side of module page. You can either click this button to run cron or set an automatic cron on your server following the instructs. The cron URL and how to setup via SSH is given on the below of tabs as shown in the below image ?
3.0.3.1.1 The functionality of Cron Function-
These are the requirements when cron function will activate maintenance mode and disable your shop.
- The module must be installed properly and enabled.
- The current timestamp must be either greater or equal to Activation time stamp means the current date is same as activation date or ahead of activation date.
- Deactivation timestamp must be greater than current time stamp means deactivation date must be ahead of the current date.
- After all above conditions are true. The following message will print on running the cron –
Maintenance mode has been enabled successfully.
These are the requirements when Cron function will deactivate maintenance mode and re-enable your shop.
- The module must be installed properly and enabled.
- All other conditions above must not be true.
- The current timestamp must be greater than deactivation time stamp means current date must be ahead of deactivation date.
- After all above conditions are true. The following message will print on running the cron –
Maintenance mode has been disabled successfully.
In case both these options are incorrect, you will be shown the following message-
The module is not enabled or Activation/Deactivation date for maintenance has not passed yet.
4.0 Front Office Interface
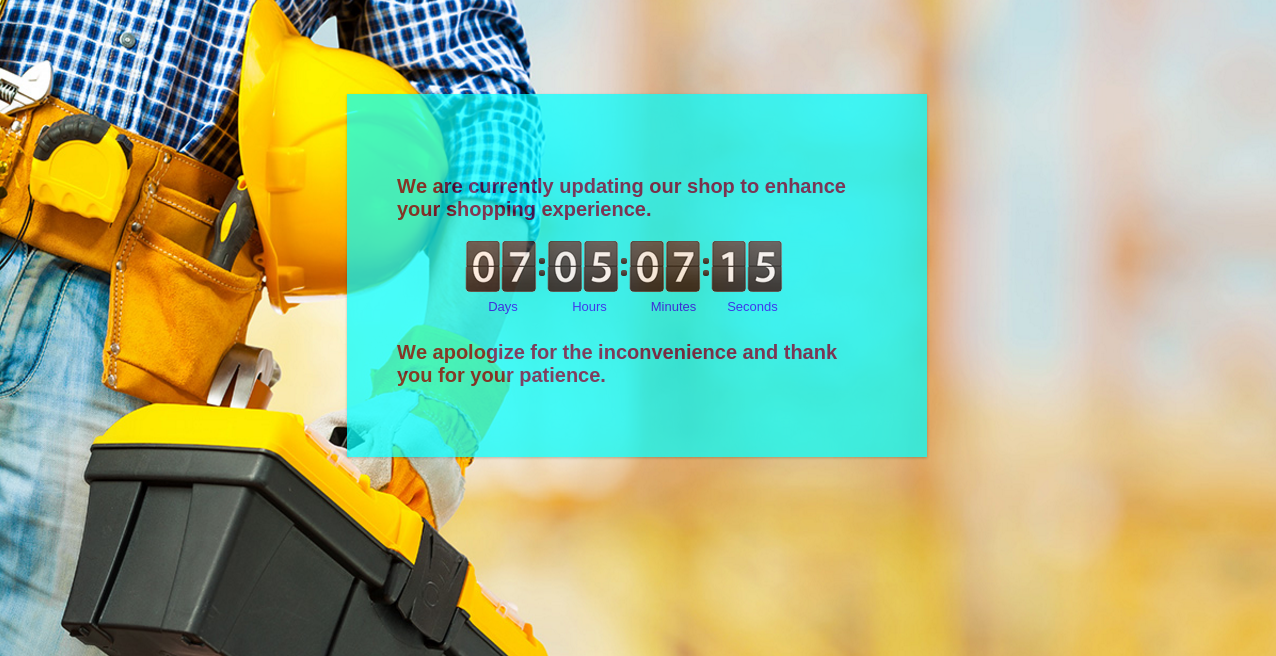
1. Domyślny interfejs ustawień

2. Without Website Logo
![]()
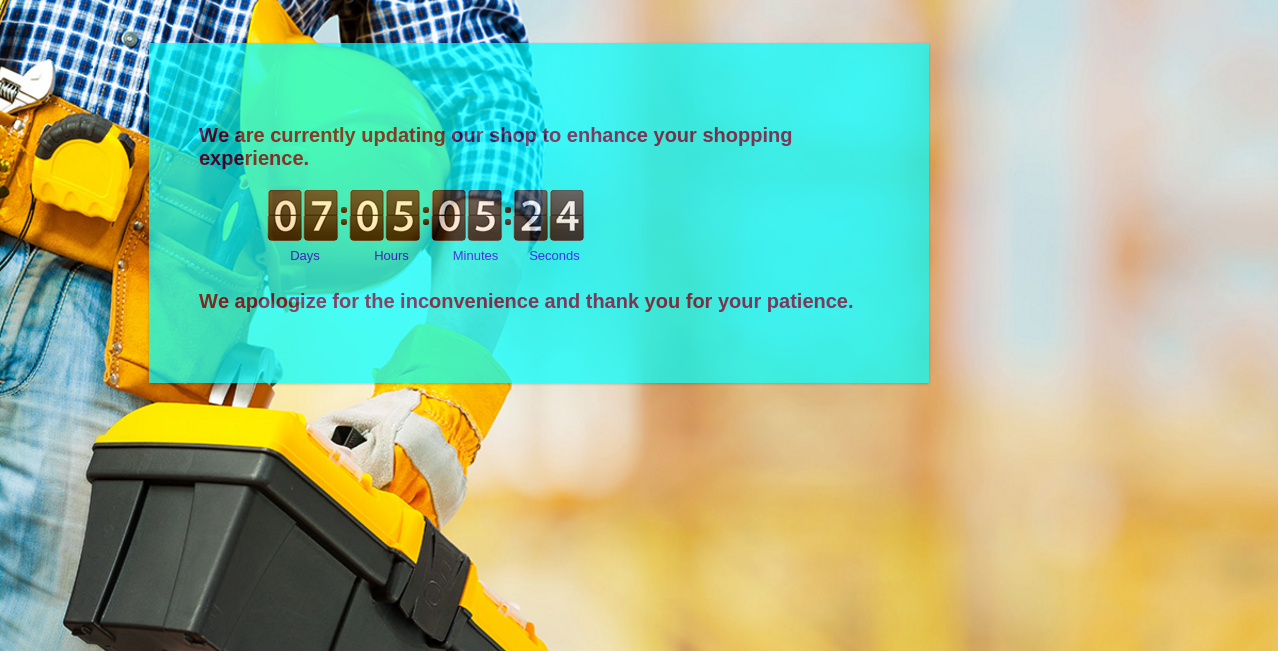
3. The changed Background Color of the content block and countdown timer
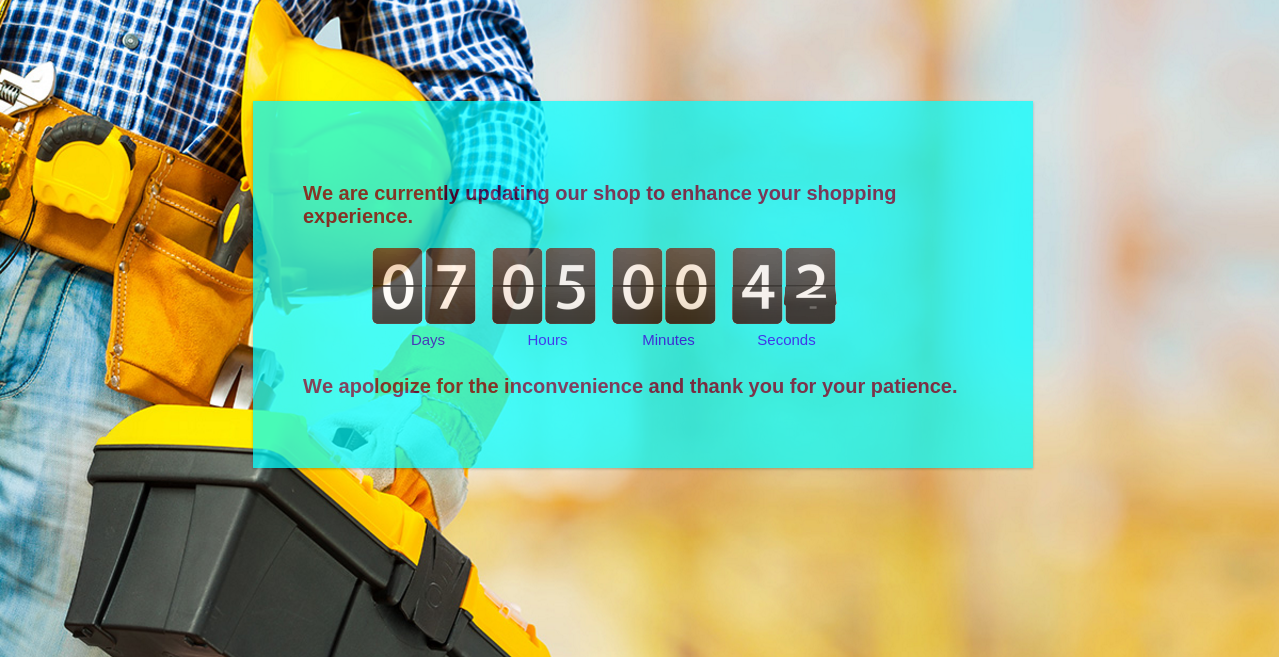
4. The maximum opacity of the content block
5. Changed font size and color
6. Changed position of the content block
7. Large Countdown
8. Smaller Countdown
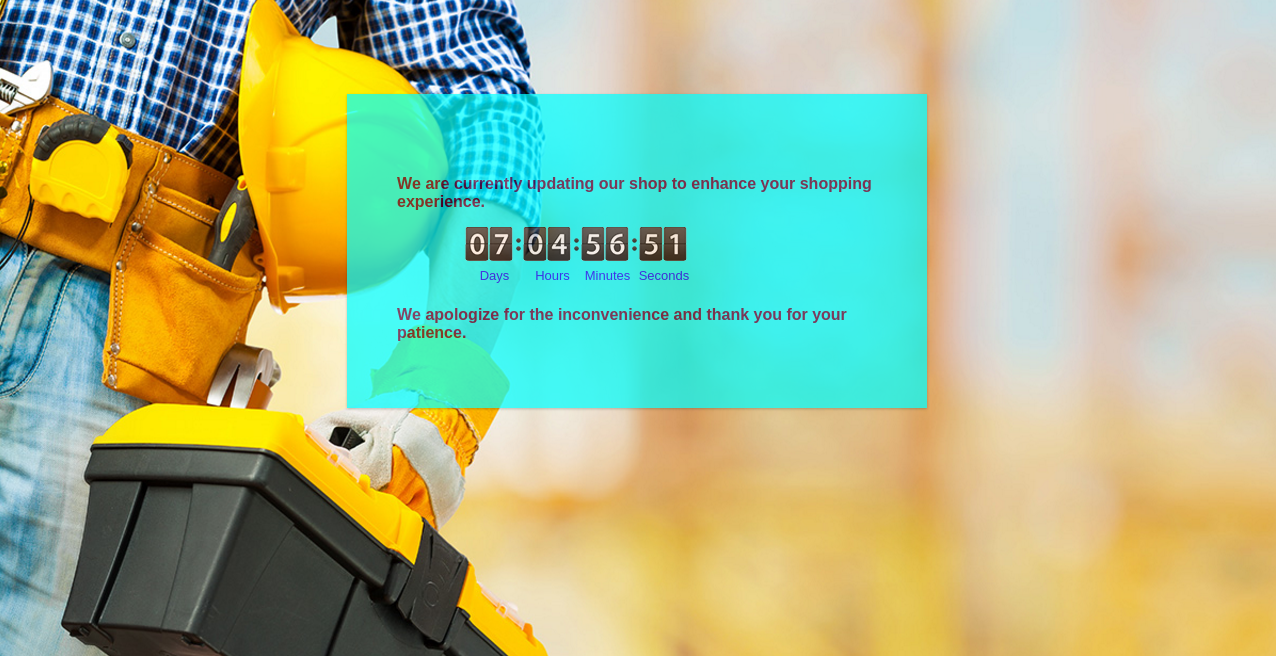
From all of the above images, you can easily make your maintenance page beautiful without making any extra efforts with the help of this module. You can fully customize maintenance page with the Prestashop Maintenance page customizer. So, attract your customers even when your actual shop is disabled.
Lubiłem to? Spodoba ci się to

