
Google has recently announced that the beloved Google Analytics version Universal Analytics will be no longer in service by June 2023. Moreover, UA lovers are finding the news shocking as Google shared an update. As you will not be able to shift your Universal Analytics data into Google Analytics Version 4. Thus, it becomes necessary to understand the workflow of GA4 on a priority basis and start collecting new data for your business. Although GA4 is considered a huge update by Google, the question is what are the new features you will find in GA4?
Thus, in the below-mentioned article, we have tried to cover up GA4 vs UA battle as well as the step-by-step guide to connect GA4 with your Shopify store. Let’s start with the advantages of GA4 over Google Universal Analytics.
Advantages of GA4 over Google Universal Analytics
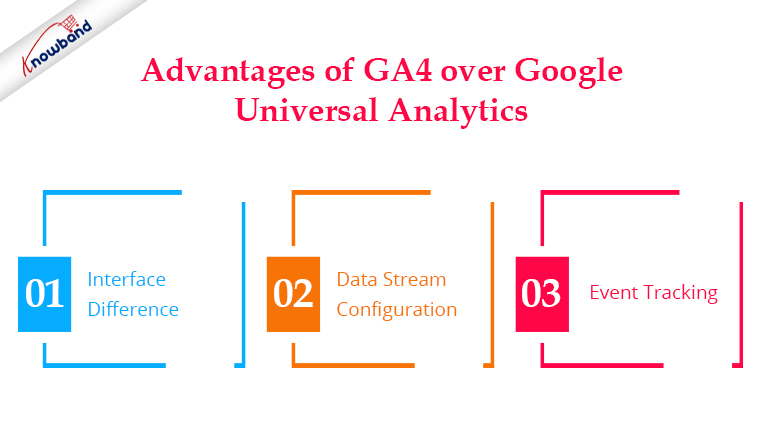
Interface Difference:
If you are familiar with GA3 (Universal Analytics) you can notice various modifications in the GA4 interface. Most of the options are replaced or removed in the latest Google Analytics update.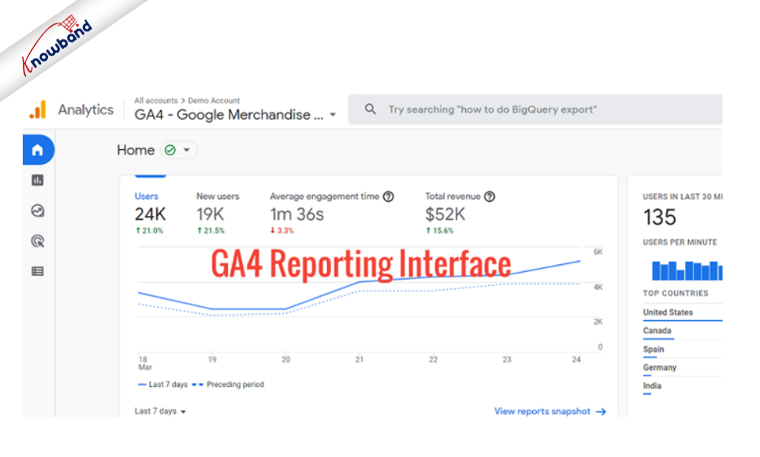
Moreover, in Google Analytics version 4 reports get generated only when you set a tracking event for the same. Another reason for the interface and reporting difference from UA is that the GA4 is developed on Firebase Analytics.
Data Stream Configuration:
One of the major differences that make GA4 different from the Universal Analytics version is that the users will not get an option for creating the views in Google Analytics version 4.
Where in the current version GA3, the Analytics users get an option for creating views to analyze customer behaviors.
Also, one of the major features Google added in the GA4 update is that now you will be able to create data streams on your applications and websites.
Event Tracking:
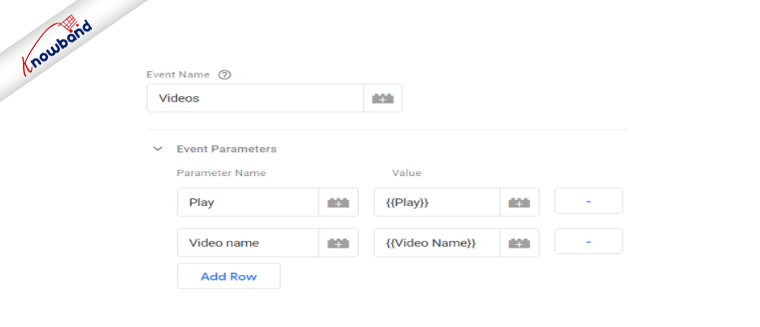
In the case of event tracking Google Analytics 4 provides more flexibility than Universal Analytics. Where in the GA3 version, the users had an option for creating events in the format category-actions-label-value.
On the other hand, in the recent update now the GA4 users will be able to create events with just event names and event parameters.
GA4 Event Interface:
Also, Google Analytics provides options to track automatic collections, enhanced measurement events, recommended events, and custom events. Moreover, if you want to check the automatically collected and enhanced measurement event, you will not even require to touch your codes. As the following details get fetched automatically.
The only condition that requires to be there for the working is you should have installed gtag.js implemented from Google Tag Manager or directly. These are a few of the differences you notice in the GA4 version. Moreover, it is considered that users will find new streams of data and usability with the help of the GA4 version.
Our next point of discussion comes to how to integrate GA4 with Shopify. Before initializing the integration, there are some points of consideration. Instance, your entire integration process is going to depend on the Shopify version you are using at your end.
For example, Shopify Plus sellers get an option to include the Google Tag Manager on all the website pages. Including the website checkout page. On the other hand, if you are not using the Shopify Plus version, you can add the tracking code on all pages except the website checkout page.
So, for integrating Google Analytics 4 with your standard Shopify online shop, you will require to follow the below-mentioned steps.
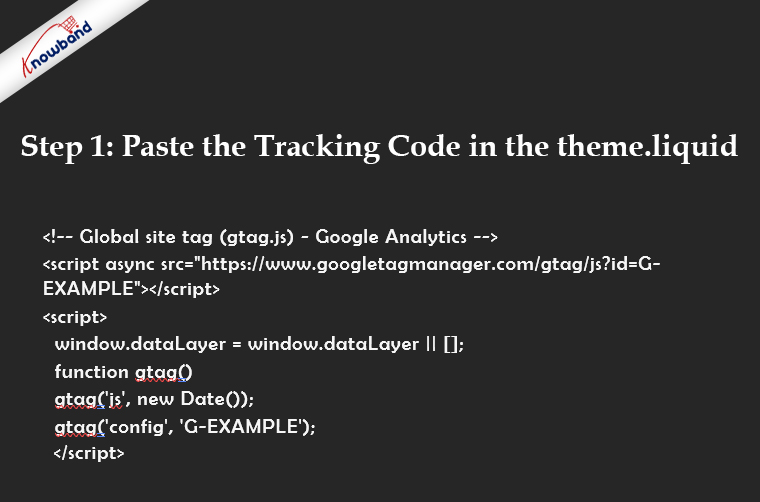
Step 1: Paste the Tracking Code in the theme.liquid:
For the very initial step, head down to the Online store. In all the appeared options, choose Themes. There you will find the themes. Liquid file. All you need to do is paste your tracking code between the head tags. Also, you will require to change the G-Example instances with your measurement ID (Find the same in the GA4 data stream).
Step 2: Add the Code to Your Order Confirmation Page:
After getting done with the first step, here comes the next one. For the following step, you will have to visit the below path in your Shopify store. Setting>>Checkout>>Order Status Page>>Additional Scripts.

Step 3: Remove Shopify as a Referral in GA4:
After following the first and second steps you will find the work done. Moreover, if you do not want to show the Shopify checkout pages as a referral in your reports, you will require to disable the same.
For the following option, you are going to need a GA4 visit. On your Google Analytics 4 dashboard. Head down to the data stream>>More Tagging Setting>>List unwanted referrals.
On the appeared page, all you require to do is enter myshopify.com.
In the End,
While adding GA4 to your website with the help of the above-shared code, you will have to change the G-EXAMPLE keyword with your measurement ID. Also, if you are using UA for your website and planning to shift to GA4, the present is the right time.
Not just because the services are less complicated but also because you will not be able to shift your UA data into GA4. Also, if you want us to take care of the process, you can drop us a mail to our Knowband team at support@knowband.com.

