
MailChimp is one of the most used email marketing software-as-a-service. Because of its free start up plan, it is the favorite email service for most of the marketers.
Like every other top email marketing software, MailChimp too provides different APIs for development and integration solutions. For example, the MailChimp API key can be used to integrate this service with any CMS or eCommerce platform through modules.
For example, the PrestaShop MailChimp integration module uses the API key to capture and sync the email data from a PrestaShop store to the MailChimp email list. There are several other solutions and modules that use the API for various types of integrations.
Steps to get MailChimp API key
Step 1: Visit https://www.mailchimp.com and create a user account, if not done already. After account creation, login to your account.
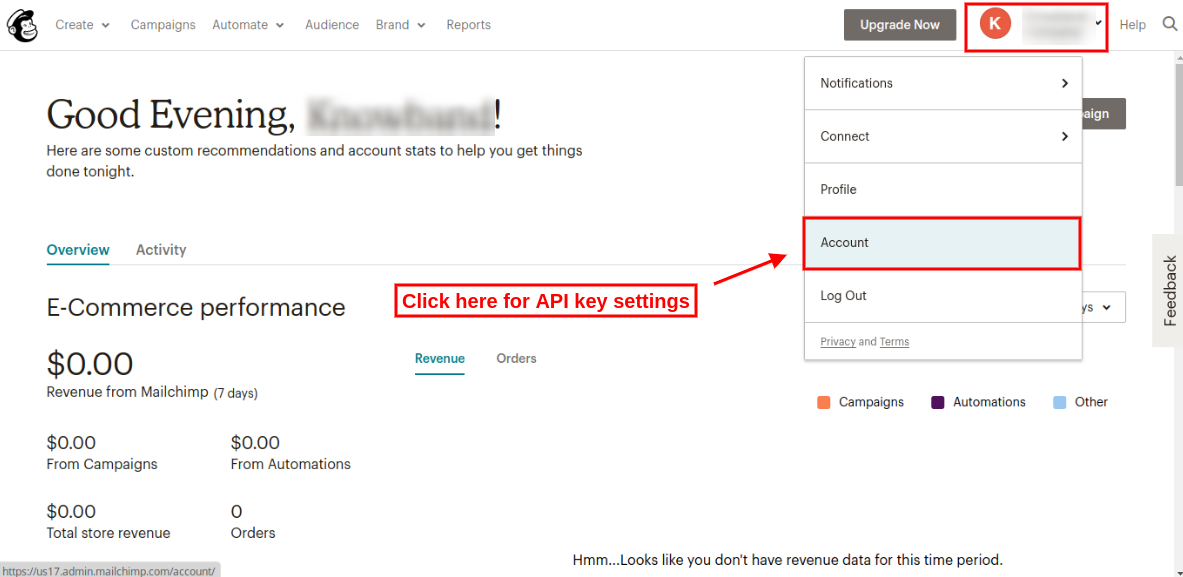
Step 2: On the Dashboard, click the button on the upper right corner of the dashboard. Drop down menu will open, click “Account” link in that menu as seen in the screen below.
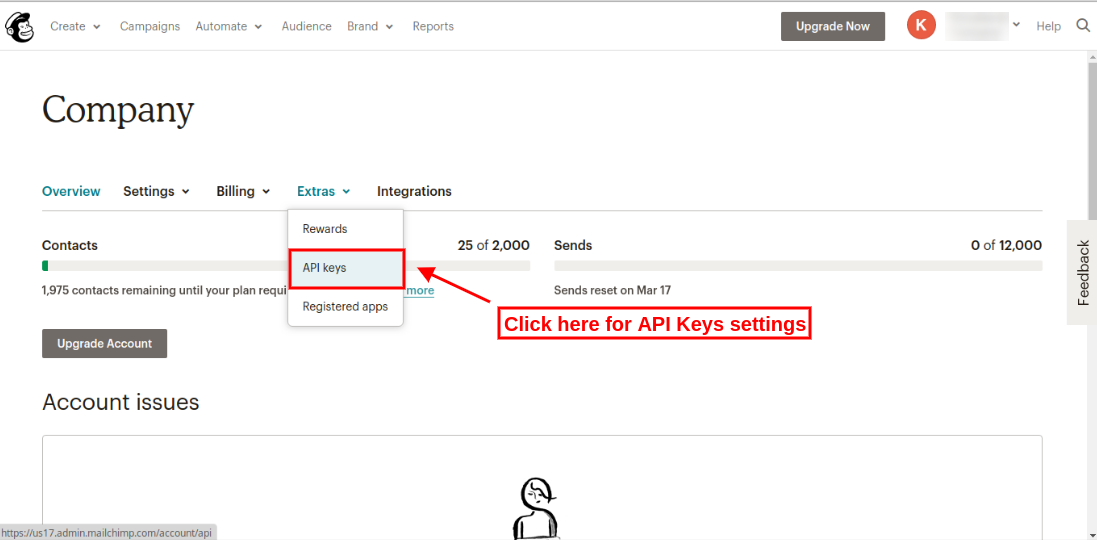
Step 3: On the Account settings page, some sub-menus will be visible. Click the “Extras” submenu to open the drop-down menu. Click “API keys” as shown in the screen below:
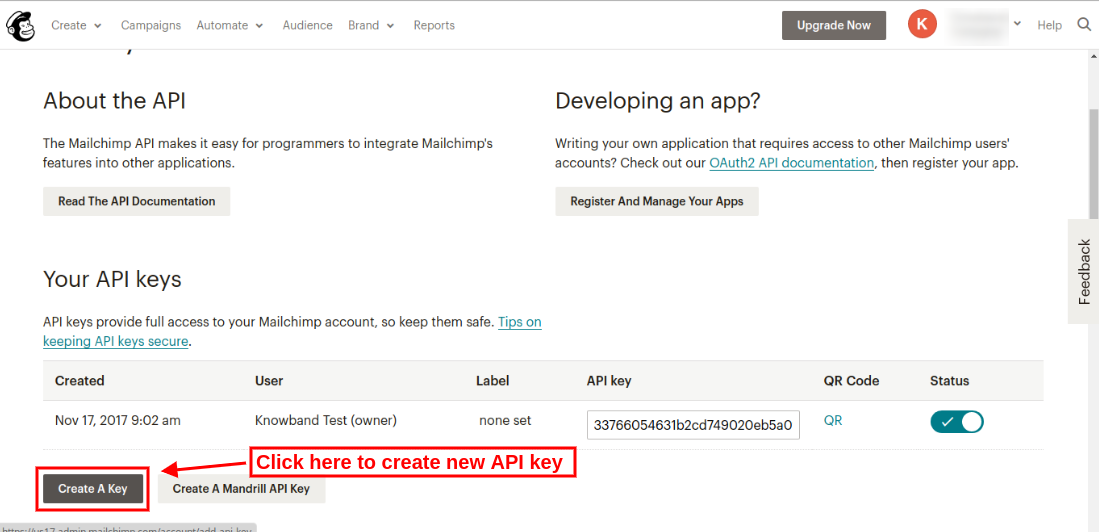
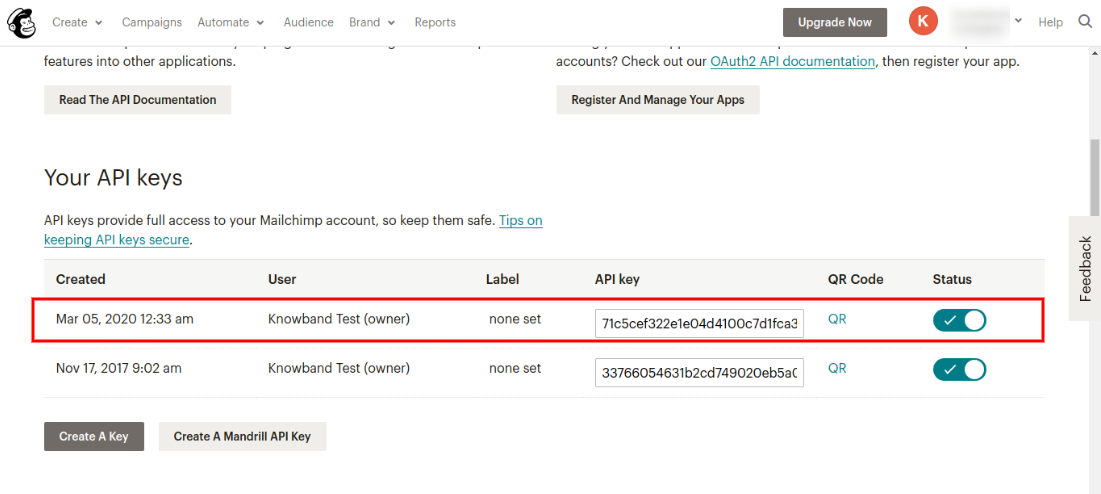
Step 4: On API keys page, click “Create a key” to generate an API key. After creation, a new API key will be added to your API keys list. The screen is given below:
After clicking on Create a Key button, the user can view the newly created API key as shown below:
To create MailChimp Audience
Step 5: Now to create an audience, click on the “Audience” tab in the upper menu. Admin will be redirected to a new page where he/she can view previously created audiences and also create a new audience. The screen is given below:
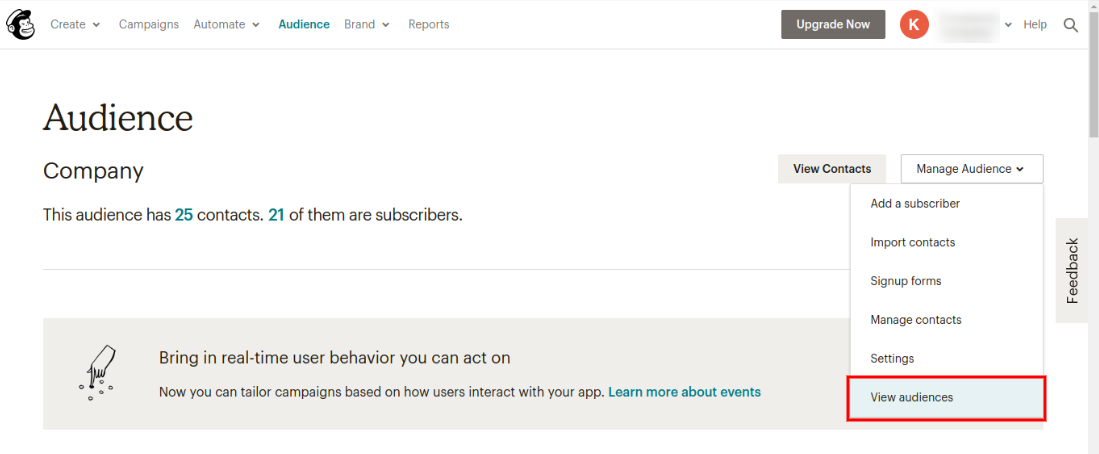
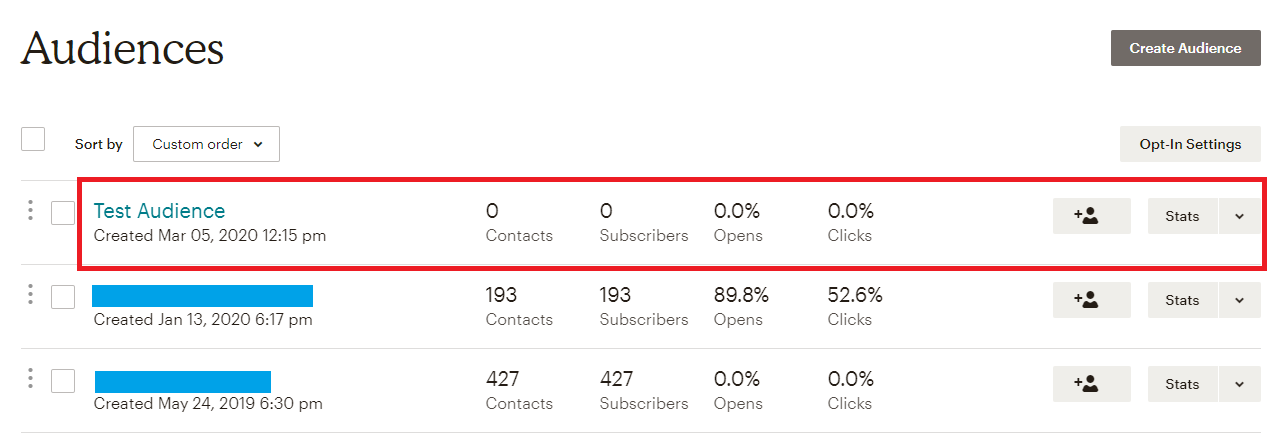
Step 6: On clicking “view audiences” option, admin can view previously created audiences as shown below:
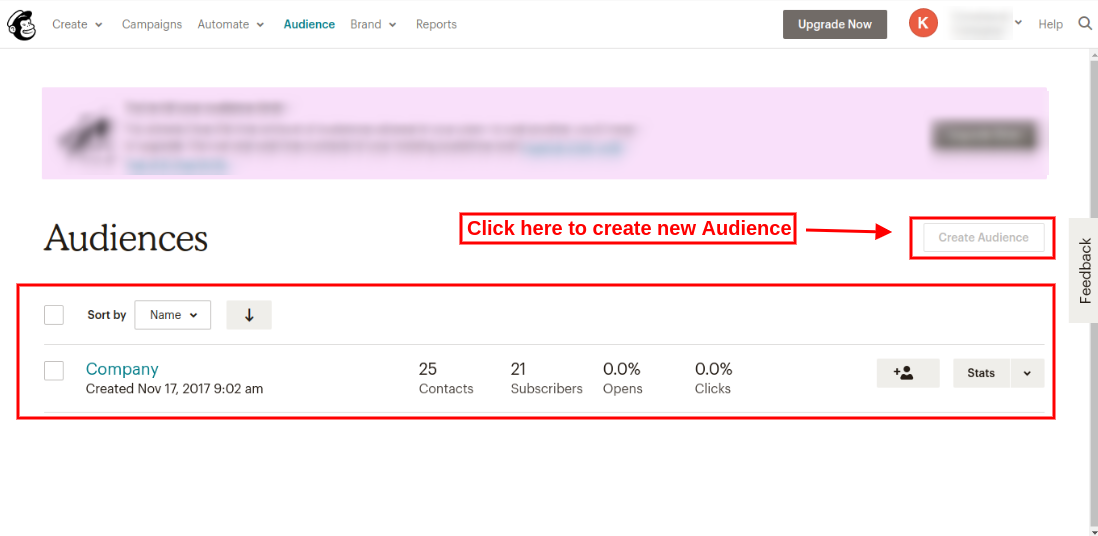
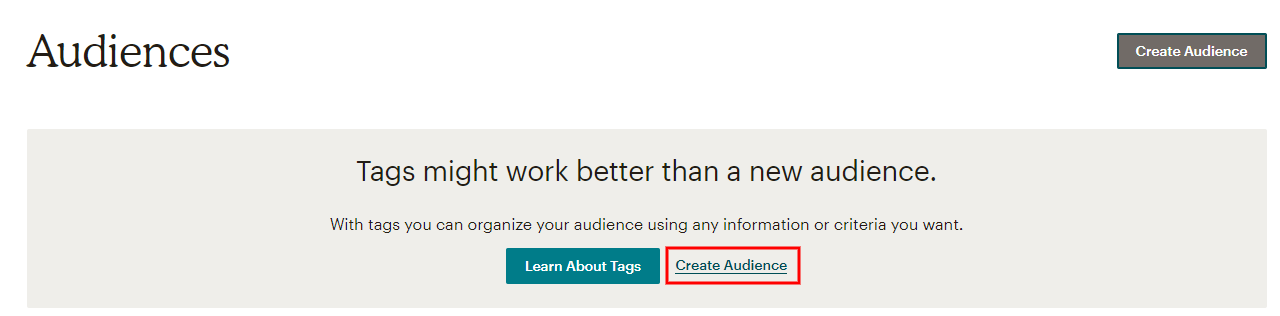
Admin needs to upgrade his/her account for adding more audiences. In the free account, admin can create a single audience only. Admin can upgrade account and then click on “Create Audience” option as shown below:
After clicking on “Create audience” option, admin needs to fill the required information:
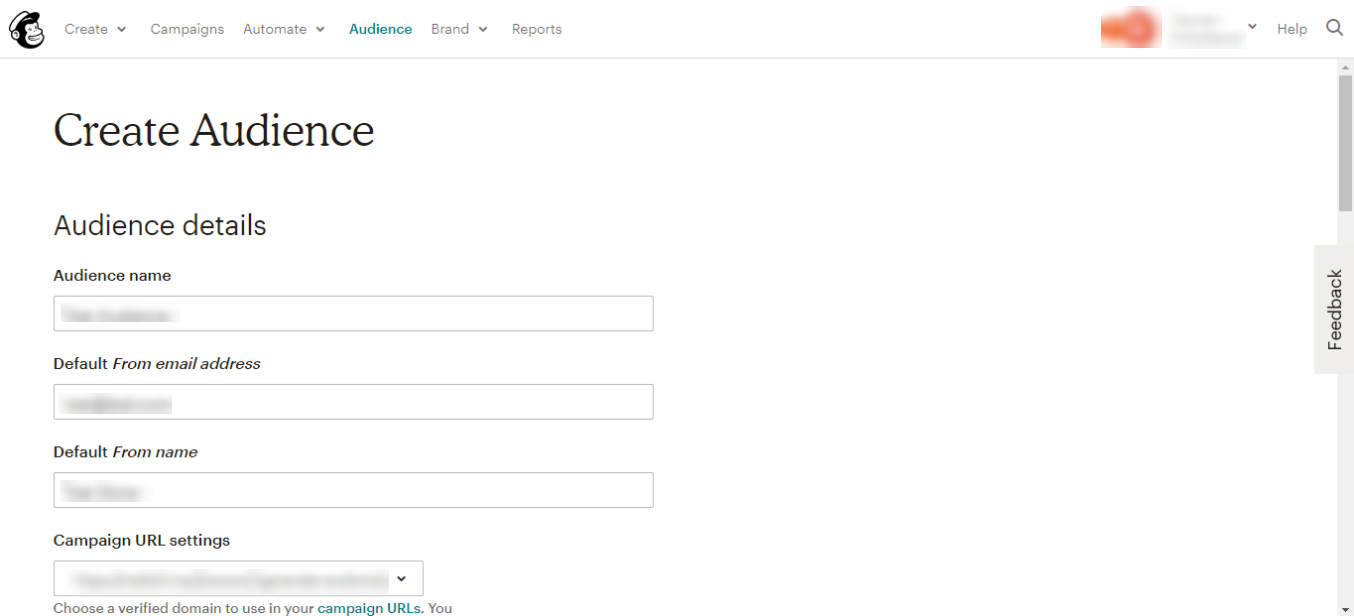
After saving all the details, the admin needs to save it. This way, admin can create new audience ash shown below:
Knowband offers a Prestashop Mailigen and MailChimp Integrator module that integrates your MailChimp account with the Prestashop store. With the help of the Prestashop addon, the admin can automatically sync the details of the subscribers with the respective MailChimp and Mailigen account of the customers. You can configure the MailChimp API details on the following interface.
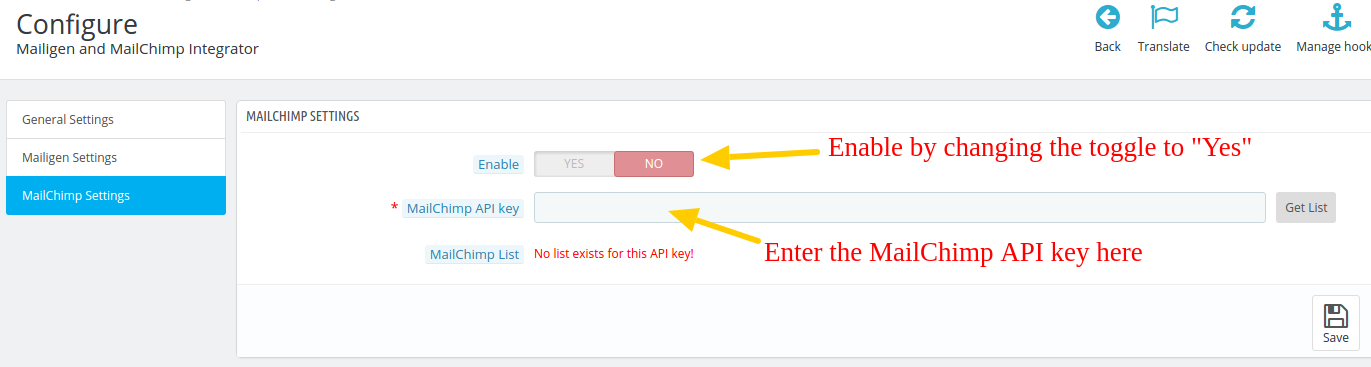
Here you need need to enter the MailChimp API Key that you have got in the step 4, and then enable the integration by switching the toggle to “Yes”.
Prestashop MailChimp Integration extension offers a smart sync that synchronizes the email IDs and related details of the website subscribers automatically. The email IDs are synced from the Checkout Page or from the Customer Registration Page.
Additionally, Prestashop MailChimp integrator addon developed by Knowband makes automates the entire process data synchronization and removes the tedious job of manual synchronization.
Liked This? You’ll Like These Too

