
1.1 Introduction
The Prestashop Wallet System module is an addon that enables the customer to make the payment for the product purchased at the time of check-out using the e-wallet system. Thus, simplifying the customer buying experience by providing them with a simple and easy-to-use digital payment method.
2. Installation Guide
The folder structure of the Prestashop Customer Wallet System module folder.

Copy the module folder under the “root_directory/modules/” of the admin store via FTP or use the Prestashop interface to upload the plugin.
Further, after copying, the Prestashop module will be listed on the module listing page in the admin panel as given in the below screen.
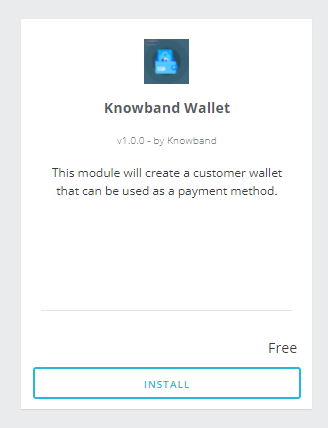
The admin will be able to find the Prestashop Wallet System ready to be installed in the Modules in the admin PrestaShop store as shown below.
Therefore, click on the Install link to install the plugin.
3. User Manual
This User Manual provides the admin with the guidelines of this Prestashop Wallet System Addon. In fact, this e-wallet module contains 2 interfaces:
- Admin Interface
- Front-End Interface
3.1 Admin Interface
To access this module, click on the “Wallet Module” button of Prestashop Customer Wallet Addon. Further, on clicking, the admin will get three different options:
- General Settings
- Customer Wallets
- Orders
3.1.1 General Settings
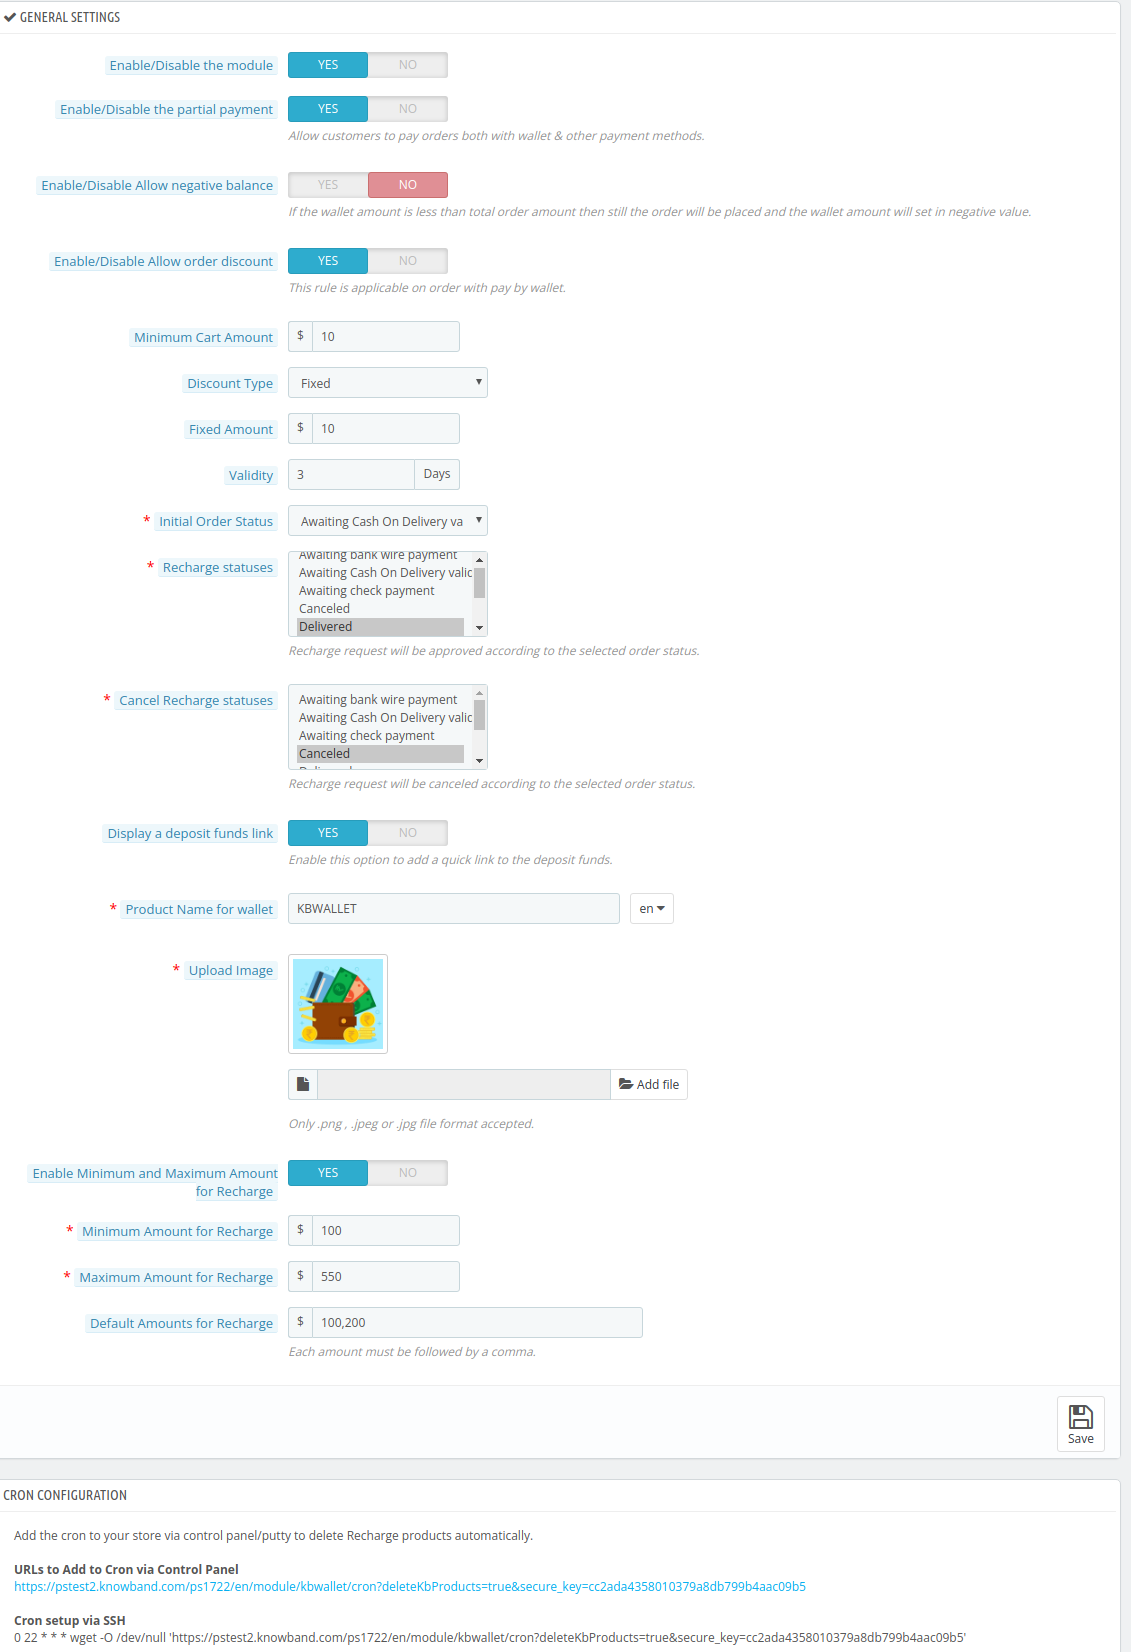
3.1.1.1 Enable/Disable the Module
Using this button the admin can easily enable the Prestashop Customer Wallet plugin. In fact, the admin just needs to toggle from No to Yes.
Note: The default value will be “No.”
3.1.1.2 Enable/Disable the partial payment
This Prestashop Customer Wallet Addon will help the admin empower the customer to make a part payment using the digital wallet. In addition, the remaining payment is usable from the other payment options. In fact, to enable this option the admin just needs to switch the Enable button from No to Yes.
3.1.1.3 Activate/Deactivate Allow negative balance
Through this option, the admin can simply allow the negative balance in the e-wallet. Further, the default option selected here will be No. In fact, if the admin wants to enable it, he needs to toggle the button to Yes.
Note: If the wallet amount is less than the total order amount then still the order will be placed and the wallet amount will be set in negative value.
3.1.1.4 Enable/Disable Allow order discount
Using this option, the admin can either enable or disable the option to permit a discount on placing an order using the wallet. However, the customer will be able to enjoy the discounted price of the product only when they choose Wallet as their payment option.
In addition to this, if the admin enables it, he will get different options
3.1.1.5 Minimum Cart Amount
This will help the admin to set the minimum order amount on which the discount will be applicable. For Instance, $100.
3.1.1.6 Discount Type
Using the Prestashop customer wallet addon, the admin will be able to choose between two different types of discounts:
a. Fixed: For Instance $10
b. Percentage: For Instance 10%
On the basis of this, the customer will be able to reap the benefits of discounts under this e-wallet system plugin.
3.1.1.7 Validity
This option of Prestashop Customer wallet addon will help the admin to set the time period for which the discount will be valid.
3.1.1.8 Initial Order Status
The admin can choose the initial order status to display when the customer chooses to pay from the wallet. The following are the options:
- Awaiting Bank Wire Payment
- Awaiting Cash on Delivery Validation
- Canceled
- Awaiting Check Payment
- Delivered
- Mobile App Awaiting PayPal Payment
- Mobile App PayPal Payment Accepted
- On Back Order (Not Paid)
- On Back Order (Paid)
- Payment Accepted
- Payment Error
- Processing in Progress
- Refunded
- Remote Payment Accepted
- Shipped
3.1.1.9 Recharge Statuses
Depending on the Order status, the admin can set the recharge statuses. The options available are:
- Awaiting Bank Wire Payment
- Awaiting Cash on Delivery Validation
- Canceled
- Awaiting Check Payment
- Delivered
- Mobile App Awaiting PayPal Payment
- Mobile App PayPal Payment Accepted
- On Back Order (Not Paid)
- On Back Order (Paid)
- Payment Accepted
- Payment Error
- Processing in Progress
- Refunded
- Remote Payment Accepted
- Shipped
3.1.1.10 Cancel Recharge Statuses
Depending on the Order status, the admin can cancel the recharge statuses. The options available are:
- Awaiting Bank Wire Payment
- Awaiting Cash on Delivery Validation
- Canceled
- Awaiting Check Payment
- Delivered
- Mobile App Awaiting PayPal Payment
- Mobile App PayPal Payment Accepted
- On Back Order (Not Paid)
- On Back Order (Paid)
- Payment Accepted
- Payment Error
- Processing in Progress
- Refunded
- Remote Payment Accepted
- Shipped
3.1.1.11 Display a deposit funds link
By utilizing this option, the admin can easily enable or disable the static quick link. If this option is enabled the customer will be able to recharge the wallet while staying on the product page.
3.1.1.12 Product Name for the wallet
As the option suggests, the admin can easily set the e-wallet name. For instance, PSWALLET.
3.1.1.13 Upload Image
By using this option of the Prestashop customer wallet plugin, the admin can easily upload and set the image for the e-wallet.
3.1.1.14 Enable Minimum and Maximum Amount for Recharge
This option will allow the admin to set the minimum and maximum range for recharging the e-wallet. To enable this feature Switch the option from No to Yes.
- Minimum Amount for Recharge: For instance $100
- Maximum Amount for Recharge: For instance $500
Note: If you disable this option, the admin needs to set the default values for digital wallet recharge. Moreover, the admin needs to keep in mind that he needs to separate the default recharge values by comma.
3.1.1.15 Executing Cron functionality
The admin can add the cron to the store via control panel/putty to delete Recharge products automatically.
3.2 Customer Wallets
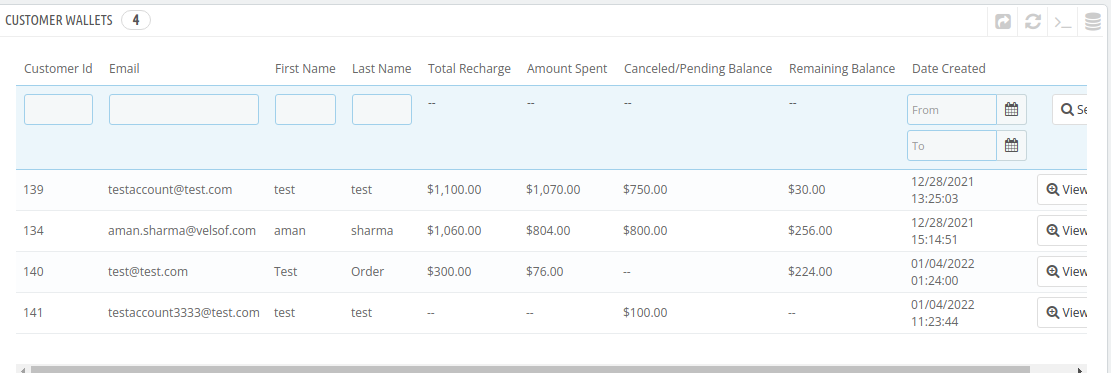
In this section of the Prestashop Customer Wallet System addon, the admin can track all the customers using the wallet. In fact, he can even view the following details of the customers:
- Customer ID
- First Name
- Last Name
- Total Recharge
- Amount Spent
- Canceled/Pending Balance
- Remaining Balance; and
- Date Created
In fact, the admin can view a detailed report of every customer in this section. In addition, he can also edit the same. For instance, he can recharge the customer’s wallet. Further, he can even debit an amount from the same.
3.3 Wallet Orders
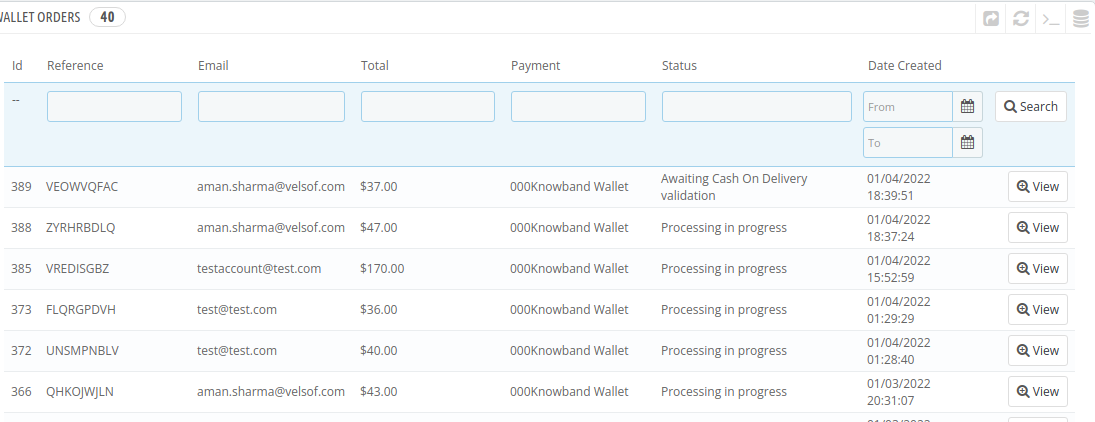
In this section of the Prestashop Customer Wallet Addon, the admin can view all the transactions made with the wallet. In addition, he can apply filters as per the date the orders were placed.
Please contact us at support@knowband.com for any query or custom change request as per your business requirement.

