
Magento is one of the most popular Content Management System(CMS) for an E-commerce website. It is one of the most flexible E-commerce platforms. Magento uses MySQL as its database, PHP as the programming language and elements of zend framework. It has two Editions one is a Paid edition and other is an Unpaid edition:
- Enterprise Edition ( Paid )
- Community Edition ( Unpaid )
The tutorial runs you through the ways to install Magento on Ubuntu. Read on to know:
Prerequisites for installing Magento
Before we begin, there are few steps that are needed to be completed in order to install magento. These steps include :
- You will need at least 2 GB ram for installing magento on Virtual private server (VPS).
- You will need a LAMP(Linux, Apache, Mysql and PHP) stack installed on your VPS server.
- Now for installing it you need to first download magento, you can get a community edition version of magento online.
Getting Started
- After complete download you will see a ZIP folder named mazento.zip on your downloads folder.
- Copy the Zip Folder to the path provided below :
|
/var/www/html |
- Extract the files here by right clicking on the zipped folder and then left clicking on the Extract here option.
Creating Database using PHPMyAdmin
For creating a database follow the steps provided below :
- Open a new tab of your browser and enter the following on the address bar :
|
localhost/phpmyadmin/ |
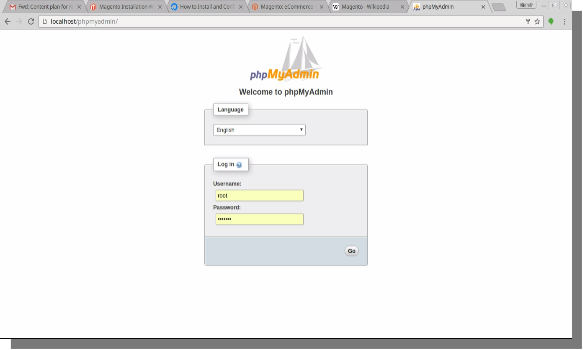
- Press enter you will see the login page of PHPMyAdmin. Enter the Username and Password and click on Go to login. The login page will look like this.
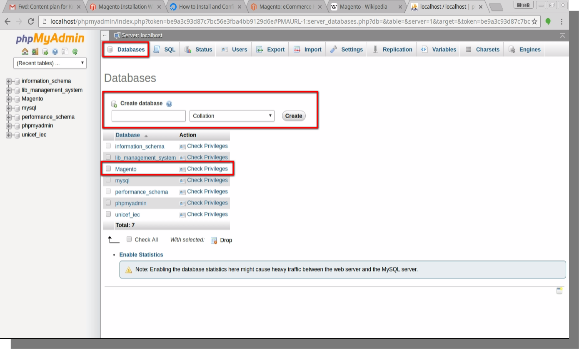
- You will see phpmyadmin main page, click on database, you will see a create database option.
- Enter the name of database( say magento) and click on create option, your database will be created as shown below.
Importing sample database on Your database
After successfully creating the database, you have to import the sample database on your database. Now for that you have to follow the below mentioned steps:
- Click the import option on phpmyadmin page.
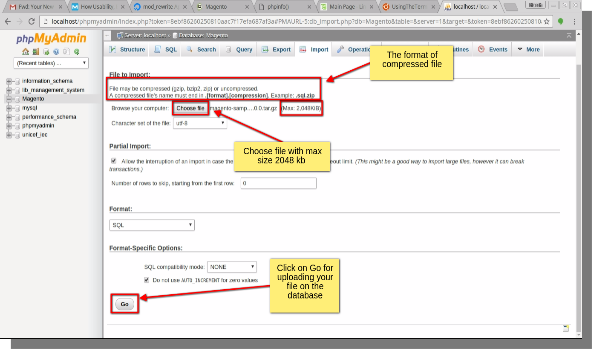
- Now click on the choose file to upload the sample database on your database.For uploading a file you have to note the following properties of the uploaded file:
- The maximum size of the file must be 2048 kb.
- The format of the file must be .sql format.
- The type of compression used to compress large files must be .zip
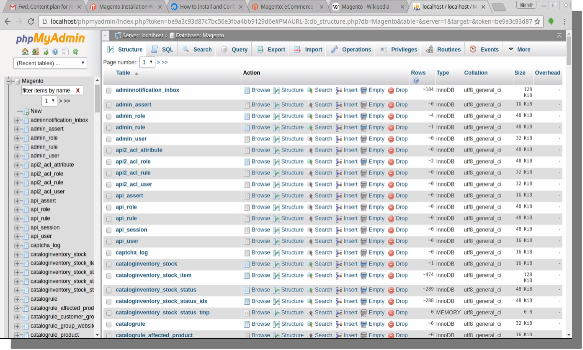
- Now click on Go option and your file containing sample database will be uploaded on your database.You will see that the files are uploaded on your database.
Triggering magento setup file
Now all you have to do is to trigger the magento setup file. Consider the following steps for the same.
- Now open a new tab of your browser and enter the following path:
|
Localhost/magento or localhost/magento/index.php/install |
License Agreement
- You will be directed to Magento’s installation page, accept the agreement’s terms and conditions and click on continue.
Localization
- Select the Locale(language), Time zone and Default currency and click on continue.
Configuration
- Here you will encounter the “write permission issue”, you have to fix all these issues before continuing further.
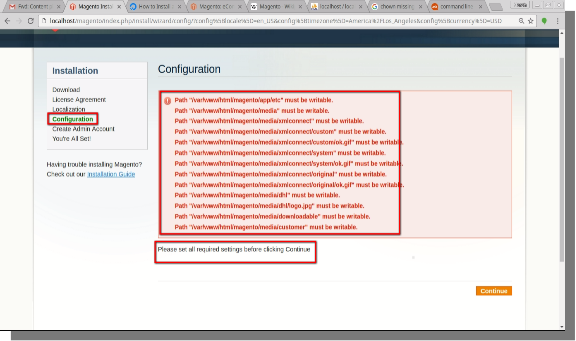
- For fixing the write permission issue follow the below mentioned steps:
- Open the terminal of your system.( CTRL+ALT+T )
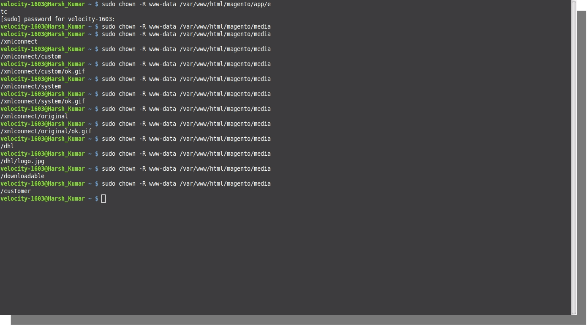
- Enter the following command to resolve the permission issues:
|
sudo chown -R www-data /file path |
|
Eg: sudo chown -R www-data /var/www/html/magento/app/etc |
- It will ask you for the system password, enter your system password and press enter, it will ask the password only once.
- Enter the command for all the files having same issue, using the example above and then click continue option on the magento installation page.
- After clicking on the continue option you will encounter php extension loading error. It is shown below:
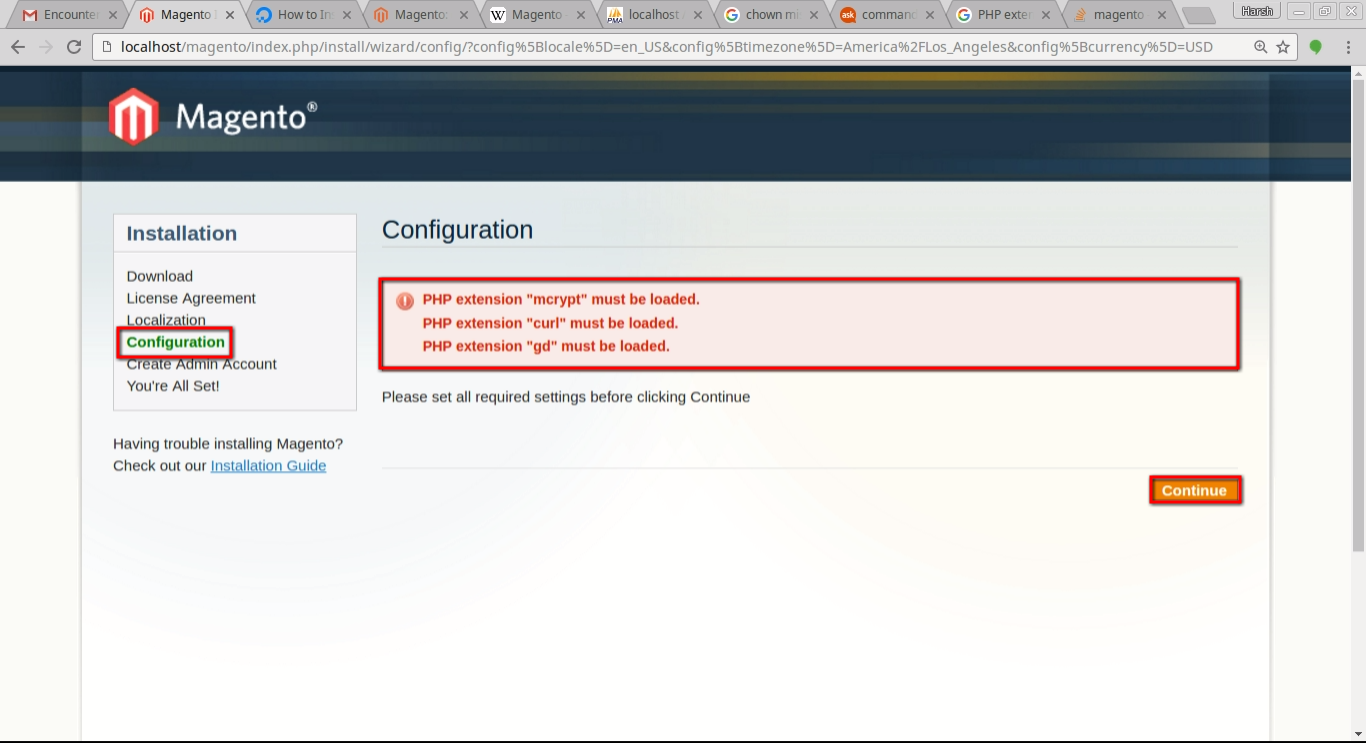
- If you encounter this error follow the steps below:
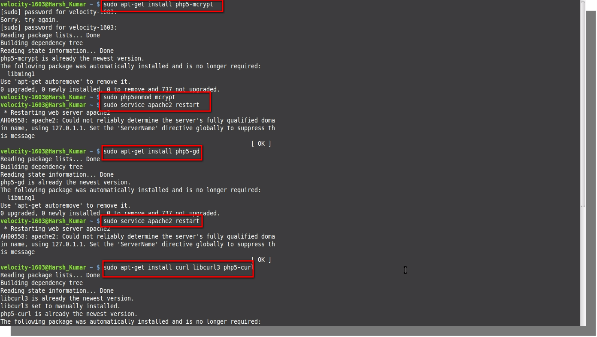
- Open the terminal and enter the command below :
- For installing mcrypt
|
sudo apt-get install php5-mcrypt sudo php5 enmod mcrypt sudo service apache2 restart |
- For installing curl
|
sudo apt-get install curl libcurl3 php5-curl sudo service apache2 restart |
- For installing gd
|
sudo apt-get install php5-gd sudo service apache2 restart |
- Then click continue on the magento installation page.
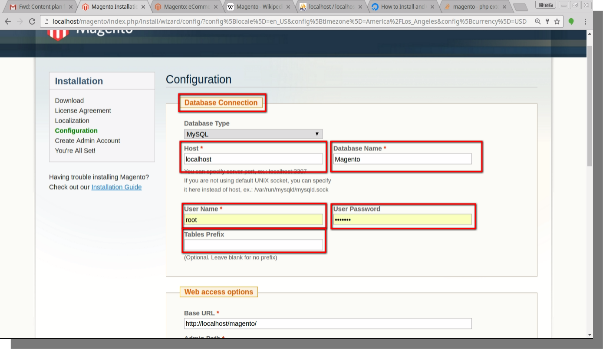
Database Connection Page
- After clicking continue you will be directed to a database connection page where you can:
- Set a Username and Password.
- Change the database name.
- Set the table prefixes. (optional)
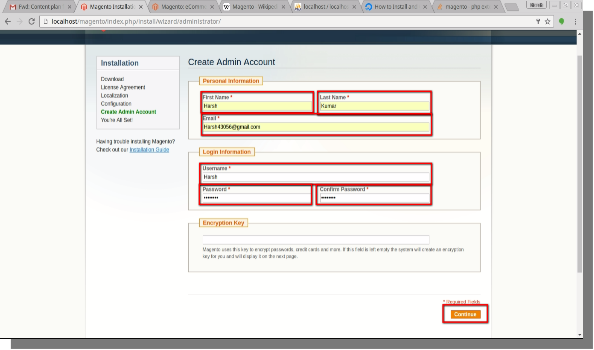
Create Admin Account
After Completing all the processes under configuration, you will be directed to create admin account, where you have to :
- Enter your Personal details:
- First Name
- Last Name
- E-mail Id
- Enter Login Information:
- Username
- Password
- Confirm Password
- Enter Encryption Key (Optional)
- Then click on continue button.
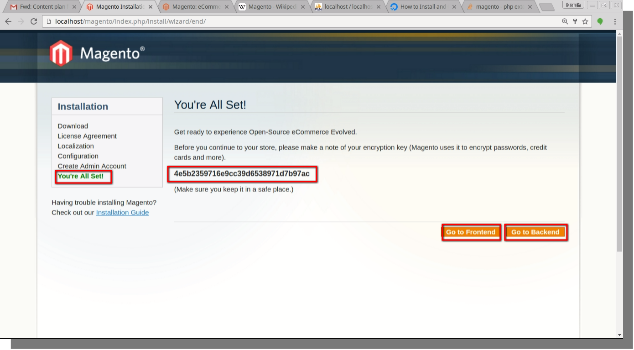
You are all set
This is the last step in the installation process of magento. Here you will be provided with an encryption key which you have to save, as magento uses it to encrypt passwords, credit cards etc.
- Now you have two options on your screen:
- Go to Front-End
- Go to Back-End
- You can visit either of them.
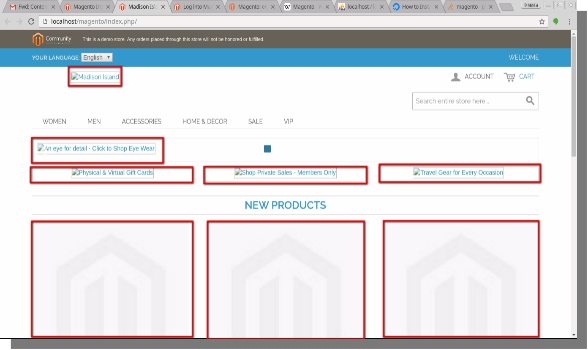
Front-End And Back-End
When You visit your Front-End, you will notice that there are no logos, banners and images for any product or brand. Therefore for that you have to make some changes from the Back-End to make sure that everything works well before you can work on magento.
Necessary changes
- For Uploading Images on the front end
- Copy Media and Skin folders from magento-sample-data and paste them on your setup folder.
- Setup folder will already contain these folders, just you have to do is replace them.
- Then go to your Front-End and refresh the page. You will see that the logos, images and banners are uploaded.
- In some case you will see there is no updation, the Front-End is still blank. In that case follow the below mentioned steps:
- Open the terminal and type the command:
|
sudo chown -R www-data/var/www/html/magento/media/ |
- Then go to your Back-End, hover your cursor over system menu in the admin panel menu bar and click on the cache management on the drop-down option.

- After clicking on the cache management option you will be directed to a new page where you will see two options on the top right corner of the page:
- Flush Magento Cache
- Flush Cache storage
- Click on these options to Flush Magento Cache and Cache Storage.
- Now Go to your Front-end and refresh the page, you will see that all the banners, logos, images are updated, you will get your Front-end ready.
- Modifying File Index.php
- Now Open Index.php, you will find index.php at the path provided below:
|
/var/www/html/magento |
- Click on the Index.php file and open it.
- You will see a Php code, go to line 73,74 and 75 and place double slash at the beginning of these lines and remove “#” at the beginning of line 77 as shown below:
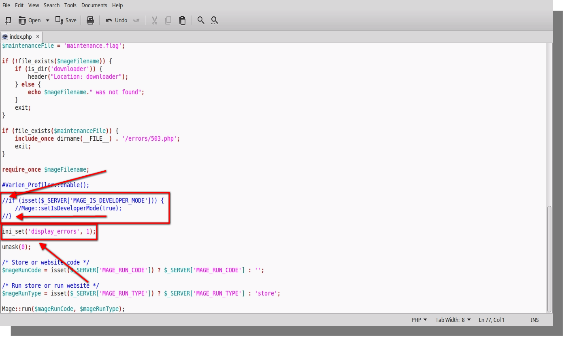
- Now save the file and close it.
- Modifying File Varien.php
- Now Open Varien.php, you will find Varien.php at the path provided below:
|
/var/www/html/magento/app/code/core/Mage/Core/Model/Session/ Abstract |
- Click on the Varien.php file and open it.
- You will see a Php code, go to line 99, 100 and 101 and assign values as shown below:
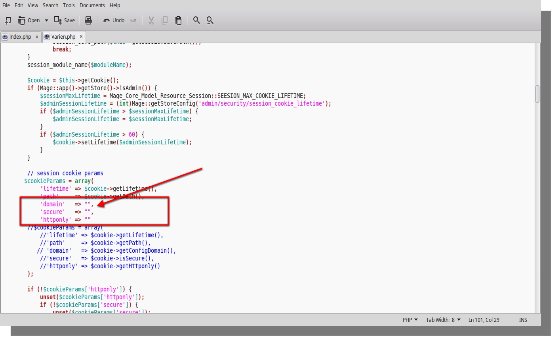
- Remove the lines like $cookie->getconfigDomain() from line 99,100 and 101 and place double quotes as shown in the figure.
- Now save the file and close it.
You Might Also Like:

