How to show slider on a specific information page in OpenCart?

Sliders play an important role in improving the look and feel of your OpenCart site.

Sliders are an important part of any website as they add an aesthetic look and appeal. They help in displaying the images, scenery, and other promotional items in the best possible manner. It is one of the important element that is increasingly used by websites around the world and the same is actively adopted by platforms such as OpenCart.

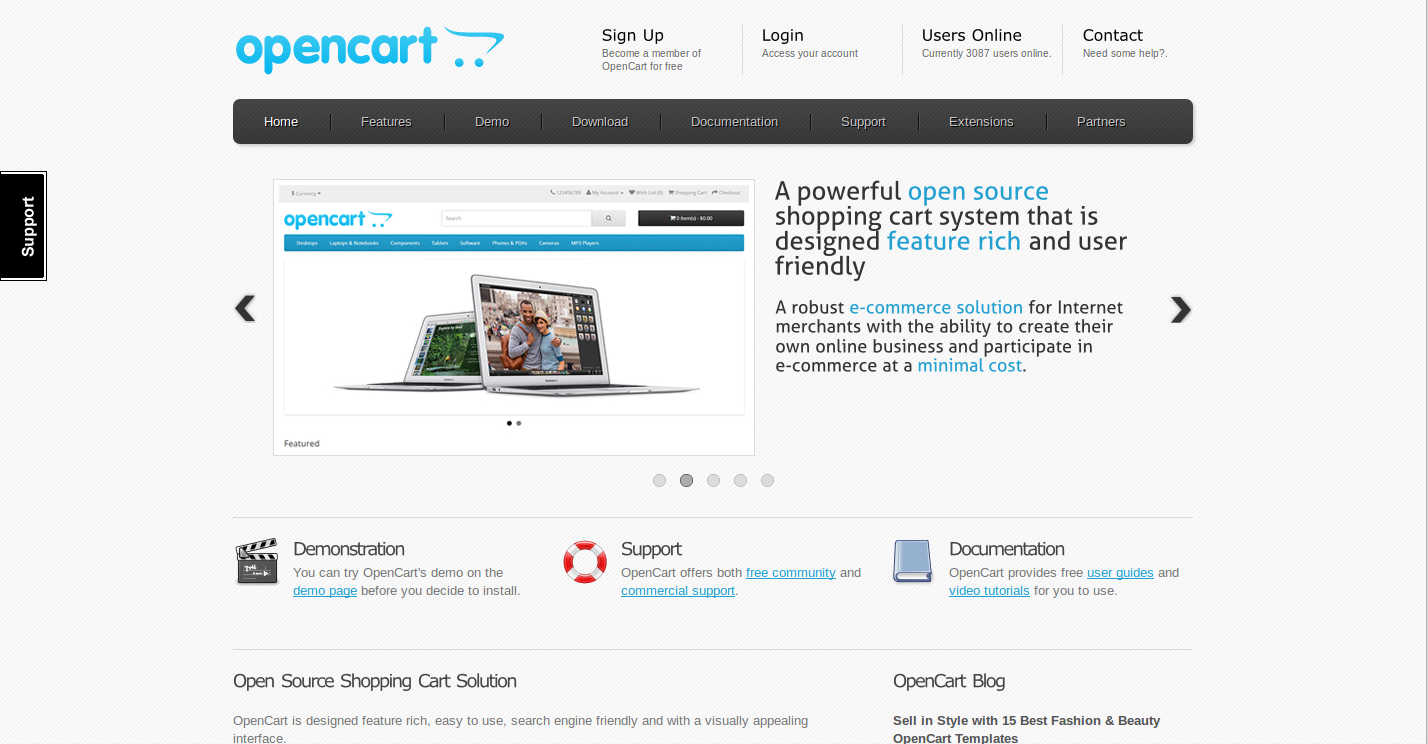
E-Commerce stores based on OpenCart platform are utilizing sliders in a big way as it helps in showcasing their latest arrival products, upcoming shopping deals, latest events, detailed product view or any other such purposes. The slider option is available due to the presence of built-in OpenCart extensions that improve the look and feel of a website. These sliders can be prominently seen on the home page of numerous eCommerce stores around the world as they help in better customer targeting and attention. However, it needs to be understood that home page is not the only place of utilizing sliders as they can be used effortlessly on any part of your website.

If you are keen to add a slider on the specific information page of your OpenCart site, you need not be worried about how to perform the same. Here are the simple steps that can guide you in the right direction.

1. You need to first navigate towards System >> Design >> Banners.

2. For adding a banner, site owners need to create a new banner by including a unique name along with the images that you want to display on the information page.

3. Site owners can further edit the slideshow module by following the path Extensions >> Modules >> Slideshow.

4. You need to click on the Add module.

5. It is then required to select the desired banner from the given list and set the layout to the Information page.

6. Finally, you need to save the settings now.

The above steps will help in displaying the slider on all information pages. In case, you want to show the slider only on one information page, it is advised to include the below mentioned code at the starting of the /catalog/view/theme/default/template/information/information.tpl file.

<?php if($heading_title != ‘About Us’) echo ‘<style>.slideshow{display:none;}</style>’; ?>

Point to remember

In the PHP statement mentioned above, you need to replace the “About Us” with the required page where you want to display the slider.

Apart from displaying the slider option, OpenCart site owners can also add the desired functionality by installing the required OpenCart extensions from Knowband store. In addition to this, you can also avail the customized plugin development services for your Magento, OpenCart or PrestaShop site. In case, you have any other query related to your OpenCart site or the above mentioned platforms, do share with us. We will help you with the solution that can improve the sales and conversions of your online business.
How can you add the product name on the OpenCart Download Page?

If you are into the eCommerce business, it is sure that you must be familiar with the name of OpenCart as an eCommerce platform. It is one of the fastest growing eCommerce platforms that is a perfect choice for multiple small, medium and large eCommerce stores due to the availability of more than 14,000 OpenCart extensions, themes, integrations, and APIs.

These extensions and other features have made it a delectable platform for various eCommerce stores around the world. However, the platform does not just mean features and functionalities alone without any customer support services. To resolve the issues of its ever growing OpenCart customers, the platform offers the dedicated customer support and technical assistance through community forums.

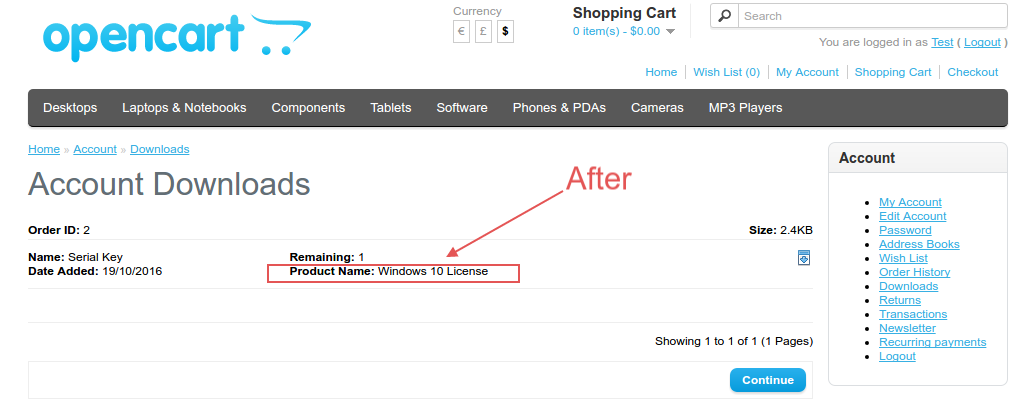
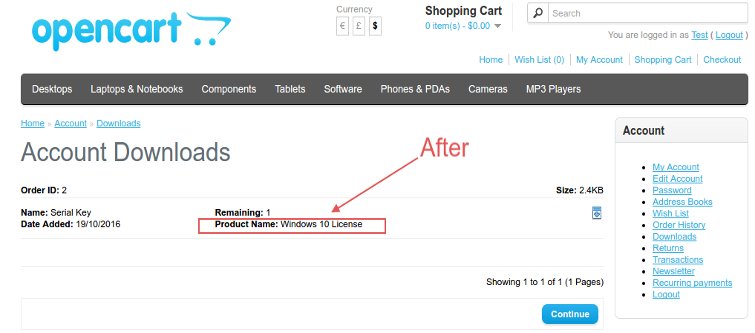
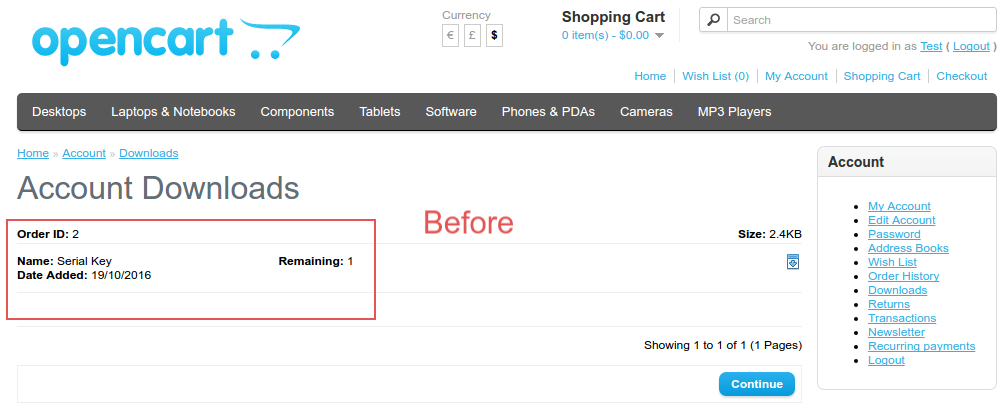
I have observed a common problem that many site owners have also mentioned on community forum discussions. The issue is that site owners while downloading any virtual products on their OpenCart site are unable to get product name information. The list of all the downloadable virtual products are available on the “Account downloads” page but the names of the downloadable products are not shown to site owners. Due to this scenario, it becomes extremely difficult for OpenCart site owners to know which product has been downloaded or not. To have a better idea about this problem, you need to check out the image shown below:

In the default case, the name of the downloadable product is not shown.

Here, under the “Account Downloads page, the product name is not mentioned which makes it difficult for owners to get proper information about the product which is downloaded. If you want to resolve this problem, here are the few changes that are required in the coding files of your OpenCart site.

1. Site owners need to make required changes in mainly three OpenCart files to display the name of their downloadable products. They need to first search this required file /catalog/view/theme/default/template/account/download.tpl and find out this code as shown below:

<div><b><?php echo $text_remaining; ?></b> <?php echo $download[‘remaining’]; ?></div>

After locating the above statement, it needs to be replaced with the given code:

<div><b><?php echo $text_remaining; ?></b> <?php echo $download[‘remaining’]; ?><br> <b> Product Name:</b> <?php echo $download[‘product_name’]; ?> </div>

2. Once, you are done with making changes in the /catalog/controller/account/download.php file, it is necessary to search this coding,

foreach ($results as $result) {

and then replace it with the PHP coding as shown below.

foreach ($results as $result) {$q_result=$this->db->query(‘SELECT name from ‘.DB_PREFIX.’order_product where order_product_id=’.$result[‘order_product_id’].”);

In the same file, you need to search for this given code,

‘name’ => $result[‘name’],

and then change it with the programming code as shown below,

‘name’ => $result[‘name’],’product_name’=>$q_result->row[‘name’],

3. Finally, you need to make changes in this catalog/model/account/download.php file and then search for the below coding part,

$query = $this->db->query(“SELECT o.order_id, o.date_added, od.order_download_id, od.name, od.filename, od.remaining FROM ” . DB_PREFIX . “order_download od LEFT JOIN `” . DB_PREFIX . “order` o ON (od.order_id = o.order_id) WHERE o.customer_id = ‘” . (int)$this->customer->getId() . “‘ AND o.order_status_id > ‘0’ AND o.order_status_id = ‘” . (int)$this->config->get(‘config_complete_status_id’) . “‘ AND od.remaining > 0 ORDER BY o.date_added DESC LIMIT ” . (int)$start . “,” . (int)$limit);

After locating the above code, you need to replace it with the programming statements as shown below:

$query = $this->db->query(“SELECT od.order_product_id, o.order_id, o.date_added, od.order_download_id, od.name, od.filename, od.remaining FROM ” . DB_PREFIX . “order_download od LEFT JOIN `” . DB_PREFIX . “order` o ON (od.order_id = o.order_id) WHERE o.customer_id = ‘” . (int)$this->customer->getId() . “‘ AND o.order_status_id > ‘0’ AND o.order_status_id = ‘” . (int)$this->config->get(‘config_complete_status_id’) . “‘ AND od.remaining > 0 ORDER BY o.date_added DESC LIMIT ” . (int)$start . “,” . (int)$limit);

By making small changes in the above files, site owners can add the product name on the download page of OpenCart site without any trouble. In case, you want to add any other desired functionality in the OpenCart site, you can add desired OpenCart extensions from Knowband store.

This Would Also Interest You:

How to Hide Input Fields for Disabled Languages in OpenCart while Adding New Category?

OpenCart is hailed as an amazing eCommerce platform due to its multiple functionalities and features that have made it a popular choice among site owners. One of the wonderful features that have earned it followers across geographical boundaries is its multi-language support due to the presence of OpenCart extensions. Due to this feature, numerous eCommerce site owners can run their online store in an efficient manner by targeting their customers in their native language.

However, sometimes this advantage becomes an issue for certain site owners while adding a new product category for their OpenCart store. Let me explain you the situation which is observed by several OpenCart users during the addition of new product category.

Assume that you have an OpenCart website that is particularly targeting the Dutch customers. Now, if you want to add a new product category in that OpenCart site, a small issue arises. Several OpenCart site owners have observed that even if they have disabled a particular language on their site, they are still asked to fill out the product details in that inactive language during the addition of a new product category.

Before providing the solution of the above problem, let me clarify your doubt. The OpenCart platform always shows all the inactive language during the task like the addition of a new product category. This occurs due to the fact that this OpenCart platform believes that those inactive languages could be used by the site owner in the future business dealings.

Let us talk about the resolution of this problem. It is really irritating to fill out those lengthy product details for each and every disabled language in the OpenCart site during the addition of product category. Check out these helpful tips that can help you in avoiding this boring task of filling out product details for each inactive language. Here are the steps you need to follow as an OpenCart store owner.

1. First, create the backup of the required file /admin/view/template/catalog/category_form.tpl.

2. You need to edit the above file and search the below mentioned code:

<?php foreach ($languages as $language) { ?>

3. This PHP statement will be visible to you in two places. The site owner needs to replace the coding in both these places with the one as shown below:

<?php foreach ($languages as $language) { ?><?php if($language[‘status’] == 0) continue; ?>

By performing these simple steps, it is now easier for any OpenCart site owner to resolve the problem of adding product details in inactive languages. For adding any other desired functionalities and new features in your OpenCart site, you can install any of the feature loaded OpenCart extensions from Knowband store.

Stay involved with us and avail the solution to your eCommerce platform related issues for mainly three platforms- OpenCart, Magento, and PrestaShop. We do offer customized plugin development services for these platforms.

How can you change the currency format in an OpenCart platform?

OpenCart is an engrossing eCommerce platform that is being used on a large scale globally due to the presence of a wide range of features and functionalities. Also, it has emerged as a promising platform for new and experienced site owners equally with its impeccable eCommerce features.

With its multi-currency support feature, brilliant themes, and OpenCart extensions, it has found its clients all across the world that want to carry out their business in their native language. However, I have seen numerous site owners who are unable to implement changes in the currency format on their OpenCart store. Through interaction with those customers, I found the common problem “How to change the currency format in OpenCart as per the Indian currency system?”

Recommended Read: 5 Questions to ask while going for an OpenCart Platform

How to change the currency format in OpenCart as per the Indian currency system?

Understanding the sensibilities and concerns of all those store owners that are facing this issue, here is the solution for you. Before we move ahead in this direction, let us have an insight into the standard currency format in the OpenCart platform.

By default, OpenCart follows a standard currency format that places a comma (,) after every three-digit in a number while displaying the price but this is not the case with the Indian currency format. For example, store owners who are targeting customers residing in India want to change the price format from $ 1,000,000 to INR 10,00,000 which represents the Indian decimal value system.

To carry out this customization, OpenCart store owners need to understand the fact that there is no back-end functionality available in the admin panel to make this change. However, the required changes can be accomplished by making the required changes in the core OpenCart files.

Recommended Read:  Decoding the OpenCart Platform Briefly in eCommerce Scenario

Below are the steps that can guide OpenCart store owners in the right direction.

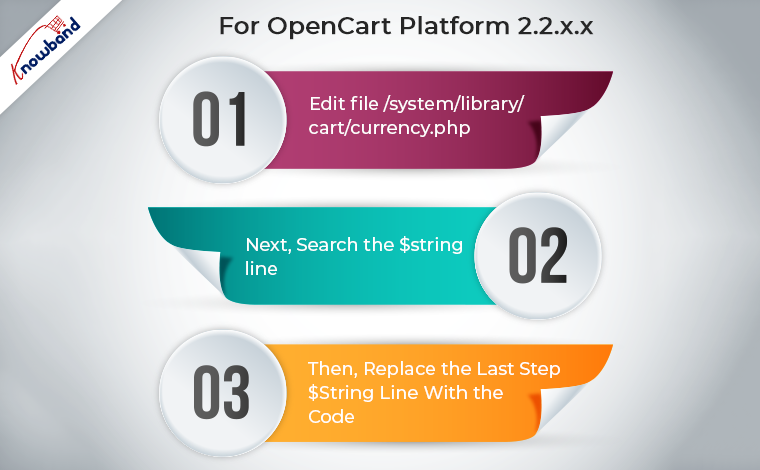
For OpenCart Platform 2.2.x.x and above

  • Edit file /system/library/cart/currency.php. We recommend you create a backup of this file before editing it.
  • You need to search the below line,

$string .= number_format($amount, (int)$decimal_place, $this->language ->get(‘decimal_point’), $this->language->get(‘thousand_point’));

  • Now, you need to replace the above line with the code given below,

$string .= number_format($amount, (int)$decimal_place, $this->language->get(‘decimal_point’), $this->language->get(‘thousand_point’));
$string1=substr($string,0,1);
$string2=substr($string,1);
$string2=str_replace(‘,’,”,$string2);
setlocale(LC_MONETARY,’en_IN’);
$string = $string1.money_format(‘%!i’, $string2);

  • You need to save the file with implemented changes for acquiring the desired currency format.

For all other OpenCart Versions before 2.2.x.x

  • First, edit file /system/library/currency.php. We recommend you create a backup of this file before editing it.
  • Next, you need to search the line given below,

$string .= number_format(round($value, (int)$decimal_place), (int)$decimal_place, $decimal_point, $thousand_point);

  • Then, you need to replace the above line with the code given below,

$string .= number_format(round($value, (int)$decimal_place), (int)$decimal_place, $decimal_point, $thousand_point);
$string1=substr($string,0,1);
$string2=substr($string,1);
$string2=str_replace(‘,’,”,$string2);
setlocale(LC_MONETARY,’en_IN);
$string= $string1.money_format(‘%!i’, $string2);

Finally, you need to save the file with the implemented changes to get the desired currency format.

Recommended Read: What are the merits and demerits of using an OpenCart platform?

These are the simple steps that need to be implemented by OpenCart site owners to achieve the Indian currency format while displaying the product pricing to its customers. In case, you need any other OpenCart extensions to improve the functionality and performance of an OpenCart store, you need to visit the Knowband site. Besides, providing wonderful extensions for Magento 2, OpenCart, WooCoomerce and PrestaShop sites, the company is capable of providing customized plugin development services to its worldwide clients.

For platforms like Magento 2, Prestashop, OpenCart, and WooCommerce, we offer the greatest plugins. Also, for the website and modules, we offer custom module development and modification services. Besides that, we have a dedicated support team that is always available to aid clients when they need any assistance from us in order to deliver the best and most effective post-sale support to our customers. Moreover, on weekends, we continue to fulfil our obligations to customers who need assistance with urgent website problems. Also, in case of doubts or queries related to the OpenCart Module functionality feel free to drop us an email at support@Knowband.com

Additional Alert Email field issue in Opencart v2.3.0.2

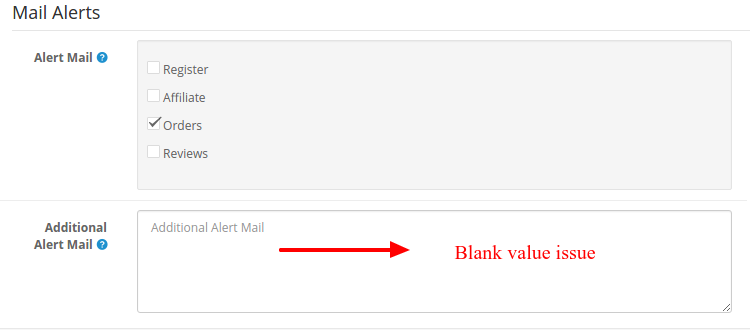
If you are using Opencart v2.3.0.2 and trying to save an additional email address to receive email alerts then you will notice that this version is not saving the value of the “Additional Alert Email” field. After saving its value, when you come back to the store setting page, you will find that the “Additional Alert Email” field is blank, this may cause you to think that you can’t receive email alerts to additional emails because it is not saving additional email address.

After receiving emails from several customers, when we looked into the issue, we found that it is actually saving the additional email address and is also sending email alerts to the additional email address, the only issue is that when you come back to the setting page, it is not showing the saved additional email addresses.

This issue can be solved in the following two ways:

Method #1: Download this free module and install it on your store. Follow the below instructions to install it.

  1. Extract the downloaded zip file.
  2. Upload the XML file from the Admin panel’s Extensions > Extension Installer page.
  3. Now refresh the modifications from the Admin panel’s Extensions > Modifications page.

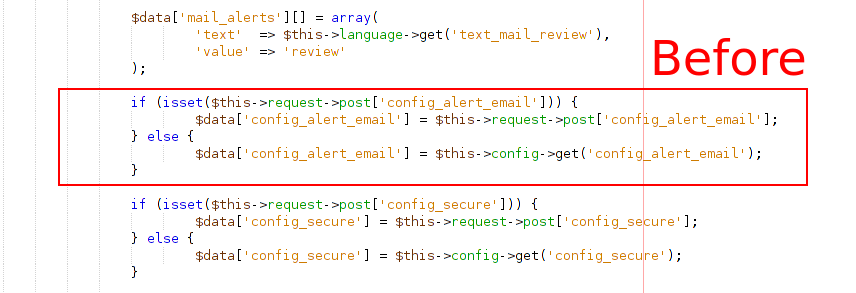
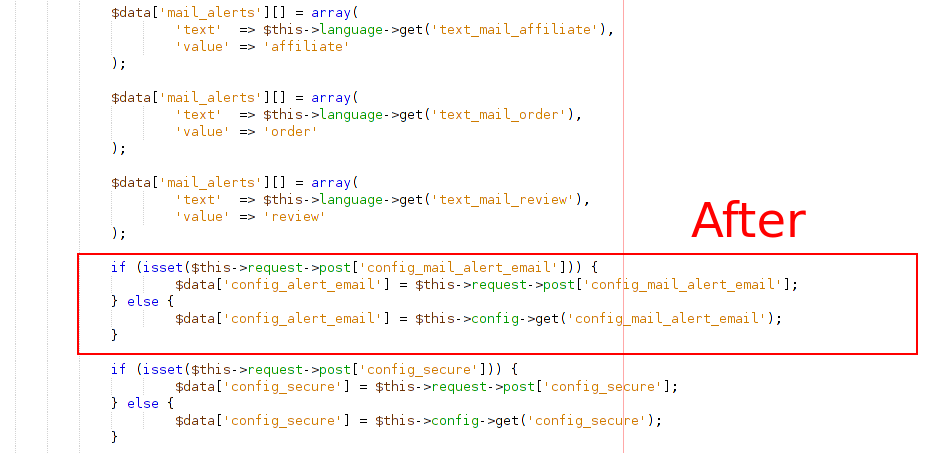
Method #2: Make the required changes manually by following the below instructions. You just need to edit one file.

File to edit -> /admin/controller/setting/setting.php

Search for

config_alert_email

and replace it with the following code at 1st, 3rd and 5th position.

config_mail_alert_email

If you face some issue or need some help to fix this bug, feel free to contact us. We will fix it for free.

Related Stories