
How to install OpenCart Follow Up Email plugin on your server
1. Folder structure of the Follow Up Email plug-in folder.

2. Open the upload folder and you will find the following folder structure:

You must have VQMOD installed for this plug-in to work. If VQMOD is not installed please download and install from the URL below:
https://code.google.com/p/vqmod/
3. Select all the folder and drag and drop them to the root directory of your OpenCart store throughFTP.
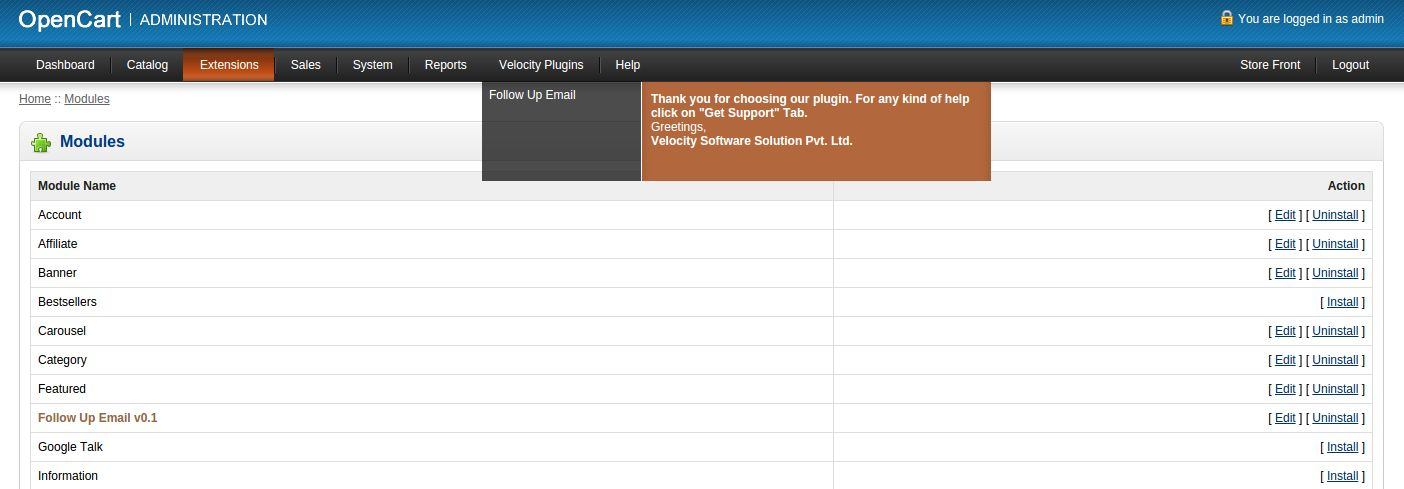
4. You will be able find the plug-in ready to be installed in the Modules in your OpenCart store as shown below.

5. Click on the Install link to install the plug-in. This will also add a dropdown option in your menubar which will list all plug-ins by Velocity installed on your store for fast navigation. Thisdropdown also has a message box, using which we can inform you about new launched plugin or new update.
6. Delete the Vqcache files from the vqmod/vqcache folder.
7. To access Follow Up Email plug-in click on edit button in module section as shown below:
8. On clicking edit button the module for plug-in will open. It contains navigational bar at top, menu at left and main content at center as shown below.

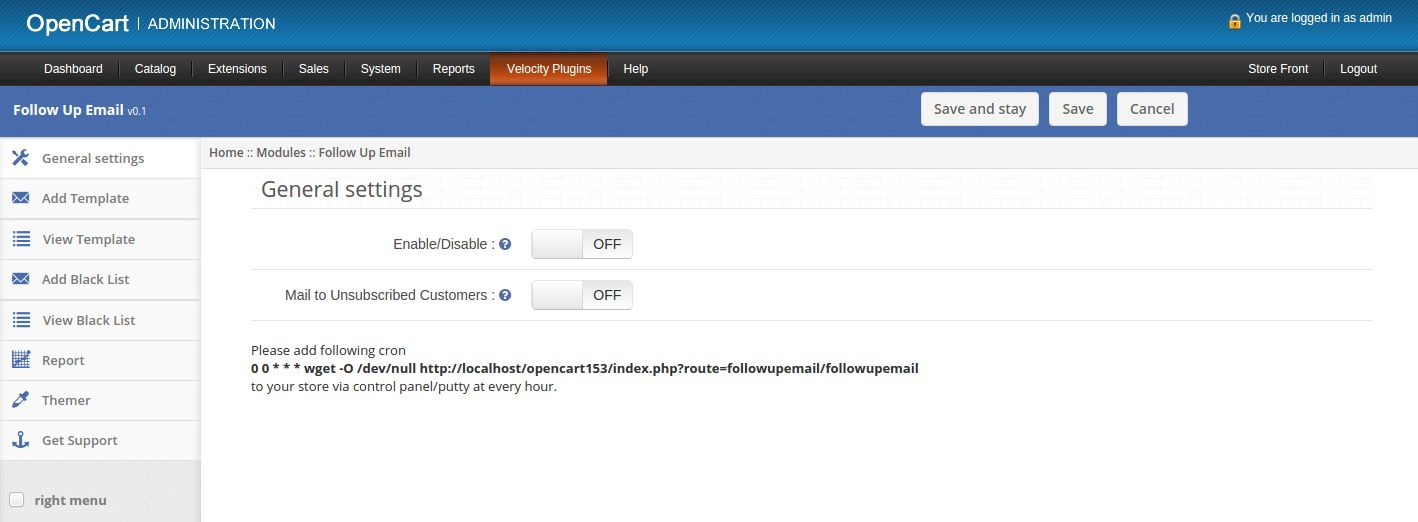
1. General Settings tab
1. Enable/Disable: Enable or disable plug-in.
2. Mail to Unsubscribed Customers: Enable or Disable sending mails to unsubscribed customers.
2. Add Template tab
1. Here admin can create a new template.
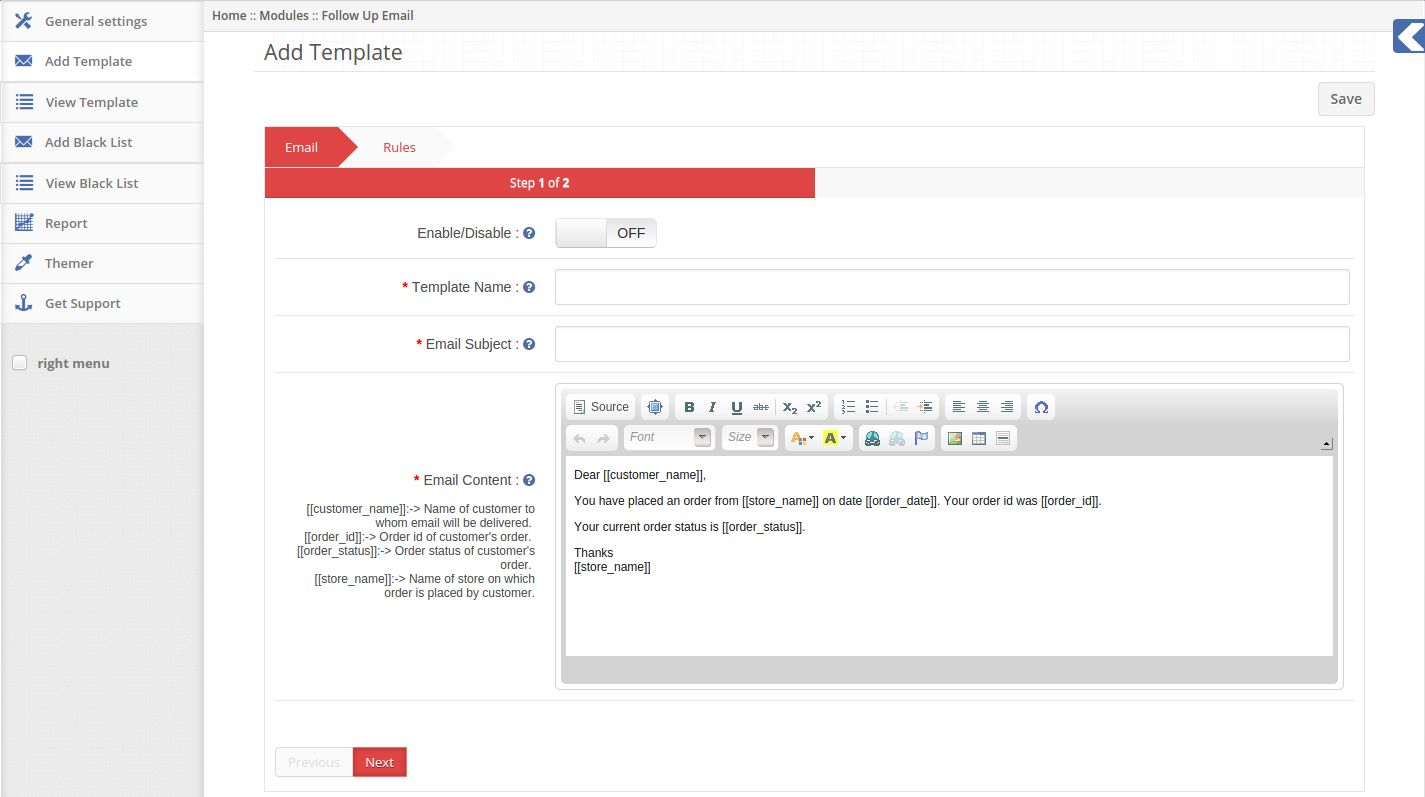
2. Enable/Disable: Enable or disable template.
3. Template Name: Set name of template.
4. Email Subject: Set subject of email to be sent.
5. Email Content: Set content of email to be sent.

6. Active from: Set start date of sending emails of this template.
7. Active to: Set end date of sending emails of this template.
8. Email Frequency: Set delay time (in hours) for sending emails.
9. Order Status: Select one or multiple order statuses after which you wish to send emails.
10. Customer Group: Select one or multiple customer groups. Email will be sent to customers belonging
to selected customer groups.
11. Stores: Select one or multiple stores. Email will be sent to customers who placed orders from
selected stores.
12. Email will be sent to customers belonging to any of the selected customer groups who placed order
from any of the selected stores, after selected (email frequency) hours of their order reaching any of
the selected order statuses.
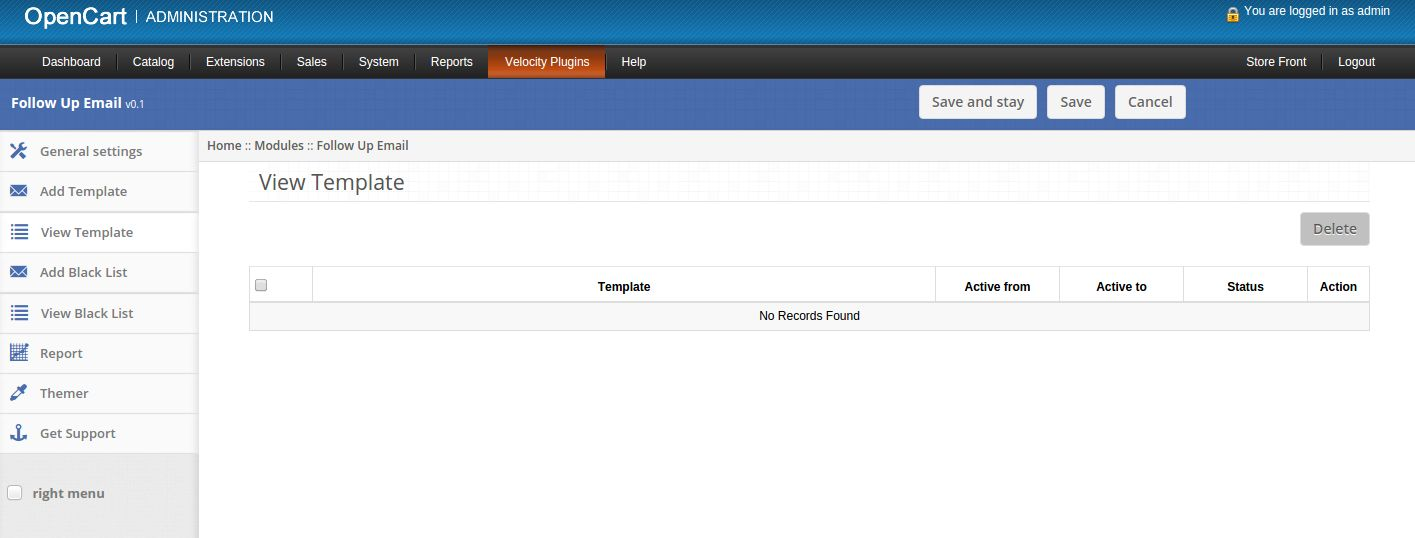
3. View Template tab
1. Here admin can see list of saved templates.
2. If their are no saved templates then this tab will look as follows:
3. If their are some saved templates then this tab will look as follows:
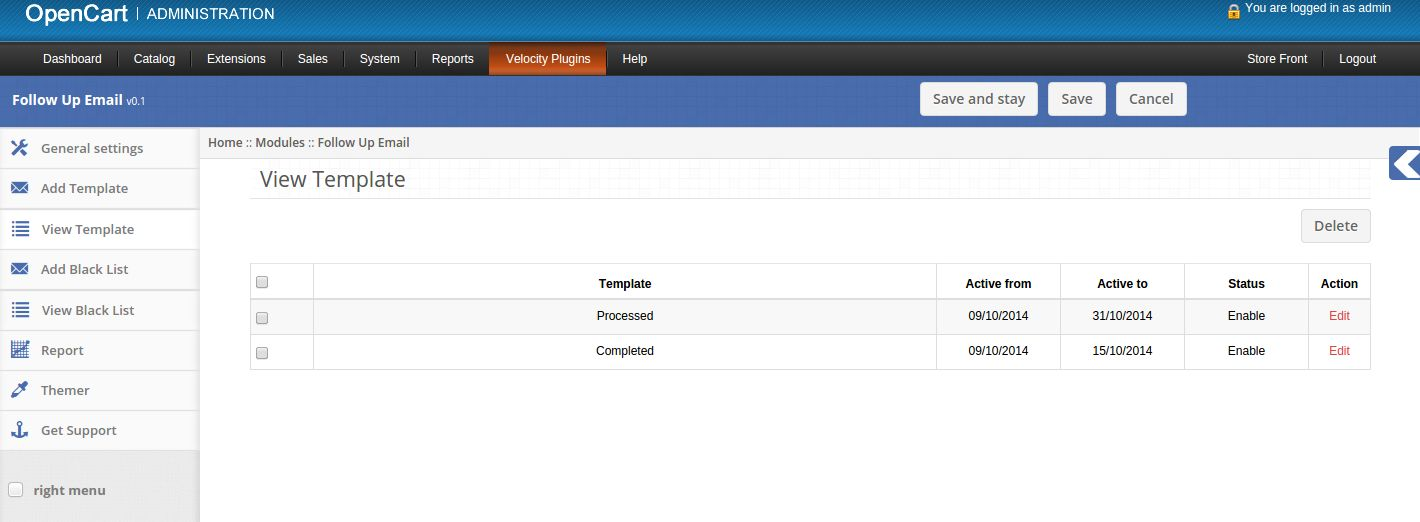
4. Click on Edit link provided in front of every template to edit that template.
5. Click on Delete button to delete selected templates.
6. On clicking the edit link a form will appear to edit the promotion.
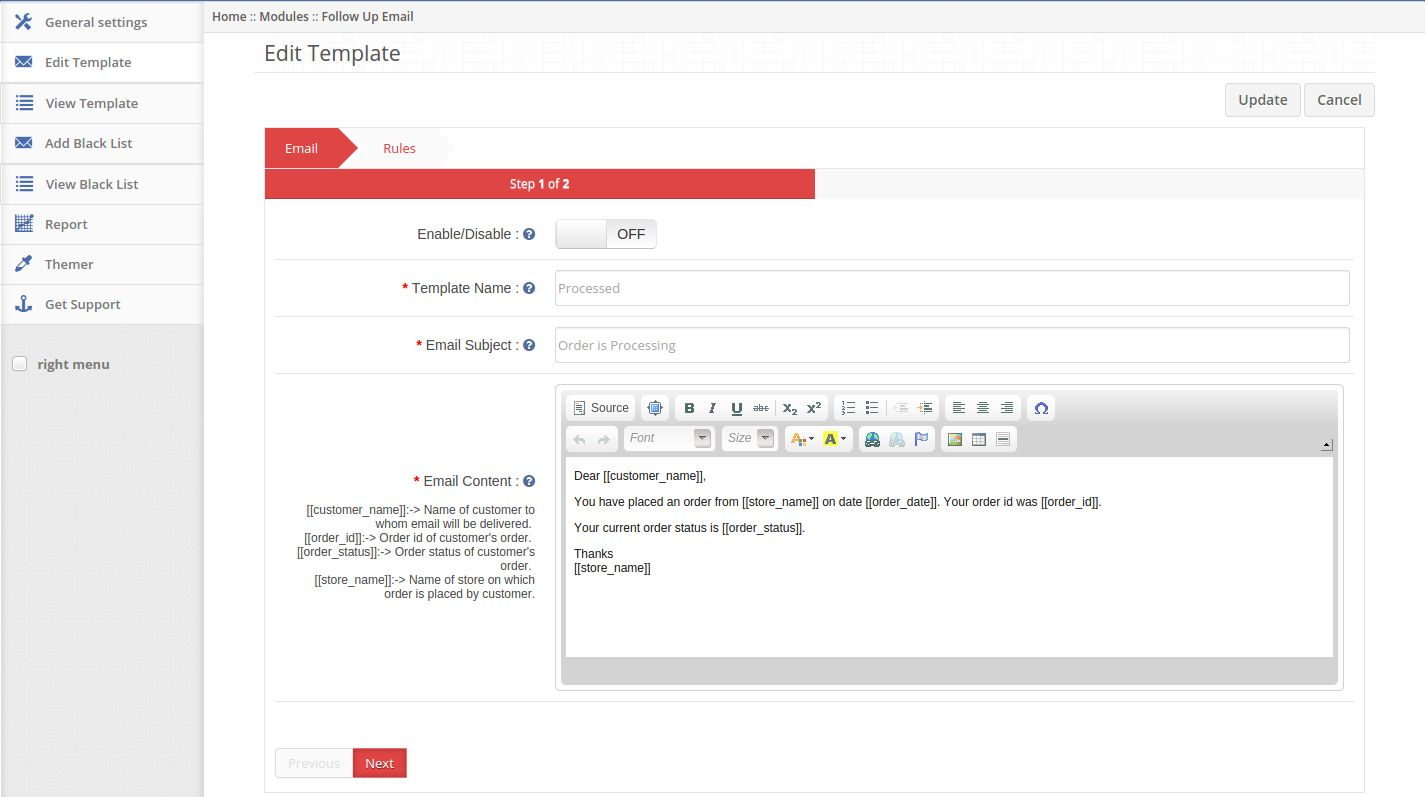
7. Enable/Disable: Enable or disable template.
8. Template Name: Set name of template.
9. Email Subject: Set subject of email to be sent.
10. Email Content: Set content of email to be sent.
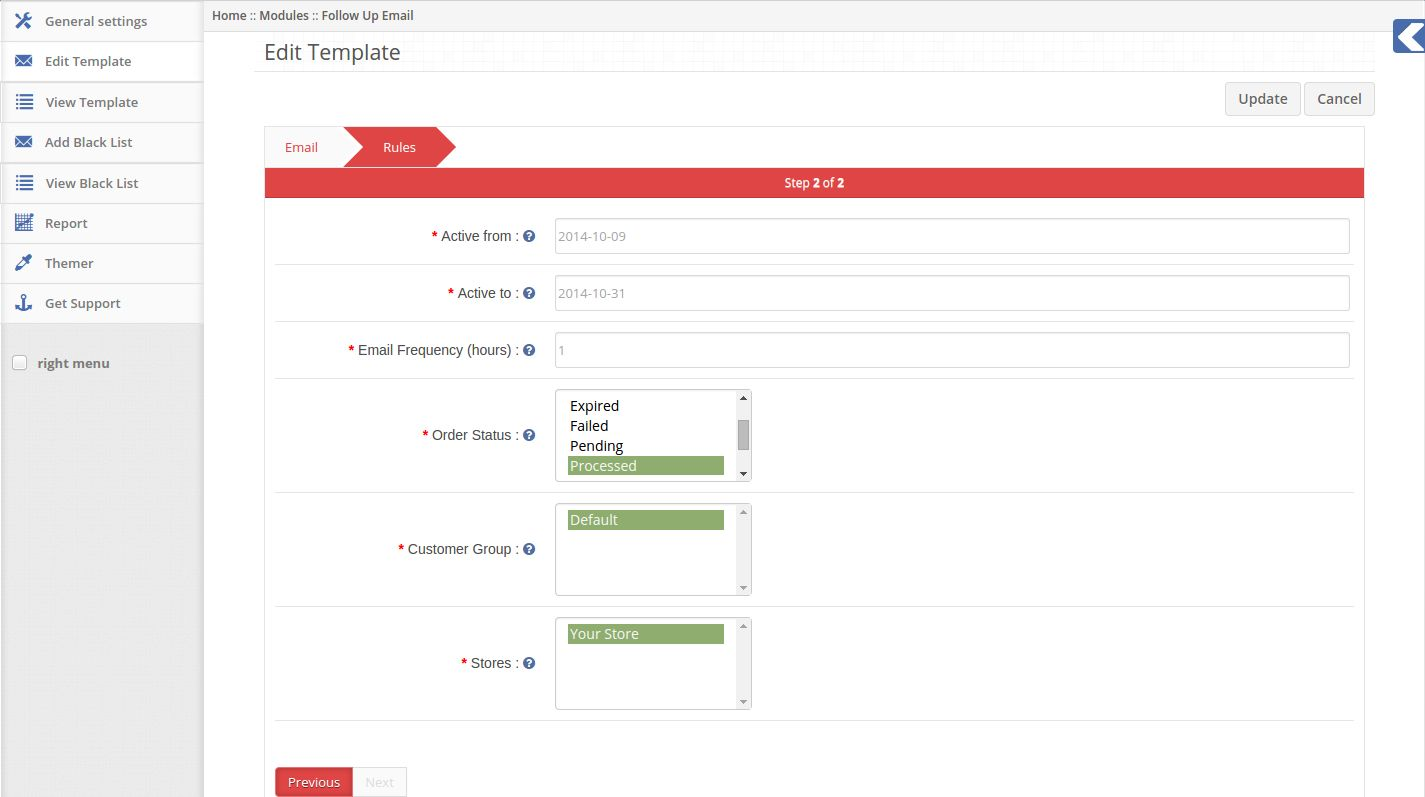
11. Active from: Set start date of sending emails of this template.
12. Active to: Set end date of sending emails of this template.
13. Email Frequency: Set delay time (in hours) for sending email.
14. Order Status: Select one or multiple order statuses after which you wish to send emails.
15. Customer Group: Select one or multiple customer groups. Email will be sent to customers belonging
to selected customer groups.
16. Stores: Select one or multiple stores. Email will be sent to customers who placed orders from
selected store.
4. Add Black List tab
1. Here admin can add email id in black list.
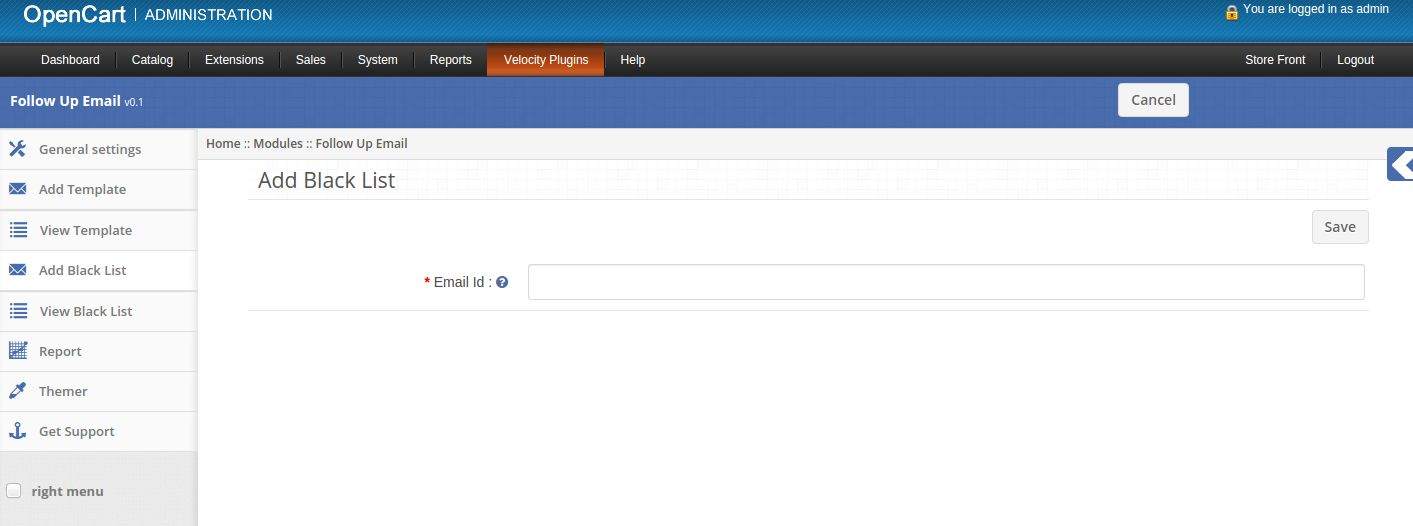
2. Email Id: Enter email id to which you do not wish to send emails.
3. No email will be sent to email ids listed in black list.
5. View Black List tab
1. Here admin can see black listed email ids.
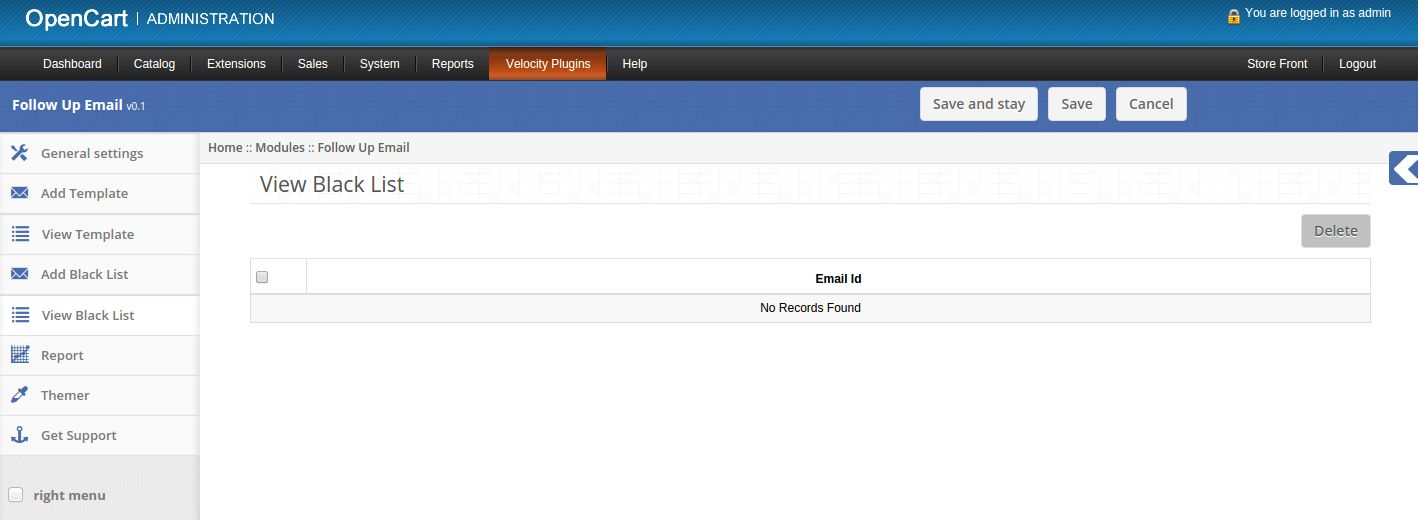
2. If there are no saved black listed email id then this tab will look as follows:
3. If their are some saved black listed emails then this tab will look as follows:

4. Click on Delete button to delete selected email ids from black list.
6. Reports tab
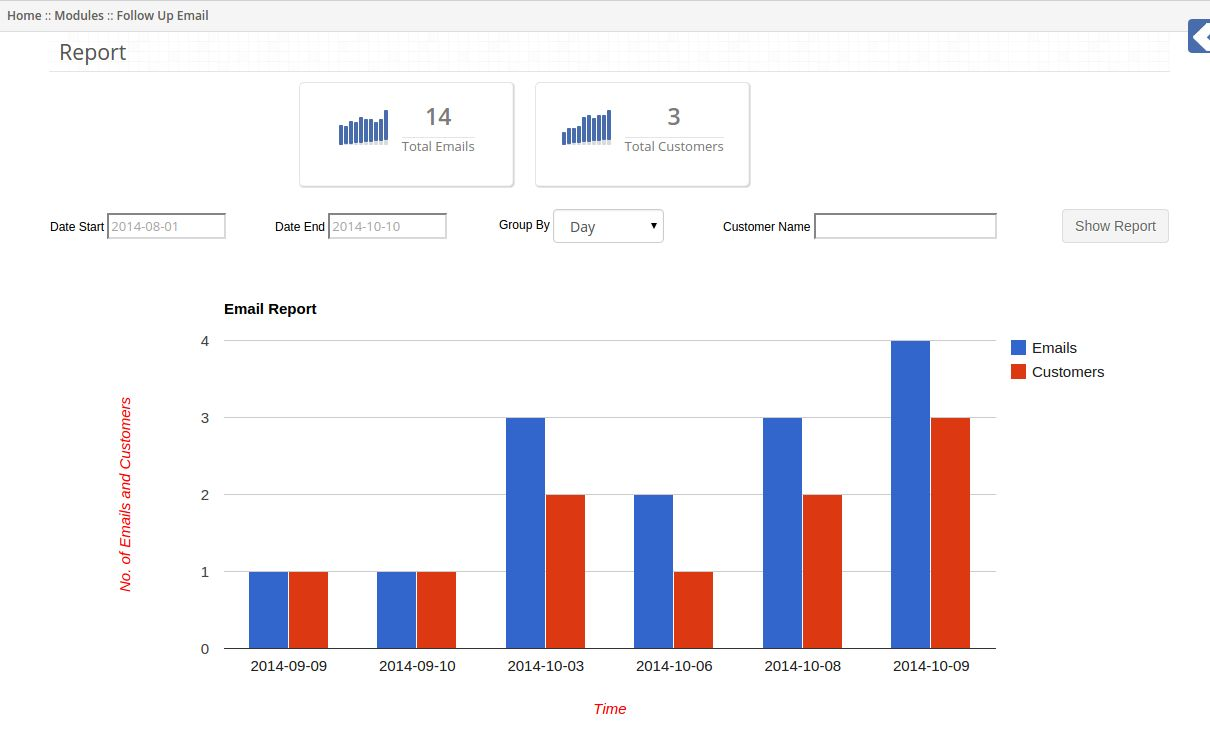
1. Here admin can see reports of emails sent to customers.
2. On the top of this tab total number of emails sent and total number of customers received email is
displayed.
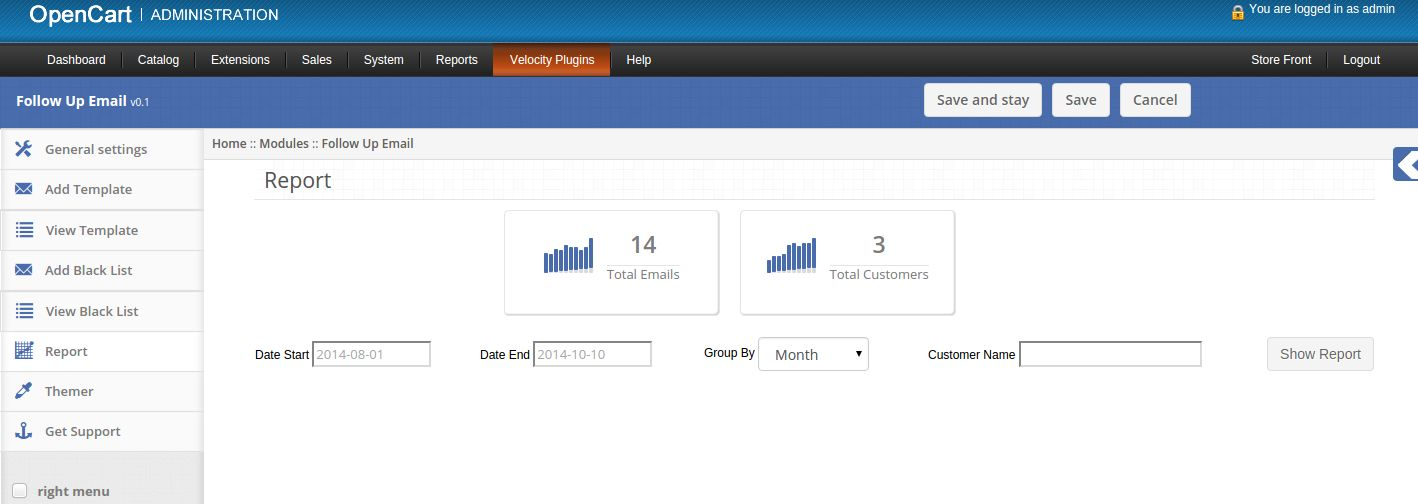
3. On clicking Show Report button graphical report will appear as per values of filter.
4. You can also see report of email sent to particular customer by writing his name in filter.
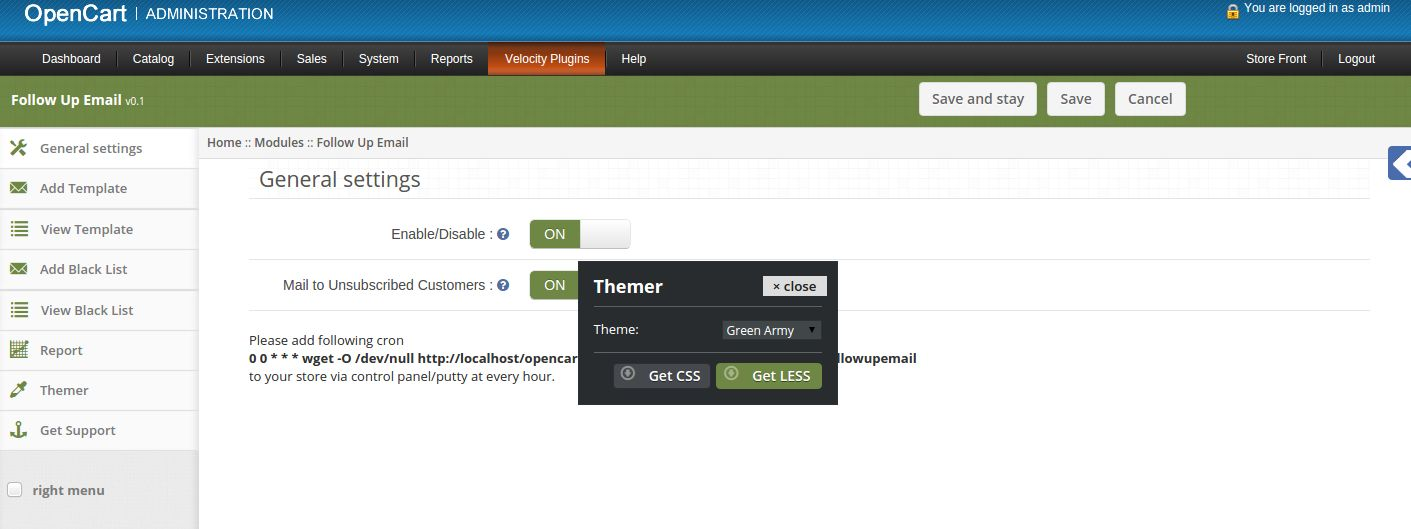
7. Themer tab
By clicking on themer tab, you will have an option to change the theme of Follow Up Email admin
panel.
8. Get Support tab
By clicking on Get Support tab, you will be redirected to our support website, where you can contact
our support for help. Use this tab in case you some query/issue or found some bug.
Cron Setup
After installation of plug-in please add following cron to your store via control panel/putty. This cron should run once in every hour.
0 0 * * * wget -O /dev/null https://yourstore.com/index.php?route=followupemail/followupemail
Replace yourstore.com with url of your default store.
Recommendations
Set cron file to run once in every hour.

