Implementing Lazy Loading for Product Images in OpenCart

In today’s internet-driven world, users expect websites to load instantly. Customers want pages to load quickly when they visit your OpenCart website. Customers may become irritated, and your business may lose revenue if your product pages take too long to load, especially on mobile devices where internet rates may be slower.

Large or numerous graphics are frequently the primary cause of slow page loading. Product photos might be big files, but they are an essential component of any e-commerce website. Lazy loading can help with it.

The Performance Challenge in eCommerce Sites
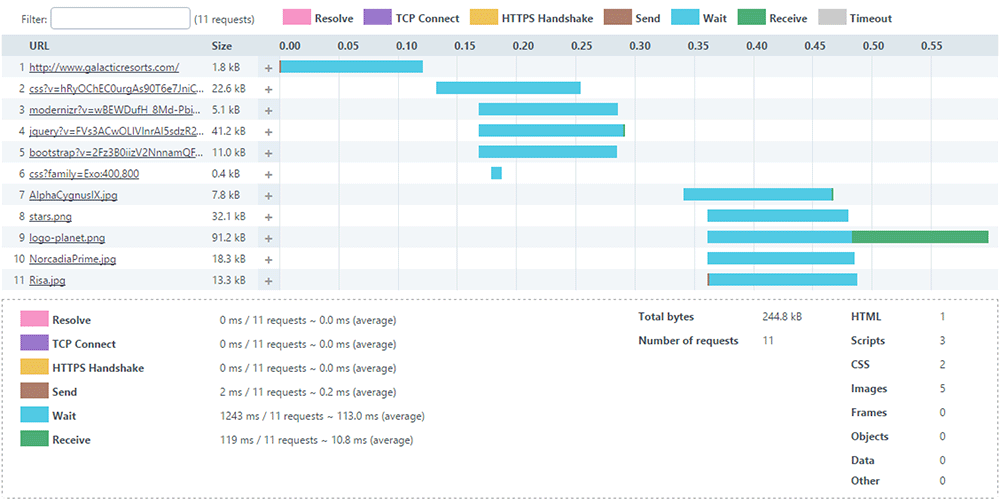
Moment’s eCommerce spots are veritably visual. A standard order runner can have

  • 20-50 pictures of the product
  • Banners
  • Thumbnails and icons
  • Sections on related products

The browser will need to load each image before the page is completely interactive if all of these are loaded at once. This leads to:

  • First Contentful Paint (FCP) at a slower pace
  • Increased Interactive Time 
  • Poor performance on mobile devices
  • A higher server load
  • Increased rates of bounce

The user experience will be significantly impacted by this, particularly on slower networks.

What Is Lazy Loading?

The technique known as “lazy loading” delays the loading of images (or other content) until they are truly required, which is typically when a user is ready to view them by scrolling into view. Lazy loading waits until the user is ready to view the image before loading it, as opposed to loading all the images at once.

Lazy loading has the following advantages:

  • Bandwidth conservation
  • Better performance on mobile devices
  • Improved SEO and essential web elements
  • Quick loading of the first page

When many of the images may load simultaneously on product pages, lazy loading is especially helpful.

Why Lazy Loading Matters

Imagine looking through an item catalogue. Even if the product images are far below the fold, your browser will try to load them all at once when using traditional loading. Only the images that are in or near the viewable portion of the screen will load initially when using lazy loading. The remaining images will gradually load as the viewer scrolls.

Both your clients and search engines like Google, which like websites that load quickly, will benefit from a quicker and more seamless experience.

Real-World Example: Category Page Without Lazy Loading

Consider this example:

24 products on a category page, Each thumbnail = 150 KB, Total image weight = 3.6 MB

Before even loading banners, CSS, and JavaScript, the browser has to download close to 4 MB of images.

Now consider that the visitor only scrolled halfway through the page. Half the images were never viewed – but downloaded anyway. Therefore, this is wasted bandwidth and 0This is where lazy loading comes in.

Lazy Loading and Core Web Vitals

Web Vitals. The following are directly impacted by large images:

  • Paint with the Largest Content (LCP)
  • Shift in Cumulative Layout (CLS)
  • Next Paint Interaction (INP)

Correctly loading images slowly will enhance performance metrics, particularly on product and category listing pages.

Still, there’s one important thing to keep in mind

 Images above the pack, like the primary product image on a product detail runner, should n’t be lazy loaded.

When to Apply Lazy Loading?

Lazy loading is best suited for:

  • Product listing pages
  • Category pages
  • Blog listing pages
  • Manufacturer pages
  • Upsell sections

It might not be the best fit for:

  • Hero banners above the fold
  • Main product image on the product page
  • Critical branding visuals

How to Implement Lazy Loading in OpenCart

Method 1: Lazy loading in native browsers

Modern browsers use the loading=”lazy” property to provide built-in lazy loading

Example:

<img src=”image.jpg” loading=”lazy” alt=”Product Image”>

OpenCart Steps:

  • Open your theme file:
Version File Path
OpenCart 2.x catalog/view/theme/your_theme/template/product/category.tpl
OpenCart 3.x catalog/view/theme/your_theme/template/product/category.twig
OpenCart 4.x catalog/view/template/product/category.twig
  • Locate the product image <img> tag.
  • Change it as follows:

Before:

<img src="{{ product.thumb }} alt="{{ product.name }}"  width="300"  height="300"

     title="{{ product.name }}">

After:
<img src="{{ product.thumb }}"loading="lazy"  alt="{{ product.name }}"  width="300"  height="300"     title="{{ product.name }}">

That’s all. JavaScript is not necessary. Furthermore, this is the most easy and cleanest way.

Method 2: Using lazysizes (Best for Older Browser Support)

Steps:

  1. Add the lazysizes script:
    <script src="https://cdnjs.cloudflare.com/ajax/libs/lazysizes/5.3.2/lazysizes.min.js" async></script>
  2. Open your theme file based on the OpenCart version mentioned in Method 1 and update the image markup:
  • Before:
    <img src="{{ product.thumb }}" class="lazyload" width="300" height="300" alt="{{ product.name }}">
  • After:
    <img data-src="{{ product.thumb }}" class="lazyload" width="300" height="300" alt="{{ product.name }}">

Method 3: Using Intersection Observer API (Advanced Control)

Modern JavaScript API for better control.

Example:

const images = document.querySelectorAll(“img[data-src]”);

const observer = new IntersectionObserver((entries, observer) => {

  entries.forEach(entry => {

if (entry.isIntersecting) {

   const img = entry.target;

   img.src = img.dataset.src;

      observer.unobserve(img);

}

  });

});


images.forEach(img => observer.observe(img));

This method gives full control over loading behaviour.

Important: AJAX-Based Product Filtering

When products are loaded dynamically via AJAX:

Native loading=”lazy” works automatically.

However, ifyou are using lazysizes, Intersection Observer then You must re-trigger lazy loading after AJAX content loads.

Example:

document.addEventListener('ajaxComplete', function() {

    lazySizes.autoSizer.checkElems();

});

Otherwise, newly injected images may not load correctly.

The Best Methods for Lazy Loading in OpenCart

✔ Avoid loading the images above the fold.

✔ Make sure your images are the right size; avoid using thumbnails that are too big.

✔ Always use PageSpeed Insights to test; optimiseoptimize images to WebP format.

✔ Always test with PageSpeed Insights

✔ After making changes to the template, clear the OpenCart cache.

Measuring Performance Before and After Implementation

To evaluate the impact of lazy loading, follow these steps:

Before Implementation

Test your category page and record the following metrics:

  • Page size
  • Page load time
  • Core Web Vitals scores

After Implementation

Run the same tests again and compare the results. You should observe:

  • Reduced initial load time
  • Lower Total Blocking Time (TBT)
  • Improved Lighthouse performance score

The implementation options outlined in this guide, from native HTML attributes to lazysizes and the Intersection Observer API, offer solutions for every level of technical complexity. Whether you are maintaining a small boutique store or managing a high-traffic multi-category catalogue, there is an approach that fits your needs. Start with Method 1 for instant results, and build up to more advanced methods as your requirements grow.

Performance optimisation is not a one-time task as it is an ongoing commitment. Pair lazy loading with image compression, WebP conversion, and proper caching to unlock the full potential of your OpenCart store’s speed.

About Knowband

Knowband is a trusted eCommerce plugin and extension provider with years of experience helping online merchants build faster, smarter, and more feature-rich stores. Whether you run your store on PrestaShop, OpenCart, Shopify, WooCommerce, Magento, or any other major platform, Knowband offers a wide range of ready-to-use plugins and extensions that help you enhance functionality, improve performance, and deliver a better shopping experience, without needing to build from scratch.

Beyond plugins, Knowband also offers comprehensive website development and mobile app development services. Whether you need a fully custom eCommerce storefront built from the ground up, a tailored mobile shopping app for iOS and Android, or a bespoke integration with your existing systems, Knowband’s team of developers has the expertise to bring your vision to life.

If you are looking to optimize further your OpenCart store, or any other eCommerce platform, explore Knowband’s plugin marketplace or get in touch with our team to discuss a custom solution tailored to your business goals.

Contact us at support@knowband.com for custom plugin development, website development, and mobile app development services.

One Page Super Checkout: A Simple Way to Reduce Abandonment and Increase Sales

A lot of OpenCart & Prestashop shops are losing their customers at checkout. And the reason behind it is that the general checkout process consists of an excessive number of steps and multiple fields to fill out. Research indicates that over 65% of online customers abandon the site during the checkout process when they find the process to be time-consuming or difficult to comprehend. When customers get frustrated, they stop buying, and the store loses an easy sale.

Hence, the easiest way to solve this issue is by using the OpenCart One Page Super Checkout by Knowband. This addon integrates all the checkout elements, including cart details, address, shipping, payment, and the order summary on a single page. With this, customers can make orders within seconds without switching several pages.

This smooth and fast experience reduces the number of drop-offs and increases conversions. With this addon, store owners can finally offer a checkout that customers enjoy using.

By integrating the Prestashop responsive one-step checkout addon, merchants can reduce cart abandonment and increase conversions. This powerful Prestashop fast checkout addon supports major payment gateways such as PayPal, Stripe, Authorize.Net, Braintree, Amazon Pay, Apple Pay, Google Pay, Square, Klarna, Worldpay, Mollie, Skrill, Neteller, Payoneer, and 2Checkout, providing shoppers with a variety of secure and convenient ways to pay. Offering multiple trusted payment methods helps build customer confidence and ensures more orders are completed successfully.

Benefits of the OpenCart One Page Checkout Extension

Quick Checkout, Increased Conversions.

Knowband’s OpenCart One Page Supercheckout Plugin has everything on a single page. Customers can fill in the details in a short time and complete the purchase without getting lost. Thus, once the checkout is made quicker, the conversion rate automatically increases.

Lower Cart Abandonment

Moreover, the PrestaShop Quick Checkout Module eliminates all those unnecessary steps that frustrate customers. No more loading new pages. No more long forms. This simple and clean screen keeps the customers on track and reduces the number of abandonments.

Better Mobile Shopping Experience

Most users today make purchases on mobile phones. The Responsive One Page Checkout Plugin for OpenCart is compatible with all screens, including mobiles, tablets, and desktops. Hence, customers can place their orders with ease, no matter the device they are using.

Fast Orders with Guest Checkout

Generally, when people are forced to create an account during checkout, they leave instantly. Using the Knowband Prestashop One Step Checkout Addon, customers can easily check out as guests. 

Easy Setup With No Coding

The OpenCart Simplified Checkout Plugin does not need technical skills. The extension can easily be installed by store owners, and they can configure the entire extension in just minutes.

Integrate Your PrestaShop Store with AI Chat Support

Boost engagement and conversions with instant AI replies, multilingual support, and real-time order updates.


SHOP NOW

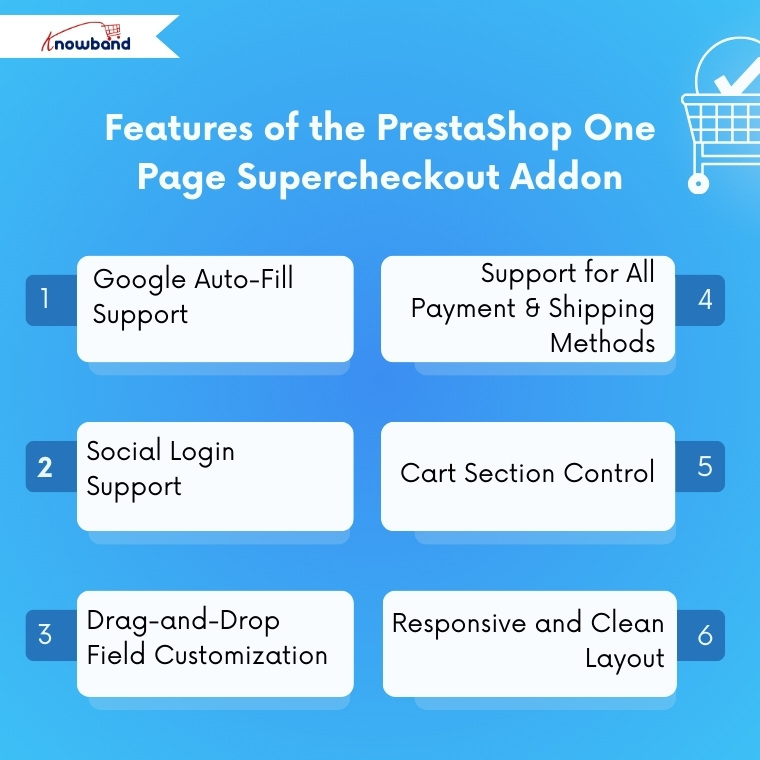
Features of the PrestaShop One Page Supercheckout Addon

Google Auto-Fill Support

The checkout form includes auto-fill to help customers enter their address faster. Thus, this reduces typing time and prevents mistakes, leading to a smoother buying process.

Social Login Support

Moreover, with the PrestaShop One Page Checkout Module by Knowband, customers can sign in using Facebook, PayPal, and Google. Thus, this saves them from creating new accounts and speeds up the purchase process.

Drag-and-Drop Field Customization

Store owners can fully customize the checkout layout. The OpenCart fast checkout extension allows adding, removing, and rearranging fields with simple drag-and-drop options. Hence, you can shape your checkout page based on your store’s needs.

Support for All Payment & Shipping Methods

The plugin works smoothly with all payment or shipping methods added to the store. In addition, admins can also customize how these methods appear by adding logos and short descriptions.

Cart Section Control

Moreover, store owners can choose what to display in the cart section on the checkout page. For example, they can show stock details or price information only to registered users while hiding them from guest users.

Responsive and Clean Layout

Last but not least, the OpenCart one-step checkout extension by Knowband provides a clean and organized layout that is easy to understand. This helps customers complete their order faster without getting confused.

Conclusion

Knowband has developed the Prestashop One Page Super Checkout Module, which is one of the strongest upgrades that any opencart & prestashop store can make in 2026. The module makes a slow, multi-step checkout process of checkout process fast and friendly for the customer. This module consists of great features such as social login, checking out as a guest, auto fill, drag and drop customization, and more.

This enhanced experience results in a reduction in the number of unfinished orders, increases successful orders, and improves customer satisfaction. Thus, Knowband’s OpenCart One Page Supercheckout Extension is the best option that you can invest in case you want to expand your opencart and prestashop store by reducing checkout friction and speeding up sales.

For more information, you can refer to the https://www.onepagesupercheckout.com/, here you can find the detailed information of  Knowband’s One Page Supercheckout, which is available for Prestashop, Opencart & Magento 2.

Must Read

Gear Up for 2026 with the Next-Gen Knowband AI Content Generator Plugin

Discover how the startup OrderFast launched its full-featured mobile app in only one week with the WooCommerce Mobile App Builder


Time Is Ticking in 2025 – Get Your OpenCart Mobile App Live Fast

The world is going mobile, and so are the shoppers. If your OpenCart store is not yet optimised for mobile shoppers, you are missing out on huge sales. The OpenCart Mobile App Builder by Knowband is a solution that allows you to bring your online shop directly to your customers’ phones, supporting both Android and iOS devices.

You do not have to write code or hire developers. With a few clicks, you will be able to start a professional, fast, and responsive OpenCart eCommerce Mobile App Builder, which will stay synchronized with your website in real-time.

Why Store Owners Need an OpenCart Mobile App Maker Addon

Shoppers love convenience. They make more frequent purchases when they can shop using a mobile application. The Android and iOS Mobile App Builder Addon for OpenCart allows you to give them that experience.

Your mobile app will keep your products in your customers’ pockets. You can share them with offers, their order, and abandoned cart details with push notifications. Moreover, the mobile app provides quick and easy checkout. Hence, with all this, you can build long-term relationships with your customers.

Data indicate that application shoppers spend three times more time shopping than web shoppers. Hence, stores with apps record more frequent re-orders. This is why the OpenCart Mobile App Maker Plugin by Knowband is one of the most intelligent additions to your online business.

Key Benefits of Using the OpenCart Android & iOS App Builder Extension

OpenCart Android App Builder Extension by Knowband is used by thousands of store owners because of its great benefits, as follows:

  • Boost Conversions: Apps convert better than websites.
  • Build Loyalty: An app keeps your customers connected as they feel comfortable using a mobile app instead of a website.
  • Increase Visibility: Reach Android and iOS users through app stores.
  • Save Time: Moreover, you can manage everything from your OpenCart dashboard. Hence, no need to change platforms.
  • AdMob Integration: You can add advertisements in various pages of your app with AdMob integration, which this module provides for some extra income.

Thus, whether you’re just starting or managing a big OpenCart store, Knowband’s Mobile App Builder Plugin for OpenCart is the simplest way to go mobile.

Features That Make the Mobile App Builder for OpenCart Powerful

The OpenCart Mobile App Creator by Knowband is full of features that enable you to manage your app with ease and efficiency:

  • No-Code Setup: You don’t need any technical expertise to install and configure the module.
  • Real-Time Store Sync: Products, categories, and stock are automatically synchronised between the website and the app, thanks to Knowband’s OpenCart Mobile App Builder Module, which provides real-time sync.
  • Multi-Device Compatibility: Moreover, the addon is compatible with all Android and iOS devices.
  • Push Notifications: You can use push notifications to share festival offers, new products, orders, and more.
  • Easy Checkout Integration: Moreover, the module provides a quick and easy checkout process.
  • Personalised Style: The store owner can easily customise the home page layout elements, like adding products, categories, banners, and many more, to fit their brand.
  • Multi-language and Multi-Currency Support: In addition, with the support of multiple languages and currencies, you can sell internationally with ease.

In short, it is not just a mobile app; Knowband’s No-code App Builder puts your whole store in the hands of your customers in days.

How the OpenCart Mobile App Builder Module Works

The setup process of the OpenCart No Code Mobile App Builder Plugin is extremely easy:

General Settings

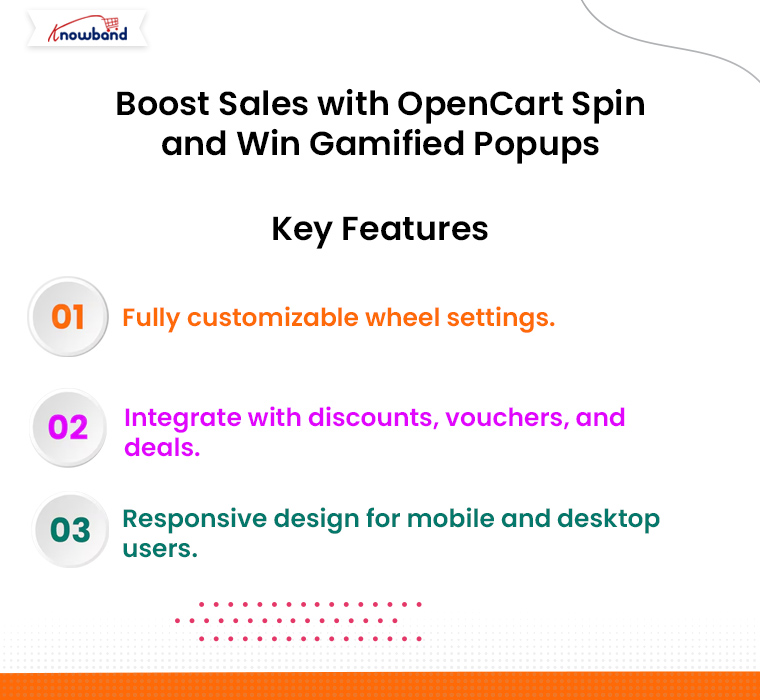
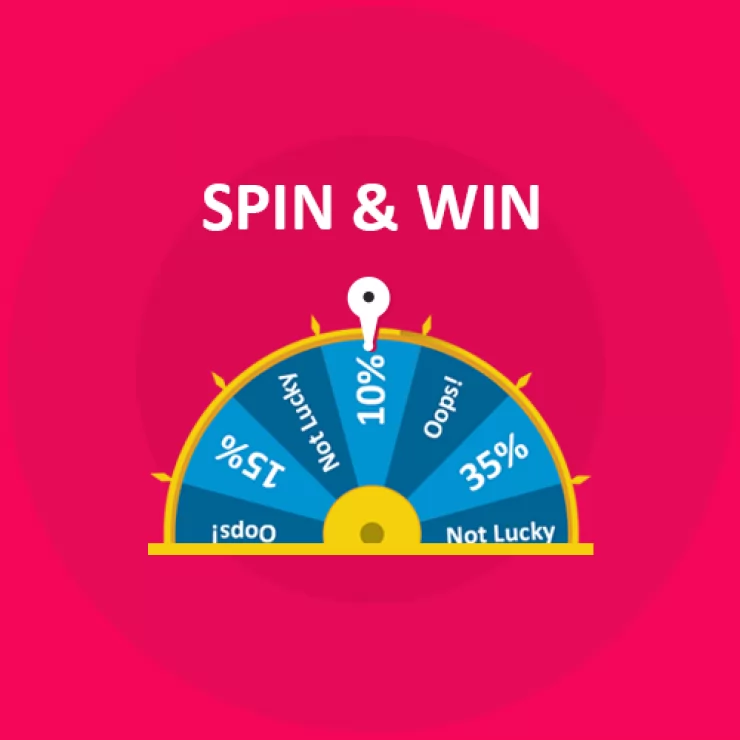
After installation, you will first go to the configuration settings on the module, where you can turn the entire module on or off with just one click. Next, you can enable/disable the spin and win module integration, logo, fingerprint login, phone number registration, sign-in/login popup, and more. Here, you can also customise the font and colors of the buttons and page.

Push Notifications

Here, you will first add a JSON file to enable push notifications. After which, you can enable the notification setting and add a custom notification message and title for created orders, order status, and abandoned carts. Moreover, in push notification settings, you can see the notification history, and you can share an instant notification from there with a clickable image.

Payment Method

Here, you can add multiple payment methods that are added to your website. As a result, it will support all the payment methods that your default website supports. Not only that, you can add the payment option for the backend configuration, too.

 Home Page Layout

Here, you can personalise the entire home page by just dragging and dropping multiple elements on the page, such as a square banner, a grid banner, a countdown banner, a login/signup popup, a recently accessed product, and more.

GDPR Settings

This OpenCart Mobile App builder includes features that support GDPR requirements, such as user data access, deletion requests, and consent management. Moreover, the plugin provides synchronisation between CMS pages, which helps the store owners to export any CMS data to the GDPR Page.

Advertisement Settings

Lastly, the No Code Mobile App Builder for Opencart allow the store owners to add advertisements on home, product, category, and CMS pages. This helps in increasing revenue and boosting sales.

Conclusion

In the modern world, having a website is nice, but having a mobile app is better. OpenCart Mobile App Builder by Knowband is a product that helps in developing Android and iOS apps in small duration of time, without any coding. The mobile app is automatically synchronized with the website, compatible with all devices, and it helps you to sell more.

Hence, if you want to boost sales, expand your market, and provide a more convenient shopping experience, it is time to upgrade your store.

Try the KnowBand OpenCart Mobile App Builder plugin today and watch how smoothly your store can go mobile.


Check out Our Latest Blogs

Turn Your OpenCart Store Into a Mobile App: A Simple Solution for Android and iOS


How to create breadcrumb in OpenCart?

Objectives of the blog

Breadcrumbs typically appear horizontally across the top of a web page, often below title bars or headers allows users to keep track of their locations within pages.

After reading this blog we will be able to add custom breadcrumb in Opencart page.

Problem Statement

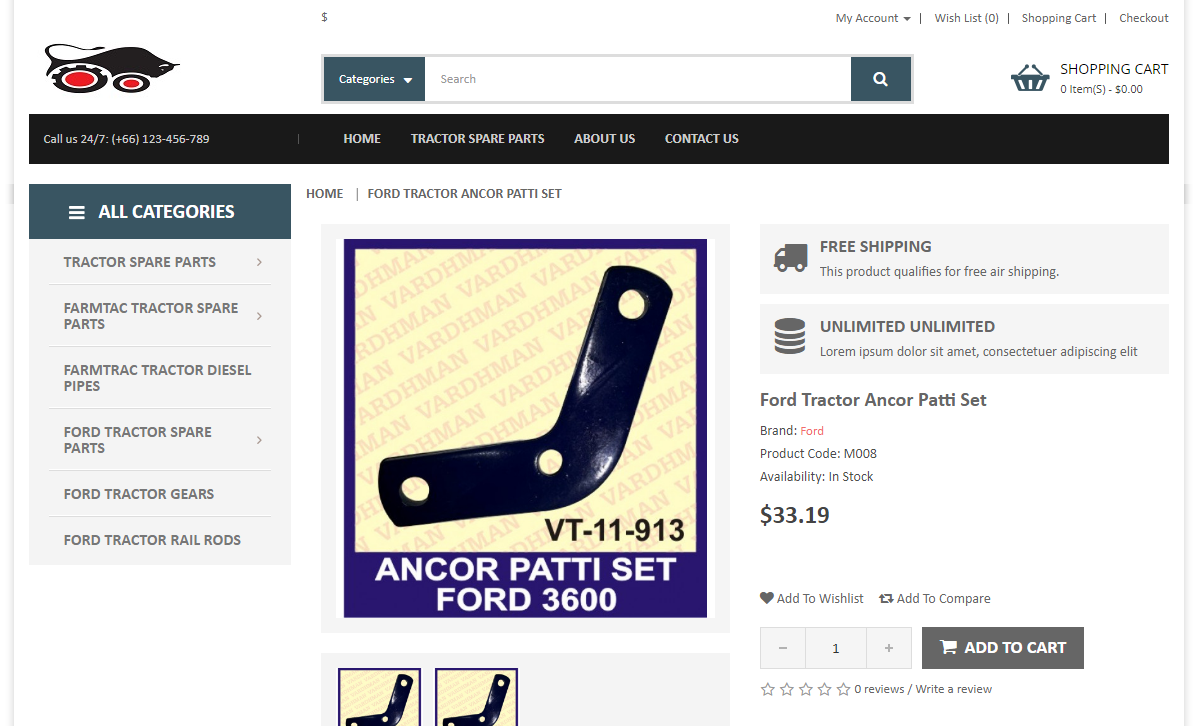
Many of the paid custom theme does not provide breadcrumbs in their theme. But it’s not that hard for a user to add a breadcrumb in OpenCart pages.

Refer below screenshot for the same:

Solution:

You just need to add block of  code in your custom view template file of page in which you want to add breadcrumb. Block of code is as follow –


<div class="page-top">
<div class="container">
<ol class="breadcrumb">
<?php foreach ($breadcrumbs as $breadcrumb) { ?>
<li><a href="<?php echo $breadcrumb['href']; ?>"><?php if($breadcrumb['text'] != '<i class="fa fa-home"></i>') { echo $breadcrumb['text']; } else { if($theme_options->get( 'home_text', $config->get( 'config_language_id' ) ) != '') { echo $theme_options->get( 'home_text', $config->get( 'config_language_id' ) ); } else { echo 'Home'; } } ?></a></li>
<?php } ?>
</ol>
</div><!-- End .container -->
</div>


You can add the above code  after <?php echo $column_left; ?> declaration.

This custom breadcrumb can be added on product pages, account pages, category pages and others.

$breadcrumb variable called in above tpl is already defined in all the pages controller in opencart. It is defined in below format in controller file of page –

$data['breadcrumbs'] = array();

$data['breadcrumbs'][] = array(
'text' => $this->language->get('text_home'),
'href' => $this->url->link('common/home')
);
$data['breadcrumbs'][] = array(
'text' => $category_info['name'],
'href' => $this->url->link('product/category', 'path=' . $path)
);


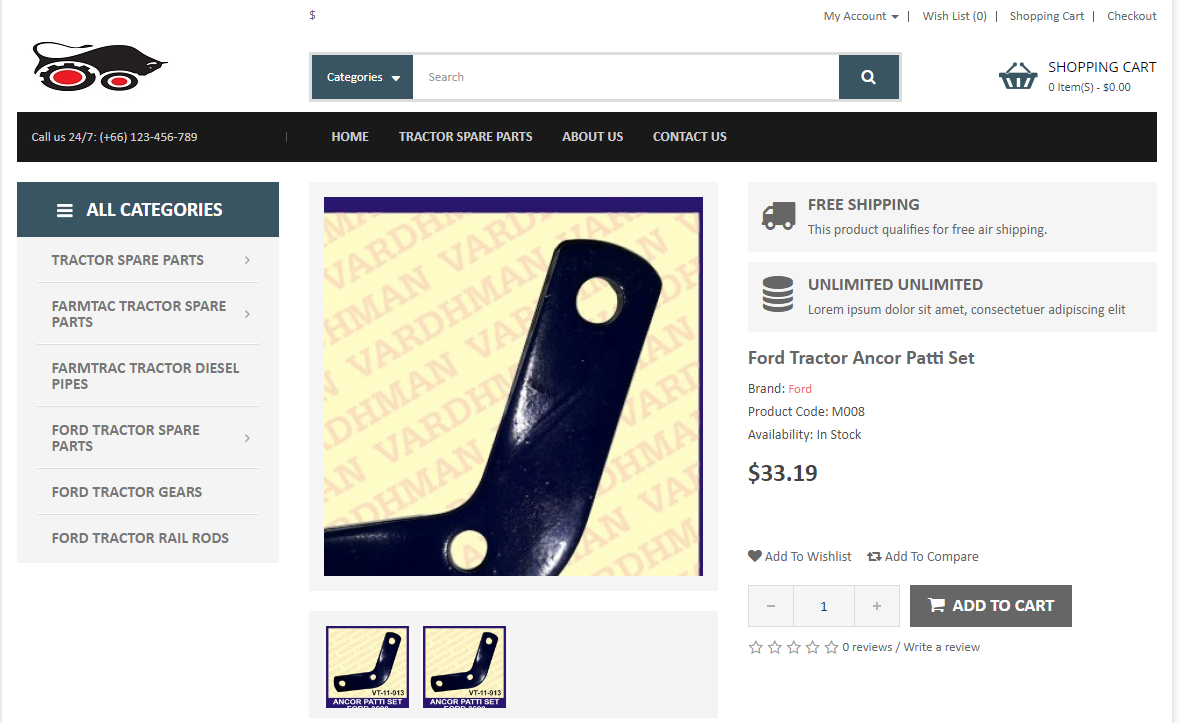
Once, you added the code in tpl file you can check your breadcrumb on your page. Please check our custom breadcrumb  (HOME | FORD TRACTOR ANCHOR PATTI SET) on product page below –


Summary

After reading the above solution, you will be able to add your own custom breadcrumb in the OpenCart pages.

How to open “Terms & Conditions” link in a new tab on checkout page (OpenCart)?

Objectives of the blog

After reading this blog we will be able to add the html attribute in “Terms and Condition” link to open it in new tab.

Current Scenario

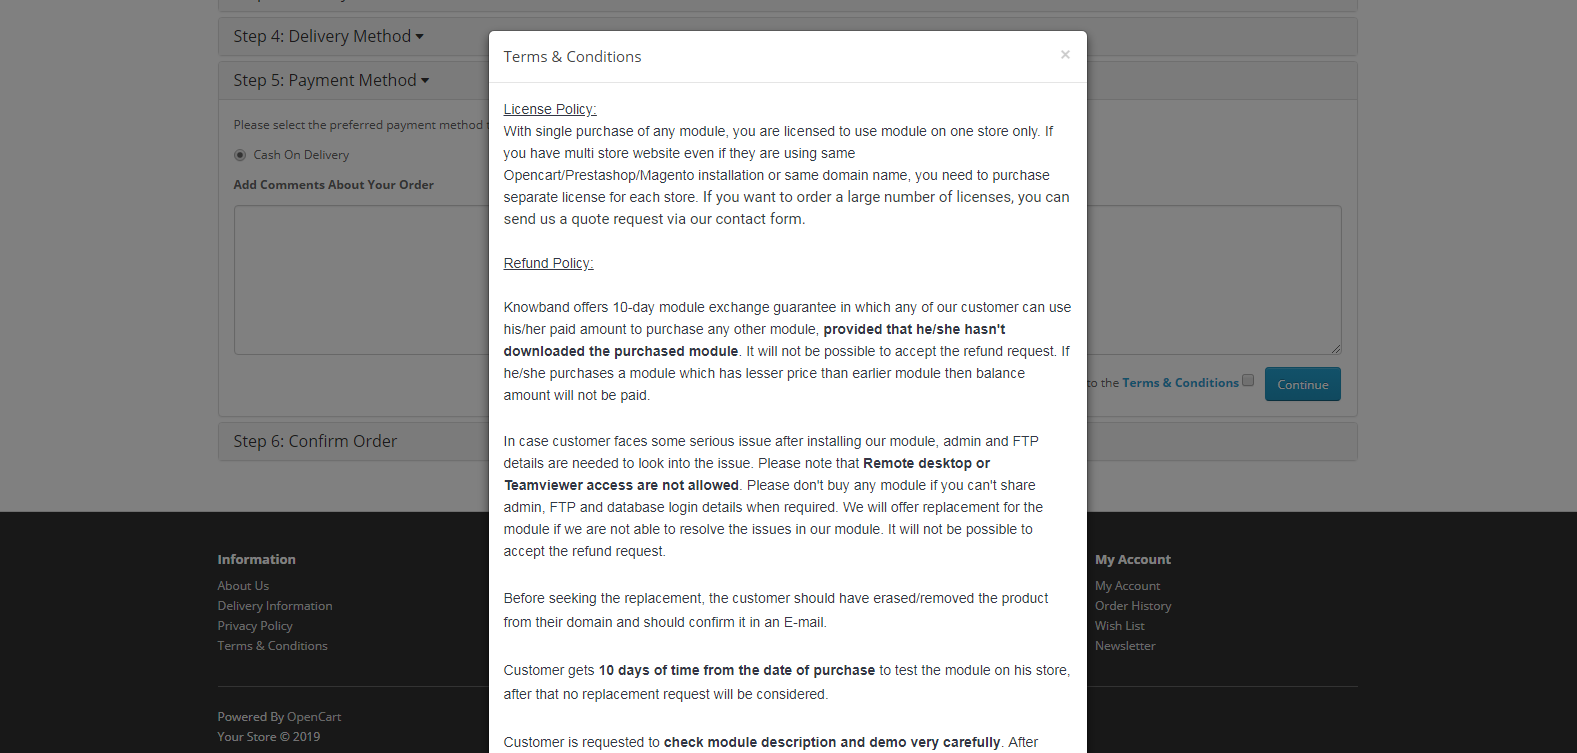
Presently, The “Terms & Conditions” link shows entire page in a popup window on checkout page of Opencart. But for “Terms & Conditions” having custom texts and html we want to open the same link in new tab as the content of page may not look appropriate in pop-up.

Refer below screenshot for the same-


Procedure:

STEP 1:-

Terms and Conditions link displayed on default checkout page resides in catalog/view/theme/default/template/checkout/payment_method.tpl, Block of code used for link is as below :


<div class="pull-right"><?php echo $text_agree; ?>


$text_agree is the variable that prints the link on page and this variable is set at location catalog/controller/checkout/payment_method.php

Variable definition looks as below :-

$data['text_agree'] = sprintf($this->language->get('text_agree'), $this->url->link('information/information/agree', 'information_id=' . $this->config->get('config_checkout_id'), true), $information_info['title'], $information_info['title']);


You need to replace this definition with new one –

$data['text_agree'] = sprintf($this->language->get('text_agree'), $this->url->link('information/information', 'information_id=5' , true), $information_info['title'], $information_info['title']);


we have replaced the href :-

https://your_store_url/index.php?route=information/information/agree&information_id=5


that does not contain header, footer and other content with

https://your_store_url.com/index.php?route=information/information&information_id=5


which contains header, footer and other content in the page.

STEP 2 :-

Lastly, you have to edit the definition of link in catalog/language/en-gb/checkout/checkout.php

In above file location there would be a definition as below : –


$_['text_agree'] = 'I have read and agree to the <a href="%s" class="agree"><b>%s</b></a>';


We have to add a attribute  target=”_blank” and remove  class=”agree” in above anchor tag to open the link in new tab. The new definition of text_agree key would be as follow:-

$_['text_agree'] = 'I have read and agree to the <a href="%s" target="_blank"><b>%s</b></a>';


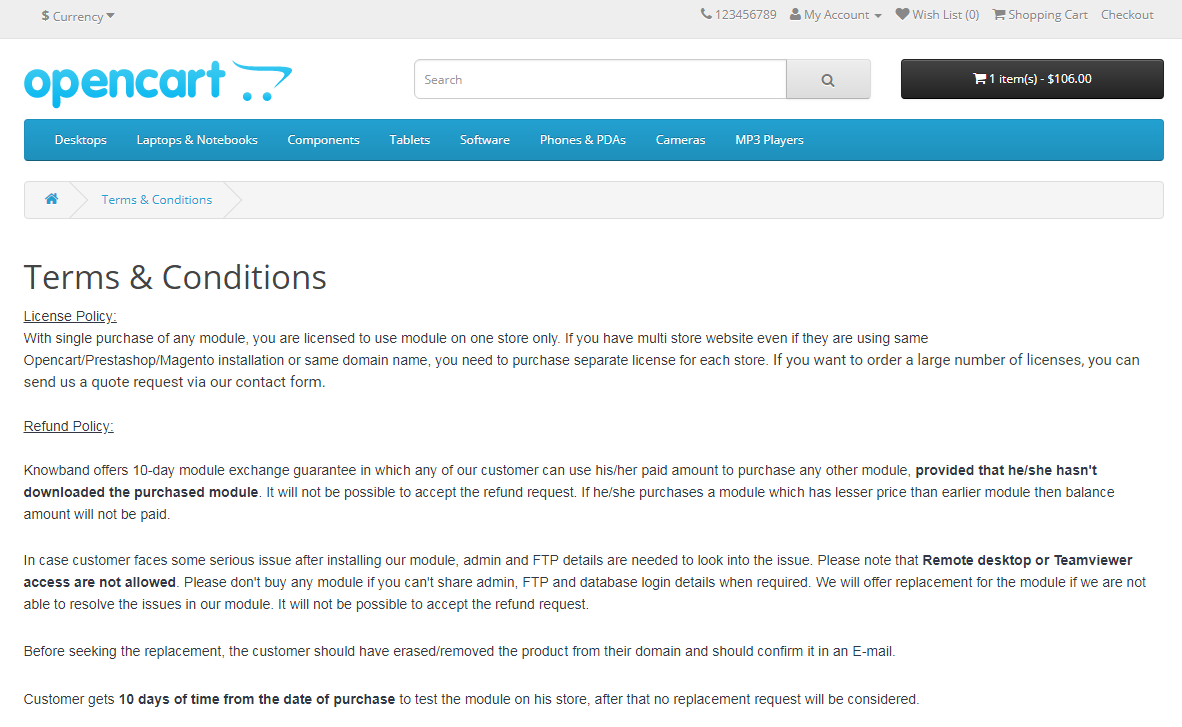
After saving the above changes, we will be able to open the “Terms & Conditions” link in a new tab on checkout page.

Please refer to the screenshot below :-


Summary:

After following above changes, we will be able to open the “Terms & Conditions” link in a new tab on checkout page.

NOTE: This demonstration is for default template but this will work same for other templates having similar code.

Show all products when search is blank (Opencart 2.3.x)

Objectives of the blog

After reading this blog you will be able to display all products when the search is blank.

Problem Statement

Currently in Opencart, when user search for any string using search functionality, then no products are returned if no search product found in database. We want to make it return all the products when search is empty.

Code Implementation

To achieve this, we will have to make some changes in the model function which we are using to fetch products from database on the basis of entered search keyword.

Here we are making changes in getProducts()  function of model catalog/model/catalog/product.php as we are using this function to display results on the basis of search keyword.

Note: you can make same changes in the model function which you are using to fetch products.

Here is the code which we have added in the model:

/*Checked if the result empty (affected rows 0) of query which is running to fetch data on the basis of search keyword.
* If yes then added new query to fetch new added products and executed same.  
* By doing this we will display our new products on the search page instead of showing blank page.
*/
if($query->num_rows == 0){
   $sql = "SELECT DISTINCT p.product_id  
           FROM " . DB_PREFIX . "product p  
           LEFT JOIN " . DB_PREFIX . "product_description pd ON (p.product_id = pd.product_id)  
           LEFT JOIN " . DB_PREFIX . "product_to_store p2s ON (p.product_id = p2s.product_id)  
           WHERE p.status = '1' AND p.date_available <= NOW() AND p2s.store_id = '" . (int)$this->config->get('config_store_id') . "'  
           GROUP BY p.product_id ORDER BY p.product_id DESC LIMIT 20";
   $query = $this->db->query($sql);
}

Add this code just after executing main query or just after line ($query = $this->db->query($sql)).

In this code first we have checked the number of affected row by the main query (used to fetch data on the basis of search keyword). If the affected row is 0 ($query->num_rows == 0) then added our query to fetch new added products.

By doing this we will display our new products on the search page instead of showing blank page.

Note: here we have written query to fetch new added products from the database if search is empty. You can also add query to fetch special or best seller products according to your requirement.

Summary

After making the following changes in the model file, new added products will be shown when the search is empty.

Get latest products without special prices (Opencart 2.3)

Objectives of the blog

After reading this blog you will be able to fetch products from Opencart database on the basis of parameter which is passed from URL.

Requirement

We have to display latest products on the basis of passed parameter in the URL. Using this parameter we have to decide that whether we have to display special products or not.

Code Implementation

To implement this we need to make change in our controller and model. In controller we added condition to pass parameter and in model we will make changes in the query according to the passed parameter.

To handle condition we are using show_special parameter in the code.

Below is the code which we have to add in controller (catalog/controller/extension/module/latest.php):


/*Checking for show_special key in get parameter
* This key ($show_special) will be used to conditionally fetch data from the database.
* i.e. if $show_special = 1 then display products which special
*         $show_special = 0 then display products which are not having special
*      else
*         display all products irrespective of special
*/
if (isset($this->request->get['show_special'])) {  
     //passing the value in variable if set in URL
     $show_special = $this->request->get['show_special'];
} else {
    //Otherwise empty string will be passed
    $show_special = '';
}
               
//Creating a variable to be passed into model
$filter_data = array(
'start' => ($page - 1) * $limit,
'limit' => $limit,
     'show_special' => $show_special
);
               
//Calling model function to fetch data from database according to the data passed in the filter_data array.
$results = $this->model_catalog_product->getProductLatest($filter_data);


In this code first we have checked that if ‘show_special’ parameter is set in the URL or not. If yes then set value of parameter in a variable $show_special and if no then set variable as blank.

Then we have created an array ($default_data) with the values on behalf of which we have to fetch products from database.

Then we have called model function getProductLatest() to fetch latest products according to the variable passed ($filter_data) in the function.

Here is the function which we have to add in model (catalog/model/catalog/product):


public function getProductLatest($data = array()) {
   //Setting $join and $condition parameters to fetch data of special products
   if($data['show_special'] == '1'){
        $join = "LEFT JOIN " . DB_PREFIX . "product_special ps  ON (ps.product_id = p.product_id) ";
        $condition = "AND ps.customer_group_id = '" . (int)$this->config->get('config_customer_group_id') . "'  
                             AND ((ps.date_start = '0000-00-00' OR ps.date_start < NOW()) AND (ps.date_end = '0000-00-00' OR ps.date_end > NOW() OR ps.date_end = '0001-01-01')) ";
   }
   //Setting $join and $condition parameters to fetch data of products which are not specil
   elseif($data['show_special'] == '0'){  
       $join = "LEFT JOIN " . DB_PREFIX . "product_special ps  ON (ps.product_id = p.product_id) ";
       $condition = "AND ps.product_id IS NULL";
   }else{
   //Setting $join and $condition parameters to fetch data of all products irrespective of special
       $join= '';
       $condition = '';
   }
           
   //Query to fetch data of products from database. Added $join and $condition parameter in the query to fetch data accordingly
   $sql = "SELECT DISTINCT p.product_id  
           FROM " . DB_PREFIX . "product p  
           LEFT JOIN " . DB_PREFIX . "product_description pd ON (p.product_id = pd.product_id)  
           LEFT JOIN " . DB_PREFIX . "product_to_store p2s ON (p.product_id = p2s.product_id)  
           $join
           WHERE p.status = '1' AND p.date_available <= NOW() AND p2s.store_id = '" . (int)$this->config->get('config_store_id') . "'  
           $condition
           GROUP BY p.product_id ORDER BY p.product_id DESC";
           
   //Setting limit in query if passed LIMIT from controller.
   if (isset($data['start']) || isset($data['limit'])) {
          if ($data['start'] < 0) {
                $data['start'] = 0;
          }
 
          if ($data['limit'] < 1) {
                $data['limit'] = 20;
          }
 
          $sql .= " LIMIT " . (int)$data['start'] . "," . (int)$data['limit'];
   }
 
   $product_data = array();
   //Execute query
   $query = $this->db->query($sql);
           
   //Loop to set fetched data in the variable to pass in controller.
   foreach ($query->rows as $result) {
        $product_data[$result['product_id']] = $this->getProduct($result['product_id']);
   }
   //Return products data to controller.
   return $product_data;
}


In model we have set variables $join and $condition on the basis of following three conditions:

  1. If show_special is 1: In this case we have displayed only products those are special. As in opencart the data of special products is stored in oc_product_special table so we have added join of oc_product table with the oc_product_secial table to fetch data of special products only.
  2. If show_special is 0: In this case we have displayed products which are not set as special. So to find products which are not special we have to fetch products which are in special table but on in oc_product_special table. For this we have added LEFT join of oc_product table with oc_product_secial table and added condition “ps.product_id IS NULL”.
  3. If show_special is other than 0 and 1: In this case we have to fetch all products whether they are special or not. So for this we have directly fetched data from oc_product table.

After adding all three possible condition we have written query and executed it. Then we have set all fetched data in $product_data array and return the same to controller.

Note: here to fetch latest products we have just used ‘Order by product_id DESC’ in query. If you want to fetch data of products which were added in last few days then you can add one more condition in the WHERE clause i.e. date_added > ‘any date’.

Summary

After following the above procedure, you will be able to fetch latest special products on the basis of passed parameter for special products in the URL.

How to show Opencart product reviews to search engines?

In Opencart, product reviews are not visible to Google because they are loaded using Jquery code. It is not good from SEO perspective because product reviews can help merchants to improve SEO of their website.

In Opencart, product page loads its main content first and then it uses a Jquery function to load product reviews of the product, due to which product reviews do not come in the source code of the page. Since Google only sees the first loaded content which is available in the page source, therefore products reviews are not crawled by Google.

This issue can be fixed in following three 3 ways:

Method #1

You can use our OpenCart Review Incentive plugin which not only shows your product ratings in Google search result but also makes required changes in Opencart product page so that Google can see all product reviews and can crawl them.

Follow the steps mentioned-below to incorporate the same.

Step 1: Purchase OpenCart Review Incentive extension from the Knowband store and install it in your store. For more information regarding the installation and configuration, click here.

Step 2: Once the installation is complete, enable it from the back-end. Set the content that you want to display at the front-end of the site.

That’s it. The customers can give reviews and they will get incentives in return.

Here are some of the other features offered by OpenCart Review Incentive module:

  • The OpenCart plugin replaces the default review system of OpenCart and shows the reviews in the page source code, so that, search engines can read the reviews.
  • Additionally, the store admin can send email reminders notifying the customers to give their reviews.
  • The customers get incentives in return of the reviews given by them. The store admin can fix the amount that they offer as an incentive to the customers.
  • The automated approach of the OpenCart customer review plugin allows the admin to set the frequency of the email.
  • Additionally, they can track the reviews received and incentives redeemed from the back-end of the OpenCart review incentive module.

Method #2

You can make all required changes by following steps which are mentioned below:

  • Edit file “/catalog/view/theme/your_theme/template/product/product.tpl”
  • Replace the following code

<div id=”review”></div>

with

<div id=”review”><?php echo $allreviews;?></div>

In the same file, you also need to replace the following code

$(‘#review’).load(‘index.php?route=product/product/review&product_id=<?php echo $product_id; ?>’);

with

//$(‘#review’).load(‘index.php?route=product/product/review&product_id=<?php echo $product_id; ?>’);

  • Now edit file “catalog/controller/product/product.php”
  • Search for “$this->load->model(‘catalog/product’);” without double quotes and add following code before first search result.

$result=$this->customreview($product_id);
$data[‘allreviews’]=$result;

Also, search for “public function index() {” without double quotes and add following code before search result.

public function customreview($product_id) {
$this->load->language(‘product/product’);

$this->load->model(‘catalog/review’);

$data[‘text_no_reviews’] = $this->language->get(‘text_no_reviews’);

if (isset($this->request->get[‘page’])) {
$page = $this->request->get[‘page’];
} else {
$page = 1;
}

$data[‘reviews’] = array();

$review_total = $this->model_catalog_review->getTotalReviewsByProductId($product_id);

$results = $this->model_catalog_review->getReviewsByProductId($product_id, ($page – 1) * 5, 5);

foreach ($results as $result) {
$data[‘reviews’][] = array(
‘author’ => $result[‘author’],
‘text’ => nl2br($result[‘text’]),
‘rating’ => (int)$result[‘rating’],
‘date_added’ => date($this->language->get(‘date_format_short’), strtotime($result[‘date_added’]))
);
}

$pagination = new Pagination();
$pagination->total = $review_total;
$pagination->page = $page;
$pagination->limit = 5;
$pagination->url = $this->url->link(‘product/product/review’, ‘product_id=’ . $product_id . ‘&page={page}’);

$data[‘pagination’] = $pagination->render();

$data[‘results’] = sprintf($this->language->get(‘text_pagination’), ($review_total) ? (($page – 1) * 5) + 1 : 0, ((($page – 1) * 5) > ($review_total – 5)) ? $review_total : ((($page – 1) * 5) + 5), $review_total, ceil($review_total / 5));

if (file_exists(DIR_TEMPLATE . $this->config->get(‘config_template’) . ‘/template/product/review.tpl’)) {
return $this->load->view($this->config->get(‘config_template’) . ‘/template/product/review.tpl’, $data);
} else {
return $this->load->view(‘default/template/product/review.tpl’, $data);
}
}

Method #3:

Knowband offers a free module that can help you show the reviews in the page source code and makes it readable by the search engines. Download this free module and install it on your store. Follow below instructions to install it.

  1. Extract the downloaded zip file.
  2. Upload the XML file from Admin panel’s Extensions > Extension Installer page.
  3. Now refresh the modifications from Admin panel’s Extensions > Modifications page.

If you face some issue or need some help to fix this bug, feel free to contact us.

This Would Also Interest You:

How to Reset Opencart admin password?

Have you lost your OpenCart password? You might be surprised to learn that this is a problem with admin panels quite frequently.

You can update the password in the database if you’ve forgotten your OpenCart admin password. Your account’s password must be changed using phpMyAdmin in cPanel.

Most of the times, it happens when you forget or lost your admin login password and are not even able to recover it using forgot password link. In this case, the only way to regain access to the admin panel is to reset the password directly from the database. The steps to reset the password from the database are easy, but can cause a critical issue if not performed properly. The tutorial discusses the steps to reset OpenCart admin password.

Before proceeding further, we recommend you to take backup of your complete database, just in case.

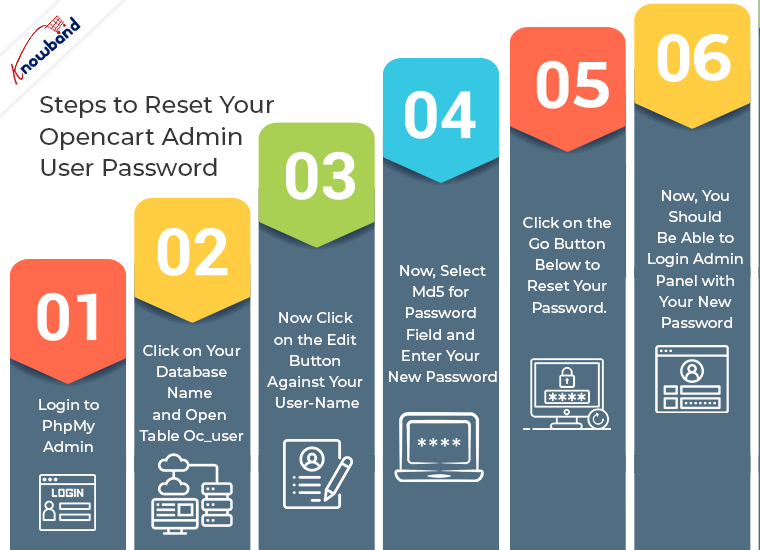
You need to perform following steps to reset your Opencart admin user password.

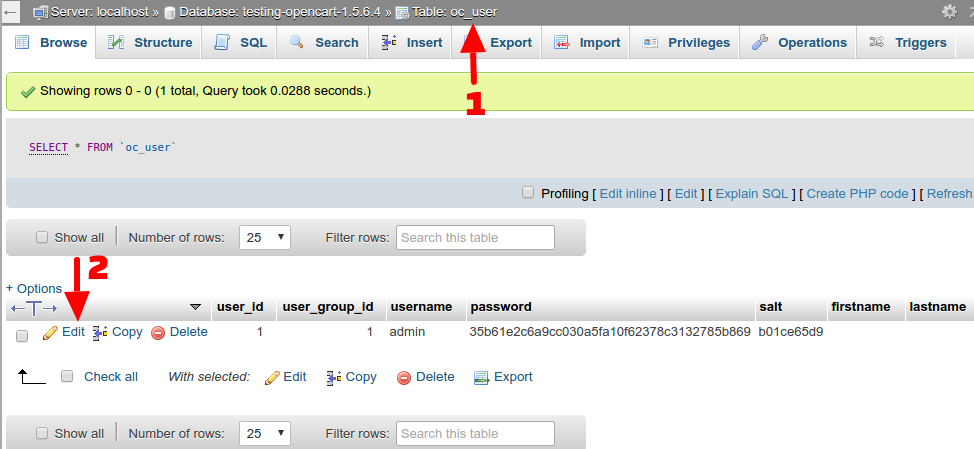
Step #1: Login to PhpMyAdmin. PhpMyAdmin is a tool which is used to access Mysql database.

Step #2: Click on your database name and open table oc_user (we are assuming here that your database prefix is oc_).

Step #3: Now click on the edit button against your user-name.

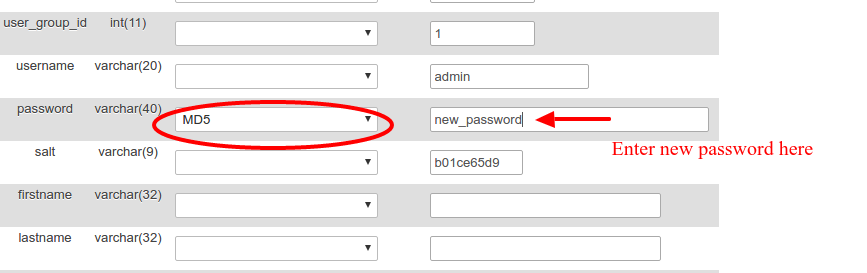
Step #4: Now, select md5 for Password field and enter your new password.

Step #5: Click on the Go button below to reset your password.

Step #6: Now, you should be able to login admin panel with your new password.

These are steps to reset OpenCart admin password.

Feel free to contact us, if you face any issues with the steps mentioned above. Moreover, visit Knowband and avail the solution to your eCommerce platform related issues for mainly these platforms- OpenCart, Magento, Magento 2, Woocommerce, and PrestaShop. We do offer customized plugin development services for these platforms.

Check out No Code Mobile App Builder Solution that every Opencart Admin must have: