
As a graphics designer, it is very much important to deliver our product with a better UI. We also to do the work in more efficiency and with more speed. But any time we have to do the same task in the repeatedly in Adobe Photoshop. As a human nature, we lose our interest to do the same task repeatedly. We always try to create something new every time.
Adobe Photoshop can give us relief from that continuous repetitive work. We can use Actions in Adobe Photoshop to do so.
Let’s learn about the Action in Photoshop
Action in Photoshop is some pre-defined work that we have recorded before.
Photoshop actions come in the.ATN file format. It allows us to record the actions for our repetitive tasks.
Suppose we have 1000 photo and on those, we want to add some watermark then the best way to do it is to make an action for it.
Process to record actions
Step 1:
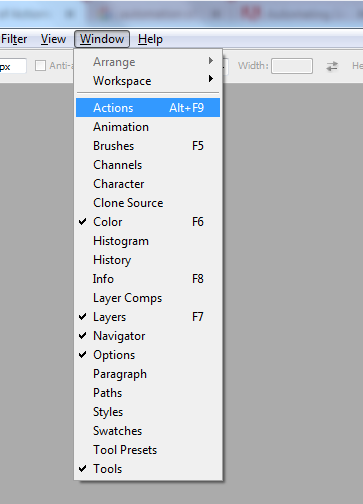
Open your Photoshop application -> Go to Windows -> Action
Then a window will open:

Step 2:
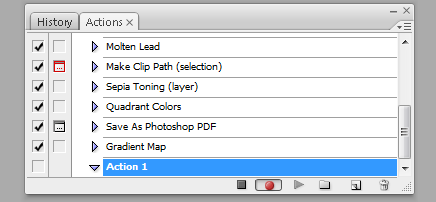
Click on the "Create New Action" icon to start the recording.

Step 3:
Name the action so, you can easily recognize it for future use..
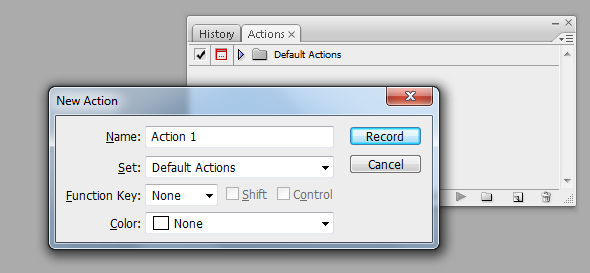
After we click on that “Record” button you’ll notice that a recording gets started.
Step 4:
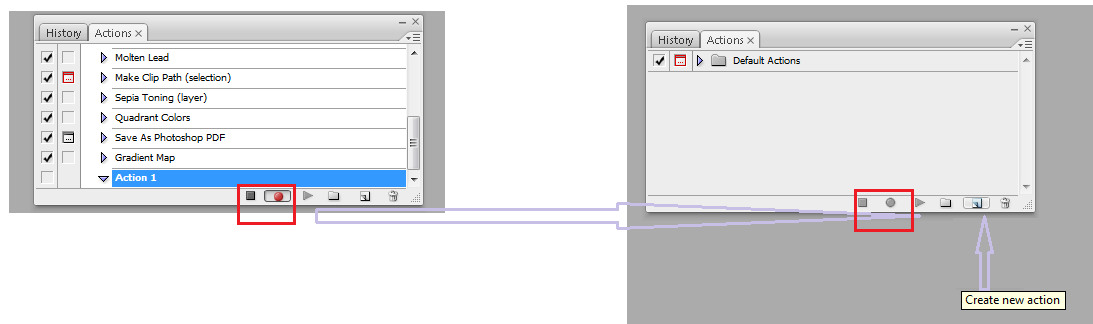
Now do your work in Adobe Photoshop and it gets recorded.
Step 5:
Now after getting work done we stop the action from getting recorded.
Process to implement the recorded action
To implement the recorded action for the bulk images Photoshop has given a wonderful option for that and we call is as “batch process”. Let’s go step by step to implement the action.
Step 1
Click on the File => Automate => Batch
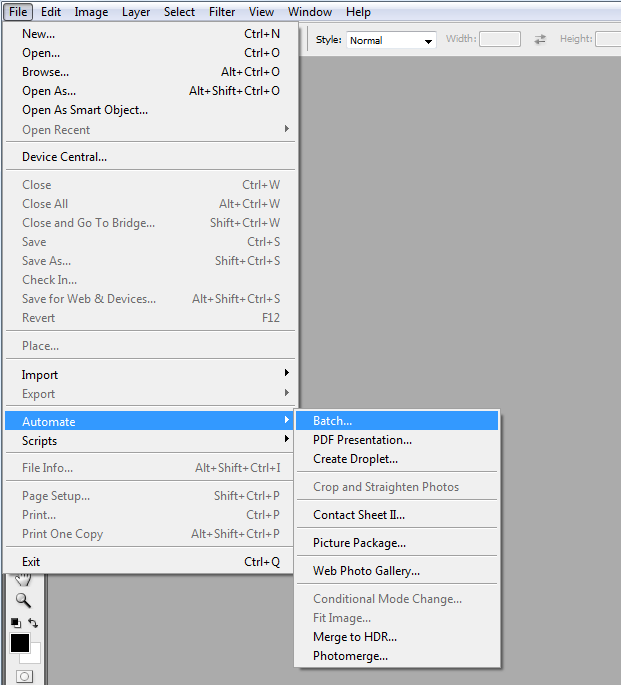
When we click on “Batch” option we will get a pop up window with the option of “Batch Process”.
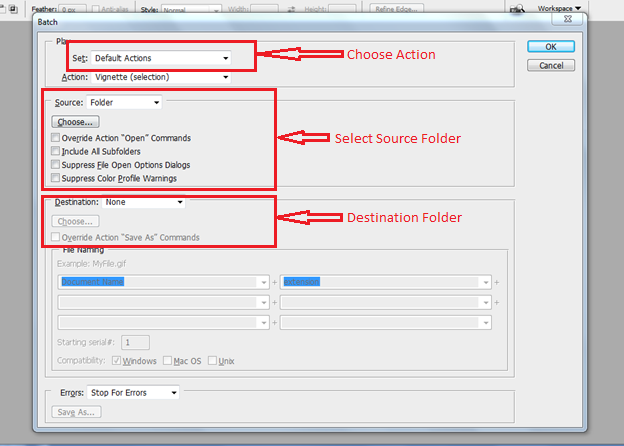
From the Pop Up we can select our action, source folder of image and destination folder to render the image. When we click on “OK” button Photoshop will do the operation in bulk and our images will be saved in the destination folder.
I hope you get all my points, if I am wrong at some point, please let me know in the commenting section, I will for sure take a look at it.

