
Introduction
This document contains steps to install Xdebug and Configure it with Netbeans.
Steps to install Xdebug and Configure it with Netbeans
To install Xdebug and Configure it with Netbeans, steps are given below –
1. Install Xdebug for PHP by running following command in Linux environment
sudo apt-get install php5-xdebug
2. Setup Xdebug.ini for Linux
sudo vi /etc/php5/apache2/conf.d/20-xdebug.ini
Add the following lines –
xdebug.profiler_output_dir=/tmp
xdebug.profiler_output_name=cachegrind.out.%p
xdebug.profiler_enable_trigger=1
xdebug.profiler_enable=0
xdebug.remote_enable=true
xdebug.remote_host=127.0.0.1
xdebug.remote_port=9001
xdebug.remote_handler=dbgp
xdebug.remote_autostart=0
3. Restart Apache
sudo service apache2 restart
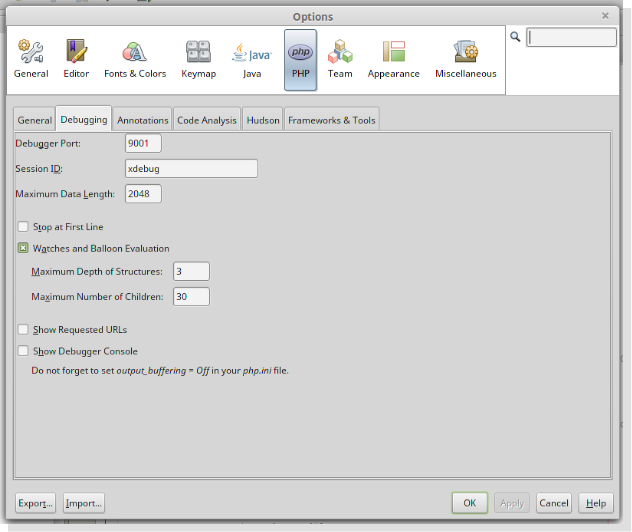
4. Now, configure Netbeans by following given steps below and shown in screenshot –
- Go to Tools -> Options -> PHP -> Debugging
- Set Debugging Port : 9001
- Press OK button and then start debugging your project by CTRL + F5 or file by CTRL + SHIFT + F5
Video Tutorial:
Looks helpful? Also, read the other part of the article for complete & detailed information:

