
Introduction
This document is all about the Xdebug installation & configure it with Netbeans in Windows.
How to debug through Xdebug in a project?
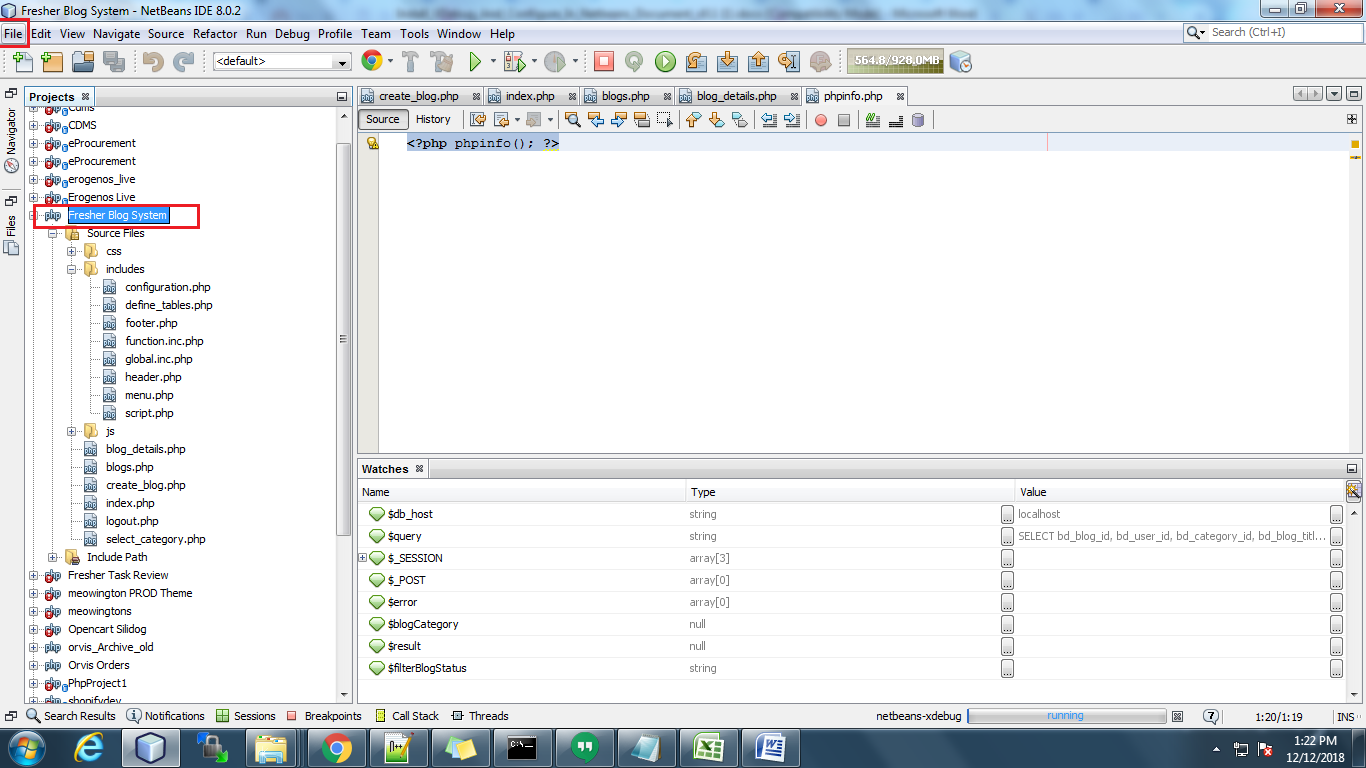
To debug through Xdebug you have to set up the project in Netbeans. Setup the Blog system project in NetBeans. After setting up the project in NetBeans select the project for which you want to debug. Now, go to the File menu in the top menu bar.
Then click on Project properties.

After clicking on this, a popup will open where you have to select the Run Configuration tab.
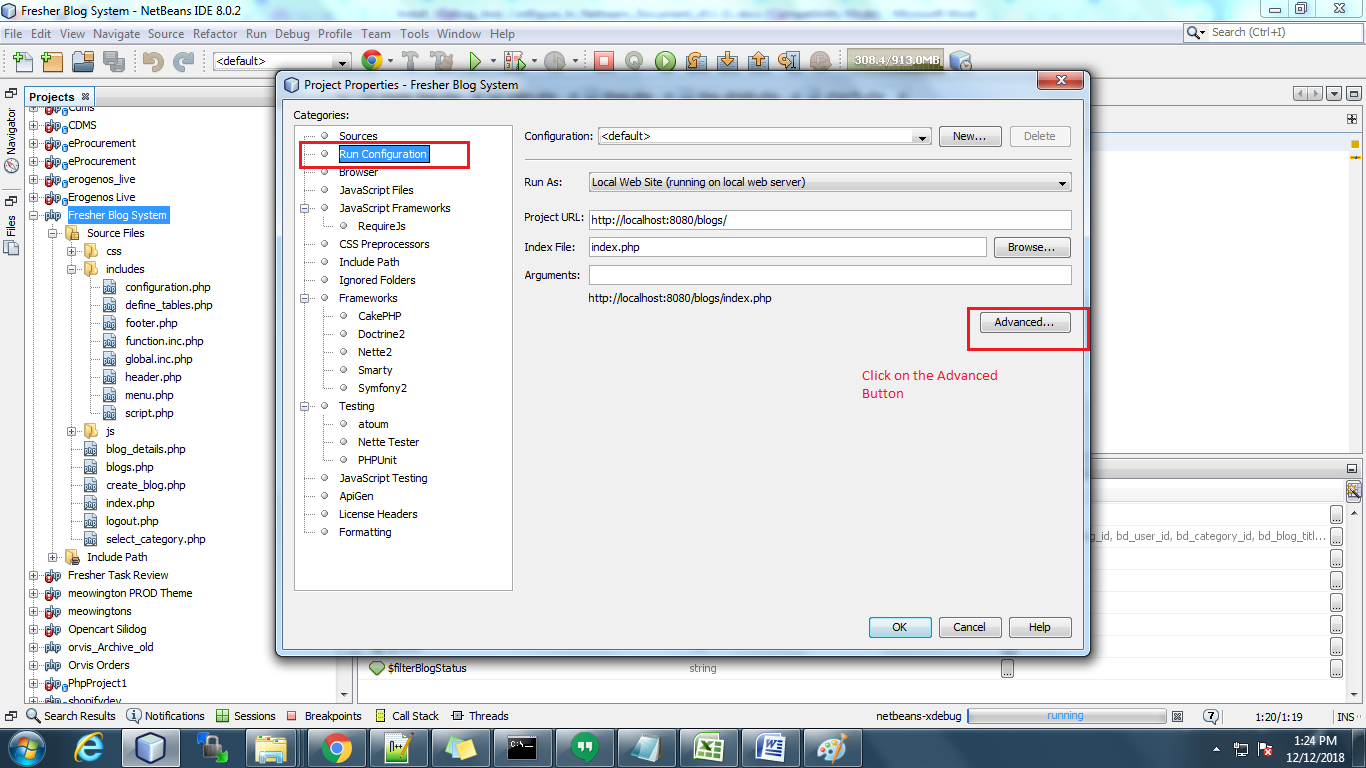
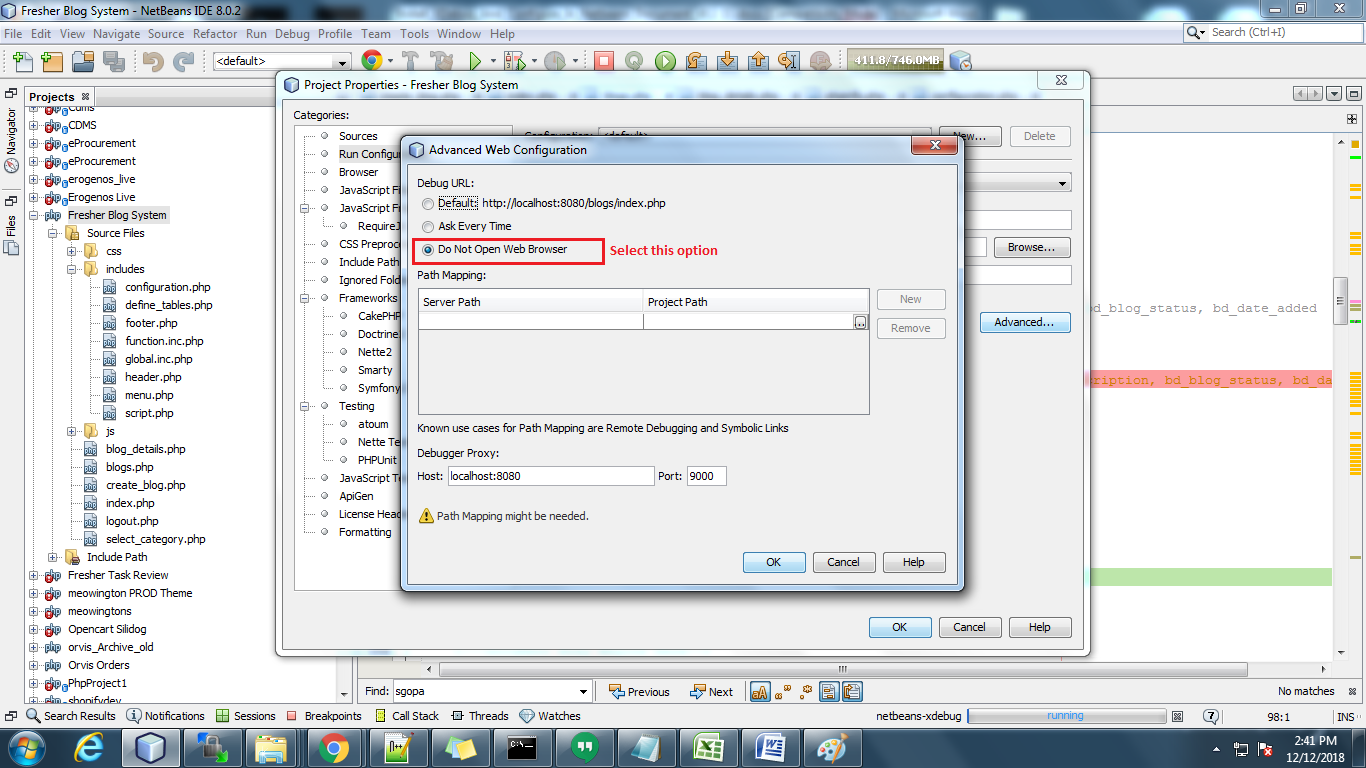
After clicking on this, a popup will open where you have to select the Run Configuration tab. Then you can see the Advanced button there. Click on this and select the “Do not Open Web Browser” option and click on OK.
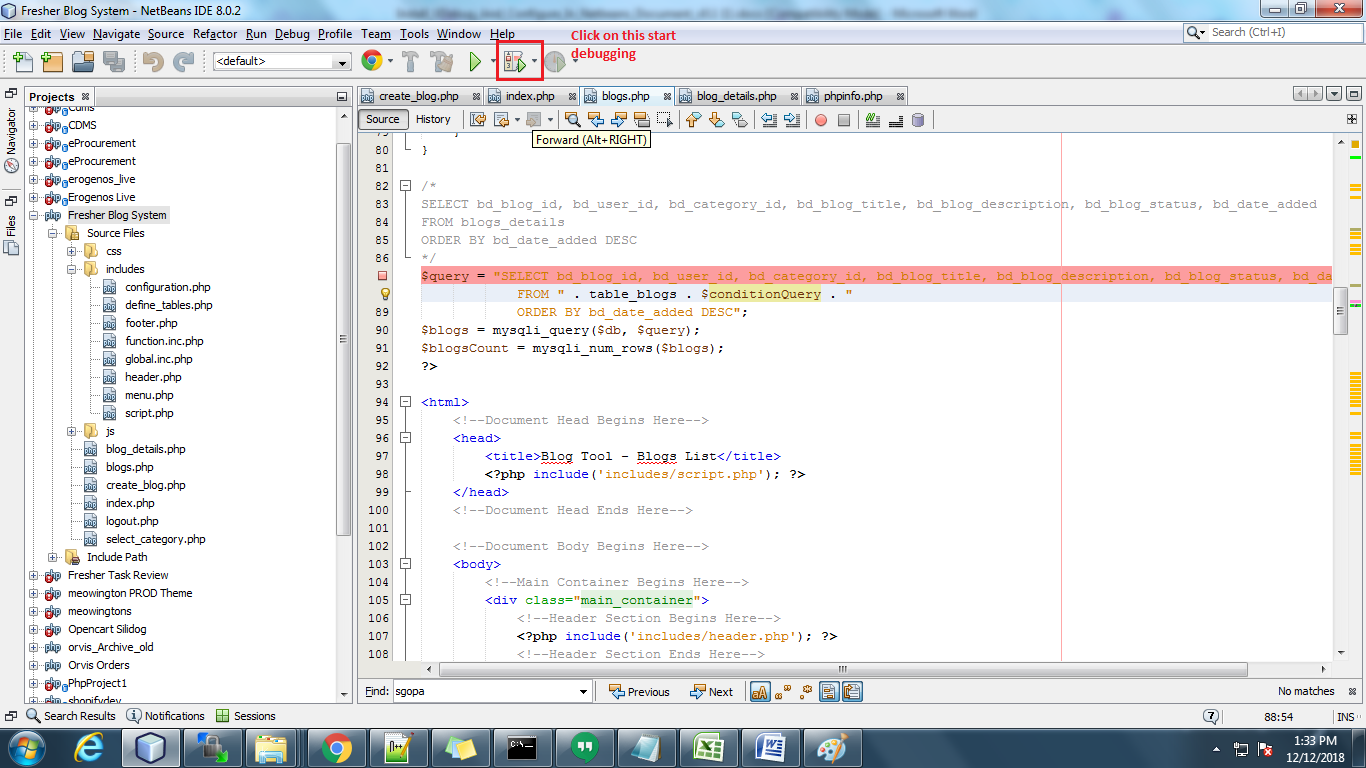
Now click on debugger to start debugging. Please see in screenshot. And before that you have to open the project in browser :
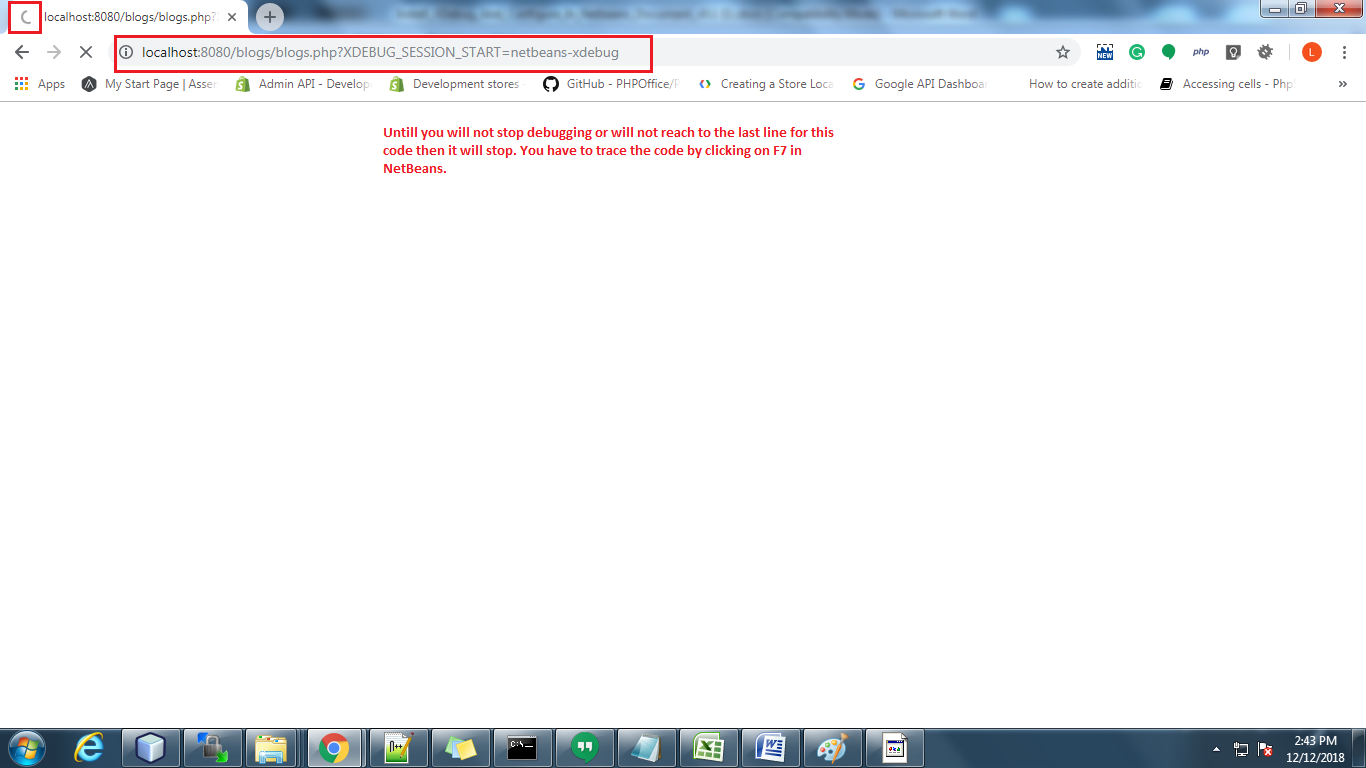
For example: https://localhost:8080/blogs/blogs.php?XDEBUG_SESSION_START=netbeans-xdebug
Note: The Highlighted part in the URL above is the xdebug session id. You have to pass it on the page which you want to debug.
You can see the Xdebug in running state in below the NetBeans notification bar in the snapshot below:
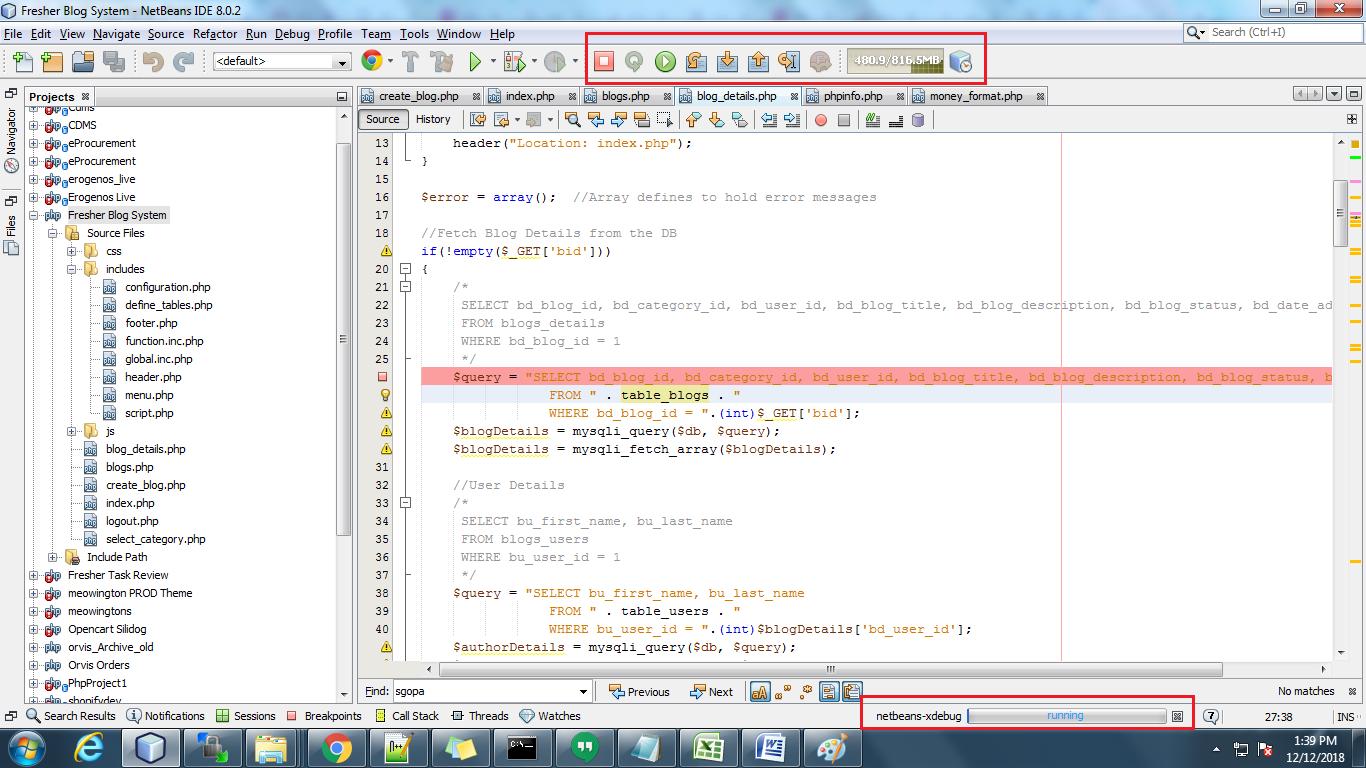
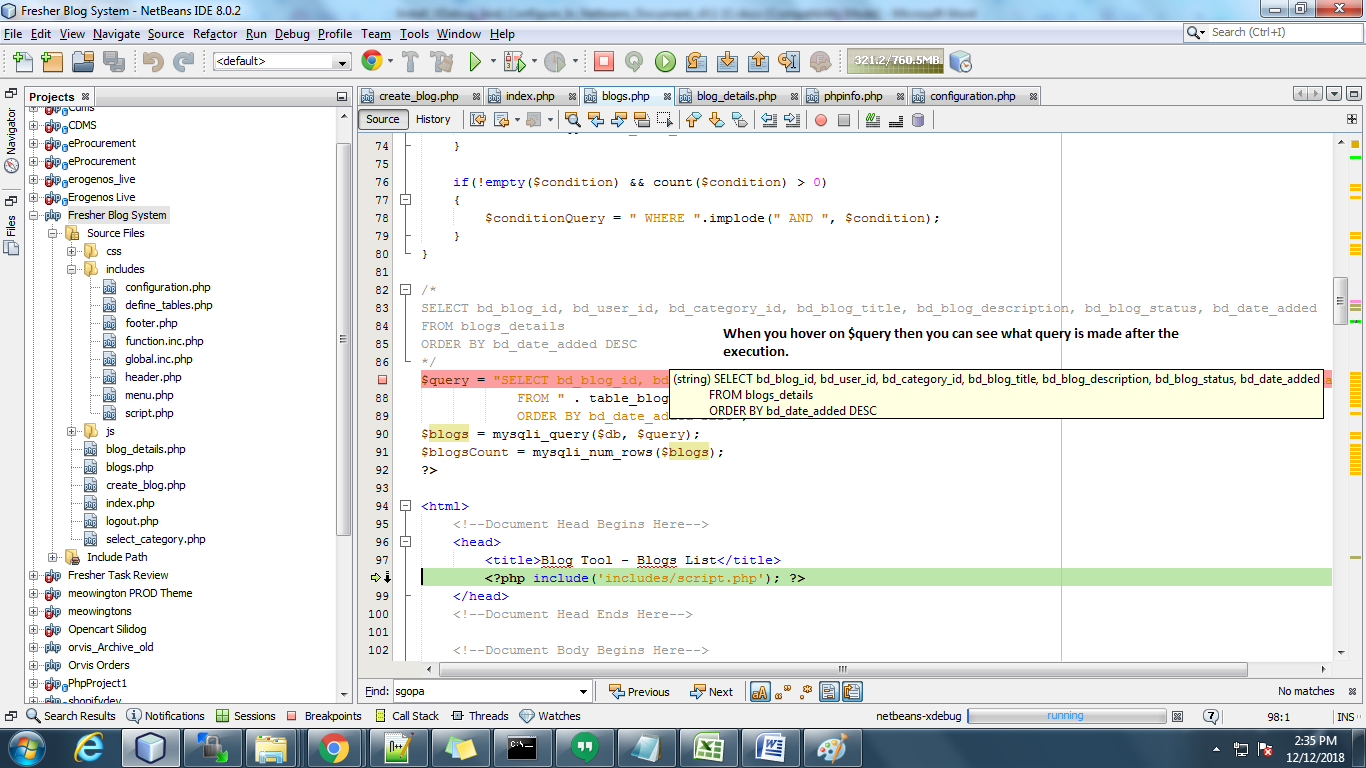
Then you have to add a breakpoint in the code file. The code will stop at that point and you can check the values. You can trace the code by clicking on F7 in NetBeans.
You can check the value of dynamic variables by hovering the variables. You can also add the variable in watch list.
Until you will not complete or reach the last line for the code which you are debugging, in the browser, it will stop. It just showed loading. After completing the debugging or closing the debugging session it will come to page ((in browser) which you are opening.
Watch the complete tutorial in the following video:
Looks helpful? Also, read the other part of the article for complete & detailed information:

