
Introduction
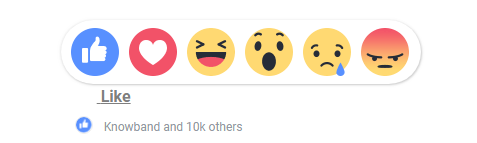
Reactions are more expressive as compared to the simple like and dislike buttons. Using reactions the user can easily express their thought because emoticons are basically a way to show the emotions. On the other hand if we use like and dislike button then the user can not show the exact emotion. Using emoticons we can make our site more expressive for the user.
Objectives of the blog
In this blog, you will find an easy and quick way to implement the Reactions functionality. After going through the blog, you will be able to create a reaction system for your website same as Facebook’s Like button.
Working
There will be one Like button and rest of the Reaction buttons. On focus the Like button, the Reaction buttons will be displayed. JQuery will be used to handle the taps on the reaction buttons. On tapping reaction button, an Ajax request is sent on like.php page. The logic to save/update data on database can be written on the handler page.
On tapping the reaction text again, the reaction is undone and this time we are sending Ajax on undo_like.php page.
All the functionality to show/hide the reaction buttons and animation is added through JavaScript and CSS.
Creating the HTML Structure
Before working on the logic, we will have to create the layout. HTML for the layout is following –
<!DOCTYPE html>
<html>
<head>
<title>Facebook Reactions</title>
<meta name="description" content="Facebook Like Reaction System" />
<!-- bootstrap css -->
<link rel="stylesheet" href="https://maxcdn.bootstrapcdn.com/font-awesome/4.3.0/css/font-awesome.min.css">
<link rel="stylesheet" type="text/css" href="css/style.css" />
<!-- Css for reaction system -->
<link rel="stylesheet" type="text/css" href="css/reaction.css" />

<script type="text/javascript" src="js/jquery.min.js"></script>
<!-- jQuery for Reaction system -->
<script type="text/javascript" src="js/reaction.js"></script>
</head>
<body>
<div class="container">
<div class="header">
<h1>Facebook Reactions</h1>
</div>
<div class="main">
<!-- Reaction system start -->
<div class="reaction-container"><!-- container div for reaction system -->
<span class="reaction-btn"> <!-- Default like button -->
<span class="reaction-btn-emo like-btn-default"></span> <!-- Default like button emotion-->
<span class="reaction-btn-text">Like</span> <!-- Default like button text,(Like, wow, sad..) default:Like  -->
<ul class="emojies-box"> <!-- Reaction buttons container-->
<li class="emoji emo-like" data-reaction="Like"></li>
<li class="emoji emo-love" data-reaction="Love"></li>
<li class="emoji emo-haha" data-reaction="HaHa"></li>
<li class="emoji emo-wow" data-reaction="Wow"></li>
<li class="emoji emo-sad" data-reaction="Sad"></li>
<li class="emoji emo-angry" data-reaction="Angry"></li>
</ul>
</span>
<div class="like-stat"> <!-- Like statistic container-->
<span class="like-emo"> <!-- like emotions container -->
<span class="like-btn-like"></span> <!-- given emotions like, wow, sad (default:Like) -->
</span>
<span class="like-details">Knowband and 10k others</span>
</div>
</div>
<!-- Reaction system end -->
</div>
</div>
</body>
</html>
Adding Style
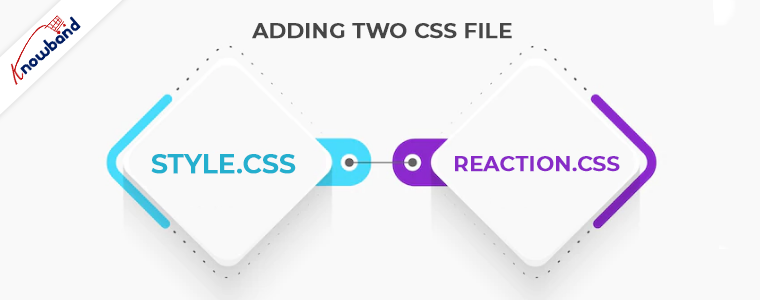
We are using two CSS files (style.css and reaction.css) to add styling in the page.
Note: You can find the CSS files in the complete project build.
Adding Functionality
Once our layout is ready, we can work on the functionalities.
First we will be handling the taps on the Like and Reaction buttons. For that, we will be using jQuery and we will be adding the click events. The code to add the click events is given below –
// Adding the click event as soon as the document is ready
$(document).ready(function () {
// Adding the click event on reaction button by using the class name
$(".emoji").on("click", function () {   // like click
// Here we will be writing the code, which will run on tapping the reaction button
});
});
On focus of the reaction button, we will be sending the Ajax request on php page. The Ajax request is given below –
// Sending Ajax request in handler page (like.php) to perform the database operations
$.ajax({
type: "POST",
url: "php/like.php",
data: "",
success: function (response) {
// This code runs after the Ajax is successful
}
})
Then we will have to create a handler page. This can be a simple php file.
Note: User can perform database changes in the handler file according to the requirement.
Whatever is returned/printed in that file is returned to the Ajax request and we can update layout accordingly. Here we have added the code to update the layout to show the currently saved reaction. The full code of the reaction.js file is following –
$(document).ready(function () {
$(".emoji").on("click", function () {
// Here we are getting the reaction which is tapped by using the data-reaction attribute defined in main page
var data_reaction = $(this).attr("data-reaction");
// Sending Ajax request in handler page to perform the database operations
$.ajax({
type: "POST",
url: "php/like.php",
data: "data_reaction=" + data_reaction,
success: function (response) {
// This code will run after the Ajax is successful
$(".like-details").html("You, Knowband and 10k others");
$(".reaction-btn-emo").removeClass().addClass('reaction-btn-emo').addClass('like-btn-' + data_reaction.toLowerCase());
$(".reaction-btn-text").text(data_reaction).removeClass().addClass('reaction-btn-text').addClass('reaction-btn-text-' + data_reaction.toLowerCase()).addClass("active");

if (data_reaction == "Like")
$(".like-emo").html('<span class="like-btn-like"></span>');
else
$(".like-emo").html('<span class="like-btn-like"></span><span class="like-btn-' + data_reaction.toLowerCase() + '"></span>');
}
})
});

$(".reaction-btn-text").on("click", function () { // undo like click
if ($(this).hasClass("active")) {
// Sending Ajax request in handler page to perform the database operations
$.ajax({
type: "POST",
url: "php/undo_like.php",
data: "",
success: function (response) {
// Handle when the Ajax is successful
$(".reaction-btn-text").text("Like").removeClass().addClass('reaction-btn-text');
$(".reaction-btn-emo").removeClass().addClass('reaction-btn-emo').addClass("like-btn-default");
$(".like-emo").html('<span class="like-btn-like"></span>');
$(".like-details").html("Knowband and 1k others");
}
})
}
})
});
Summary
You can download the full project from the following location –
Click here to download the complete project
In this tutorial we have not covered the database connection and operations as the database logic can be different as per your needs. With the help of this project, you can easily implement the reactions functionality same as Facebook in your webpage.
If you face any issues, drop us an email at support@knowband.com. We also provide plugins for Prestashop, Opencart, Magento and Magento 2. All sorts of customization is also done by us on your store.
Take a look at one of our top selling modules:
Prestashop One page Supercheckout by Knowband is a must have tool for any eCommerce store as it helps you streamline the checkout process, increase your conversion rate and reduce the abandoned carts. Know more here:

