2. Here you need to log in with your apple account. You will receive the Authentication code, so please keep your iOS device with you in which you have logged in with the same Apple account.
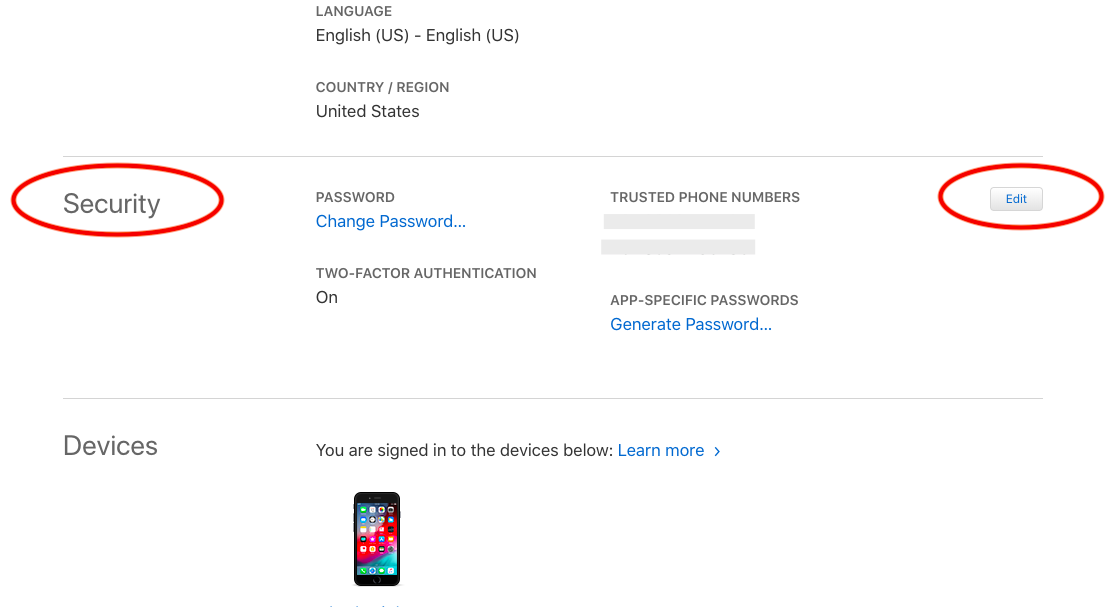
3. After you have logged into the account. Scroll down to “Security” section and click on “Edit” button. This will expand the security section and new options will appear.
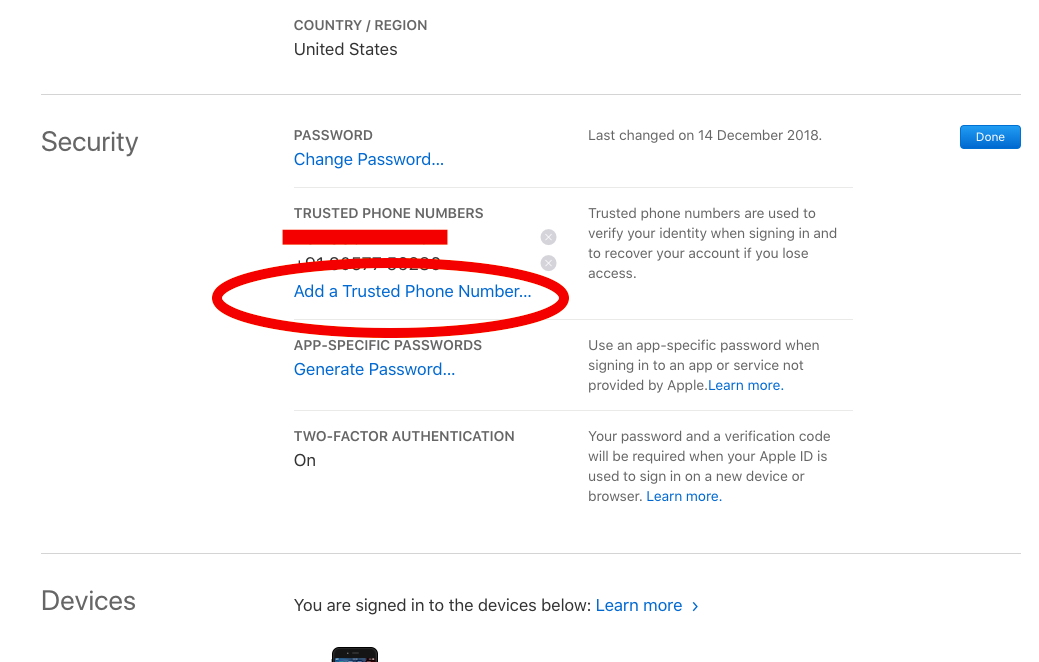
3. Below is the expanded “Security” Screen. Here you will have to click on “Add a trusted Phone Number“. Then a new pop up will appear where you can enter your phone number to be added as a trusted device.
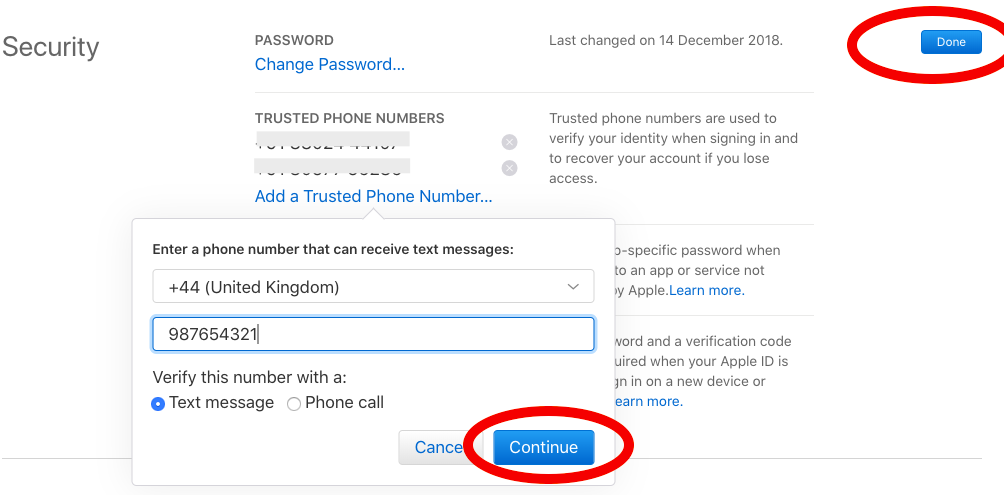
4. Enter the mobile number you want to add as a trusted device. Please keep the device with you as you will receive Authentication code after this step.
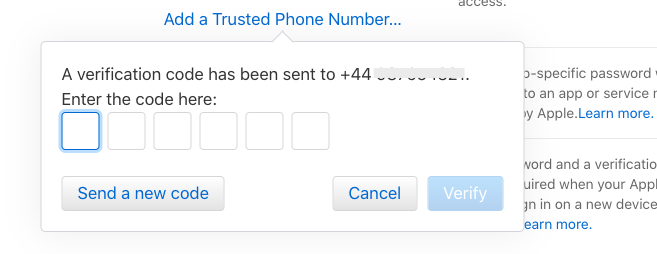
5. After filling the authentication code, the new device will be added to your Apple Developer Account as a trusted device.
The best way to put any elements in a linear fashion in Android is to use LinearLayout. Specify the attribute ‘orientation‘ of the LinearLayout to ‘vertical‘.
Now any number of elements put inside the LinearLayout will be in vertical order.
To align the elements at the bottom of the screen, use ConstraintLayout and add constraints to the LinearLayout to attach it with the bottom of the screen.
Find the sample code below where there are two TextView(s) placed one below the other and the container LinearLayout is attached to the bottom of the screen.
<?xml version="1.0" encoding="utf-8"?>
<android.support.constraint.ConstraintLayout xmlns:android="https://schemas.android.com/apk/res/android"
xmlns:app="https://schemas.android.com/apk/res-auto"
xmlns:tools="https://schemas.android.com/tools"
android:layout_width="match_parent"
android:layout_height="match_parent"
tools:context=".MainActivity">

<LinearLayout
android:layout_width="match_parent"
android:layout_height="wrap_content"
android:orientation="vertical"
app:layout_constraintBottom_toBottomOf="parent"
app:layout_constraintEnd_toEndOf="parent"
app:layout_constraintStart_toStartOf="parent">

<TextView
android:id="@+id/element1"
android:layout_width="wrap_content"
android:layout_height="wrap_content"
android:text="This is element 1" />

<TextView
android:id="@+id/element2"
android:layout_width="match_parent"
android:layout_height="wrap_content"
android:text="This is element 2" />

</LinearLayout>

</android.support.constraint.ConstraintLayout>
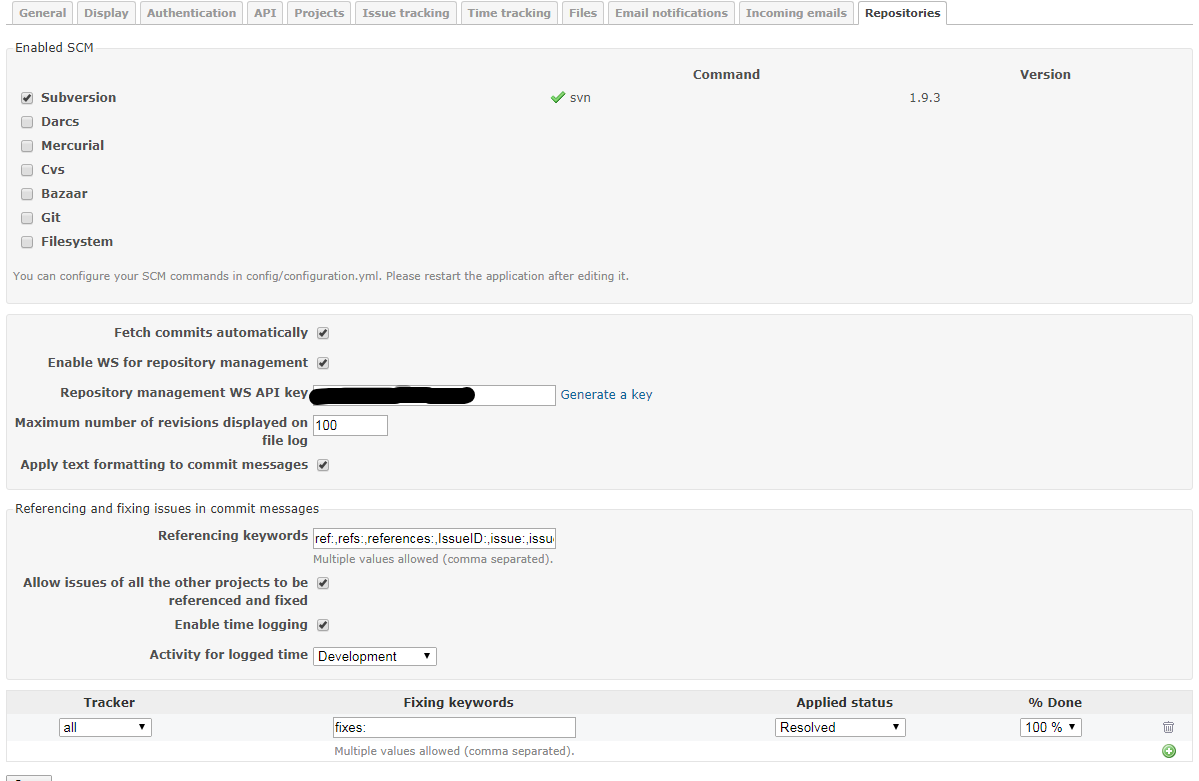
Goto Redmine > Administration > Settings > Repositories and make sure the settings are as shown below:
Fetch commits automatically
When you enable this option the applicatiojn automatically starts retrieving the revisions when the user tries to access the repository page
Default value is: Yes
You can disable this option and automate the call to Repository#fetch_changesets using cron to regularly retrieve the revisions for all of the repositories in the background.
For Velocity: We have not disabled it and at the same time put up an automatic fetch whenever a new commit is made. To know how the same has bene done, please read further.
Example:
ruby script/runner “Repository.fetch_changesets” -e production
For Redmine 2.x:
ruby script/rails runner “Repository.fetch_changesets” -e production
For Redmine 3.x:
bin/rails runner “Repository.fetch_changesets” -e production
You can setup the automatic call from post-commit (for SVN) and post-receive (for GIT) hook and make the changesets being fetched after each commit. Please note that running the above statement would fetch details for each reporsitory added in any project in Redmine so in case you have large number of such repositories added in the projects then it becomes a time consuming process. For me it was around 10 seconds for 1 repository. I have more than 100 repositoties for various projects so unnecessarily waiting for each fetch everytime a commit is made in any repo does not make sense
You can fetch all the repositories via browser using the following URL:
http : / /<redmine url>/sys/fetch_changesets?key=<your service key>
To fetch only one repository via browser use the following URL: (Fetching only the repository for which the commit was made is far more efficient and less time consuming.
Until you fetch the repository the Tasks in Redmine will not be closed.
Project identifier can either be the number of the project, e.g. id=1 or the identifier name that you gave the project, e.g., id=mobileapp
http : / /<redmine url>/sys/fetch_changesets?key=<your service key>?id=<project identifier>&key=<your service key>
This option should be activated only if you installed the script for automatic SVN repository creation. Default: No. But in order to autofetch each repository on commit, please enable this even if you do not want to create SVN repo automatically.
Repository management WS API key
A secret key for repository management WS. This will be used in fetching each repository secretly.
Maximum number of revisions displayed on file log
It provides a way to limit the amount of revisions which are retrieved from the SCM for a certain, browsed path.
Referencing issues in commit messages
When fetched from the repositories, commit messages are scanned for referenced or fixed issue IDs.
These options lets you define keywords that can be used in commit message to reference or fix issues automatically, and the status to apply to fixed issues.
Default keywords are:
for referencing issues: refs:, references:, IssueID: (capital and small matters)
for fixing issues: fixes:, closes:
There’s no default status defined for fixed issue. You’ll have to specify it if you want to enable auto closure of issues.
If you want to reference issues without using keywords, enter a single star: * in the Referencing keywords (Administration/Repository) setting. In this case, any issue ID found in the message will be linked to the changeset.
Example of a working commit message using default keywords:
This commit refs #1, #2 and fixes #3
This message would reference issues 1 and 2 and automatically fix issue 3.
After a keyword issue IDs can be separated with a space, a comma or &.
The keywords are caseinsensitive and at least one blankspace or colon is needed between the keyword and the first hash to produce
a match. More examples that will produce the same result as the example above:
This commit refs:#1, #2 and fixes #3
This commit Refs  #1, #2 and fixes #3
This commit REFS: #1, #2 and fixes #3
Enable time logging
Allows time logging directly from commit messages. This only makes sense if you activated the “Time tracking” module in said project. In this case, you can add special words in your commit message to indicate the time you spent on an issue.
The basic syntax for doing that is : @<time>, where time consists in a number of hours or minutes.
Here’s a list of many valid commit messages that would work if you want to say you spent N hours on issue 1234:
This is the type of activity that should be used when detecting there’s a log time in a commit message (see above).
Step2: Making changes in the Project
2. Ensure that you are able to commit and update the Project Repository which you intend to access from the server where Redmine is installed.
For Velocity: For Velocity there is a generic user: velsofsvn which is added to all the repositories and this is the user used on Redmine server to refresh the repository listings when commits happen. So check if this user has access to the repository being setup for auto closure of issues via SVN. In case facing issues with access check if the IP restrictions are there in the repository on Assembla/SVN host.
2. Goto your Project as a system admin and there goto Settings > Modules. Enable Repository Module.
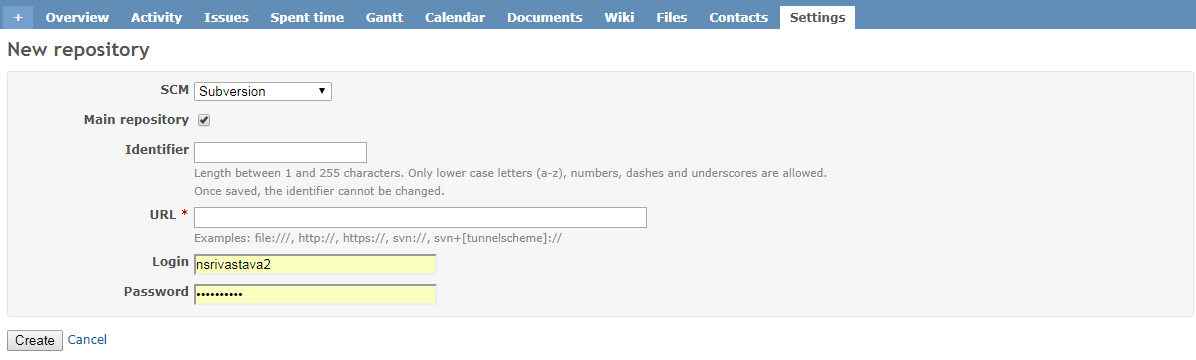
3. Fill in the below shown form in the Repository module for that project:
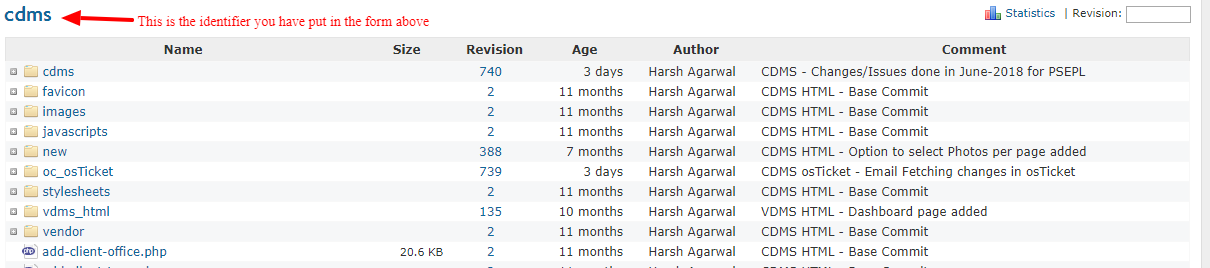
4. Once you have completed Step #3, the Repository will start showing like the way shown below:
Step3: Making changes in Assembla SVN
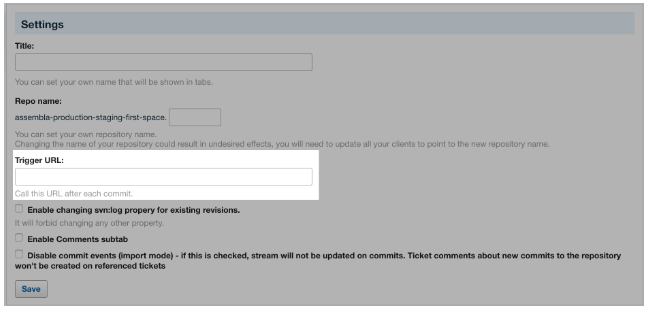
5. To access to this page, you must be an owner or a member with ALL permissions (learn more about roles and permissions). To get here, go to your Assembla SVN repository > Settings > General Settings.
Trigger URL:
This feature calls a specific URL after each commit. Our server sends a request to the remote service specified in the URL. The result will depend on what a user sets this service to do under this specific URL. GET URL after each commit can be used to trigger a build for example.
Here in Trigger URL you have to put in the url dicussed above for Auto Fetching a particular Repository:
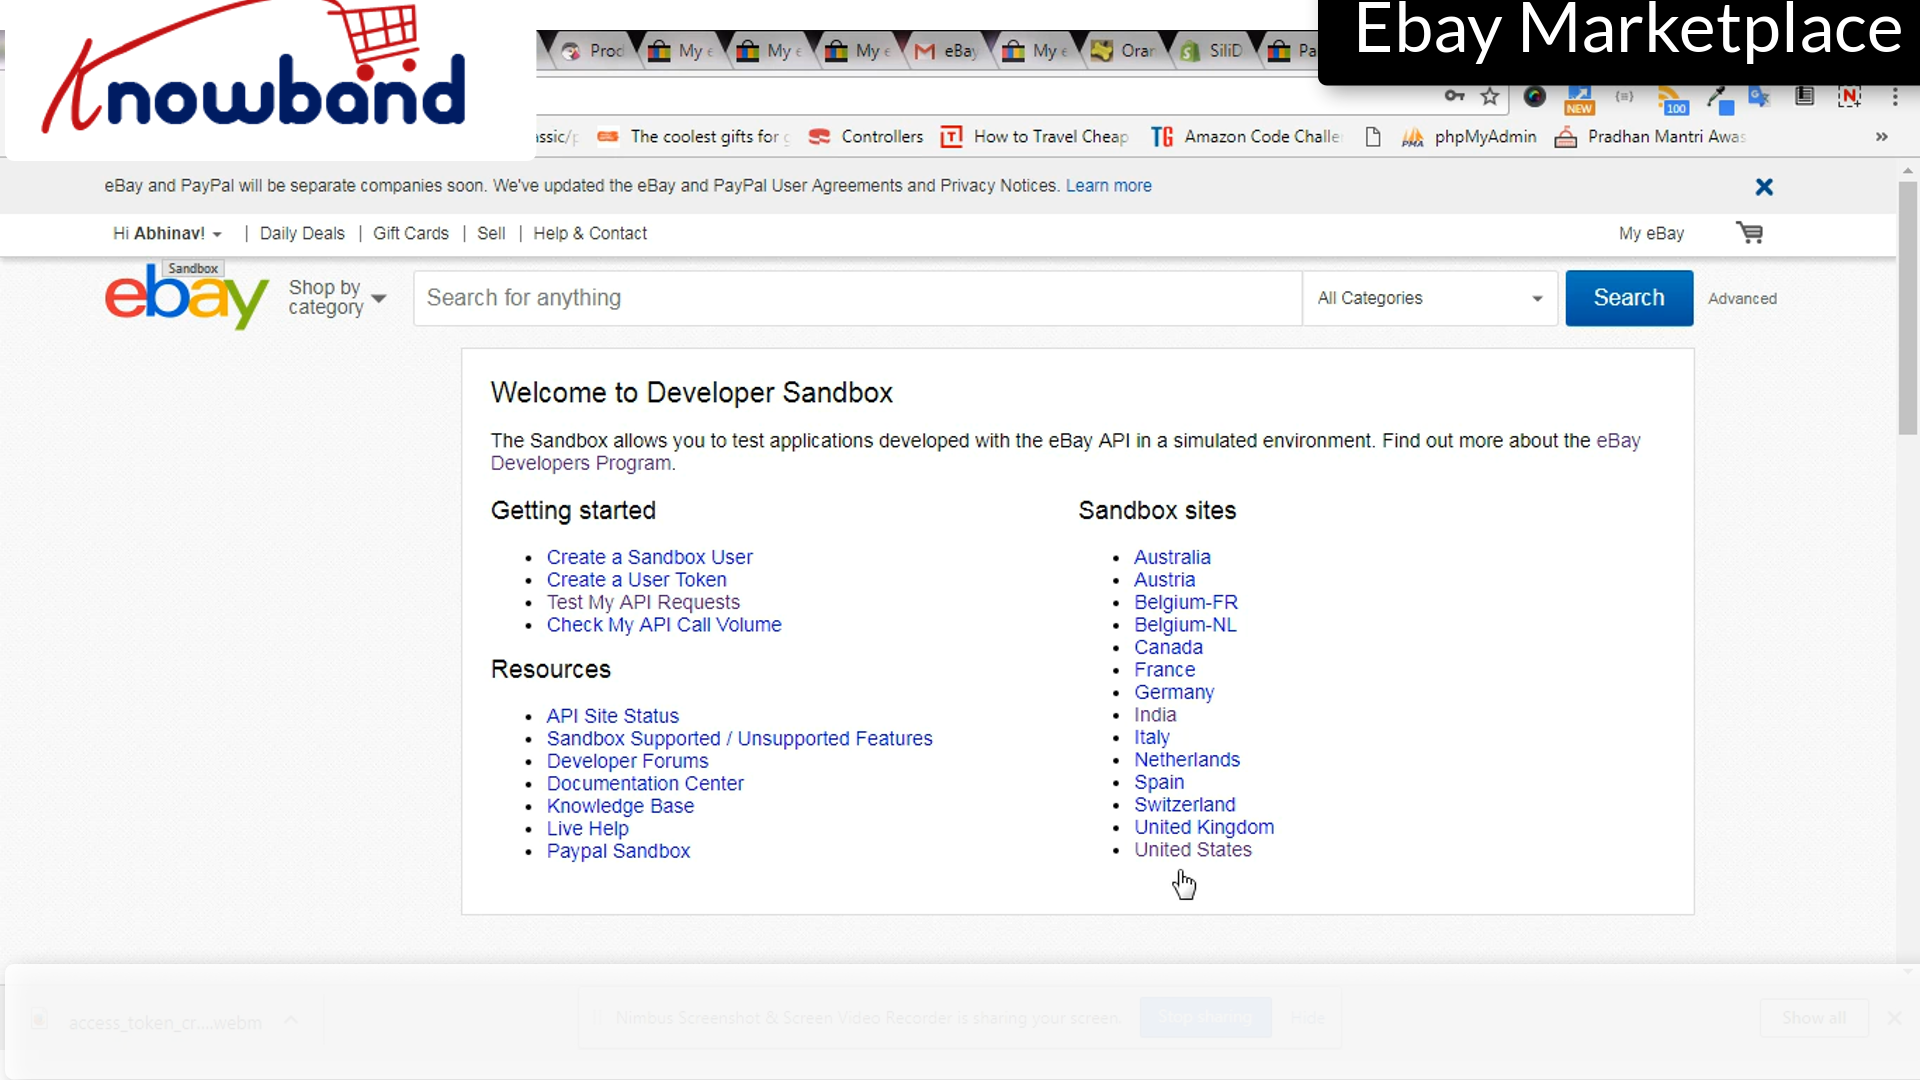
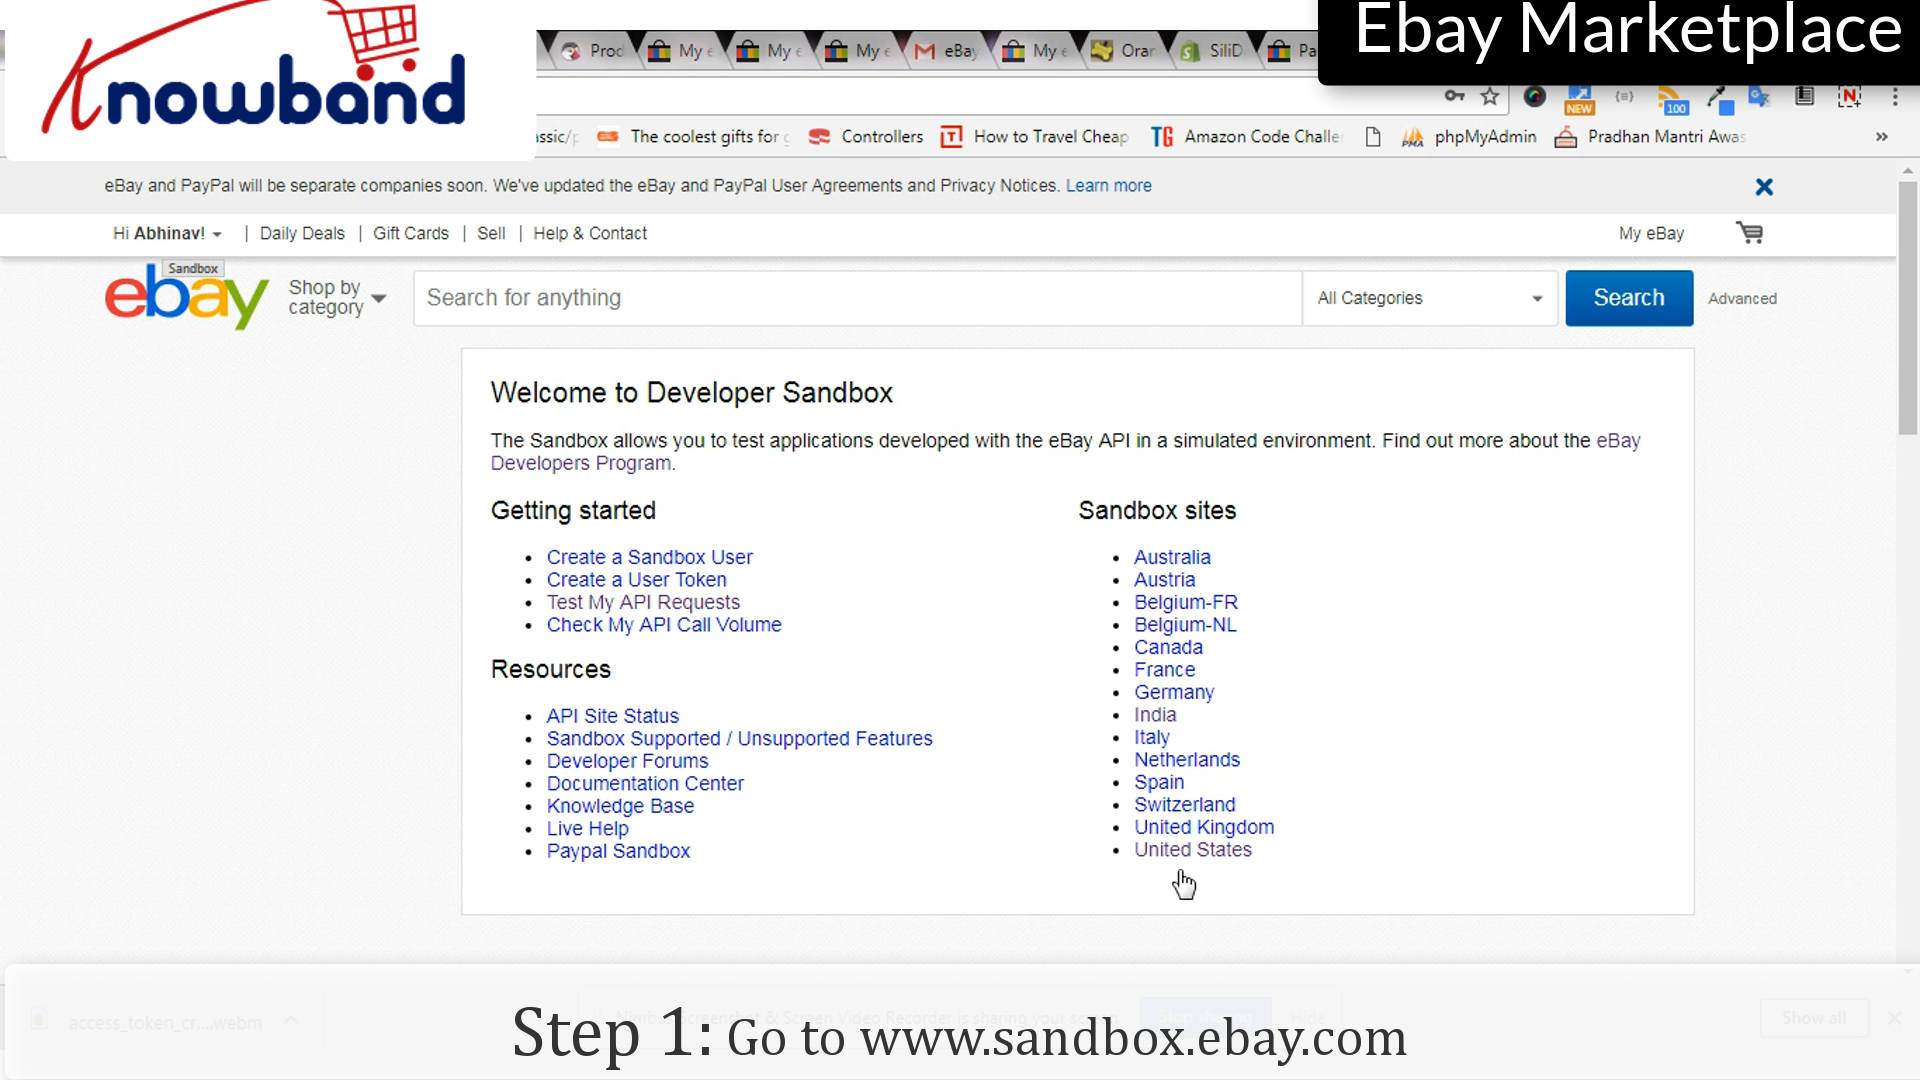
Go to www.sandbox.ebay.com. eBay provides the sandbox environment. It is a special environment designed just for testing, and an application that targets the Sandbox can perform all the operations it can in the Production environment. This allows you to test applications developed with the eBay API in a simulated environment.
This duplicates much of the functionality that is on the eBay Web site. It processes API calls in exactly the same manner as does the Production environment, and it includes a subset of the eBay site’s Web pages. The difference is that all the users are test users (created by developers like you) and all the money exchanged is test money.
Their test users are virtual eBay accounts that exist only in this environment. These accounts represent the user entities that partake in the mock transactions you create as you run your application in the testing phase.
eBay provides this environment. This is a special environment designed just for testing, and an application that targets it can perform all the operations it can in the Production environment.
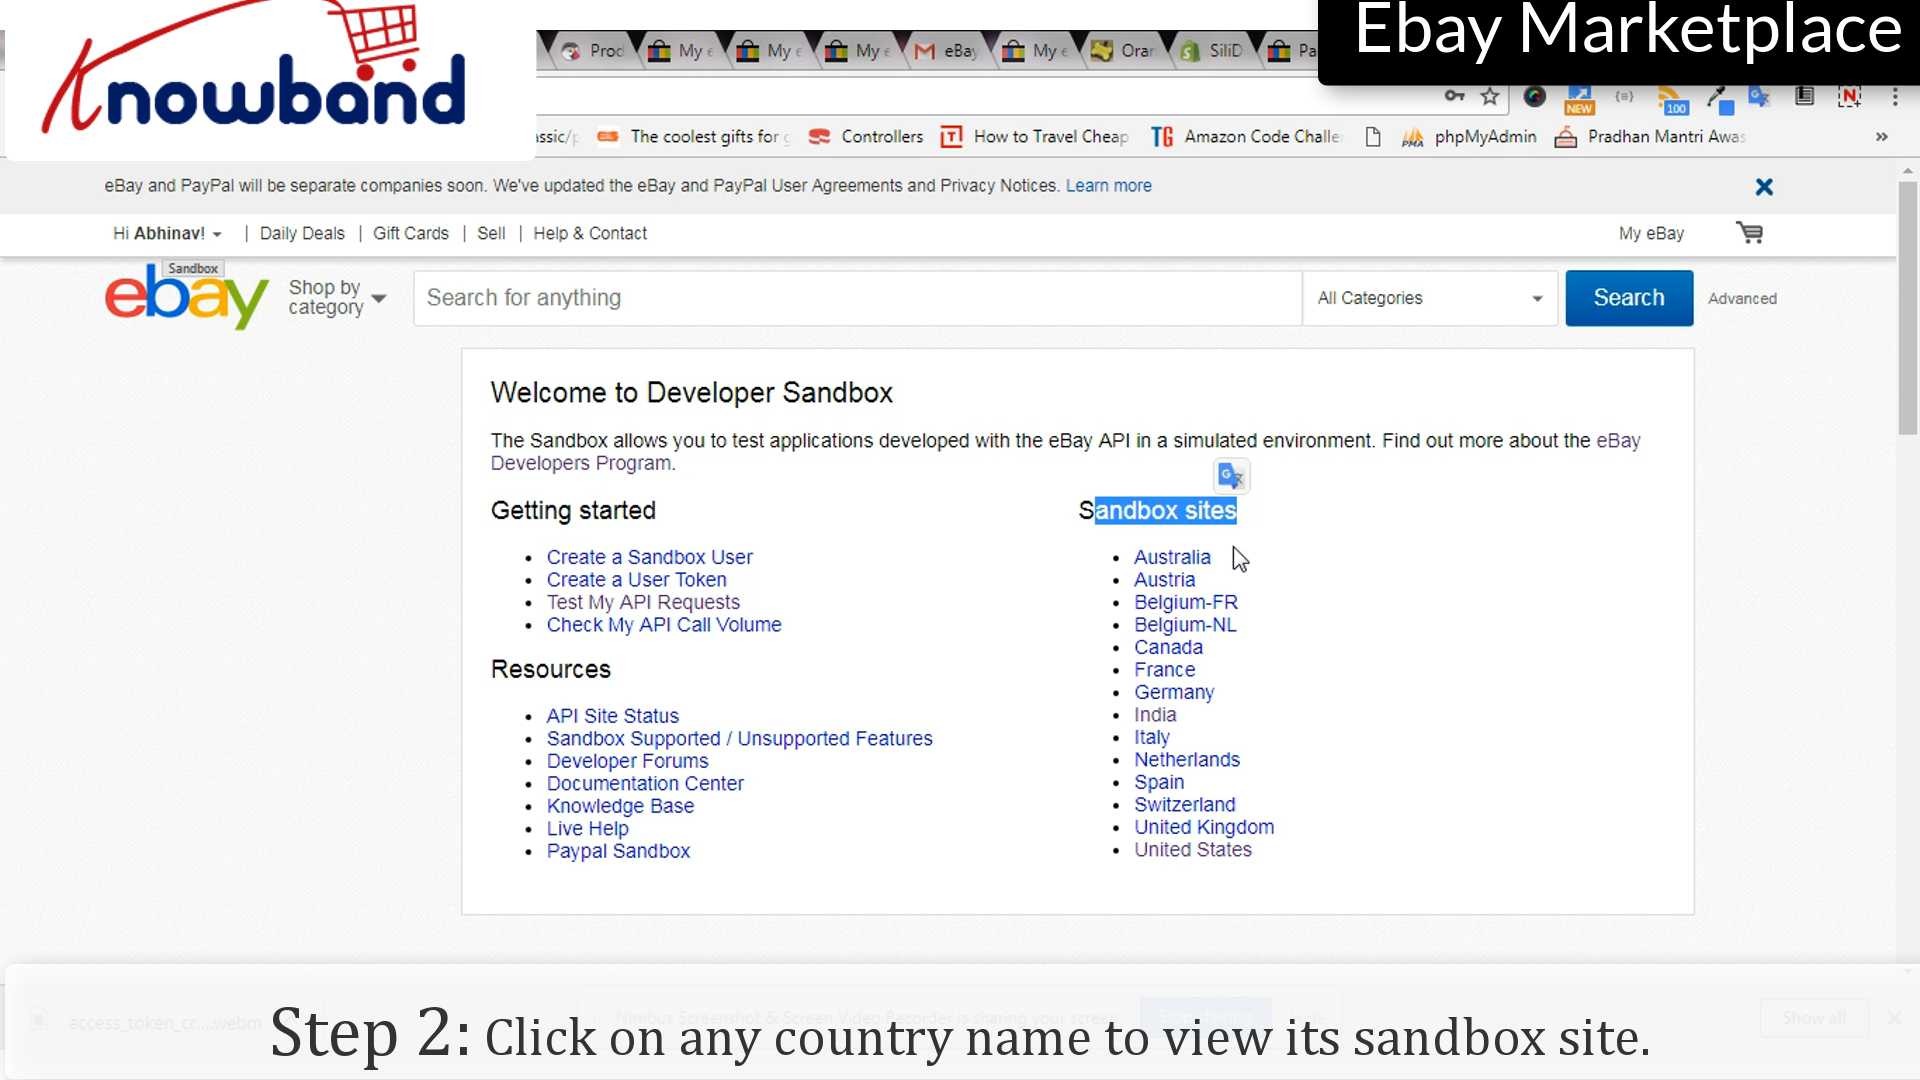
Step 2: View the eBay sandbox site
Click on any country name listed to view the sandbox site for the same. Here you can find all the listed sites.
After listing once, there may be many times when you will be required to change the details or even delete the listing. It provides easy steps for these modification processes, here’s how you do it:
Following are the steps to revise the list:
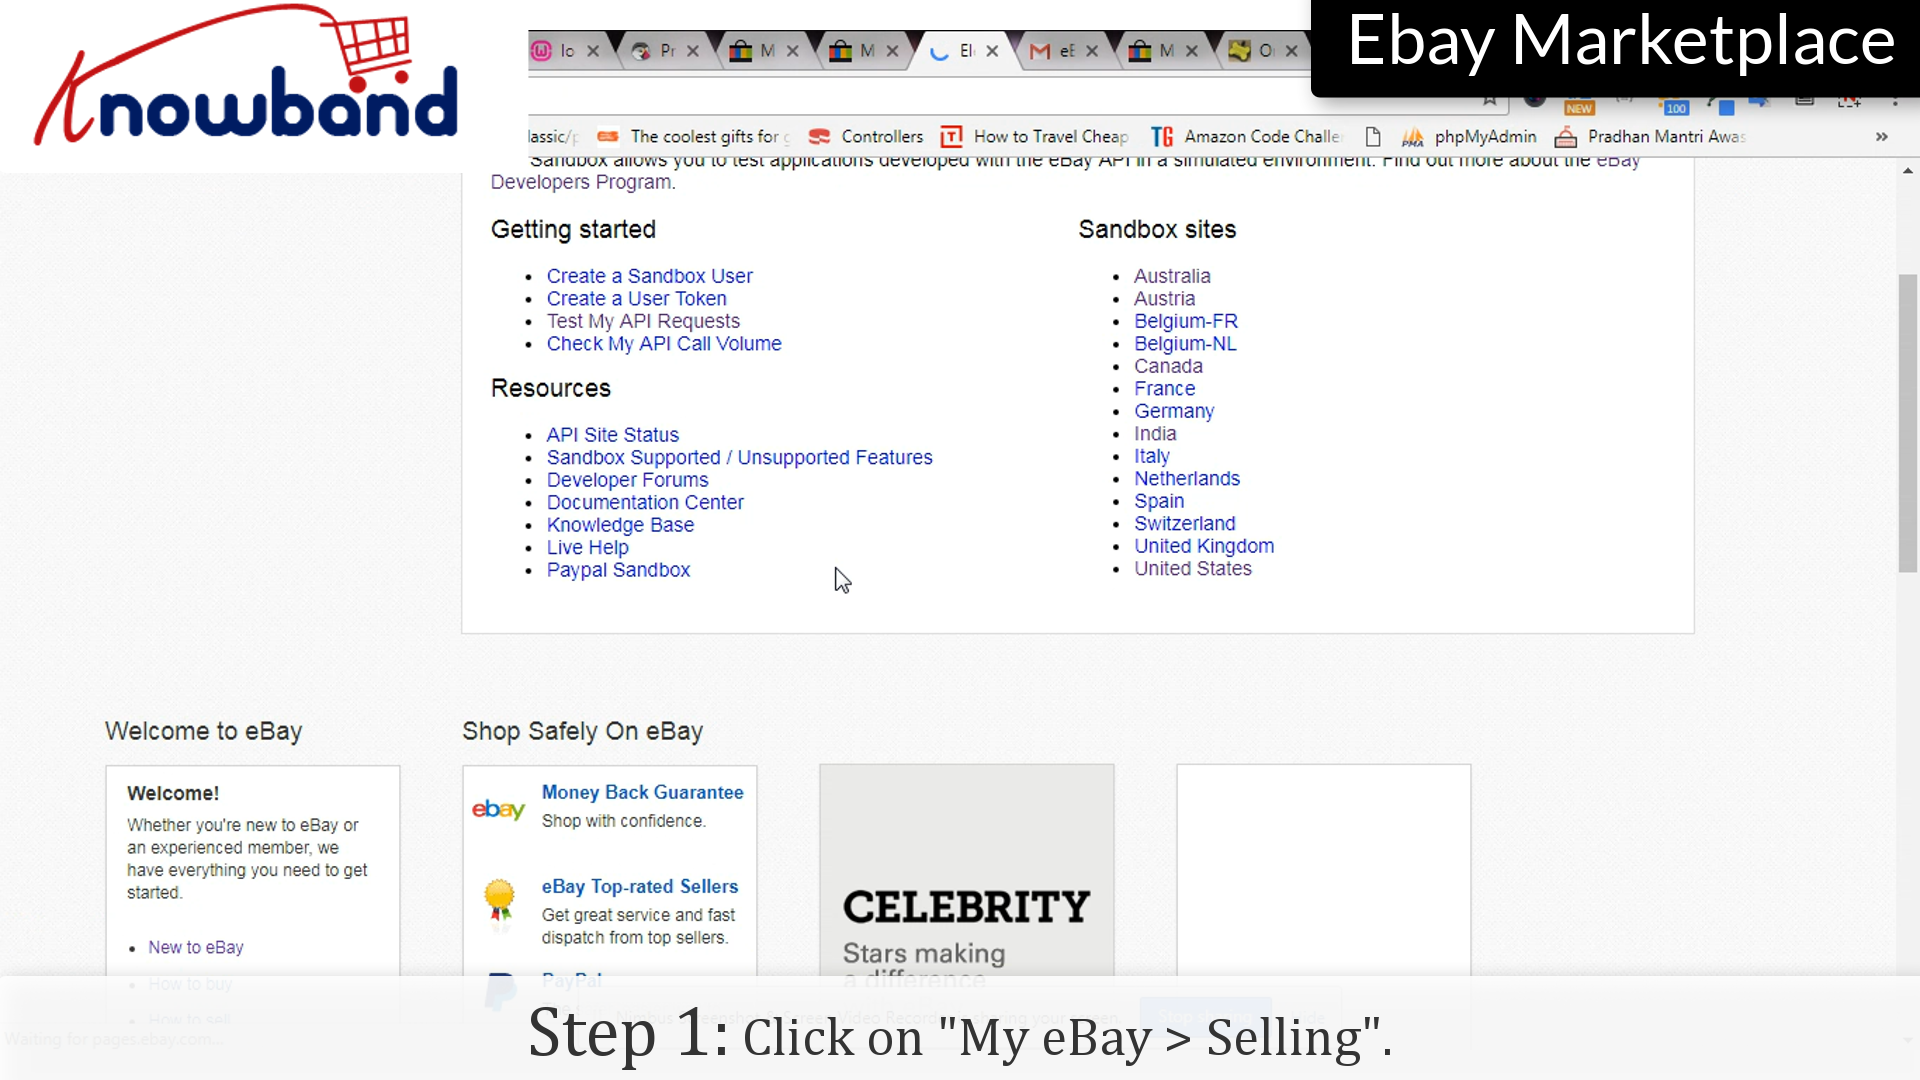
Step 1: Selling
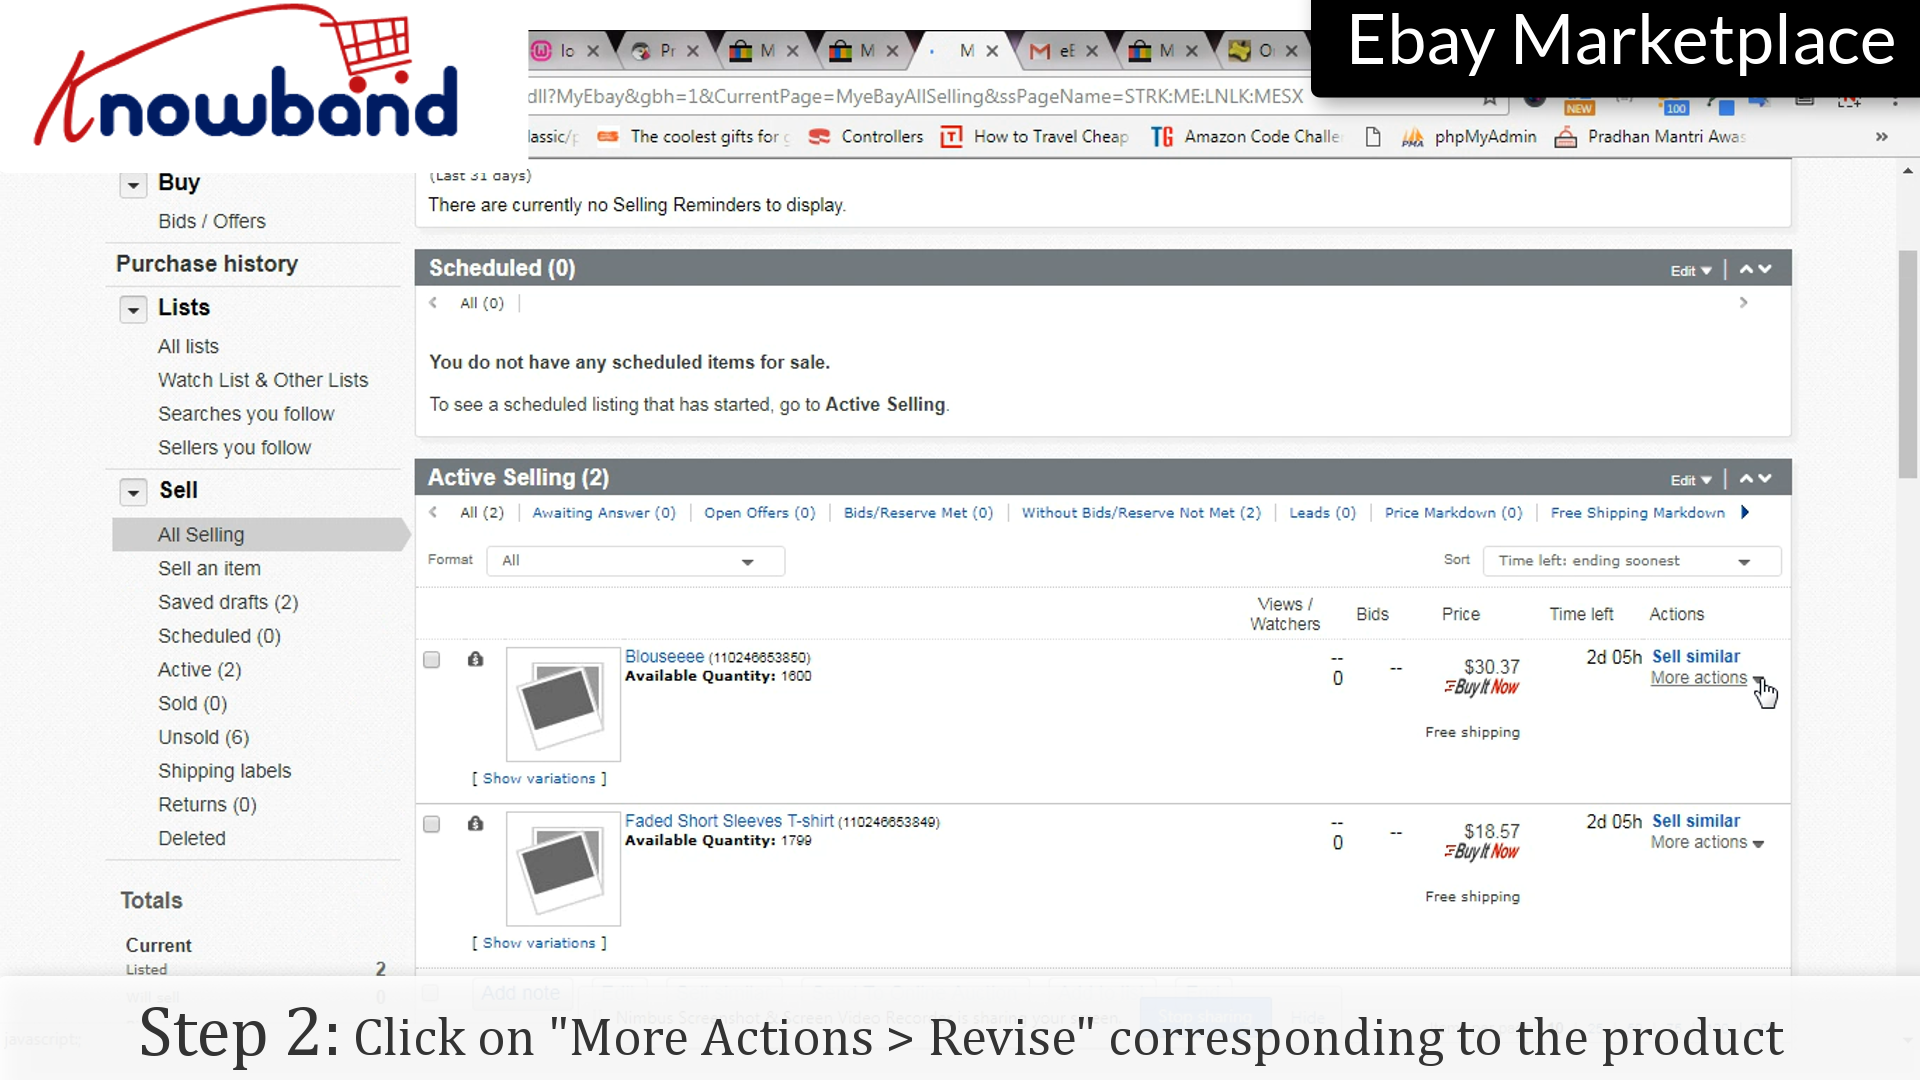
Click on “My eBay > Selling” in the menu.
Step 2: Revise
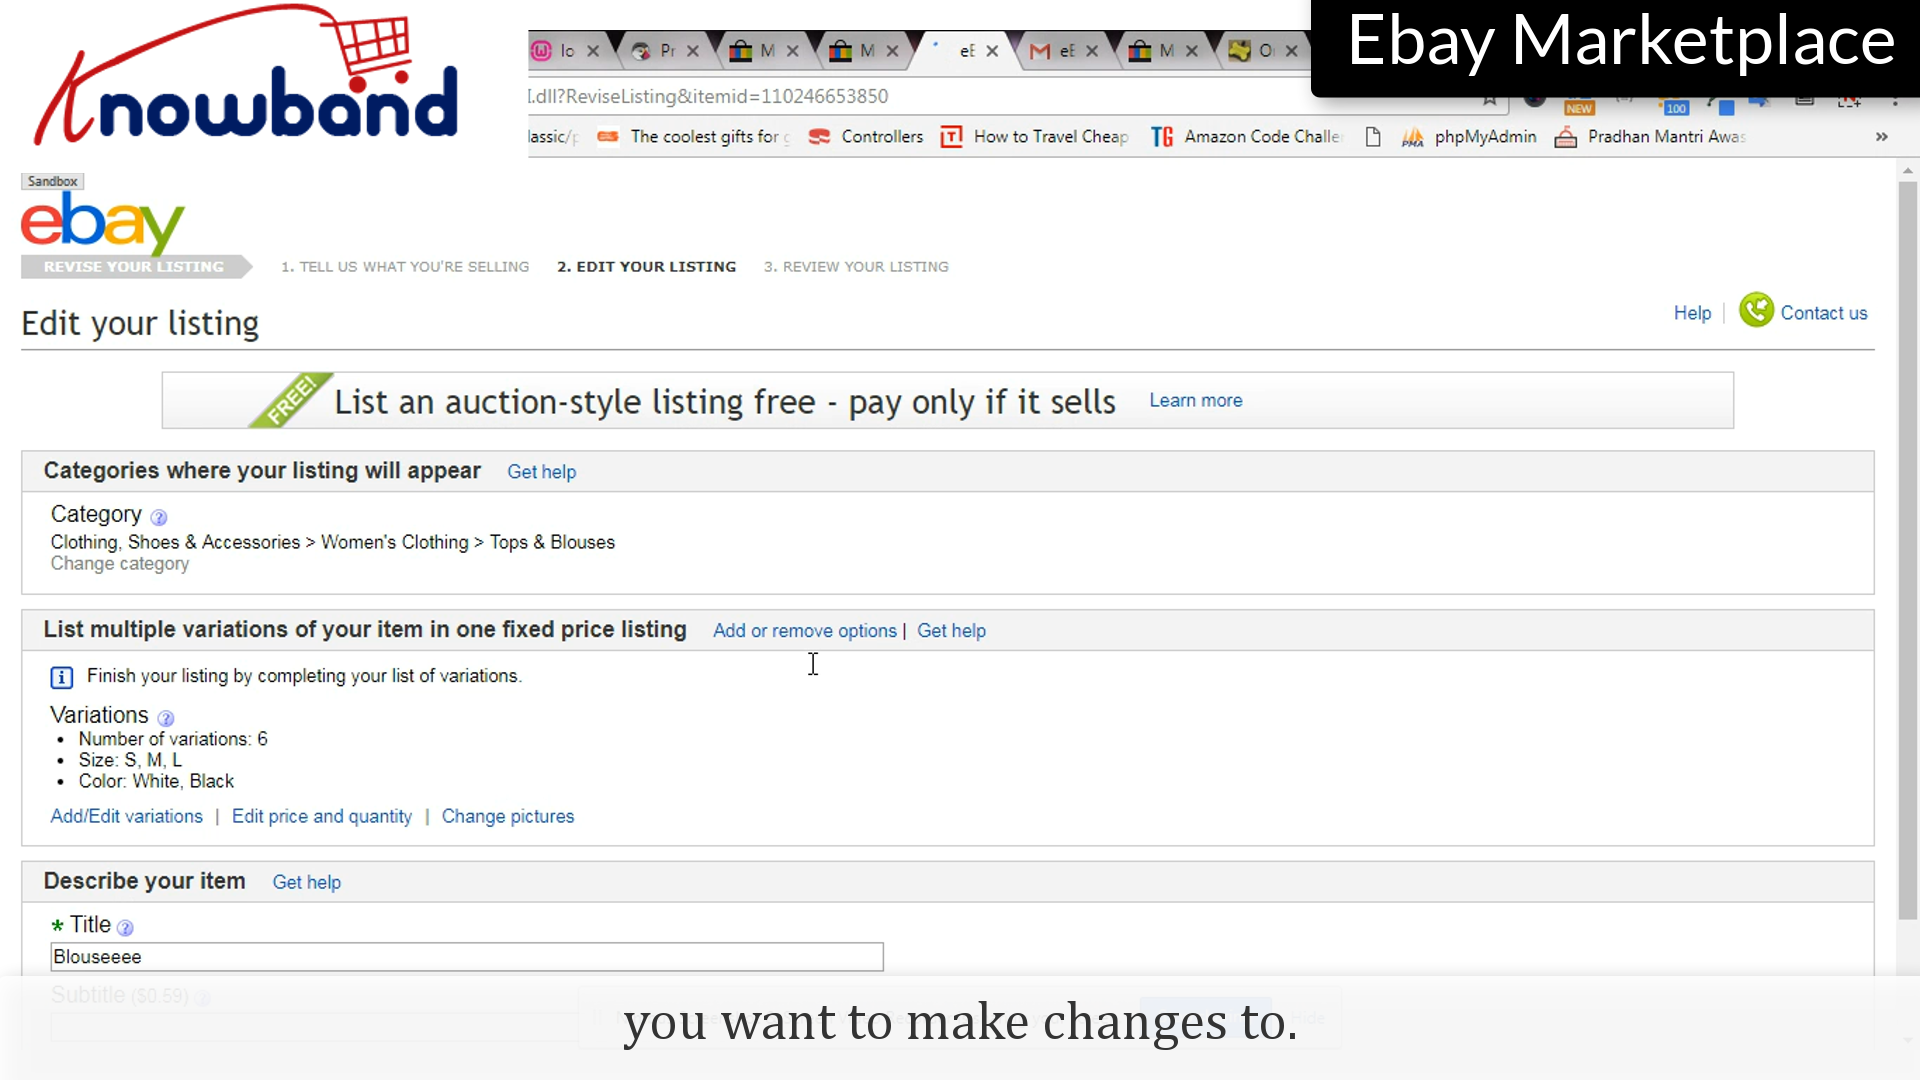
Corresponding to the listing you want to make changes to, there is an option “More Actions”, once clicked you will be shown a drop-down menu, click “Revise” option provided in the list.
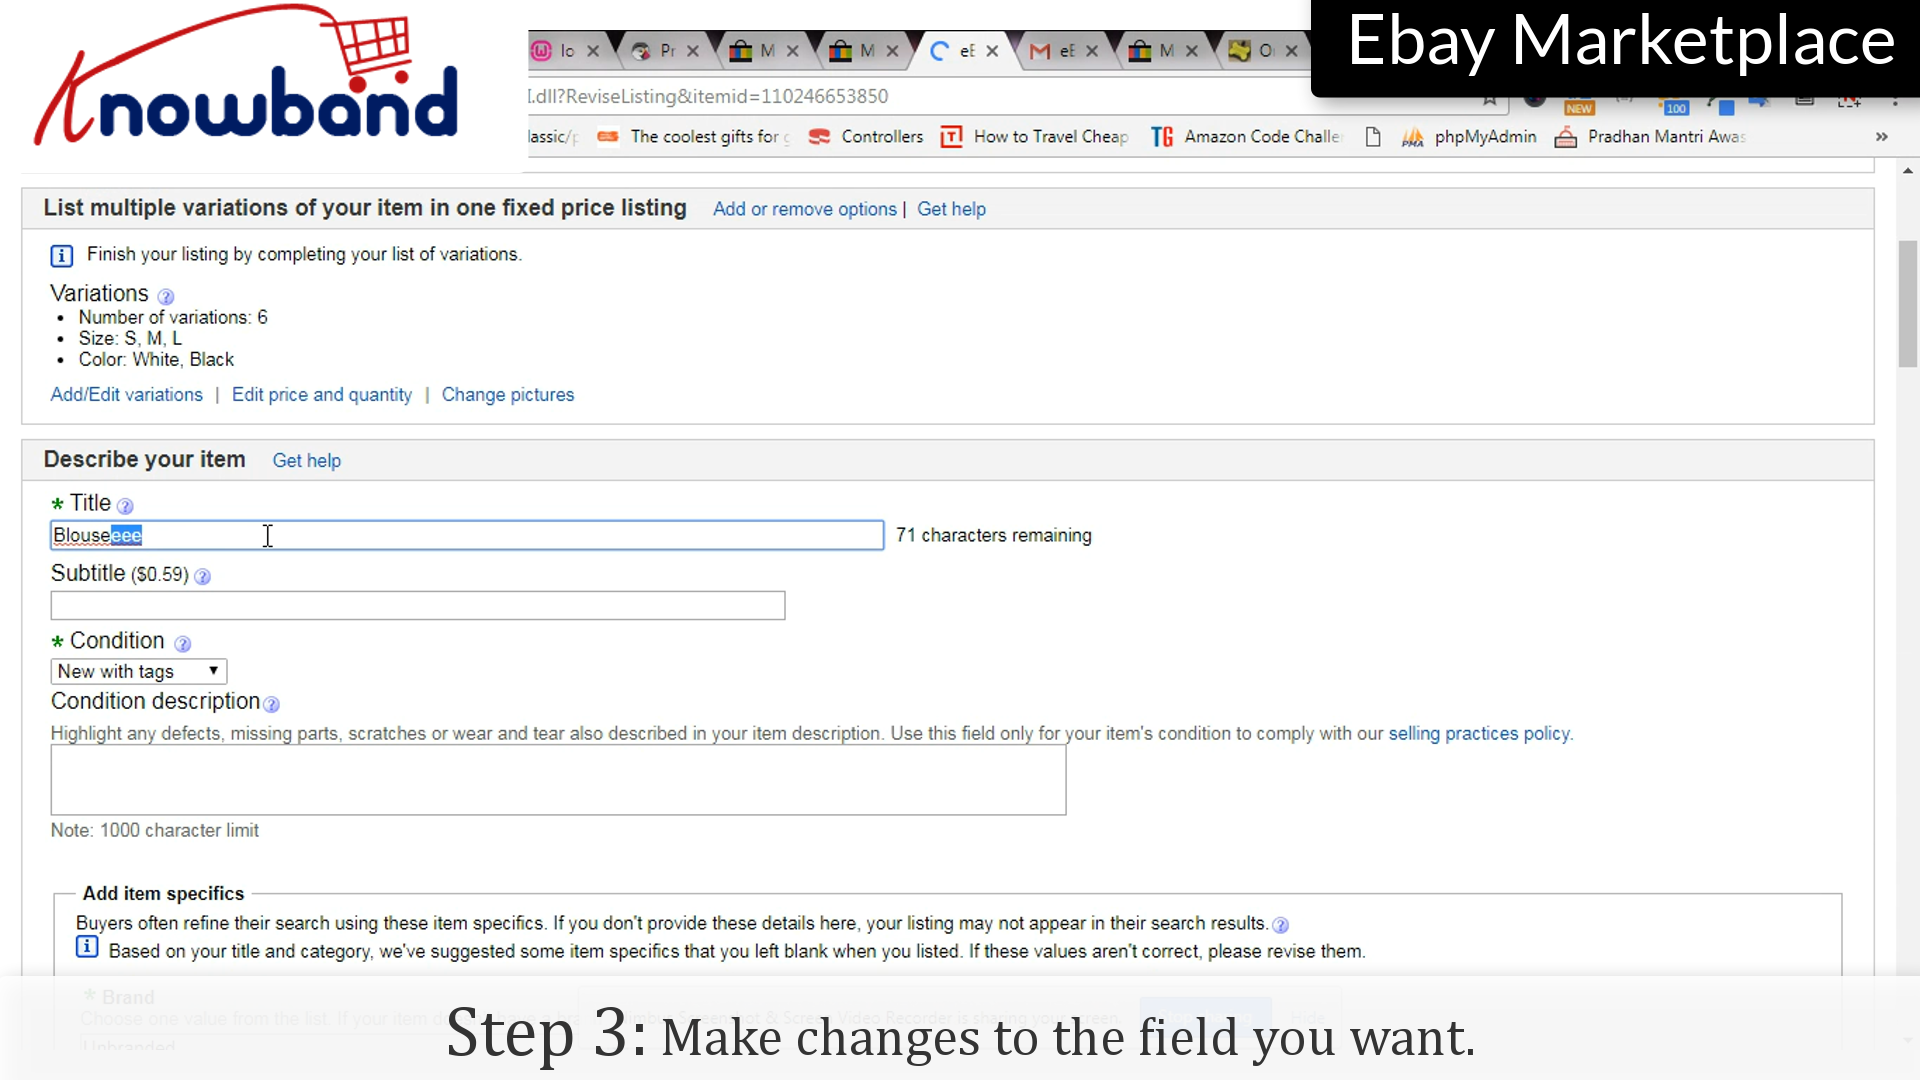
Step 3: Changes
Make changes to the fields you want to change.
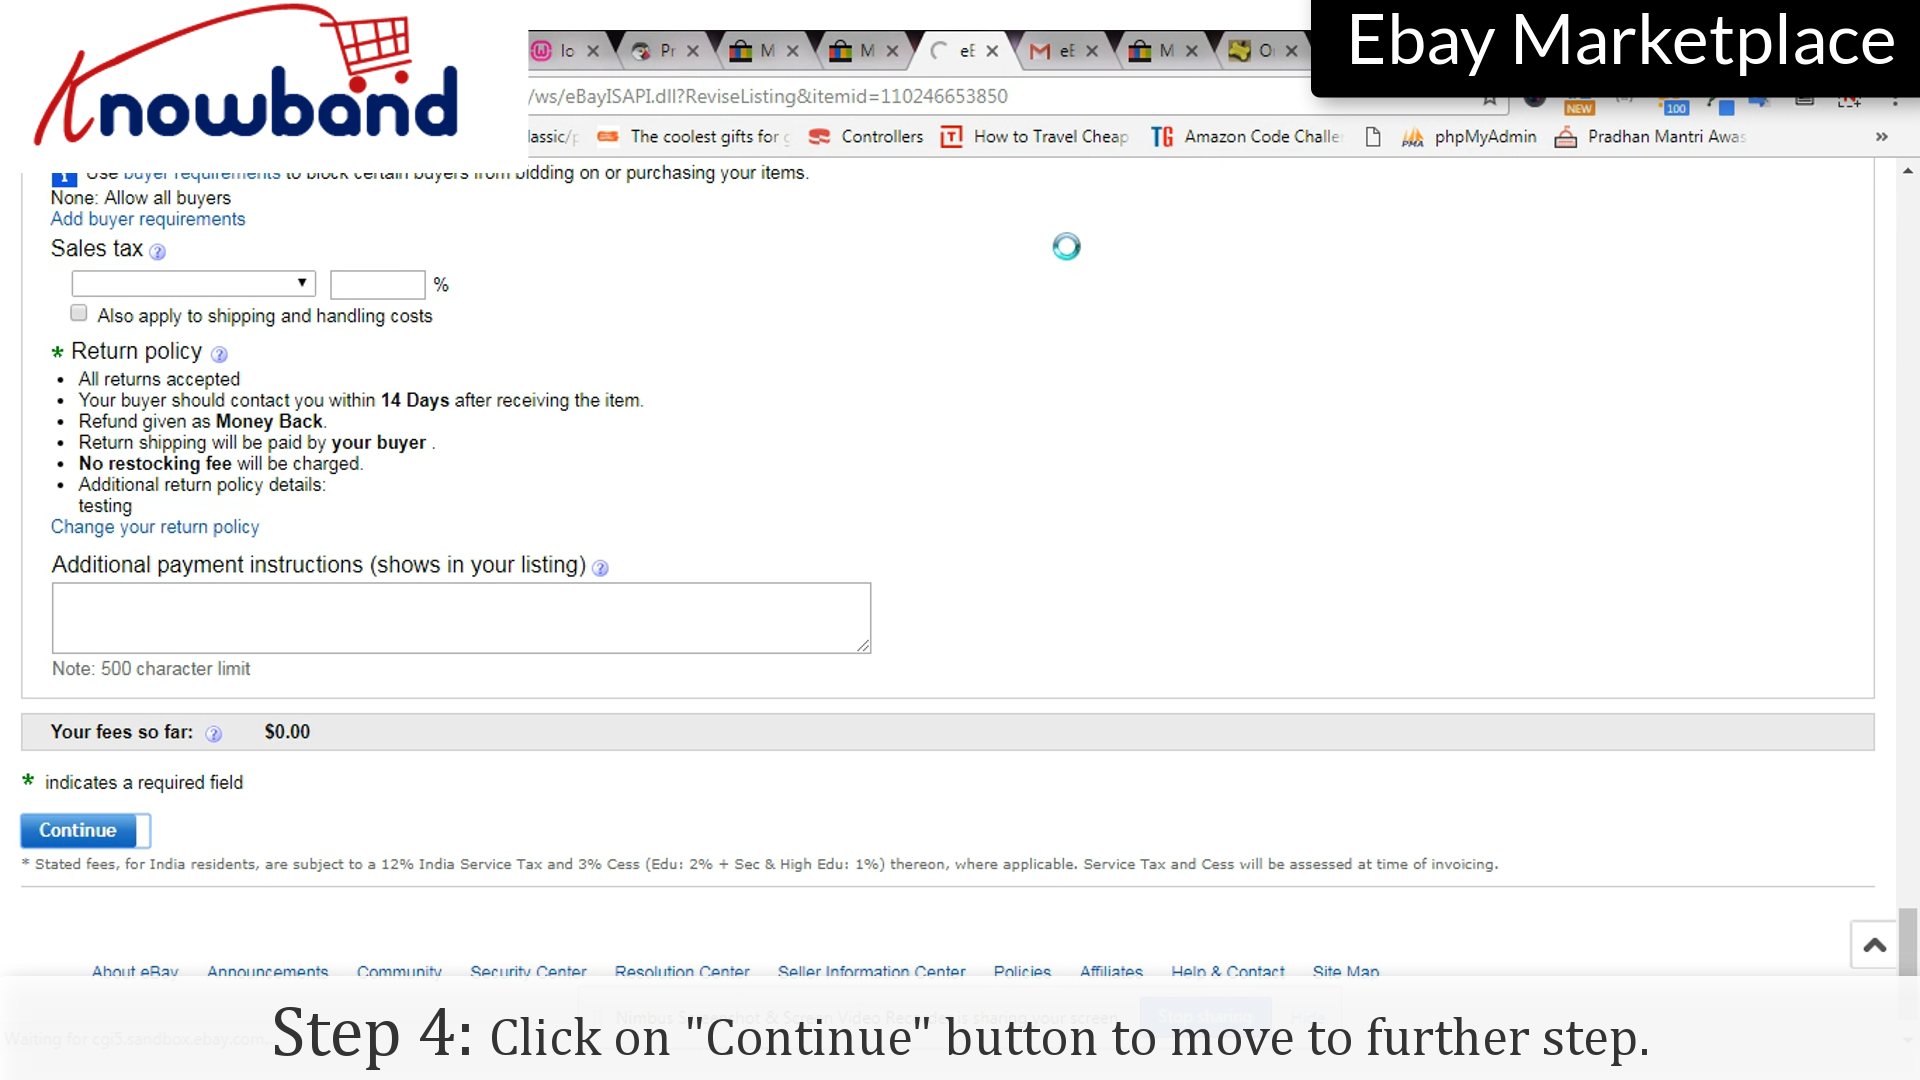
Step 4: Continue
Click on the “Continue” button to save the changes and move further.
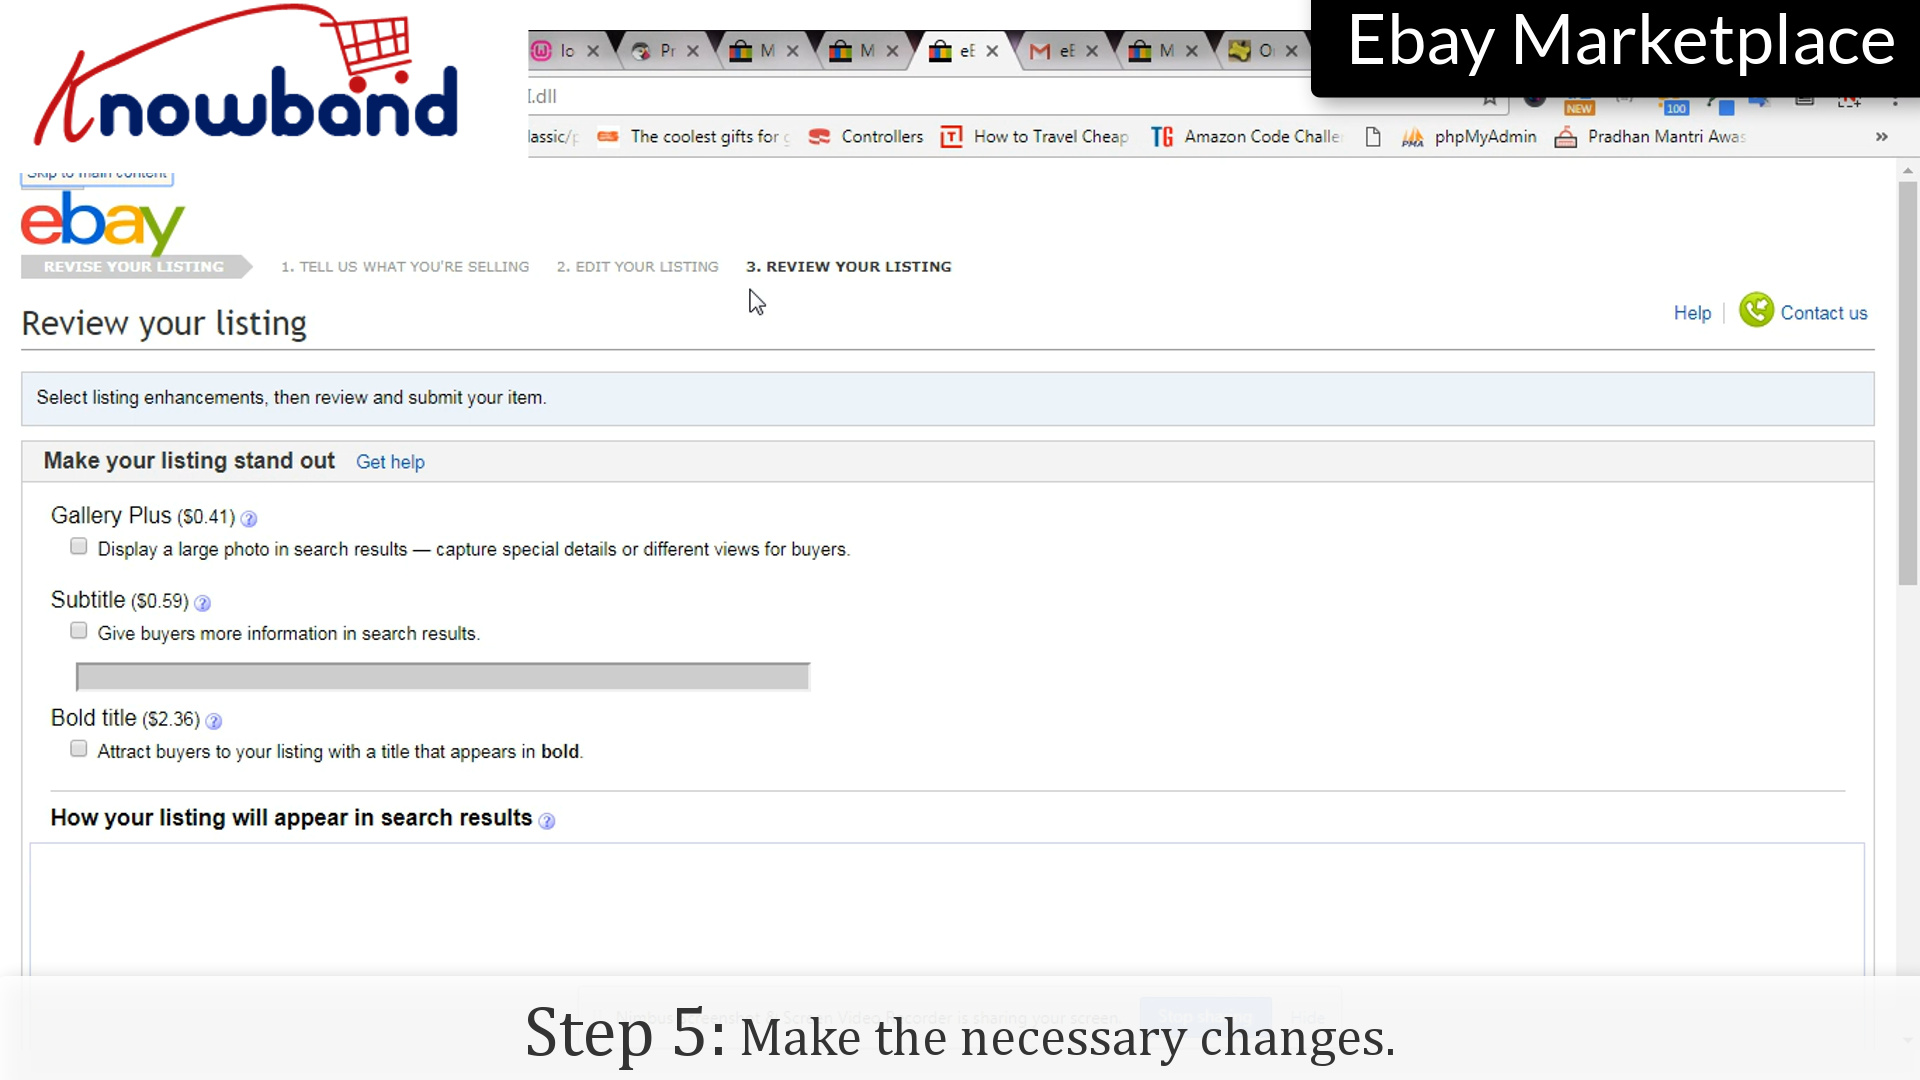
Step 5: Changes
Make the necessary changes in the final step of revising the list.
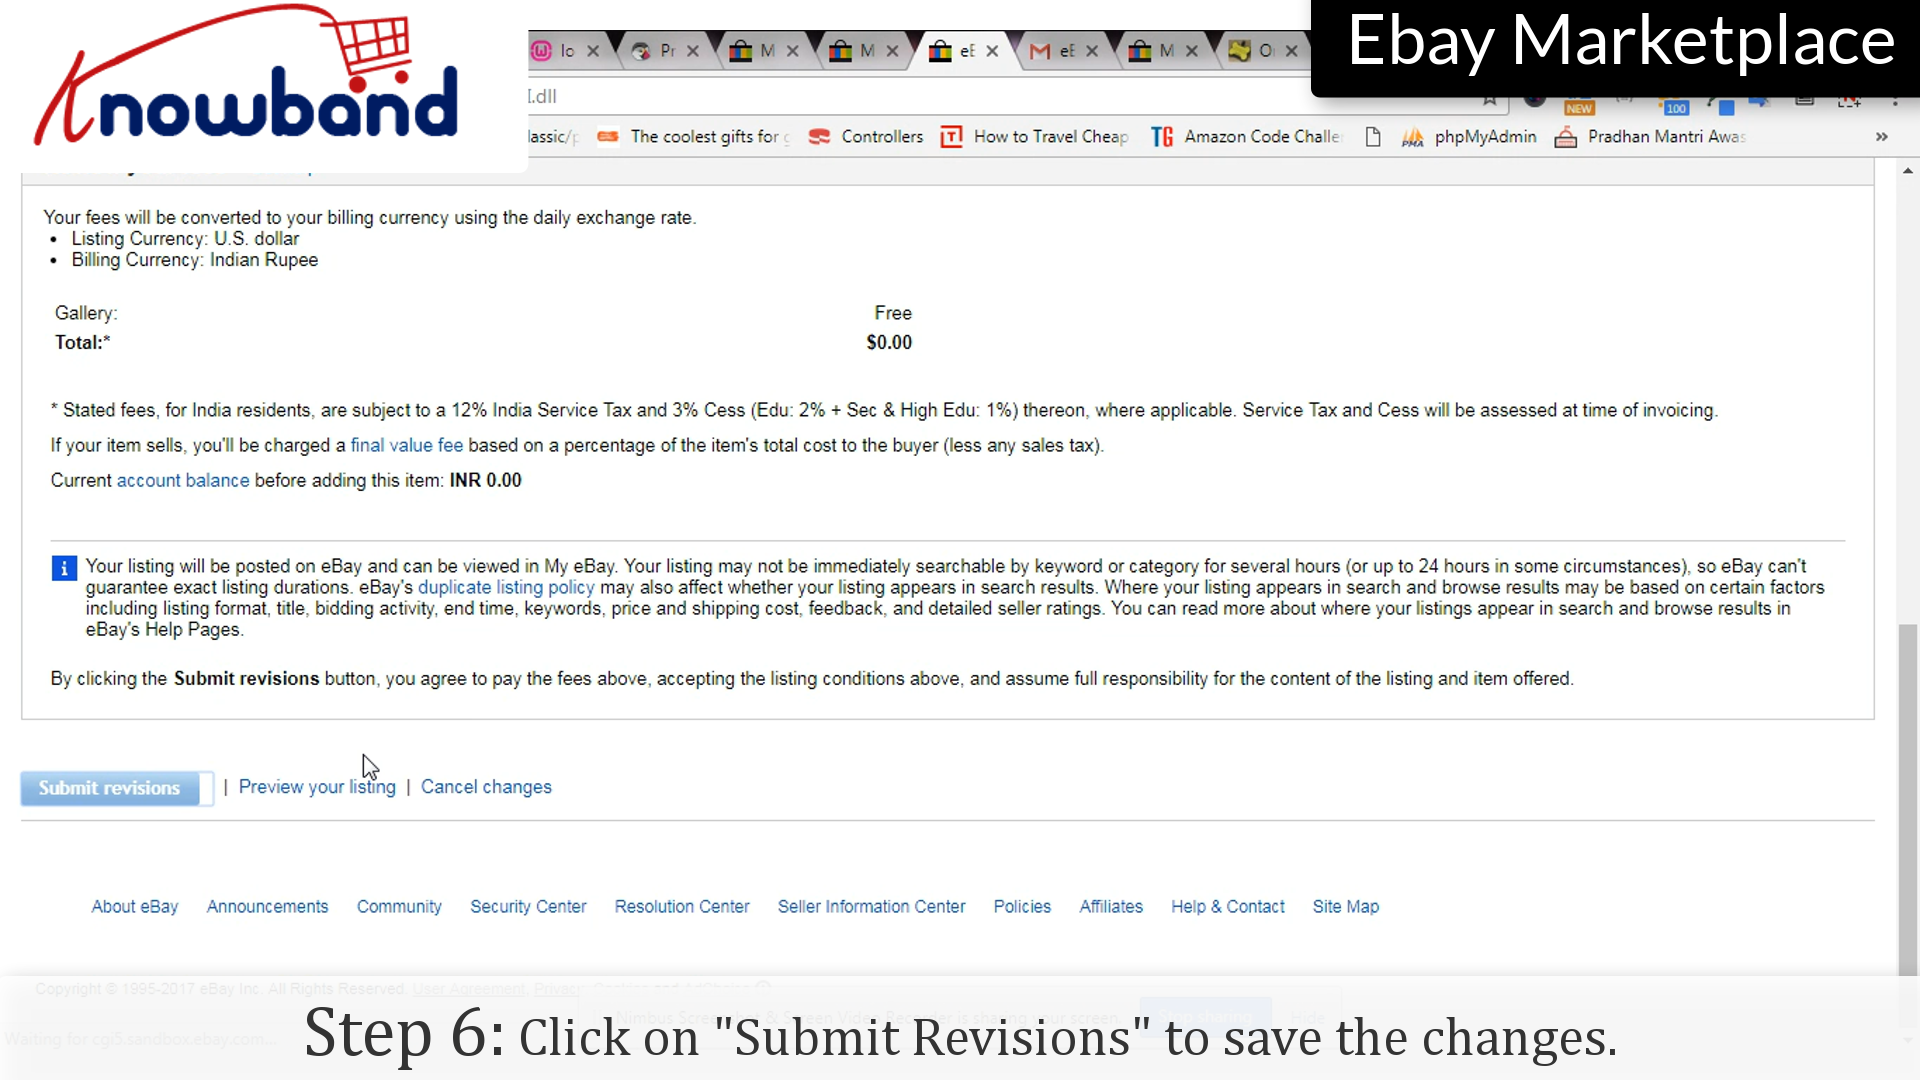
Step 6: Submit
Click on the “Submit Revision” option to save the changes to the listing.
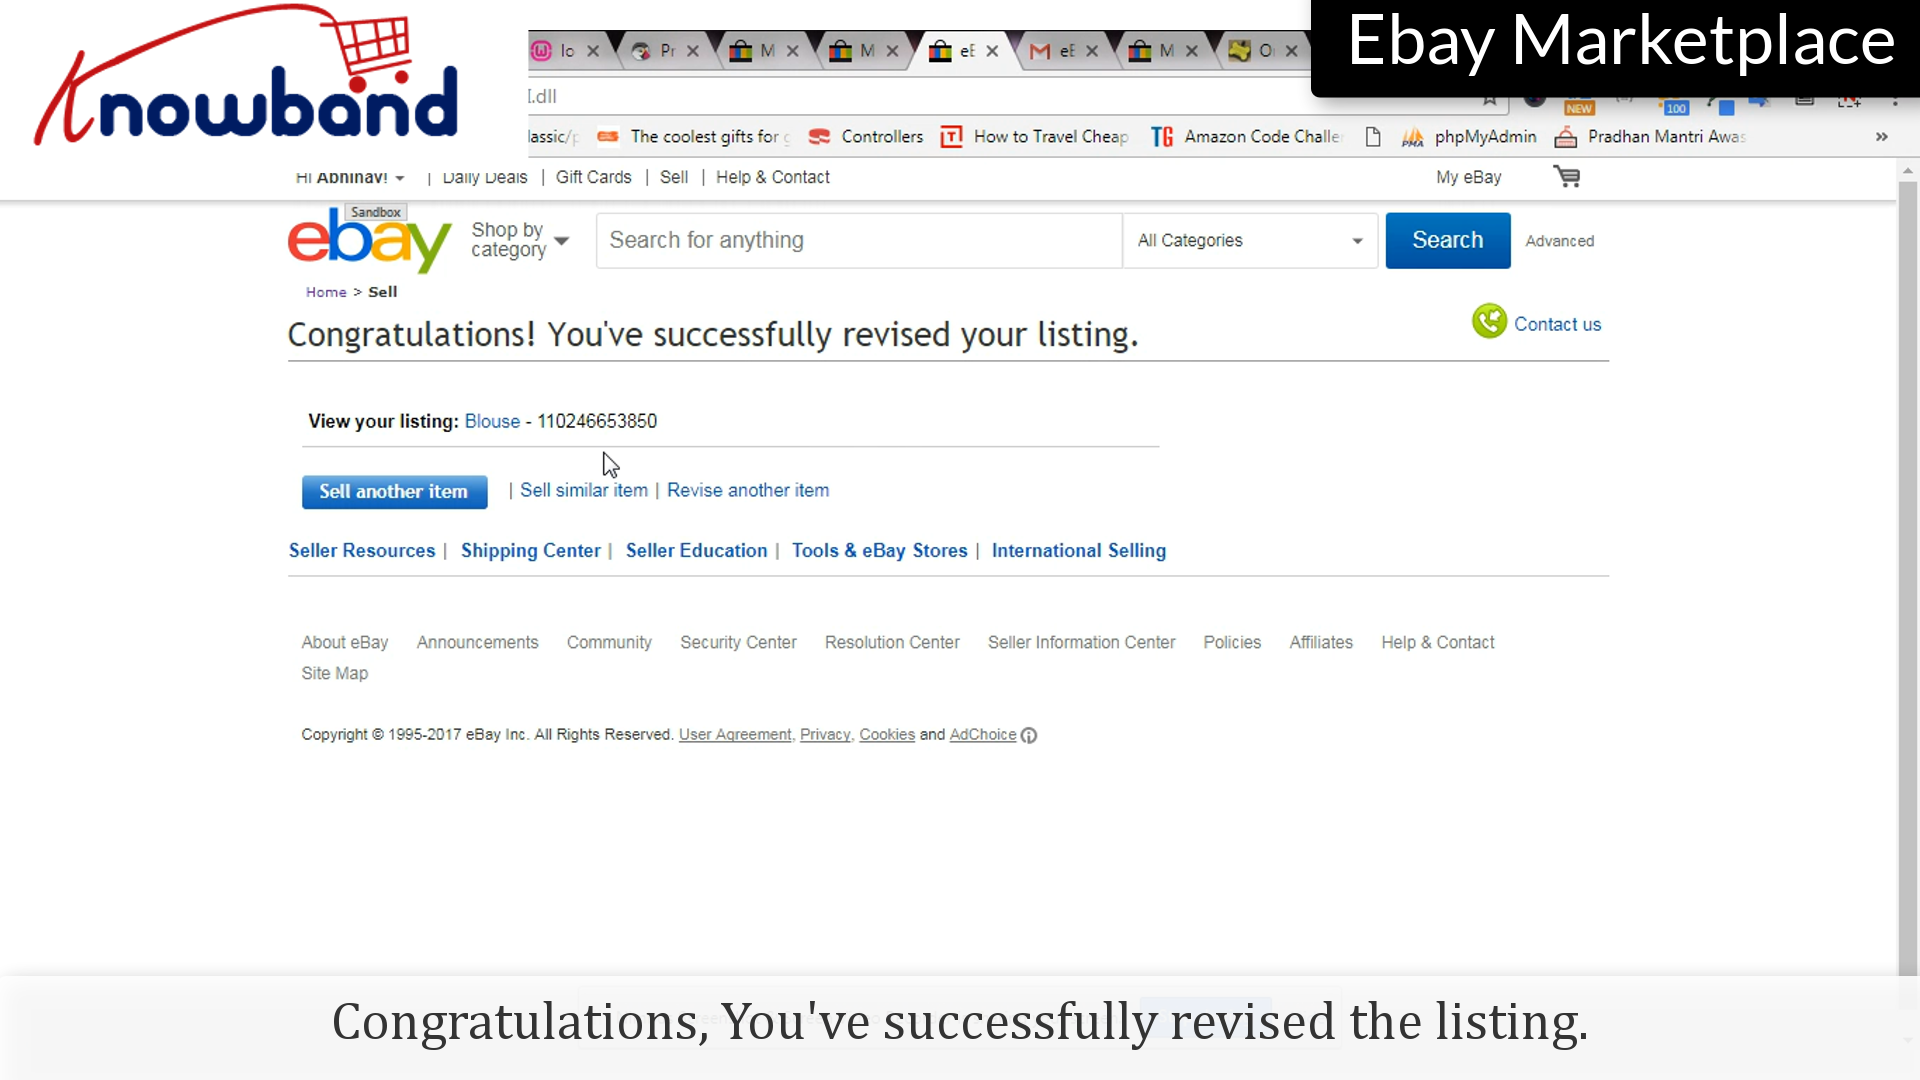
Congratulations, you’ve successfully revised the listing.
Follow the following points to end the listing:
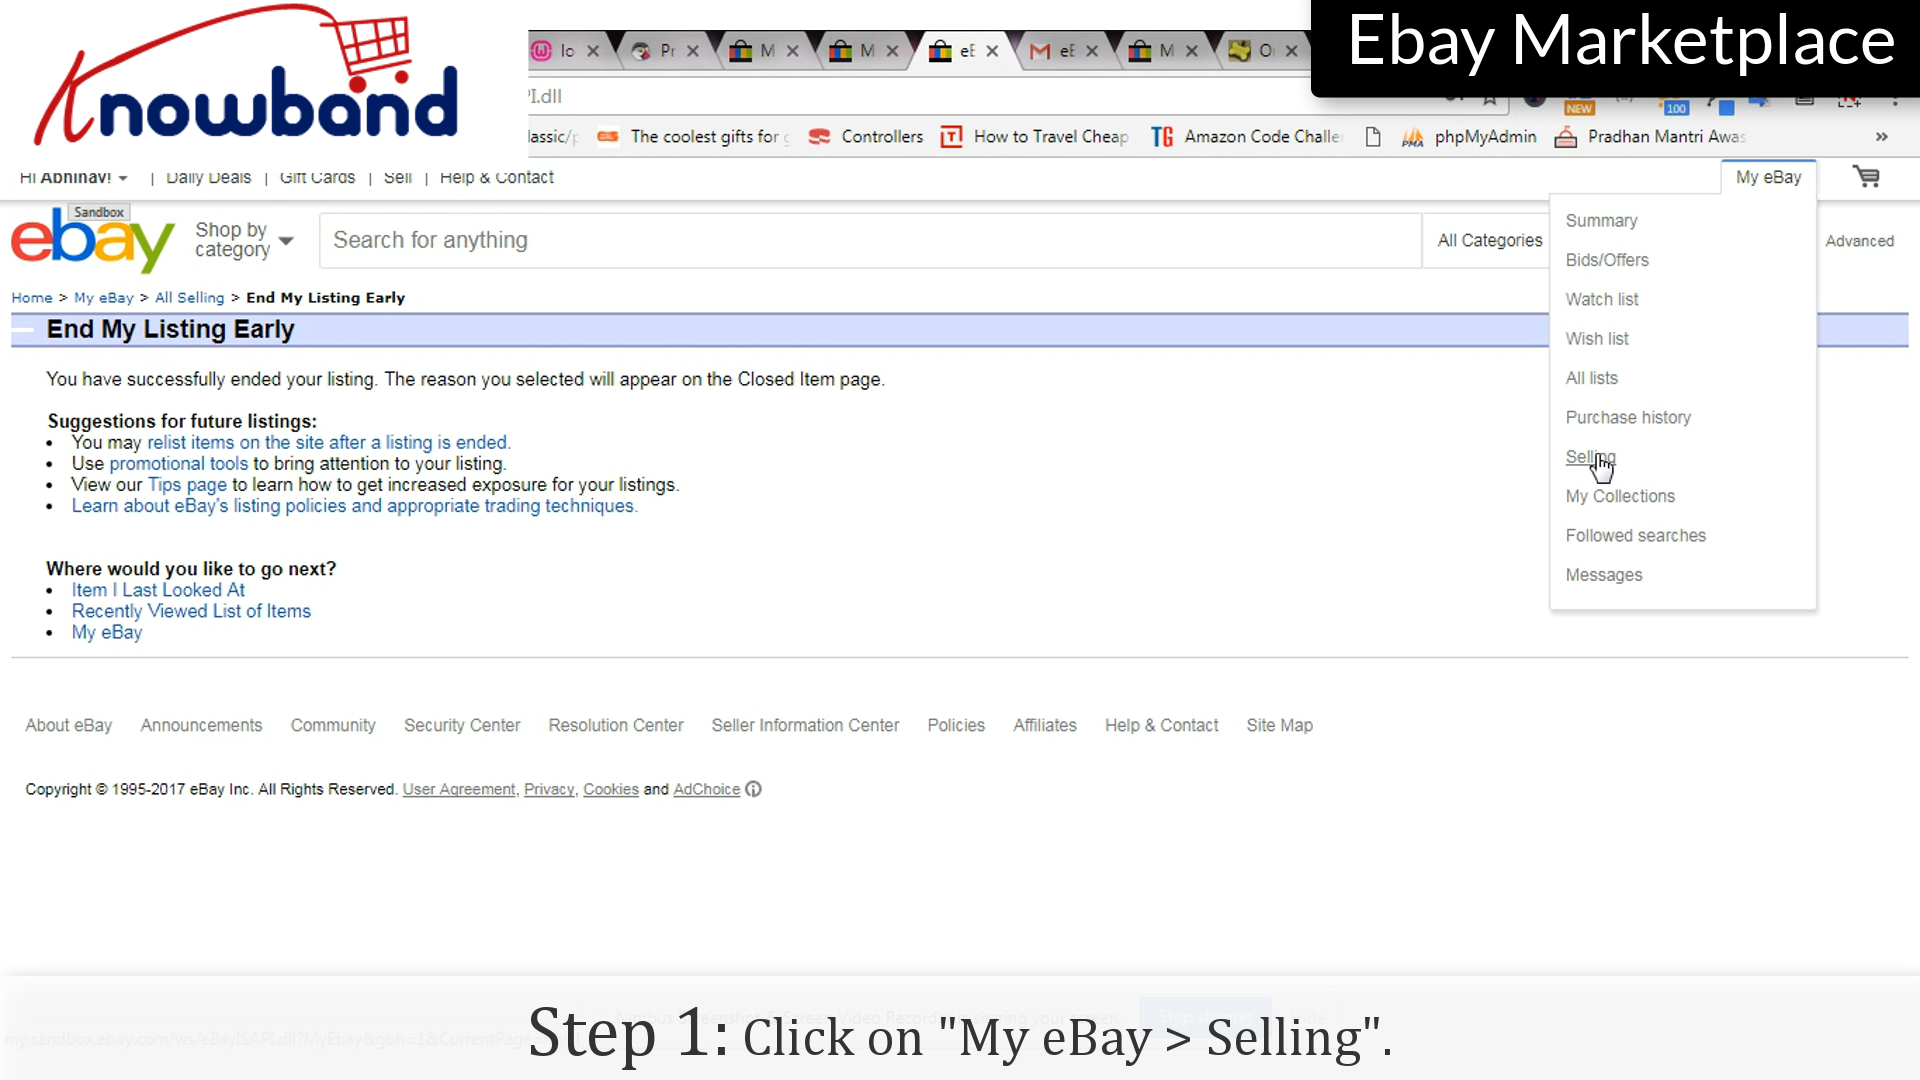
Step 1: Selling
Click on the “My eBay > Selling” option on the menu.
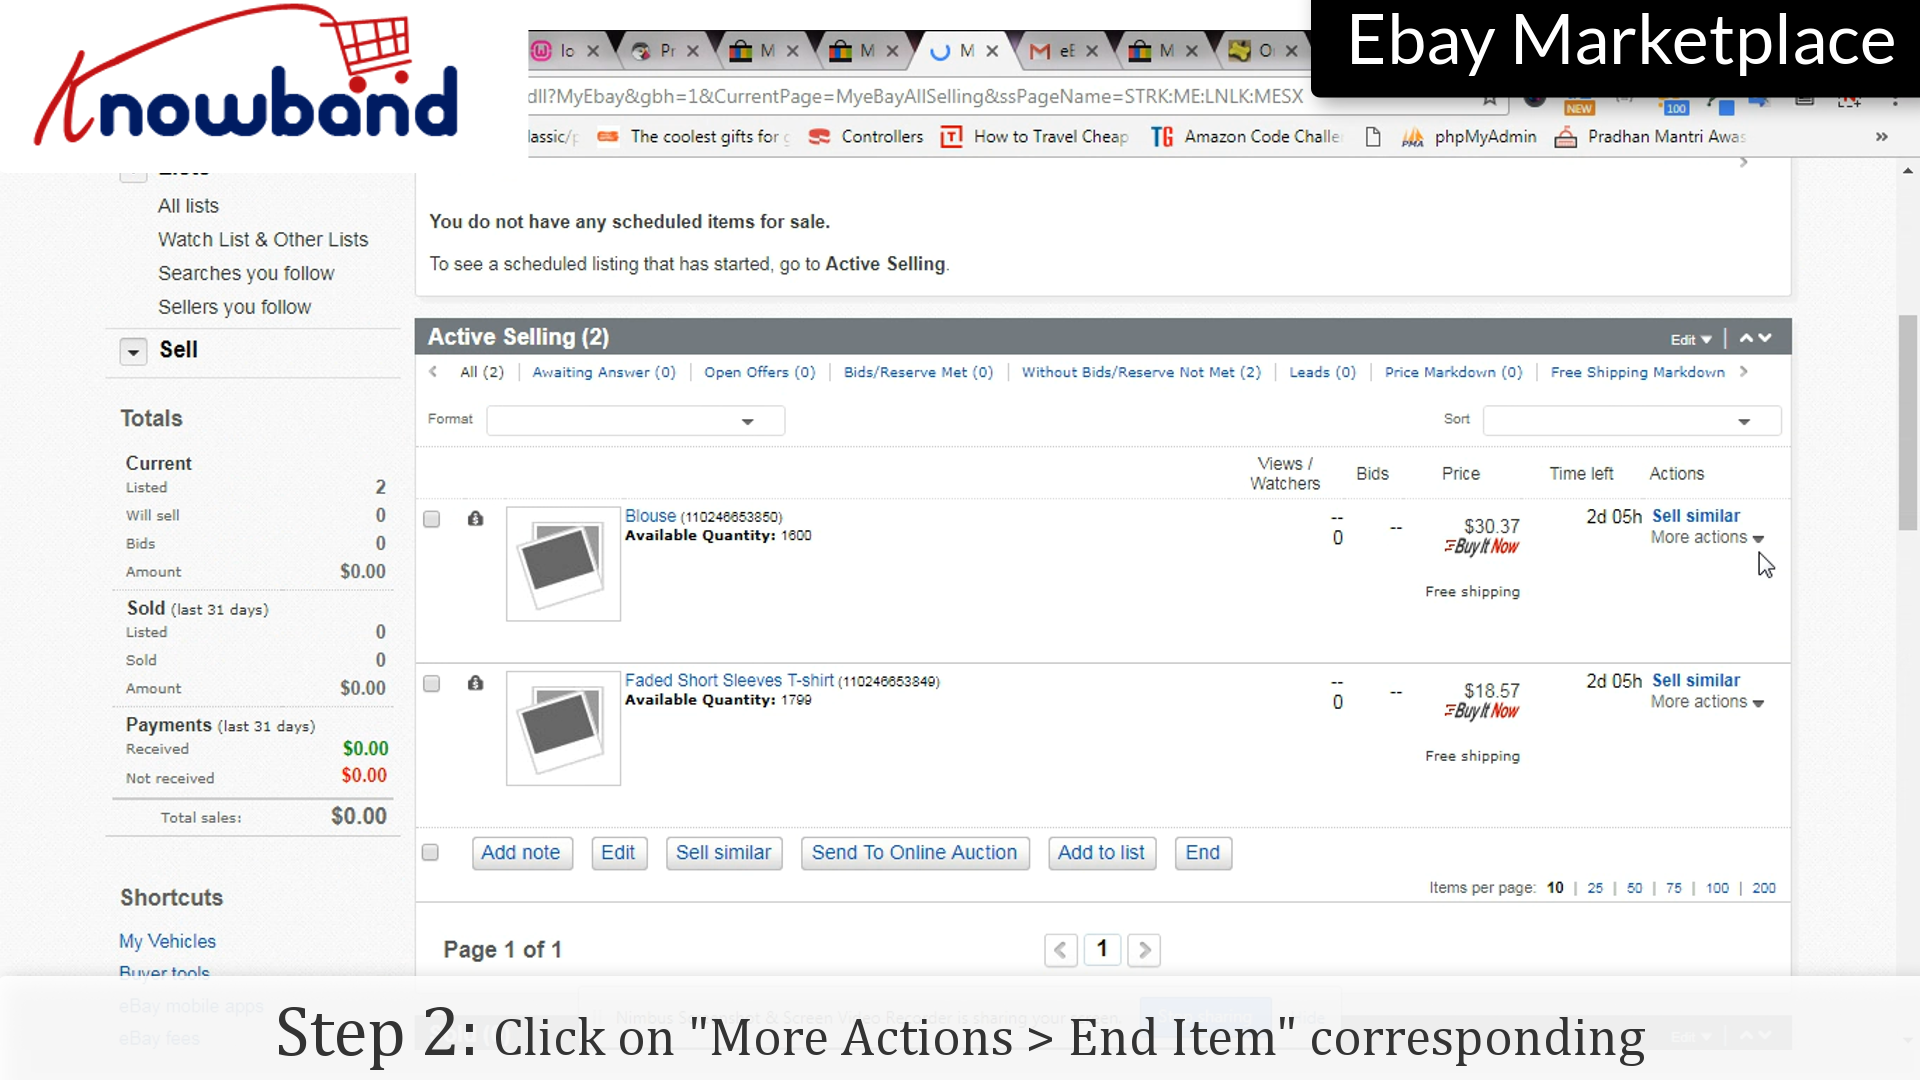
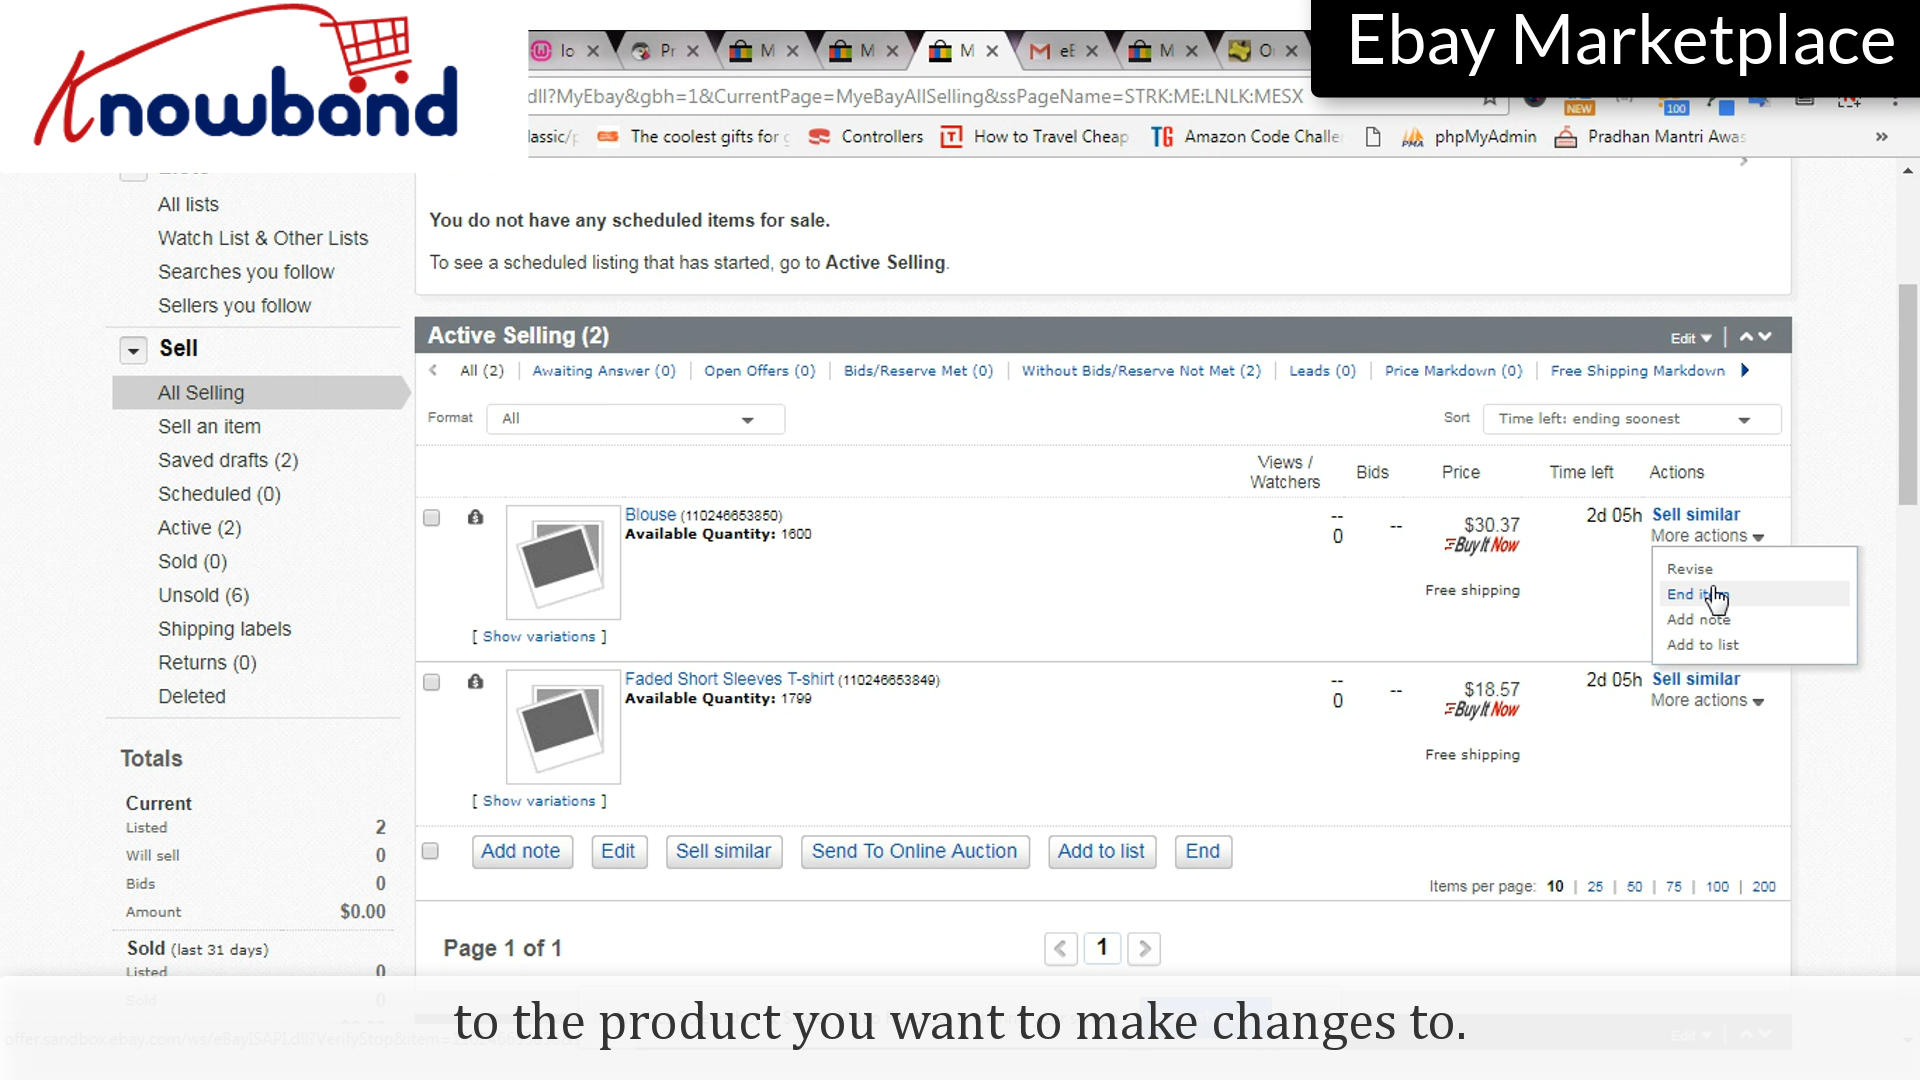
Step 2: End Item
Click on “More Actions” and then in the drop-down menu, click “End Item”.
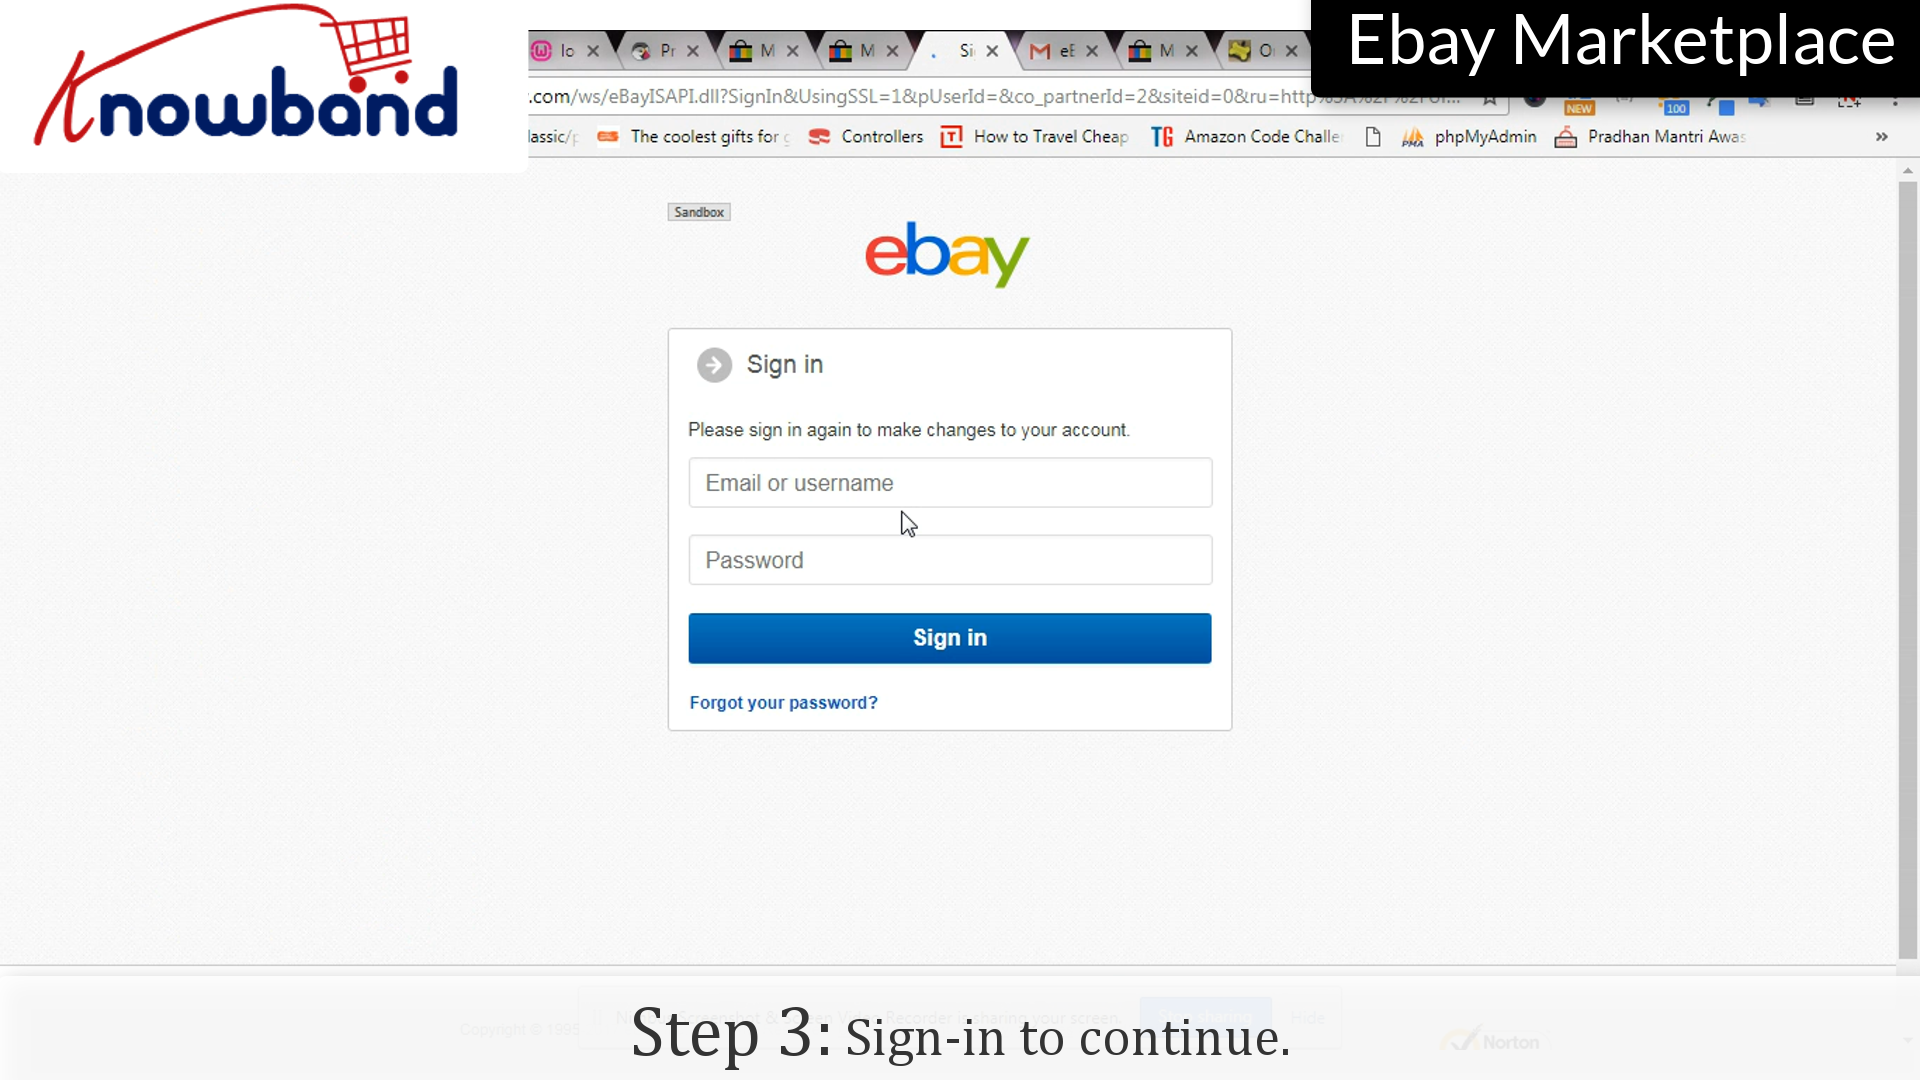
Step 3: Sign-in
Enter your credentials as confirmation to end the listing.
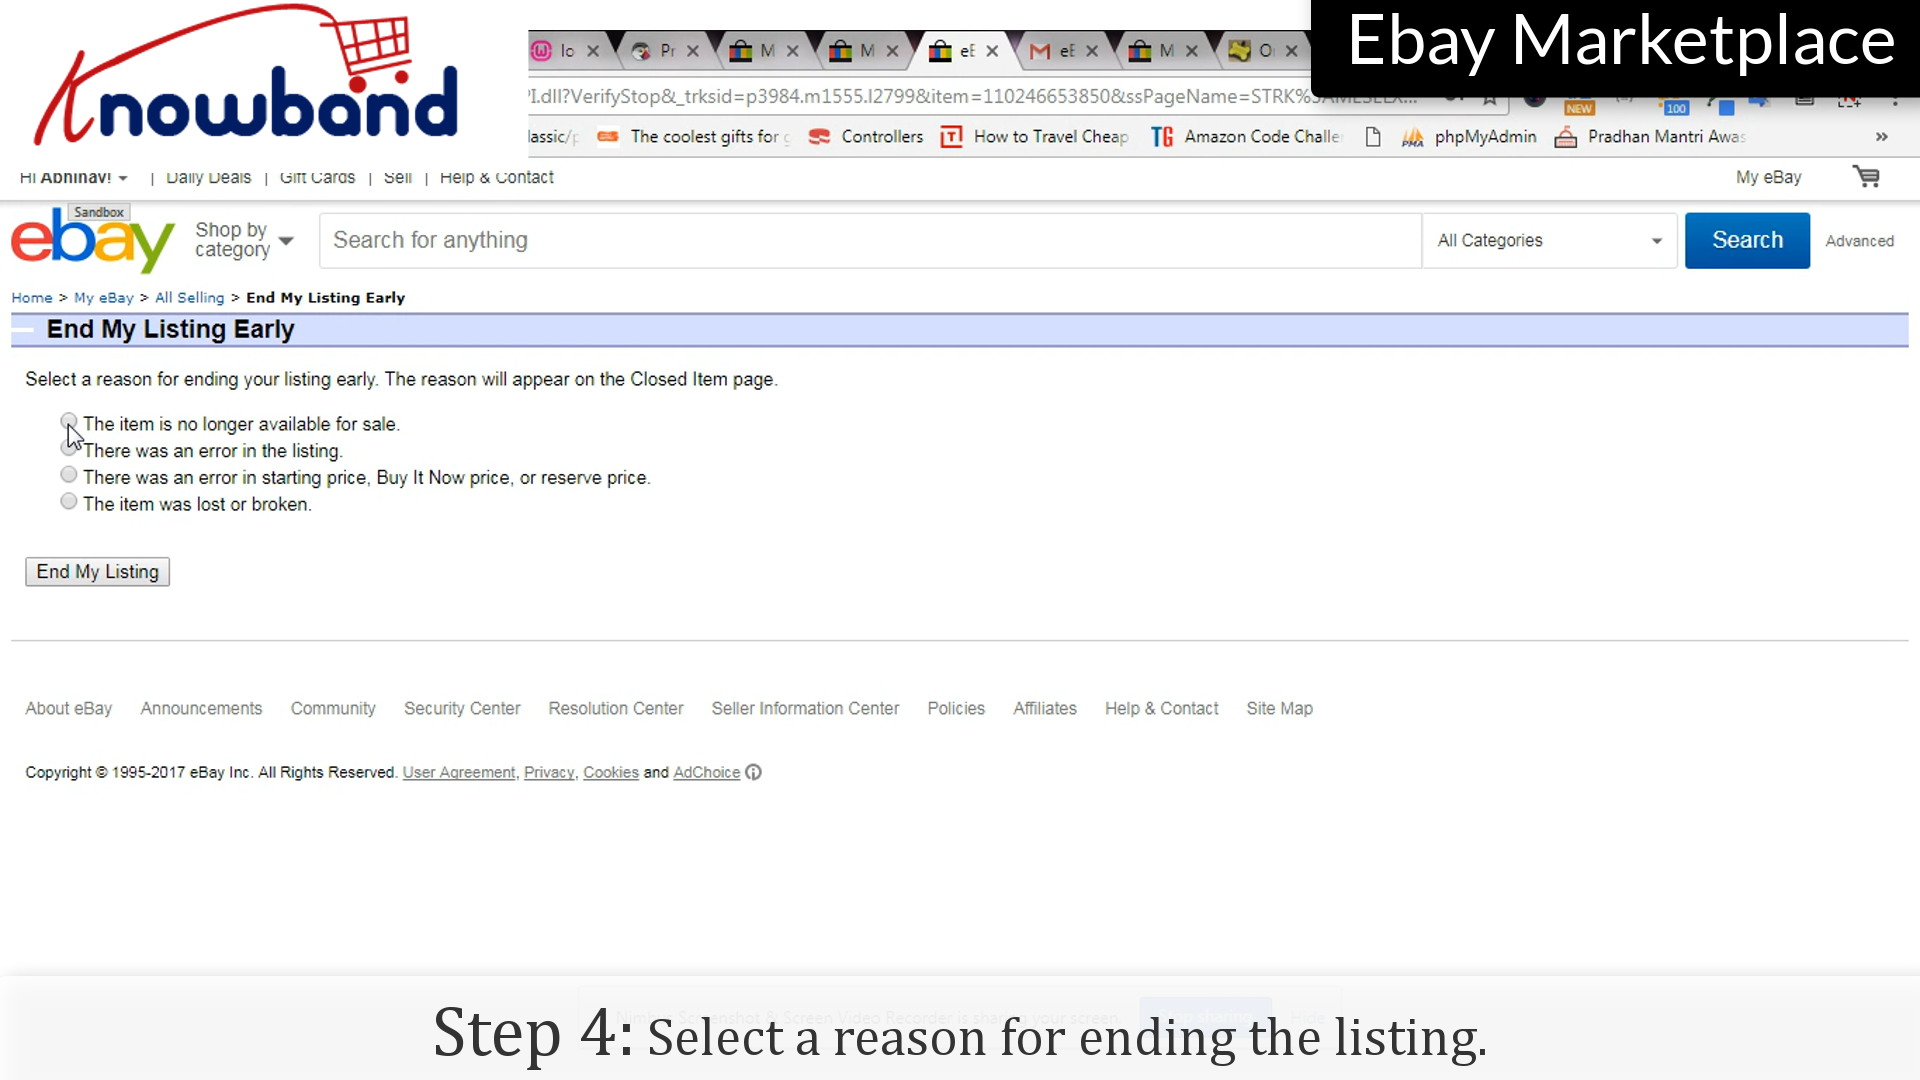
Step 4: Reason
Select any reason to end the listing.
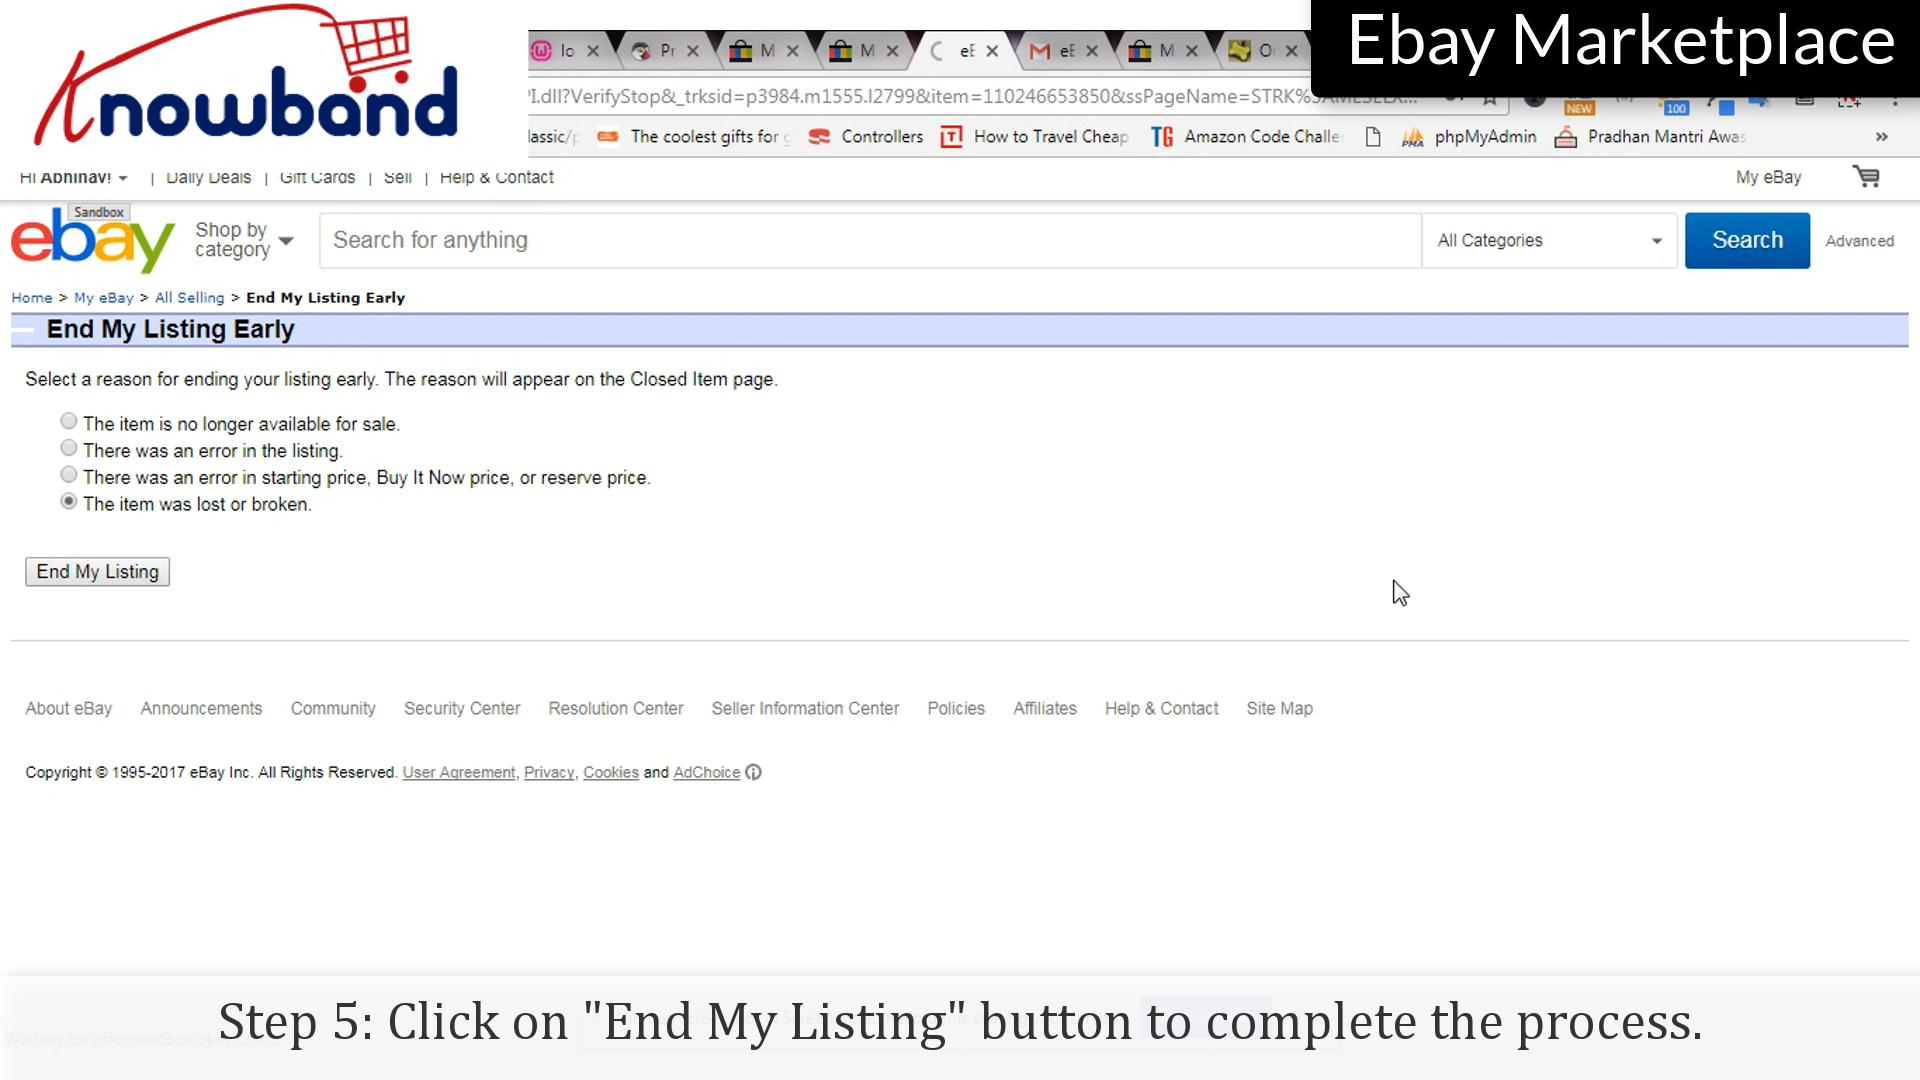
Step 5: End my listing
Click on the “End My Listing” button to end the listing.
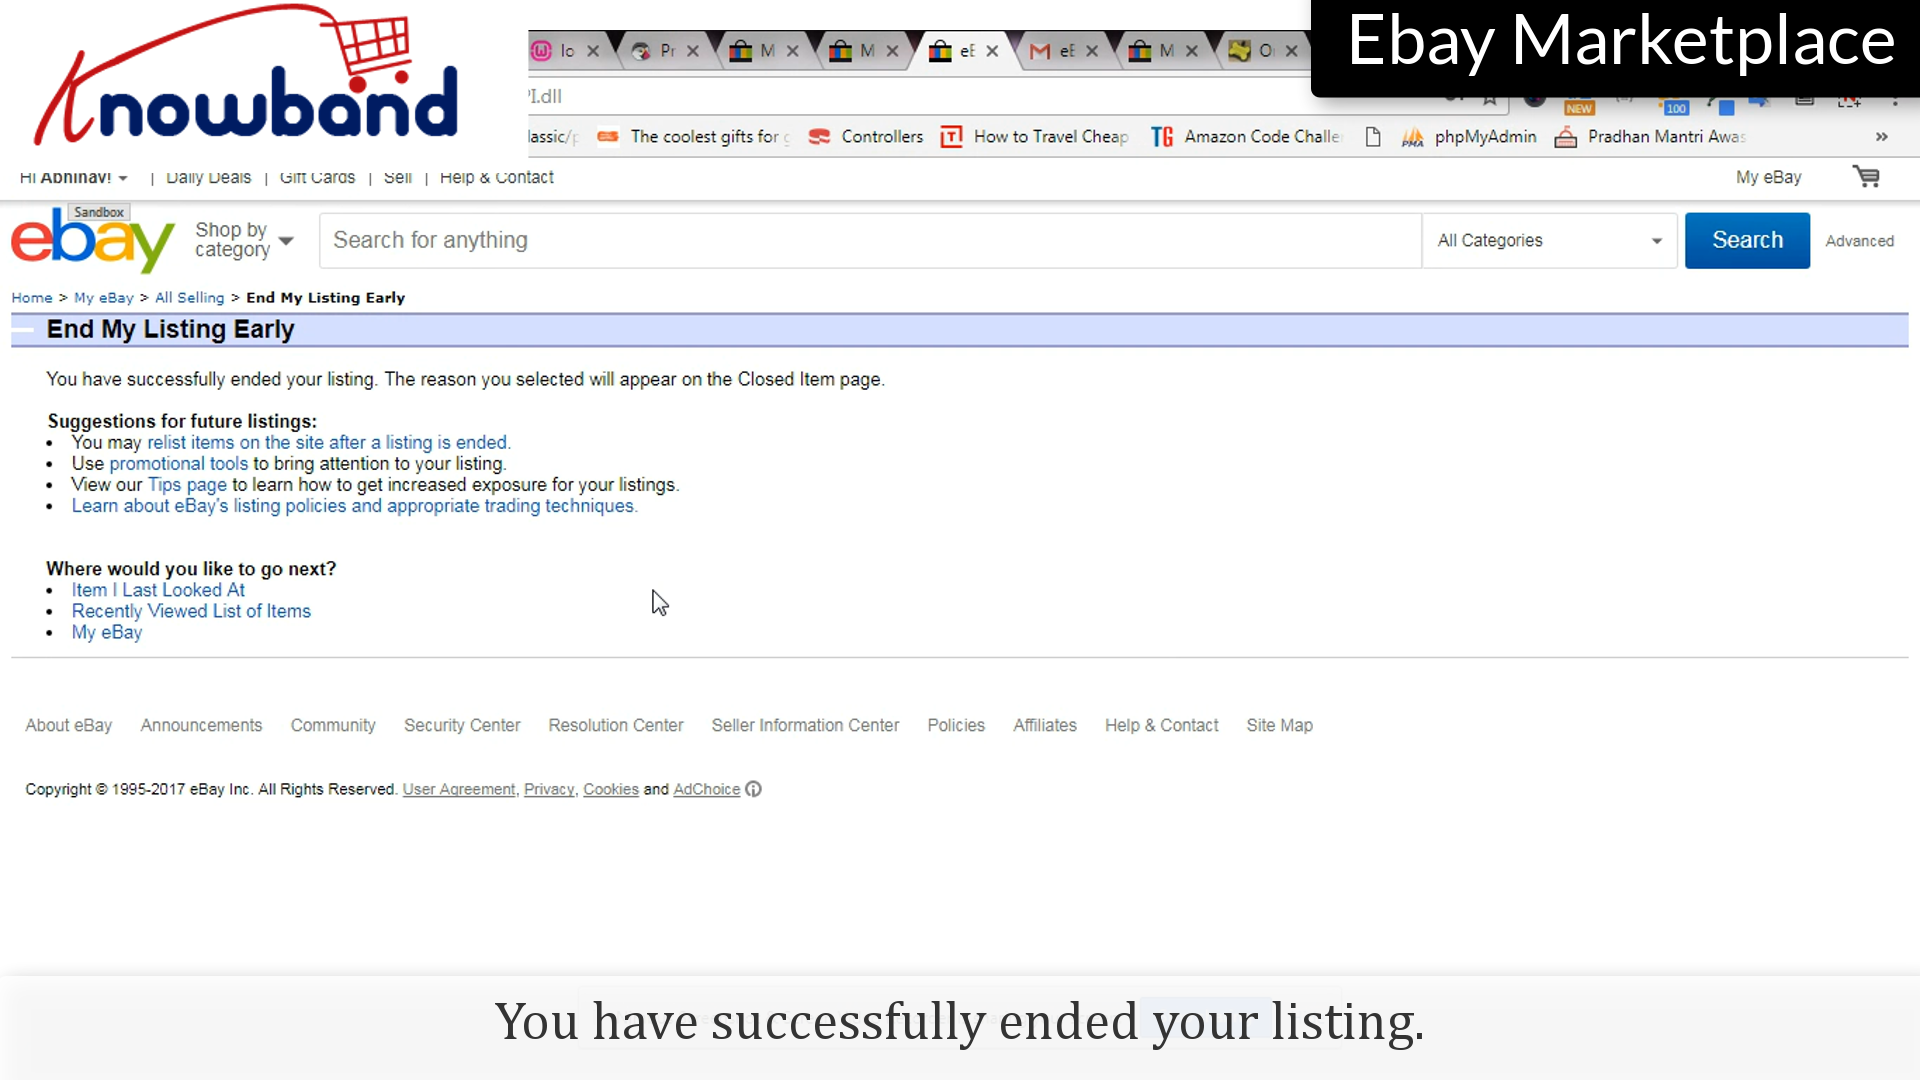
You have successfully ended the listing.
Follow the points to re-list the item:
Step 1: Selling
Click on “My eBay > Selling” option to re-list the item:
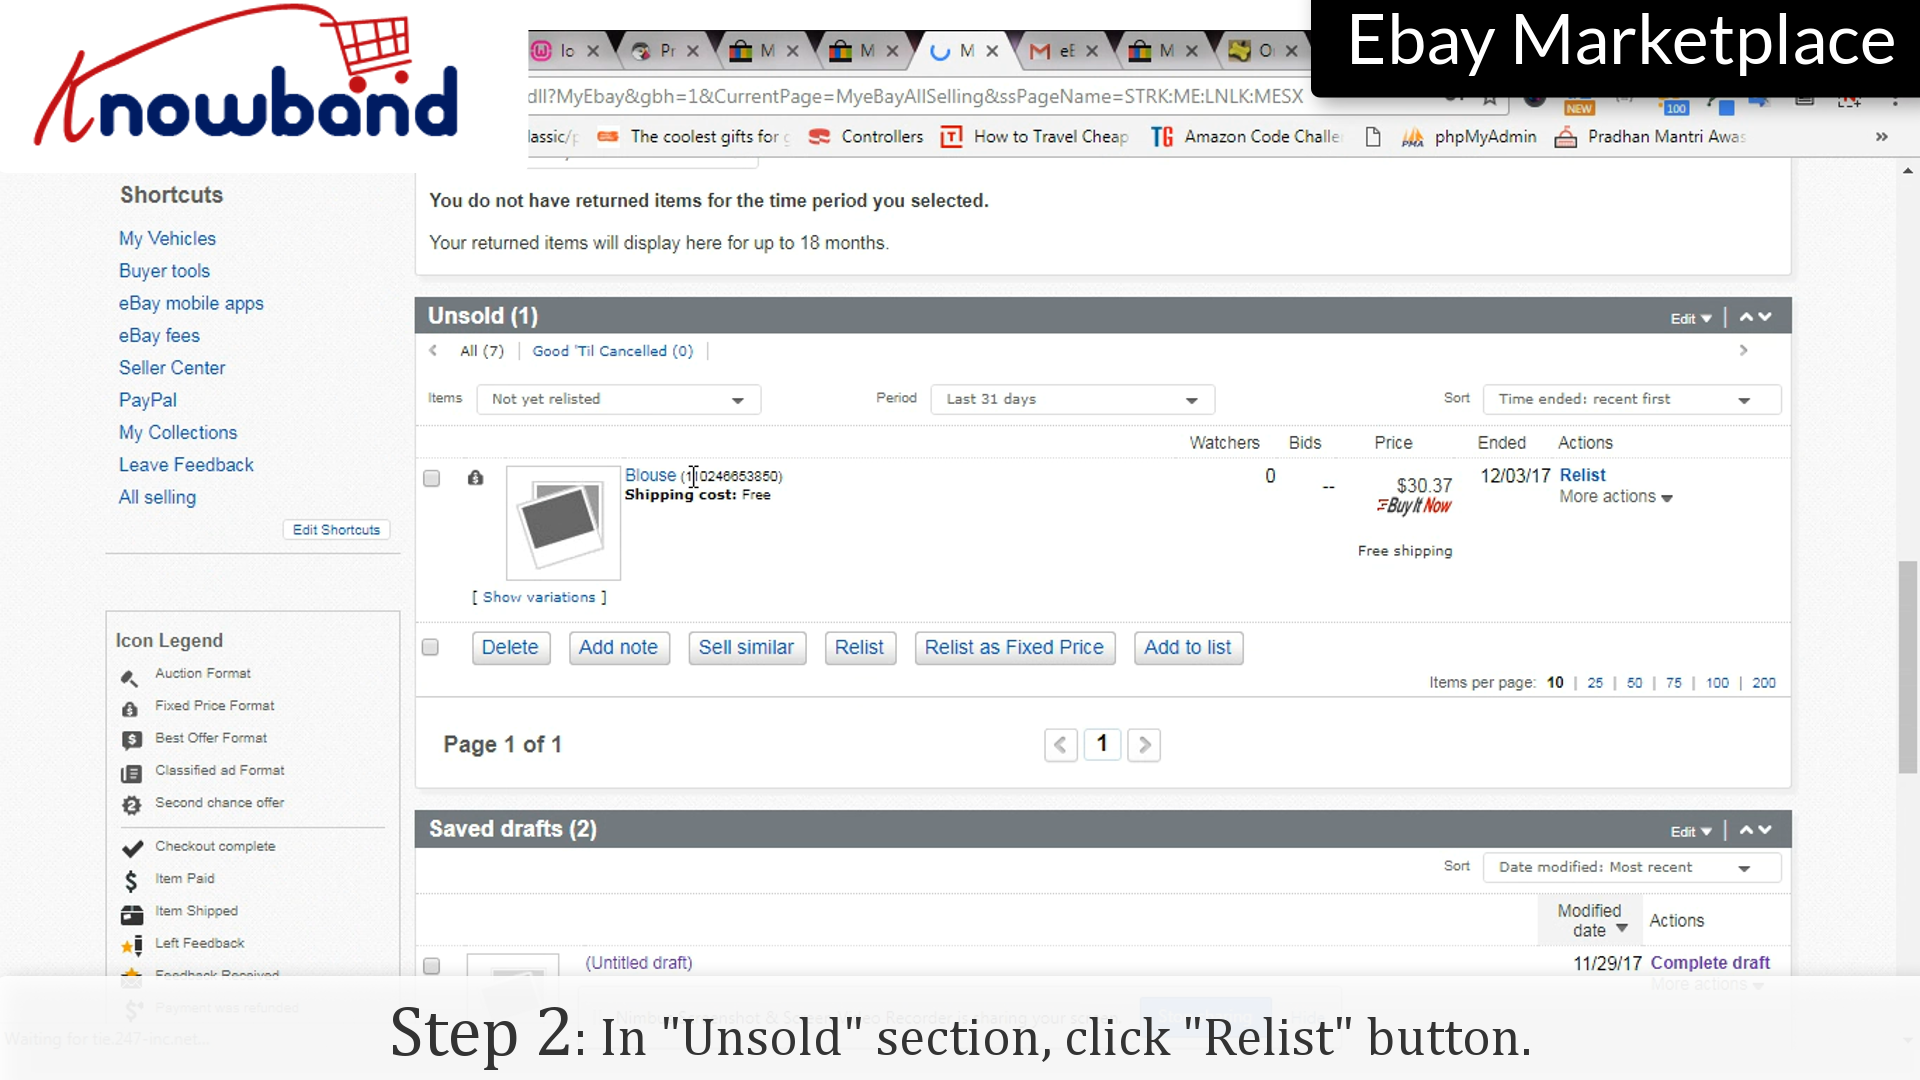
Step 2: Relist
Under the “Unsold” section, click the “Relist” option corresponding to the product you want to relist.
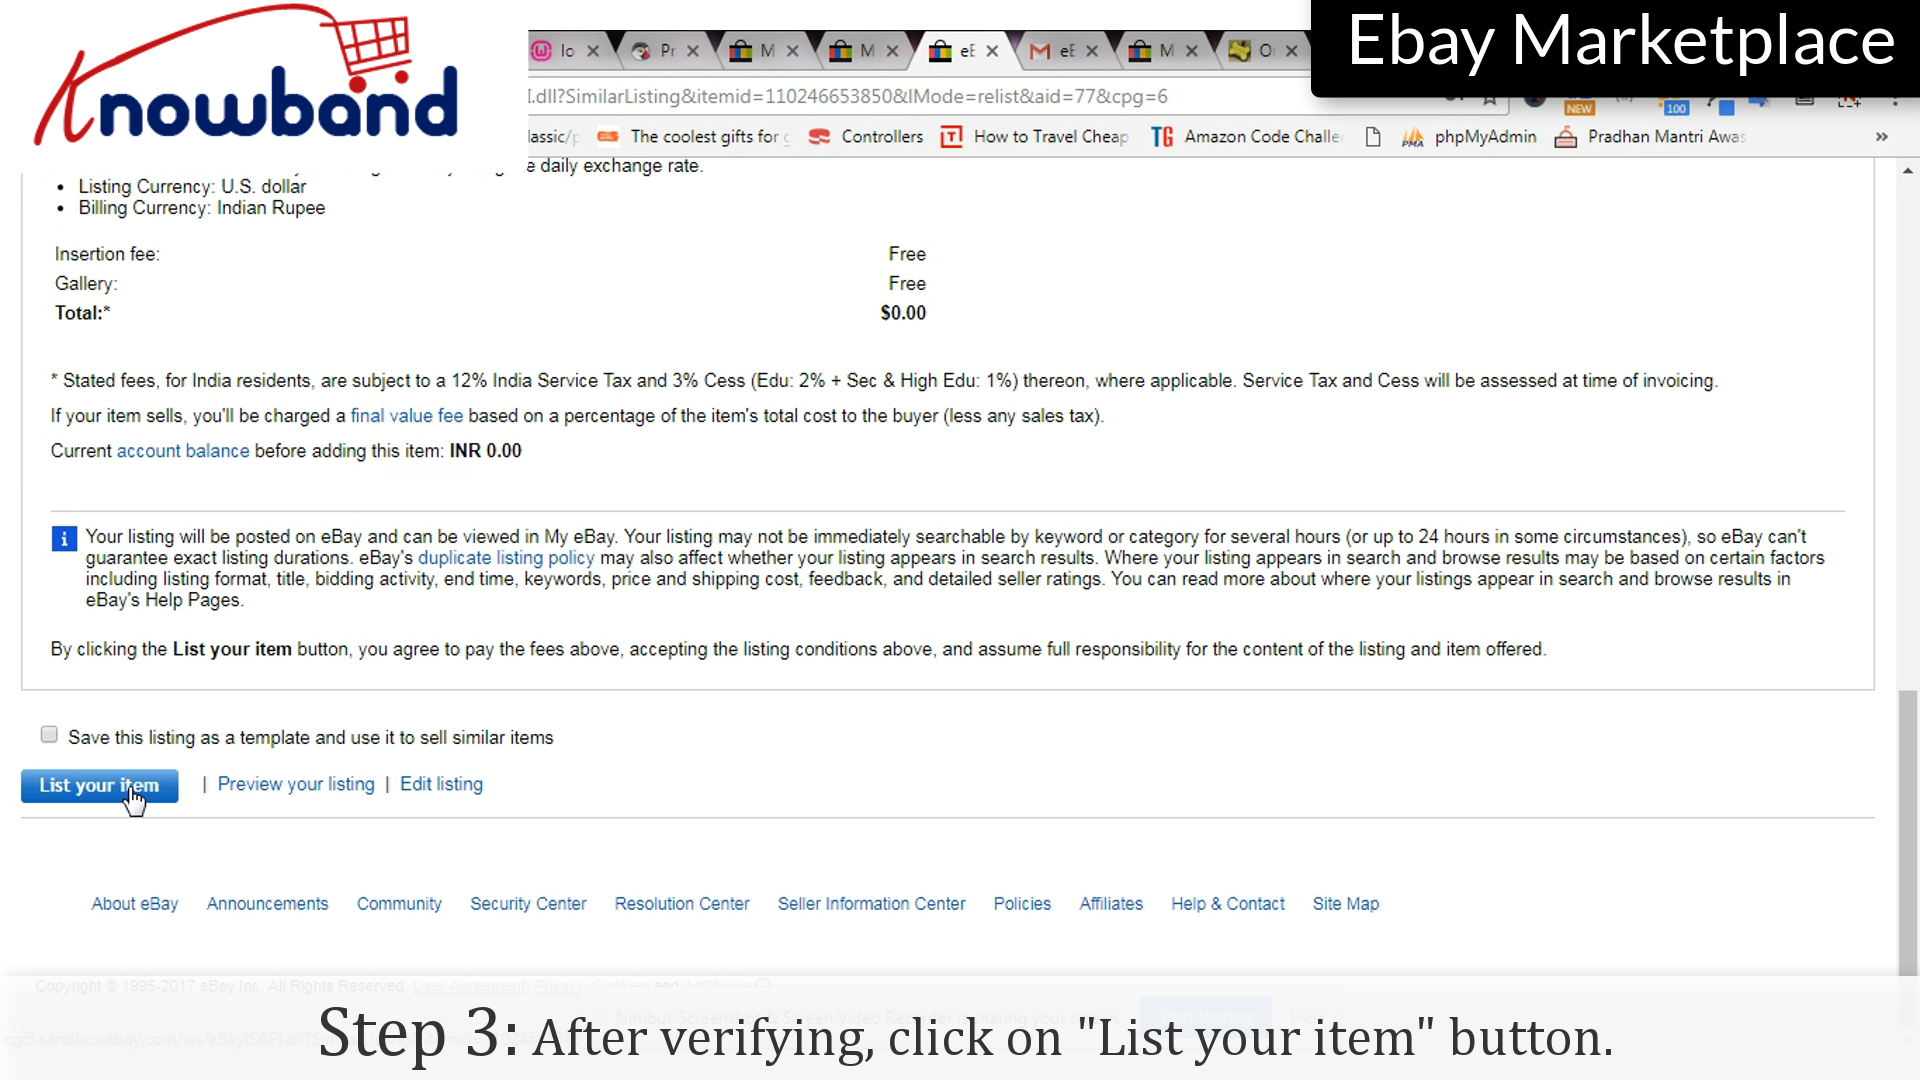
Step 3: Verify
After verification, click on “List my item” to complete the process.
Upgrade Now: Prestashop eBay Connector v2.2.1 is Here!
Great news for Prestashop store owners! Knowband has just released out v2.2.1 of the Prestashop eBay Marketplace Connector, and it’s a game-changer for marketplace management.
This release focuses on enhancing operational reliability between eBay and the prestashop store and preventing common eBay integration issues. The Rate Limit API Monitoring feature ensures your API usage is fully tracked, preventing disruptions that could affect your product listings or order synchronisation.
The Inventory Comparison is another highlight, allowing you to manage your Prestashop stock with your eBay listings in real-time. This proactive feature ensures your customers never encounter “out-of-stock” surprises and keeps your inventory accurate across platforms.
Don’t wait! Upgrading to v2.2.1 now ensures your store stays ahead, saves you time, and maximizes sales potential. Act fast before any missed opportunities!
When you have successfully created a seller account on eBay Marketplace, you need to add products in your shop. Adding the products in your cart is an easy process with the following steps:
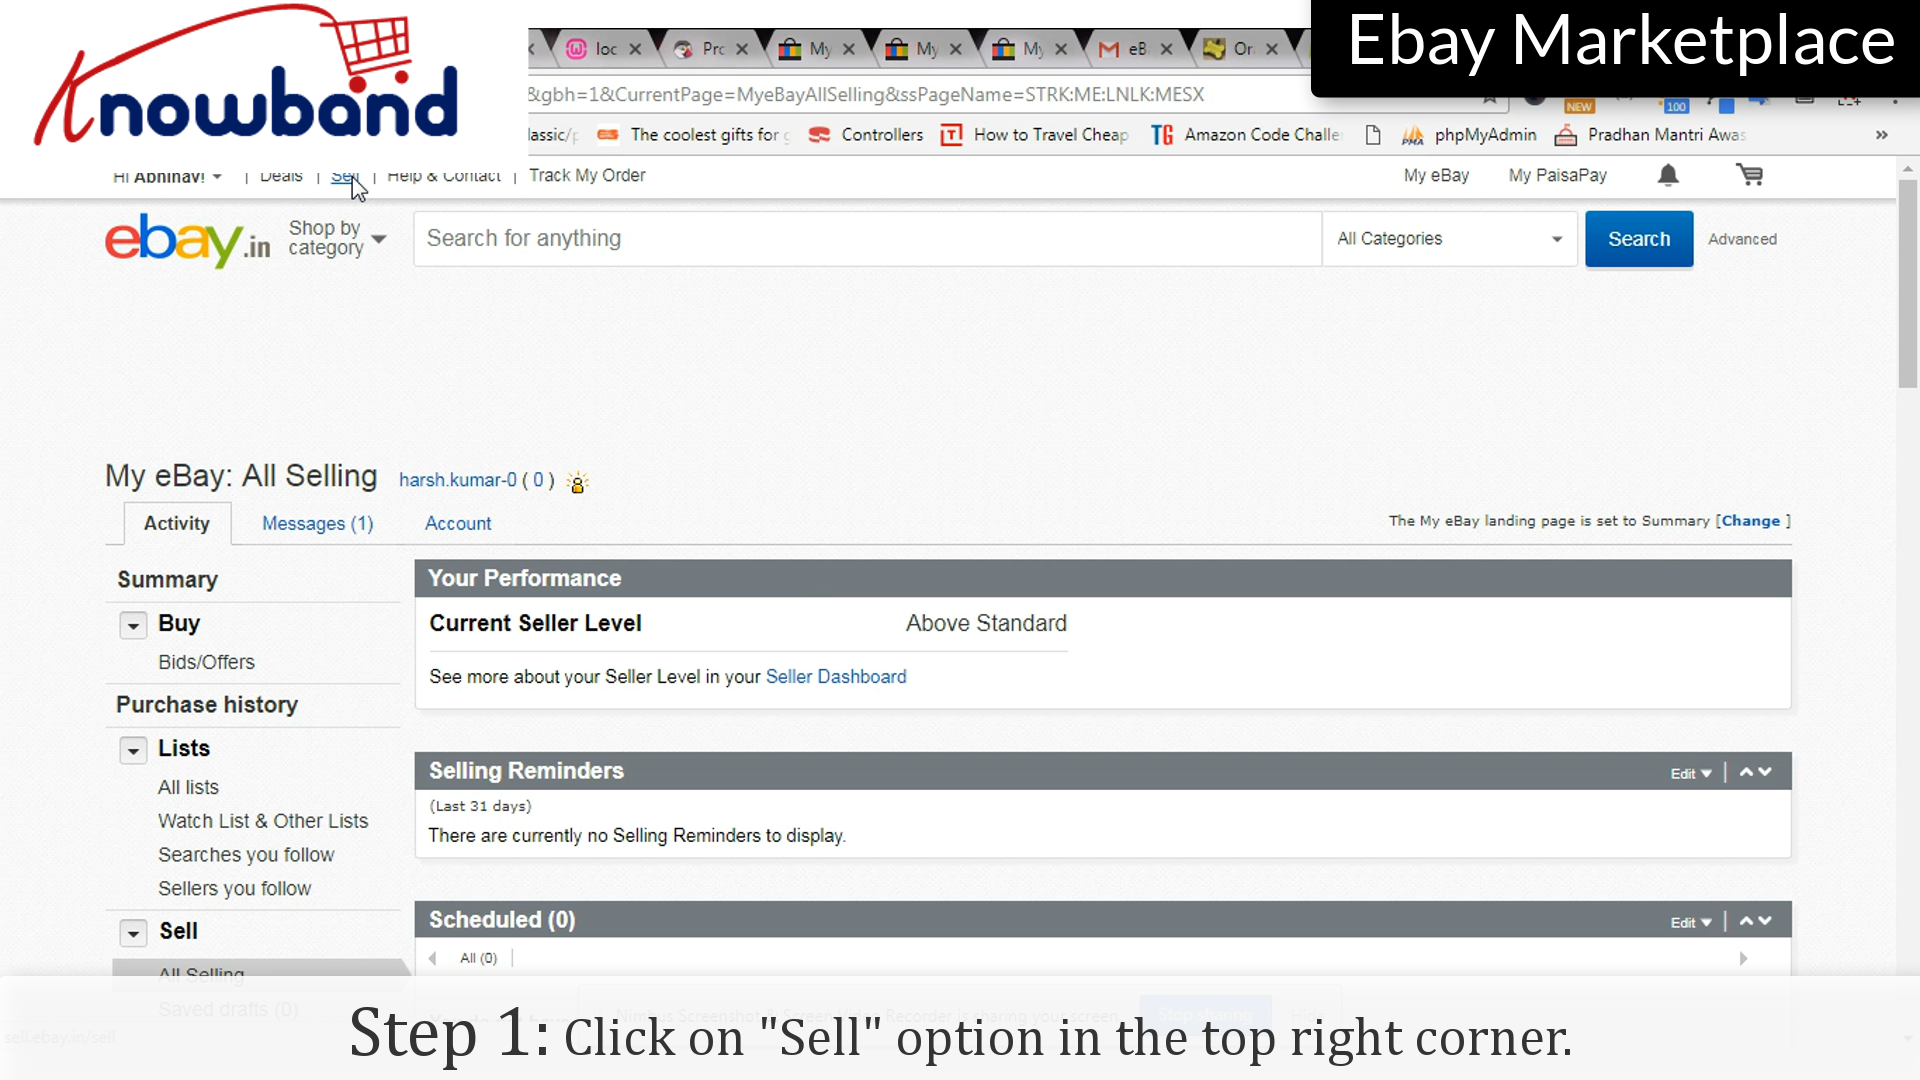
Step 1: Sell option
Click on the “Sell” option in the top right corner.
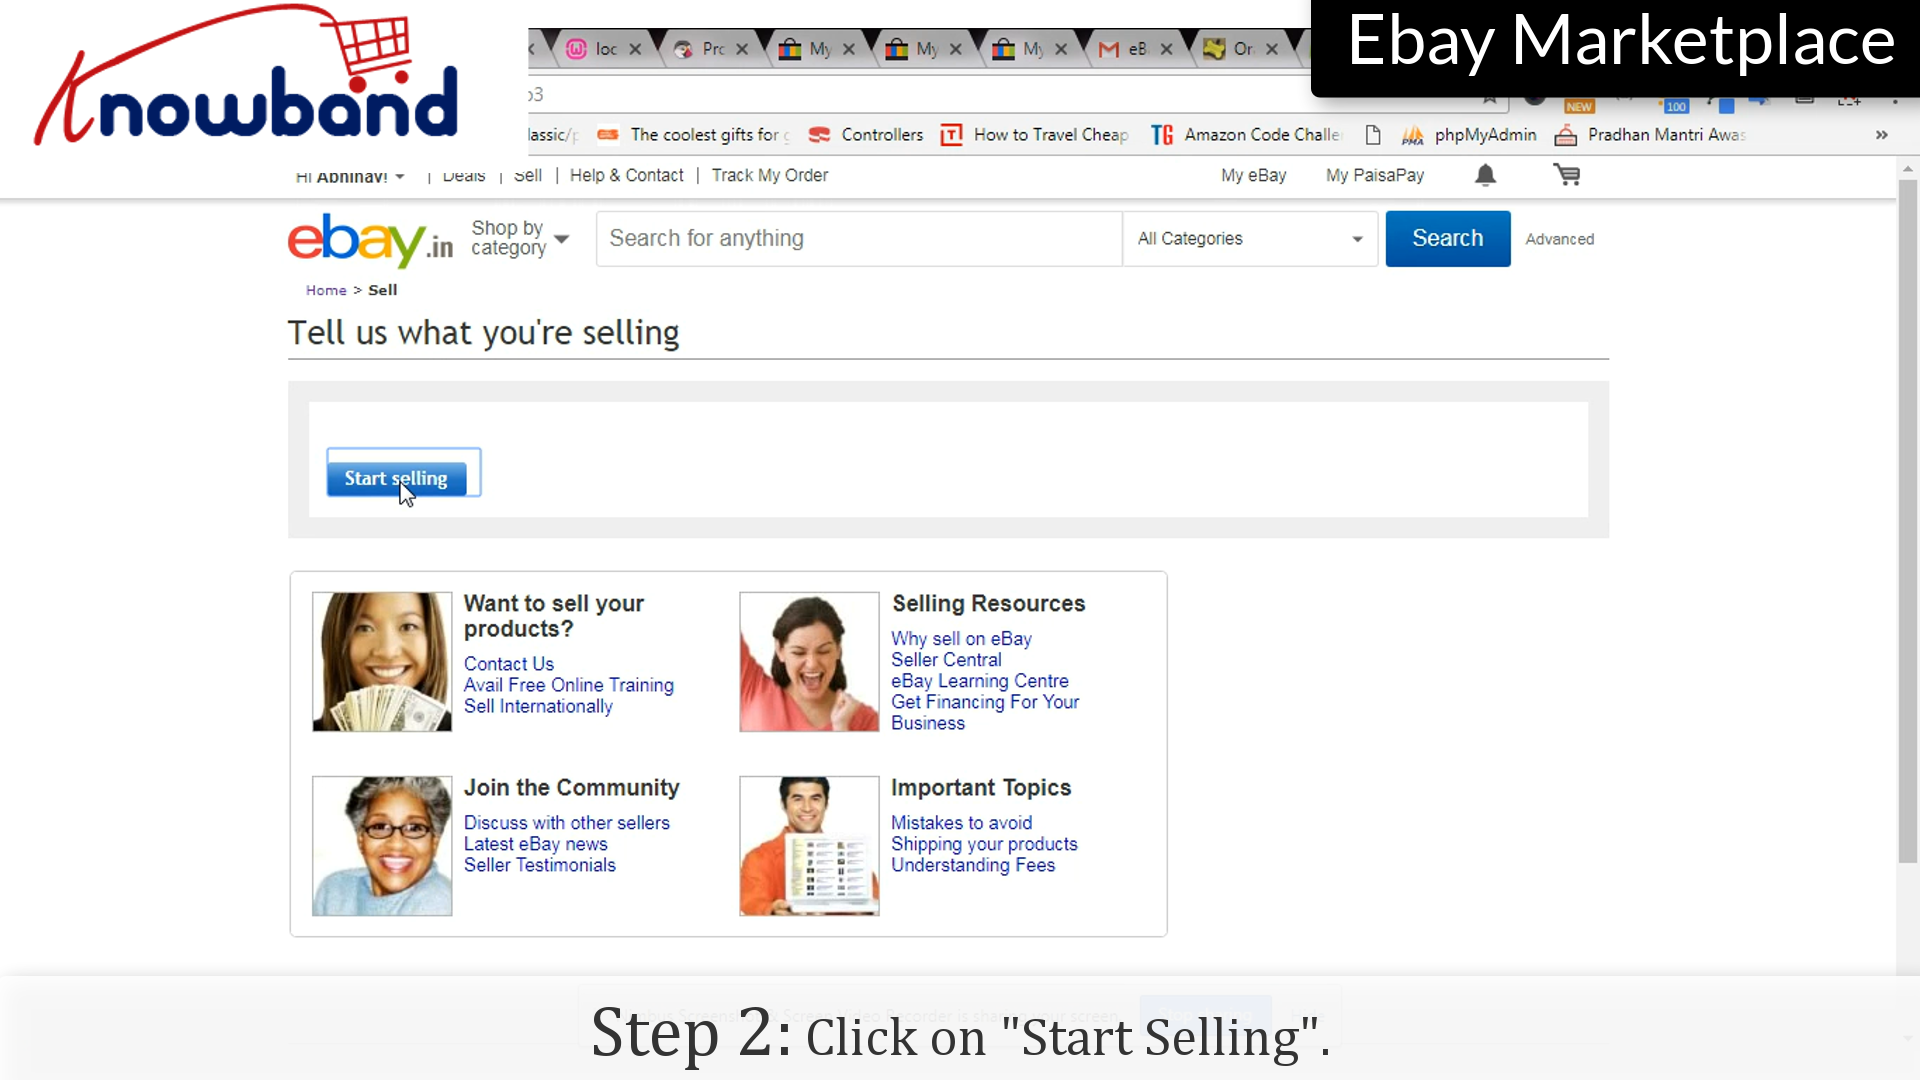
Step 2: Start Selling
Click on the “Start Selling” option to start the process.
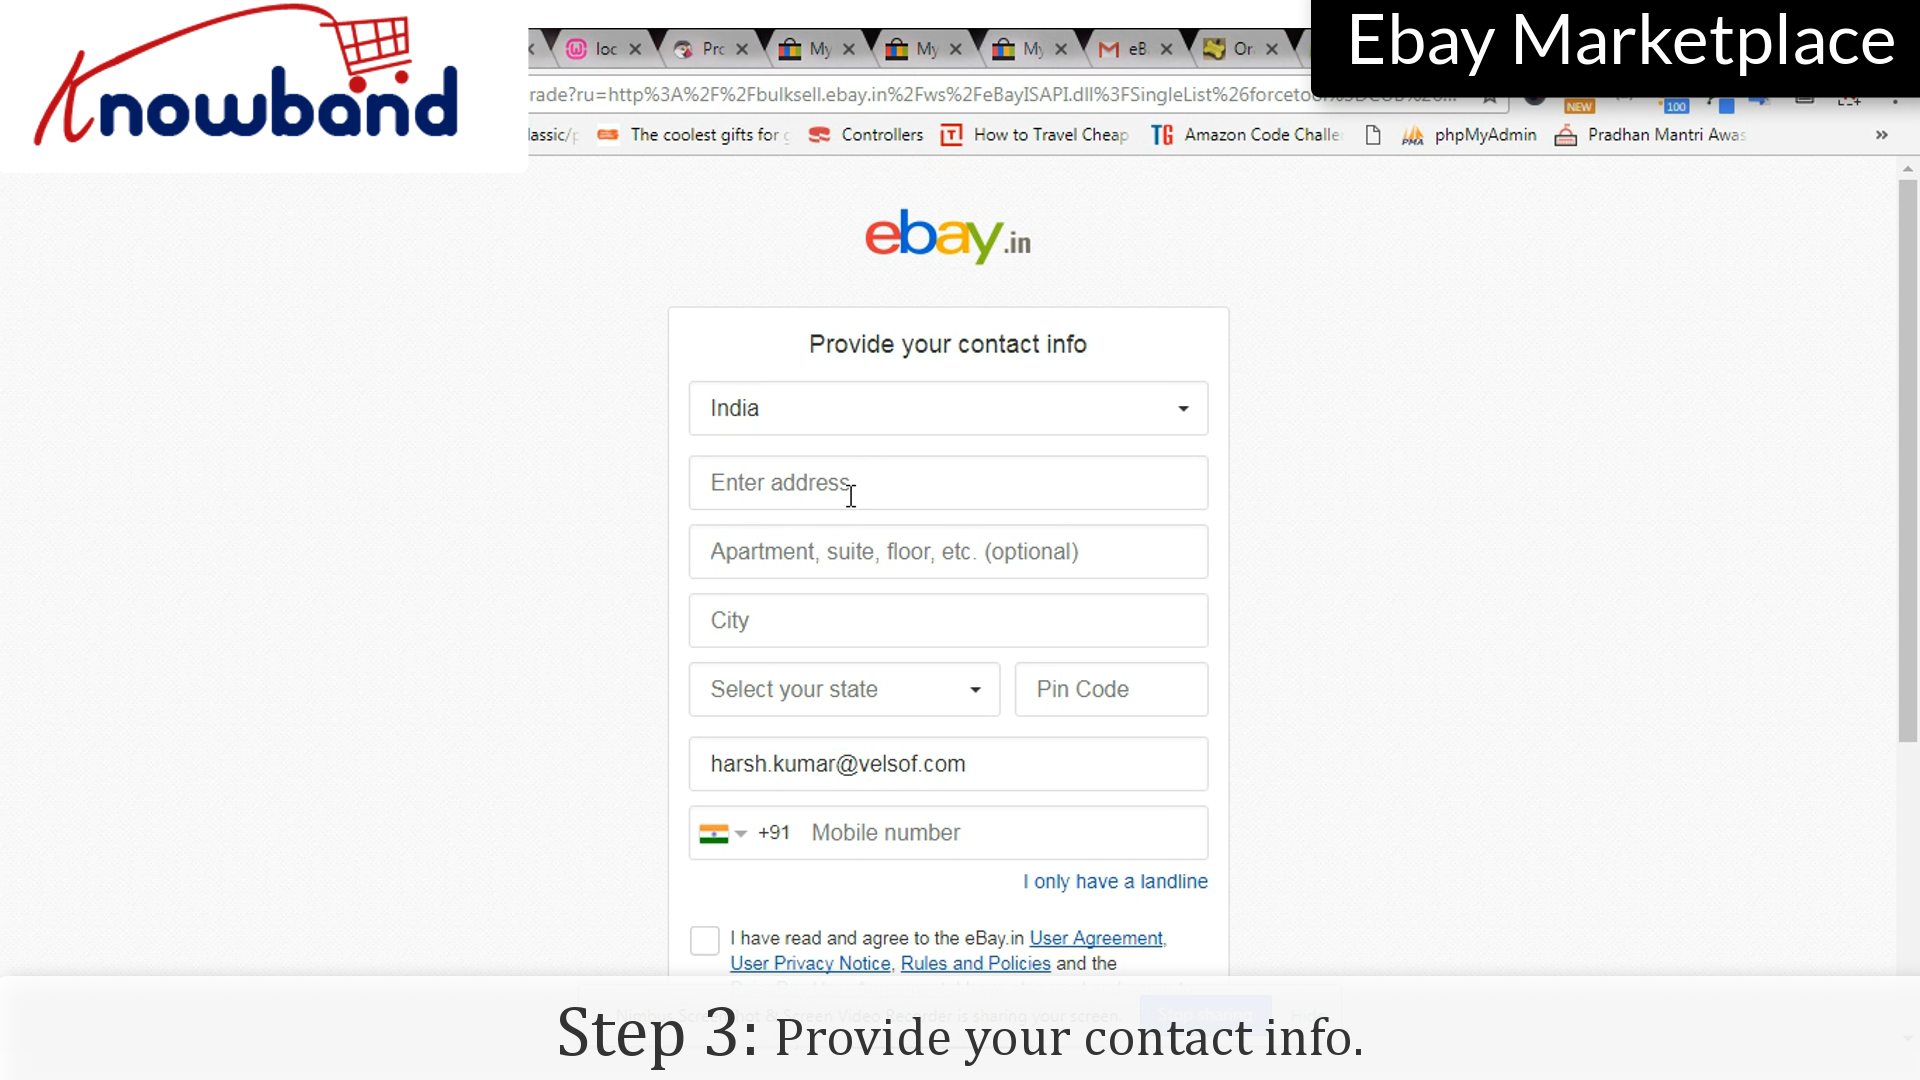
Step 3: Contact info
Provide your contact info so that eBay can contact you in case of any issue with the products added.
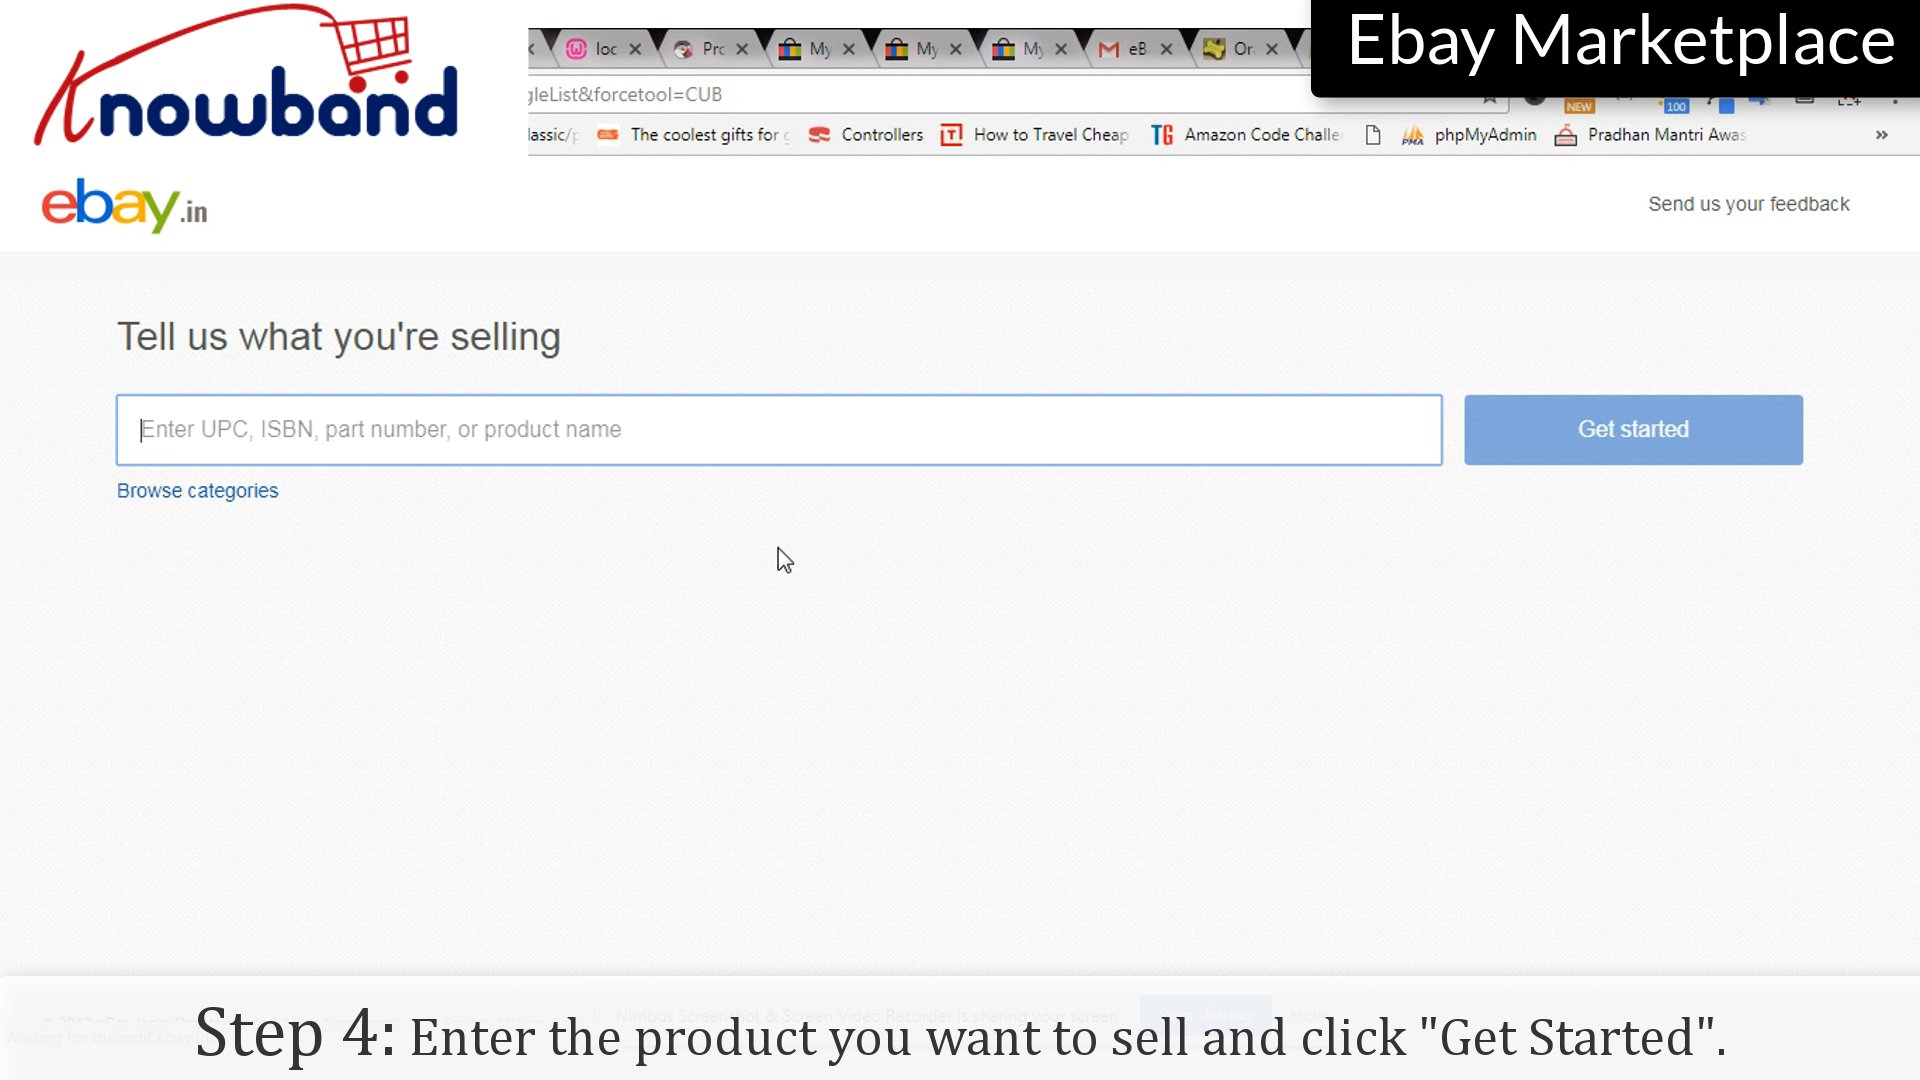
Step 4: Get Started
Enter the product you want to sell and click “Get started”.
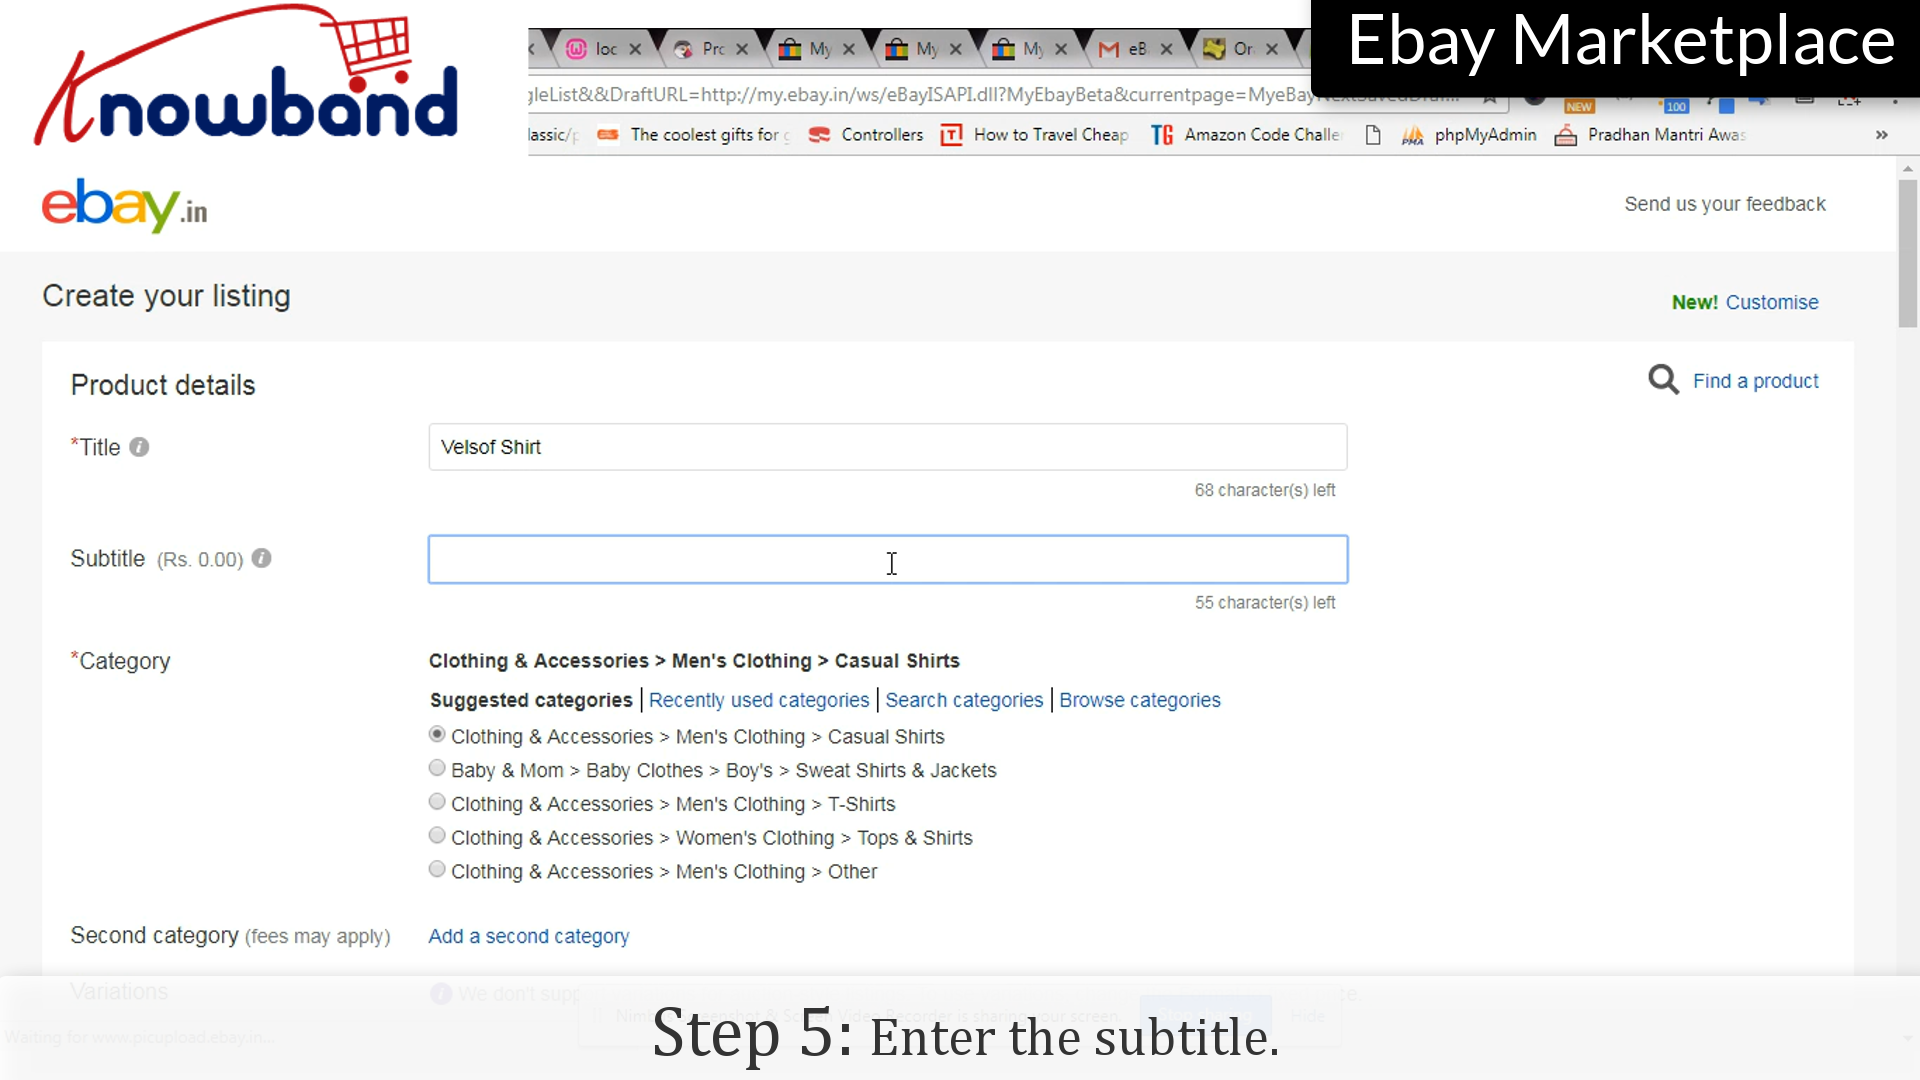
Step 5: Subtitle
Enter the subtitle of the product/listing.
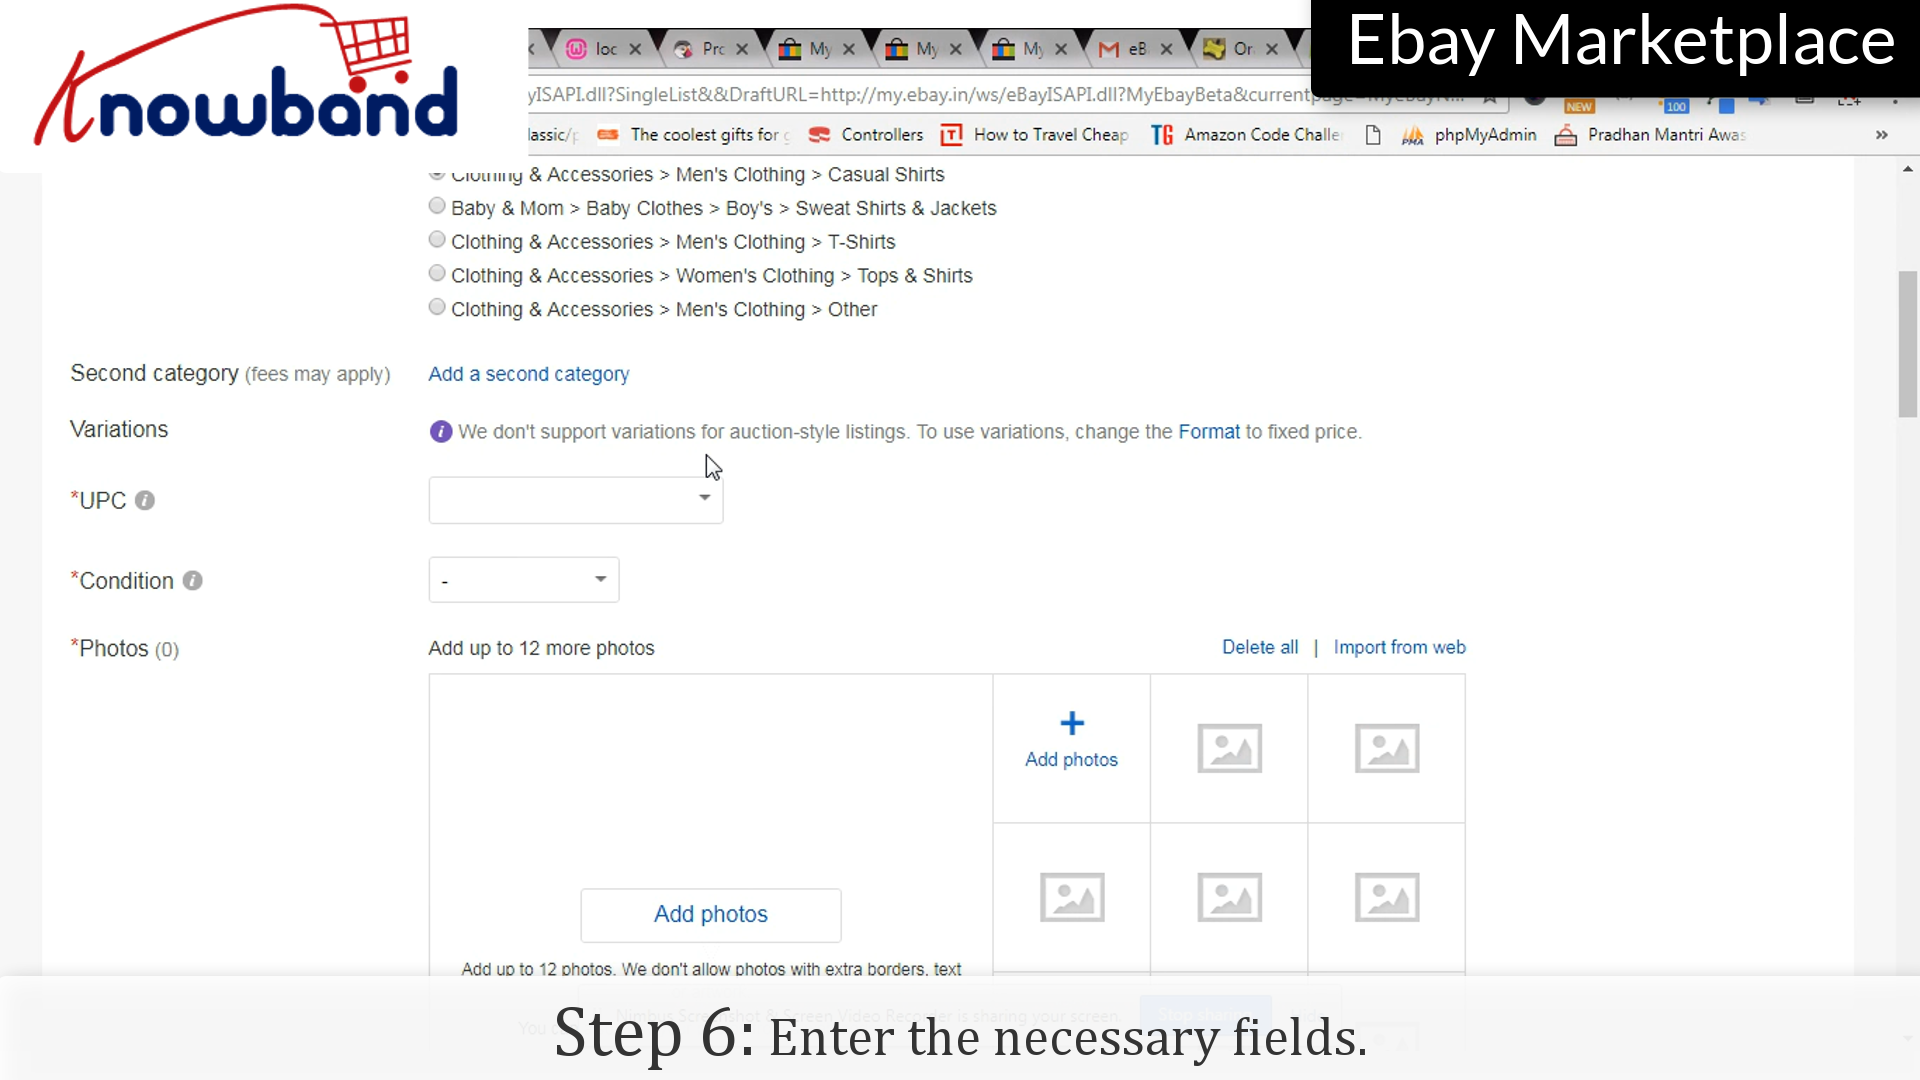
Step 6: Fill Up the form
Enter the necessary details which you want to display to the user.
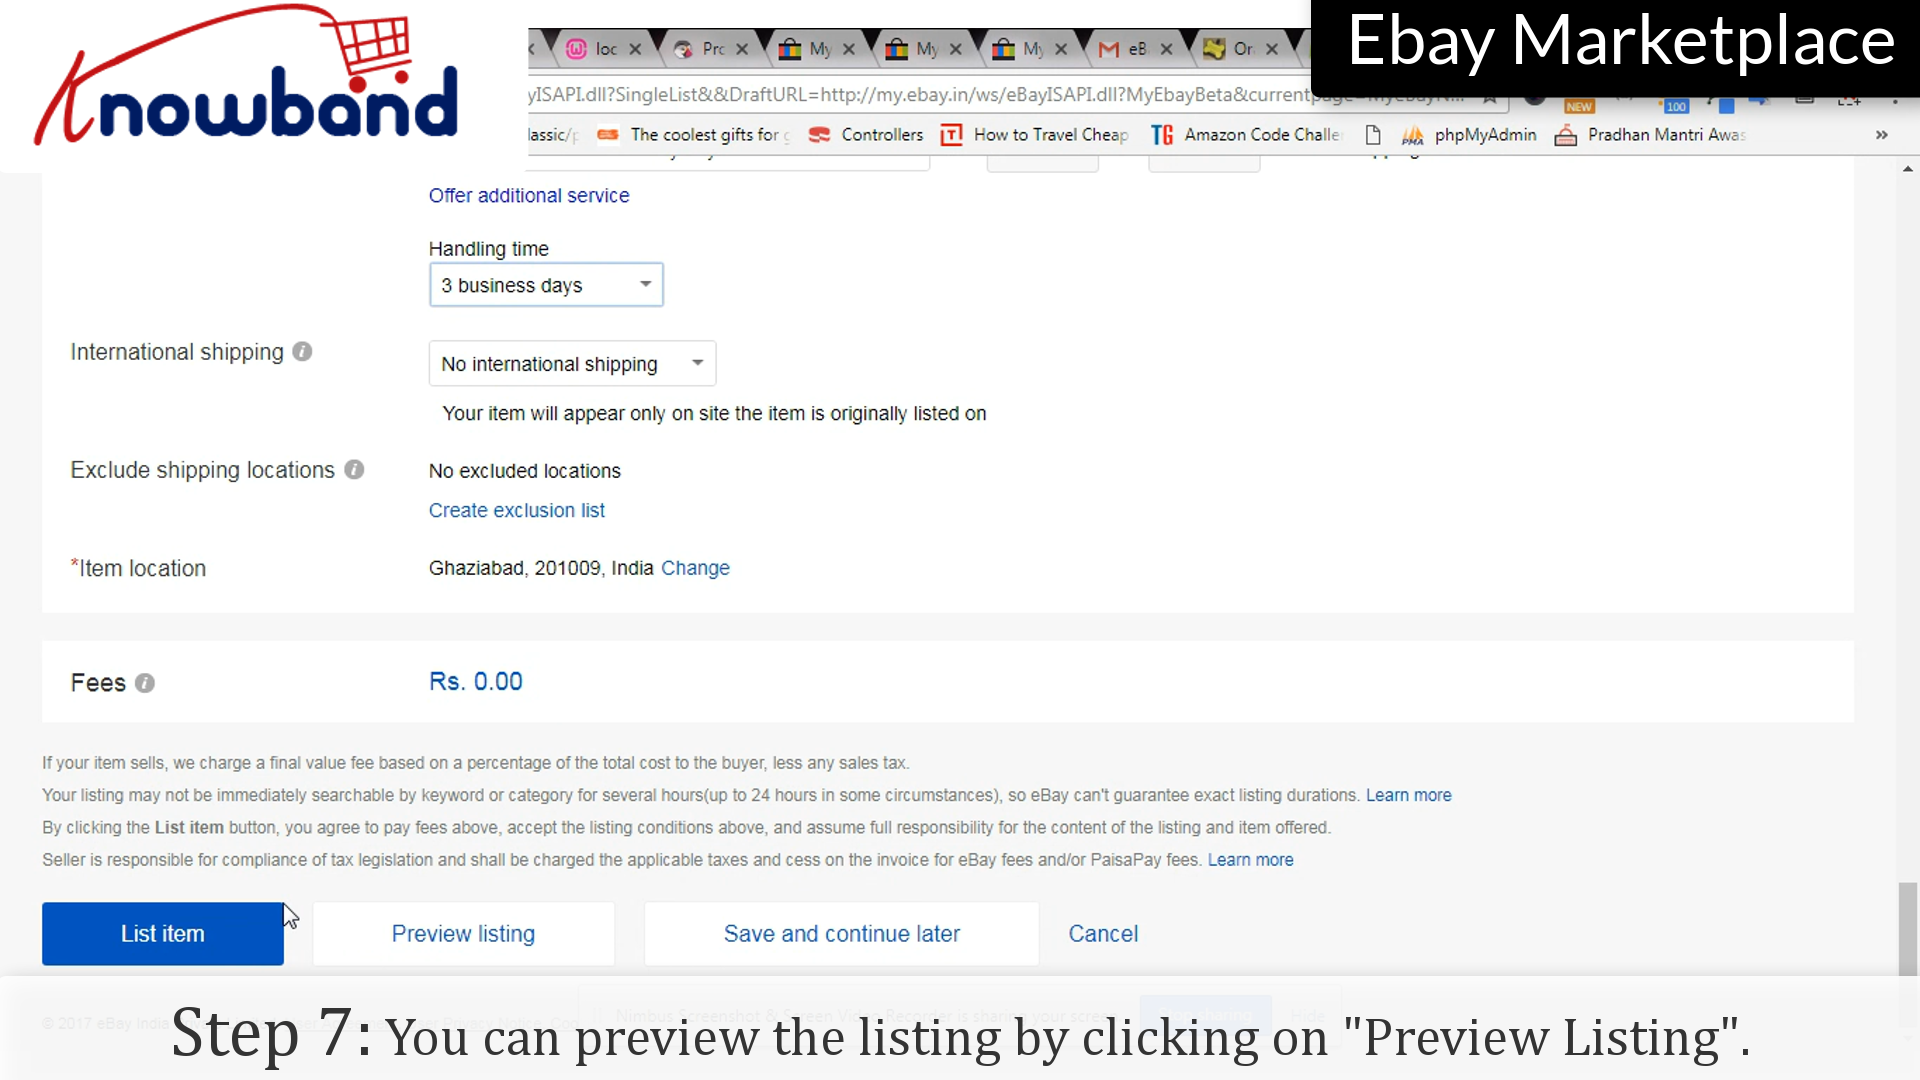
Step 7: Preview Listing
Before saving the list, eBay provides you an option to preview the listing with all the details.
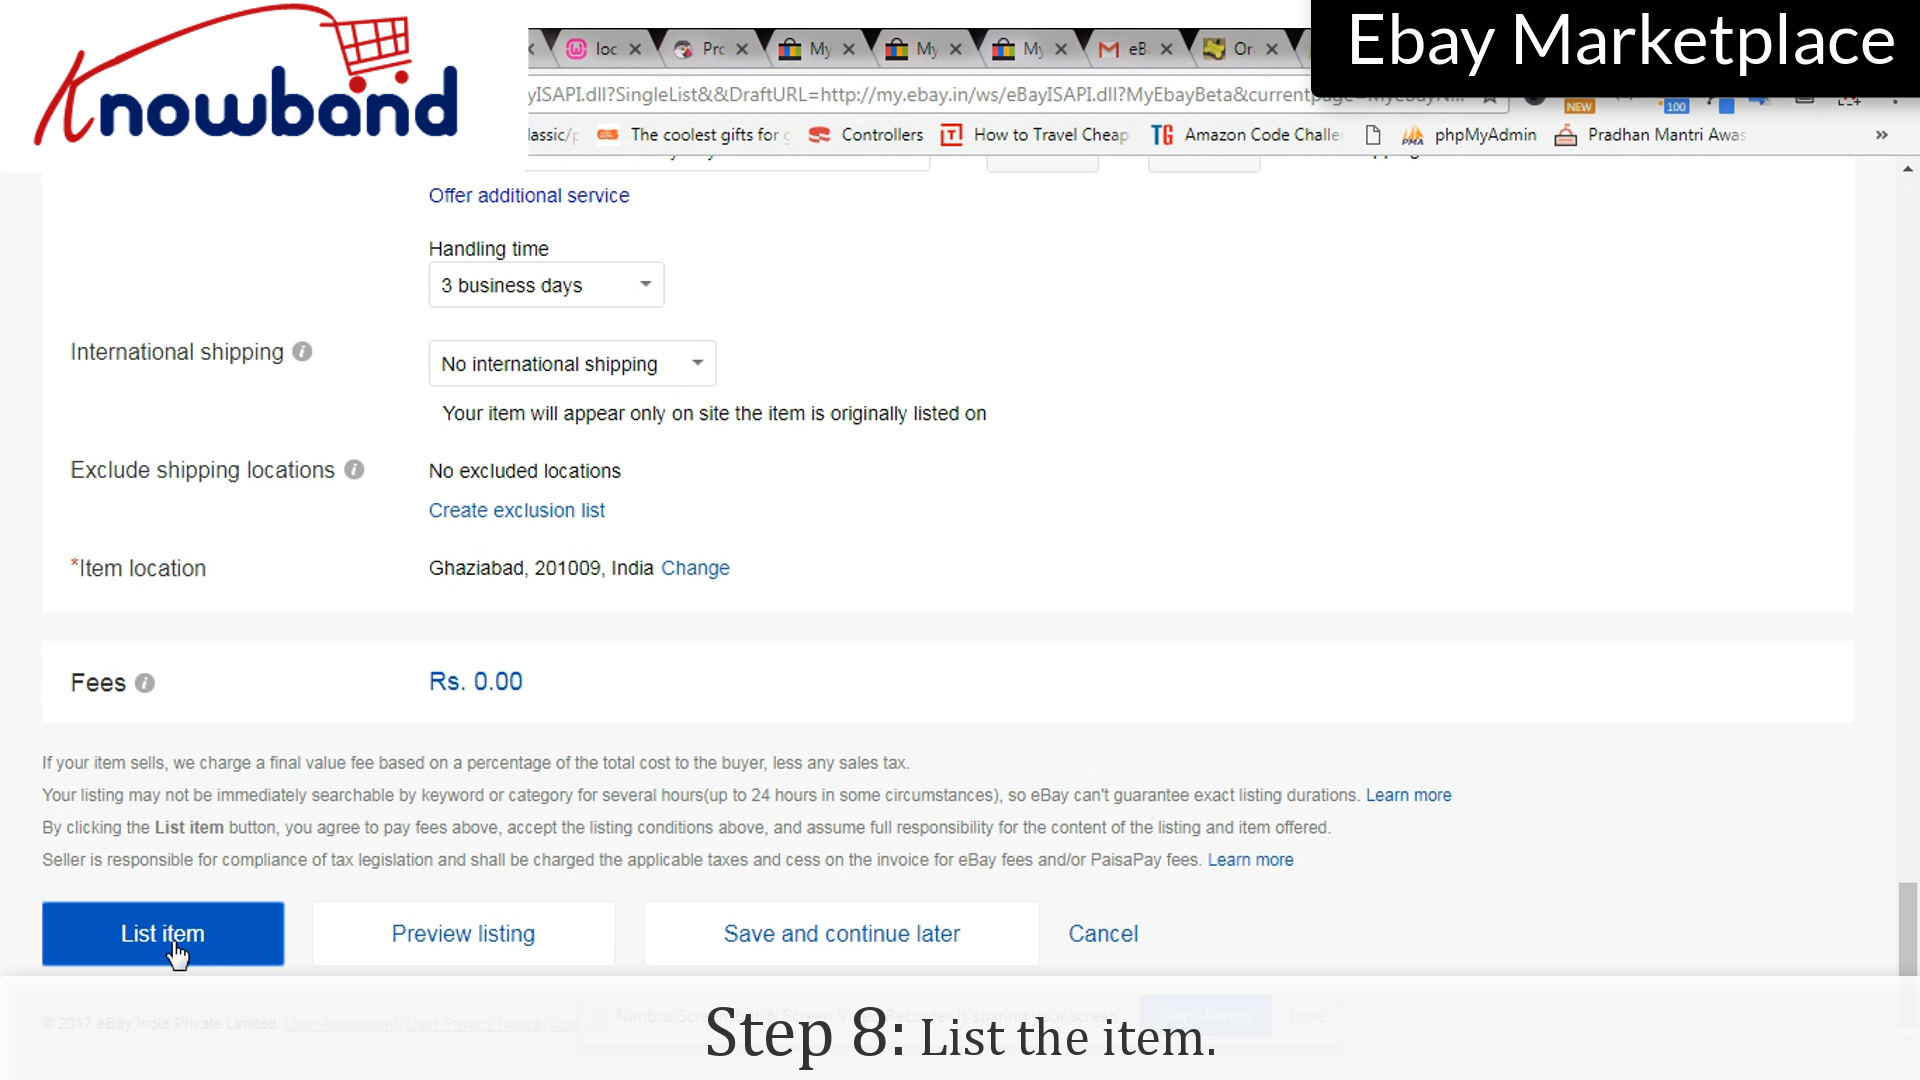
Step 8: List the item
Click on “List the item” to make the item public.
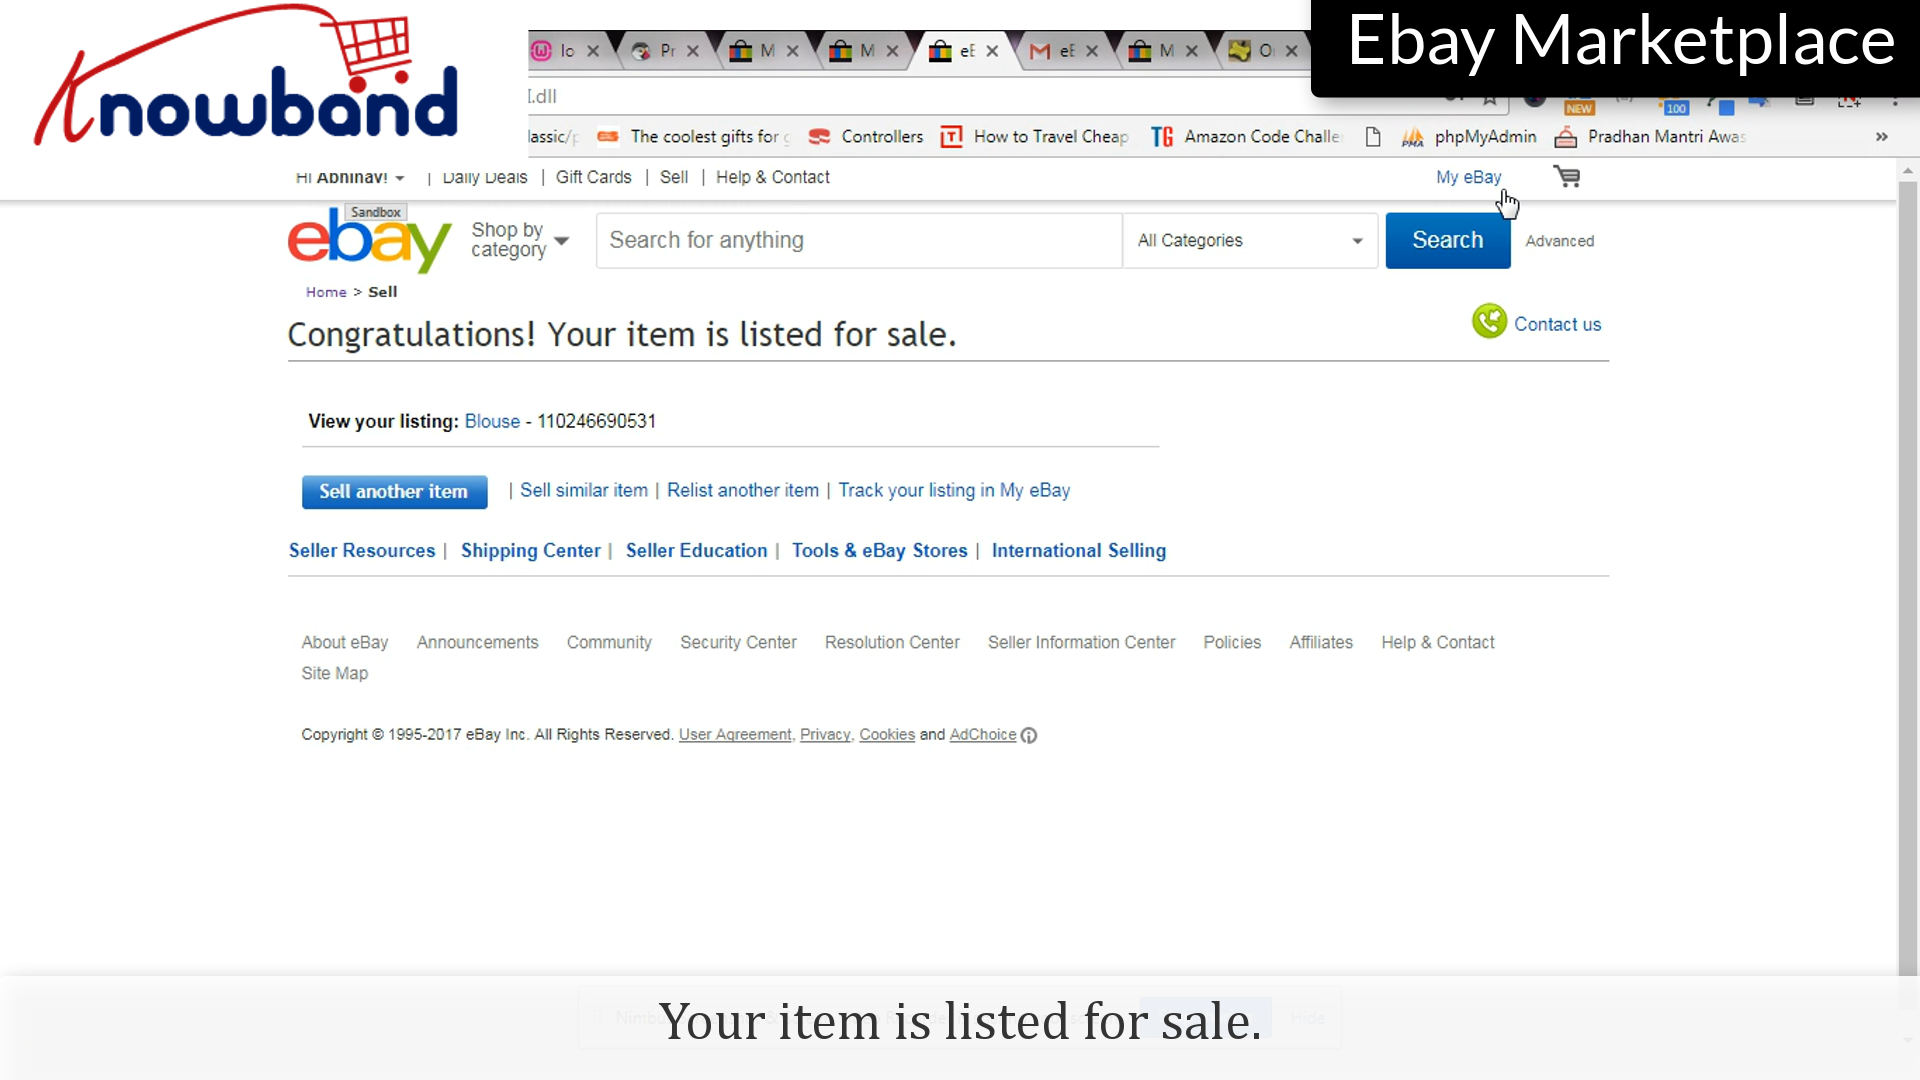
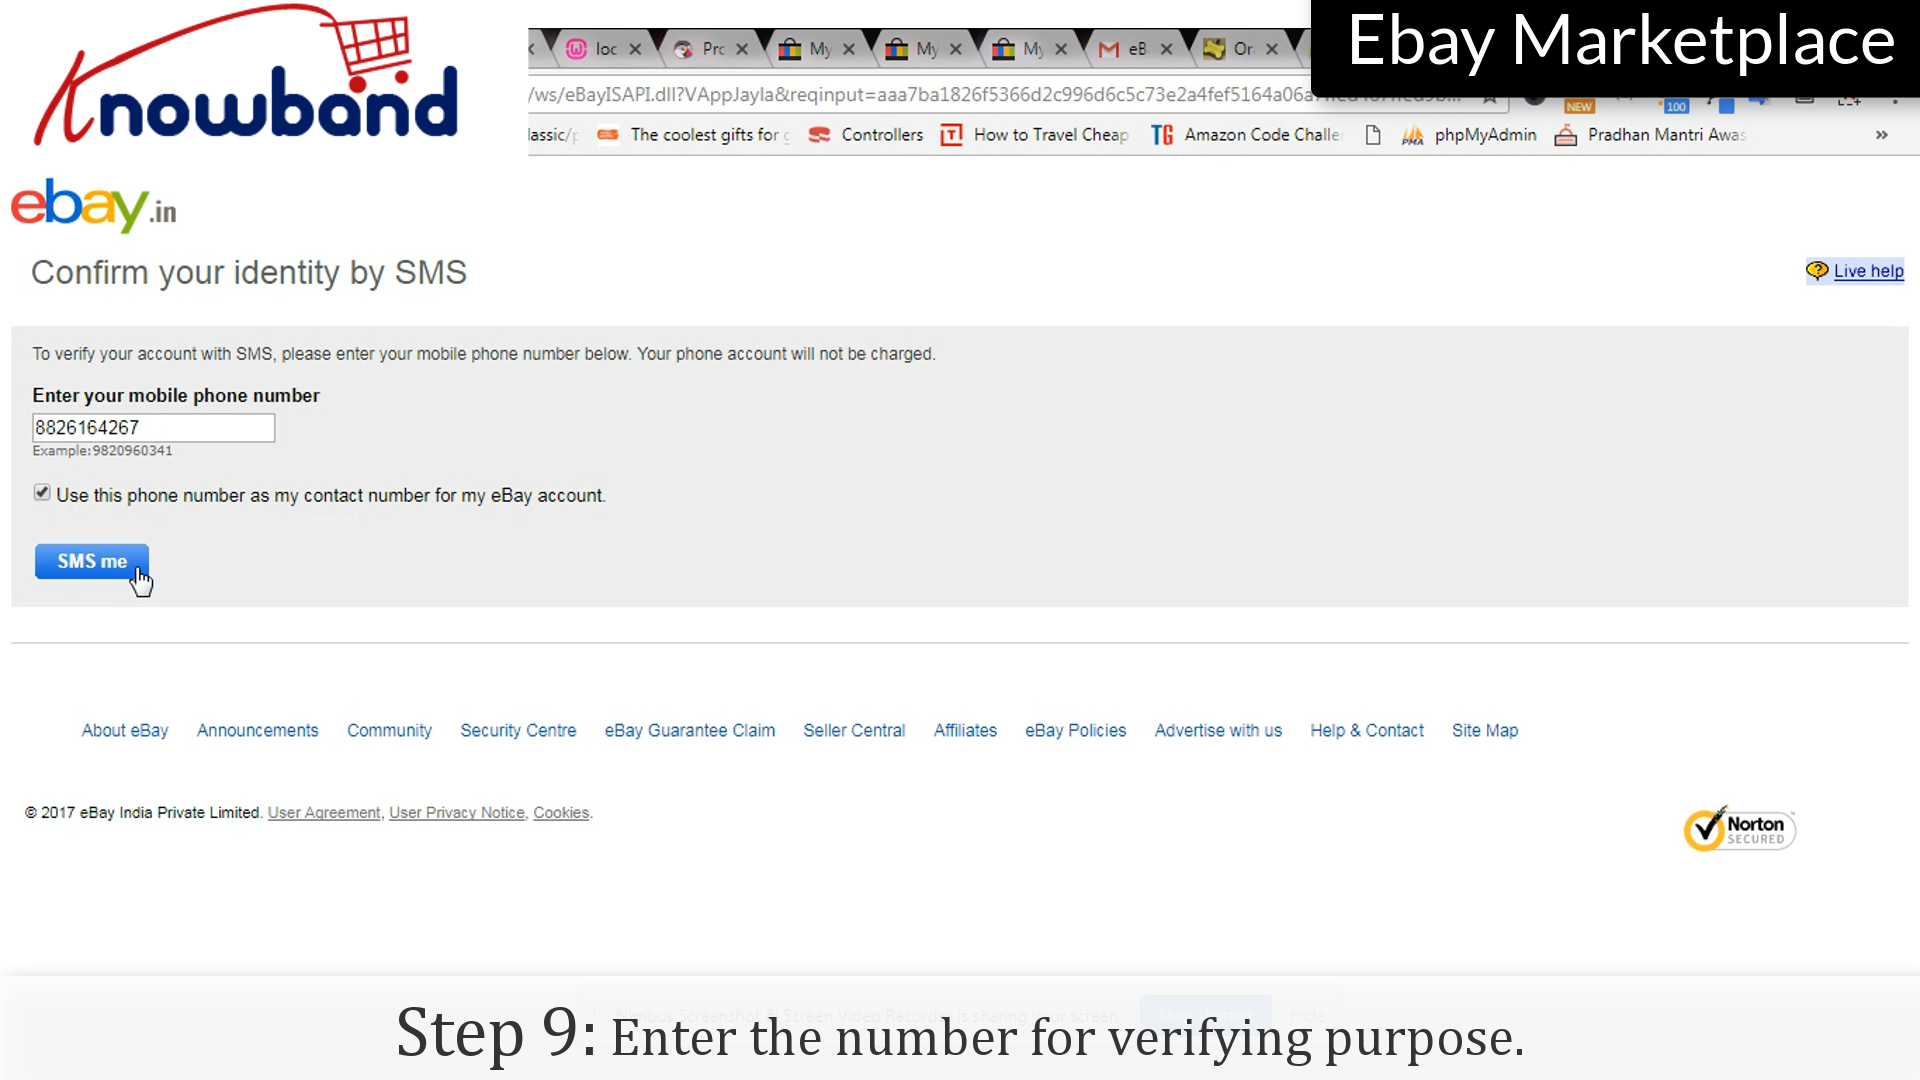
Step 9: Contact number
Enter the number for verifying purposes. Your item has been listed and is publicly available to the users.
Watch how to list a product in eBay Marketplace?
We hope that this information will help you to list products on eBay Marketplace and easily achieve good profits very soon.
Although listing products directly on eBay is possible but if you already own an eCommerce store, it becomes easier. So, if you are an eCommerce store owner and want to sell your products on eBay than you can integrate them via eBay Integrators.
KnowBand’s eBay Integrators bridges the gap between the store and the Marketplace via eBay API. After successful integration, sellers can map their product listings on eBay and earn sales and profits at high scale. The eBay Integrators are available for various CMS platforms as follows:
eBay Marketplace has emerged as one of the best and most popular online shopping destinations all over the globe. With over 179 million active users, selling on eBay would directly lead you to higher sales. Although eBay has set up a strict policy and guidelines. Although eBay accepts third-party sellers on its website but it’s still a dream of many sellers to sell on eBay.
So, if you are unaware of the procedure of selling products on Walmart, this guide will make you walk through each step starting from the seller’s application until the launch of its store.
Getting a shelf on eBay is a huge opportunity for your business. To sell the products on eBay, you will be required to create a sellers account. Once you have created seller’s account, you can add any number of products in your store and here’s how you create a sellers account:
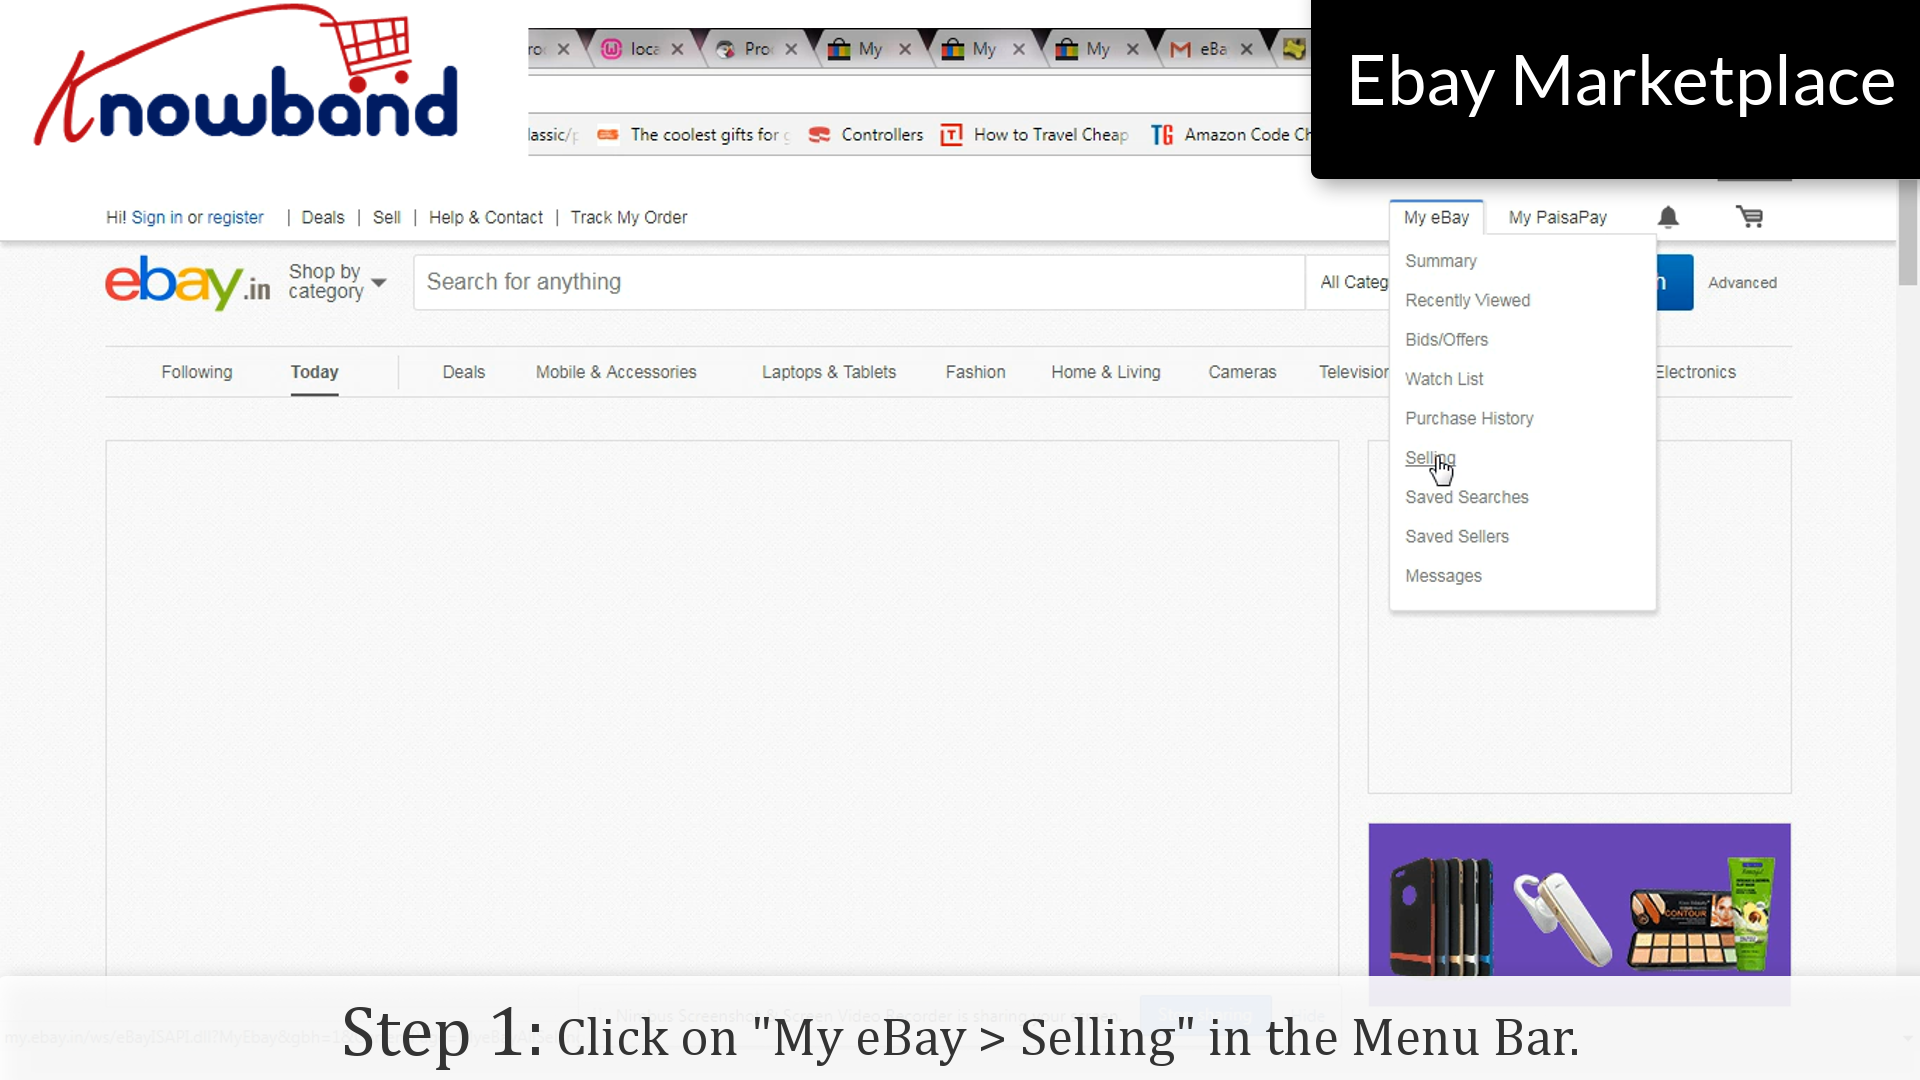
Step 1: “My eBay > Selling”
Click on the “My eBay > Selling” option provided in the menu.
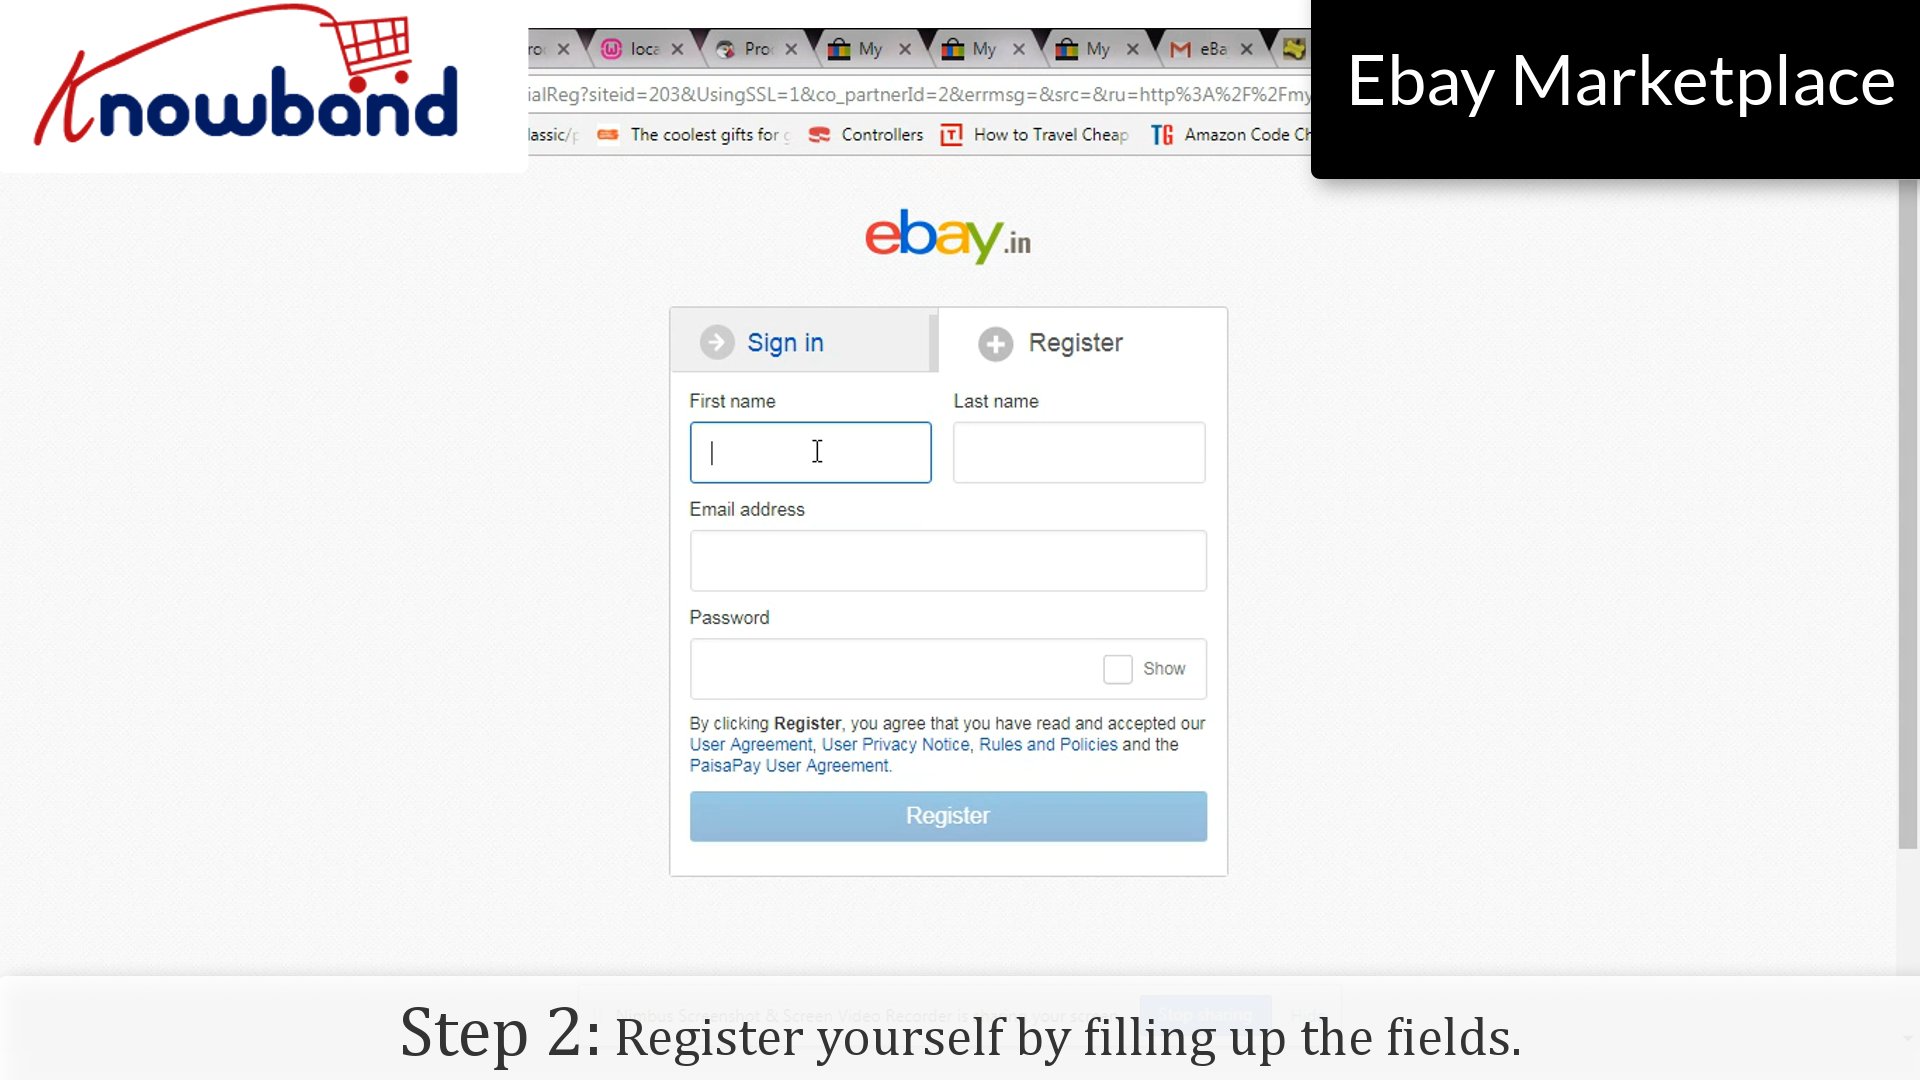
Step 2: Register
Register yourself by filling up the fields. Mention all your relevant details and click on the “Register” button.
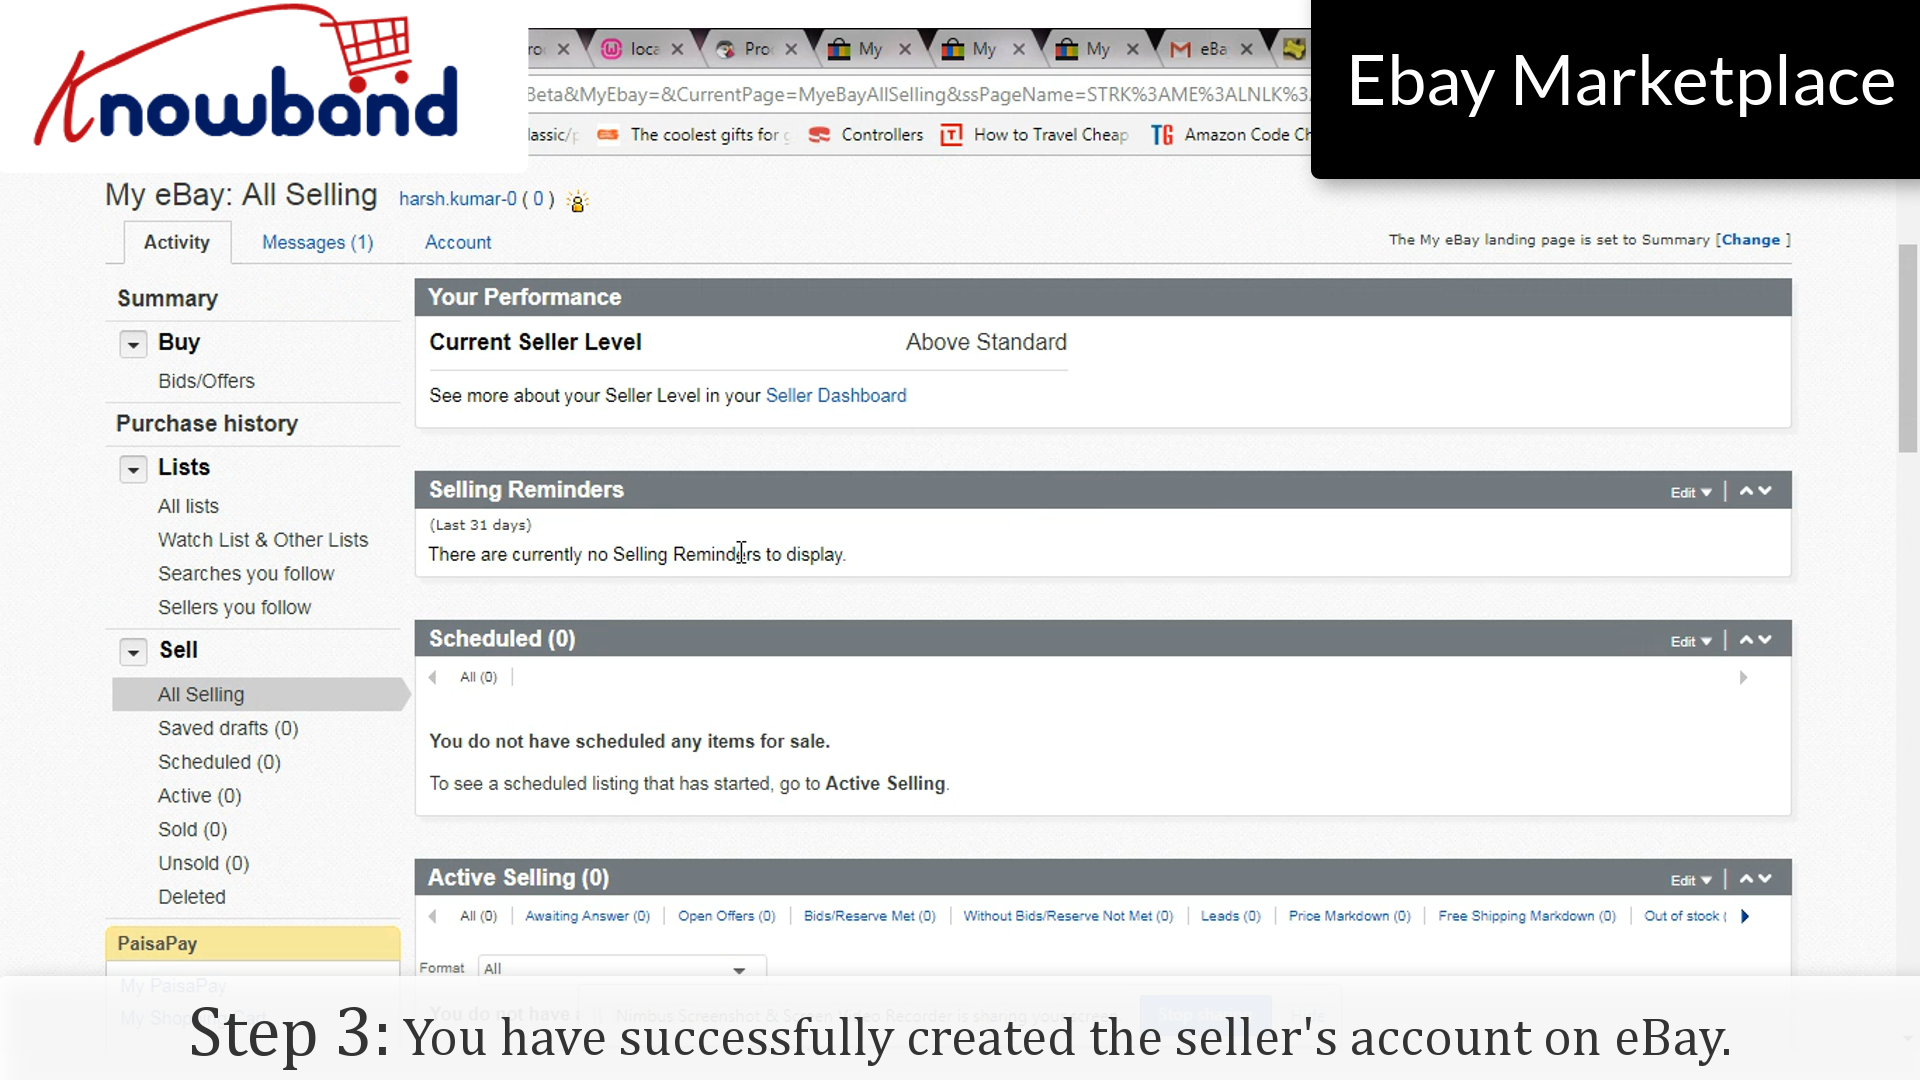
Step 3: Confirmation
You have successfully created the seller’s account on eBay. You will receive an invitation mail stating your confirmation as a third party seller on eBay. Verify your confirmation by clicking on the link mentioned in the mail and you will be directed to the eBay website.
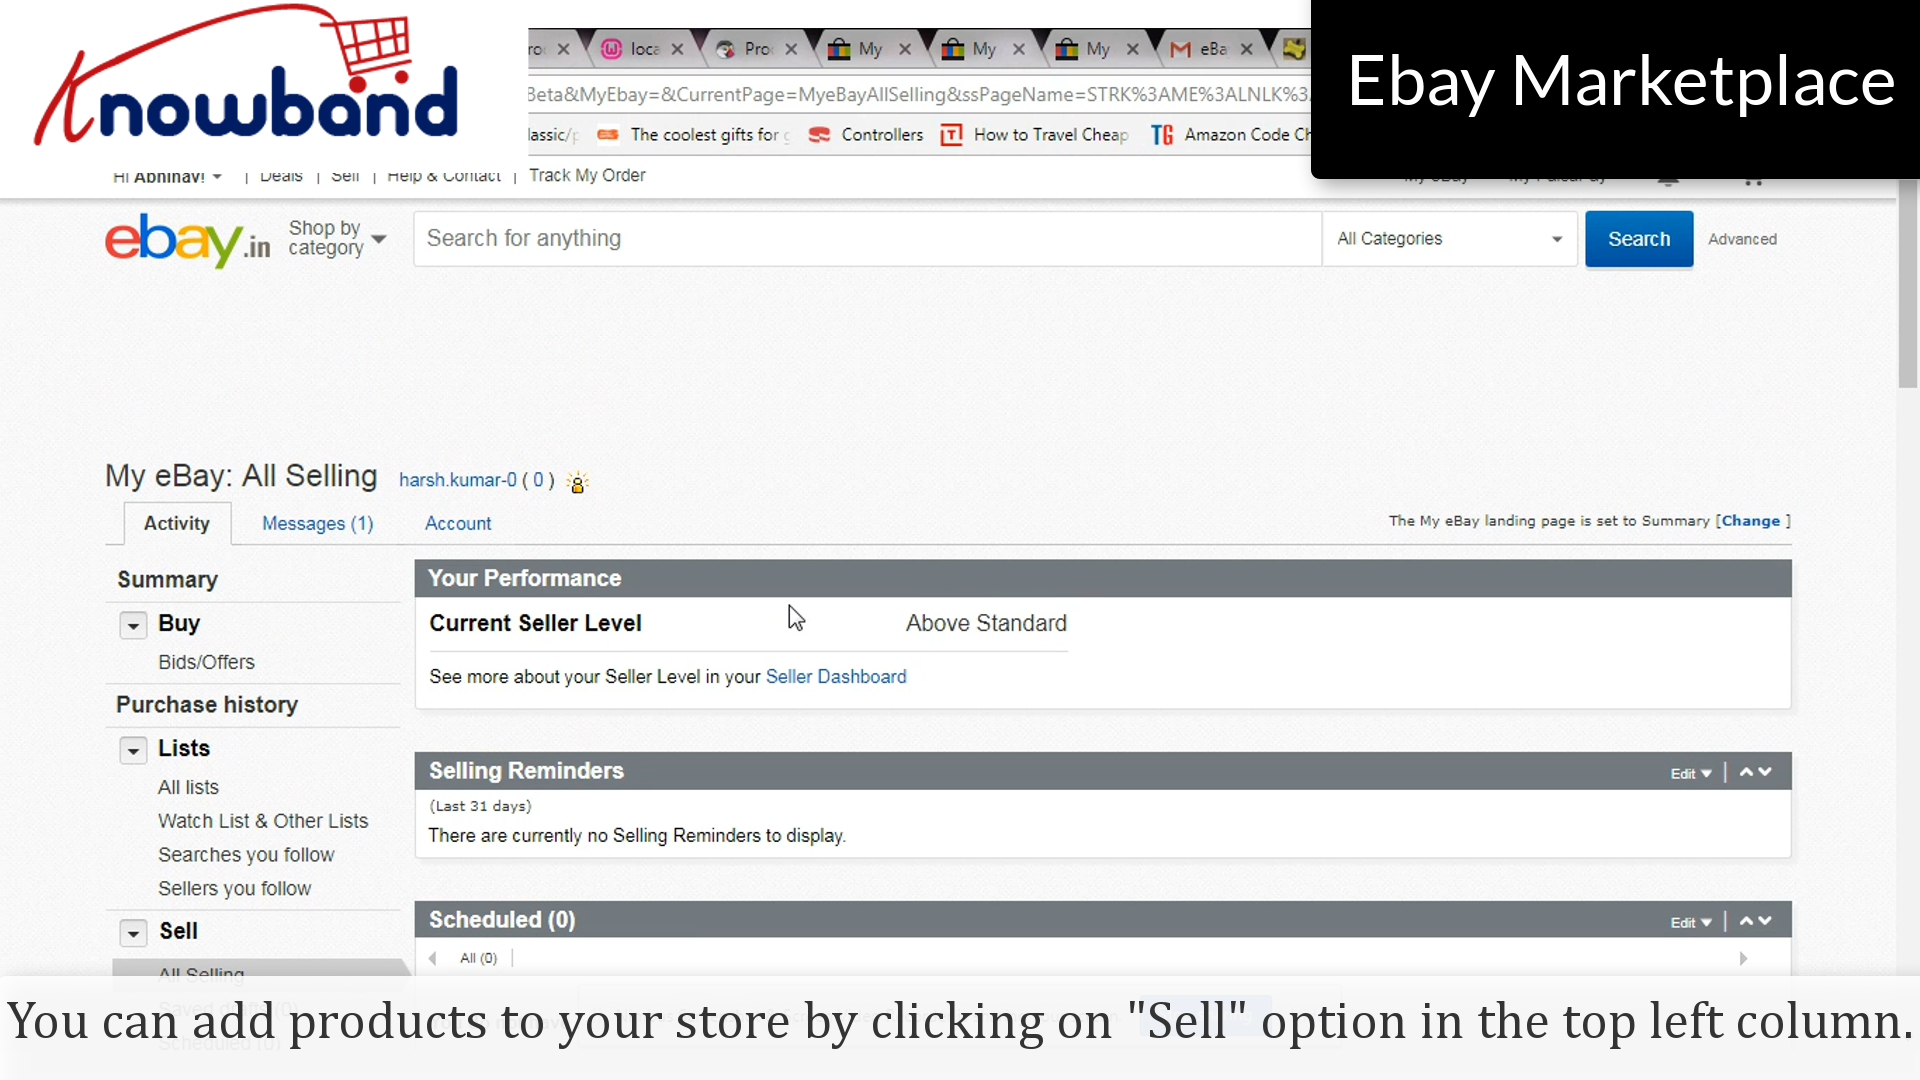
Now you can easily add products to your store by clicking on the “Sell” option in the top left column. You can manage your product catalog accordingly. This will let you remove the products that are out of stock and manage it in a bonafide manner.
Over to you:
Selling products on a huge and fast-growing marketplace like eBay is like working in a gold mine. There are numerous third-party sellers who want to register themselves as eBay marketplace sellers. With the growing competition, becoming a third party seller on eBay is definitely not easy as it seems. The seller’s market does not entertain the sellers who are not meeting up the parameters set by them. As these renowned Marketplaces always prefer brands over retailers so try to own a brand name to make yourself more eligible from other sellers. Do keep a check on the requirements and there’s a quite good chance that eBay will accept you as a marketplace seller. Hopefully, you will witness the increased number of orders and sales for your business.
With the help of eBay Integrator by Knowband, you can now sell and manage the inventories at the Walmart Marketplace from the backend of your store. Sellers can also sync orders placed on the eBay website from the backend itself by this module. eBay integrators are available for various CMS platforms like Prestashop, Magento, OpenCart, and Shopify.
There are various APIs which requires Access Token, it is created by eBay itself to have your store uniquely connected to that particular API. Creating the Access Token is like a cake walk and here’s how you do it:
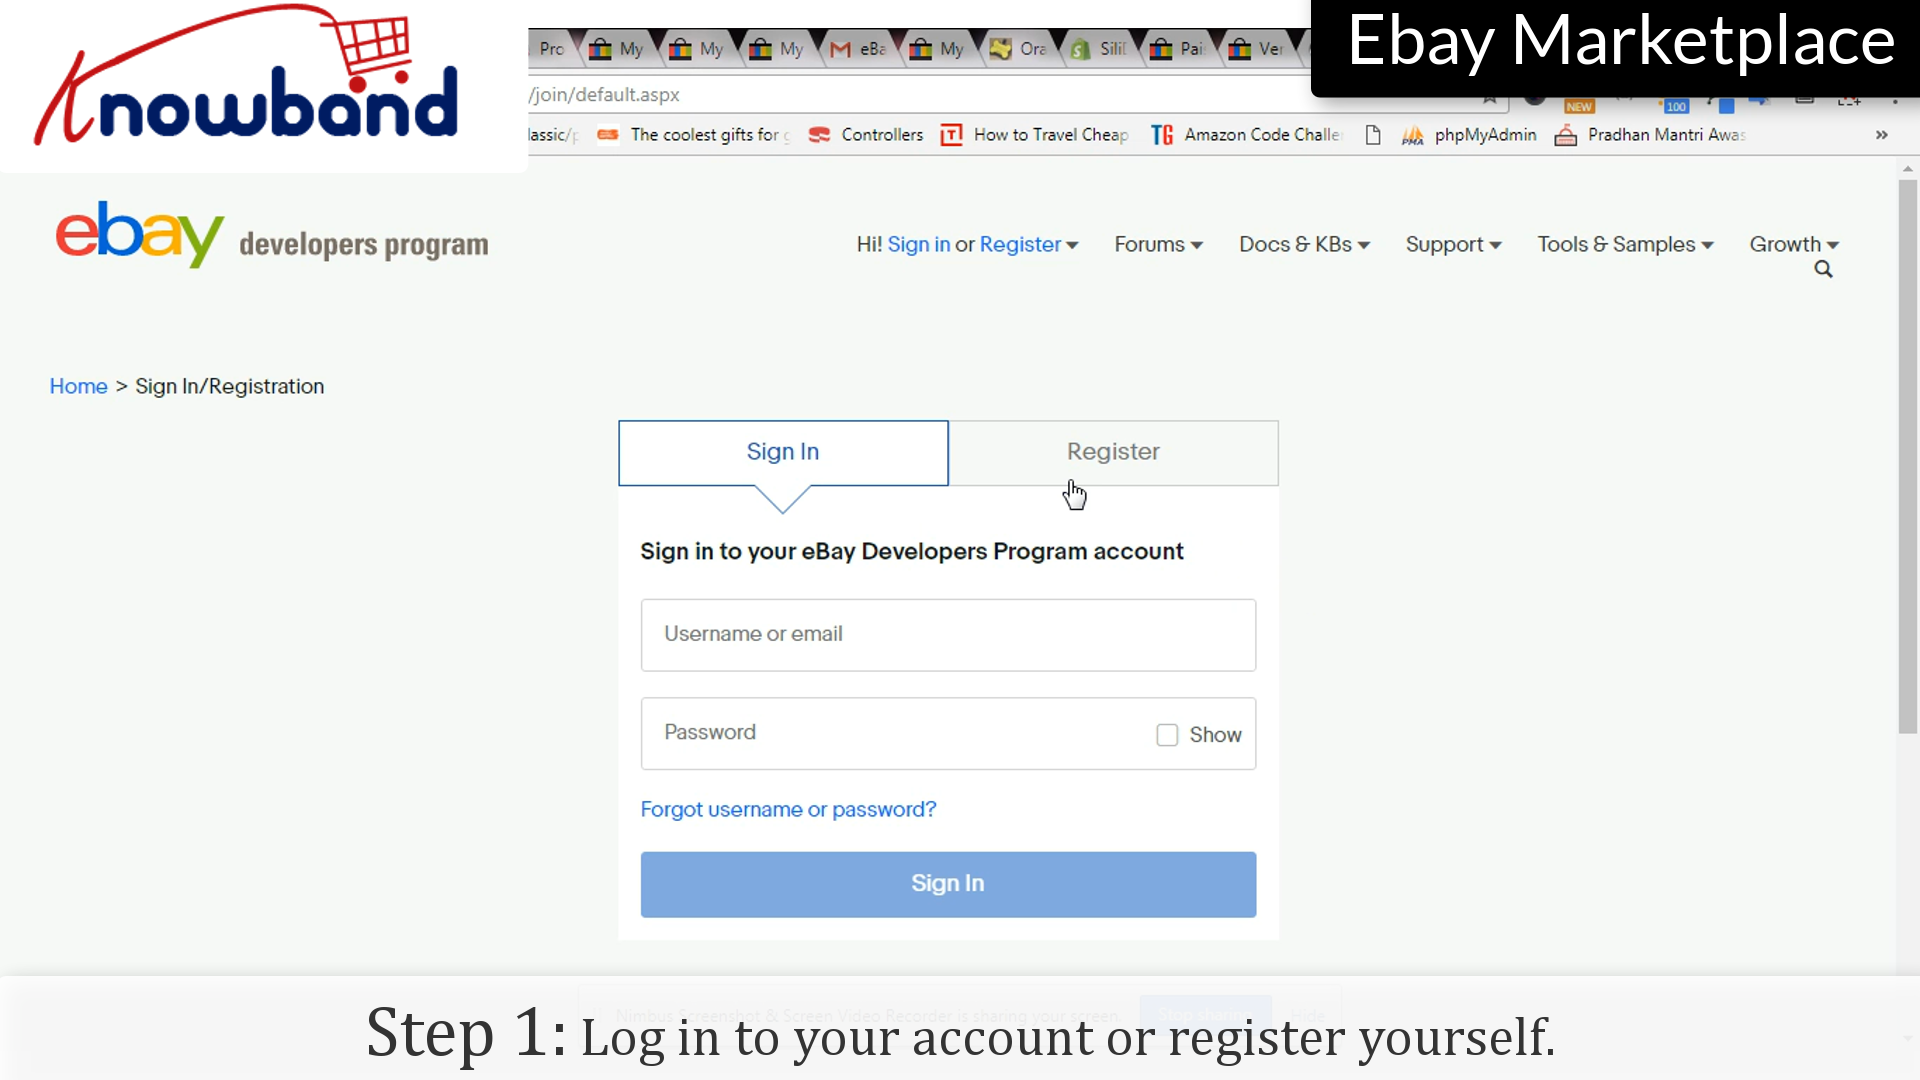
Step 1: Log in to your account or Register yourself
Login to your eBay account by clicking the “Sign in” option or you can register yourself if you are using it for the first time.
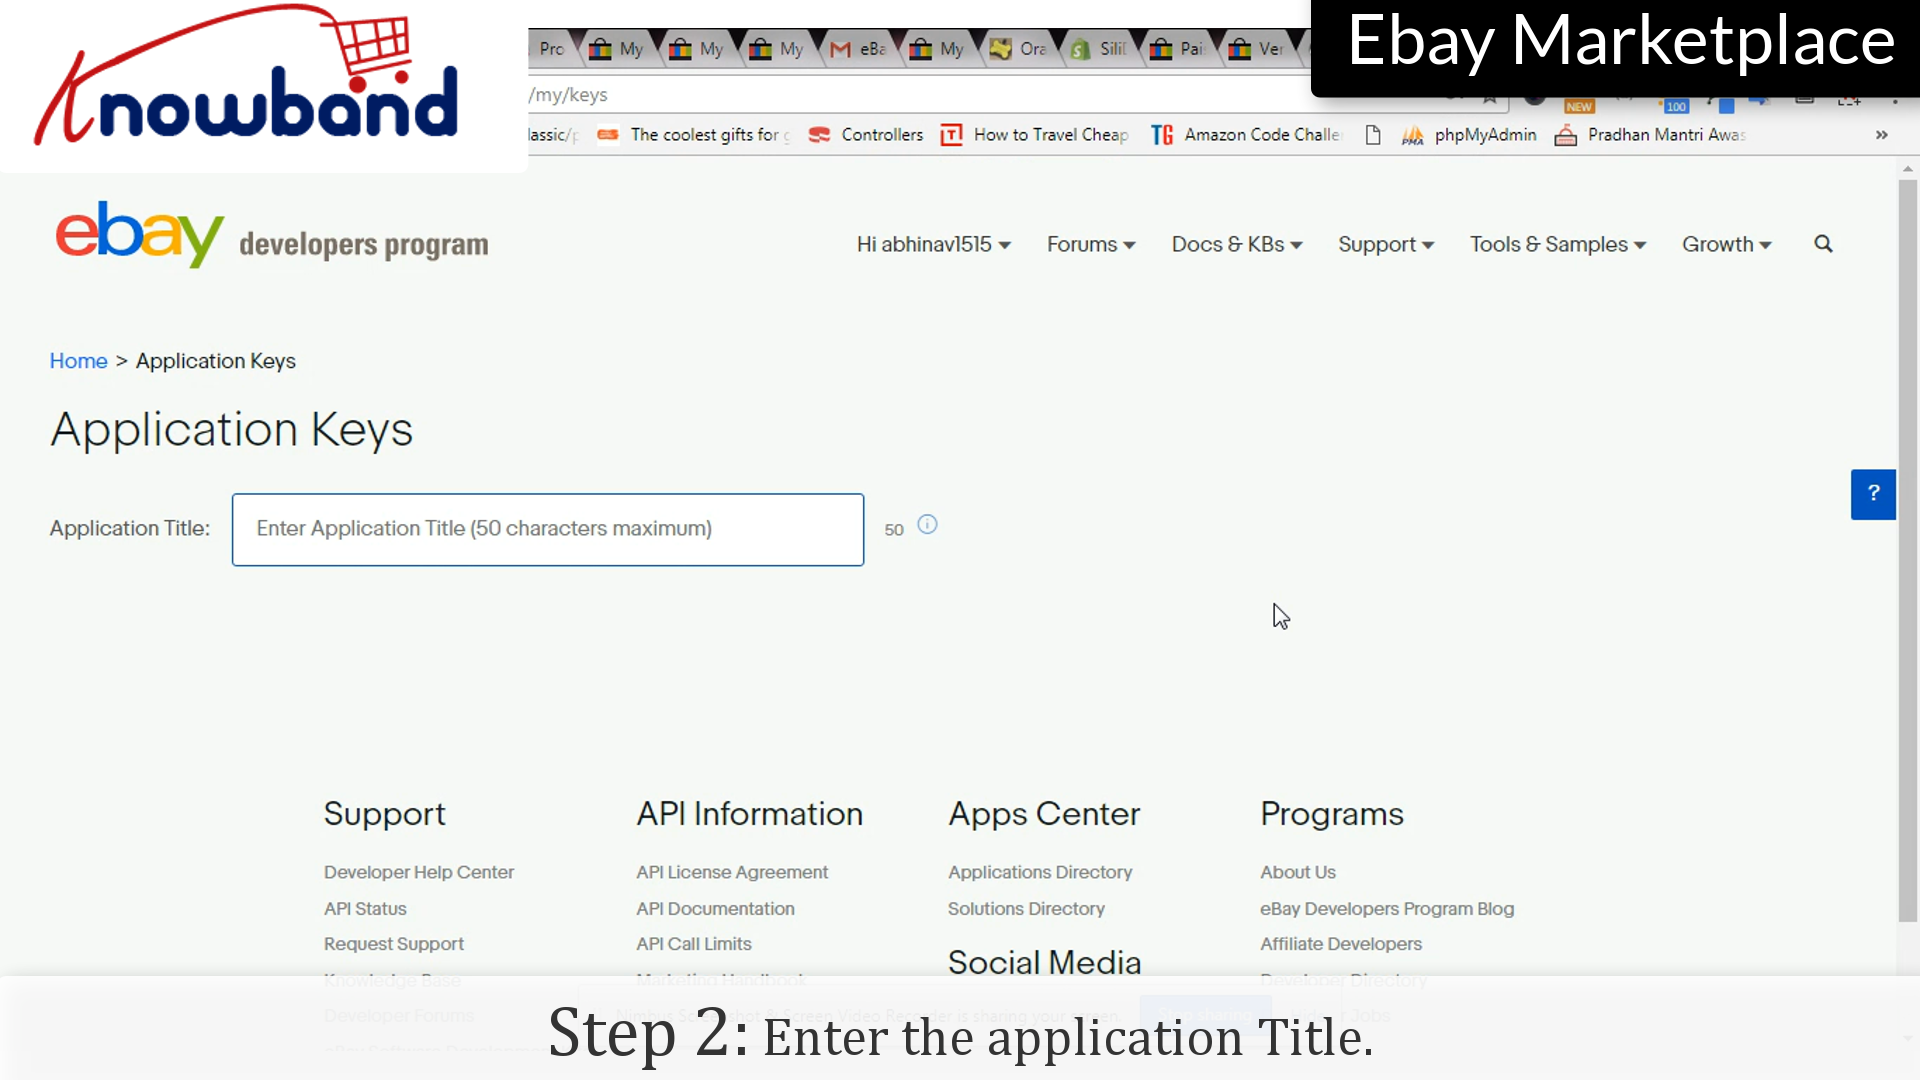
Step 2: Application Title
Enter the application name for which you are creating the token.
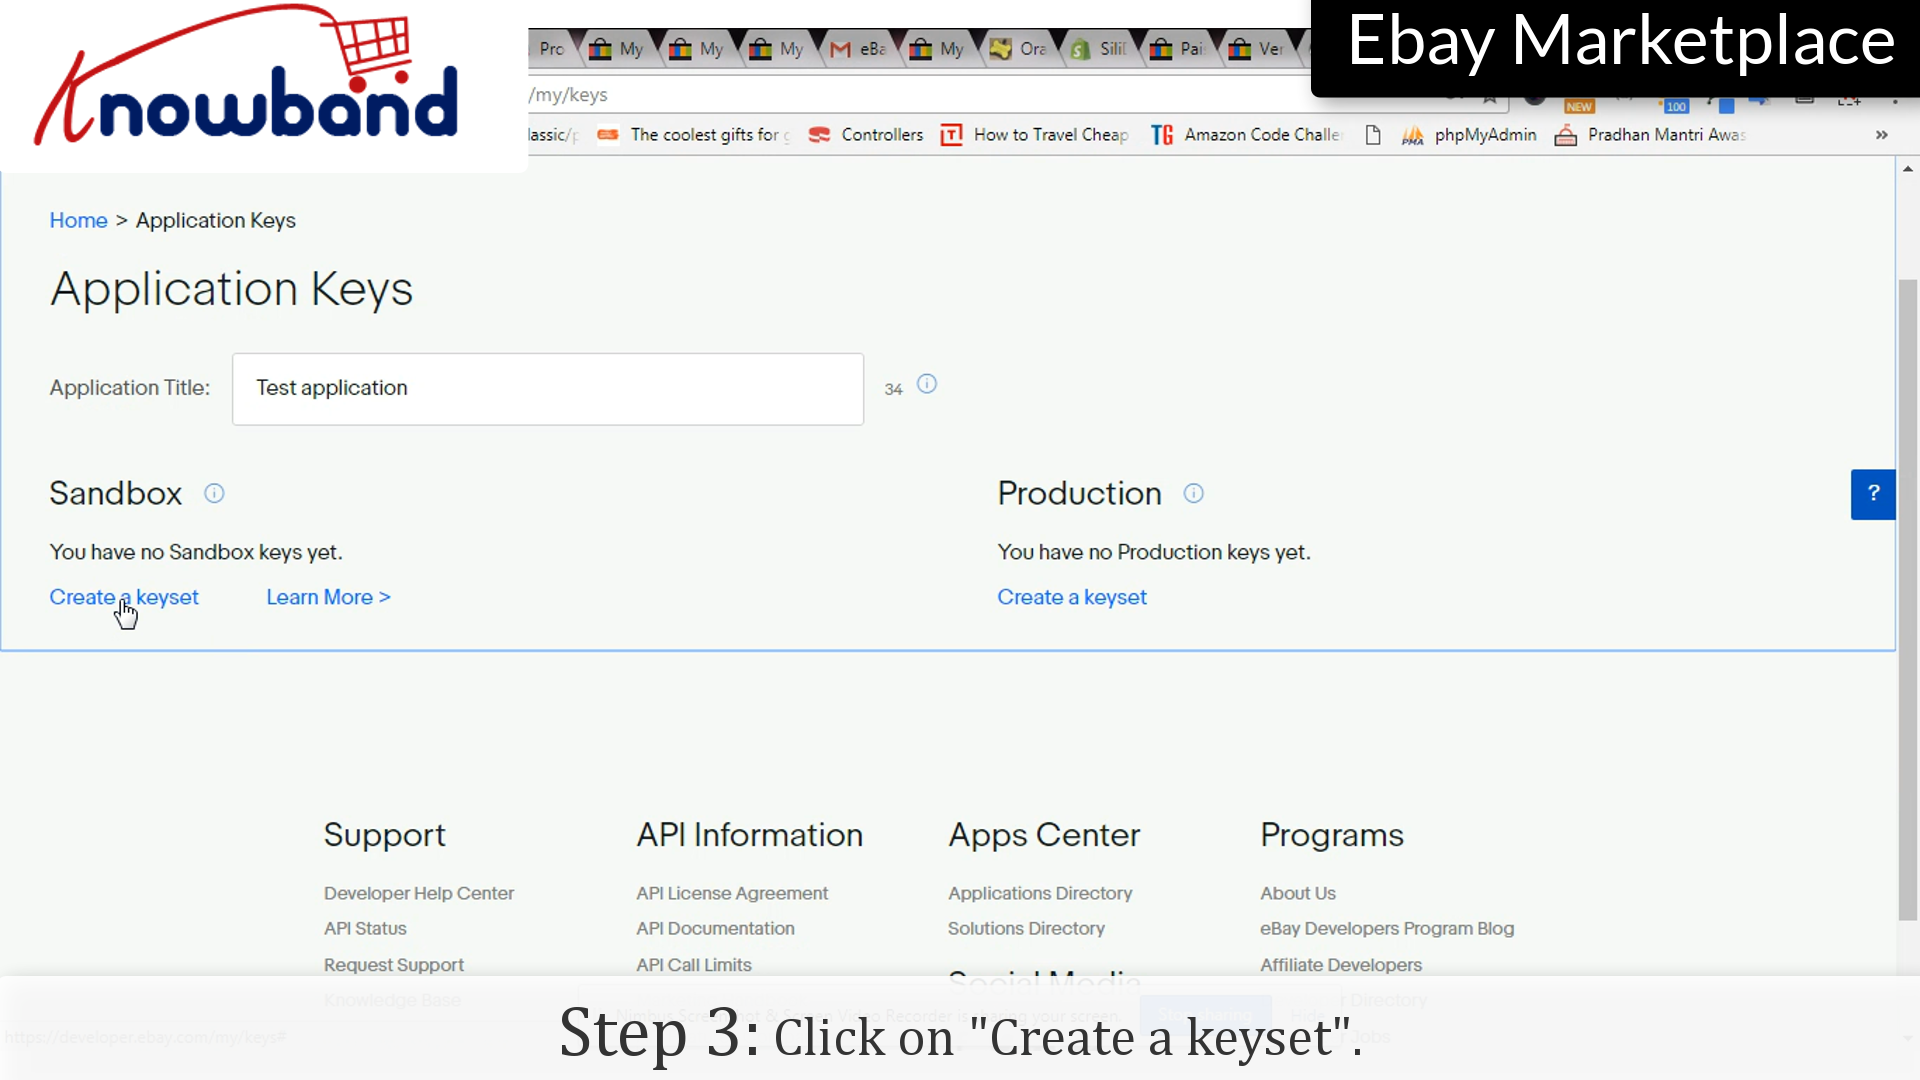
Step 3: Keyset
Click on “Create a keyset”, which will create a set of keys which you can use in any application.
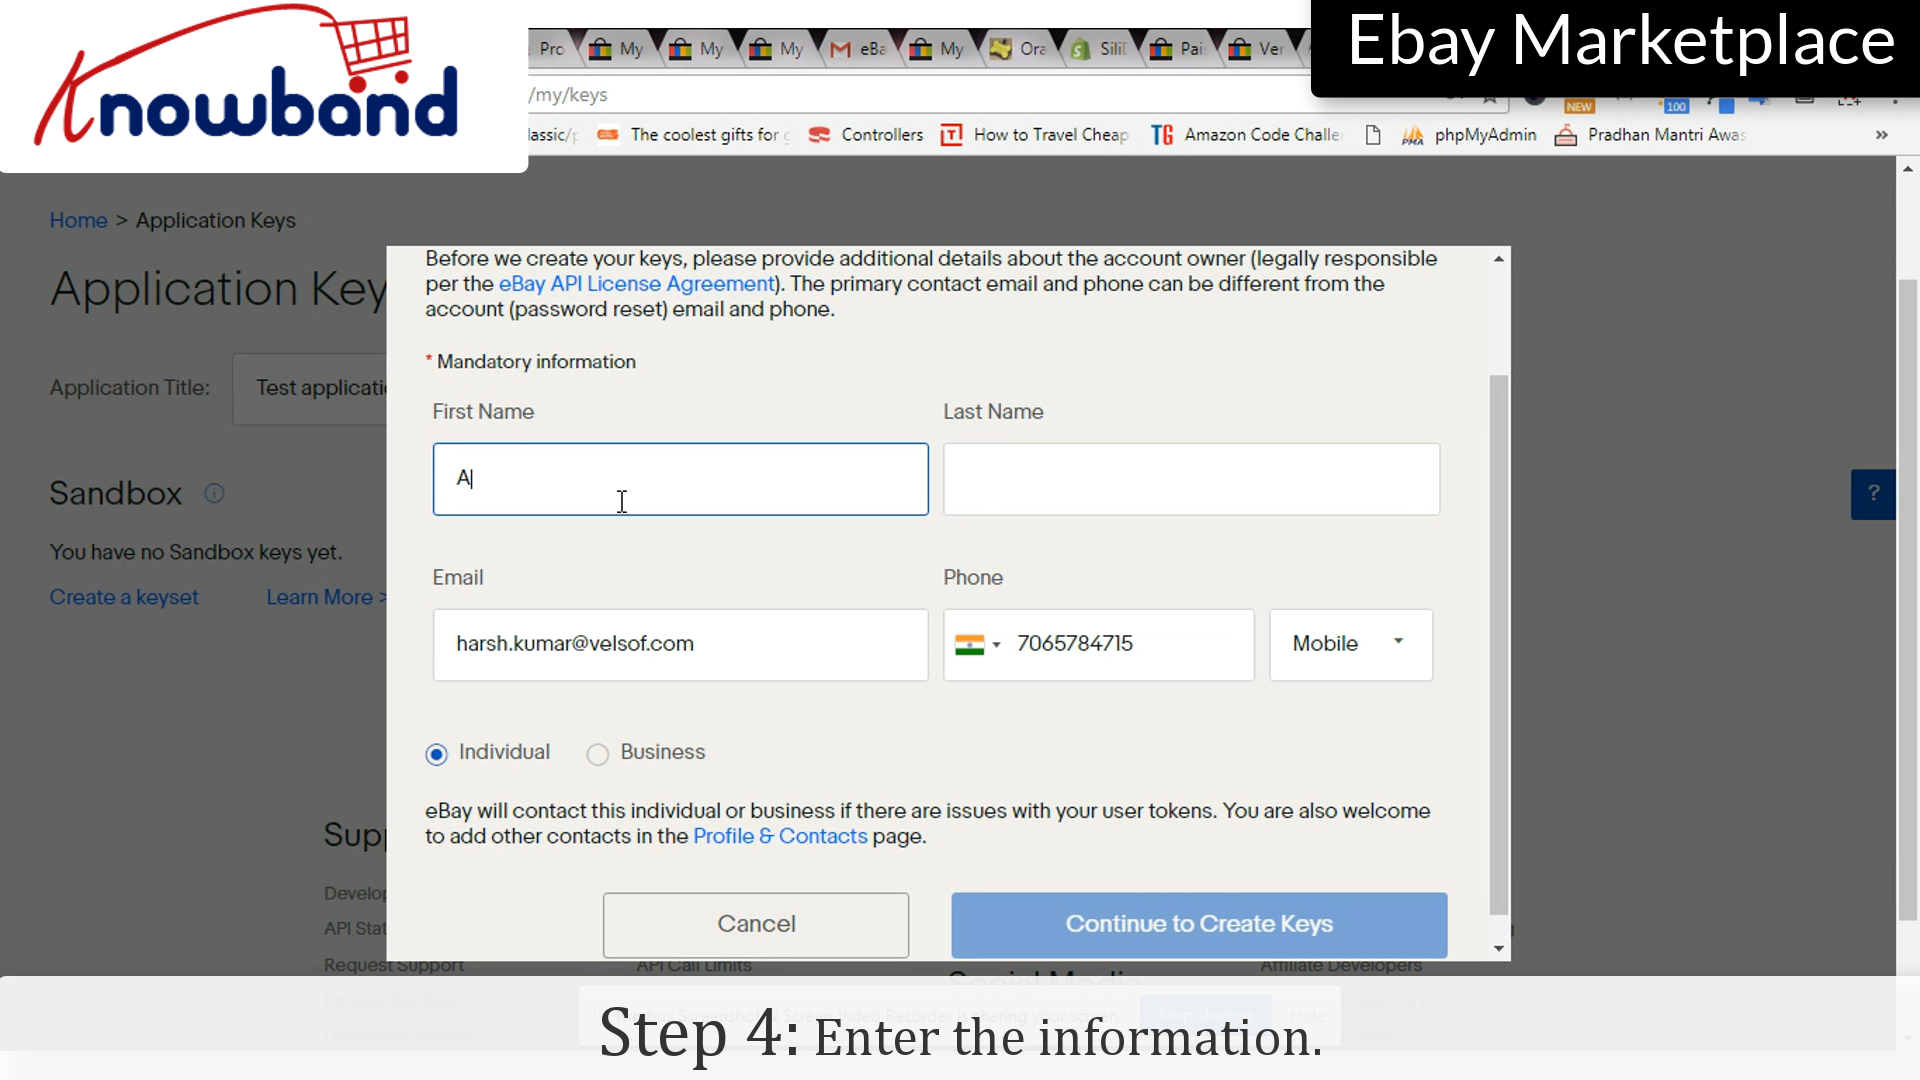
Step 4: Info
Enter the information such as, First Name, Last Name, E-mail ID etc.
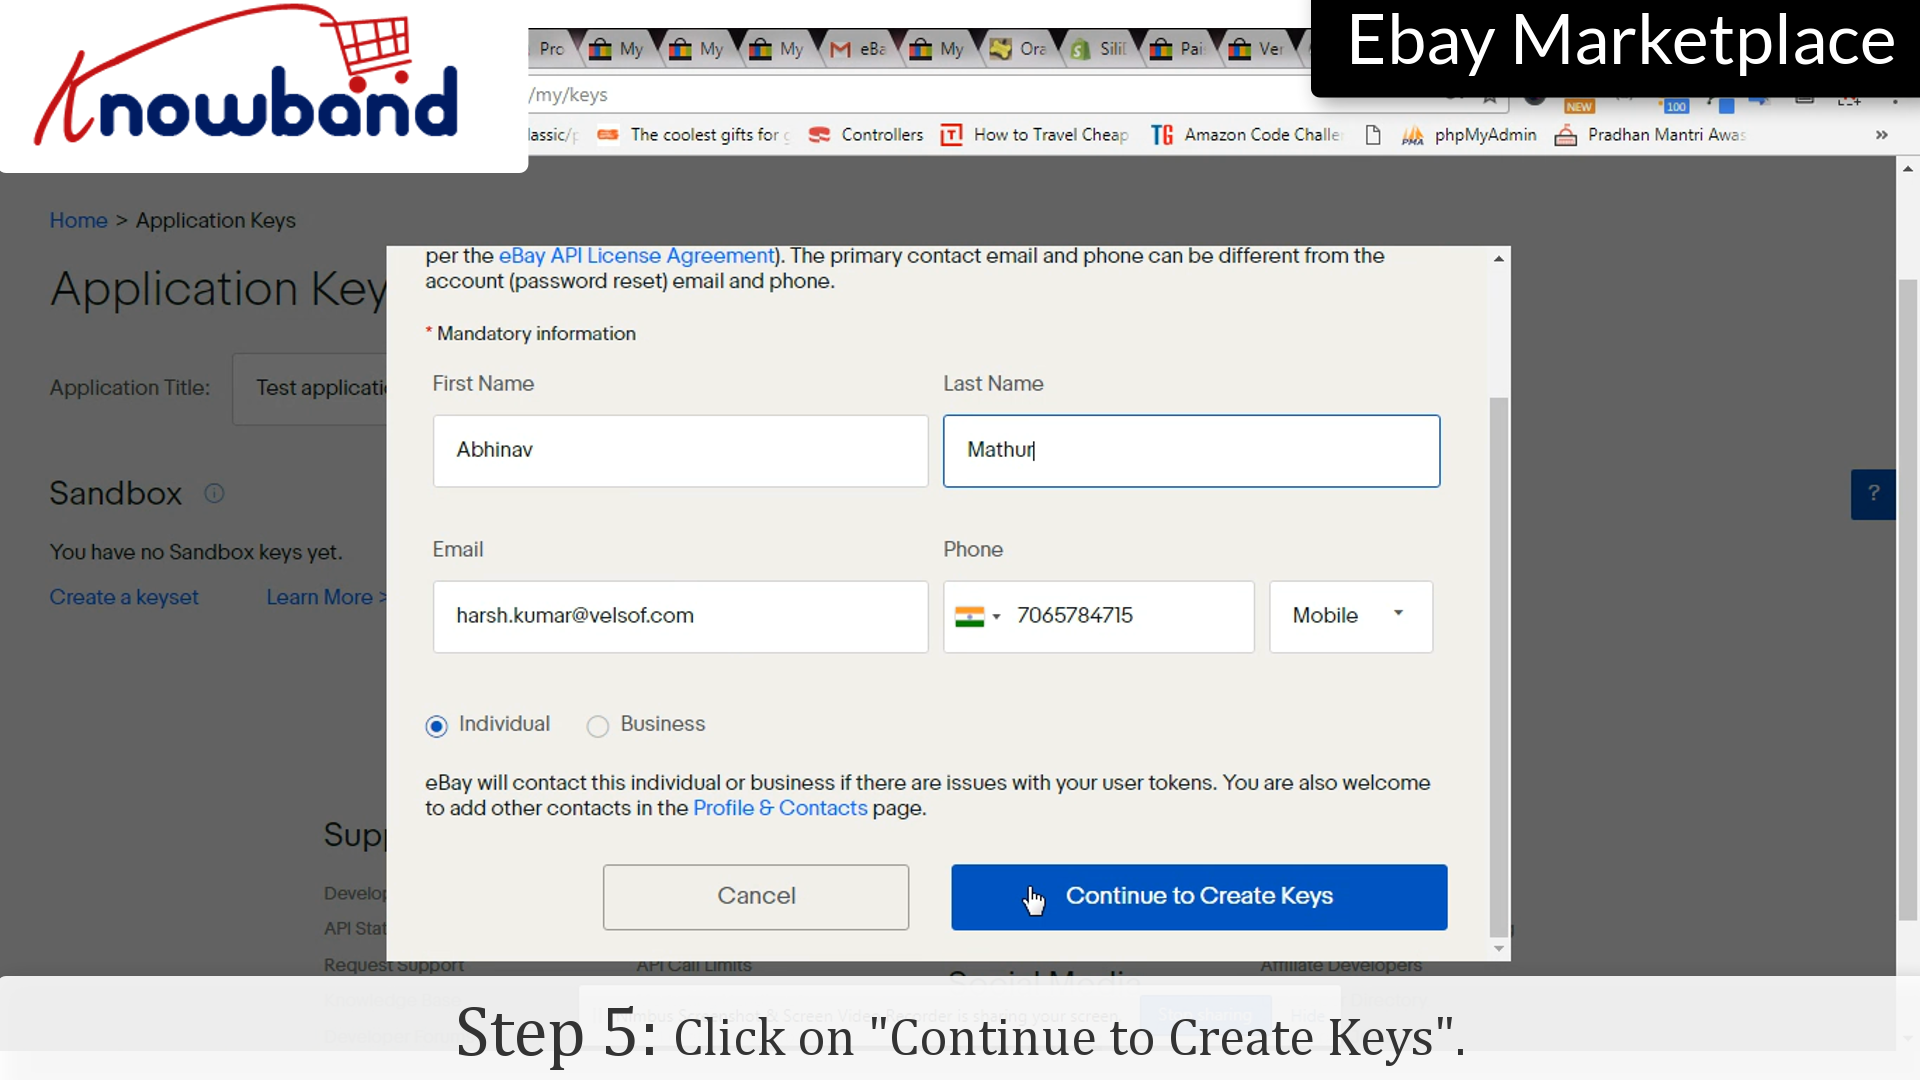
Step 5: Continue
Click on “Continue to Keysets” to move to further steps.
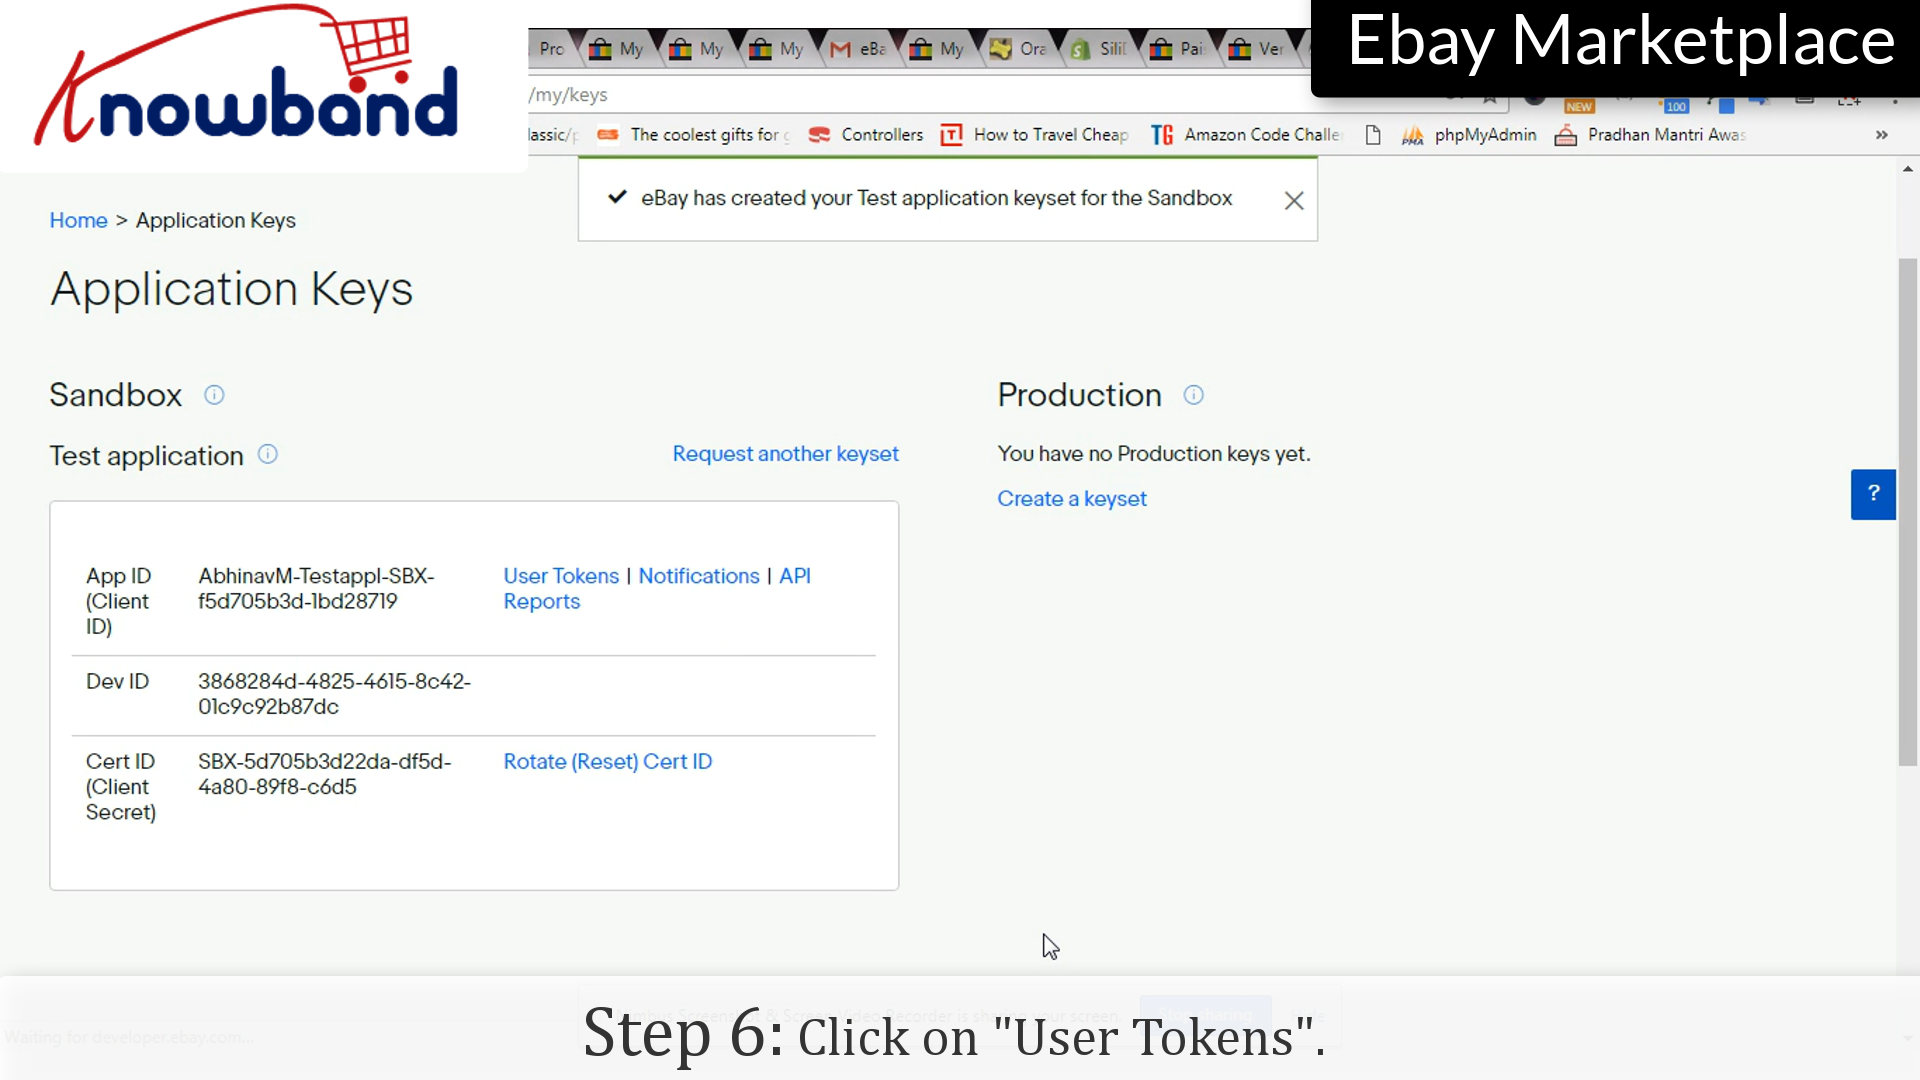
Step 6: Keys
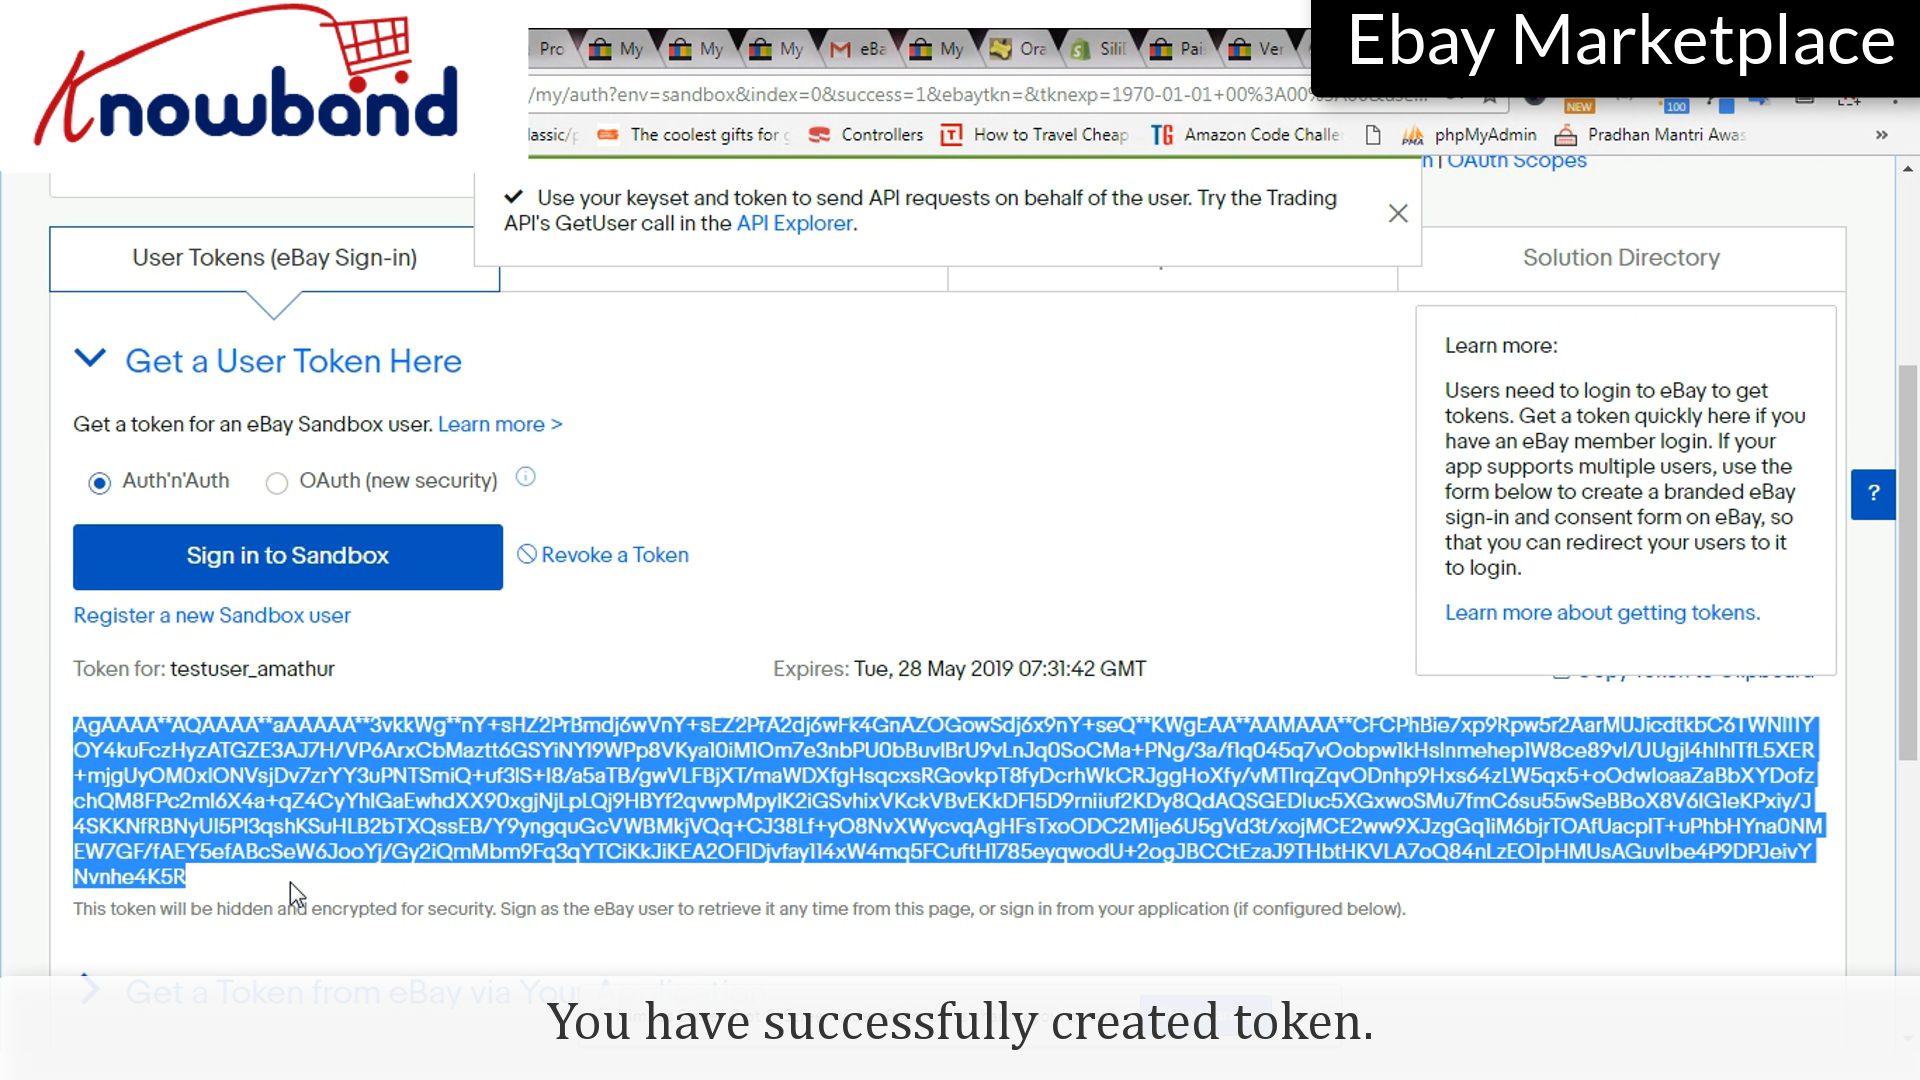
There are set of keys generated, App ID, Dev ID and Cert ID. Click on “User Tokens” option.
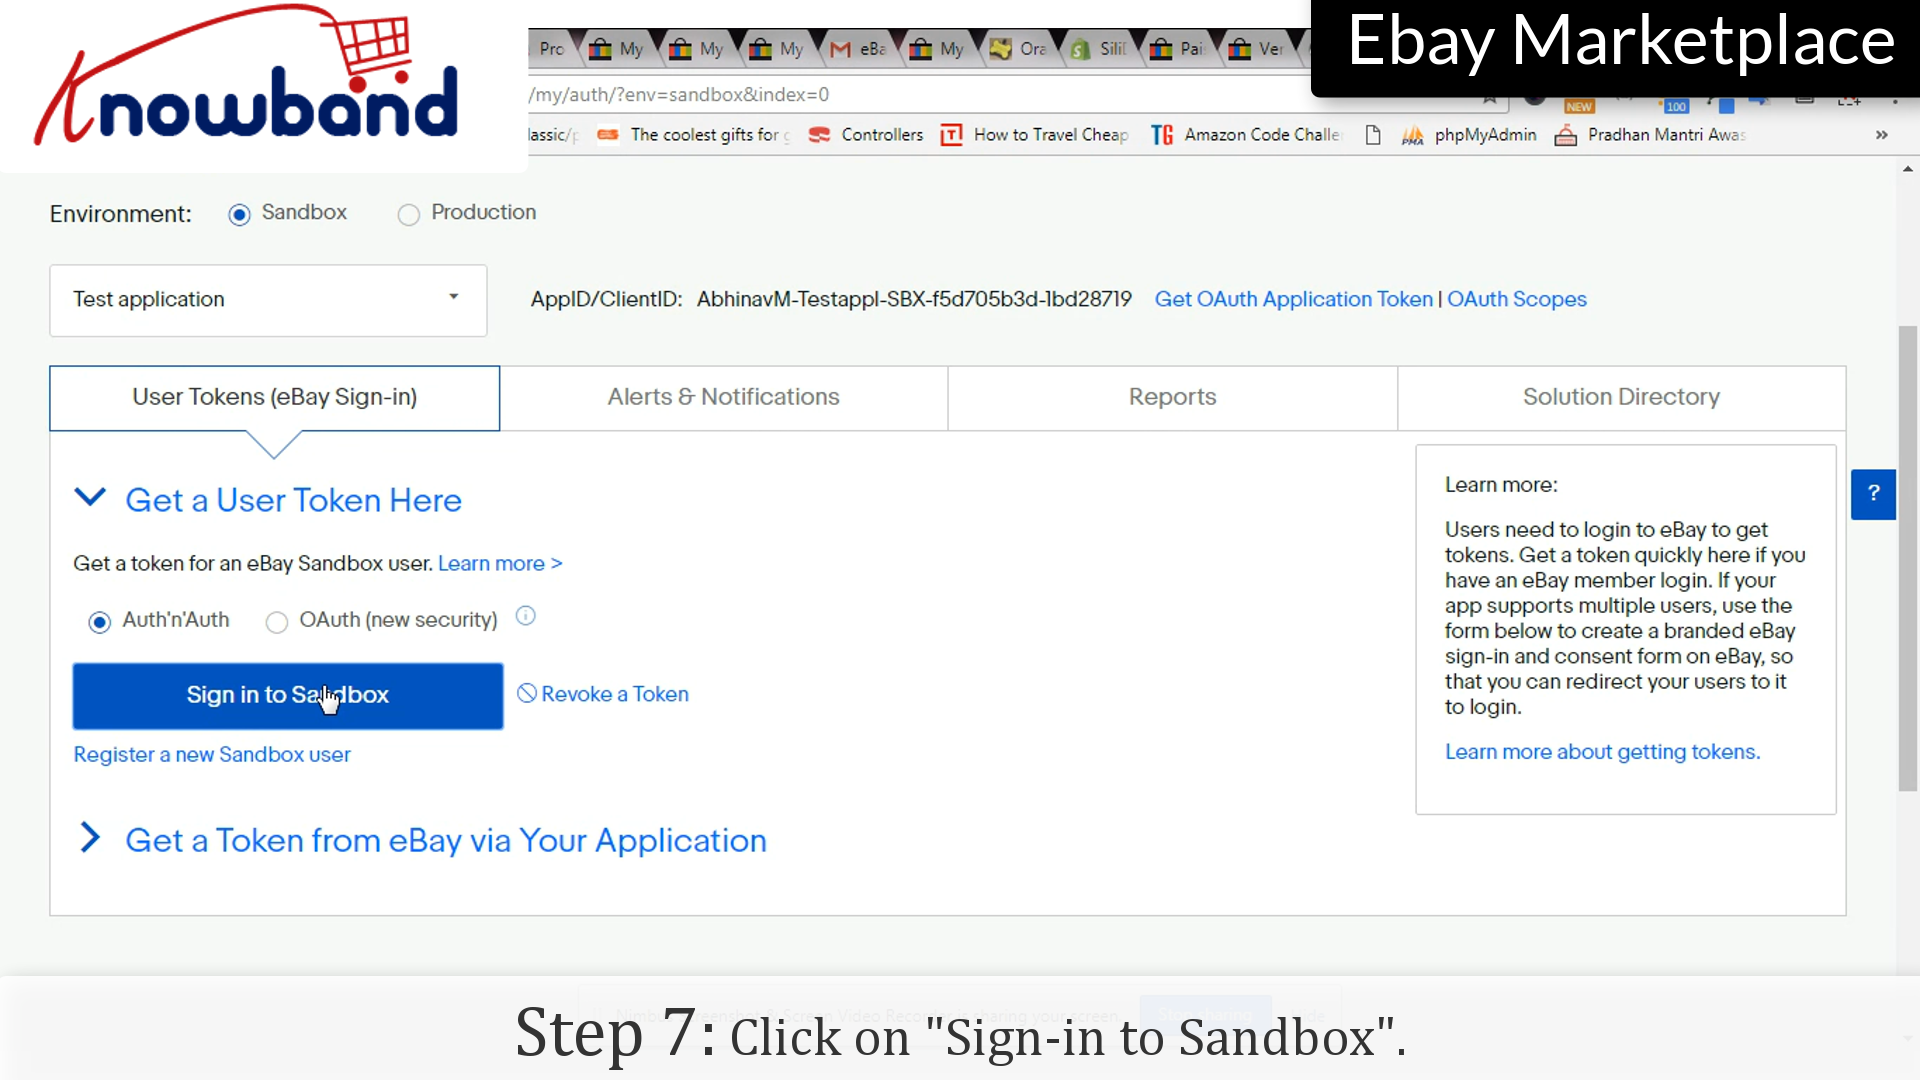
Step 7: Sign-in to Sandbox
Click on “Sign-in to Sandbox” option.
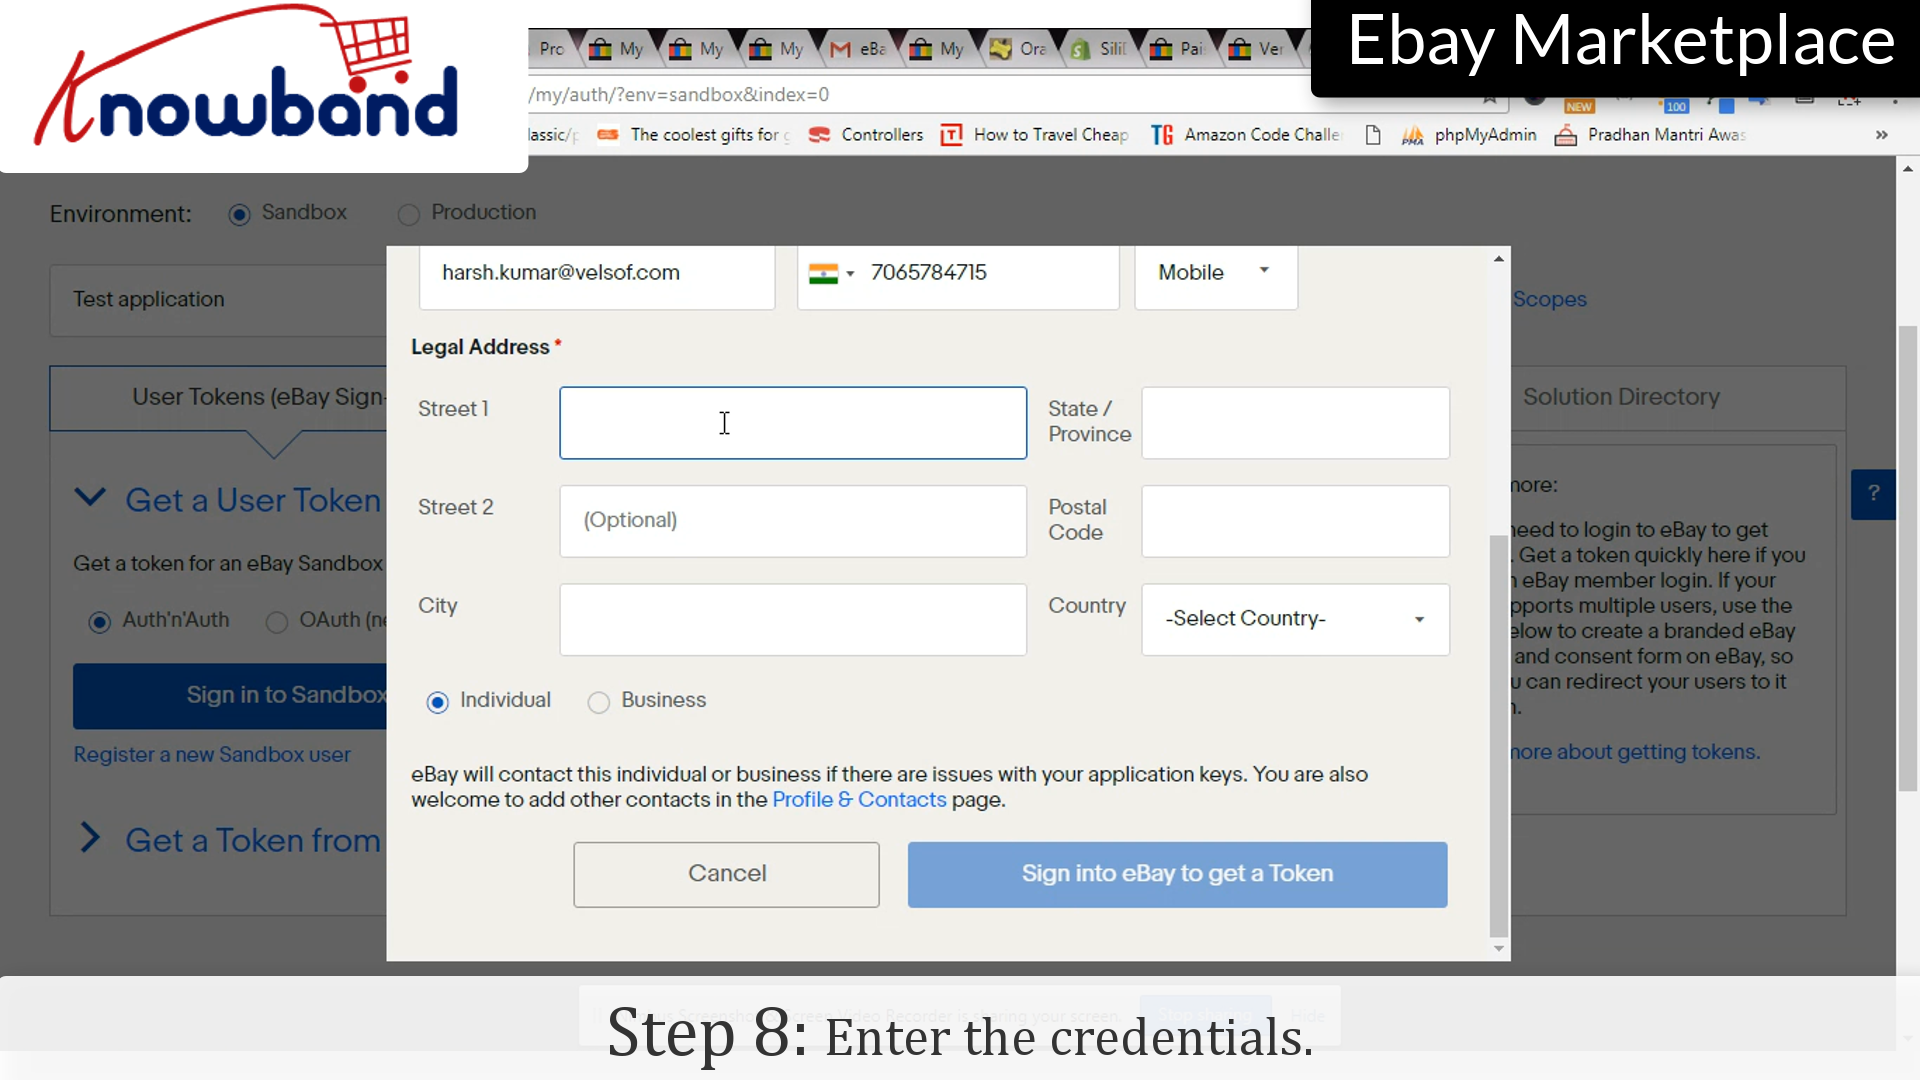
Step 8: Credentials
Enter the credentials. eBay will contact the person whose information has been entered in case there will be any issue with the Application Keys.
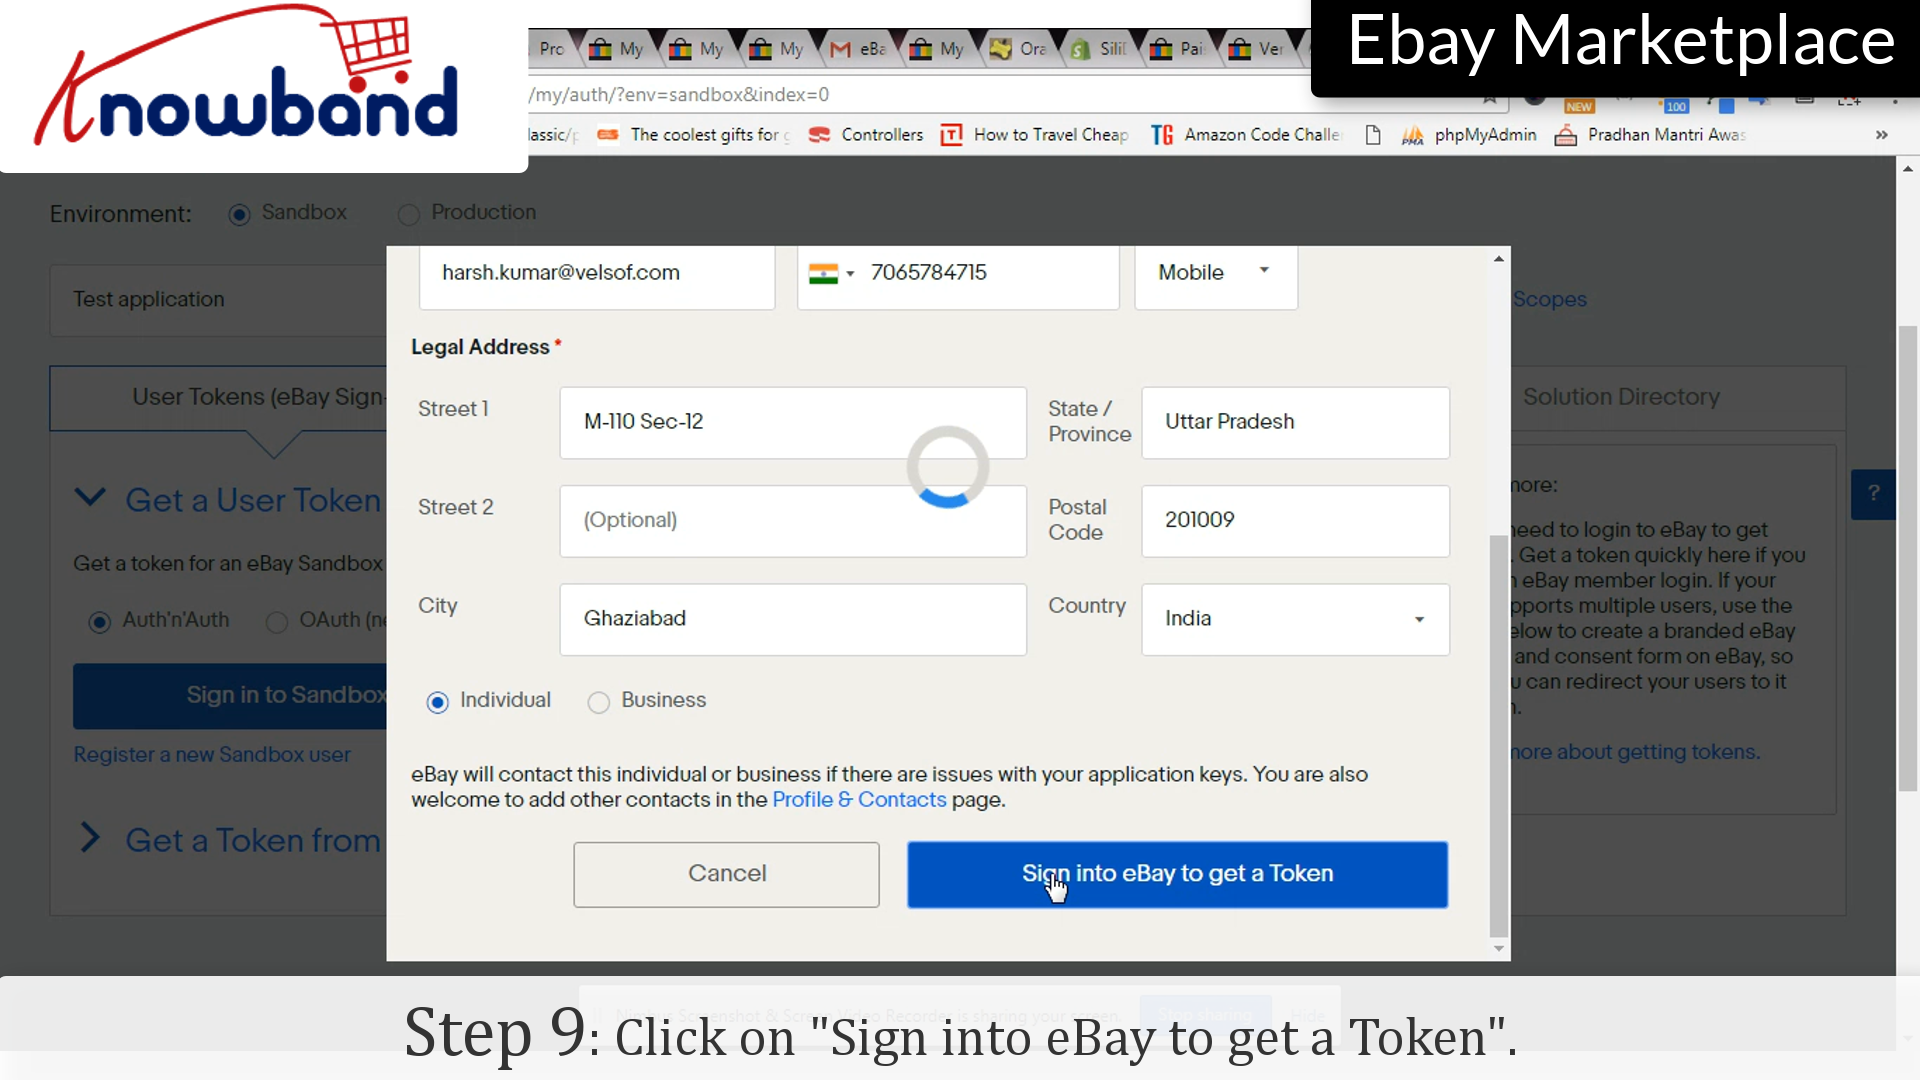
Step 9: Sign in to get token
Click on “Sign-in to get Token” button to save the credentials and move to next step.
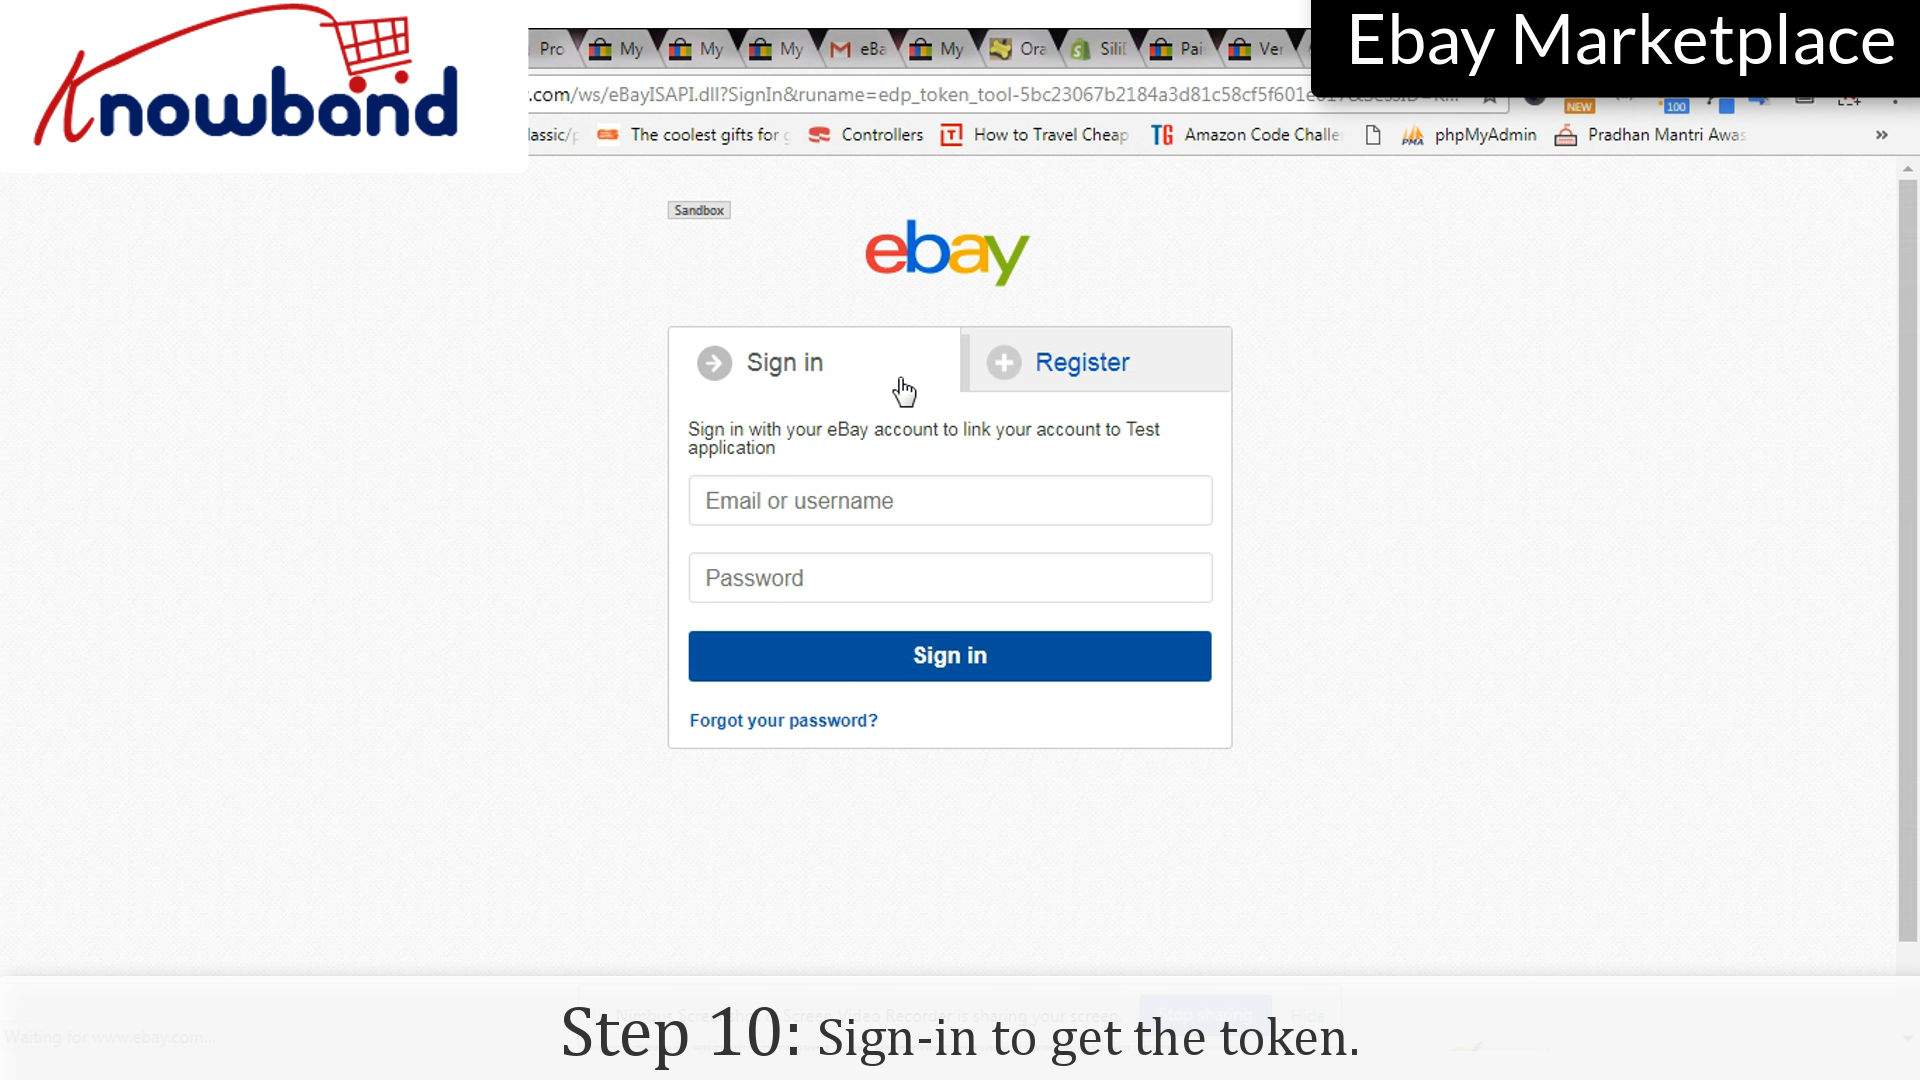
Step 10:Sign-in
Enter your login credentials again.
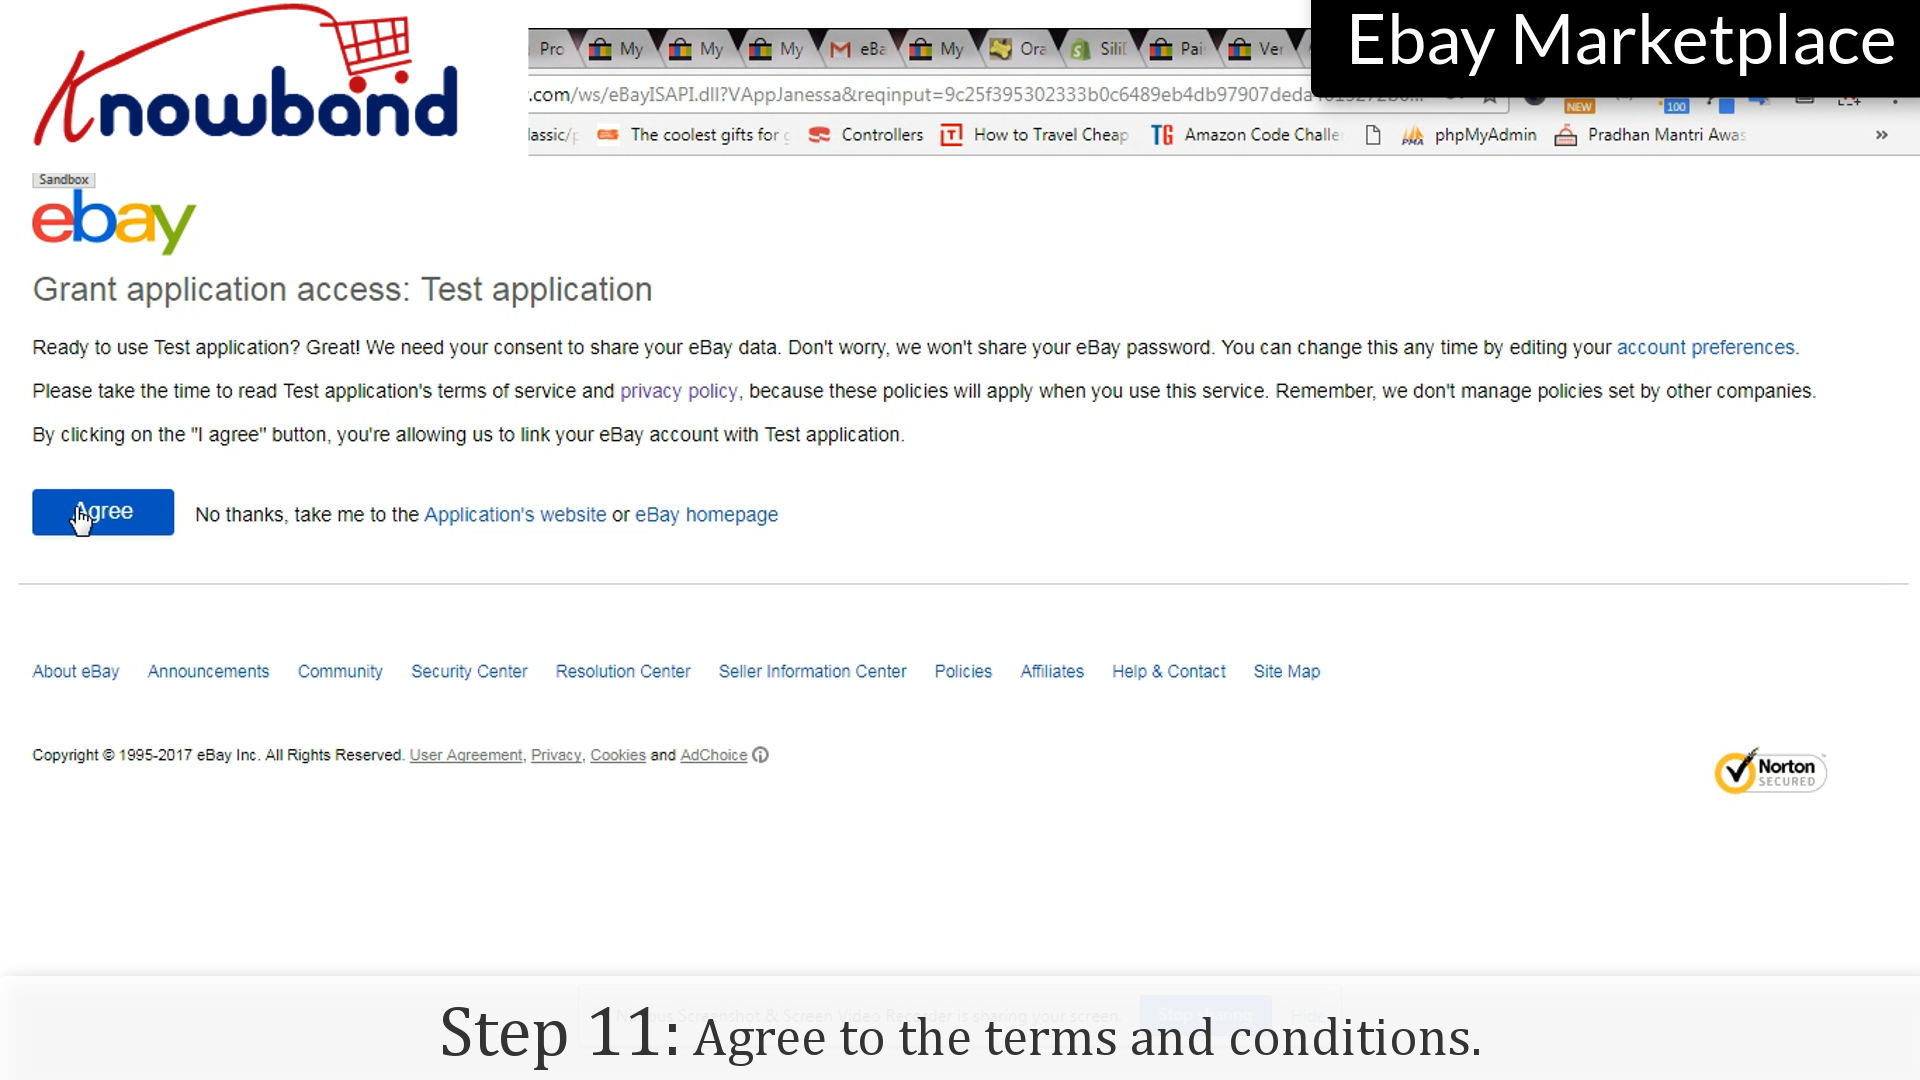
Step 11:Terms and conditions
Read the terms and conditions, and click on “Agree” button to save the settings.