Pre-requisites to publish your app on Apple App Store

You had an idea for an iOS application and got it developed. Great! Let’s find what are the requirements for launching your app on the Apple App Store. Publishing app on iOS store isn’t that easy. Apple store has a lot of requirements before app submission which might be confusing sometimes. It is better to keep all the necessary things ready before you begin the process. The successful distribution of your app directly depends on complying with these requirements. This document lists all the details required to publish app on Apple App Store.

Create a Developer Account

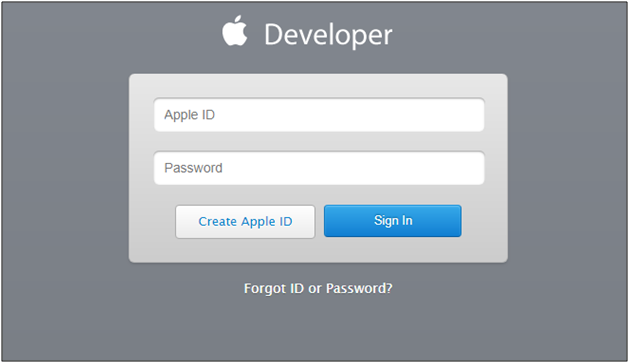
First of all, the user who is intending to go live with the App Store needs to have a developer account. The paid account requires around $99 per year for the subscription. This account has all the details required to manage the app on the App Store.

Follow the steps mentioned in the link below in order to register as a developer.

https://idmsa.apple.com/IDMSWebAuth/login?appIdKey=891bd3417a7776362562d2197f89480a8547b108fd934911bcbea0110d07f757&path=%2Faccount%2F&rv=1

Pre-requisites for launching an app on iOS Store

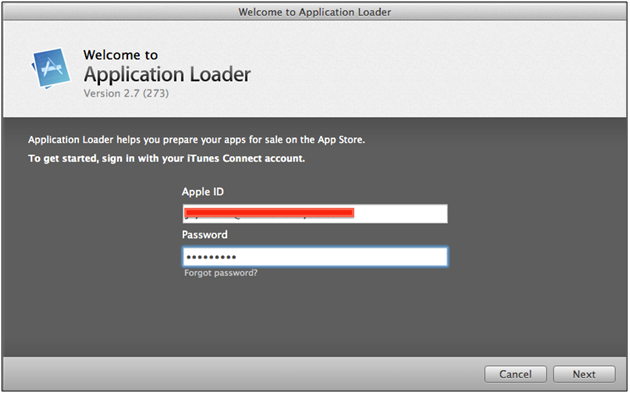
  1. Uploaded binary on iTunes Connect – The binary should be uploaded on iTunes Connect. A binary (IPA file) can be uploaded on iTunes Connect via Xcode or Application Loader.

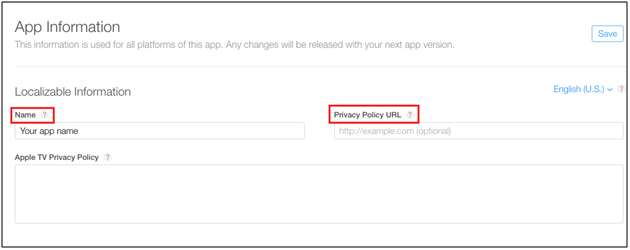
  • App Name – Name of your application to be displayed on App Store.
  • Privacy Policy URL – URL redirecting to privacy policy of your app.

  • Promotional Text (max 170 characters) – The promotional text can’t exceed more than 170 characters. It lets you inform your App visitors about current features without requiring an updated submission. This promotional text will appear above your description on the App Store for customers with devices running iOS 11 or later, and Mac OS 10.13 or later.
  • Description (max 4000 characters) – Description of your app must contain detailed features and app functionalities. It will be displayed in the App Store and can’t exceed more than 4000 characters.
  • Support URL – A URL with support information for your app. It will be visible on the App Store.
  • Copyright – The name of the person or entity that owns the exclusive rights to application along with the year when the rights were obtained. (for example, “2008 Acme Inc.”). Here, do not provide a URL.
  • App Icon – App icon plays the major role in providing first impression of your app, so try to make accurate app icon.
  • General Information – This contains all the information related to you as First Name, Last Name, Address, City, State, Postal Code, Country, Phone Number, and Email.
  • Screenshots – You must provide a set of screenshots for all types of devices.
  1. For iPhone, you need one set of screenshots for a 5.5-inch display.
  2. For iPad, you need one set of screenshots for a 12.9-inch display.

You can find the complete screenshot specifications here:

https://help.apple.com/app-store-connect/#/devd274dd925

Apple store review guidelines

Apple is very strict when it comes to app review. The App Store review guidelines are categorized in the five clear sections:

  • Safety
  • Performance
  • Business
  • Design
  • Legal.

Apple has also provided detailed guidelines on app review. Find it here:

https://developer.apple.com/app-store/review/guidelines

Also, find a small list of the things which need to be taken care of for the review process –

  1. App metadata – It should not contain any name or should not point to a third party platform such as Android etc.
  2. Screenshots – The uploaded screenshots should not be captured from an Android device.
  3. Objectionable Content – The app will be rejected if it supports or sells any kind of drugs, alcohol products etc.

What you must avoid before publishing the app in the Apple App Store

Well, if your eyes are on publishing the apps on the Apple App Store then you should completely understand the app submission process on the Apple App Store. The app submission process on the Apple App Store included a ton of requirements & guidelines. So, check these guidelines before publishing an app on the Apple App Store:

1. Avoid any kind of racist, sexist or homophobic content
2. Do not include any sort of false information
3. Do not make a copy of another app
4. Crashes & Bugs
5. Accurate Information
6. Poor UI
7. Irrelevant Information
8. Bad Performance

Releasing application on App Store

After acquiring all the required things for app submission, it’s time to get it published. The steps below illustrate how you can release an application on the App Store –

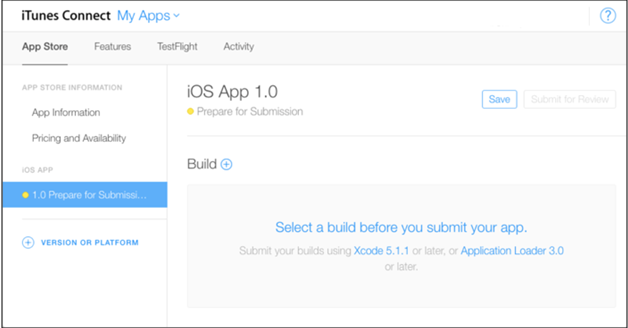
  • Upload the binary on iTunesConnect and submit the app for the review process. The binary can be uploaded using Xcode or Application loader.
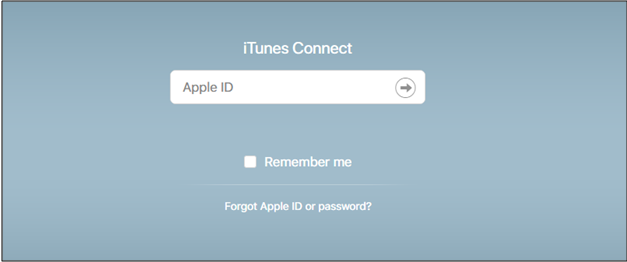
  • Go to AppStoreConnect and login into the account.
  • Go to My Apps section.
  • Click on plus (+) button shown at top start corner.
  • Click on New App option.
  • Fill the required details and click on Create
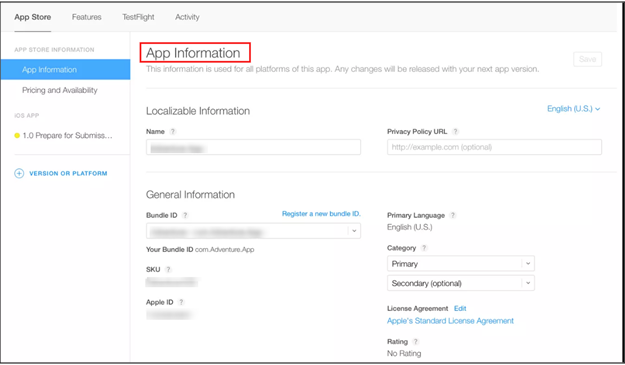
  • Now, you will be redirected to the next page where you will have to fill the metadata related with your app. Following details are required in this section –
  1. App Information
  2. Pricing and Availability
  3. Prepare for Submission
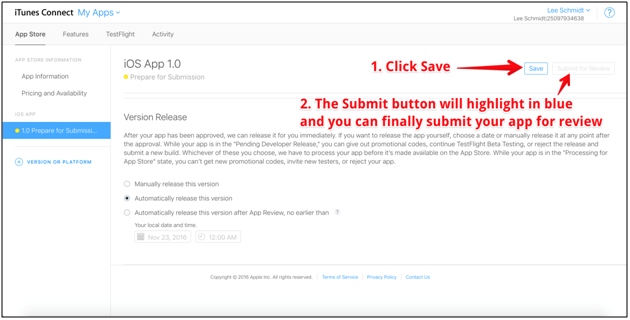
  • After filling out the information, click on Submit for Review . It will ask to choose in between two more options and the binary status will be changed to `Waiting for Review`

Once, the review is completed by Apple, the application will be live on App Store.

Conclusion

The process of app distribution on the Apple App Store might seem quite lengthy for a new application, but it is worth the effort. Manage all the above-mentioned prerequisites before app distribution and the process will become seamless for you. You can even find a more detailed info on the topic here.

Sometimes, Apple regulators reject the app for some reasons. Find few such app rejection reasons and their solutions here. A better way to avoid such happening is by Creating a proper application and start counting the download figures.

Pre-Requisites to Publish App on the Google Play Store

Although there are various app markets available nowadays, Google Play Store is the most popular and the largest of all. Google play not only allows you to distribute your app to a wide range of users but also allows you to manage the advertisement and selling of the app. Are you planning to publish an app on the Google Play store? Here, we have discussed some requirements for a seamless app submission on Play Store.

1. Create a Developer Account

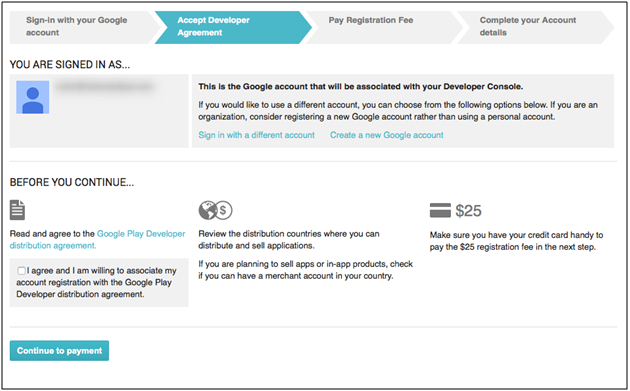
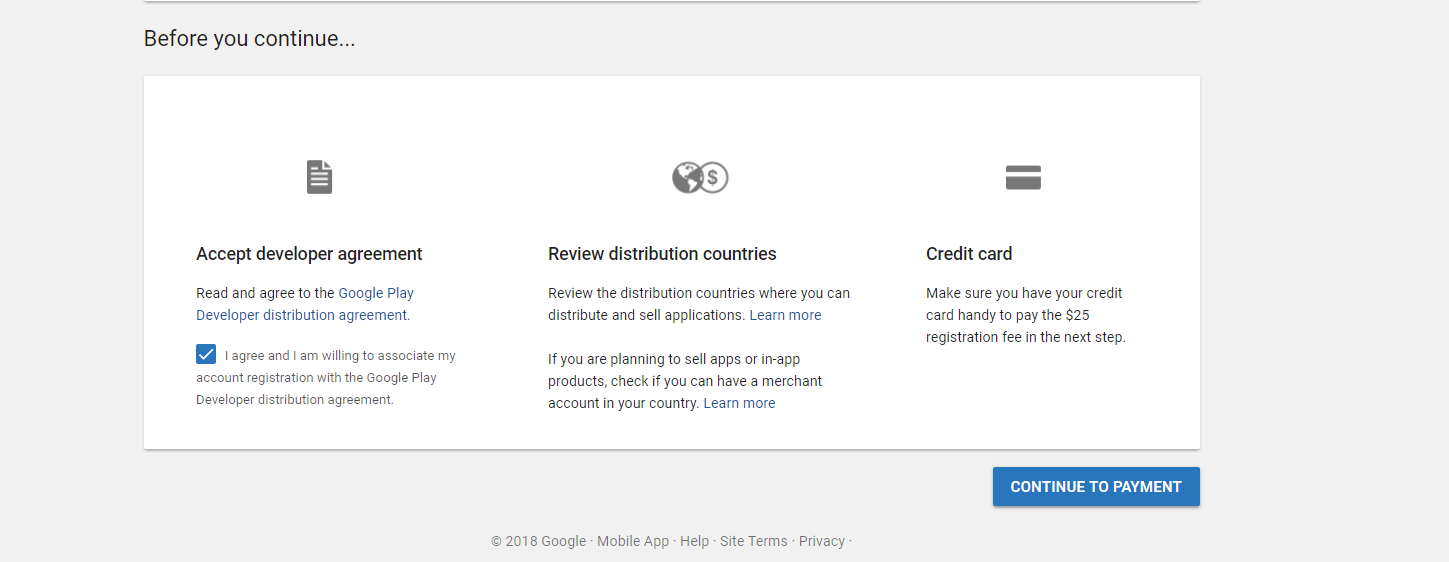
First of all, the user who is intending to go live with the Play Store needs to have a developer account to release the application. There is a one-time $25 payment required to open this account, which can only be done once. The user can follow the steps mentioned below to register as a developer using his/her Gmail account.

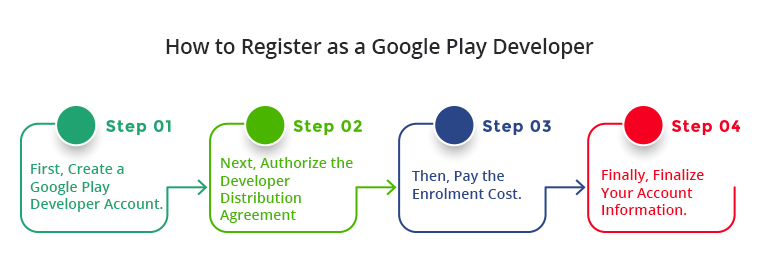
Steps to Create a Google Play Developer account

  1. First, create a Google Play Developer account.
  2. Next, authorize the Developer Distribution Agreement.
  3. Then, pay the enrolment cost.
  4. Finally, finalize your account information.

For Detailed Step-by-Step information, please visit the link

2. Pre-requisites for Publish App on the Google Play Store.

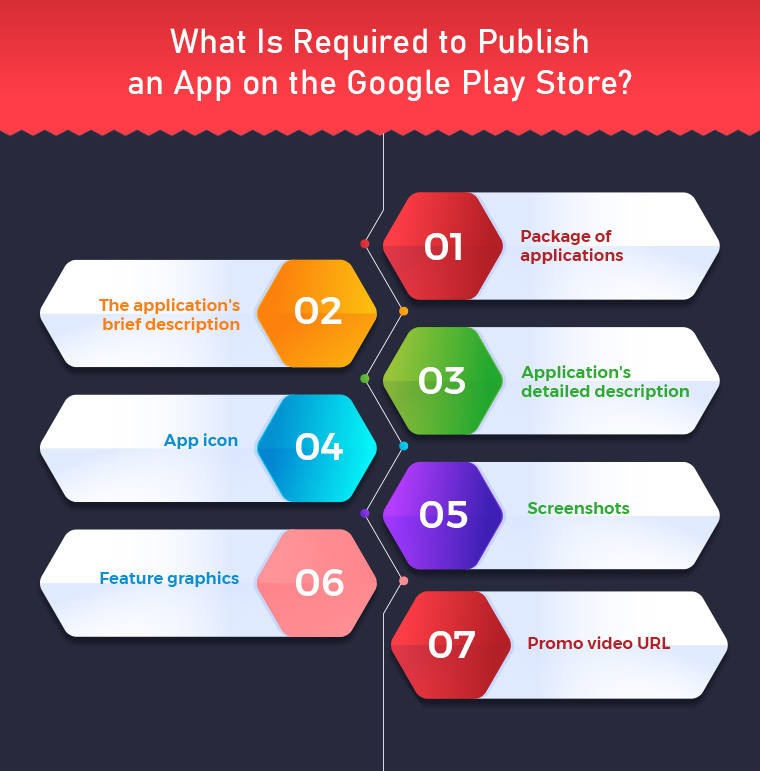
  1. Application Package:- apk file which is to be released on the Play Store.
  1. Short Description of the application: – The short description should not be more than 80 characters.
  1. Long Description of the application: – The long description should not be more than 4000 characters.
  1. App Icon:- Hi-resolution icon in png format. (512*512). Here, a few tips are discussed for making an effective app icon.
  1. Screenshots:- 8 different screenshots of the application with hints. The image should not be larger than (3480*3480) and must be in png format. Find an example here – https://play.google.com/store/apps/details?id=com.vel.barcodetosheet
  1. Feature Graphics: – Feature graphic of resolution 1024px(width) * 500px(height). A nice featured graphic usually attracts more users and get downloads for your app.
  1. Promo Video URL: – YouTube tutorial video showcasing the use of the application (if any). It should be 30 seconds to 2 minutes long.

 Recommended Read: How to publish your Android App on Google Play Store?

3. Releasing Application on Play Store

It’s time to publish the app in the store after getting everything prepared for submission of the app. The steps discussed below illustrate how you can distribute your app on the Play Store –

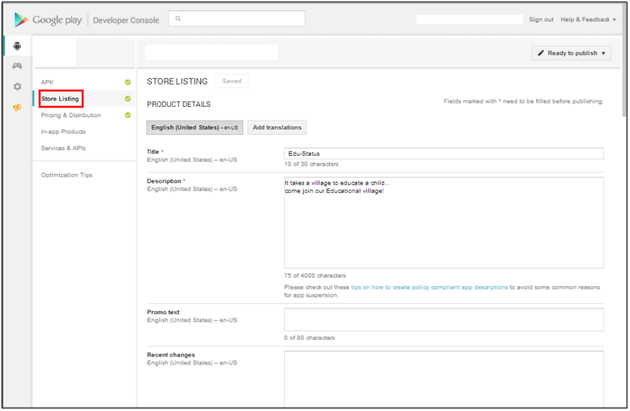
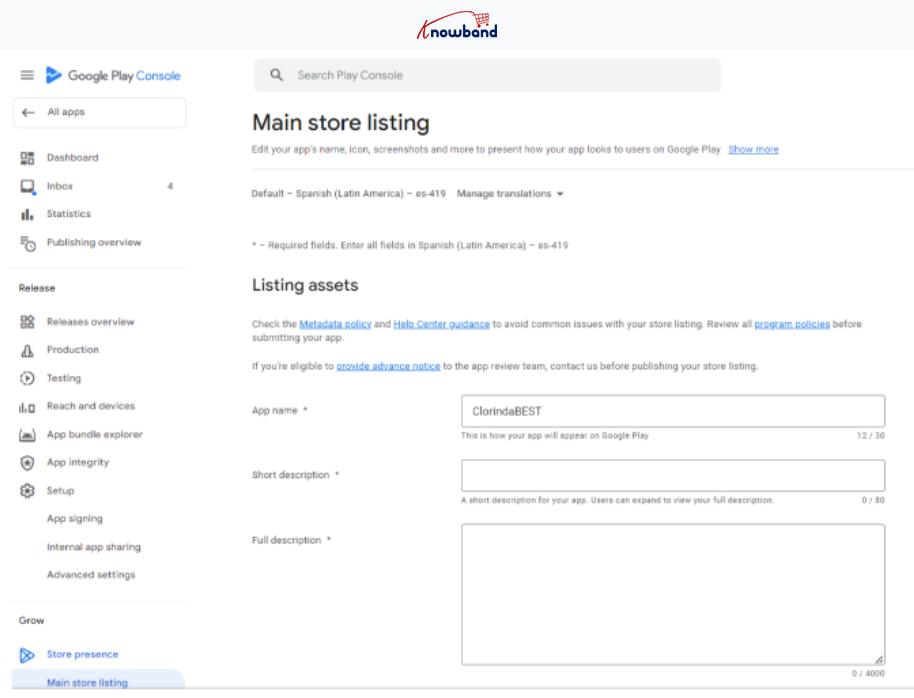
  • In the pop-up screen, enter the name of your application. Google allows 30 characters for the title of your Android application.
  • Now, you will be redirected to the Store Listing under the Store presence page, add the following details here:

  1. Short App Description
  2. Long App Description
  3. App Icon
  4. App Screenshots
  5. Featured graphics
  6. YouTube Video
  7. On the store listing page itself, you will be asked to select the Application type whether it is an App or a Game.
  8. Select the category of your App or Game to which it belongs.
  9. Enter the contact details and privacy policy URL for the app. The privacy policy is mandatory for app distribution.
  10. Now click on the ‘Save Draft’ option and move to the ‘App Releases’ option under the ‘Release Management’ option.
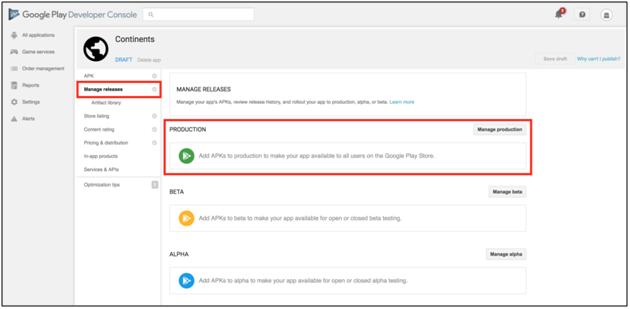
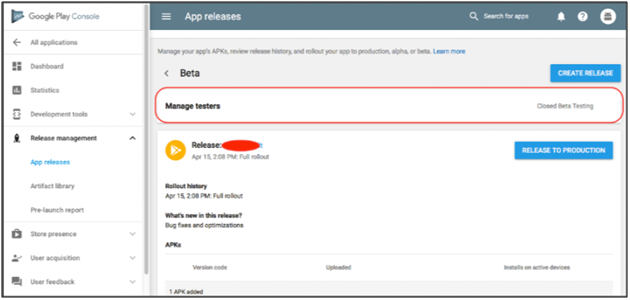
  • Select Create Release option in the production tab if you want to release your application to production. The application can also be released under beta and alpha testing before being moved to production.

  • Select the Application Package to be uploaded to Play Store.
  • Update the release notes for the application and click on Save Draft.
  • As we have now uploaded the application package (APK), you can now apply for submitting a Content Rating for the application.
  • Now open Store Presence and select Content Rating.

  • Fill in the questionnaire and you will receive a content rating based on the entered details.
  • Now, move back to the ‘App Releases’ tab

  • Under the Production track, select Manage
  • Click on the Review button at the bottom of the screen. You will be redirected to details of the application package and release note.
  • To release the application package on Play Store, select the option “Rollout to Production” to make the application available for release.

When Google has processed your request, you can download your application from the Play Store.

Recommended Read: What to do if Google Play Store rejects your App Submission?

Need An eCommerce Shopping App?

If you’re an eCommerce store owner and looking for native shopping apps for any of the following platforms:

PrestaShop Mobile App Builder

OpenCart Mobile App Builder

Magento 2 Mobile App Builder

WooCommerce Mobile App Builder

This readymade tool by Knowband will create and publish an app on the Google Play Store. The mobile app creator for iOS and Android securely connect your store with the mobile apps. The Android and iOS mobile apps automatically roll back any changes you make on the website. Therefore, flawlessly synchronised mobile apps manage the entire workload without the need for manual synchronisation. The plugin comes with 3 months of free support including a free cost app release.

Conclusion

These were some of the pre-requisites for the distribution of the app on the Google Play Store. You can also find detailed info about app publishing on Google Store. Once Google approves your app, your app will join the Play Store. However, Google frequently rejects apps for common reasons that are disregarded at the time of app submission. However, you can curb the reasons for rejection and republish it with ease. You can also create a perfect mobile app and publish the same, just keep above mentioned pre-requisites in your mind.

What to do if your app was declined on the Apple App Store?

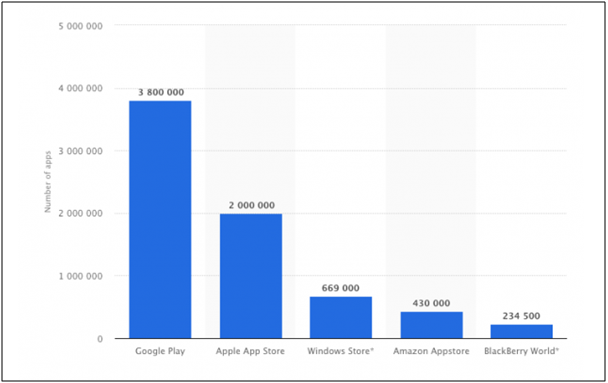
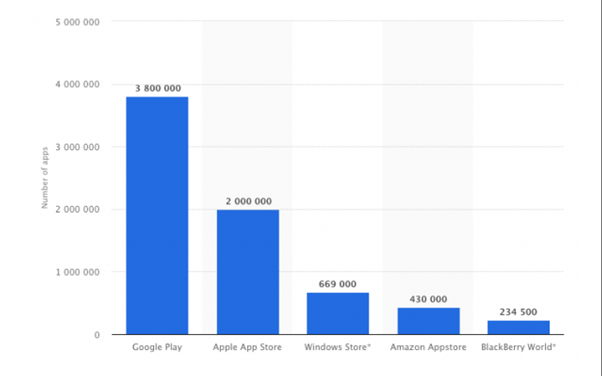
Apple App Store has such a jam-packed app environment, that sometimes publishing your app there becomes quite an arduous task. As per a survey, there are around 2 million apps available in the Apple store. Entering into this huge competition isn’t everyone’s cup of tea and often you find your App declined by Apple Store. This data isn’t stopping; every day new applications are being built and published.

According to a report on Statista, after the Google Play Store, Apple leads the list with the most number of applications available:

It is quite unfortunate that some of the apps fail to pass the iOS gatekeepers and get rejected by the store. For beginners and also for professionals, it isn’t that easy to understand why their app got declined by the iOS store and what to do next. So, here are a few reasons why your app gets declined on the Apple store along with their solutions. Keeping these points in your mind would surely get your app published in one shot. Additionally, the developers whose app got rejected can retry and get it published with these measures.

Recommended Read: What to do if your app was declined on Google Play Store?

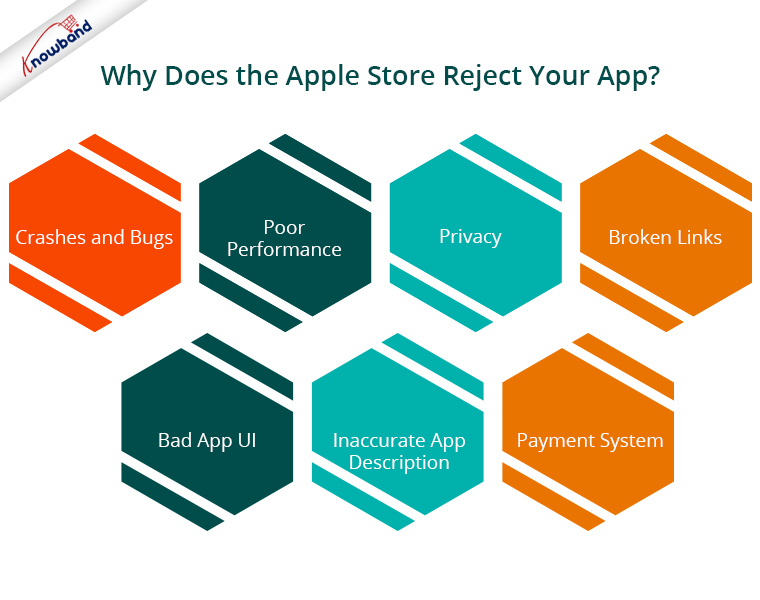
Why does your App gets declined on the Apple Store?

1. Crashes and Bugs

Apple isn’t lenient for apps that contain any kind of bugs or crashes. Make sure your app works fine before sending it for approval. If during testing, Apple regulators find any kind of unstable app performance, your app will surely get rejected.

2. Poor Performance

Often it happens that the app looks stunning and reliable, but when it comes to the performance they fail miserably. Either the app takes a huge time to load or it doesn’t meet the user’s expectations. Try to make App’s performance optimal if you don’t want your app in the rejection bin. You can even hide app loading time by making the right splash screen for your app.

3. Privacy

The privacy policy of the Apple App Store is very strict. You need to carefully read all the privacy policy requirements before publishing it. If you don’t provide enough privacy details in your application, it will lead to app rejection.

Recommended Read: How to save data to firebase in swift language using iOS?

4. Broken Links

Broken links have been one of the top reasons for app rejection in the Apple store. Before submitting an app for approval, go through every app page and check if all the links are working fine. There are various tools available for checking broken links in an application, I would suggest trying them at least once.

5. Bad App UI

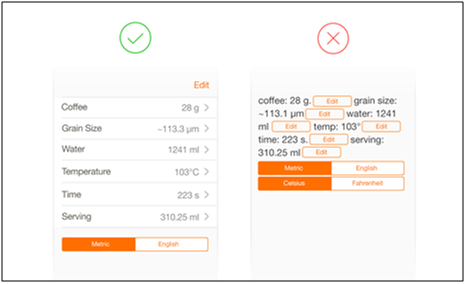
Before designing the interface of your application, in order to meet design expectations and quality, get along with Apple’s Design Guidelines. These guidelines will enrich you with a better idea of how to properly design the user interface of an application which will bring out the best results for you. Here is an example illustrating what not to do while designing app interfaces.

6. Inaccurate App Description

Lack of app description, metadata, screenshots, and preview could possibly be the reason behind app declination. The incorrect information about the application can also cause App Store rejection. Try to keep your description to the point and accurate.  Also, make sure your app doesn’t point out any lies. If your app description is misleading, you might find yourself in the hot water.

7. Payment System

If your software uses in-app purchases or digital subscriptions, transactions must go through the in-app purchasing system. Otherwise, your app will face rejection while reviewing. This is something which you should keep in mind while upgrading your website to a mobile application.

Recommended Read: How to download the Android/iOS app from the Diawi link?

Other Reasons for App Store Rejection

There might be a few other reasons for app rejections as well. So, If you have submitted your app to the Apple store for approval and it got rejected for some unknown reason, you can contact Apple support.

How to avoid app rejection from Apple App Store?

The above discussed were some of the basic reasons for app rejection. One thing is certain before submitting your app, you can avoid such rejections if you are careful while app development. Now let’s see ways through which you can save your app from hauling and get it approved:

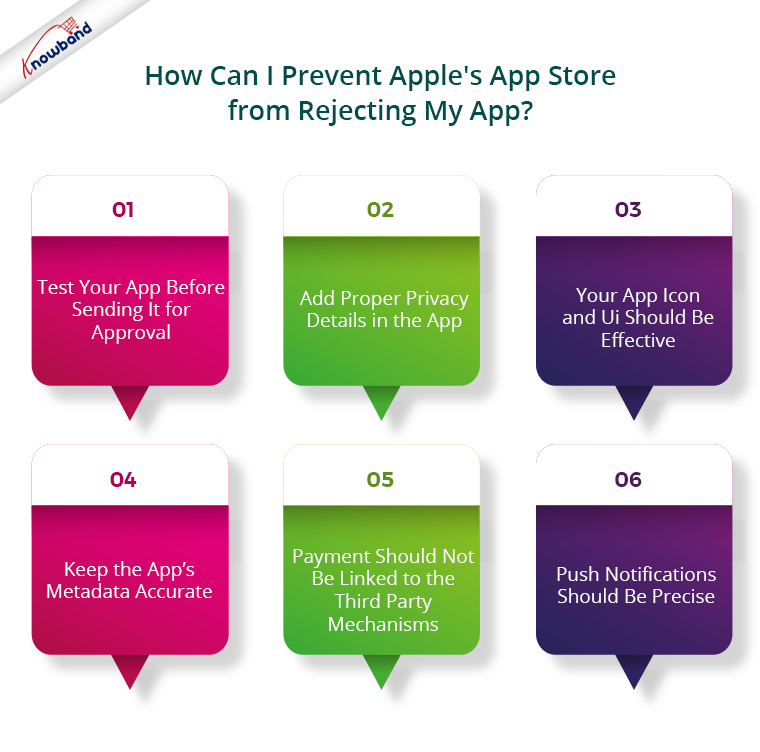
1. Test your app before sending it for approval:

App testing is a very necessary and very basic step. Any bugs or errors, if found in-app functionality, should be curbed out instantly. Before sending the application for the approval process, it should be thoroughly checked on different devices for performance issues. Fixing all the major errors could simply prevent your app from getting rejected by regulators. Test your app properly and then send it for review, and hopefully, you won’t have any issues.

2. Add proper privacy details in the app:

As per Apple’s guidelines, two types of links are must in your app, if you want it to be published:

  1. Support link with contact information.
  2. Privacy Policy page link.

I would suggest you make your application compliant with GDPR rights and Apple’s privacy policy for the safe side.

3. Your App icon and UI should be effective:

The app icon also plays a major role in app publishing on an iOS store. If your app consists of a similar kind of icon which already exists in the App Store, it will face rejection. Your app icon speaks about what your app provides to the users, so, try to make an effective app icon. Also, check your app UI shouldn’t look crammed up.

Recommended Read: 10 Tips for Creating an Icon for a Mobile App

4. Keep the App’s Metadata Accurate:

Your app description or the metadata should not discuss or point to any other mobile platform. Your app metadata should be accurate. Ensure that app content and functionality are in sync with each other and both together make a good combination.

5. Payment should not be linked to third-party mechanisms:

Apple neither accepts payment outside its App Store for one-time purchases nor for digital subscriptions. So, you should make sure that all the purchases from your application go through the user’s iTunes account.

6. Push Notifications should be precise:

Push notifications are a marketing tool which surely is a great way to engage your users who use your app. However, you should make sure that your app is registered with the APN (Apple Push Notification) service or else it will be declined by the App Store.

Wrapping Up

This rejection process of Apple is basically for preventing users to deal with a buggy or spam applications. If they become lenient, the Apple store would be full of misleading apps and it would ultimately affect their brand image. So, there are valid reasons why the apps get rejected by Apple. This approval process wouldn’t be a headache for you if you keep check of all the above-discussed checkpoints while developing an eCommerce mobile app and getting it published. They would surely help you with hassle-free app approval. So, keep a check on app rejection reasons and start reaping iOS store benefits.

Every portable device is totally compatible with the apps developed by the eCommerce mobile app provider. They are small and easy to use. Your eCommerce website is easily accessible to online customers. In spite of the fact that a sizable portion of the eCommerce market has already converted their websites into fully functional mobile stores, our job is to remove the obstacles in your way and make this process considerably simpler for you.

How to Publish your iOS App on the Apple App Store?

Publishing an iOS app on Apple App Store is surely an inevitable task for app developers. Developing an application requires the huge effort and for making it publicly available for the users, getting it listed on the App Store is a must.

How beneficial could be publishing an iOS app on Apple App Store, it can be understood by following fact which tells that recently Apple has set a record of $300 million in purchases on the very first day of the year 2018.

Publishing your mobile app requires a plenty of challenges which could be simply dealt with in a few steps discussed as follows:

1. Set up your iTunes Connect Account:

You need an active and paid account in iTunes Connect for publishing an app on the iOS store.  The paid account requires around $99 per year for the subscription. This account has all the details required to manage the app on the App Store. Once your account is created, configure it and choose an iOS developer program in Apple Member Center. Also, Apple provides a detailed guide on how to connect with the App Store.

2. Gather all the information required for publishing app:

Once the account is created, now it’s time to prepare your app’s homepage on the App Store. It involves a simple process which could be more seamless if all the required things are already prepared. Here, is the list of requirements:

  1. Maximum two categories for your application. They help the users to find your app easily. Apple even has a detailed info on choosing effective categories for your application.
  2. An app icon in proper resolution ( Read tips to make perfect app icon)
  3. Name of your application (See an example)
  4. URL to Privacy Policy of your company
  5. URL to Support Page of company
  6. Pricing details (Free/Paid)
  7. Targeting countries
  8. App description (see an example)
  9. Keywords for the app which will make app search easier
  10. The name of your organization
  11. Company contact details
  12. App Screens

3. Upload the app:

You again need your iTunes Developer account for uploading an app. Once all of the necessary app details have been entered in the iTunes Connect, you can upload your app on Apple Member account and Apple development tools as Xcode or Application Loader. After you create an iTunes Connect record for your app, the upload is displayed in the Activity section.

To prepare the proper build for your app, you have to establish a few crucial things which will be available till your app remains in App Store:

a) In the Apple Member Center:

  • Assign Access for developers to the Apple Member Center (see guide)
  • Generate a Distribution Certificate (more info)
  • Create Distribution Provisioning profiles (more info)
  • Create an app ID with a unique bundle ID. (Once uploaded can’t be changed, read here)

These points listed above generates a proper build for your app and makes it ready for uploading. It is better to ask your developer for the complete job as it requires some technical knowledge.

b) In iTunes Connect:

  • Upload a .ipa file to the existing app in iTunes Connect ()

Note: Your app won’t appear at once after being uploaded. Do not panic at that. Apple takes some time for processing the .ipa file on their servers.

4. App review and release

After successful submission of your application to Apple, you are given three choices regarding when you want to publish your application. These are :

  • Automatic app release (App will be published as soon as it is accepted by Apple)
  • Automatic app release, no earlier than (App will be published on a selected day and time)
  • Manual app release (You can choose the right moment)

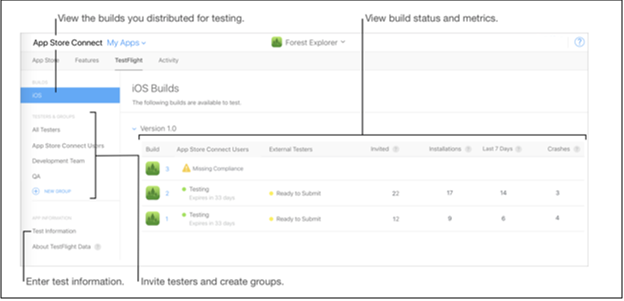
Note: You can also check for app testing. Test Flight functionalities are a good alternative before making the app live.

Wrapping Up

I hope these points would be helpful in publishing iOS app on Apple App Store. Developing an iOS app requires technical knowledge, which can be a bit arduous. Similarly, publishing app can be exciting and nerve-wrecking for a newbie developer. For both experienced and inexperienced developers, sometimes it might be time-consuming also. But when you have millions of user in the target zone, the efforts are worth to make.

There are times when your app gets declined also by App Store. Here, are some easy measures to handle iOS app rejection.

Suggested Reading:  How to Publish your Android App on Google Play Store? 

How to Publish your Android App on Google Play Store?

After spending a substantial amount of time developing an Android application, the next step is to publish your Android app on Google Play Store. Currently, there are more than 1 billion active users of Android. Publishing your app on the Google Play Store will make your reach prospective audience base at ease. If we look at the following statistics, the number of available applications in the Google Play Store from December 2009 to June 2024 is gradually increasing:

With such a huge no of apps available in the Play Store, publishing an android app would be quite beneficial for your business. If you are a newbie in the field of app development or this is your first-time publishing an Android App on Google Play Store, here are some useful tips on that:

Recommended Read: Pre-Requisites to Publish App on the Google Play Store

1. Create a developer account in Google Play Console

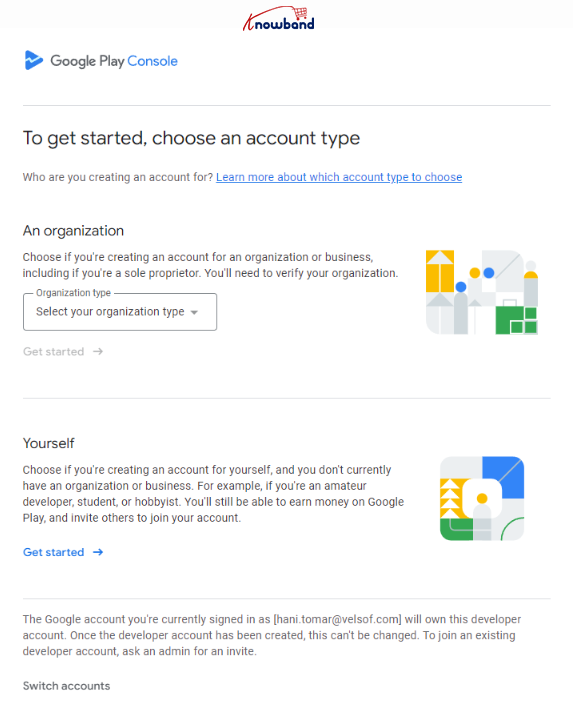
To begin with the app upload, the initial steps comes as creating a new developer account. Furthermore, there are 2 types of Google Play Console developer account: Individual and organizational.
Creating a new developer account starts with visiting the Google Play Developer Console sign-up page. You can only register a new Play Console developer account only if you have enabled 2-Factor authentication on your Gmail account.

Either you can select the option as an Individual registration, or if you are willing to register as a business, you can select the organization type from the dropdown list.

2. Submit the Details:

If you are registering into a new Play Console developer account, you are going to need a D-U-N-S number for your organization, A contact phone number and email address for Google Play users, A contact phone number and email address for Google, and a single time fee of $25 USD.

Once these details are submitted, you can get your Play Console Developer account approved within 3-5 business days.

3. Upload your app

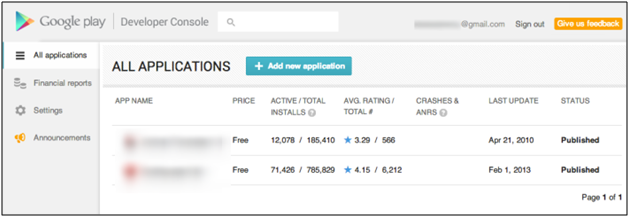
Upload your android app with Add new application option.

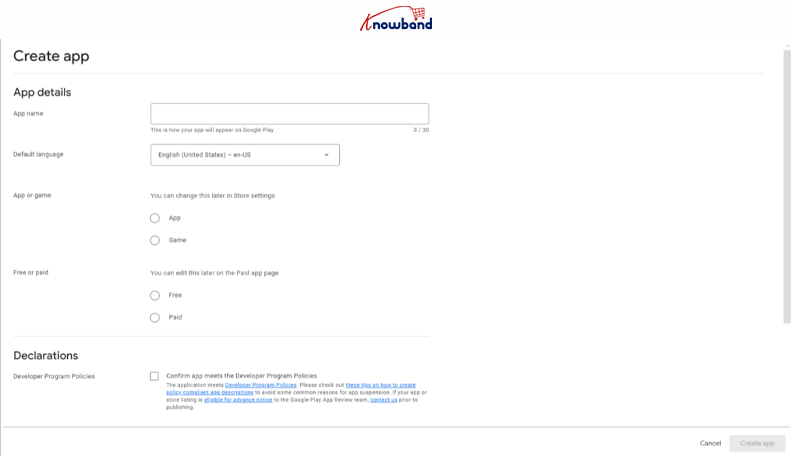
To submit a new app, click on the create app button shown in the above screenshot. Once done, you will have to fill in the basic details such as the App name, default language, selection between app and game, and the Play Console policy declarations.

Fill in the requested details and click on the create app button.

4. Set-up Your App:

Once the basic details are submitted, you will be redirected to the Play console account dashboard. For the next step, click on the dashboard tab visible in the side menu and visit the Set up your app section.

Here you will have to fill all the details that are mandatory to submit the app on the Play console. Start by one by one. Once you are done with the app content section, there comes the next step.

5. Enter Store listing details

Your app page plays a very vital role in attracting Android users. Keep its details compact and precise. After uploading the APK file, go to the store listing page and add the following details related to your application:

  • Full description ( up to 4000 characters)
  • Short description( up to 12 to 80 characters)
  • App snapshots
  • Promo video
  • YouTube video URL (optional).
  • Chromebook Screenshots (Optional).

You can also provide details such as contact, category, and more. These store listing details can be updated whenever required.

6. Add pricing and distribution details

Now come pricing and distribution details. Enter the price of your app with the following steps:

  • Select whether your app is free or paid.
  • Select the targeted countries.
  • Check the boxes stating that your app complies with the content guidelines.

Save the details and further move on to the next step.

There are a few extra options are available that might not be mandatory while publishing the app, but they surely prevent your app from getting negative feedback. Also, you can manually filter non-compatible devices. So, use these options to curb any negativities and stay at the top of your game.

Recommended Reads: Alternatives to publishing your Android app on Google Play Store

Looking for native shopping apps for any of the following platforms as an owner of an online store?

Building Mobile Apps with PrestaShop

Mobile App Builder for OpenCart

Build Mobile Apps for Magento 2

Building Mobile Apps with WooCommerce

A Google Play Store App will be created and published using this ready-made tool from Knowband. Your store and the mobile apps are safely connected through the mobile app developer for iOS and Android. Any modifications you make on the website are automatically undone by the Android and iOS mobile apps. So, without the need for manual synchronization, flawlessly synchronized mobile apps handle the full task. The plugin includes a free app release and three months of unrestricted support.

Note: These steps are applicable only in case you have a registered account as “Organization” on the Play Console. If you have registered as an Individual, you will have to meet the closed testing requirements for app submission.
Check out our other article about “Google makes closed testing mandatory for the personal accounts“.
Once the closed testing is done, you can submit your Android app on Play console by following the same steps as mentioned in the article above.

In Conclusion

A well-crafted Google App page is a key to your app’s success. With the above-discussed points, it is quite clear that publishing an Android App on Google Play Store is a simple process and just requires a few minutes. So, go ahead, publish your app, and reap out benefits of the Google Play Store.

If your app somehow got rejected by Google regulators, don’t worry, we got you covered. There might be a few reasons behind Google declining your app which are discussed here along with proper solutions.

Knowband’s Mobile App Builder

Get the mobile app created for your store in few hours with Knowband Mobile App Builder Module.

SHOP NOW

At Knowband we provide no-code mobile app builders for Prestashop, Opencart, WooCommerce, and Magento 2 eCommerce platforms. Our apps come with a ton of richly loaded features that can help your business to grab the attention of your customers. If you have any queries/suggestions regarding app submission on the Play Console, feel free to reach out to our support team at support@knowband.com.


You can also find out: How to Publish your iOS App on Apple App Store?

10 Essential things to follow when creating the icon for your Mobile App

Motivating the users to download your app isn’t a cake-walk nowadays. Along with the app development, good description, app promotion various other strategies are required for making an app successful. The app icon is one such factor that makes your app noticeable. Creating a stunning mobile app icon that can motivate the users to click on your app is way trickier than it seems.

What was different in the popular apps and their development process that contributed to their tremendous success? This question might have popped in your mind. Well, the answer is that a successful app developer pays attention to each and every aspect. Even a seemingly small factor might play a key role in the success of an app. The app icon is one such factor that can play a vital role in contributing to the success of your app. The small colorful squares may easily entice people to try your app once. Earlier mobile app icons were created mainly for showing app functionality, but now they are created to give users a clue about the core concept of your business. The app icon is the very first thing which a user experiences. In the overcrowded app store, it is one of the ways to attract the attention of the users.

So, here are some tips and suggestions for designing a mobile app icon. Read on to know:

1. Pick a unique shape for the app icon, but keep it clear

Your app icon should look bold, that’s what makes it recognizable among your competitors. For making it noticeable, a unique shape is necessary. Along with uniqueness, it should also be simple enough to portray your entire theme to the user in just one look. Making your app icon unique and simple would entice more users to download your application. Android provides us the luxury of choosing various shapes for icons. Unlike iOS, that only offers the option to choose a round shaped icon.

For instance, Spotify and Google duo both have creatively shaped unique app icons.

2. Avoid image in the app icon, keep them symbolic

If you thinking of using an image in your app icon, I would suggest you avoid it if possible. The image in an app icon reduces your app credibility in the users’ eyes. This would ultimately create a bad impression of your application.

Images can be used for those mobile applications which need to share more information with the users than just the core business concept. However, if the purpose is served with an icon or a letter, it would be a better option. You can even go for vector images or images with symbols if there is no other choice left but to use the image.

3. Keep your brand name highlighted in the app icon, if the text is used

Your app icon size is very small. Considering the maximum permissible size, using a detailed text on the app icon is not feasible. It will neither give the idea of your app to the users nor the users will be able to read the text and get a clue. In every possible way, it will be a total loss for you. Use moderate text on the icon and make the brand name bold.

For instance, BBC news app and ESPN app use the text in the icon but keep their brand name bold and recognizable.

4. Use minimum colors in the app icon, that too vibrant ones

Choosing the right color combination is a prominent issue faced while designing the app icon. There are some icons that use 4 to 5 different colors which don’t look attractive or engaging in any way. Avoid using a lot of colors in the icon. Also, the color chosen must be vibrant enough to attract users with just a look. There are various icons which share the same color, you should make sure your icon color must vary from other apps available, especially in the same category.

For instance, the color used in the icon of Snapchat and Instagram provide them an edgy look. The color combination makes them stand out even in the jam-packed competitive ecosystem.

5. Instead of lengthy words in the app icon, a single letter will do the job

As discussed above, the text won’t look good on the icon and neither will it serve the purpose. Similarly, using words in the icon doesn’t even put effective impression. Rather than going for text, a single alphabet can even make your app popular and would keep you ahead in the competition.

Take the example of Facebook and Pinterest, they technically use alphabets in their icons and are amongst the most successful apps today.

6. Add the outline border, to make app icon stand out

Around the app icon, the simple border can be used to make it visually attractive. Outline/border increases the impact of your app icon as it highlights the actual content of the icon. Be it color, design or letter, the presence of the border makes the icon more attractive. Different 3D borders are also being used nowadays, but I would suggest going for the simple ones.

For instance, Apple uses borders around both the app store and iTunes icons. It makes them stand out from the competitors.

7. Get new ideas and improvise accordingly

Before creating an app icon for your app, go and have a look at your competitor’s app icons. Try to figure out what different are they are doing and what is making some of them popular. Spending some time in this analysis would help you in differentiating ugly and good icons. You will understand how you have to start making yours and what to avoid in the process.

8. Create a prototype first

When you get all the ideas related to icon creation, you should draw a prototype sketch on a piece of paper first. Drawing multiple variations of an icon on a paper will surely help you and your designer in taking the decision. The major motive of this sketching is to get an idea about your app icon before taking the final decision.

9. Run A/B test on an app icon, before making it final

The icon you pick for your application is going to be used for marketing, brand enhancement and more. It is better to test, how engaging your app icon is before finalizing it. For this, there is A/B app icon testing. This testing basically compares two app icons and analyze graphical results depicting which one can get downloads for your application.

10. Make sure your app icon meets size guideline

At last, when you have visually analyzed app icon on your phone screen and you are on the verge of creating it, I would suggest checking if your app icon’s size is all right. It should be proportioned with the screen and easily visible to the user’s eyes.

Apple will also reject your app if its icon doesn’t meet size guidelines. So, this check would save you from your loss of money and time. So, before sharing apps with Apple and Google for app submission, refer following size guidelines:

iOS app icon size guidelines
Android app icon size guidelines
In Conclusion
App icon shows your business credibility, which is a parameter for the users to decide where they can invest their money. So, a refined and well-crafted app icon that can motivate the potential users to delve into your app. Not just this, even the other UI aspects like splash screen and others contribute to the user engagement. Hence, ensure a flawless and user-friendly interface while creating a mobile app and stay ahead of your competition.

How to Create right Splash Screens for your Mobile App?

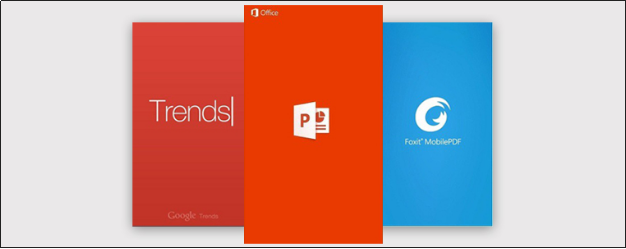
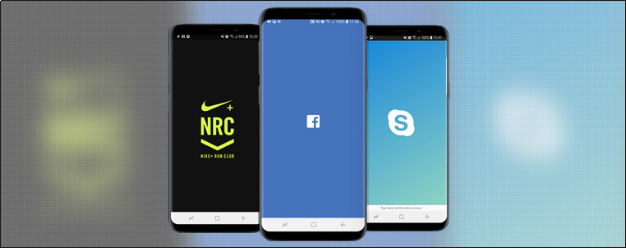
A splash screen also known as boot screen/load screen is an intro which appears while a mobile app is loading. It is designed for enhancing user experience while an app is in process of the boot which usually takes a few seconds to complete. The splash screen contains attractive designs or business logo along with multiple animations. It turns out that these launch screens are directly responsible for creating the first impression of your app on the users. Their purpose is not only to hide the loading time, but they also contribute to keeping the users engaged while the app is opening. A well-designed splash screen can easily provide a brand recognition to your application as well.

Before creating the splash screen for your app, there are certain essential factors you need to keep in your mind. Here are some of the tips and suggestions that will surely help you to create a splash screen which results in impressing users positively.

1. Splash screen size does matter, manage it

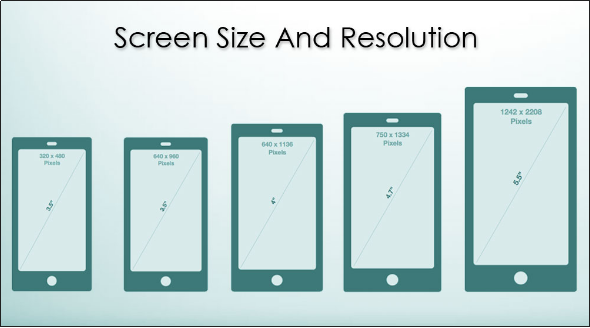
Splash screens are different for variable screen sizes. Now-a-days every smartphone comes with different screen dimensions, so the screen size analysis has become the basic requirement before making a splash screen. The type of the Smartphone and its screen are the two important factors to consider while choosing a splash screen.

For instance, if you use boot screen of older smartphone model in a newly launched one, it will hardly get proportioned with the new device and leave the users with distorted or poor experience. Google and Apple provide few guidelines for appropriate screen sizes to ensure that your app UI perfectly adept with all devices. These tips could be used for the creation of an effective splash screen.

2. Experiment with different designs, but keep it simple

While designing splash screen, your aim should be gathering user’s attention through it. Make it witty rather than an ordinary screen with long text on it. As it will stay for a few seconds, the user won’t have time to read it. Instead of using text, keep your users engaged with some creative approach. Keep composition of images and animation clear in a single portrait image that too in the center. It keeps the edges free from all the sides, and you can crop it for whichever dimensions you require them.

3. Show off about your Brand’s Awesomeness

Earlier, displaying a logo or business theme was the major way of conveying the message to users and even for the brand enhancement. However, now a splash screen does the job for you in a really appealing and visual manner.
Designing a great launch screen with interesting visuals for your visitors can be a major way to improve user experience, which will ultimately benefit you. Apple and Google also provide guidelines for developing responsive and interactive app UI to improve customer’s experience.

4. Inform user, the app is loading

When it takes time to load application, the splash screen without any animation appear like your app is stuck. Users may think their smartphone got hanged. It disappoints users as they remain unaware of loading progress till the app really opens. Especially, when it comes to eCommerce mobile apps, the high load time may cripple some conversions. This when an engaging splash screen can help you out.

Booting time of an app can vary a lot depending on the user’s device. Therefore, to assure your users, you should mention loading text on the screen. I would suggest a progress bar can be a more suitable option in that case. The user can wait patiently if he/she is being notified about the process.

Do not put any advertisement or promotional content on your splash screen. It takes away the user’s interest from the application and leaves a commercial business impression on your app.

5. Entertain users while the app launches

There are few apps which take time to load due to their complex functionality or heavy size. For instance, some large-sized gaming apps often load slowly. Displaying just a logo or an image wouldn’t be a great idea then. Along with the app loader, using some witty or creative graphical approach could be more responsive in such cases.

Thus, if your app is taking more than 10 seconds to load, try to use some riddle or collage or even videos related to your app theme. It will keep the user engaged with your application.


Final Words

The seemingly negligible aspects like creating the app icon and splash screens can actually make your app extraordinary from a basic application. Mastering them isn’t a tough row to hoe. You just need to be more creative and consider the above-discussed facts before developing them. Your app splash screen should be as per your brand’s point of view. Thus, in this overcrowded environment of mobile apps make a responsive splash screen and knock out your first impression on visitors.

How to create Mobile Icons for your Mobile App?

Mobile app icon might just seem a negligible factor in app development, but they may have a great impact on the user’s purchase decision. App icons are the very first thing that a user comes across while searching for an app.

Your goal is to make your app noticeable among the competitors. App icons play a major part in it. A well-crafted and clear icon can give the users an idea of you being a professional and your app being reliable.

Here are a few tips about how an app icon could be made creative and better:

1. Keep app icon simple and clear

A lot of colors or images make the icon visually crammed up. Even if there is a need for colors and graphics in it, try to keep the focus on the core concept of your application. Also, try to make a simple icon. Jamming up every app feature in a single icon wouldn’t look good for your app.

2. Keep app icon recognizable

Create an app icon that can easily become the face of your brand and makes you stand out in this overcrowded environment of mobile apps. Using a unique shape or symbol in the icon would make your app recognizable for the user. Using the first letter of your organization or your brand logo as icons are advisable as well.

3. Keep app icon scalable

Your icon should look great in different sizes, as screen sizes of devices vary. Android devices are available in huge variety as compared to iPhone devices. Therefore, their icon size dimensions are a bit complex. Apple and Google icon size guidelines should be considered before making an app icon.

4. Design your icon bold

To make a bold app icon, you must try some vibrant colors on a simple icon design. Using shadow effects in them could also make them visually appealing. The choice of color should be such that they look good on different backgrounds.

5. Use moderate text in the app icon

If you want to use text on the app icon, it shouldn’t contain unnecessary details. Usually, the text is not that much help in the app icon, but in some cases, it can do the job. But, keeping descriptive text on the app icon would dilute the overall impact of your app. Try to keep it limited to one or two words.

6. Create an app icon of high resolution

Your app icon is the first thing a customer will see of your application. If it is of bad quality or of low resolution, it wouldn’t make a nice impact on the users. The quality of your app icon to some extend signifies the quality of your application to potential users.

7. Keep your app icon as per your audience

Icons must be unique, attractive and memorable, but it should also work for your audience. You must know who is your audience and what will get them to tap on your icon. This is all the science needed for connecting with users through an app icon.

Clearly, these tips would surely help you in developing and designing icon for your mobile app. You can also read Essential things to follow while creating an app icon for your mobile app for more concise info on the topic.

To know, how to create an app icon, go ahead and check out the information shared below.

How can you create the app icons for all sizes with Makeappicon?

There are various app icon designers which conveniently develops icons for all sizes. Makeappicon provides one such platform which helps the designers, developers and project managers to make and resize icons for iOS and Android apps. It automatically optimizes the design of your icon and generates icons of all sizes required during submission in the app stores. Let’s see the complete process of how you can create icons for all sizes with makeappicon:
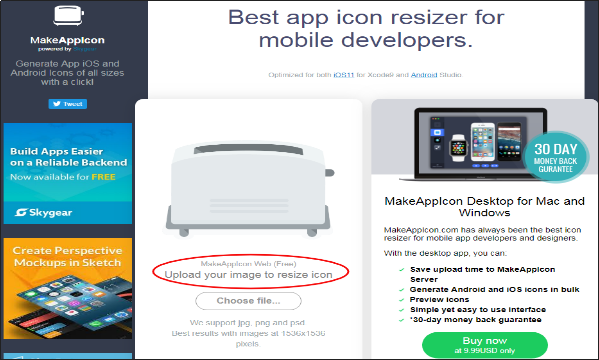
Step 1: Go to Makeappicon web page and choose the icon image which is to be resized. This web version of icon resizing is free of cost, but for offline (heavy) usage with improved functionalities, Makeappicon offers its paid version.

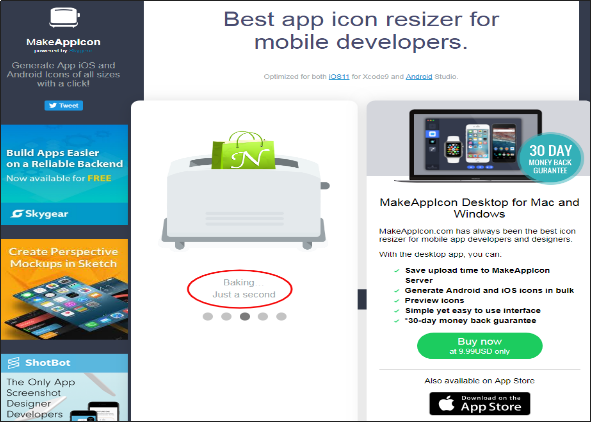
Step 2: As the image is selected for resizing, processing begins and it takes a few seconds to complete.

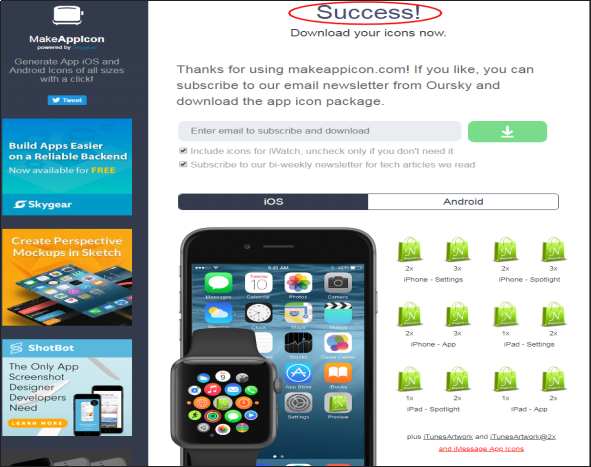
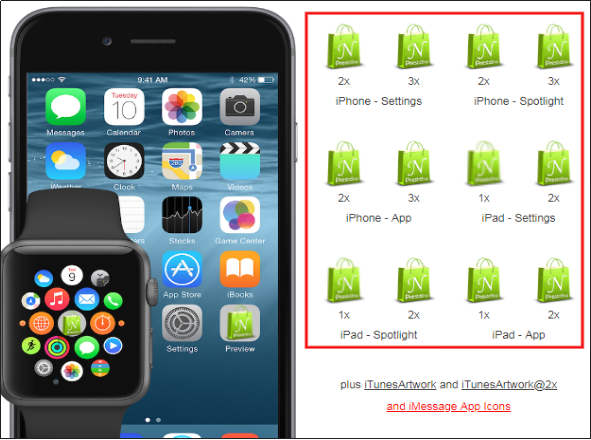
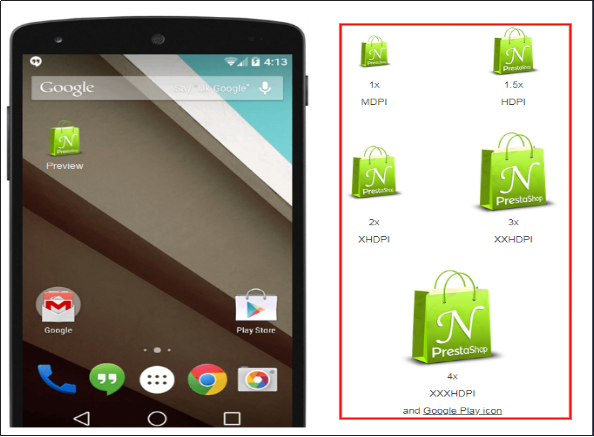
Step 3: That’s it! Your icon is resized in different sizes. You can download them now. Makeappicon resizes your app icon for both Android as well as iOS applications and classifies them according to Google and Apple app size regulations.

a) Icon resizing for iOS platform:

b) Icon resizing for the Android platform:

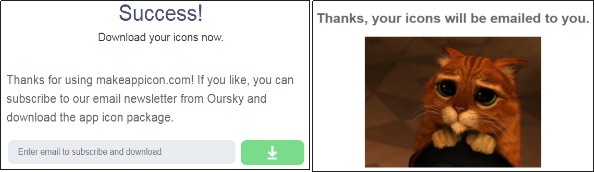
Step 4: These icons could be easily downloaded through your e-mail id. After entering mail ID, a few minutes later icons will be in your mail inbox in a zip file.

Final Words

One thing is clear that icons along with other factors of the app UI, like Splash screen and others, play a huge role in making your app popular and creating a brand recognition. So, whether you planning to hire an app development company or using a mobile app maker, make sure that the app design is taken care of. You are now a few steps away from making the coolest icon ever. Just make sure all the above-discussed points are considered before app icon’s creation and get a refined one for your application.

What to do if your app was declined on Google Play Store?

If your app lately suffered Google’s lash and got rejected on Play Store, it’s actually not a big problem and can be resolved easily. It happens quite often now-a-days that app declined by Google. The reason behind app rejection might either be that they do not meet the publishing guidelines or they have performance issues. Google has made its approval process for app more strict to offer bug-free apps for the users. Removing such apps from the play store which could damage our smartphones or steal any important data, has somehow benefited us all.

To understand how to resolve this issue, first, let us discuss why it happens in the first place. There are plenty of app rejection reasons which one should keep in their mind before getting them published on Play Store. The apps being declined after so much hard work might be scary for you, but it can be fixed. The discussion below would the do’s and do not’s in case your app declined on Google’s Play store.

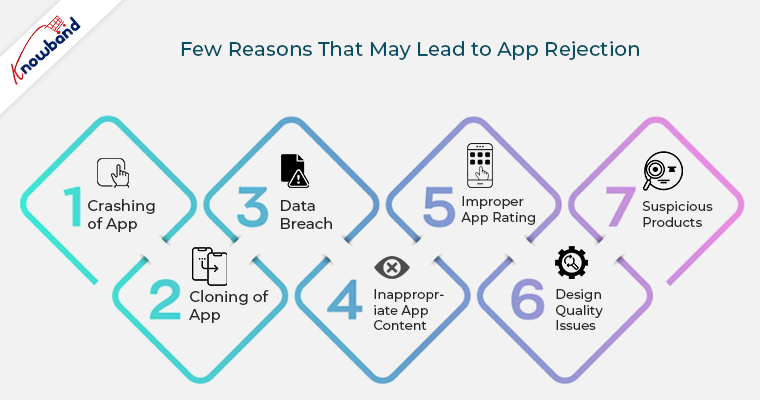
Here are the few reasons that may lead to app rejection and the ways to deal with them:

1. Crashing of App

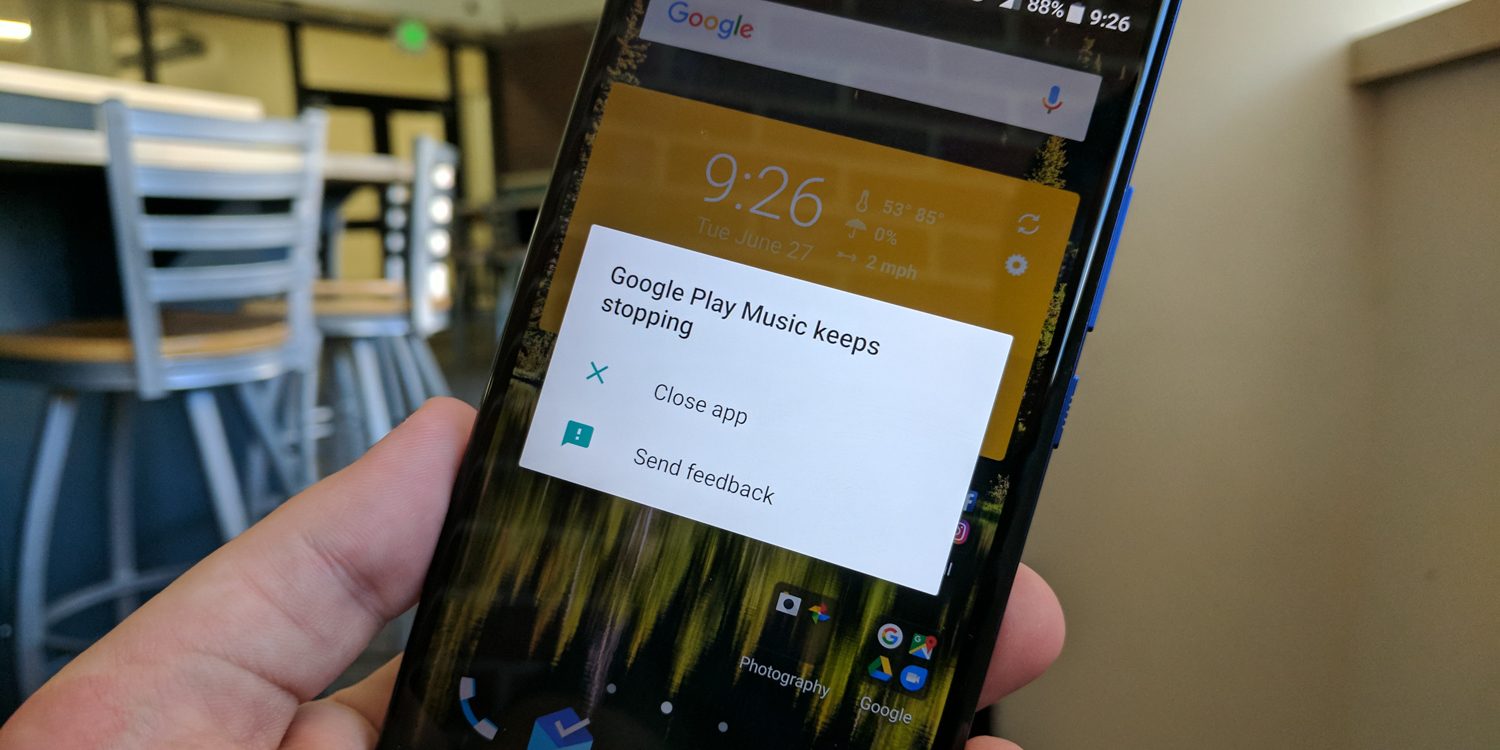
Whenever the users download an app after going through tedious searches on Play Store, they want them to work flawlessly. An app that crashes every now-and-then, might frustrate the users. Google doesn’t allow such apps in its store and thus it becomes one of the basic reasons for the app decline.

How to deal with it?

Try to test your app until you are fully satisfied with its functionality. Make sure that the app is tested as per the guidelines shared by the Play store. Get your app properly functional before publishing it to a website. If your app is already rejected, curb out its technical errors and republish it.

2. Cloning of App

Google follows very strict guidelines against copyright issues. You should be very careful before infringing on them. Your app should not be a cheap imitated version of any popular application. Concept, design or code, your app should be original. Often it happens that we somehow use a trademarked title for our app, knowingly, or by mistake, but this is restricted by Google.

How to deal with it?

If your app gets rejected due to copyright/trademark issue, just review your app title, its description, images and remove all the copyrighted names from them. If you have taken any permission from the owner regarding the same, it will be allowed by Google, prior to proper proof submission.

3. Data Breach

If you don’t want this to happen with you, keep your app enriched with the privacy policies. If your app has already been declined for the same reason, take important measures to remove data breach from it and republish it on the Google Play Store with a new account. (Refer to section 1.2 for the creation of new Google Play account)


How to deal with it?

If you don’t want this to happen with you, keep your app enriched with the privacy policies. If your app has already been declined for the same reason, take important measures to remove data breach from it and republish it on the Google Play Store with a new account. (Refer to section 1.2 for the creation of new Google Play account)

4. Inappropriate App Content

App content should not have any instance of graphic violence, racist comments or sexual content. If there is any kind of mature content available in the description, you should clearly mention at the time of app rating. If you try to hide the fact or consider it less important, you will ultimately find your app in Google’s bin.

How to deal with it?

If your app gets rejected because of inappropriate content, accept the rejection carefully and seriously. Don’t try to repeat it again with other apps linked with your account. Repeated violation of this guideline could get your entire account permanently terminated from Google’s Play Store. For the app which has been already rejected, publish it with a new account and be careful about spamming this time. Keep the address of this account different from the previous one and don’t link both of them in anyway. (Refer to section 1.2 for the creation of new Google Play account)

5. Improper App Rating

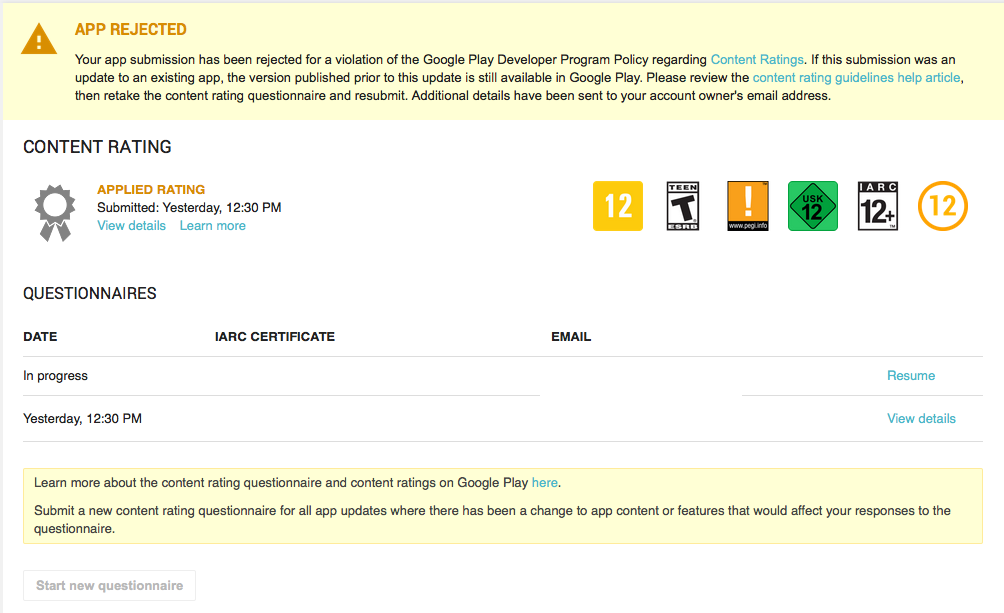
Google’s Play Store gives app content rating feature to provide info about what age group is suitable for that app. For this, there is a questionnaire that needs to be filled. On the basis which your app will be rated. You should provide all the correct info about your app and make sure it has been rated correctly for the right audience. Often people try to mislead the moderator with wrong details and ultimately their app gets underrated.

How to deal with it?

Google provides an easy solution for it, by giving you second chance to fill up the questionnaire. You should take this opportunity seriously and provide all the correct information about your app this time and get your app rated correctly on Google’s Play Store. However, if you keep on repeating this mistake, instead of being unrated, your app will be permanently rejected from the store.

6. Design Quality Issues

If your app follows proper design guidelines, you need not worry about the app rejection. Google’s design guidelines describe all the basic principles required for building your app’s UI. Keep your app’s color, fonts and graphics as per the rules and it will be easily published on the Play store or else it will be rejected.

How to deal with it?

If your app gets rejected because of design issues, I would recommend you to invest some money and get your app re-designed as per the shared guidelines. It is the best possible solution available in this scenario.

7. Suspicious Products

If an app tries to pose any type of risk on user’s security, it will be at once rejected by Google. Any type of malware, Trojan horse or other viruses and bugs if found either in-app or linked with app description, Google will catch it.


How to deal with it?

Make sure that every links and ad network used in your app are clean and does not contain any malware issues. If these ads or links are pointing to something suspicious or dangerous content, it violates Google’s guidelines. If your app already got rejected, try to remove all the malware and add a privacy policy with it if any private information is being asked by the user. Publish an app after this with a new account. (Refer to section 1.2 for the creation of new Google Play account)

1.2 How to create a new account on the Google Play Store?

You can easily set up a Google account from your Android device or laptop. Following are the few tips regarding developer account registration:

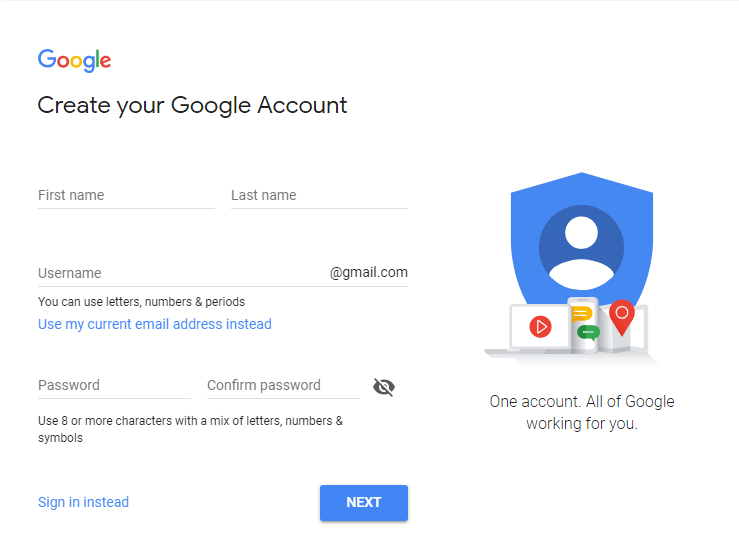
  1. Create a separate Google Account through your device.
  2. Make sure this Google account is not personal, keep this account organizational.
  3. Review all the developer and seller countries where you can target your audience before going for account creation.

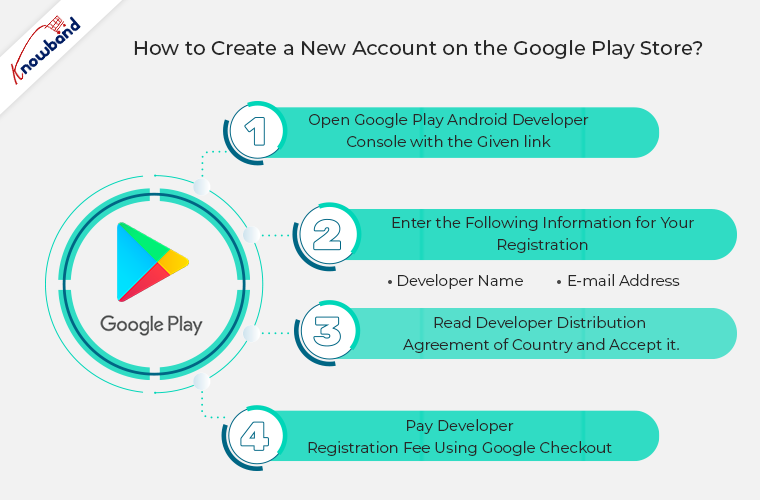
Following are the four simple steps for publishing a new account on the Google Play store:

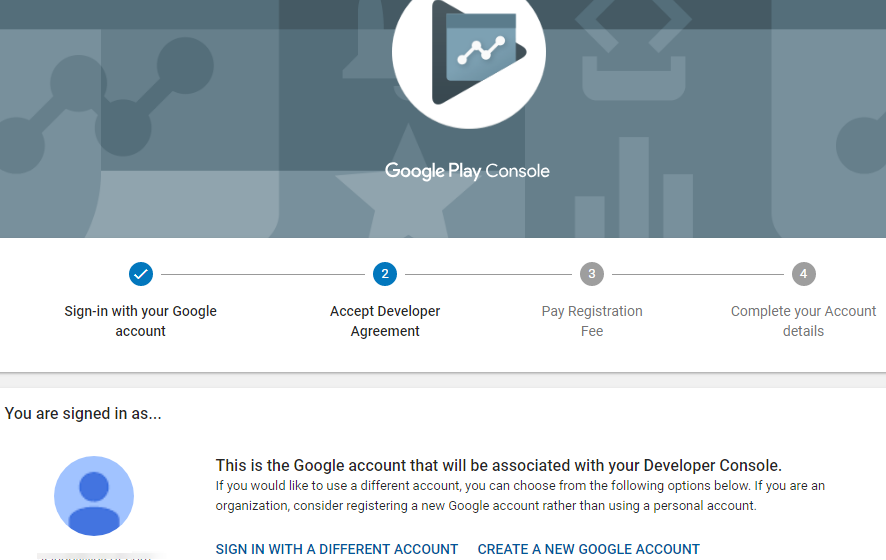
Step 1: Open Google Play Android Developer Console with the following link:

https://play.google.com/apps/publish


Either log in to an existing Google Account or register a new one through the sign-up option.

Step 2: Enter the following information for your registration –

  • Developer name
  • E-mail address

Step 3: Read Developer Distribution Agreement of country and accept it. You should keep in mind that apps which are published on Google Play Store must comply with the Developer Policies.

Step 4: Now, in the final step pay developer registration fee using Google Checkout. If you haven’t Google Checkout account just create one with the available option.

Conclusion:

There are various other reasons for app rejections, but the above-discussed one is most basic and often ignored by the developers. Google uses both manual and automated app review system, so, keeping a track of the developer guidelines could save you from the trouble. To make app publishing easier and convenient for you, build it with robust an eCommerce app builder that provides feature loaded fully functional app.

Knowband is providing one such module that can help you create a feature-rich App. We also help you in making the app live on the Google Play Store and Apple App Store.

Our No Code Mobile App solution is available for Prestashop, Opencart, Magento 2 and WooCommerce. Know more:


Also Read: