

Objective:
After reading this blog, you will be able to understand how the seller can change inventory and fulfillment latency for products on Amazon using API.
Let’s know about the Fulfillment Latency
Fulfillment latency is the number of days in which the seller needs to dispatch the order after getting the order from Amazon. It can also be defined as the maximum time available to the seller to dispatch the parcel. The fulfillment time is set by the seller corresponding to each product. Fulfillment latency is also known as handling time.
Amazon fulfillment API helps the seller to set the product’s inventory and fulfillment latency time on Amazon.
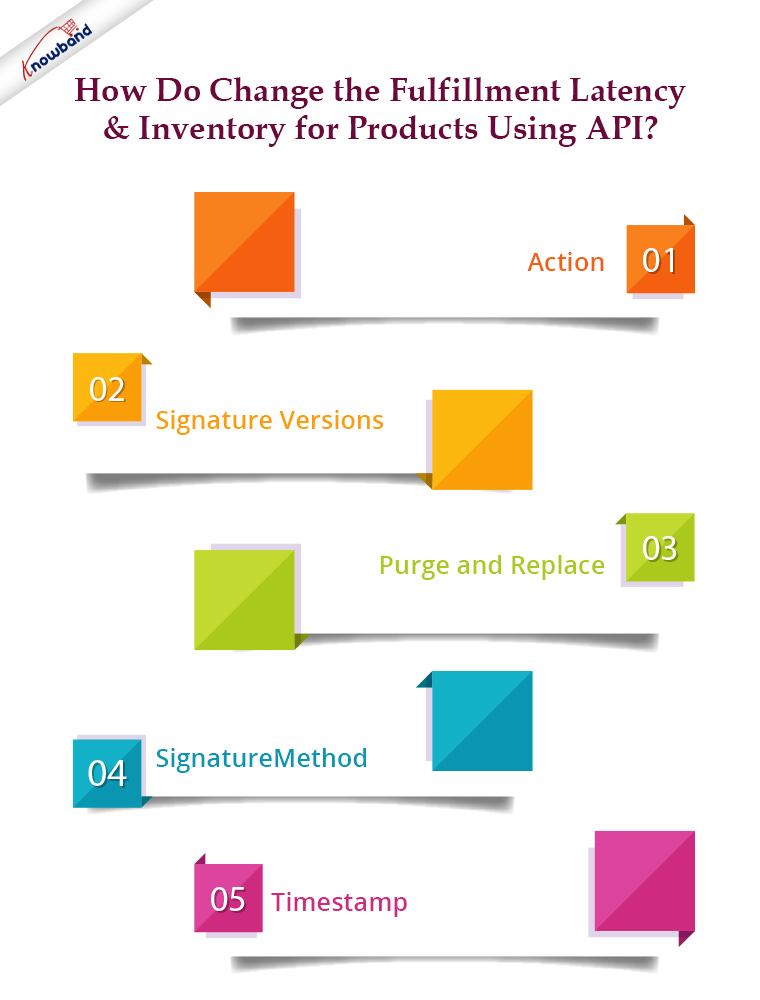
How do change the Fulfillment Latency & Inventory for products using API?
Let us know about the fields that you will need to send in the request to Amazon:
Action
This field specifies the action which needs to be performed on the request and this helps to determine what parameter should be in the request.
Signature: Whenever you send the HTTP request to Amazon, you need to add the signature with the URL. By checking the signature, Amazon can identify the merchant from whom the request has been received. We use a hash value (HmacSHA256), some data of the request, and a secret access key to create a signature.
Signature Versions
2 signature versions are supported and these versions are:
(1)Version 4:
(2)Version 2:
Both versions can be used to sign the request but we recommend you to sign your request with Signature Version 4 in this blog, signature version 2 is used.
Purge and replace
The purge and replace field replaces the existing listing of products from Amazon if its value is true. So you always need to set its value to false in the request if don’t want to remove listingsting from AmazFreeTypeType
Feed type specifies how the data should be processed. To change fulfillment latency and inventory, you need to specify the feed type “_POST_INVENTORY_AVAILABILITY_DATA_”.
Signature Method
Signature methods hash-based based protocols and you need to apply these methods to calculate signatures. E.g. HmacSHA256
Timestamp
In this field, you need to add the time at which you are making the request.
To change the fulfillment latency and inventory of the product, you need to send the following data in the request to Amazon:
$url =
https://mws.amazonservices.co.uk                               // Here you need to write the End point
/?AWSAccessKeyId=XXXXXXXXXXXXXXXXXXXX              // Here write your AWS Access Key
&Action=SubmitFeed                                        // Action should be SubmitFeed   &FeedType=_POST_INVENTORY_AVAILABILITY_DATA_  // Feed Type
&MarketplaceIdList.Id.1= XXXXXXXXXXXXXX                 // Here write your marketplace list id
&Merchant=XXXXXXXXXXXXXX                                     // Here write your seller id or merchant id
&Signature=1234Knowband1234example1234         // Here you need to write the signature
&SignatureMethod=HmacSHA256                                  // Hash method which used to create signature
&SignatureVersion=2
&Timestamp=gmdate("Y-m-d\TH:i:s\Z",time()))
&Version=2009-01-01
&PurgeAndReplace=false                                            // Always set purgeAndReplace Value as false
                                                                                   // else it will replace all the existing product data
You will also need to create the XML file which will contain inventory and fulfillment latency details of those SKUs for which you want to change the fulfillment latency and inventory. The sample feed is given below:
$xml_file = Full path of the XML file on the server
$xml_data is given below
<AmazonEnvelope xmlns:xsi="https://www.w3.org/2001/XMLSchema-instance" xsi:noNamespaceSchemaLocation="amzn-envelope.xsd">
<Header>
<DocumentVersion>1.01</DocumentVersion>
<MerchantIdentifier>XXXX-XXXX-XXXX</MerchantIdentifier>
</Header>
<MessageType>Inventory</MessageType>
<Message>
<MessageID>1</MessageID>
<OperationType>Update</OperationType>
<Inventory>
<SKU>p-25976-MB</SKU>
<Quantity>0</Quantity>
<FulfillmentLatency>2</FulfillmentLatency>
</Inventory>
</Message>
<Message>
<MessageID>2</MessageID>
<OperationType>Update</OperationType>
<Inventory>
<SKU>p-25976-XSB</SKU>
<Quantity>0</Quantity>
<FulfillmentLatency>2</FulfillmentLatency>
</Inventory>
</Message>
<Message>
<MessageID>3</MessageID>
<OperationType>Update</OperationType>
<Inventory>
<SKU>p-25976-X-L</SKU>
<Quantity>0</Quantity>
<FulfillmentLatency>2</FulfillmentLatency>
</Inventory>
</Message>
<Message>
<MessageID>4</MessageID>
<OperationType>Update</OperationType>
<Inventory>
<SKU>p-25976-SB</SKU>
<Quantity>0</Quantity>
<FulfillmentLatency>2</FulfillmentLatency>
</Inventory>
</Message>
<Message>
<MessageID>5</MessageID>
<OperationType>Update</OperationType>
<Inventory>
<SKU>p-25976-LB</SKU>
<Quantity>0</Quantity>
<FulfillmentLatency>2</FulfillmentLatency>
</Inventory>
</Message>
</AmazonEnvelope>
You need to send the request UXML XML data and header together in a request. The header values are used by the server for an end-to-end check on the data and for detecting unintentional modifications to the data further in the transition.
$headers = array (
          'Expect: ',
          'Accept: ',
         'Transfer-Encoding: chunked',
         'Content-Type: application/x-www-form-urlencoded; charset=utf-8',
         'Content-MD5: ' . base64_encode(md5_file($xml_file, true))        //encode the xml file
 );
$options = array(
         CURLOPT_URL                  => $url,
        CURLOPT_POST                    => 1,
                       CURLOPT_FOLLOWLOCATION => true, // follow redirects
           CURLOPT_RETURNTRANSFER => true, // return web page
         CURLOPT_POSTFIELDS          => $xml_data,
         CURLOPT_HTTPHEADER         => $headers,
         CURLOPT_ENCODING             => "UTF-8",       // handle all encodings
           CURLOPT_AUTOREFERER        => true, // set referer on redirect
           CURLOPT_CONNECTTIMEOUT  => 120, // timeout on connect
                CURLOPT_TIMEOUT                => 120, // timeout on response
           CURLOPT_SSL_VERIFYHOST    => 2,
           CURLOPT_SSL_VERIFYPEER     => false, // disable certificate checking
           CURLOPT_FILE                   => "$fp"
           );
$ch = curl_init( $url );
@curl_setopt_array( $ch, $options );
$content = curl_exec( $ch );
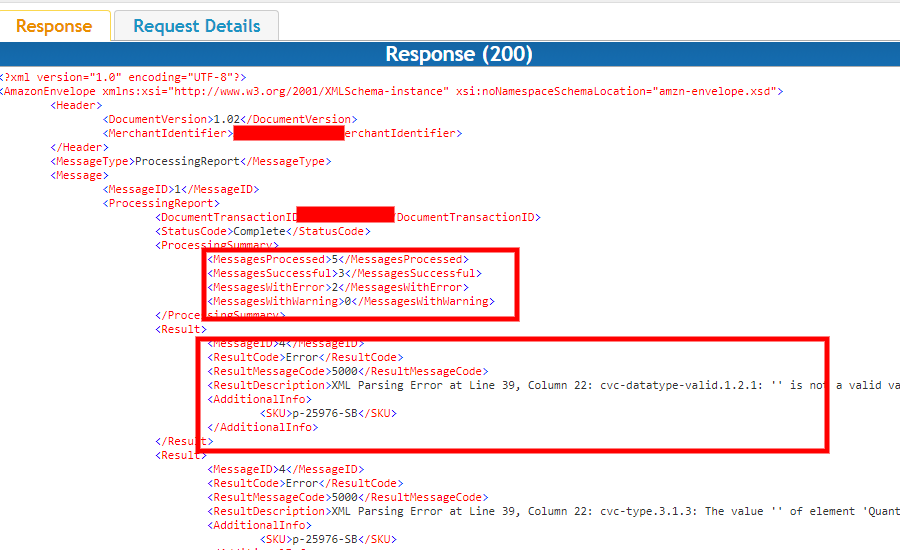
In the response, you will get the number of the SKU which are successfully processed (means fulfillment latency and inventory have been changed) and the number of SKU tis is not processed due to error, as given in the screenshot of the response feed below:
Summary
After reading this document, you (seller) can easily change the fulfillment latency and inventory of products on Amazon using Amazon MWS API.
Knowband offers eCommerce development services and can assist you in creating a brand-new eCommerce website. To provide our customers with the greatest and most efficient post-sale service, we have a dedicated support team that is constantly on hand to help them. We continue to fulfill our duties to clients that want help with urgent website issues even on the weekends.
The best Magento, Opencart, Prestashop, and Magento 2 modules are also available. One Page SuperCheckout, Multi-Vendor Marketplace, Mobile App Builder, Spin and Win Module, Abandoned Cart, and more popular modules are just a few of what Knowband has to offer. You can reach us at support@knowband.com if you have any questions.

