
Introduction of Magento Return Manager Extension
1.0 Introduction
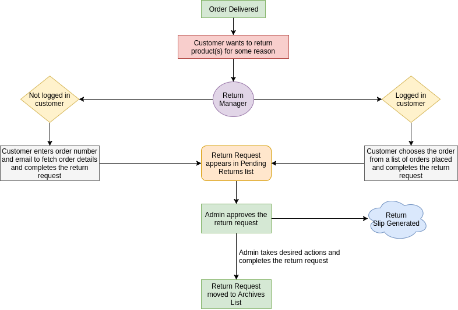
Magento Return Manager extension by Knowband adds the functionality to manage return requests for any order placed by a customer as well as a guest customer. The Magento order return manager extension adds a link to the front-end through which any customer/guest customer can apply for return of any product contained in a order placed earlier.
This is a very flexible plugin and the customer can return any product in a order completely or partially, that means the customer can also return half or less quantity of any product in the order.
For a logged in user (if the Magento module is enabled from admin panel) the return manager link appears in Account options list (near the cart link) and in the quick links shown in the footer and opens a page containing the list of all the orders placed by that particular customer and the products that are eligible for return have a link to apply for return. This page also contains history of returns applied by the logged in customer.
In case the user is not logged in the return manager link opens a page containing a form to find any order. After finding a order using the form the order detail appear and the products from that particular order that are eligible for return have a Return button to apply for return. This page also contains history of returns applied by the customer who has placed this particular order.
1.1 Benefit of the Merchant
- The Magento Return Manager extension provides a seamless interface for the customer as well as the store owner for placing and processing the returns in the most efficient way possible.
- The Magento order return manager module allows the e-merchant to add or edit the return slip at the back of the plugin.
- The Magento RMA enables the store admin to select and customize email templates as per the store’s requirements.
- The Magento Return Merchandise Authorization can deny or approve the return request of the customer as his/her desires.
- This Magento order refund manager extension allows the e-merchant to add the own return policy.
- The Admin can add the return reason or edit the already added return reason.
- This Magento return product extension gives the facility to store admin to allow the guest customers to place a return request.
- The Magento RMA allows the Magento store admin to add custom return statuses.
- The online store admin creates the return RMA request at the backend of the plugin.
- This Magento order return manager module gets notified the customer as well as the store admin when return request approve and return request raised by modulethe customer.
- This Magento return manager extension allows the e-merchant to filters the customer in archive list.
- This Magento RMA always stores return request of the customer.
- The Admin can view the pending and active return request of the customer at the backend of the RMA plugin.
- This Magento refund order helps the admin to improve the user experience.
- This Magento RMA module compatible with multi-lingual stores.
- This Magento return manager extension simple and easy to use.
1.2 Benefit of the Customer:
- The Customer can view the return status and return history from their account.
- This Magento order return extension allows the online buyers to return even a single product or multiple products out of the full order.
- The Customer can easily raise the return, refund and replacement request.
2.0 Technology for Development
Language: PHP
Frame Work: Magento
3.0 Installation Guide
- Folder structure of the Return Manager plugin folder.

2. Copy all the folders into magento root directory and clear the cash (if enabled).
3. You will be able find the “RMA” option inside the “System > Knowband Extensions > RMA”.

4. You can now configure the Magento RMA as per your requirements and check its working in the front end at following URL:
https://www.yourstore.com/rma/index/index/
4.0 Admin Module
After installing the Magento order return manager plugin into magento store, the module will provide following interfaces inside “RMA” menu:
- General Settings
- Return Slip
- Email Templates
- Return Policies
- Return Reasons
- Return Statuses
- Create a RMA
- RMA List
- Active Returns
- Archives List
- RMA Messsage
Each interface is in form of a tab and each tab contains some specific settings/functionality that can be changed according to the need. Each tab is explained below.
4.1 General Settings
After clicking on RMA tab , system will open general settings tabs by default as shown in screen below:
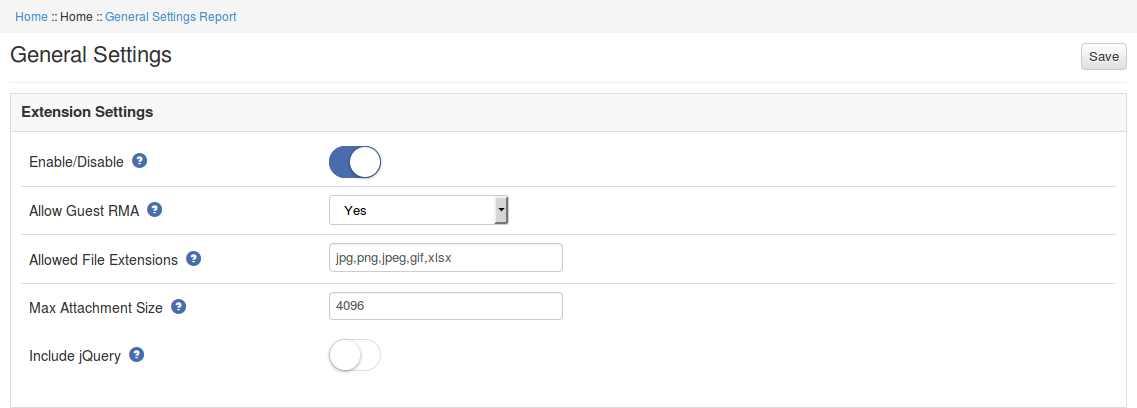
Initially fields in above form will be already filled with their default values.
- Enable/Disable: Initially, this will be “OFF”. The Store admin can enable/disable plug-in by turning ON/OFF this setting.
- Allow Guest RMA: This drop down contains “Yes” and “No” options. Set this as “Yes” to enable the return feature for those users also who are not logged in.
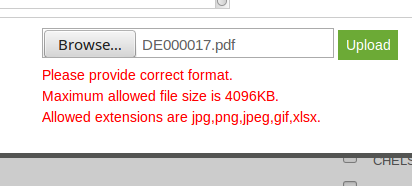
- Allowed File Extensions: This option accepts the comma (,) seperated file extensions (without space) which can be uploaded when customer uploads file related to the return request.
- Max Attachment Size: In this field Magento Return Merchandise Authorization allows the e-merchnt to add maximum allowed file size is accepted. The file size will be in KB. Eg- To allow files upto 1MB set this field as 1024.
- Include jQuery: If the RMA module does not work in Magento versions lower than 1.9, then switch on this option.
To save the settings, click on the “Save” button shown at right upper area. All the settings save the changes are view on the front end of the Magento return product extension
4.1.1 How to enable the plugin?
1.Admin panel -> System -> Knowband Extensions -> RMA
2.Navigate to ‘Return Policies’ tab.
3.Enable the switch for ‘Enable/Disable’ setting in this tab.
4.Save the settings using the ‘Save’ button to update the configurations.
5.The module is now enabled, you can check the same in the front-end header menu.
4.2 Return Slip
In this tab, the admin can alter the settings and content of the Return Slip. This return slip is generated automatically when the admin approves any return request (if the feature is enabled). The return slip is generated in ‘.pdf’ format and the link is mailed to the customer in the mail for Return Request Approval Notification.
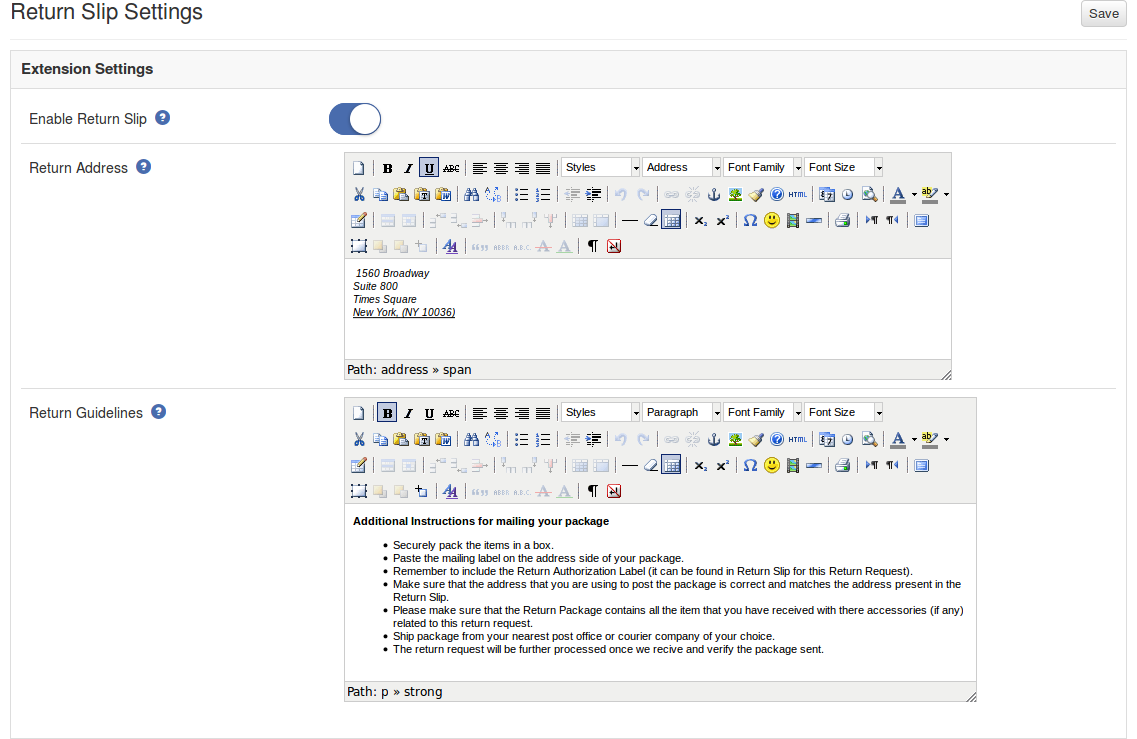
- Enable/Disable Return Slip: Initially, this will be “OFF”. Admin can enable/disable Return Slip feature by turning ON/OFF this setting. Return slips are only generated when the feature is turned ON.
- Return Address: This address will be printed on the return slip and will also be displayed on the return request form.
- Return Guidelines: These guidelines will be printed on the return slip.
4.3 Return Policies
In this tab, the store admin can add new return policies for the Magento return manager plugin and can also edit or delete a existing return policy for the plugin.
There is also a option to map the return policies to products.
Note: A product can only be mapped to a maximum of one return policy.

This tab contains a list of existing return policies for the plugin. The admin can also create a new return policy using the ‘ Add New ’ button shown near to the “Save” button.
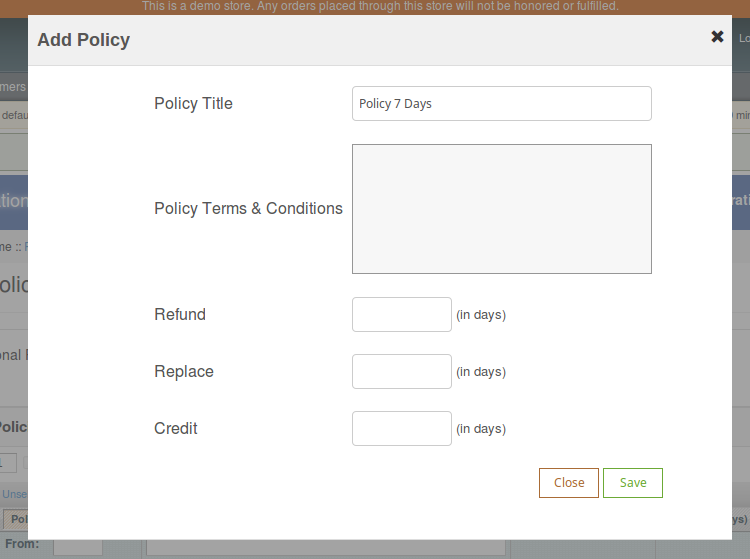
After clicking on the add new button a pop-up appears containing the form to create the return policy.
The form contains several input fields to enter the data of the policy like name of the policy, terms and condition of the policy and the option to choose the parameters i.e. Credit, Return and Replacement.
The admin can also enter the days applicable for this return policy for different options as shown in the form below.
4.3.1 How to add a return policy?
1.Admin panel -> System -> Knowband Extensions -> RMA
2.Navigate to ‘Return Policies’ tab.
3.Click on ‘Add New’ button to add a policy. A modal will appear having the form to add the policy.
4.dd the values in the above form as per your requirements.
5.Click ‘Save’ to save the policy and it will be added to the system.
4.3.2 How to edit a return policy?
1.Admin panel -> System -> Knowband Extensions -> RMA
2.Navigate to ‘Return Policies’ tab.
3.Click on button in front of respective policy to edit the policy. The following modal will appear to containing a form to edit the policy.
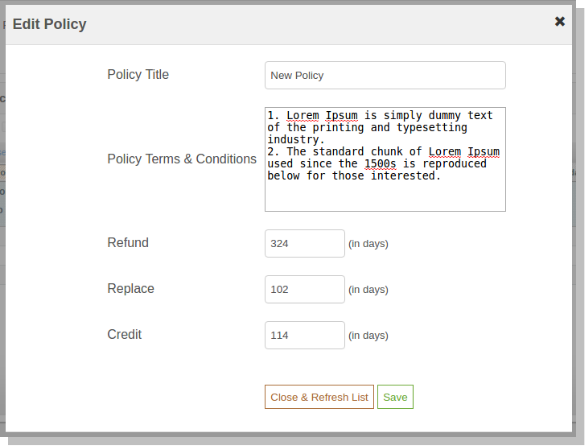
4.Change the values in the above form as per your requirements.
5.Click ‘Save’ to update the policy.
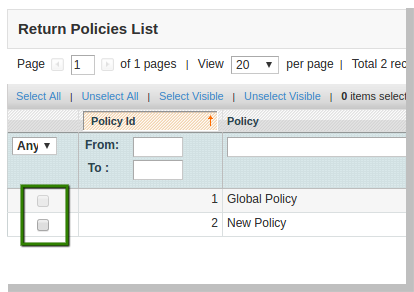
4.3.3 How to delete a return policy?
There is no action button to delete a Return Policy added in the module, but the multi-action feature of Magento Admin grid can be used to delete return policy in bulk or one at a time.
Steps for deleting a return policy to categories is as follows:
1.Admin panel -> System -> Knowband Extensions -> RMA
2.Navigate to ‘Return Policies’ tab.
3.Select return policy or return policies to delete using the check box in front of respective return policy.
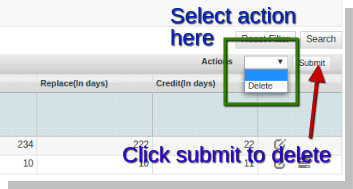
4. The select the action (i.e. Delete) and click on ‘Submit’ to delete selected return policies.
4.3.4 How to Map categories to a return policy?
In the configuration panel (Return Policies tab) there is a list of all the return policies in the system. The list contains 2 action buttons, second button is for mapping policies.
Steps for mapping a return policy to categories is as follows:
1. Admin panel -> System -> Knowband Extensions -> RMA
2. Navigate to ‘Return Policies’ tab.
5.Click on in front of respective policy
6.A modal will appear with multi-select field for selecting the categories to map. The modal is shown as follows:
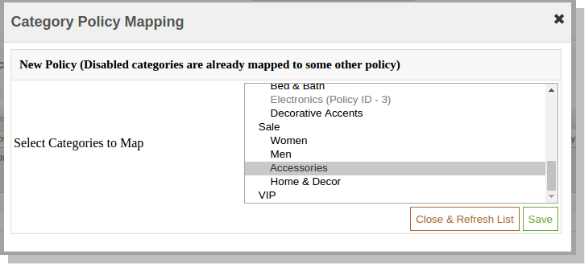
7. Select desired categories from the multi-select field to map them to the policy.
8. Click on ‘Save’ to save the mapping.
Actions
1. The admin can edit any policy using the first link in the Action column from the policy listing table. On clicking this link a modal containing the form for the policy will appear and the data for that policy is already filled in the fields. The admin can edit any data and can save the changes made.
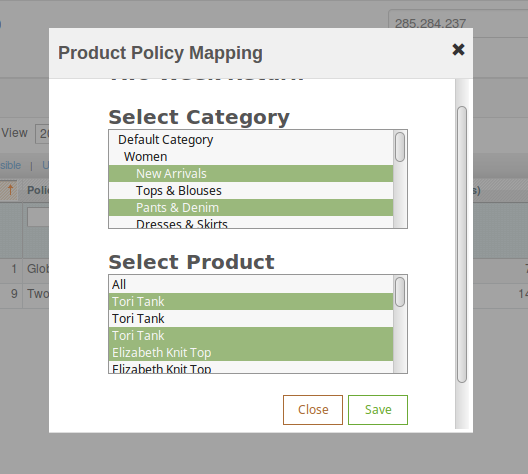
2. The second link in the actions column is for mapping products to the policy. On clicking this link a modal will appear containing the options to map the products to that particular policy.
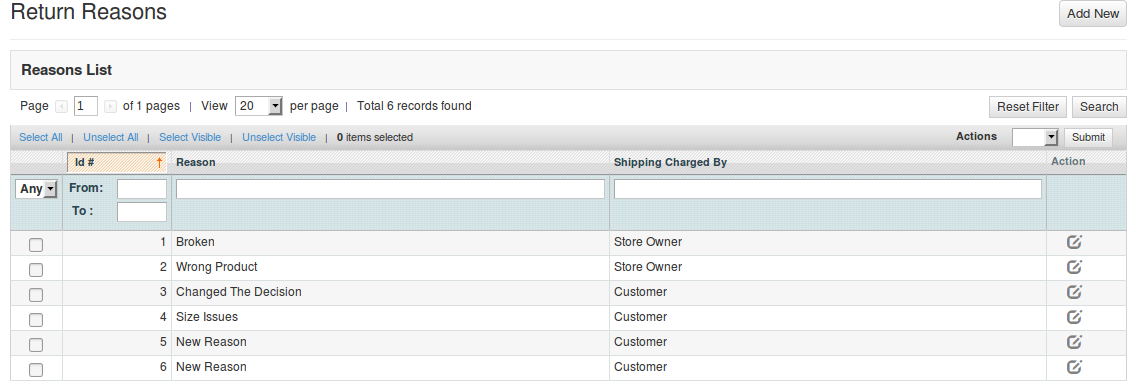
4.4 Return Reasons
In this tab, a list of return reasons will appear in the form of a table. By default there are 2 reasons already added in to the system.
In Action column there is a link to edit the reason in front of every row.
4.4.1 How to add a return reason?
1.Admin panel -> System -> Knowband Extensions -> RMA
2.Navigate to ‘Return Reasons’ tab.
3.Click on ‘Add New’ button to add a reason. A modal containing the reason form will appear.
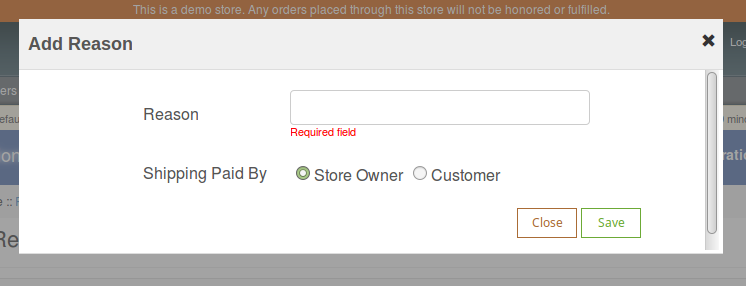
4.Add the values in the above form as per your requirements.
5.Click ‘Save’ to save the reason and it will be added to the system.
4.4.2 How to edit a return reason?
1.Admin panel -> System -> Knowband Extensions -> RMA
2.Navigate to ‘Return Reasons’ tab.
3.Click on button in front of respective return reason to edit the reason. The following modal will appear to add/edit policy.
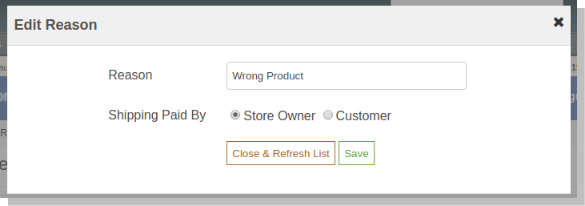
4.Change the values in the above form as per your requirements.
5.Click ‘Save’ to save/update the reason.
4.5 Return Statuses
This tab contains a list of return statuses in the form of a table. By default there are 4 statuses already added into the system. The admin can further add any numbers of statuses into the system. The tab also contains a option to choose default status of any return request. This default status will be assigned to the all the new return requests.
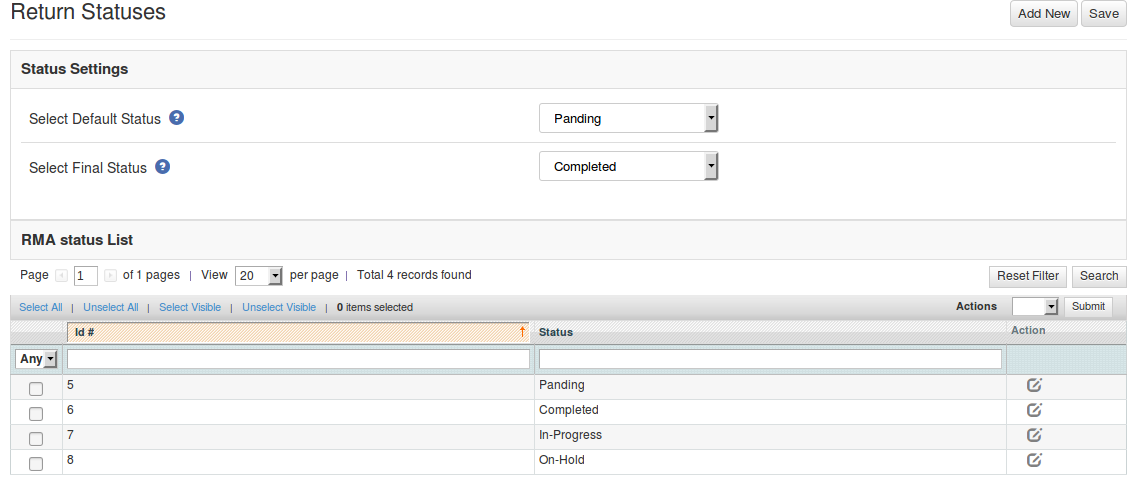
The links below the action column in the statuses list is for editing the existing return statuses.
4.5.1 How to add a return status?
- Admin panel -> System -> Knowband Extensions -> RMA
- Navigate to ‘Return Statuses’ tab.
- Click on ‘Add New’ button to add a status. A modal containing the form for adding a status will appear.
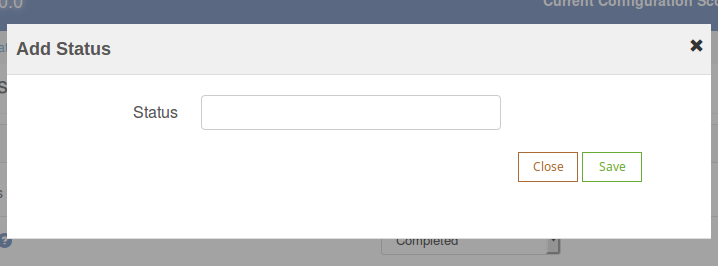
4.Add the values in the above form as per your requirements.
5.Click ‘Save’ to save the status.
4.5.2 How to edit a return status?
1.Admin panel -> System -> Knowband Extensions -> RMA
2.Navigate to ‘Return Statuses’ tab.
3.Click on button in front of respective return status to edit the status. The following modal will appear to add/edit status.
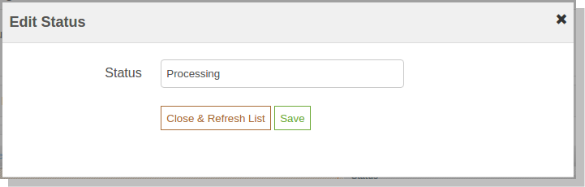
4.Change the values in the above form as per your requirements.
5.Click ‘Save’ to update the status.
4.6 Create a Return
This tab is used to generate a return request from the admin panel itself. The tab contains a form through which the admin can find any order by simply providing the reference number and the corresponding e-mail and then apply for return accordingly.
Note:
- Any return request whether is created by admin or customer is moved to the pending returns and the admin has to approve it first to further change the status of the return request or to take any further action.
- The orders that are delivered or completed are only eligible for return.
- By default the status of the return request is set to default return status set by the admin in the ‘ Return Statuses ’ tab.
4.6.1 How to create a Return Request from the admin panel?
In the module there is an option to create a return request from the admin panel as well. Steps for the same are as follows:
1.Admin panel -> System -> Knowband Extensions -> RMA
2.Navigate to ‘Create a RMA’ tab
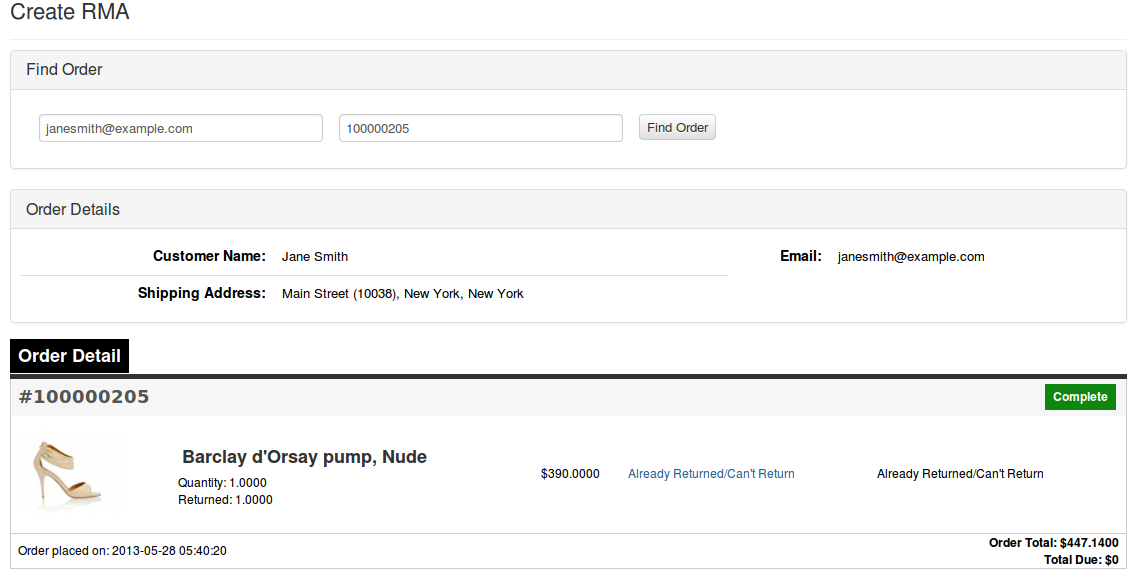
3.Enter order number and email in the ‘Find Order’ form and click on ‘Find Order’ button.
4.The order detail for the respective order will appear containing the list of products and a return button in front of products eligible for return.
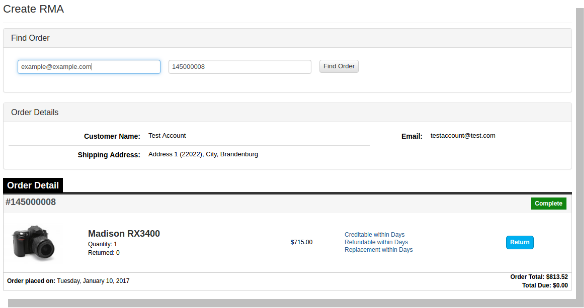
5.Click on the ‘Return’ button in front of respective product in the order details.
6. A pop up will appear containing the return form, fill the form accordingly

7.Click on ‘Submit’ button to complete the return request.
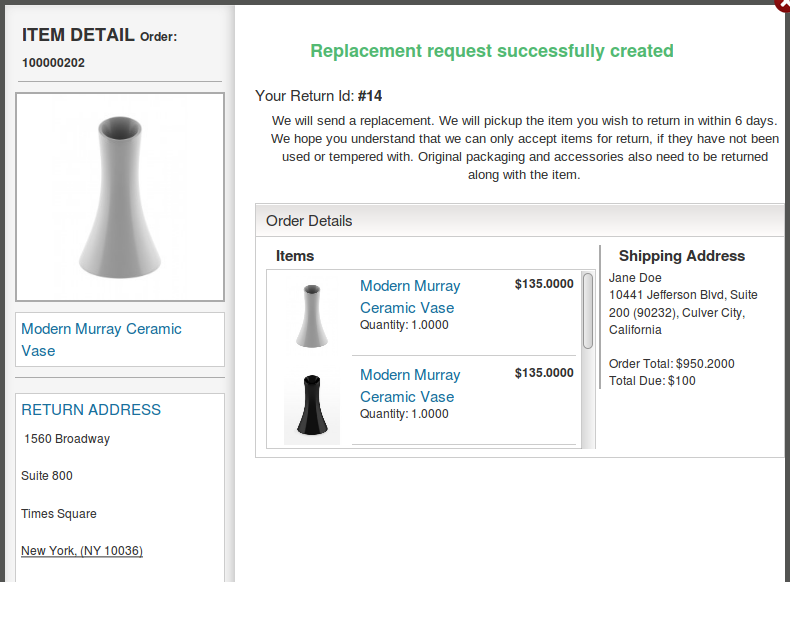
8.A pop up showing success message for return request and other details will appear, as shown below.
4.7 Email Templates
This tab contains a interface through which the admin can edit any email template that is used in this system.

There are 6 email templates available that are used by this plugin:
1. New Return Request Notice (Customer)
This mail template is used to notify the customer regarding the new Return Request generated by the customer itself. The customer who has created return request will only receive this mail.
2. New Return Request Notice (Admin)
This mail template is used to notify the Store Owner regarding the new Return Request generated by any customer.
3. Return Request Approved
This mail template is used to notify the customer regarding the Approval of the Return Request that is created by the customer earlier.
4. Return Request Dis-Approved
This mail template is used to notify the customer regarding the Dis-Approval of the Return Request that is created by the customer earlier.
5. Return Request Status Change
This mail template is used to notify the customer regarding the update in status of the Return Request that is created by the customer earlier.
6. Return Request Completed
This mail template is used to notify the customer regarding the completion of the Return Request that is created by the customer earlier.
To edit any email template the admin has to choose the desired email template. On doing the same the email template data will appear in a form below, to save the changes made the admin has to click on the ‘Save’ button.
4.7.1 How to Edit an Email Template?
1.Admin panel -> System -> Knowband Extensions -> RMA
2.Navigate to ‘Email Templates’ tab.
3.To edit any email template the admin has to choose the desired email template from the ‘Select Template’ field.
4.On doing the same the email template data will appear in a form as shown below:
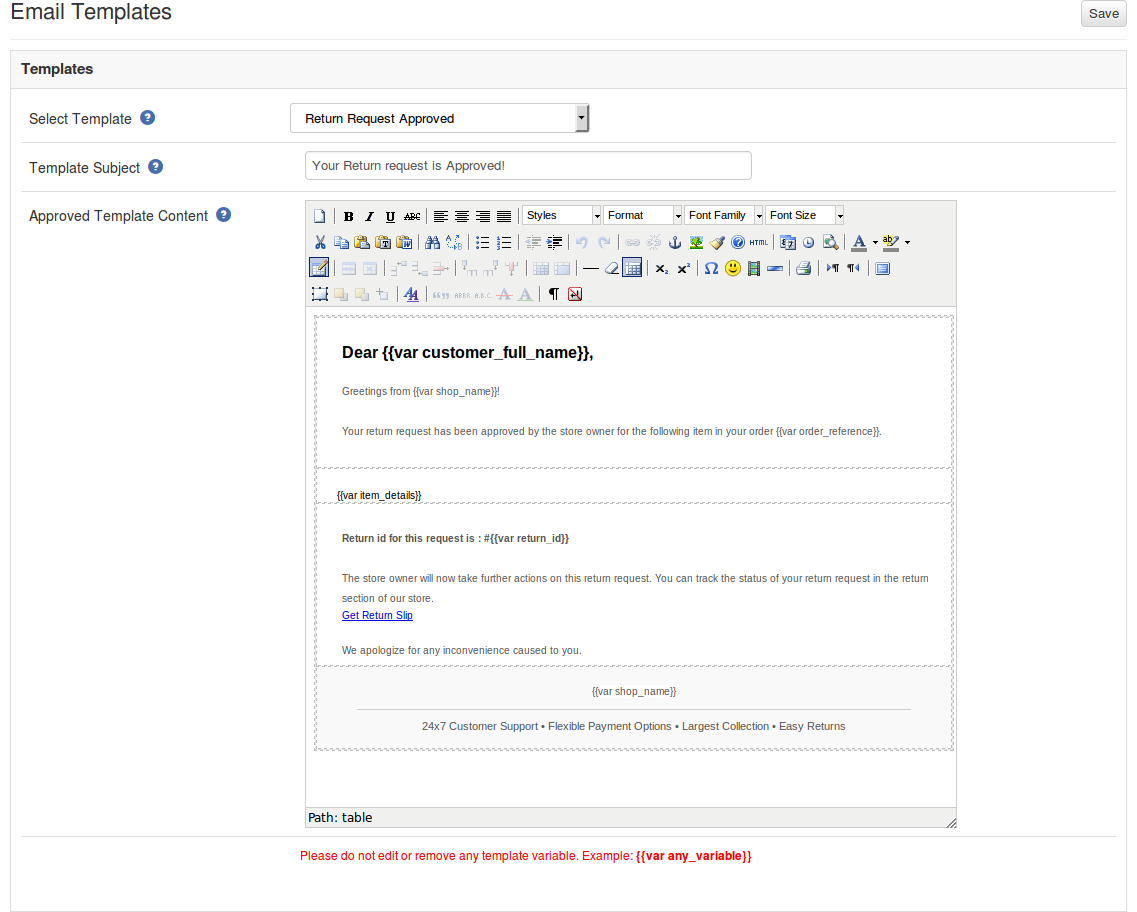
5. To save the changes made click on the ‘Save’ button.
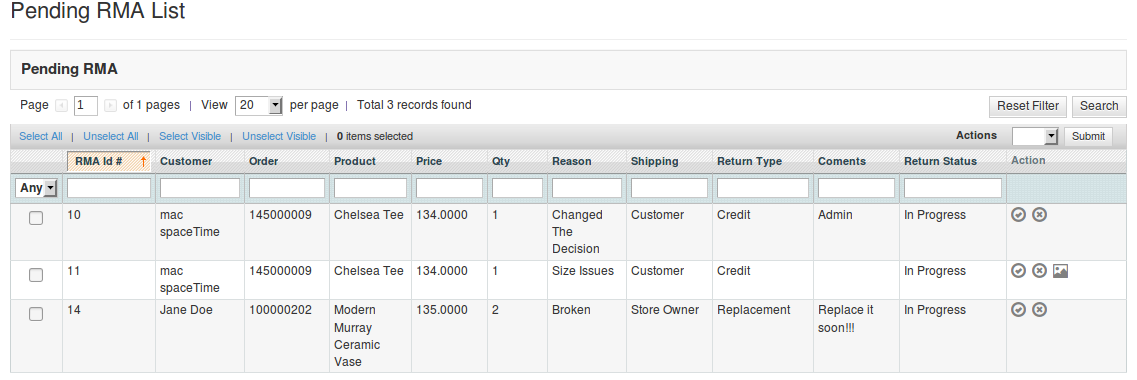
4.8 RMA List
This tab contains a list of all the returns that are pending i.e. are not approved by the admin. The admin has to approve a return request in order to perform several operations on the return request like approve and dis-approve the request or download/view the file uploaded by the customer.
The admin can approve or deny a return request using the actions available in front of the list.
Admin can also download or view the file uploaded by the customer. View option is only available if the customer has uploaded the file.
Once the admin approves a return request then it is moved to the Active Returns List.
On the other hand if the admin denies a return request that it is removed from the list and this action can not be undone.
4.8.1 How to Approve a RMA?
1.Admin panel -> System -> Knowband Extensions -> RMA
2.Navigate to ‘RMA List’ tab.
3.Click on button in front of the respective return request.
4.The return request will be approved and moved to ‘Active RMA’ list in Active Returns tab.
4.9 Active Returns List
This tab contains a list of all the returns that are approved by the admin. The e-merchant can proceed with the return process after approving the return request using this tab. The online retailors can change the status of the return request and can also deny a request form this tab and can archive the request as well.
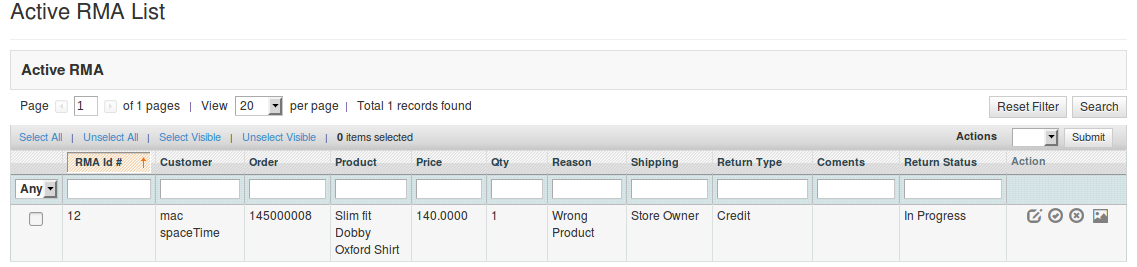
The actions that can be performed from this tab for the active returns are:
- Deny the return request.
- Change the status of the return request.
- Mark the return request as complete / add to archive.
When the store admin marks a return request as complete then it is moved to the archives list.
4.9.1 How to Reject an RMA?
1.Admin panel -> System -> Knowband Extensions -> RMA
2.Navigate to ‘RMA List’ tab or ‘Active Returns’ tab.
3.Click on the button in front of the respective return request.
4.The return request will be rejected. Please note that the online shoppers will not be able to apply for return again for the same order item.
4.9.2 How to Complete an RMA?
After approving a return request (or RMA) the customer is supposed to send the received order item back to the store owner. After receiving the order item successfully admin will take desired actions for that return request.
The return request will me marked as complete when no more actions are needed to be taken from customer/store owner.
1.Admin panel -> System -> Knowband Extensions -> RMA
2.Navigate to ‘Active Returns’ tab.
3.Click on button in front of the respective return request.
4.The return request will be marked as complete and will be moved to the ‘Archive List’ in ‘Archive List’ tab. Please note that this action cannot be reverted.
4.10 Archives List
This tab contains all the return requests that are complete. The tab also contains a form through which the admin can filter the archives list.
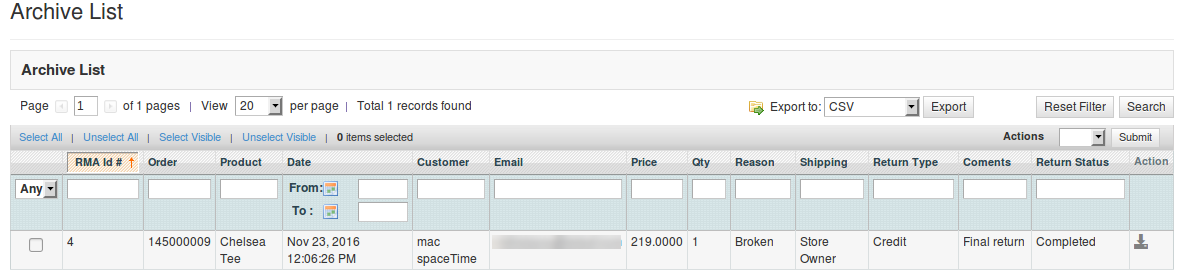
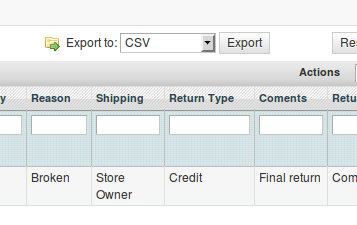
There are options to export the data into CSV file.
Single row can be exported and the whole data can also be exported using mass export option.
4.11 RMA Message
This tab contains three textareas having html editors. Using the editors, admin can set the style of the success message to be shown in the pop-up whenever the request is successful.
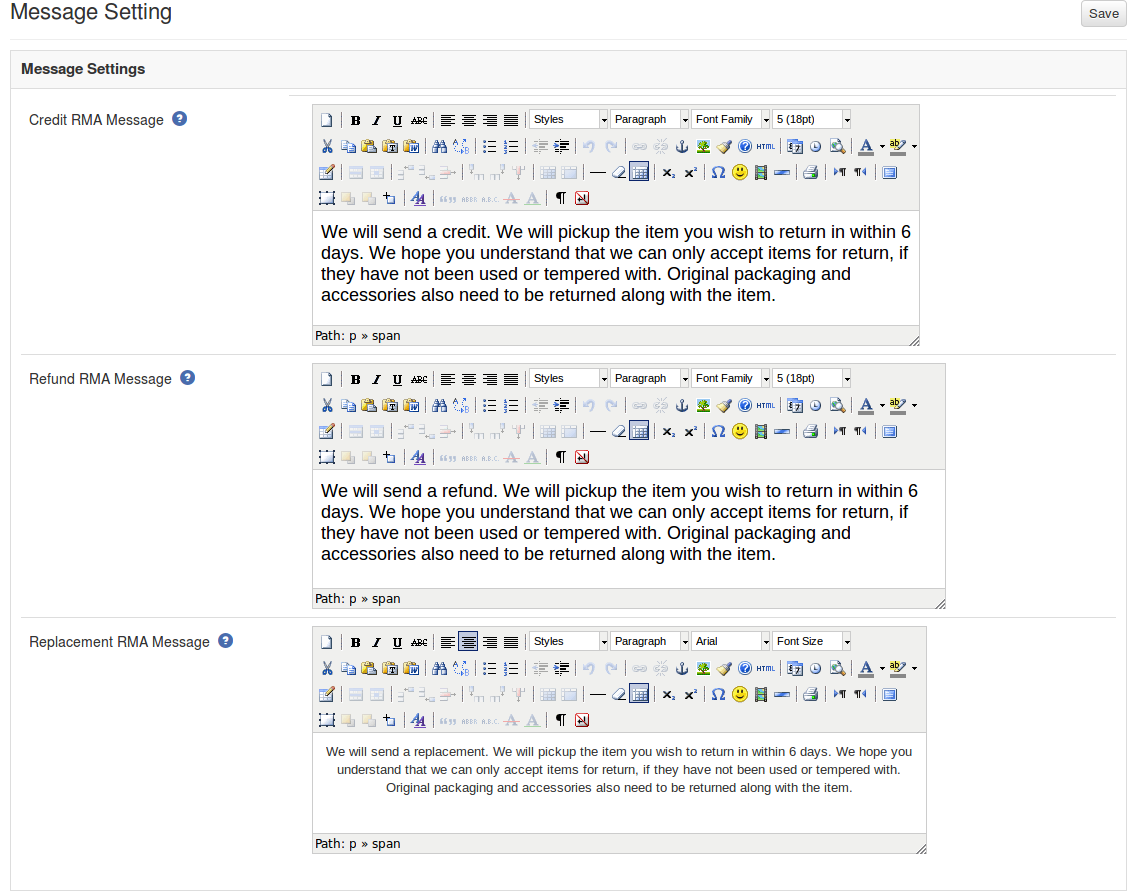
There are three messages.
- Credit
- Refund
- Replacement
5.0 Front End Module
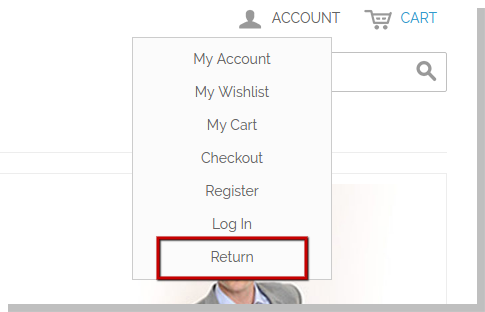
After enabling the plugin the front-end user will see a link in the header of the front-end through which the user can navigate to a new page.
The link in the account option of the front-end will appear as follows:
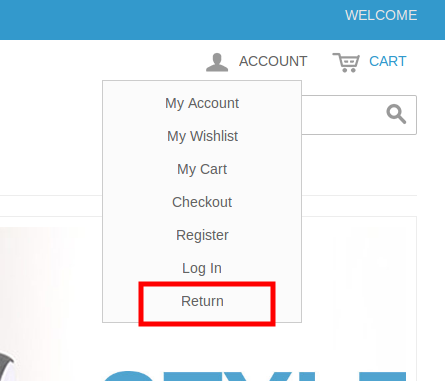
The link in the account option of the front-end will appear as follows:
When the customer clicks on this link than a new page will open on the basis of logged in status of the customer.
5.1 How to create return request for guest user from front office?
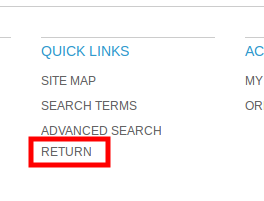
1. Navigate to the front return page by clicking on the ‘Return’ link in header account menu or from the footer (as shown above).
Note: Customer should not be logged in.
2. The following page will open containing a page to find order details for any order.
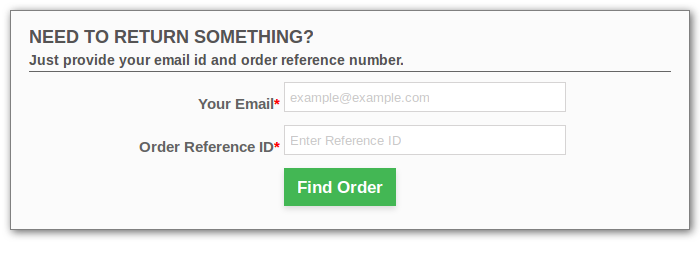
3. Provide the order reference number and the respective email the details of that order will appear including the return history on the basis of the email provided by the customer. The order details will appear as follows:
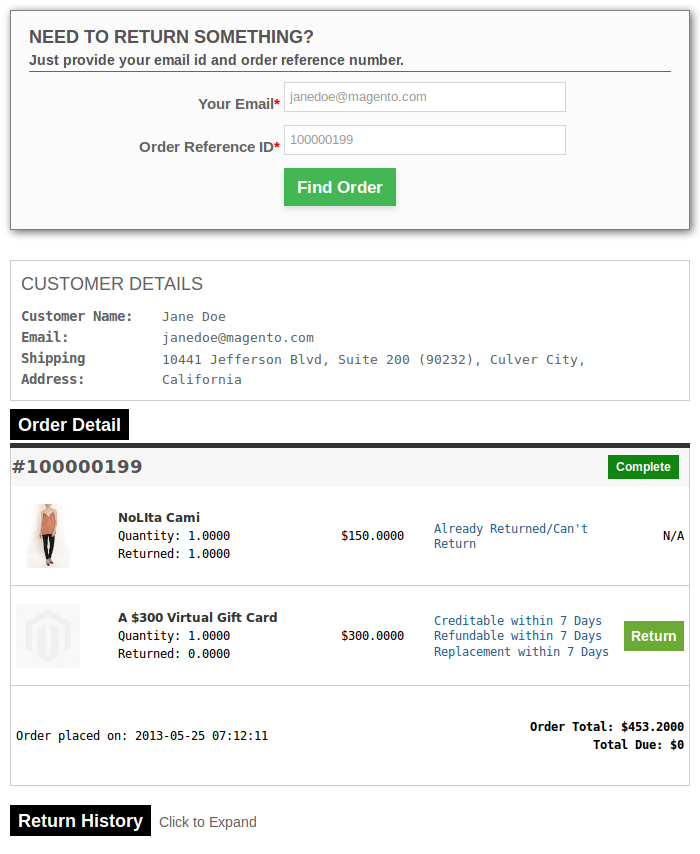
The products that are eligible for return in that particular order will have a return button. Through this button the customer can apply for return of that particular product.
Note: The return history on the basis of the email provided by the customer will also appear at the bottom.
4. On clicking on the ‘Return’ button a pop-up will appear containing the form for return of that particular order. The form will appear as follows:
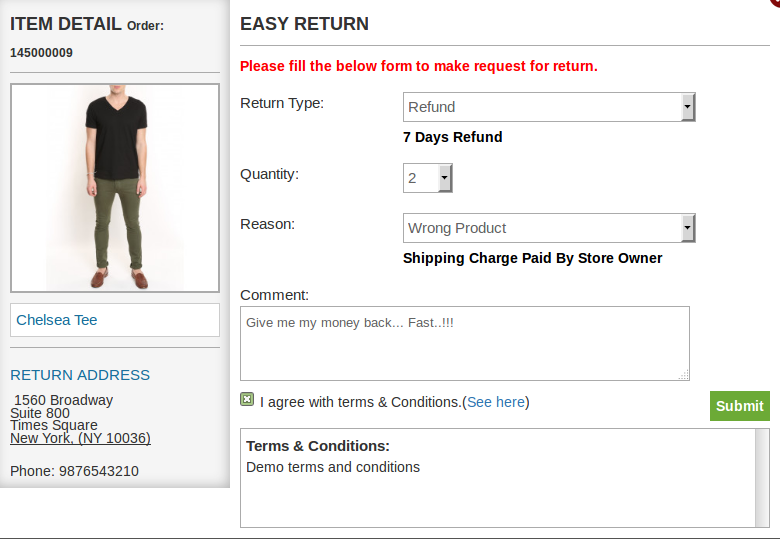
5. Complete the above form and then click on submit to submit the return request.
6. A success popup will appear showing the successful submission of the return request as shown below:
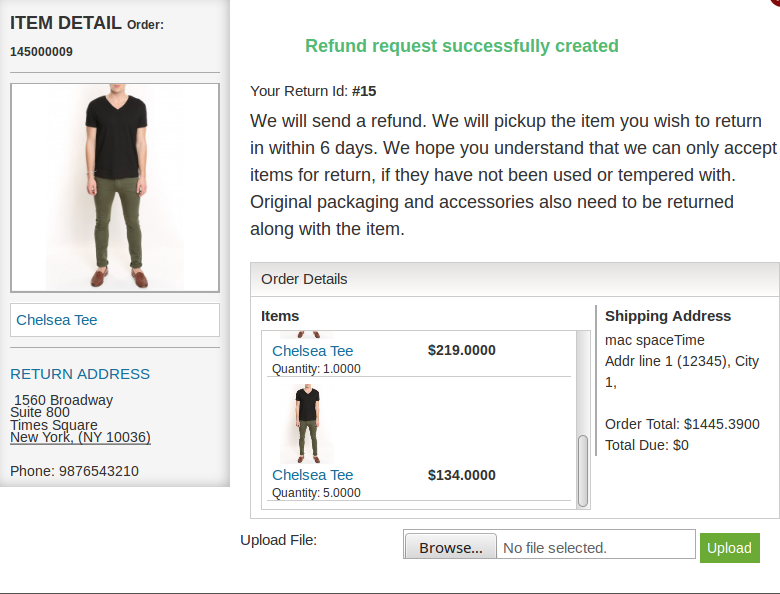
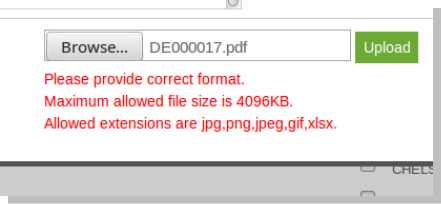
7. There is as option to upload files in the success page. From where you can upload file and admin can view/download that file from aamin panel. File limitations are set from admin panel.
5.2 How to create return request for logged in user from front office?
1.Navigate to the front return page by clicking on the ‘Return’ link in header account menu or from the footer (as shown in heading 4.0).
Note: Customer should be logged in.
2.The following page will open containing order details of all the orders placed till date by the current customer.
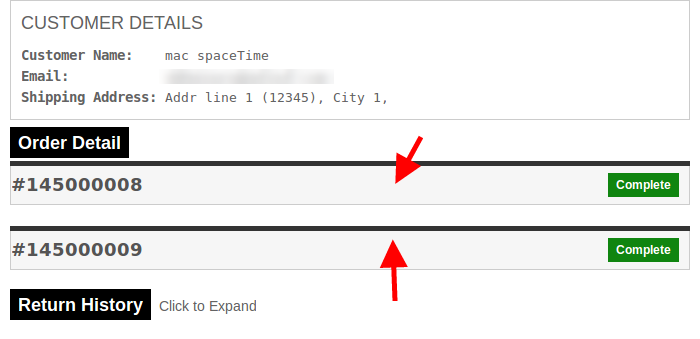
Note: There will be the details of every order. We can expand any of the order division (will have to click where the arrows are pointed). On click the respective order division will be expended.
3. To view all the history of the return requests, user will have to expand the “Return History” tab.
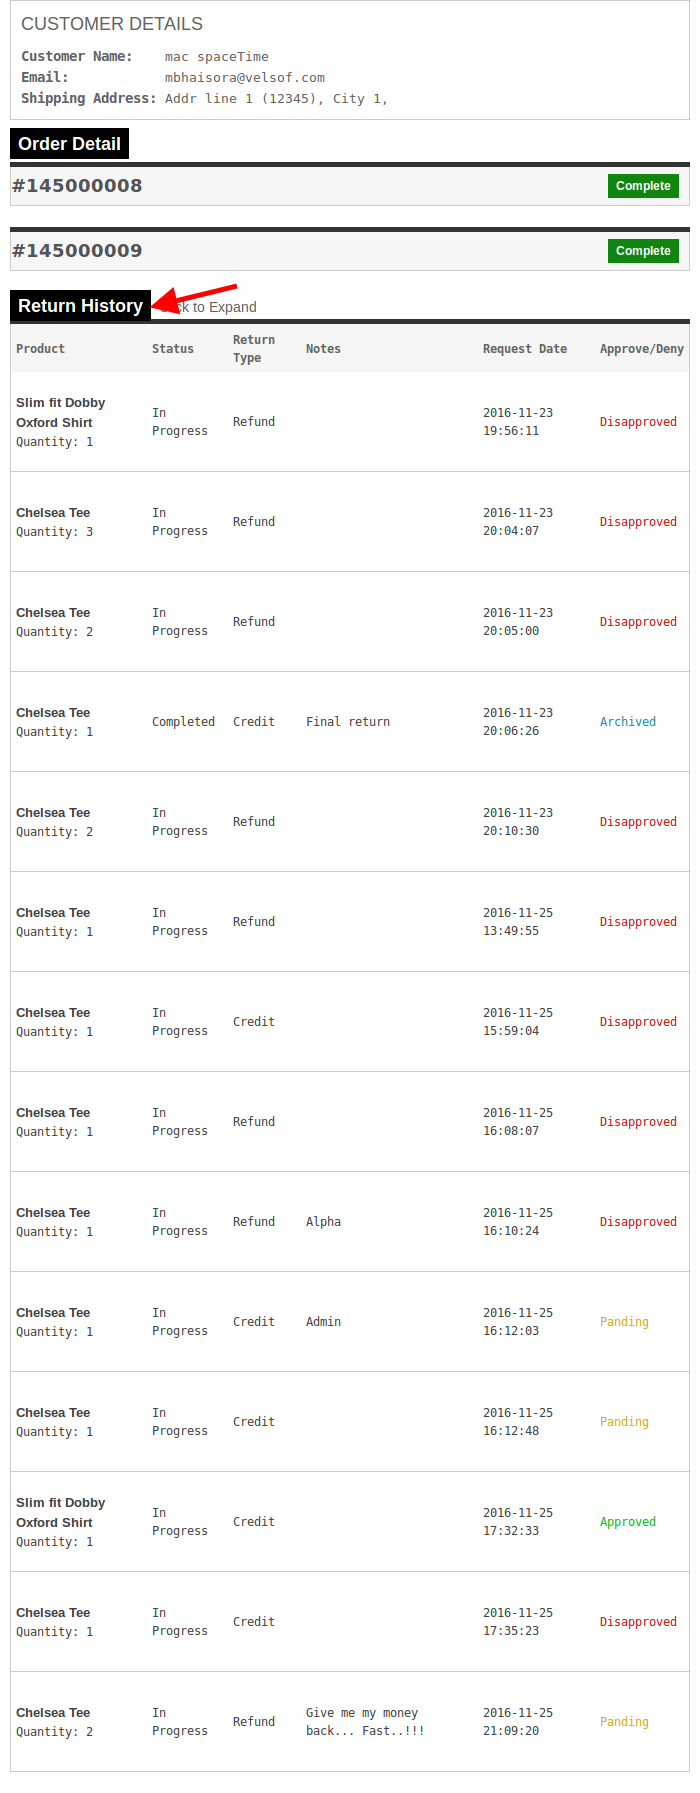
4.The products that are eligible for return in that particular order will have a ‘Return’ button. Through this button the customer can apply for return of that particular product.
5.On clicking on the ‘Return’ button a pop-up will appear containing the form for return of that particular order item. The form will appear as follows:
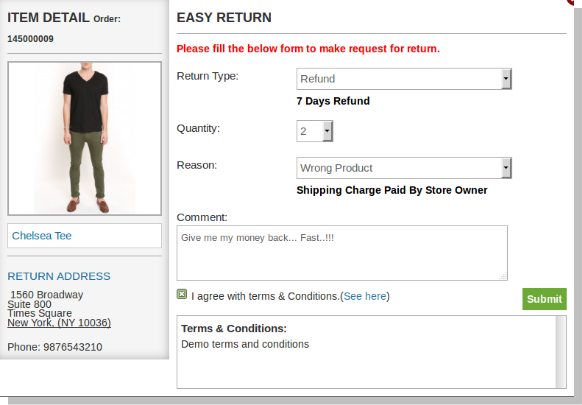
6. Complete the above form and then click on submit to submit the return request.
7. A success popup will appear showing the successful submission of the return request as shown below:
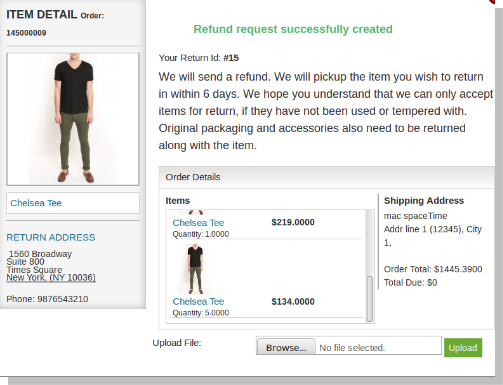
8. There is as option to upload files in the success page. From where you can upload file and admin can view/download that file from admin panel. File limitations are set from admin panel.
You can try Magento Return Manager extension for on your Magento store. KnowBand’s Magento Return Merchandise Authorization helps you increase customer enagaement to your store & you can easily manage the return request of the product.
Module Link: https://www.knowband.com/magento-return-manager
Admin Demo: https://mademo1.knowband.com/index.php/rma/adminhtml_index/index/key/ac91efaa6d652ee58a922da7896dbb33/
Front Demo Link: https://mademo1.knowband.com/
Related Stories:
