Accelerate the Checkout Process with OpenCart Single Page Checkout

The checkout page should be responsive and user-friendly with a balanced page layout and structure. OpenCart One Page Checkout module, developed by KnowBand offers you easy signup, customizable layout, several payments, and shipping method support, and a lot more that makes it best and unique. The OpenCart One Page Checkout module’s latest version compatible with the Journal theme, Opencart v2.0.x – v3.0.x versions of OpenCart. OpenCart Single Page Checkout optimizes the checkout page by speed-up the process.
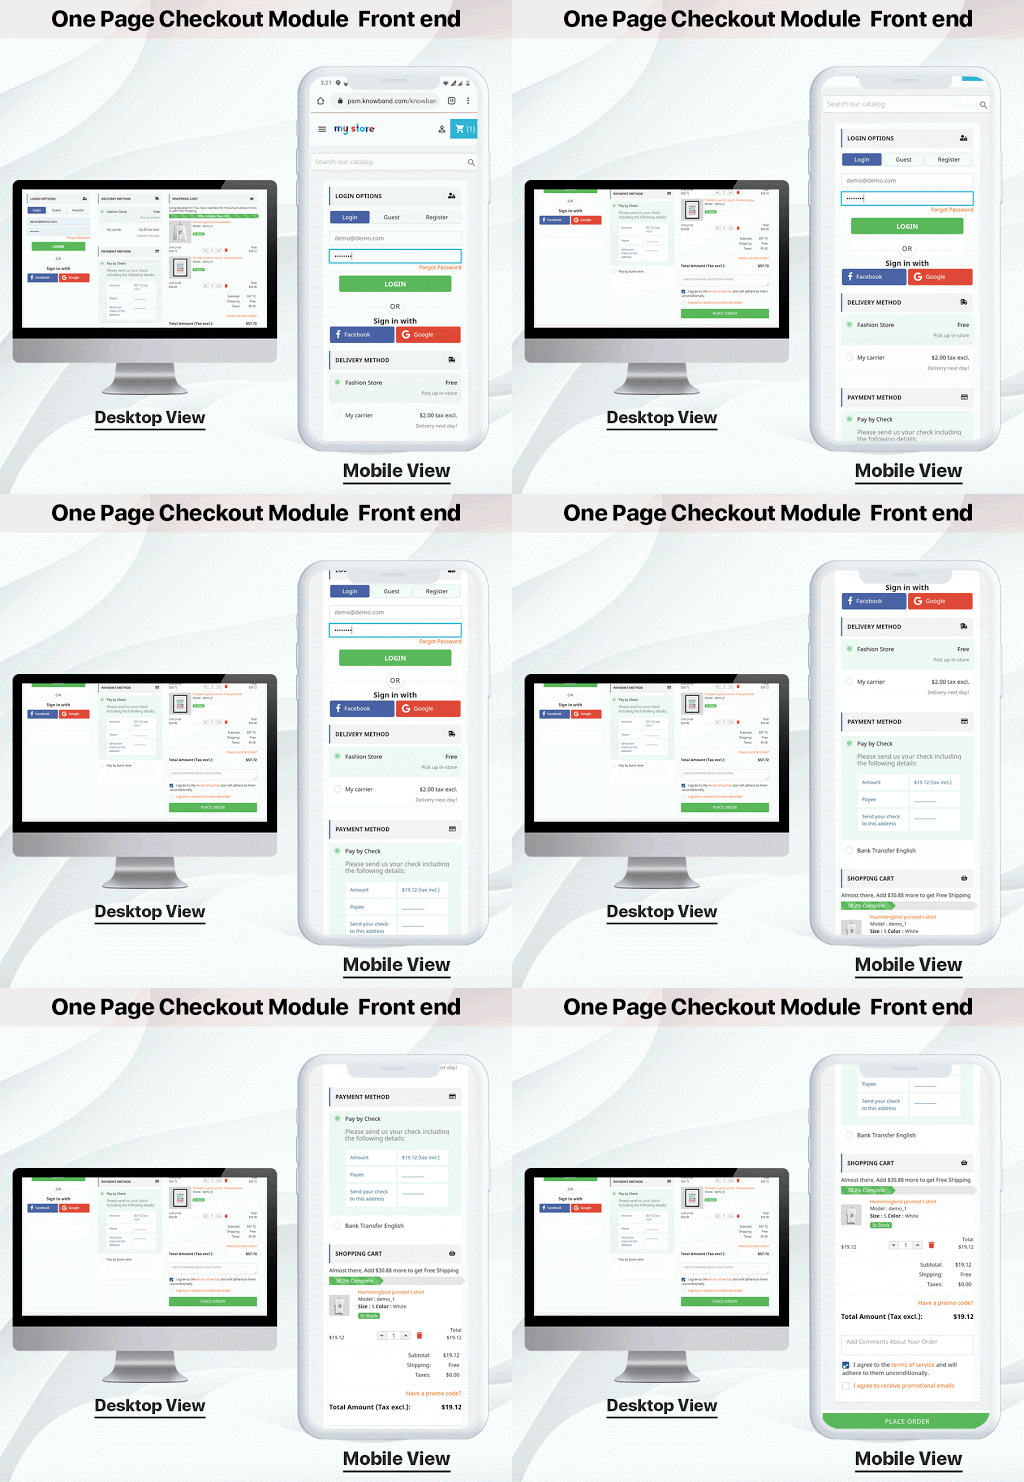
No customer wants to waste more time checking out. They want a checkout process that is legible, easy, and safe. By eliminating lengthy multi-step checkout, an eCommerce store owner may provide their customers with a simple single-page checkout. As consumers see that only on a single page can their e-Commerce experience be completed, they are more likely to finish the purchase.

Wondering why you should switch to One Page Checkout from Multi-Page Checkout? It is always a hot topic of discussion among eCommerce experts. You can read One Page Checkout vs Multi-Page Checkout and find out which is better for your store.

For better understanding, some of the best features of the OpenCart One Page Checkout Module are discussed in this blog that will accelerate the checkout process on your OpenCart store.

Quick Sign Up by Social Media
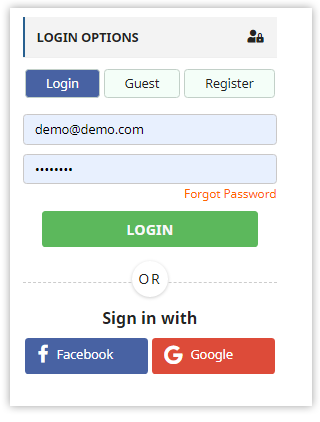
Social login is the new login trend, which significantly increases the number of registrations. With a social login option like Facebook and Google, the one-page checkout plugin is integrated. It saves time, and more specified information is received by the store owner. The social login option enhances the conversion rate for customers.

Guest Checkout

The Guest checkout option is provided by a page checkout module by KnowBand. This is an attractive feature that can save clients from filling out a long registration form. If a client does not want to go through a sign-in process, instead of abandoning the cart, he/she can make a guest checkout. If the user is already registered in the store then he can checkout directly.

Save time by removing extra fields

The Quick Single Page Checkout is the compact multi-step checkout version with a decreased number of entries. The OpenCart One-Page Checkout module that has minimal mandatory fields and no options for additional data entry will save time for the user. Some of the fields can be kept optional.

Show Product Details and Update Cart

You can also modify the cart fields in a similar way to the checkout field customization. You can specify which cart elements you want to display to the users with OpenCart One Page Checkout. You can hide the voucher entry from the Cart page, for instance, or display only a few limited fields. For both registered and non-registered users, this can be set up in a few steps.

Google auto address fill and auto-detect country code

With the enabled country auto-detect tab, the user’s location will be auto-detected. The administrator can show or hide the feature from the back end of the One Step Checkout extension of OpenCart. This is a valuable tool that can help clients and administrators alike. This reduces the time for form filling. As soon as the customer begins to fill out the address information, Google Auto-Address Fill displays the address suggestions.

Additional Features:

Layout and Structure Customization

One page checkout shows all the elements on a single page, such as registration, sign-in, payment methods, shipping methods, cart information, etc. A helpful UI allows clients to complete the transaction hassle-free in contradiction to the multiple phase checkout module. There are similar elements in the multiple-step checkout, but it looks tiring and long. It is mobile responsive.
Support for multiple shipping and payment methods

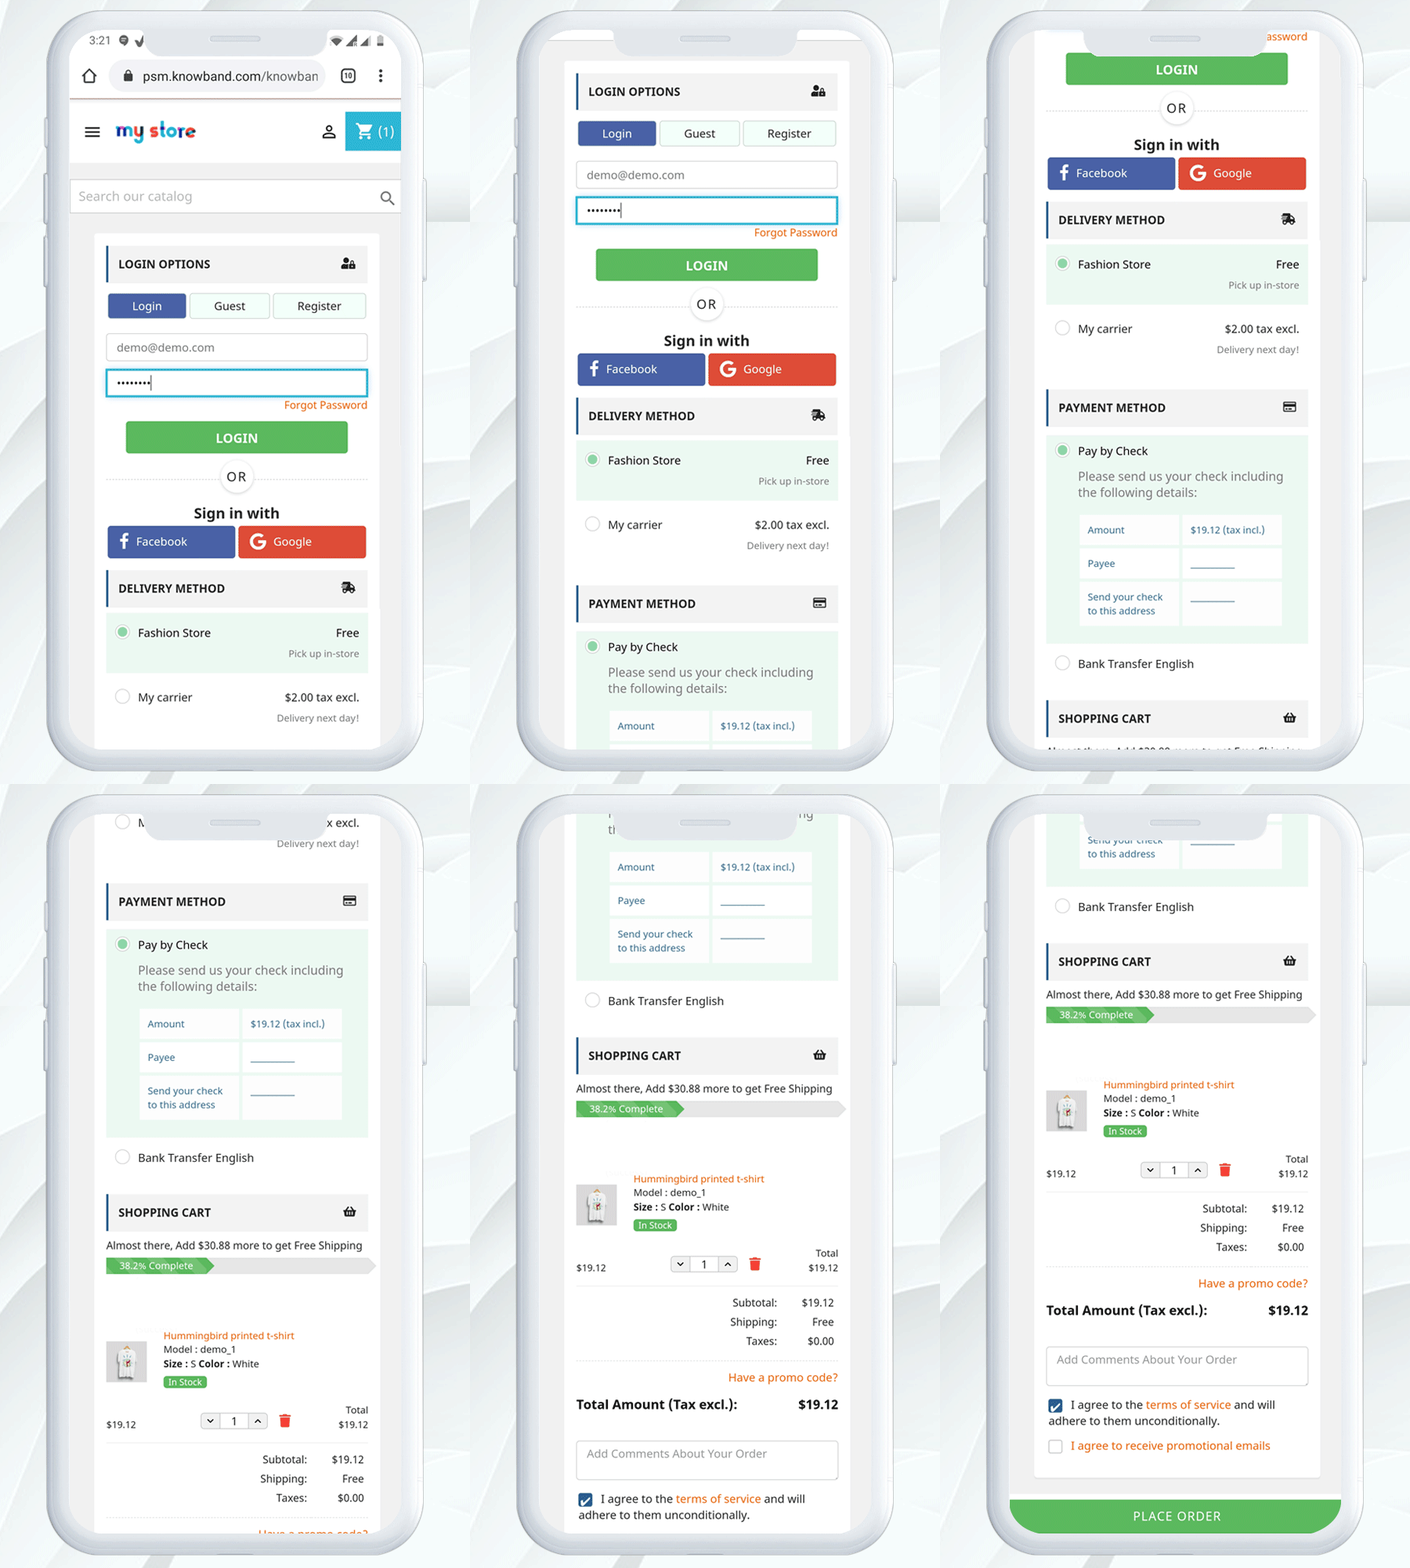
Almost all major shipping and payment methods are supported by the OpenCart One Page Checkout extension, so you can provide your customers with many shipping and payment options to choose from. A default shipping and payment method can also be set. In addition, for every method of shipping, you can specify which payment methods would apply to it.

Compatibility with Journal Theme

The Single Page Checkout Module is Compatible with the Journal 2 and Journal 3 themes of OpenCart. If you need any help with the compatibility of the theme, please contact our support team after purchasing the extension and we will help you to make the extension compatible with the theme of your store without charging any additional costs.

Conclusion: The OpenCart One Page Checkout Pro is designed to reduce the rate of abandonment of shopping carts. It is a quicker, smarter, and better checkout page that substitutes its advanced features for the default checkout. This module decreases the time required for the checkout as well as collects personal data that you can use in planning your digital marketing strategies.

Recommended Reads:
How to update OpenCart? A Step by step guide

Installing any unknown software or module is often a difficult task as it requires a great knowledge about the system requirements, software or module settings and other such parameters. I have often witnessed several OpenCart customers who are facing issues while installing this eCommerce platform on their system. This OpenCart platform is an open source shopping cart software that has gained immense popularity in a short span of time among various eCommerce store owners. Different versions of OpenCart has released so far and it is mandatory to keep updating your platform from time to time to include new exciting OpenCart extensions and functionalities into your store. The tutorial will run you through the basic steps to update OpenCart from one version to another.

This blog will help various OpenCart customers to upgrade their existing OpenCart platform to the new version without any hurdles. Let us take a step by step approach.

How to Update OpenCart from one version to another?

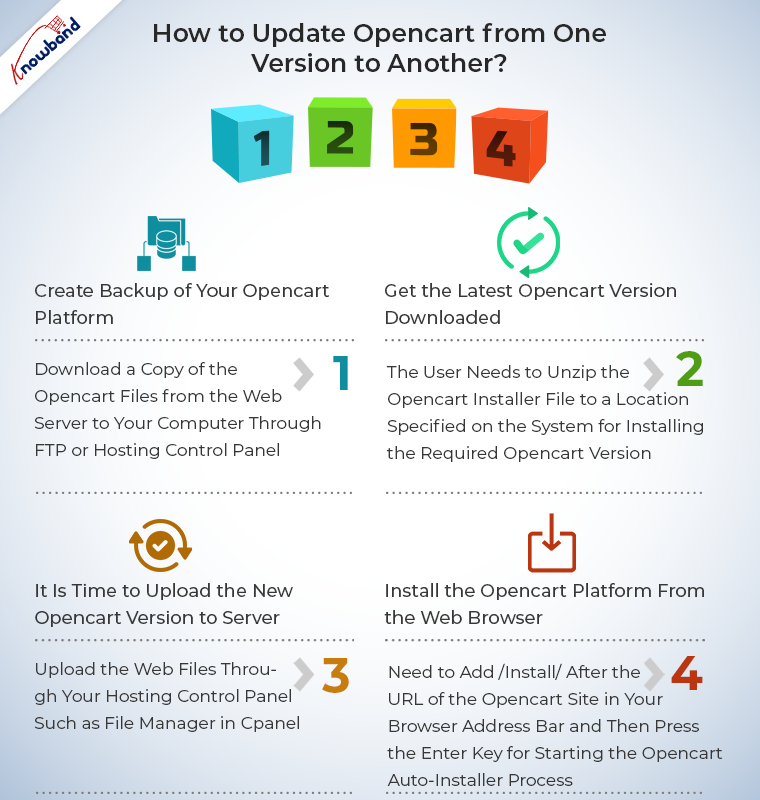
Create backup of your OpenCart platform

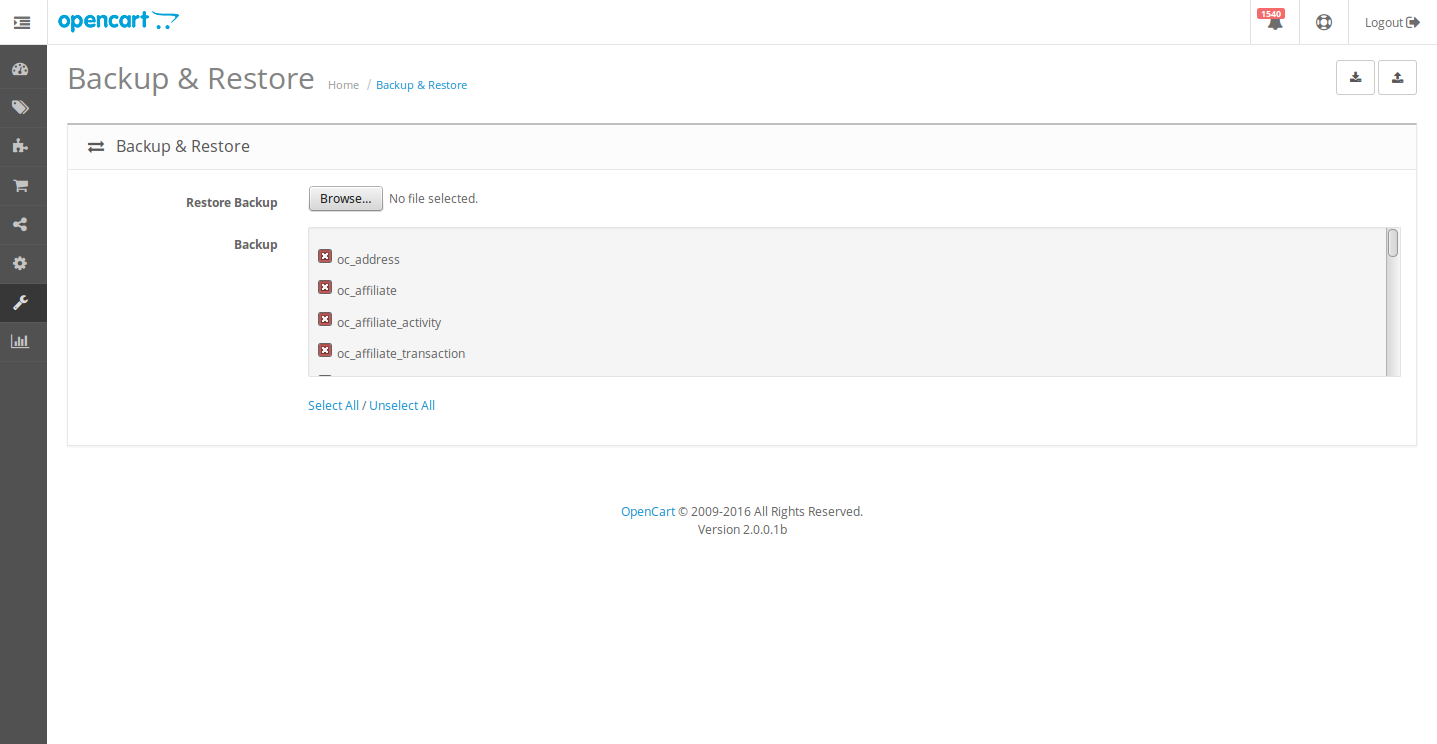
To accomplish this task, you need to download a copy of the OpenCart files from the web server to your computer through FTP or hosting control panel. You need to perform the database export through phpMyAdmin or you can also backup the database by following the path, OpenCart dashboard -> Tools -> Backup/Restore. Check out the image given below for understanding the above process.

Backup your OpenCart store for avoiding any problem during the upgradation process.

Get the latest OpenCart version downloaded

In order to download the latest OpenCart version, you need to check the link. The download file will be available in the form of a zip file. The user needs to unzip the OpenCart installer file to a location specified on the system for installing the required OpenCart version.

It is time to upload the new OpenCart version to server

Now, you can upload the web files through your hosting control panel such as File Manager in cPanel. Apart from this, user can use FTP tools for uploading the web pages and files from a computer system to web server. There, you will be prompted regarding how to handle the files with the same name during the uploading process along with the option to choose overwrite for applying changes in all the files with the same name on the web hosting account by replacing them with the new OpenCart files.

After unzipping the OpenCart installer file, you will see a folder named as “upload”. It is required to upload all the files and sub folder from your computer system to the web hosting excluding the files namely “upload/config.php” and “upload/admin/config.php”. Irrespective of the OpenCart version you are upgrading to, it is important to ensure that these two files are excluded during the uploading process to avoid the overwriting of these crucial files.

This entire process of uploading the OpenCart files from computer to web server may take some time. Based on the number of files included in the new OpenCart version, the uploading process done on the OpenCart directory located on the web server may take the involved time in the process.

Install the OpenCart platform from the web browser

Follow the simple steps of the upgradation process for ensuring a hassle free upgradation to a higher OpenCart platform.

Every other new OpenCart installation consists of an “install” sub folder present in the OpenCart root directory. Now, it is time to launch the auto-installer from the web browser. For this, you need to open the web browser on your PC or Mac and then enter the OpenCart domain name in the address bar of the browser. You need to add /install/ after the URL of the OpenCart site in your browser address bar and then press the Enter key for starting the OpenCart auto-installer process. As, you are upgrading an existing OpenCart version, it will require comparatively less time than the fresh OpenCart installation.

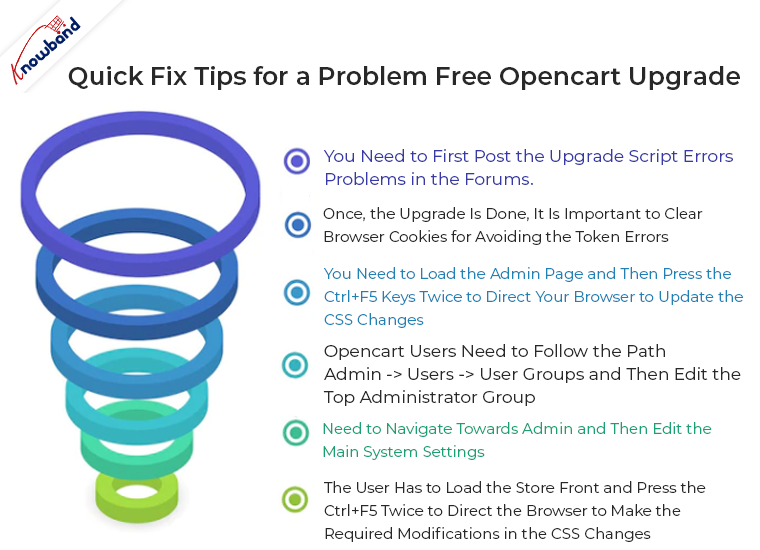
Quick fix tips for a problem free OpenCart upgrade    

If you are looking to upgrade your OpenCart store without any problem, it is time to follow these quick simple tips for the required process.

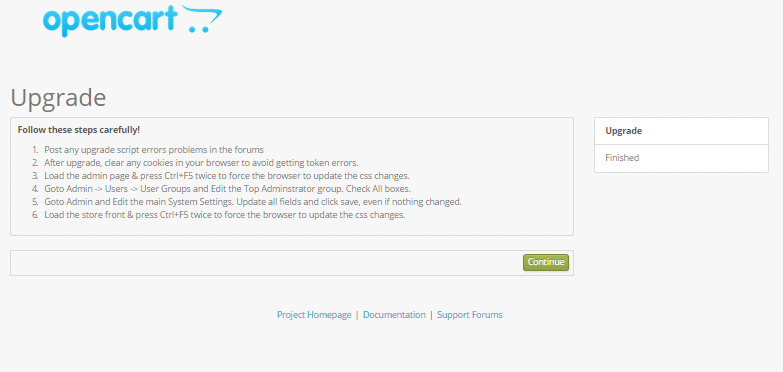
  • You need to first post the upgrade script errors problems in the forums.
  • Once, the upgrade is done, it is important to clear browser cookies for avoiding the token errors.
  • You need to load the admin page and then press the Ctrl+F5 keys twice to direct your browser to update the CSS changes.
  • Now, OpenCart users need to follow the path Admin -> Users -> User Groups and then edit the Top Administrator group. It is advised to check all the boxes there.
  • You need to navigate towards Admin and then edit the main System Settings. It is also recommended to update all the fields and then click on the save option inspite of whatever changes you have made.
  • The user has to load the store front and press the Ctrl+F5 twice to direct the browser to make the required modifications in the CSS changes.

Note- In case, you encounter any error messages from the front page or through admin dashboard when logged in such as “Use of undefined constant DIR_MODIFICATION OpenCart upgrade error”, ignore it and continue with your upgradation process.

By strictly adhering to the step by step instructions given in this blog post, any OpenCart store owners can upgrade its existing OpenCart installation into the desired higher OpenCart version in an effortless manner.

So, if you are planning to upgrade your OpenCart store, then, do not get intimidated by the technicalities as it can be handled and taken care of with ease. With the release of the latest version of OpenCart, that is, OpenCart version 3.0, the store upgrade has become a must-have. The new and positive changes with a lot more improved admin interface of OpenCart 3.0 can make your eCommerce business way more intuitive and flourishing.

Why should you upgrade to OpenCart version 3.0?

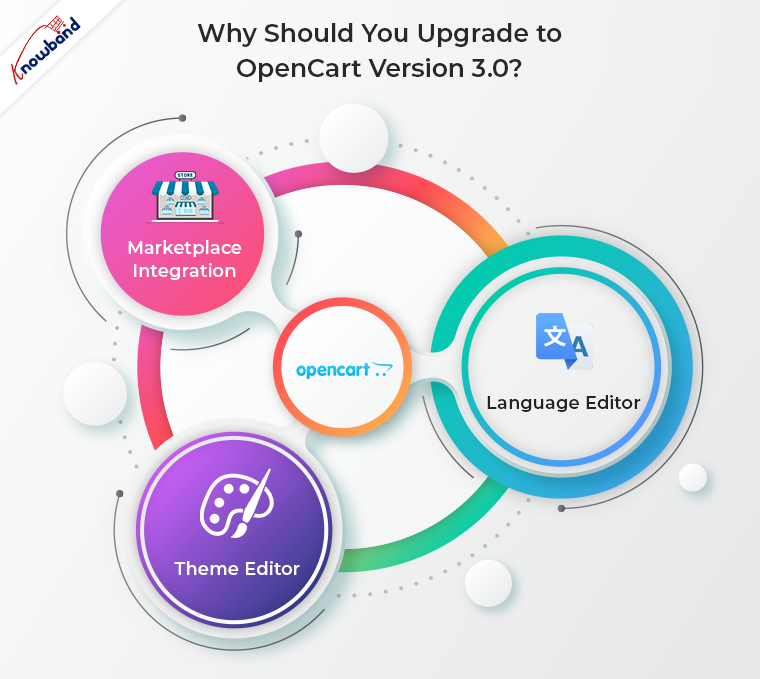
The latest OpenCart version 3.0 has come with few major changes. They are discussed below:

Marketplace integration

The marketplace in the platform itself has made the biggest impression so far. You can now get OpenCart marketplace extension and install it in your store to enable the multi-vendor feature. Before the release of this version, it was reachable only via the official website. Knowband offers one such OpenCart multi vendor marketplace extension that can convert your store into a whole new marketplace. Watch the video to know more:

Theme editor

The improved Theme Editor allows you to modify platform’s themes directly from the admin interface via Twig language. The theme editor is user-friendly and easy-to-understand. It allows you to modify 3 main elements, the themes, pages and the code of the pages in particular. You will now be able to customize your storefront and improve the look and feel of the site from the back-end.

Language Editor

OpenCart 3.0 offers Language Editor that allows the store admin to customize any text in the store. The contents can be changed to a preferred language without troublesome installation of any third-party translation extensions. Translating the text is just a matter of few clicks now.

If you further want to improve the functionality of your OpenCart store, you need to take the help of various OpenCart extensions from Knowband store that are packed with multiple features. For more information about other Magento extensions, PrestaShop Addons or OpenCart modules, you need to visit the Knowband store at www.knowband.com.