Steps to use Google Authenticator App for 2 Factor Authentication for GoDaddy

AA free security programme called Google Authenticator helps guard your accounts against password theft. Two-factor authentication, which is available on popular sites including Gmail, Facebook, Twitter, GoDaddy and Instagram, is simple to set up and use.

The app (iOS/Android) generates a random code that is used to verify your identity when you log into various services. The Google Authenticator app offers an additional layer of security over simply sending the code to your phone through text message each time.

Step by Step Guide to Use Google Authenticator app for 2 Factor Authentication for Godaddy:

Install the 2-step Google Authenticator App for increased account security.
Recommended Read: How to download your Android/iOS app from the Diawi link?

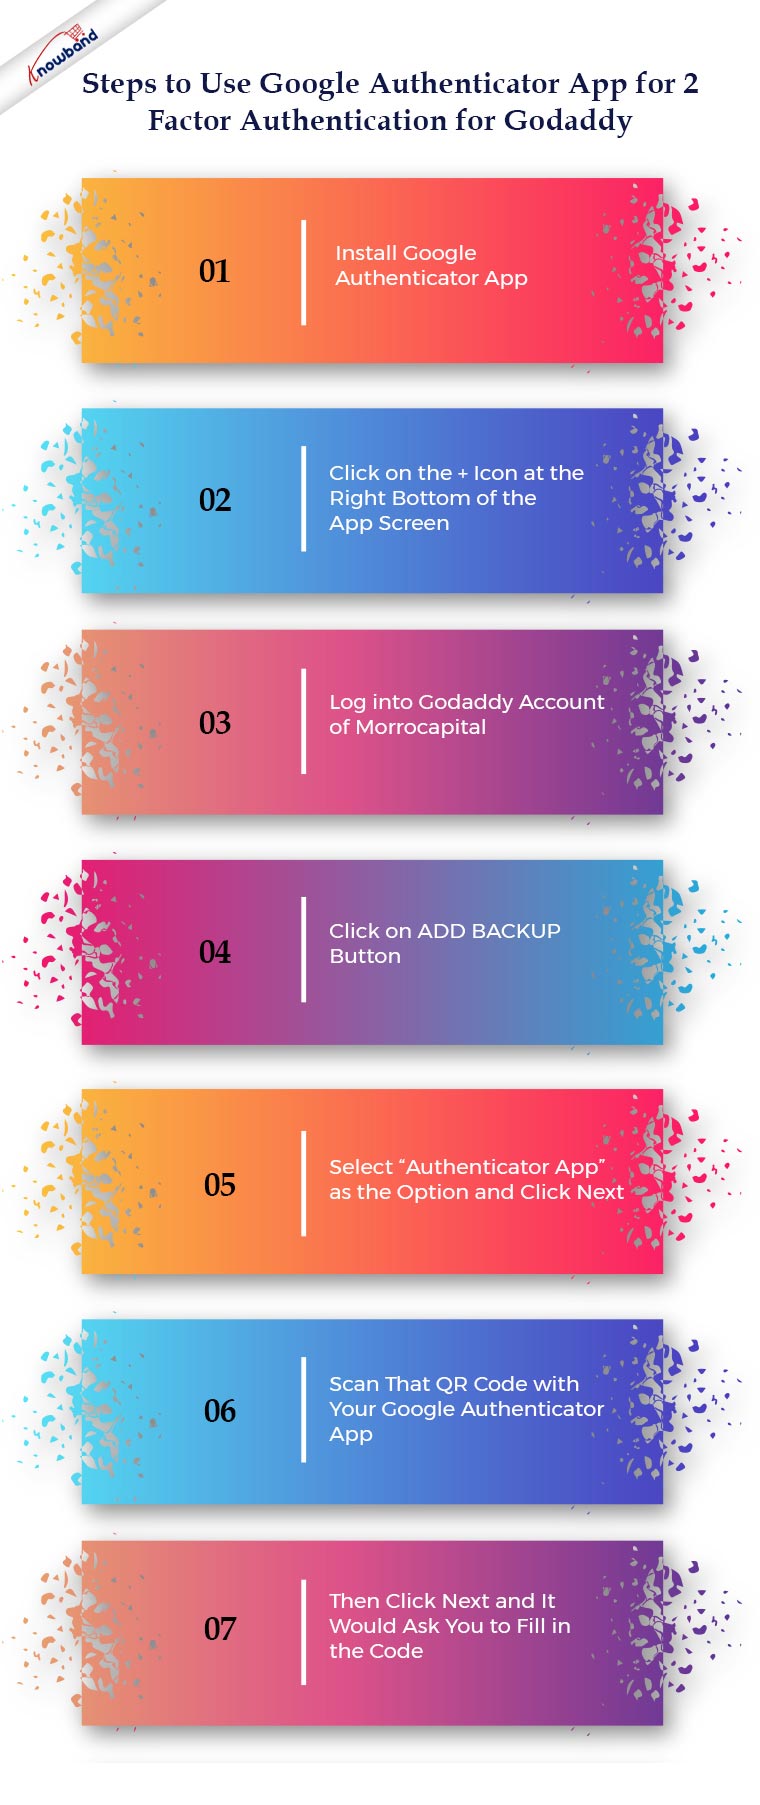
1. Install Google Authenticator App: https://play.google.com/store/apps/details?id=com.google.android.apps.authenticator

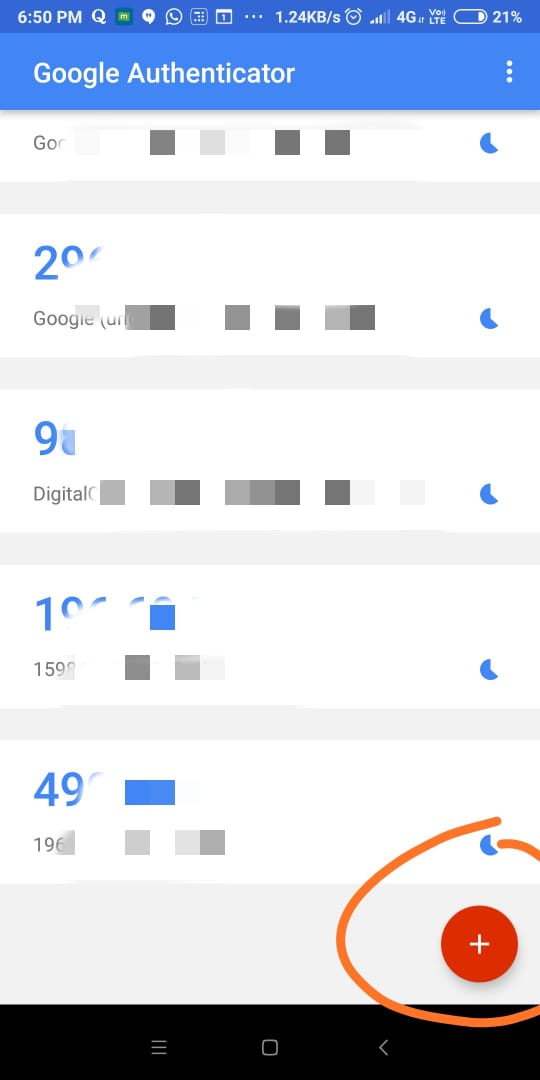
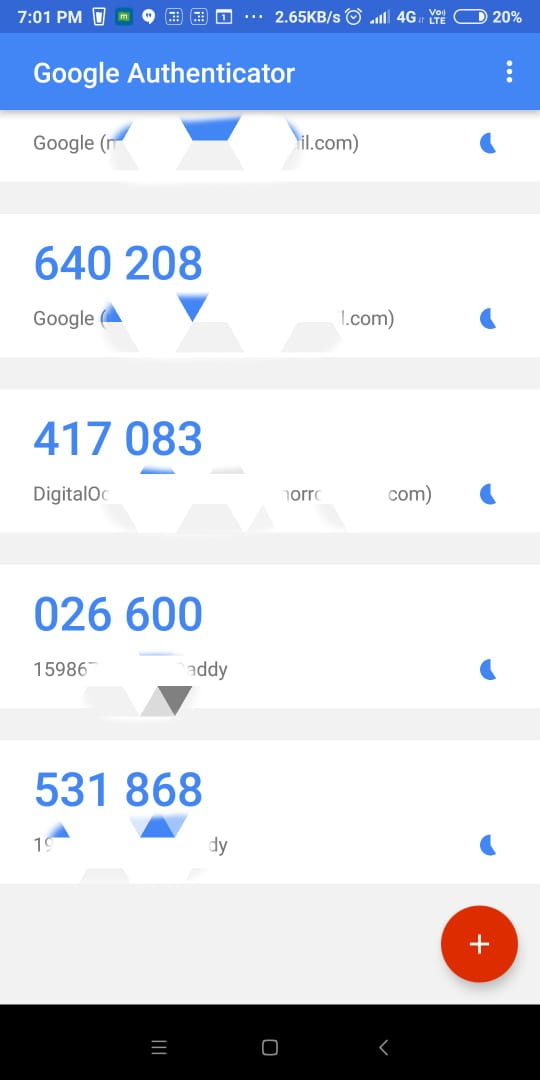
2. Click on the + icon at the right bottom of the app screen. This would give you an option to scan a QR Code.

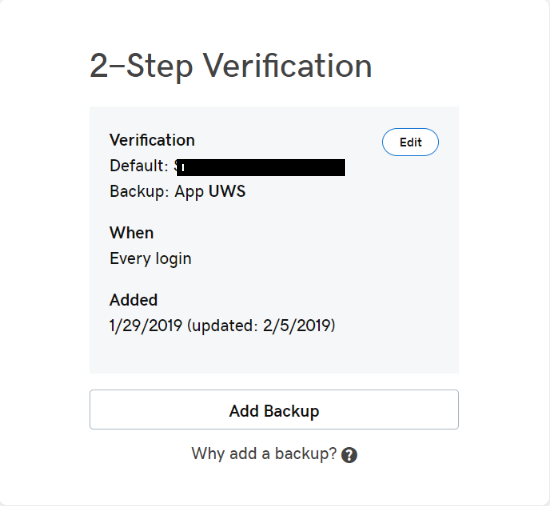
3. Log in to the Godaddy account of MorroCapital and goto: https://account.godaddy.com/security/
Recommended Read: iOS & PWA: Key Points Everyone Should Know

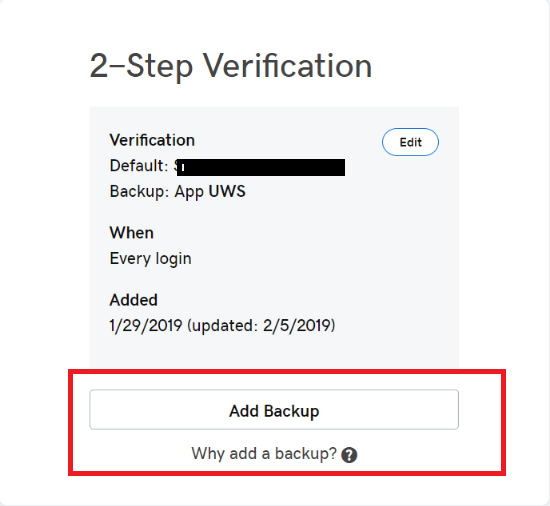
4. On the right bottom part you will see an option to ADD BACKUP. Click it.

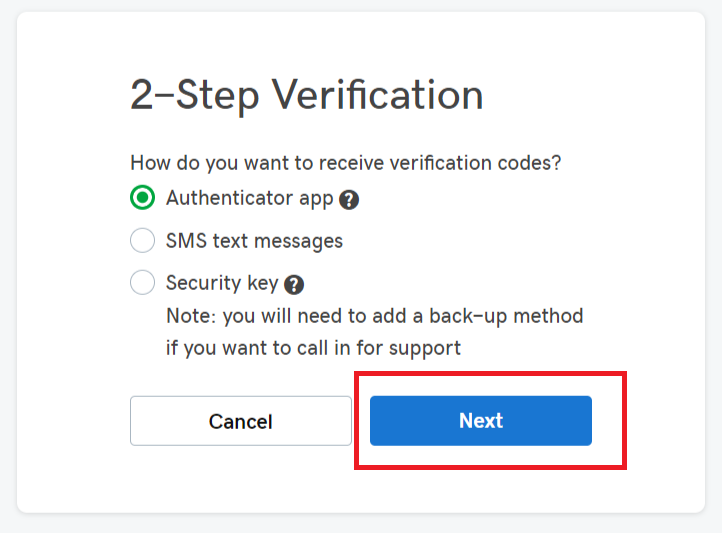
5. It will take you to the next screen where you need to select “Authenticator App” as the option and click NEXT.
6. On the new screen it would show a QR code to you. You need to Scan that QR code with your Google Authenticator app (Step:2)
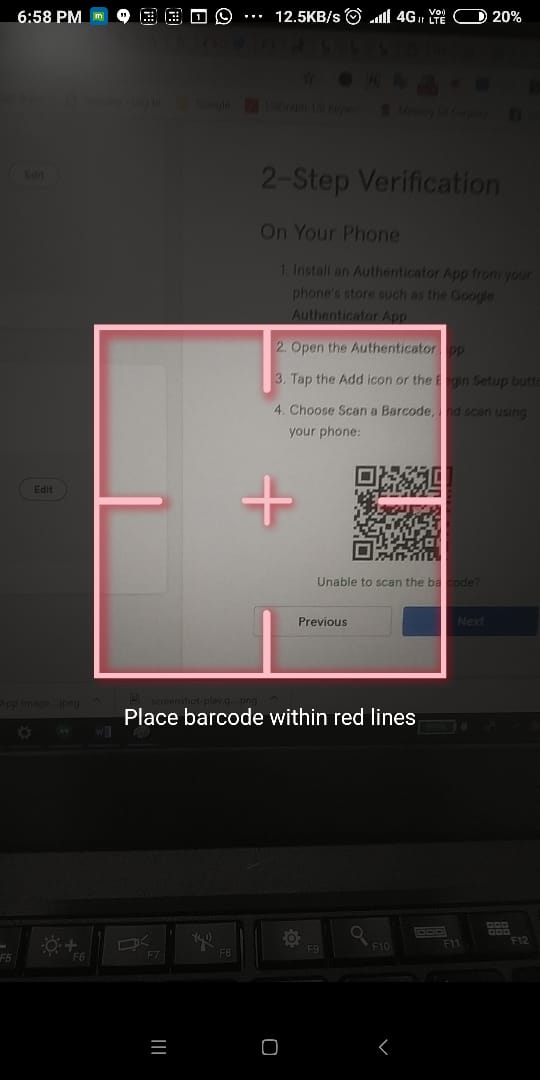
7. Then Click NEXT and it would ask you to fill in the code. Simply enter the code that is displayed in the Google Authenticator app and click Continue. Additionally, if the code is accurate, the app will be set up and you won’t need to rely just on SMS anymore. Although you can always use SMS as the authentication option while logging into the account.
Recommended Read: 3 Robust Apps Created using KnowBand’s Mobile App Builder Plugin for Poland PrestaShop Stores

In The End:

Passwords may be easy to guess or obtain in other ways. It is uncommon for the hacker to additionally have access to the user’s actual device because the bulk of attacks takes place online.
Knowband, an eCommerce plugin development company, offers the most sophisticated and automated way to expand your online business to mobile platforms. Using the Mobile App Builder, they can turn your complete website into a mobile app with features. Also, it enables the store admin to sell things on mobile devices in addition to the standard website. The app’s features and operation perfectly mirror those of the website and operate on both Android and iPhone devices. To know in detail about the eCommerce mobile app builder, reach out to us at support@Knowband.com

How to Read data from local JSON file in Swift?

Introduction

We will assume that we want to have a JSON file added inside our project and want to access its data in swift language.

Code

You can create a JSON file in Xcode by going to File > New File > Empty and giving the file any name (eg. example.json). The file will be added and then we can add a JSON String in the file. i.e. –

{“animal”:”Lion”, “bird”:”Sparrow”}

You can add the above-mentioned String directly into the JSON file that we created.

The following function can be used to read the JSON data from the JSON file so that it can be accessed in Swift –

  static func readJSONFromFile(fileName: String) -> Any?
    {
        var json: Any?
        if let path = Bundle.main.path(forResource: fileName, ofType: "json") {
            do {
                let fileUrl = URL(fileURLWithPath: path)
                // Getting data from JSON file using the file URL
                let data = try Data(contentsOf: fileUrl, options: .mappedIfSafe)
                json = try? JSONSerialization.jsonObject(with: data)
            } catch {
                // Handle error here
            }
        }
        return json
    }

<strong>Recommended Read: </strong><a href="https://www.knowband.com/blog/tutorials/iterate-element-json-string-android-ios/">Iterate through each element of JSON string in Android and iOS</a>

Recommended Read: How to Migrate Magento Store From Localhost To Server?

How to Migrate Magento Store From Localhost To Server?

After creating your dream Magento store on localhost when its time to move it to production server sometimes people get nervous. Its a piece of cake and we will help you in migrating your Magento store from localhost to production server.

Prerequisite

1. Working domain
2. Production ready for Magento

Working domain

By working domain means the domain on which you are going to host your store. For example https://mademo1.knowband.com

Production ready for Magento

It means there should be all the elements properly setup on the server which is required for a Magento to run. If you need any help regarding that then you can check the link https://www.knowband.com/blog/magento-tutorials/install-magento-using-command-line/

Steps for Migration

1. Export your localhost database

Export your localhost Magento store database. There are two ways of doing it

A) Via PhpMyAdmin
B) CLI

My personal favorite is via command line interface(CLI) as it is faster than the former one. We will see each way one by one.

a)PhpMyAdmin

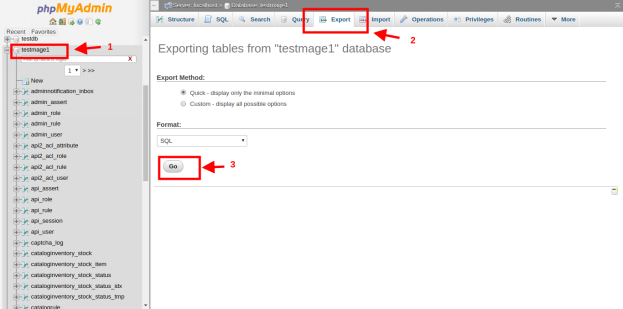
Login to you PhpMyAdmin and go to your database. There you will see option “Export” in the header. Here “testmage1” is the name of my database.

Check the below image for reference

b) CLI

CLI or command line interface is better than PhpMyAdmin as it is faster.

mysqldump -u root -p testmage1 > database_name.sql

Put the name of you database in the place of testmage1. This command will create the dump of your database with the name database_name.sql

2. Compress and upload your Magento files

After the database has been exported now its time to compress your Magento store files. Create the zip of all the files of your store. This way it will be easy to upload it on the server. Now open Filezilla and upload the zipped file over the server and extract it in the required folder.

3. Import Database

Now its time to import your database on your production. Now again there are two ways of doing it

a) PhpMyAdmin

Login to your PhpMyAdmin of production and create an empty database with the same name as on your localhost. After creating a database you will see “Import” option in the header.

Check Image for reference.

After clicking on the Import browser you file as shown in the image and click on GO. This will take a few minutes and your database will be imported.

b) CLI

For importing database via CLI you need to upload your database file via FTP and login to your server via terminal. Use following command to import the database

mysql -u username -p database_name < file.sql

Here database_name is the name of the database in which your file will be imported and file.sql is the file which you are importing.

4. Modify local.xml

Now we need to modify our local.xml file so that our Magento can access the database. Open Magento_Root/app/etc/local.xml
In it search for <connection> node.

<host><![CDATA[host_name]]></host>
<username><![CDATA[db_user_name]]></username>
<password><![CDATA[db_password]]></password>
<dbname><![CDATA[database_name]]></dbname>

Update these tags as per the production configuration. Your database connectivity is done now.

5. Update domain name

Now its time to make entry of domain name in the database. Open table core_config_data and update your domain in

1.web/unsecure/base_url
2.web/secure/base_url
as shown in the image.

6. Flush Cache

Now its time to refresh your cache as there might be some cache from your localhost machine. To refresh your cache go to

Magento_Root/var/cache

This folder contains your cache. Delete all the files and directory of this folder.

Now you are all set. Your Magento store has been successfully migrated from localhost to production server. Go to your web browser and enter your domain in address base and hit enter. Your website will open as it was in your localhost.

Bottomline

These are the steps to migrate your localhost Magento store to the production server. Always keep backup of your code and database in case anything goes wrong. If your website is not opening properly then go through the above-mentioned steps again and check if you missed anything. Happy Coding:)

How to send push notification from server?

What are push notifications?

Push notifications are the messages that are pushed to mobile from another platform than the receiving device. Let us consider any mobile app either closed or open. We get some notification from server irrespective of the app is open/closed/minimised. The only condition is that the app should be installed. In such case, we trigger notifications from web server say Firebase. We are pushing the notifications to mobile app from server. Hence these are called push notification.

Firebase provides us API(s) that can be triggered to send the push notification to any device.

Sending Push Notification using Firebase

We can trigger below API provided by the Firebase to send a push notification to any device.

API URL :

https://fcm.googleapis.com/fcm/send

Headers :

Content-Type:application/json

Authorization:key=AAAAR8kVIU:APA91bGaZe_uSKd2EtATPVoIUFGW6E3EwzcfsurUtjMIMIsxdTICC2Wl4BDtiWVupueBaJoQbb1JjAjDDEhDEWXWf3Cp_WXBAO1LkOUwtYPnj7XjeEFW1jqhzW8J1g1IwLinL42t8u

Body :

{
"to":"fqU6X2UAdiI:APA91bEHIZ2MwdsTdIW3_Sk_hvH9ZHbbbzJln4A8n6gYyYH71V5dlxazxWWejcafEOEIHc1mvwxauVodIOgdXrSiaxU0mfyPTKWr47k-8SwlyY30_Mxh8NTA2winTE16JO-KbajD",
"priority":"high",
"mutable_content":true,
"content_available":true,
"notification":{
"title":"Sample title",
"body":"Sample Body Sample Body"
},
"data":{
"title":"Title Title",
"body":"Sample body Sample Body",
"image":"Image Link",
"description":"Sample Description"
}
}

Iterate through each element of JSON string in Android and iOS

Introduction

We will assume that we are going to take JSON string as input String and we will look into the process to access each element of JSON String in Android and iOS.

Android

String jsonString = "{\"animal\":\"Lion\", \"bird\":\"Sparrow\"}";
JSONObject jsonObject = new JSONObject(jsonString);
Iterator < ? > keys = jsonObject.keys();
while (keys.hasNext()) {
String key = (String) keys.next();
String value = jsonObject.getString(key);
// Here we get the value from the JSON String justify;
}

iOS

We convert the JSON string into JSON object using the extension given below

extension String {
func toJSONObject() -> Any? {
guard let data = self.data(using: .utf8, allowLossyConversion: false) else { return nil }
return try? JSONSerialization.jsonObject(with: data, options: .mutableContainers)
}
}

We use the above-mentioned extension as below-

let jsonString = "{\"animal\":\"Lion\", \"bird\":\"Sparrow\"}";
if let jsonObject = jsonString.toJSONObject() as? [String: String] {
for (key, value) in jsonObject {
print("\(key) : \(value)")
// Here we get all the keys and values from JSON string
}
}

How to Use Actions in Adobe Photoshop?

As a graphics designer, it is very much important to deliver our product with a better UI. We also to do the work in more efficiency and with more speed. But any time we have to do the same task in the repeatedly in Adobe Photoshop. As a human nature, we lose our interest to do the same task repeatedly. We always try to create something new every time.

Adobe Photoshop can give us relief from that continuous repetitive work. We can use Actions in Adobe Photoshop to do so.

Let’s learn about the Action in Photoshop

Action in Photoshop is some pre-defined work that we have recorded before.

Photoshop actions come in the.ATN file format. It allows us to record the actions for our repetitive tasks.

Suppose we have 1000 photo and on those, we want to add some watermark then the best way to do it is to make an action for it.

Process to record actions

Step 1:

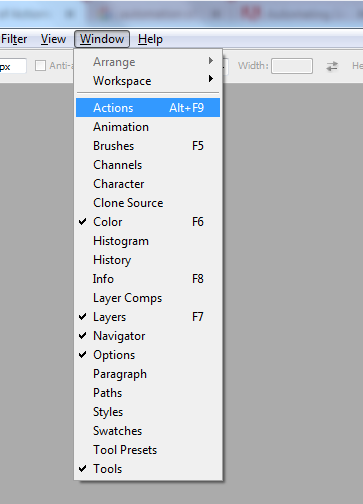
Open your Photoshop application -> Go to Windows -> Action

Then a window will open:

Step 2:

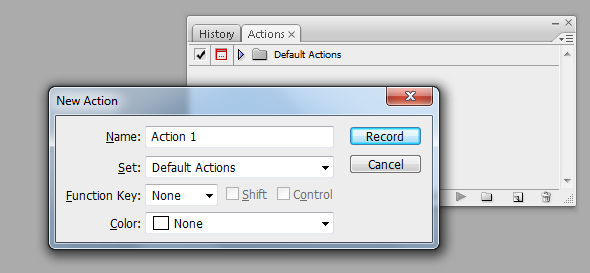
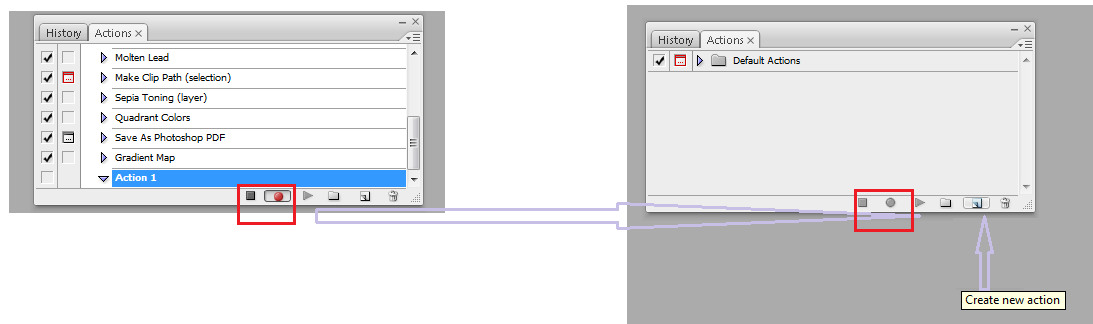
Click on the "Create New Action" icon to start the recording.

Step 3:

Name the action so, you can easily recognize it for future use..

After we click on that “Record” button you’ll notice that a recording gets started.

Step 4:

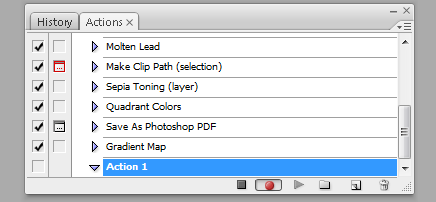
Now do your work in Adobe Photoshop and it gets recorded.

Step 5:

Now after getting work done we stop the action from getting recorded.

Process to implement the recorded action

To implement the recorded action for the bulk images Photoshop has given a wonderful option for that and we call is as “batch process”. Let’s go step by step to implement the action.

Step 1

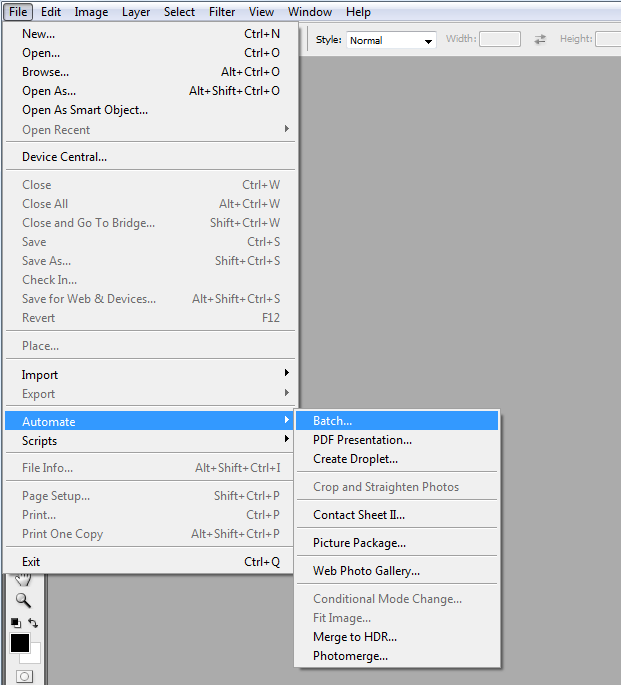
Click on the File => Automate => Batch

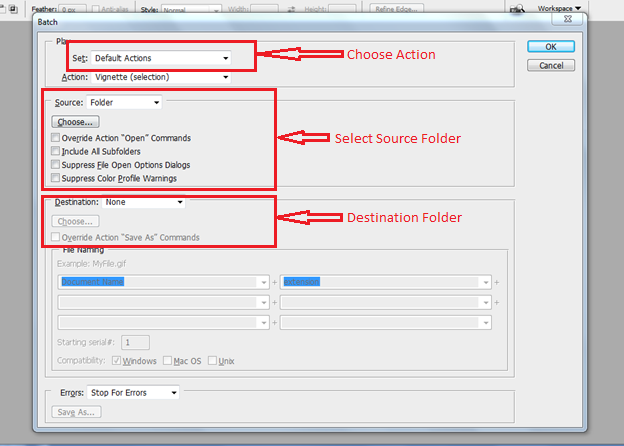
When we click on “Batch” option we will get a pop up window with the option of “Batch Process”.

From the Pop Up we can select our action, source folder of image and destination folder to render the image. When we click on “OK” button Photoshop will do the operation in bulk and our images will be saved in the destination folder.

I hope you get all my points, if I am wrong at some point, please let me know in the commenting section, I will for sure take a look at it.

How to Create Alert Dialog box in Android?

The alert dialog box can be used to display a message in a popup dialog box or display a text field for user input or show any custom view in the dialog box.

For the view to be displayed in the popup dialog, the view has to be created programmatically or via XML. Then the view has to be set in the dialog so that this view is visible to the user in the dialog box.

Find the steps below to create a dialog box in which there will be a field for user input.

1. Create a view to be displayed in the dialog box.

final EditText userInput = new EditText(this);

2. Creating and displaying a dialog box.

new AlertDialog.Builder(this)
                .setTitle(“Title of the dialog box goes here”)
                .setView(userInput)
                .setPositiveButton(“Submit”, new DialogInterface.OnClickListener() {
                    @Override
                    public void onClick(DialogInterface dialog, int which) {
                        // Handle your action here when “Submit” button is clicked
                    }
                })
                .setNegativeButton(“Cancel”, new DialogInterface.OnClickListener() {
                    @Override
                    public void onClick(DialogInterface dialog, int which) {
		// Handle your action here when “Cancel” button is clicked 
                    }
                })
                .show();

How to use GraphQL in PHP?

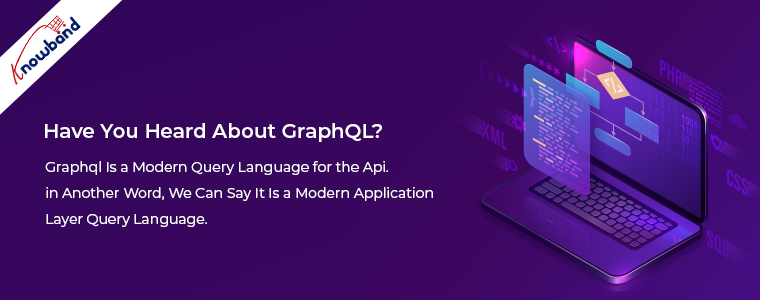
Have you heard about GraphQL?

GraphQL is a modern query language for the API. In another word, we can say it is a modern application layer query language.

With the help of GraphQL, we can fetch data from the API calls and it works on the HTTP as REST. It provides the powerful option to the client so that they ask what they exactly need and it helps in the API growth or evaluation.

Benefits of GraphQL

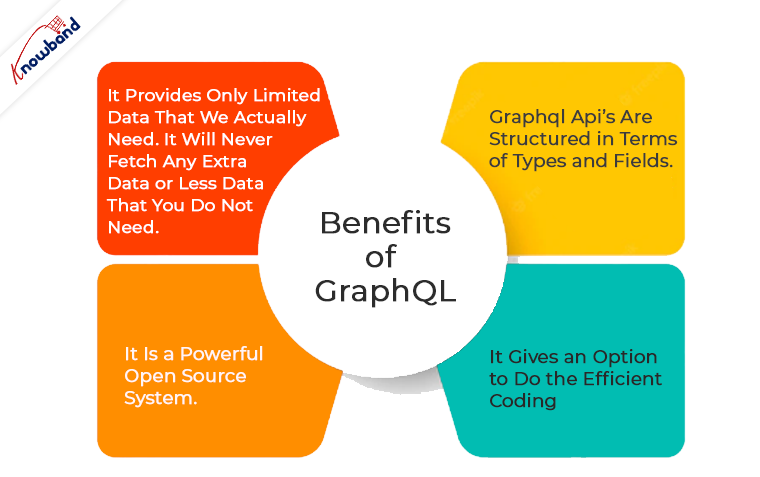
  • It provides only limited data that we actually need. It will never fetch any extra data or less data that you do not need.
  • It is a powerful open source system.
  • It gives an option to do the efficient coding. For example, suppose a table 40 column and sometimes we need the data of only 10 column or sometimes 20 etc. To solve this problem we have two option in normal API, either fetch all data in every API call and use any we want or we have to write the number of APIs for the same table so that we can call the efficient API as per requirement. But in GraphQL, we have to write only one API. So line code also gets reduced.
  • GraphQL API’s are structured in terms of Types and Fields.

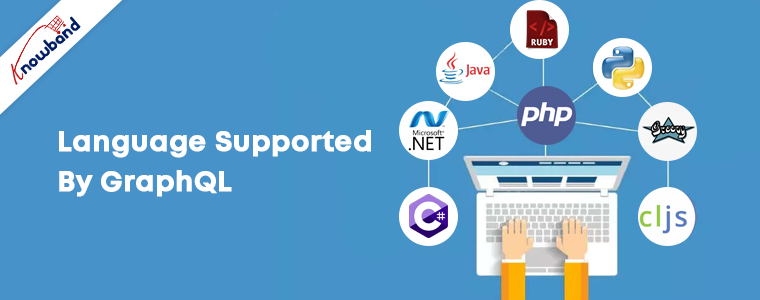
GraphQL has for supports various languages like

  • C#
  • .NET
  • Clojure
  • Elixir
  • Erlang
  • Go
  • Groovy
  • Java
  • JavaScript
  • PHP
  • Python
  • Scala
  • Ruby

In this blog, we will learn about the GraphQL in PHP.

Firstly we should know, in any language to use GraphQL we have to import their library.

In PHP, we can use this library file: webonyx/graphql-php.

Installation

Using composer, simply run:

composer require webonyx/graphql-php

How GraphQL Fetch Data with Queries?

In the REST, API returns data in a defined structure. While writing the API in REST we have to define the structure of data what it will return but GraphQL has no defined structure it will return. It can change their structure as per client need.

The client has to send some more information to the server in order to declare their requirements and this information is called the Query.

In the Query, we have to define the Root Fields in the other word we say the same as payload for the service.

Resolver

In the real world application like e-commerce application i.e. PrestaShop, OpenCart, Magneto etc. we need to fetch the customer data from the database by customerId and have to return the same. Our point is we don’t have to return the arrays, we have to return the values and graphql-php will pass it untouched to nested resolvers.

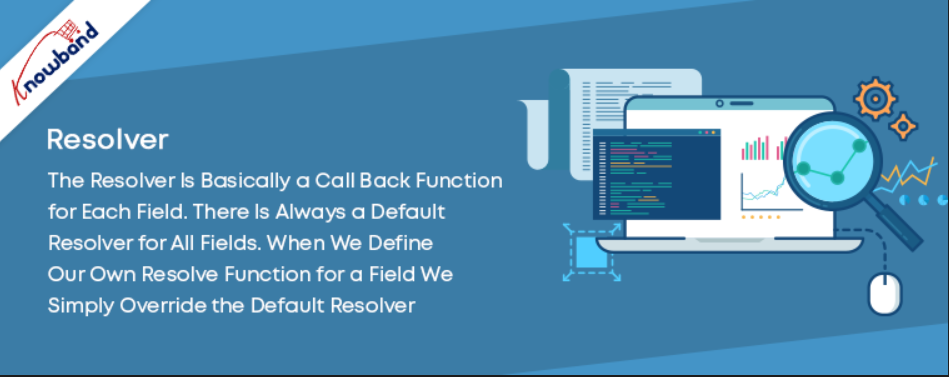
The resolver is basically a call back function for each field. There is always a default resolver for all fields. When we define our own resolve function for a field we simply override the default resolver.

How to define Schema for Query?

$schema_obj = new Schema {
          “query” => $queryType,
          “mutation” => $mutationType,
           “subscription” => $subscriptionType
}

Example

As this is a blog for the beginners or fresher let’s do a simple example.

Let’s create a type system that will be to process following simple query:

query {
  echo(message: "Hi Knowband, this is my first GraphQL program")
}

Note: We need an object type with field echo to do so.

<?php
use GraphQL\Type\Definition\ObjectType;
use GraphQL\Type\Definition\Type;
$queryType = new ObjectType([
    'name' => 'Query',
    'fields' => [
        'echo' => [
            'type' => Type::string(),
            'args' => [
                'message' => Type::nonNull(Type::string()),
            ],
            'resolve' => function ($root, $args) {
                return $root['prefix'] . $args['message'];
            }
        ],
    ],
]);

The resolve option is very important option of field definition. It is one which is responsible to for returning the value of our field. Values of the scalar fields will be directly get included in response while the values of the composite fields will be passed down to the nested field resolvers. Composite fields are interfaces, unions, objects etc.

Now after our type become ready, let’s write the GraphQL endpoint file for it graphql_program_1.php.

<?php
use GraphQL\GraphQL;
use GraphQL\Type\Schema;
try {
    $schema_obj = new Schema([
        'query' => $queryType
    ]);
    $Input = file_get_contents('php://input');
    $input_data = json_decode($Input, true);
    $query_data = $input_data['query'];
    $variable_values = isset($input_data['variables']) ? $input_data['variables'] : null;
    $value = ['prefix' => 'Output: '];
    $resultant = GraphQL::executeQuery($schema_obj, $query_data, $value, null, $variable_values);
    $output_value = $resultant->toArray();
} catch (\Exception $e) {
    $output_value = [
        'errors' => [
            [
                'message' => $e->getMessage()
            ]
        ]
    ];
}
header('Content-Type: application/json');
echo json_encode($output_value);
?>

How can we run the code?

We can run the code by:

php -S localhost:8080 graphql_program_1.php
curl https://localhost:8080 -d '{"query": "query { echo(message: \" Hi Knowband, this is my first GraphQL program \") }" }'

For any queries, please feel free to reach us at support@knowband.com. Knowband is providing the best in class modules for Prestashop, Opencart, Magento and Magento 2.

Take a look at one of our most popular for Prestashop called One page supercheckout: