
1.0 Introduction
PrestaShop Fb Wall Post User Manual provides an easy to use and configure feature to the Prestashop store owners to automatically post your products, categories and brands on your official Facebook page. The innovative and easy to understand and configure module helps in boosting the customer engagement on the social media platform in just a few button click.
1.1. Project Objectives
The module can be used by the store owner to achieve following things:
- It allows the admin to post product, category and brand automatically on your Facebook store.
- The Module even allows the admin to post the new products on the Facebook page of the store
- The admin can hide or display the price of the product.
- You can even get the Low Stock post with the help of this module.
- The admin can even post the discount coupons.
2.0 Installation
Follow the following steps to install the extension:
- Unzip the Facebookwallpost.zip file. It would contain files and folders.
- Copy all the files and folders of unzipped folder into your store “modules” directory on the path – Root Directory/modules/.
- The module is now ready to be installed in your store. You can find it in Store Admin -> Modules and Services.
- Click on “Install” button to install the module. It would show a pop-up for your confirmation. Click on “Proceed with the installation” option. This step will install the module and show notification – “Module(s) installed successfully”.
3.0 System Setup
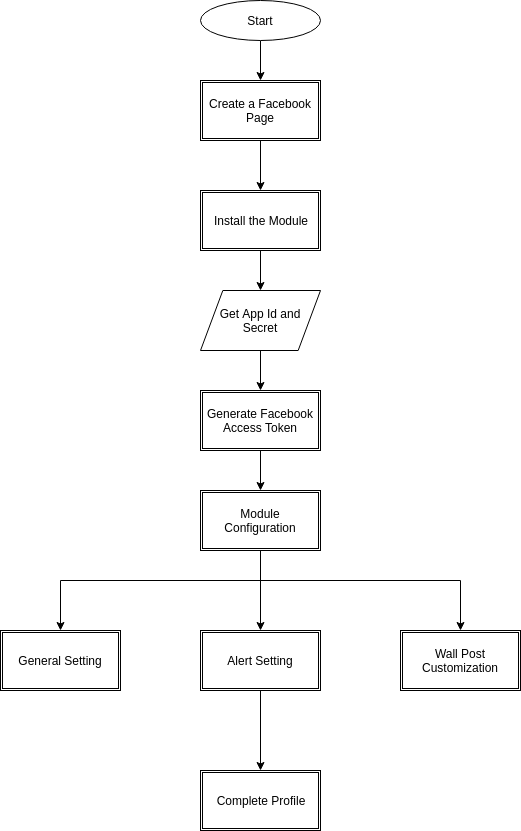
Before proceeding ahead, it is important to know that what is the correct flow of actions to setup this system as there are several things which are dependent on other things and if we do not take care of them then it would become difficult to process smoothly or may be error prone.
4.0 Admin Interface
The admin interface of the module is completely configurable. Click on the ‘Configure’ next to the module in the admin panel.

4.1 How To Start configuration process?
After clicking the “Configure” button, the admin will be redirected to the Configuration page of the module. It offers the below-listed configuration options:
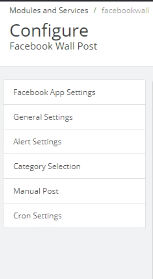
- Facebook App Setting
- General Setting
- Alert Setting
- Category Setting
- Manual Post
- Cron Setting
Let us discuss each options one-by-one.
Facebook App Setting:- The Facebook App Setting includes the process to the sync the Facebook profile of the store owner. Follow the below-mentioned steps:-
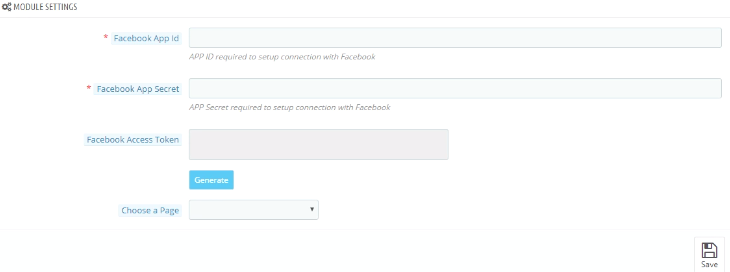
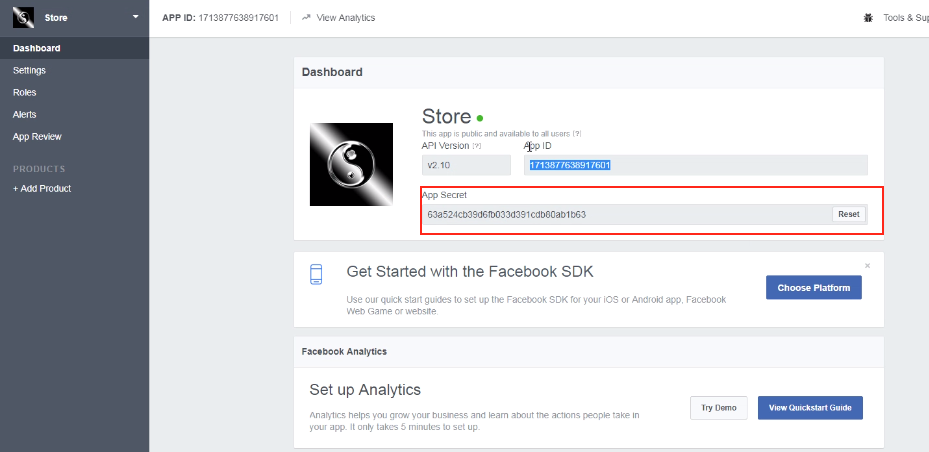
Facebook App Id:- This field is for Facebook App Id created for this module. Enter the Facebook App Id in the first column. In order to find the App id, go to the dashboard of your Facebook App. Copy the app id from the column shown in the image below and paste it in the setup page of the module.
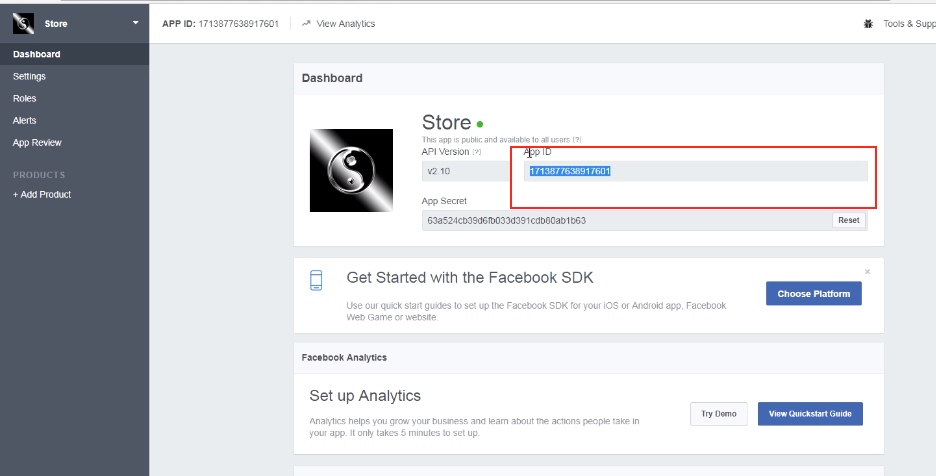
Facebook App Secret:- This field is for Facebook App Secret created for this module. Copy the App Secret from the next column as shown in the image below.
‘Save’ the changes made in the configuration setting.
Facebook Access Token: The next thing you need to do is generate the ‘Facebook Access Token’. Once the changes are saved, click on the ‘Generate’ button. This button will be disabled by default. It will be enabled only when the App Id and App Secret is entered and the changes have been saved.
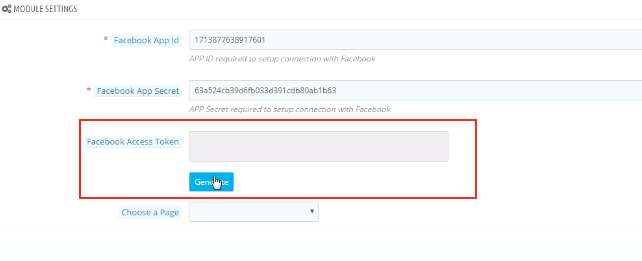
As you click on the button, you will get a pop-up for Facebook Login. Log in your Facebook store and the access token will be generated.
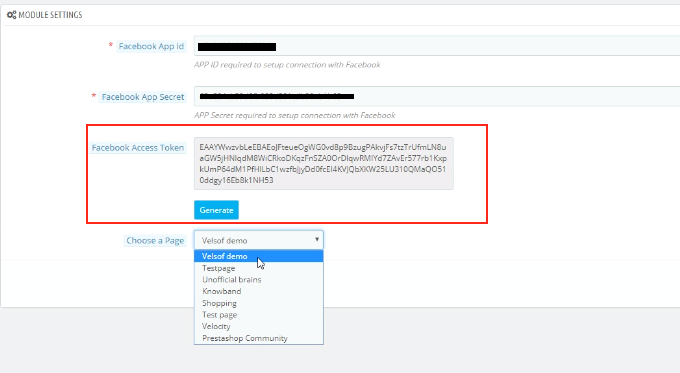
The module is now synced with your Facebook store and is ready for use.
‘Choose the Page’ from the options given in the dropdown list and save the changes. The posts will be displayed on the page selected by you.
4.2 General Settings
The module is now successfully synced with the Facebook Page of the admin.
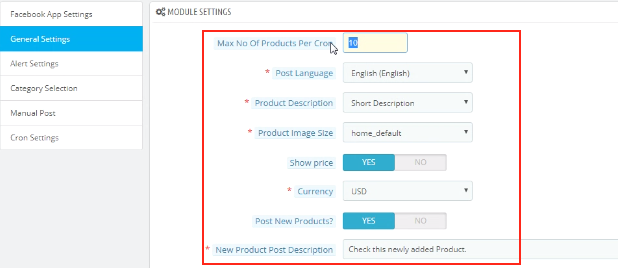
The General Setting allows to make the necessary changes in the look and feel of the FB Wall Post module. Here are some of the options offered.
- You can change the ‘Maximum number of Products Per Cron’.
- You can select the ‘Post Language’.
- The admin can set the ‘Product Description’.
- Select the ‘Product Image Size’ from the options offered in the dropdown list.
- The ‘Show Price’ option enables you to either display or hide the price of the products.
- The admin can select the desired ‘Currency’ from the option available.
- ‘Post New Products?’ option asks you if you want to Post New products on the Facebook Wall or not.
- In case you are posting the new product, then, you can even set the description for the same in the ‘New Product Post Description’.
Click on the ‘Save’ button in order to save the changes made by you.
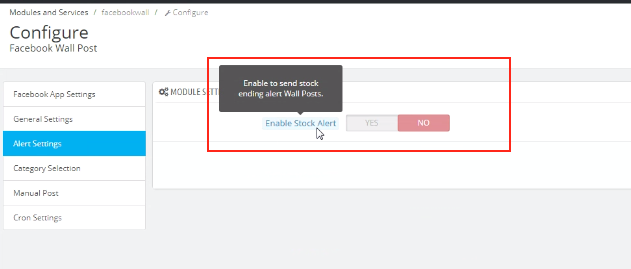
4.3 Alert Setting
Here, you can enable/disable the option to send Stock Ending Alert Wall Posts.
In case, you enable this option, then, you’ll be asked a series of question which includes the following.

- Stock Quantity Left: You can enter the quantity of the stock below which the alert will be send on the wall post.
- Wall Post Text for Stock Ending Alert: You can enter the text that you want to be displayed when the inventory falls below a certain limit.
- Generate Coupon For Stock Alert: You can enable it if you want to send coupon along with the Alert. In case you enable the coupon code option, the module provides an option to customize the vouchers as well.

- Voucher Name: The name of the voucher can be entered in the first column. You can even choose from the different language options available and select the one as per your requirement.
- No. Of Vouchers: Allow you to select the number of vouchers you want to send.
- Voucher Type: You can select the type of voucher you want to send. It can ‘Absolute’ or ‘Percentage’.

- Can be used with Other Vouchers: You can enable this option if the voucher can be send with other vouchers as well.
- Voucher Validity: Set the duration for which the voucher is valid is here.
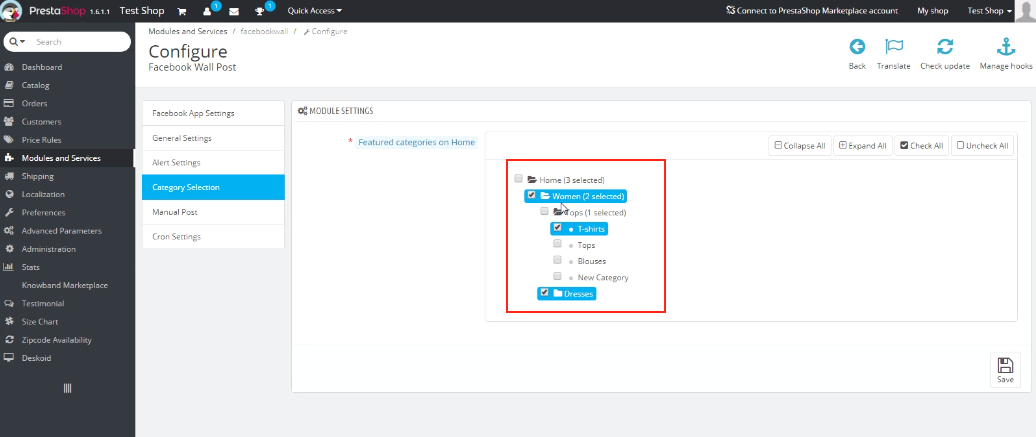
4.4 Category Selection
You can select the categories you want to display on the Facebook wall post here. Check the options that you want to display. Only those products whose default category is selected in this section will be posted on the Facebook Wall.
4.5 Manual Post
This option allows you to customize the wall post manually.
- Search Product: It will show the dropdown of various product options. You can select the one as per your wish.
- Wall Post Text For Products: Set the text that you want to display on the wall post. Click on ‘Post Product Now’ button and the products will be posted.

- Search Category: It will show the dropdown of various category options. You can select the one as per your wish.
- Wall Post Text For Categories: Set the text that you want to display on the wall post. Click on ‘Post Category Now’ button and the products will be posted.

- Search Brand: It will show the dropdown of various brands options. You can select the one as per your wish.
- Wall Post Text For Brands: Set the text that you want to display on the wall post. Click on ‘Post Brand Now’ button and the products will be posted.

4.6 Cron Selection
Add the cron configuration to your store in order to sync the products and send Facebook wall posts to your customers automatically according to your setting.

- ‘Sync Product Manually’ will allow you to sync the products. The products will then get listed below. The admin can even delete the listed products from the table by clicking on the ‘Delete’ icon.

- On clicking the ‘Send Post Manually’, the products will get posted on the Facebook Wall of the admin.
5.0 Facebook Tab UI
Once you have already configured Prestashop Facebook Wall Post module and synced with the Facebook profile, the changes will be shown in the front end.
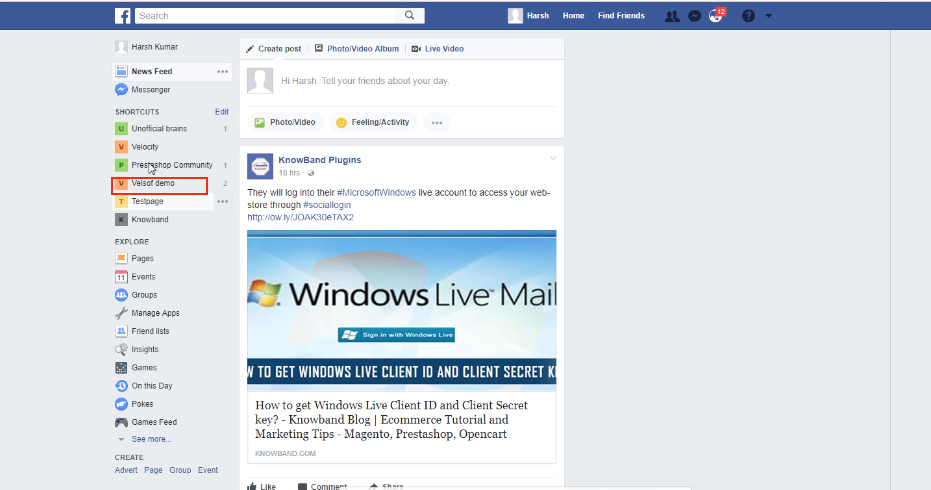
5.1 Home Page
Home page will have the UI similar to mentioned below.
5.2. Selected Page
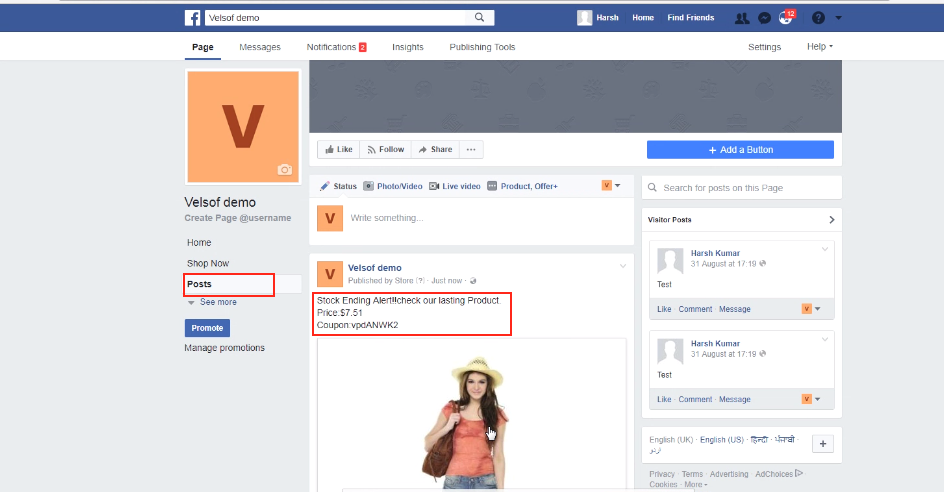
Go to the page which you selected earlier in the admin interface. The products posted will be shown on the wall post of the page.
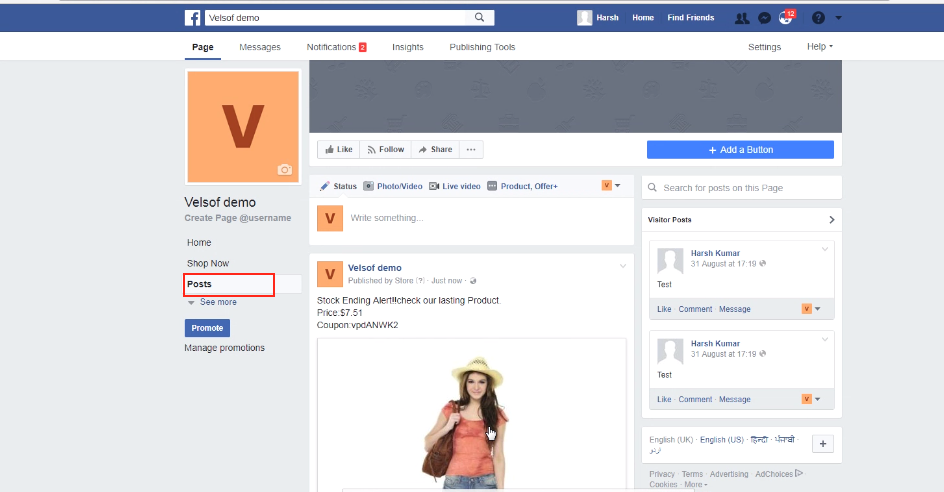
- As you can see in the image below, the Stock ending alter has been posted on the wall along with the Product Price and the Coupon Code.
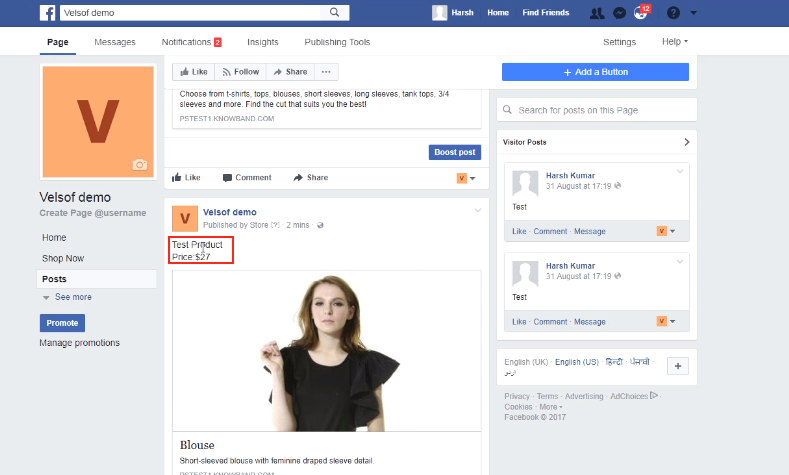
- The Product along with the price can be seen on the wall of the Facebook.
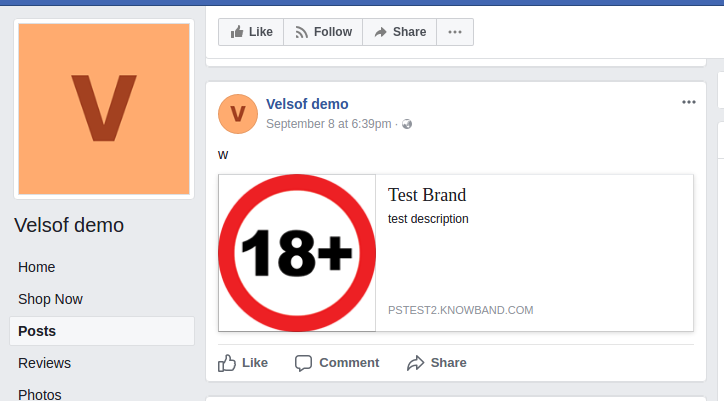
- This is how the brand posted on the wall will look like.
- The category to be displayed on the Facebook will be seen like this in the front end.

You Might Also Like:
