
1.0 Introduction
The Magento 2 store owners get an option to add additional information fields on the registration form with Magento 2 Customer Registration Fields extension. Knowband offers Magento 2 Custom Registration Fields extension that allows the admin to add custom fields on the registration form. The admin can even add and manage the look and feel of the custom fields by adding additional CSS. These details collected from the additional field can be used for marketing and sales perspective in future.
This Magento 2 Custom Fields Extension provides an option to add new custom fields and update the old custom field in the registration form. The admin can validate the custom fields from the admin interface. The Magento 2 custom registration form module allows the admin to display the details on the invoice of the customers.
The Magento 2 Registration Fields module allows the admin to create partitions of the signup form for showing the custom fields specifically. Multiple custom fields can be selected like a text box, radio button, check boxes, date, select, text area and a file field.
1.1 Salient Features of Magento 2 Custom Registration Fields extension
- New custom fields for the registration form can be created without any complicated task by using this Magento 2 Custom Registration Fields module.
- The Magento 2 Registration Fields module allows the online store admin to create sections of the registration form for showing the custom fields.
- The Magento 2 Custom Registration Fields extension allows the admin to create n number of custom fields. The plugin offers an option to create the custom section and the fields can be placed in the desired section with ease.
- The Magento 2 custom registration form module allows the store admin to apply validations from the admin interface.
- No code changes required for implementing the Magento 2 custom registration form module.
- Admin can add custom CSS code to change the look and feel of the custom fields from the admin interface of this Magento 2 Custom Registration Fields plugin.
- Custom registration field extension offers various fields like a radio button, text, select, text area, check-box, date and file field.
- The store admin can show the customer details of the specific field on the invoice by enabling the option from the admin interface of this Magento 2 Registration Fields plugin.
- Store admin can restrict the length of the custom fields from the admin interface of the Magento 2 Custom registration field extension.
- The store owner can easily install, configure and use this Magento 2 Custom Registration Fields extension.
- Store admin can allow the customers to edit the custom field information if required.
- This Magento 2 Custom Fields plugin allows adding, updating and deleting the custom field without any difficulty.
2.0 Installation
After purchasing Magento 2 Custom Registration Fields extension, the store admin will get the following files:
1. Knowband_Customfield.zip which contain source code of the Magento 2 Custom Registration Fields extension.
2. User Manual which includes all the details and helps regarding the extension.
The steps to install the Magento 2 Custom Registration Fields extension are mentioned below:
- Buy the Magento 2 Custom Registration Fields extension from Knowband. You can download the extension package.
- The package has a zipped file that contains the user manual and the source code of Magento 2 Custom Registration Fields extension. Unzip the package.
- Create a folder {Magentoroot}/app/code/Knowband/Customfield
- Upload the extracted content in the above folder via FTP manager (like Filezilla or WinSCP – download here: https://filezilla-project.org/).
- Now run below commands to install the plugin:
php -f bin/magento module:enable –clear-static-content Knowband_Customfield
php -f bin/magento setup:upgrade
php -f bin/magento setup:di:compile
php bin/magento setup:static-content:deploy - The extension is now installed and ready for use. In Admin Panel go to “Knowband Extensions >Custom Registration Fields”.
You can now configure and use the Magento 2 Custom Registration Fields extension.
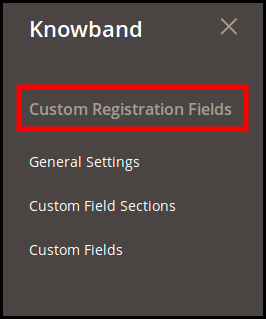
3.0 Admin interface
After successful installation, the store admin can configure the custom registration field module. Once the Magento 2 Registration Fields module is installed, the admin can enter the admin interface. In this Magento 2 custom field registration extension, you will find three customization options.
- General Settings
- Custom Field Section
- Custom Fields
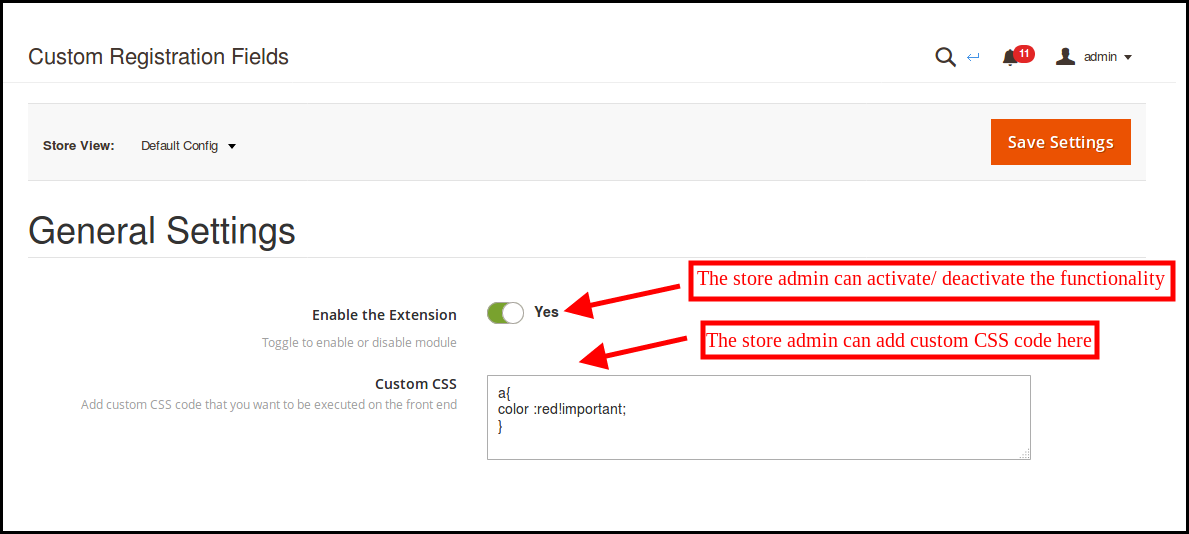
3.1 General Settings
The store admin can enable the functionalities from the “general settings” menu.
- Enable the Extension: The store admin can activate or deactivate the functionality from the admin interface.
- Custom CSS code: The store owner can add custom CSS code to change the look and feel of custom fields.
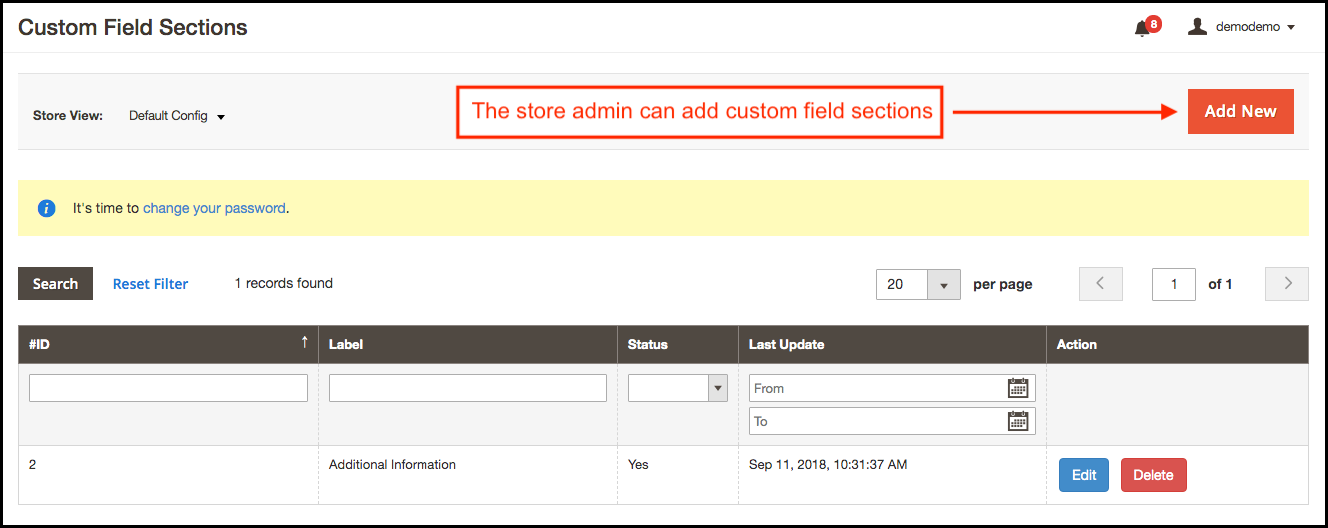
3.2 Custom Field Sections
The Magento 2 Custom Fields Extension allows the admin to create the section to display the additional custom fields. Here the store admin can view the list of the custom field sections as shown below: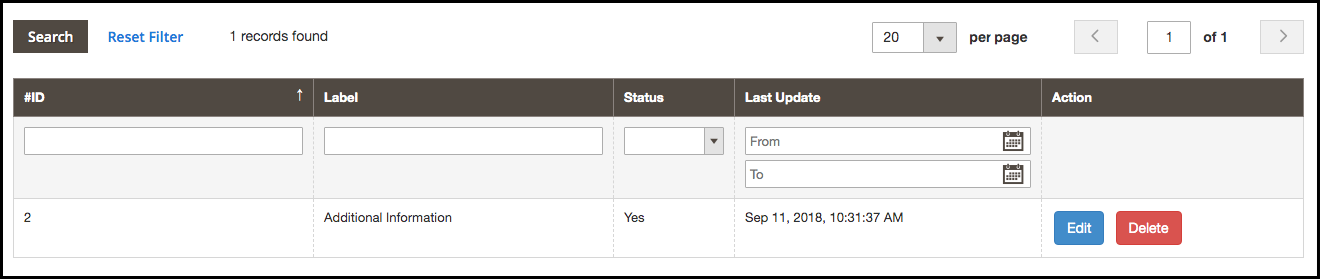
3.2.1 How to add a new custom section field?
The store admin can click on the add new option in order to add custom field section.
Here are various fields for the field creation:
- Label: The eCommerce store admin can set the label for the custom field section from this tab.
- Enable: The store admin can activate or deactivate the custom field sections as per the requirement.

3.2.2 How to edit new custom section field?
In order to edit the custom section field sections, click on the Edit button corresponding to each field. The admin can change the label name and activate the activate or deactivate this module just by clicking on the enable button.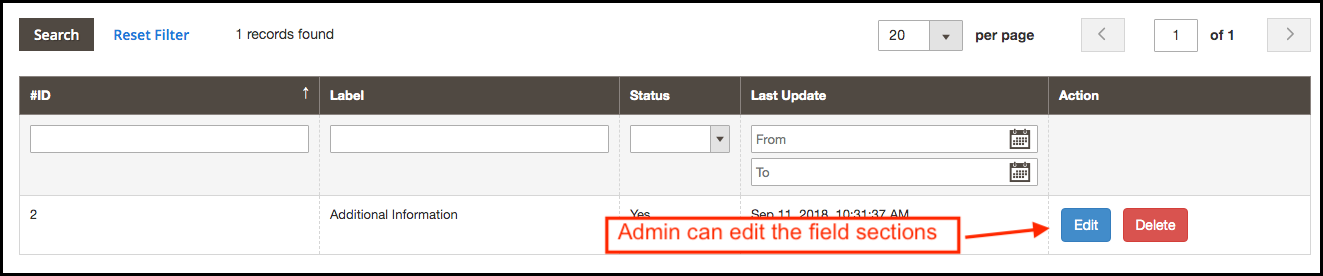
3.2.3 How to delete new custom section field?
The eCommerce store admin can also delete the custom field sections by clicking on the “Delete” option.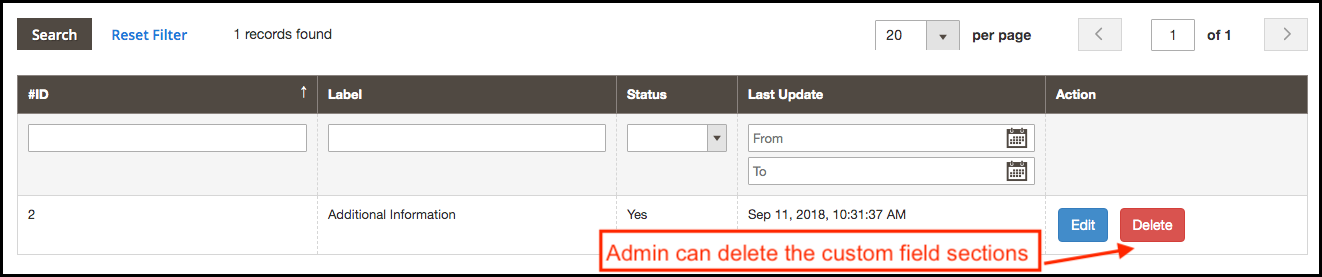
3.3 Custom Fields
The Magento 2 store owner can display the custom field after enabling the custom field sections. The admin can set the custom fields as per the requirements.
The store admin can add, delete and update the custom fields anytime.
3.3.1 How to delete the custom field?
The store owner can delete any custom field from the admin interface easily. The admin can click on the delete button. After that, a confirmation pop-up will display and by selecting yes the admin can confirm the request.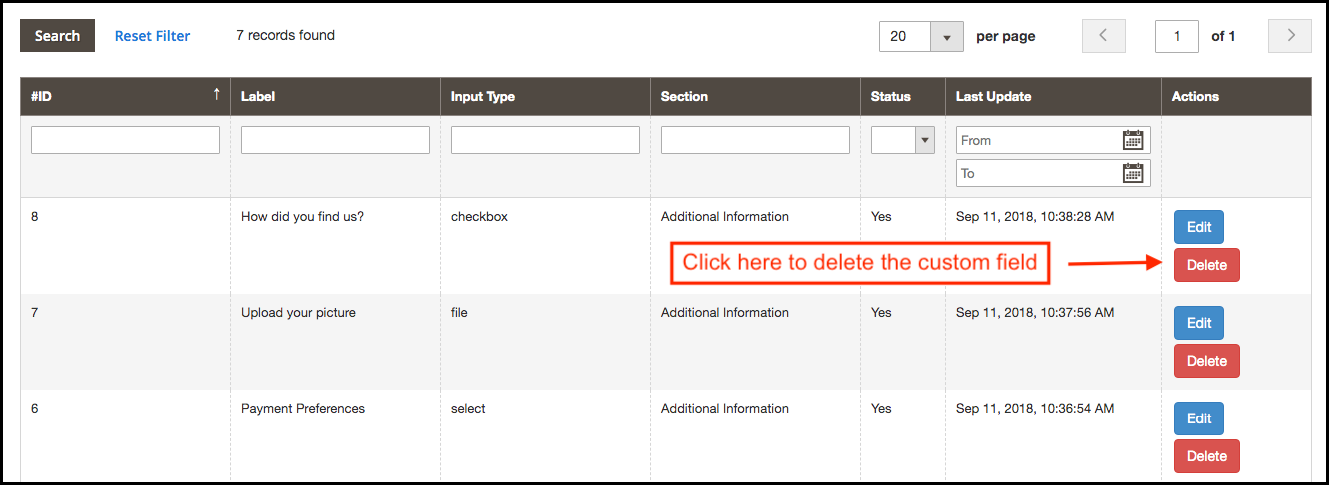
3.3.2 How to edit custom field?
The store admin can also edit the previously created custom fields. The admin needs to click on the edit button for updating the previous settings.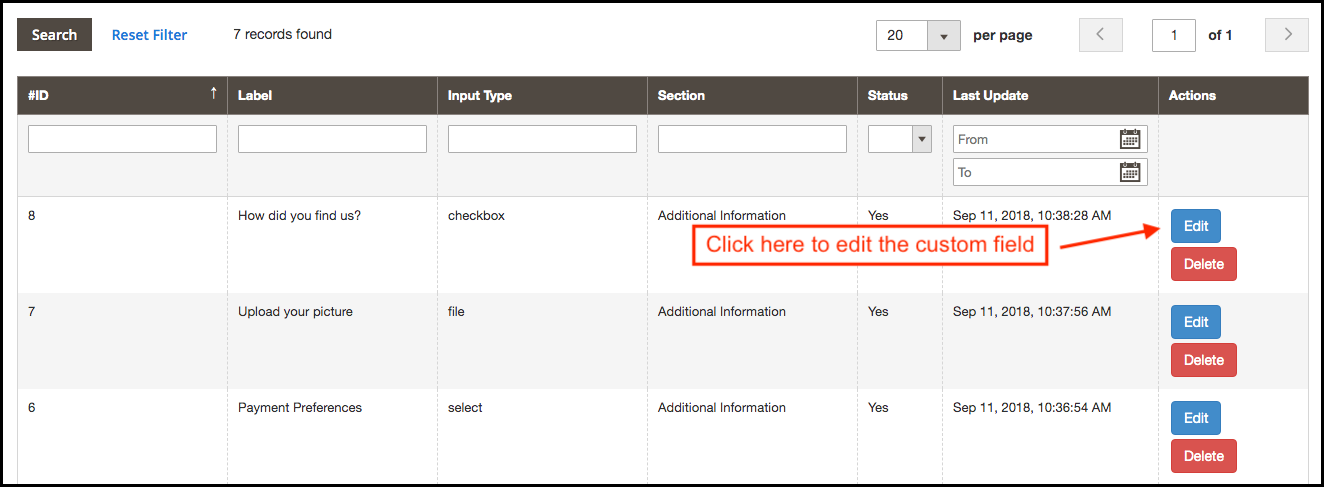
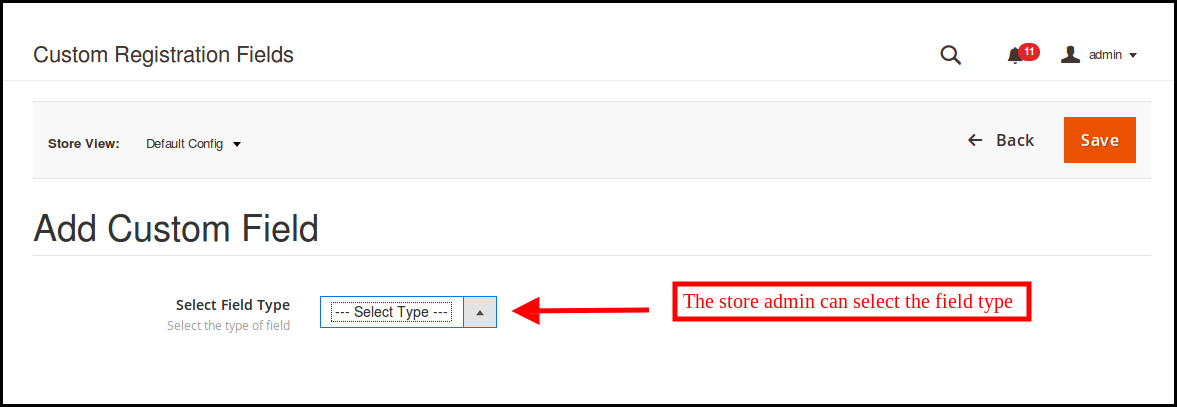
3.3.3 How to add a new custom field?
The Custom registration attributes allow the admin to add a new custom field without any hassle. The admin can click on the “Add new” option for adding a new custom field.
- Select Field Type: The eCommerce store admin can select the field type i.e text, select option, radio button, checkbox, text area, file and date field. A drop-down list is provided to select the field.

The various options offered in this section is mentioned below:
- Text
- Select
- Radio
- Checkbox
- Text Area
- File
- Date
Different field type required different information to be filled. Let us discuss them one by one.
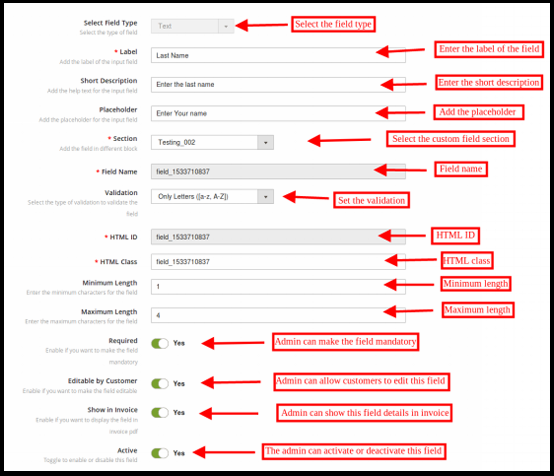
3.4 Text Field
The online customers can enter their personal details in the text box. The admin can use text-box for name, last name, address and this kind of information.
The eCommerce store owner can set the text field on the front-end by applying these settings:
- Label: The eCommerce store admin can set the label of the input field. The admin can set the name of the field.
- Short Description: The store owner can set the short description from the admin interface. With the help of a short description, the customers can understand what information is required in the particular field.
- Placeholder: The eCommerce store admin can enter the Placeholder in this section. Placeholder specifies the watermark that is displayed in the textbox.
- Section: The store admin can select the custom field section where you want to display this particular information field. Here, the store admin can select the block where he wants to place that particular field.
- Field Name, HTML ID, HTML Class: This section will provide a unique identity to the fields. It will be the same for all the three sections.
- Validation: The eCommerce store admin can set the validation type for the various fields. There is no need to change the code for applying validation. The store owner can select the validation type as mentioned below:
- URL
- Password
- Number
- Digits
- Letters
- Letter and digits
- Date
If the customer will not follow the validation rules, an error message will be displayed on the registration field.
- Maximum and Minimum Length: The store admin can fix the word limit by setting the maximum and minimum length. If the store admin does not enter any value, then the customers can enter the unlimited characters.
- Required: The admin can set any custom Registration field as required field. If the admin set the field as required, then, an exception will be shown if the customer leaves the field as empty.
- Editable by the Customer: The admin can enable or disable the option to make the field editable by the eCommerce customers. The customers can change the field information if required.
- Show in Invoice: If the store admin wants to show the customers submitted field information on the invoice, then, the admin can activate this option.
- Active: The store admin can activate or deactivate this field from the admin interface.
3.5 Select field
With the help of this “Select Field”, the admin can show an option to select the option from various choices. For example, the customers can select the “Gender” field.
The Label Name, Short Description, Section selection remains the same in this field type as the other ones. Here are the customization options offered to the store admin.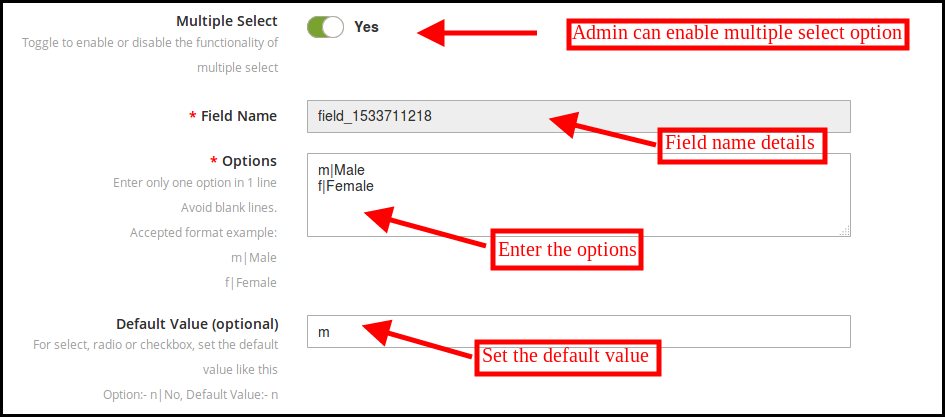
- Multiple Select: The admin can allow the customers to select multiple choices by enabling this option.
- Options: The different options can be entered here. Admin can enter only one option on one line.
- Default Value: The admin can also insert the optional default value. This is an optional field. The store admin can set the default value for the Radio, Select or Checkbox options.
3.6 Radio
The admin can select the radio field for allowing the customers to select the only one option at a time. The customization options are the same as “select field” only “multiple selection” option is not available.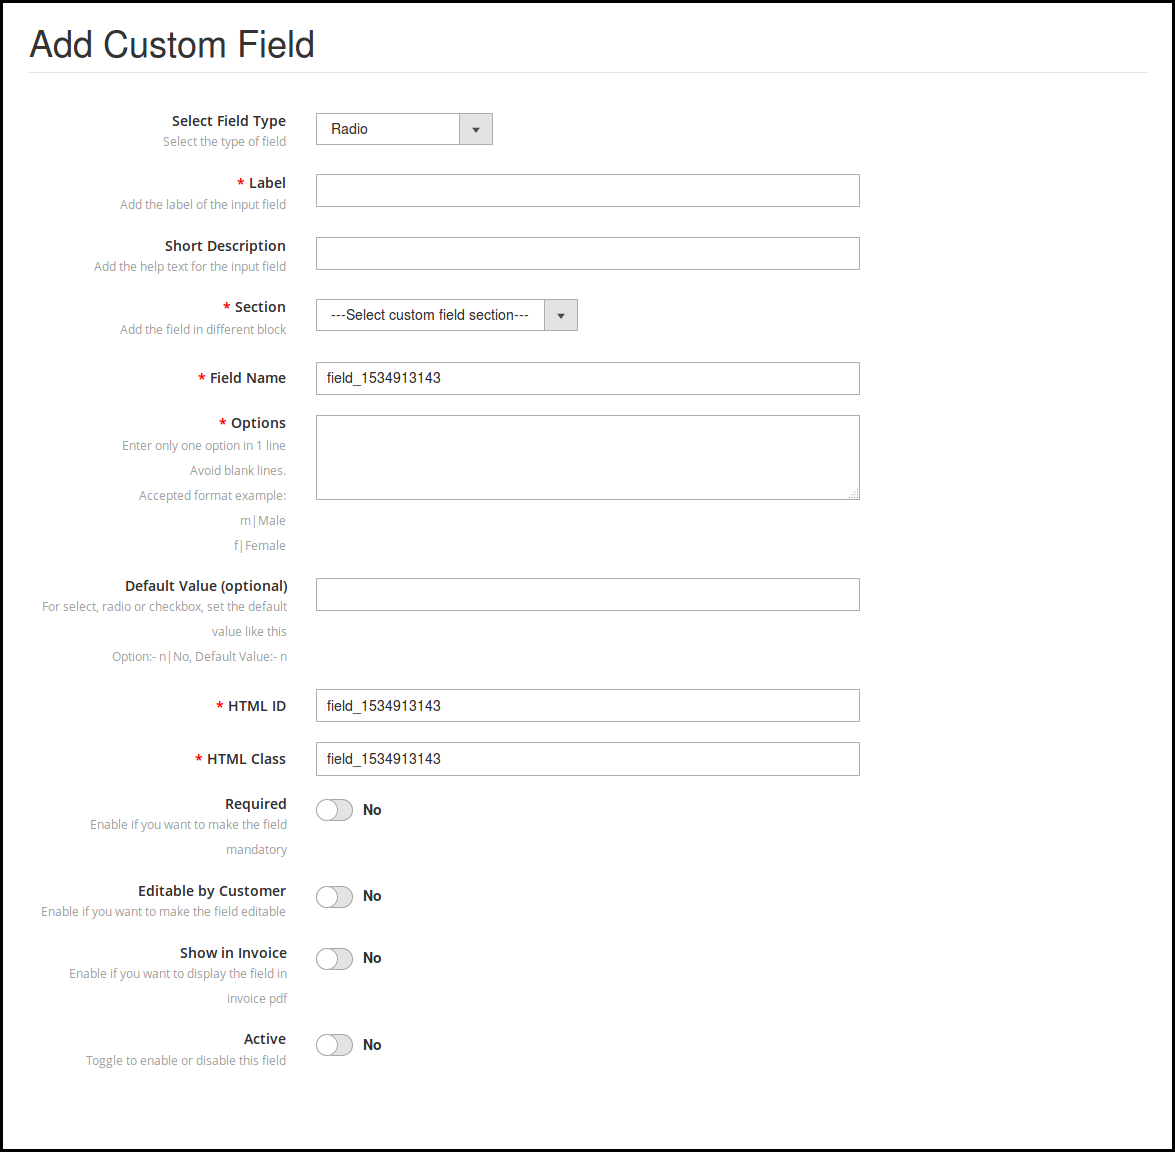
3.7 Check-box
Check-boxes allow the customers to select the option by checking the box. The functionality of the check-box is similar to radio button and select field. The admin can apply the settings easily. Same customization options are available for implementation.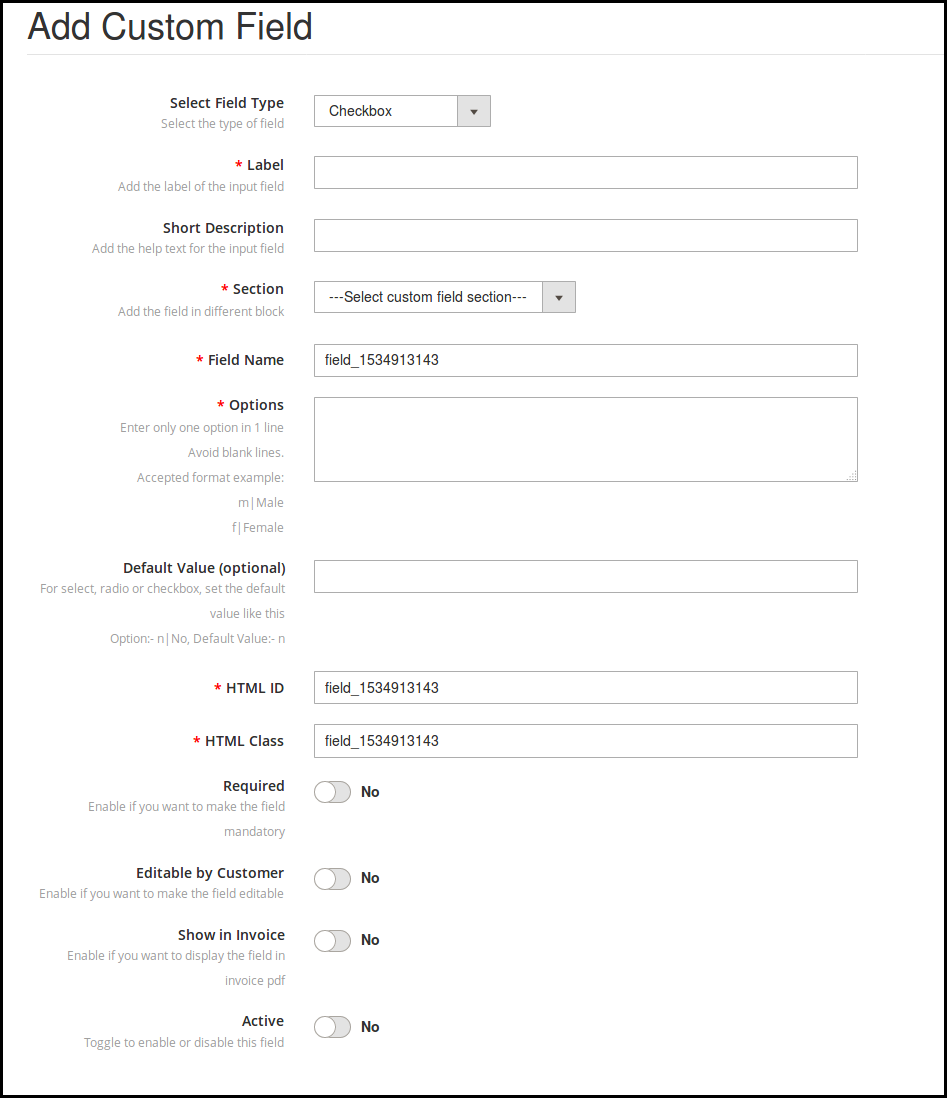
3.8 Text Area
In the text field, the customers can enter the information in one line like name, surname and address. In the case when multiple lines are required for information, the text area field can be used.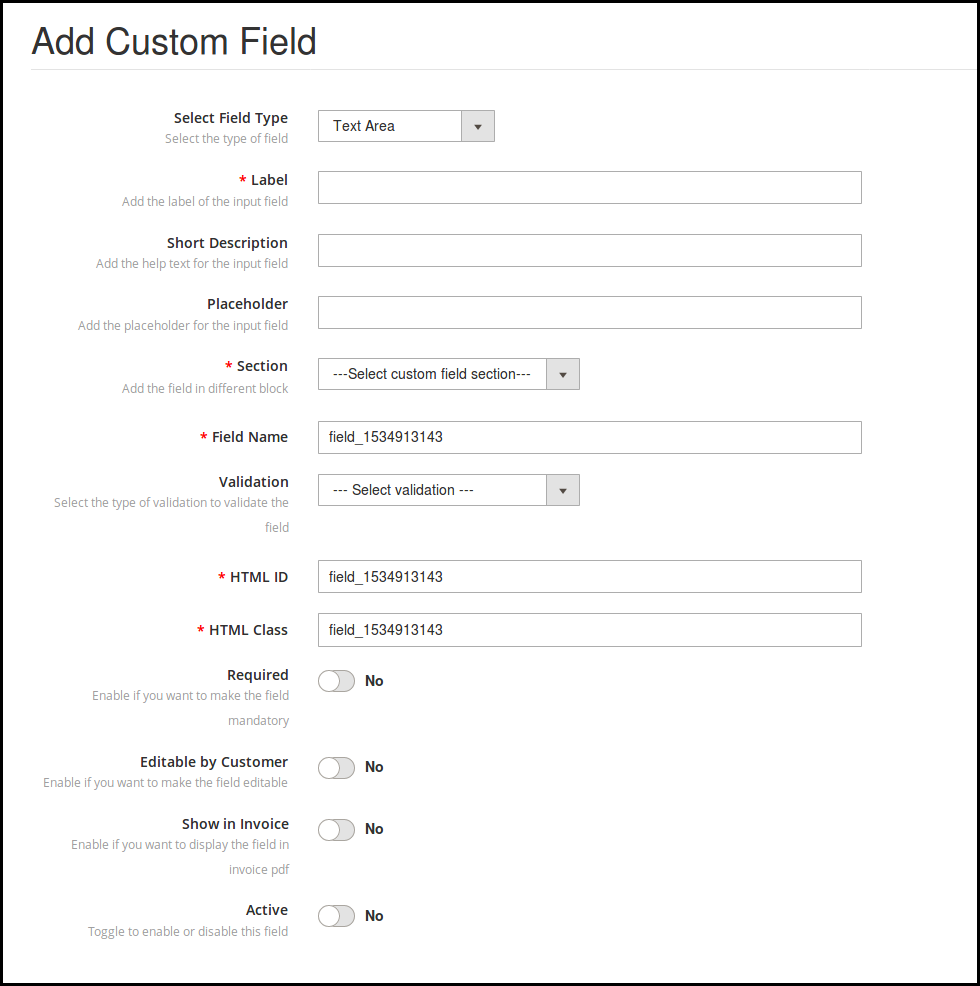
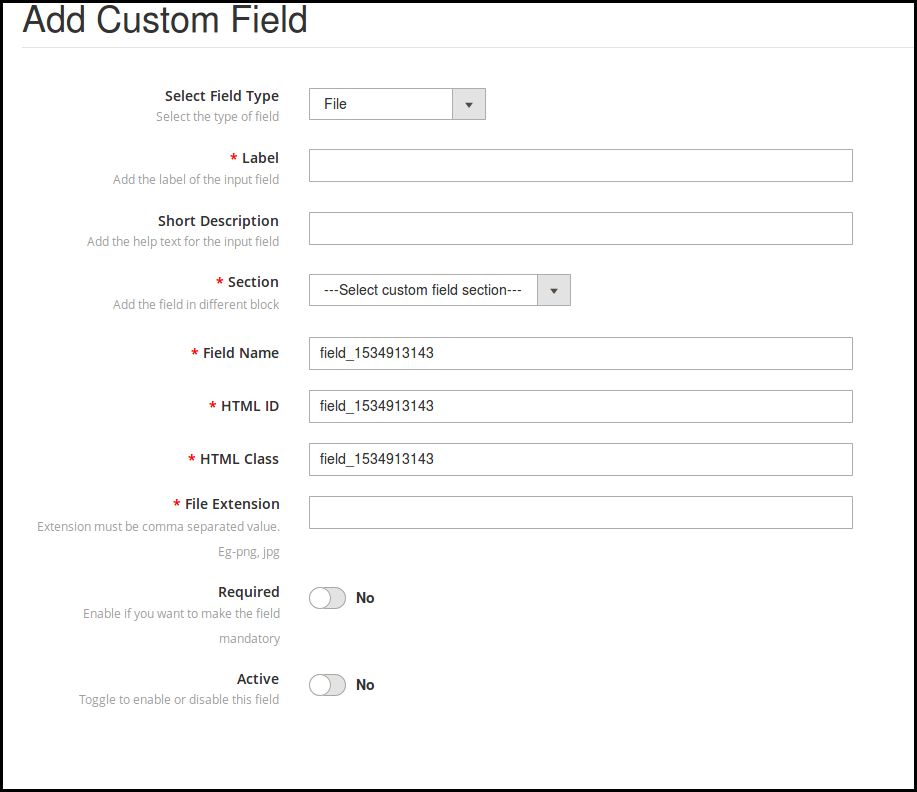
3.9 File
The admin can show this file field on the registration form. The customers can upload a file like an image, document and others. The store admin can set the allowed file extensions and make it a required field if he wishes to.
3.10 Date
The Date field allows the customers to enter the date in the proper format. The admin can enter the label, short description, placeholder according to the requirement.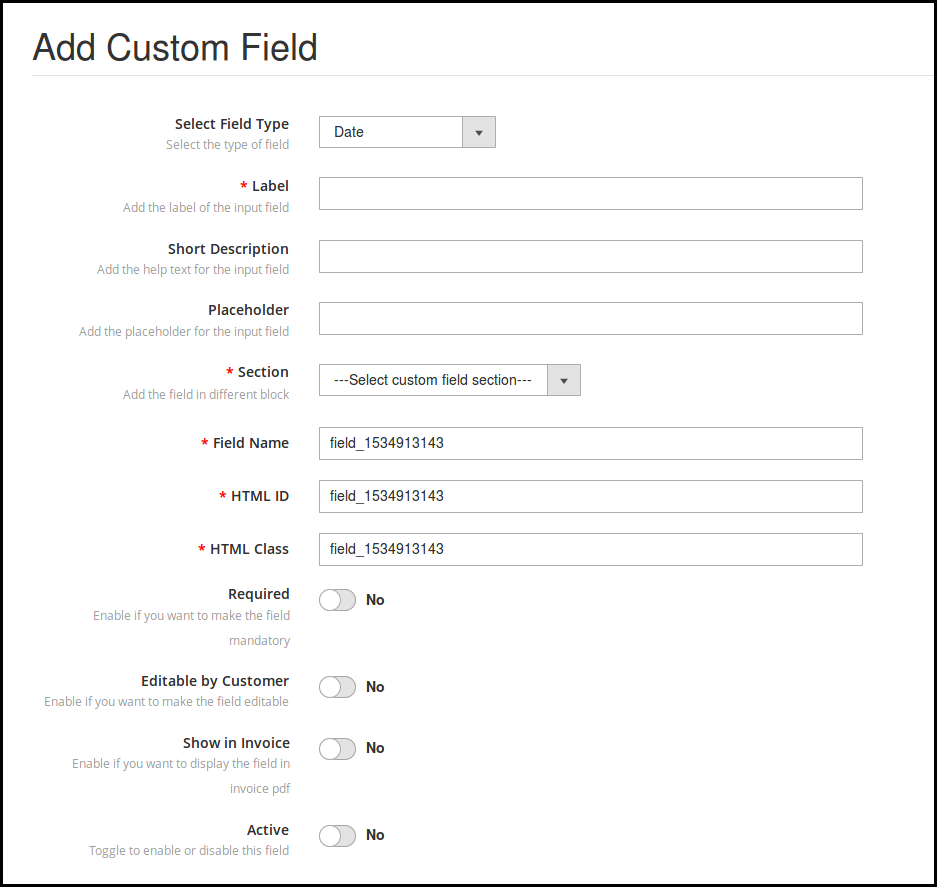
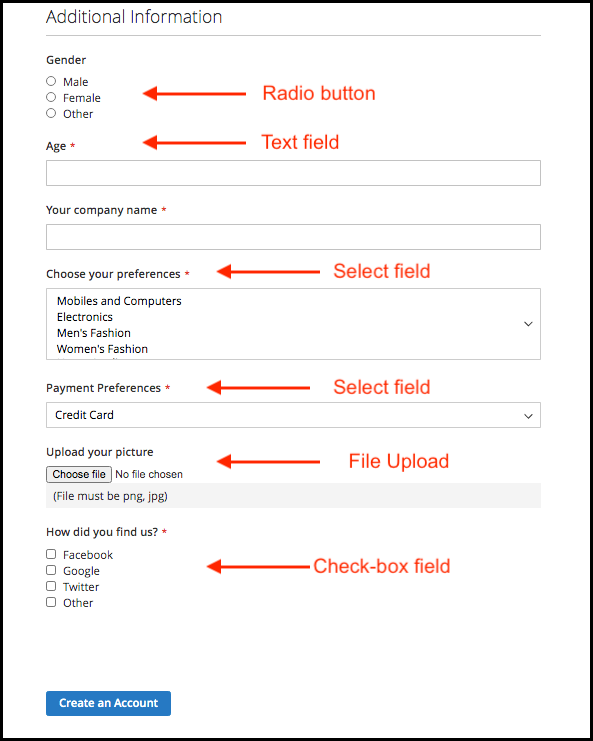
4.0 Website Registration Form UI
After applying the custom fields setting, the store owner can view the custom fields on the registration page of the website. The form will be shown as an image below:
For more Magento 2 extensions please visit Knowband.
For more details about this Custom registration attributes module visit:
Knowband Magento 2 Custom Registration Fields extension module link.
Magento 2 Registration Fields module admin demo link.
Knowband Magento 2 Custom Fields plugin front demo link.
Please contact us at support@knowband.com for any query or custom change request as per your business requirement.
