1.0 Introduction
This readymade plugin is designed & developed by KnowBand to convert your running WooCommerce store into a feature-rich Progressive Web Application. Once the eCommerce store is transformed into PWA Application, whenever any user opens the store URL in the mobile browser, the concerned person will be asked to “Add PWA To Home Screen”. Once the WooCommerce PWA Mobile App is added to the home screen of the mobile device, the user can browse the store on the app like any other application.
The WooCommerce PWA Mobile App is a web application that actually doesn’t rely on app publish on Google Play and Apple App Store. The users can simply add the Progressive Web App to the mobile device and use like any other application.
1.1 Compelling Features to Choose WooCommerce PWA:
– Faster loading & quick performance
– Fully customizable home screen with the DIY editor
– All website shipping & payment methods support
– Engaging user-friendly interface
– No dependency on App stores
– Fully branded to your store
– Email & Social Login (Google & Facebook)
– Multi-lingual & RTL support
– Offline mode working
– Live synchronization b/w website & app
– Both android and iOS compatible
– One page checkout
– Lightweight application
– CMS pages management
1.2 View WooCommerce PWA Demo
Explore module and PWA app features from the below demo links:
Module Admin Panel: https://wcdemo1.knowband.com/pwa/wp-login.php
PWA Demo App: https://wcdemo1.knowband.com/pwa/pwa-app/
Note- Copy-paste URL in the mobile browser and “Add To Home Screen”.
[IMP] Notes For iOS:
–> iOS devices do not offer any inbuilt “Add To Home Screen” prompt, so users need to manually add the PWA Mobile App to the home screen of iPhone or iPad.
–> iOS does not support web push notifications. Hence the push notifications won’t be received on the PWA installed on the iPhone or iPad.
[NEW UPDATE] WooCommerce PWA supports RTL Language Scripts:
The WooCommerce Progressive Web App Creator now supports all worldwide languages including RTL (Right To Left) ones like Arabic, Hebrew, Persian, etc. The store admin can now even add RTL languages on WooCommerce PWA Mobile App.
2.0 Admin Panel Screens:
Explore all settings under Admin Panel of WooCommerce PWA Mobile App and check how they work with the help below detailed screenshots:
2.1 General Settings:
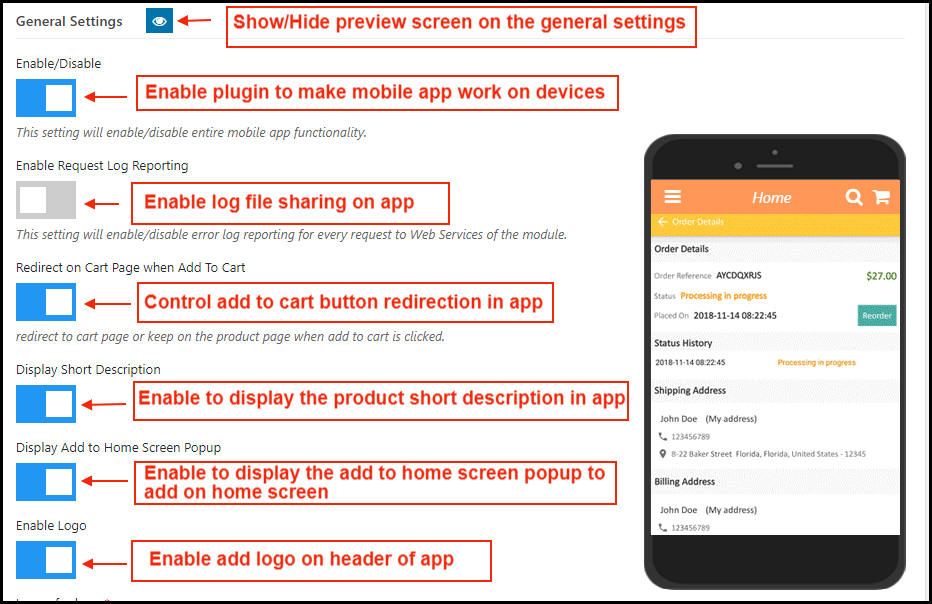
a) Show/hide Preview: Tap on the eye button to display/hide preview phone in the admin panel.
b) Enable/Disable: Enable the module to PWA work on mobile devices.
c) Enable Request Log Reporting: Enable error log on mobile.
d) Redirect on Cart Page when Add To Cart: Control redirection of Add To Cart button whenever any user taps Add To Cart button.
e) Display Short Description: Enable and display a short description for the product (if added on the website product page).
f) Display Add To Home Screen Pop Up: Offer pop-up message “Add To Home Screen” and allow users to add the PWA app on the mobile devices.
g) Enable Logo: Add your brand logo on the header of the WooCommerce PWA Mobile App.
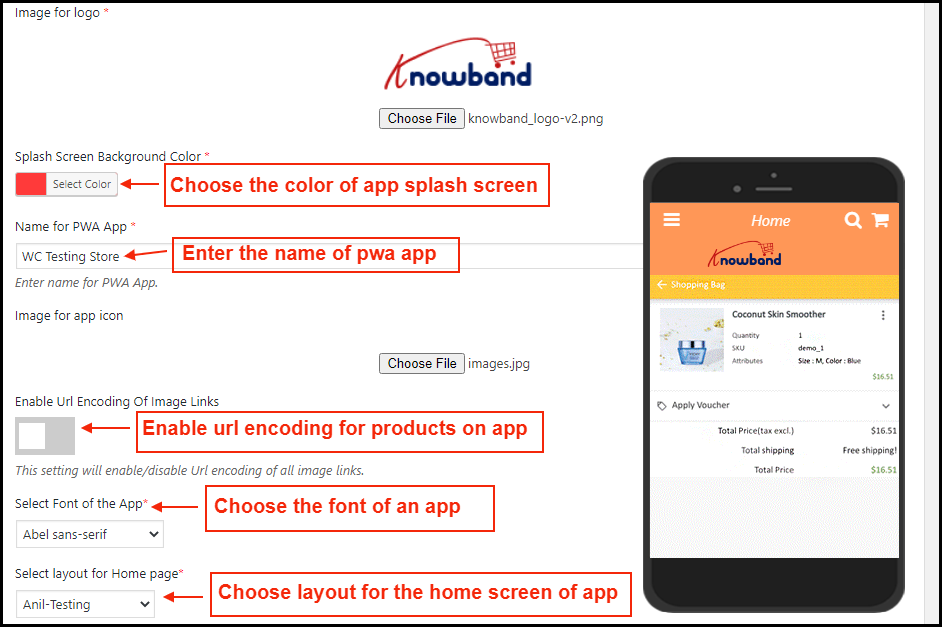
h) Splash Screen Background Color: Choose and set the color for the splash screen of the WooCommerce Progressive Web App.
i) Name for PWA App: Enter the desired name for WooCommerce PWA App. It will be displayed once the user add app on the mobile devices.
j) Image for App Icon: Add app icon image in the admin panel.
k) Select Font of the App: Choose the font for your WooCommerce PWA Mobile App.
l) Select Layout for Home Page: Choose from pre-added home screen layout for the WooCommerce PWA App.
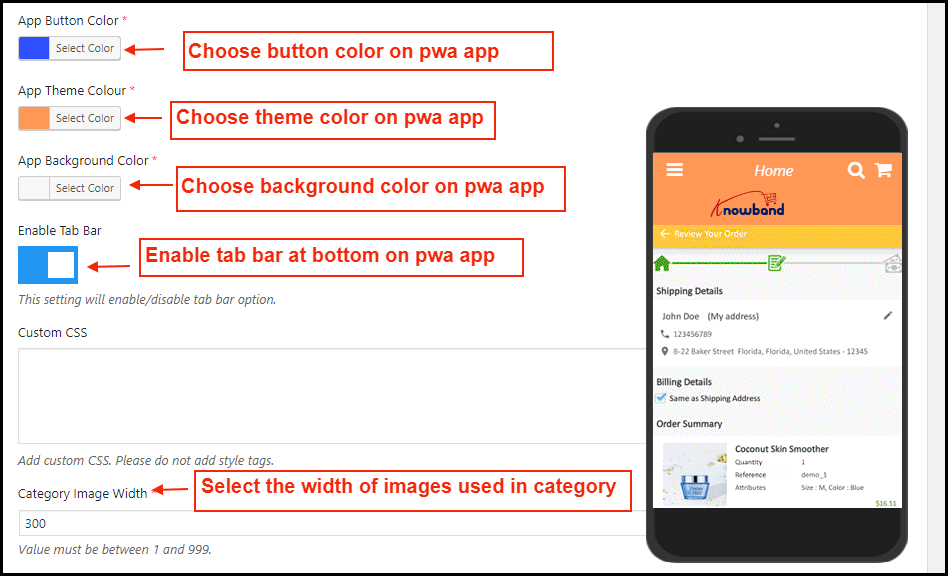
m) App Button Color: Choose button color for PWA Mobile App.
n) App Theme Color: Choose theme color for PWA App.
o) App Background Color: Choose the background color for the PWA App.
p) Enable Tab Bar: Enable tab bar on the bottom of the PWA App for quick and easier navigation.
q) Custom CSS: Enter CSS code to improve look and feel of web-view pages of PWA App like web-view payment, CMS pages, etc.
2.2 Push Notifications Settings
Push notifications are the best marketing tool for the PWA app for WooCommerce. The store admin can simply promote the store products and deals to app users and bring more sales and revenue. Enter all details in push notification settings by creating a Firebase project:
How to set up a Firebase Account?
Step 1: Login Google Firebase
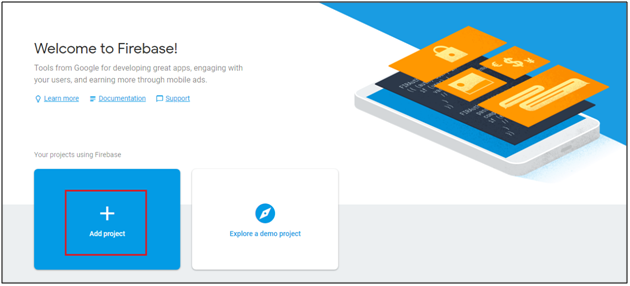
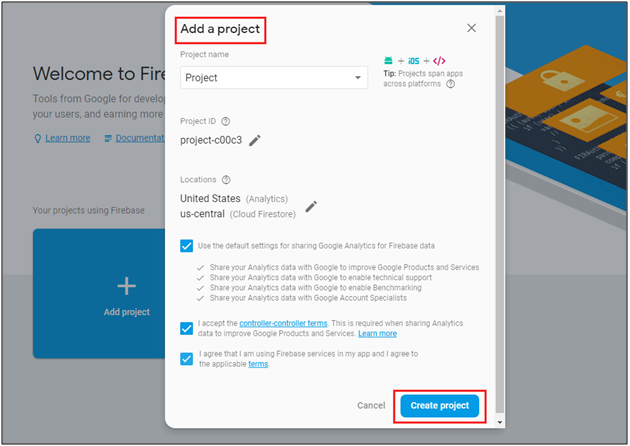
Step 2: Create a New Project
As you click on Add Project, the following dialog box will pop up:
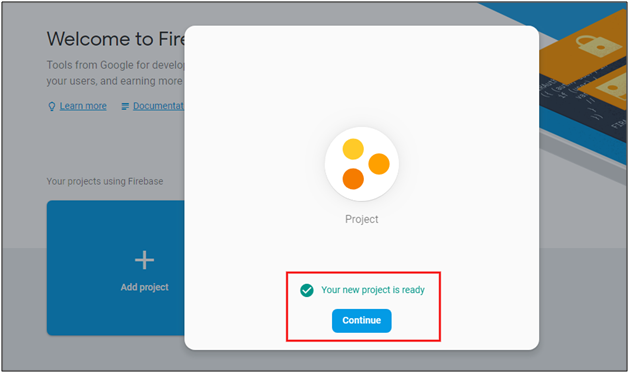
It will take a few seconds to create the project. Once the project is ready, click continue.
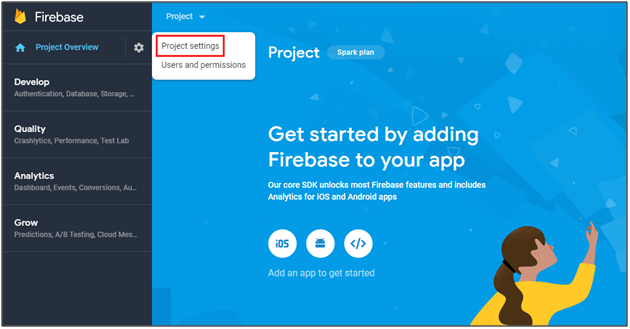
Step 3: Manage Project Settings
Once the project is created, click on Project Settings.
Step 4: Go to Authentication options:
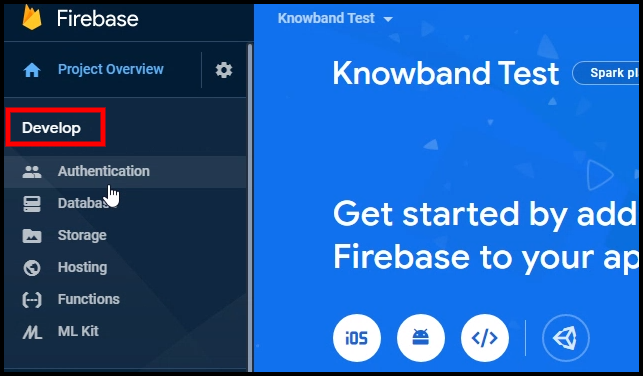
Step 5: Find Firebase Keys
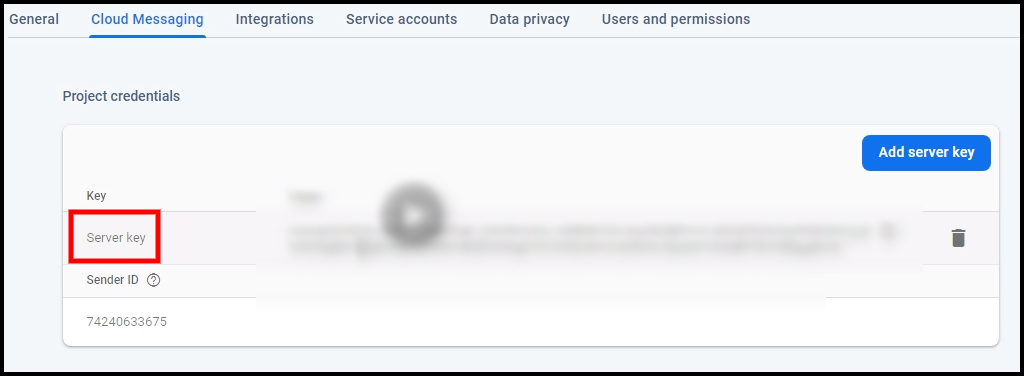
In the project settings, click on Cloud messaging settings. From here, you can directly get the server key.
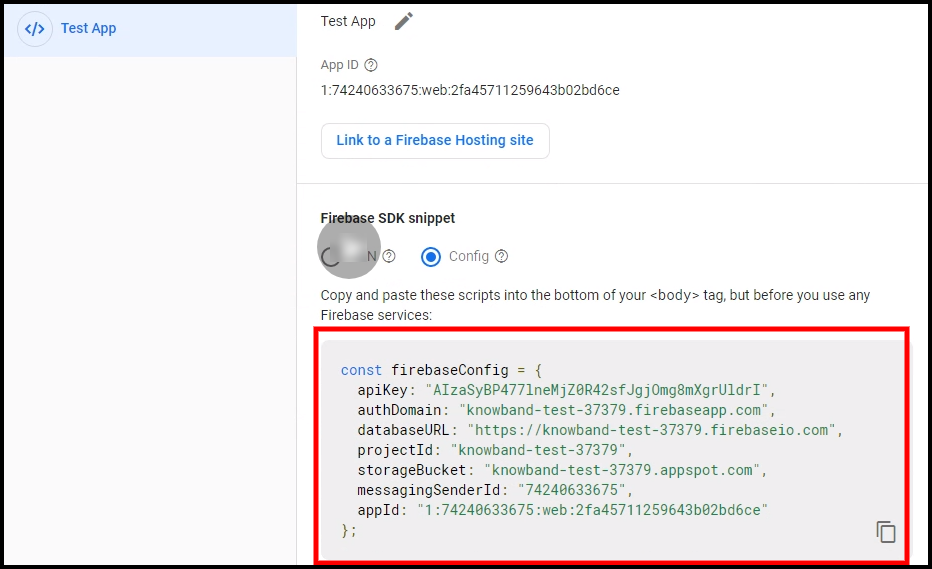
Step 6: Add your Web-App to Firebase


Step 7: Get other firebase related details and paste the same in PWA module admin panel.
Step 8: Get firebase server key from cloud messaging tab in Settings:

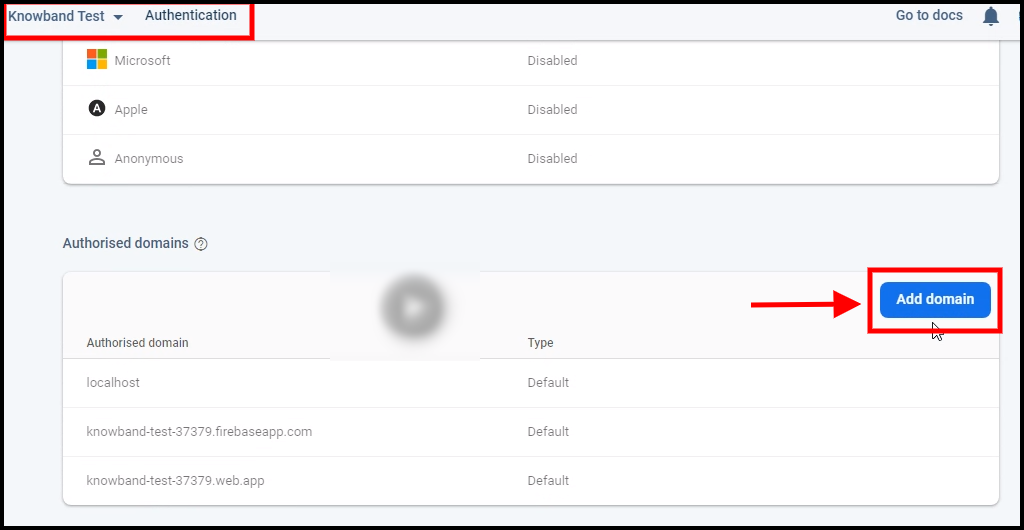
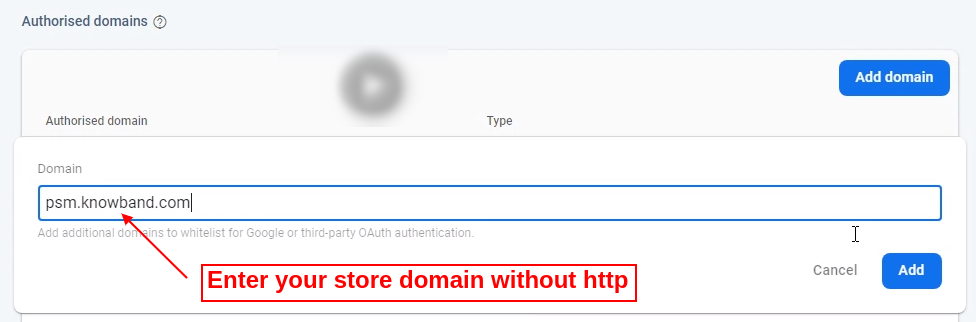
Step 9: Add your domain in authentication>>sign-in.
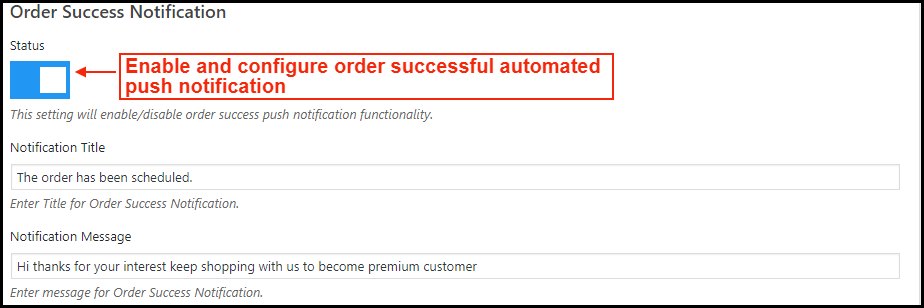
A) Successful Order Push Notification:
Enable/Disable automated Push Notification to be sent to app users whenever they place successful order from the WooCommerce PWA app.
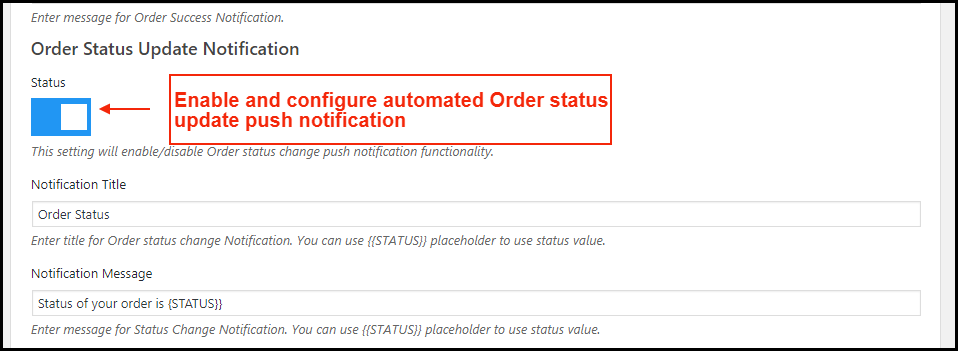
B) Order Status Update Push Notification:
Enable/Disable automated Push Notification sent whenever order status from the app gets updated. The WooCommerce PWA mobile app users can keep an eye on the details of previous orders.
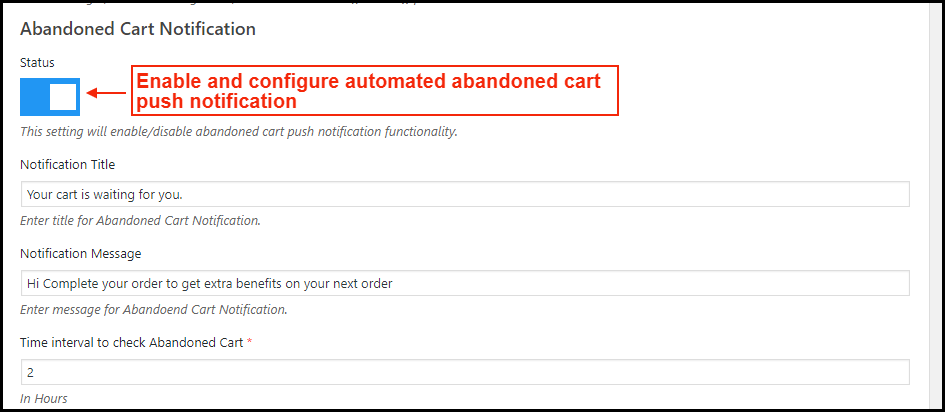
C) Abandoned Cart Push Notification:
Enable/Disable automated push notification sent to users abandoning products in cart without successful purchase. This push notification will be sent to users automatically after the entered time interval.
2.3 Push Notifications History
Complete push notification history of successfully sent push notifications will be seen here. The store admin can keep a track of previously sent push notifications from here.
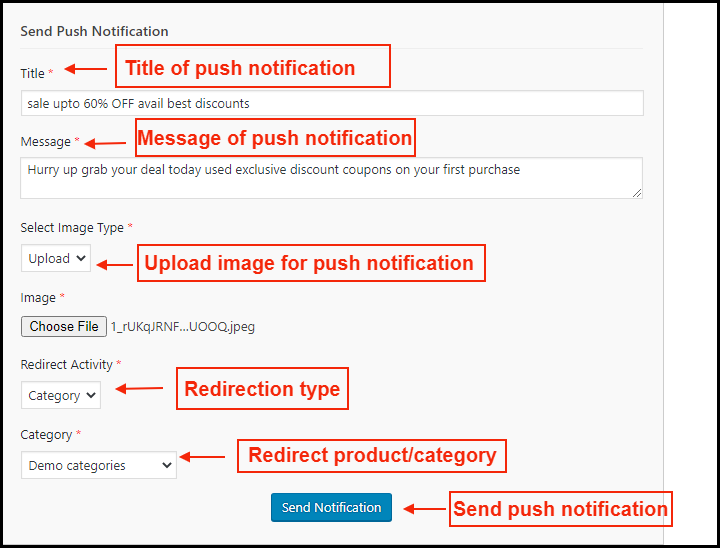
A) Send Notification:
Personalize and send push notification manually to PWA app users as per the need. The store admin can configure these notifications on their own & send them to WooCommerce PWA app users.
2.4 Home Page Layout:
The WooCommerce PWA Mobile App offers a customizable Home Screen whose layout can be designed from the admin panel with a few mouse clicks and drag-drop. The attractive layout as per running festival, sale, occasion etc. can surely help in improving sales through WooCommerce PWA Mobile Apps.
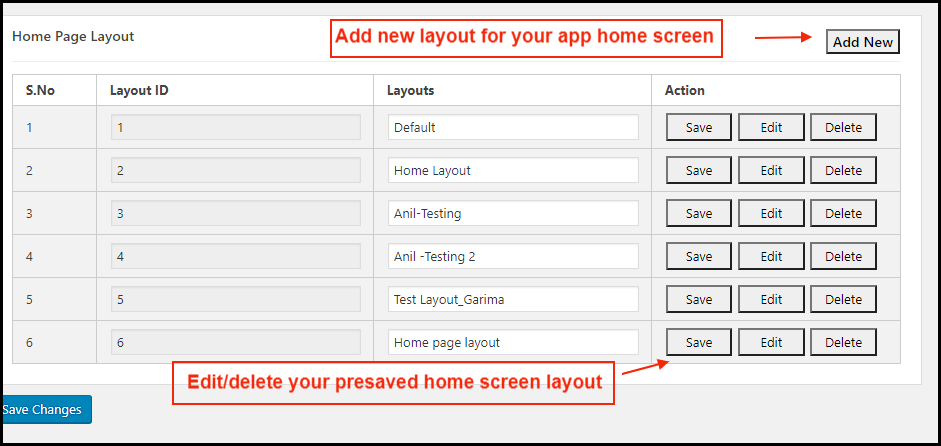
Add a new layout from this tab or edit the previously added ones. The home page configuration settings offers the following elements:
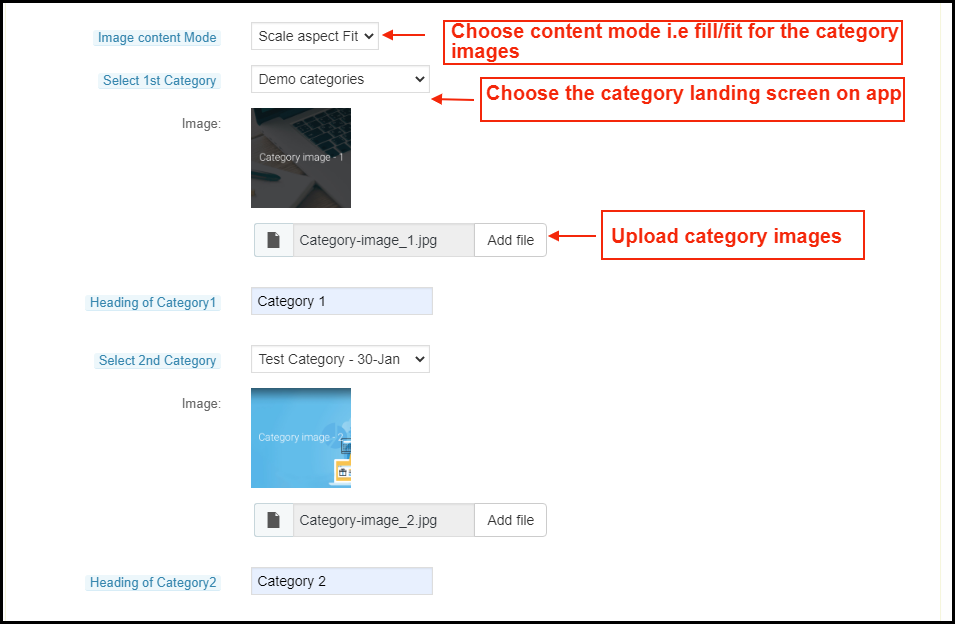
a) Top Categories:
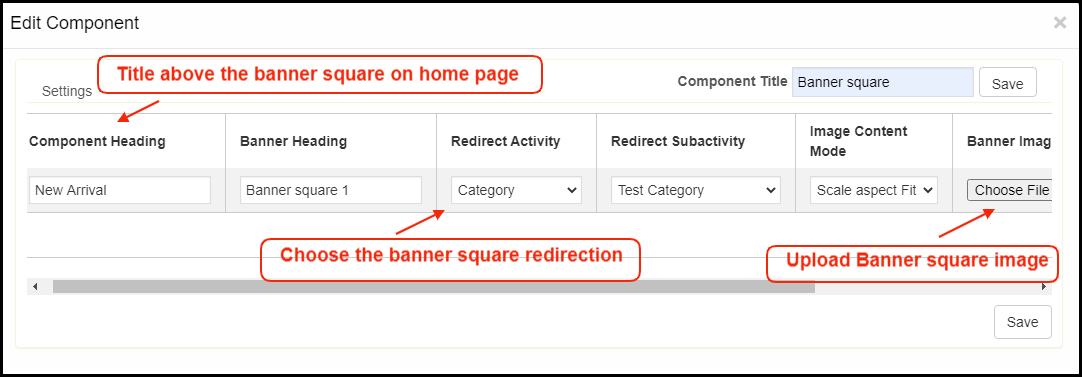
b) Square Banner:
c) Horizontal Sliding Banner:
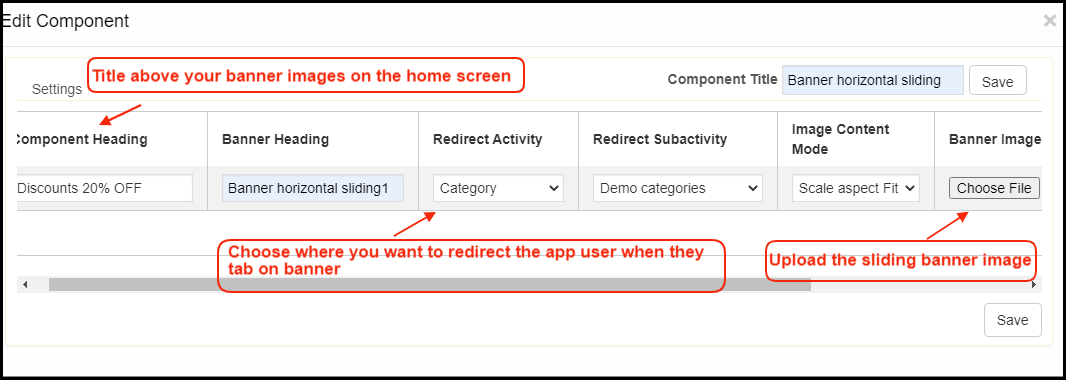
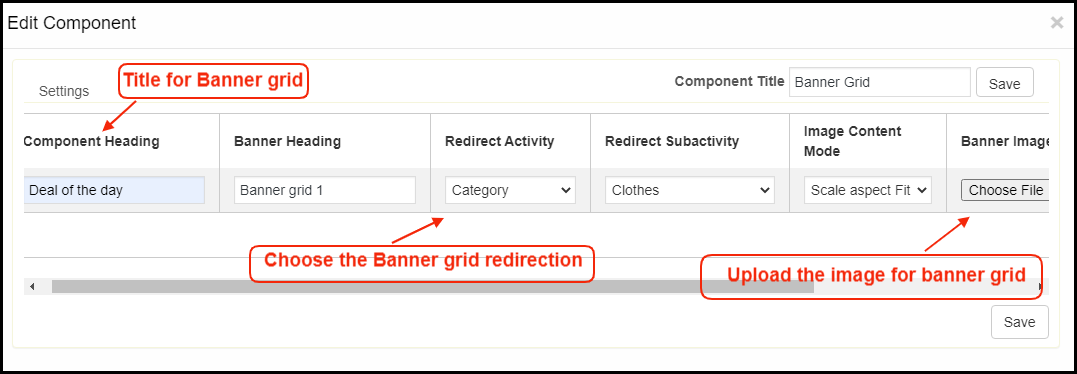
d) Grid Banners:
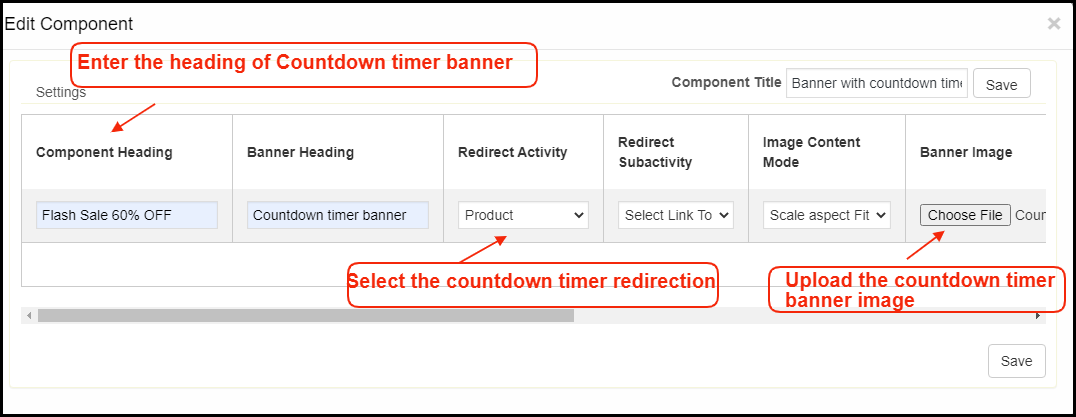
e) Countdown Timer Banner:
f) Square Products:

g) Sliding Products:

h) Grid Products:

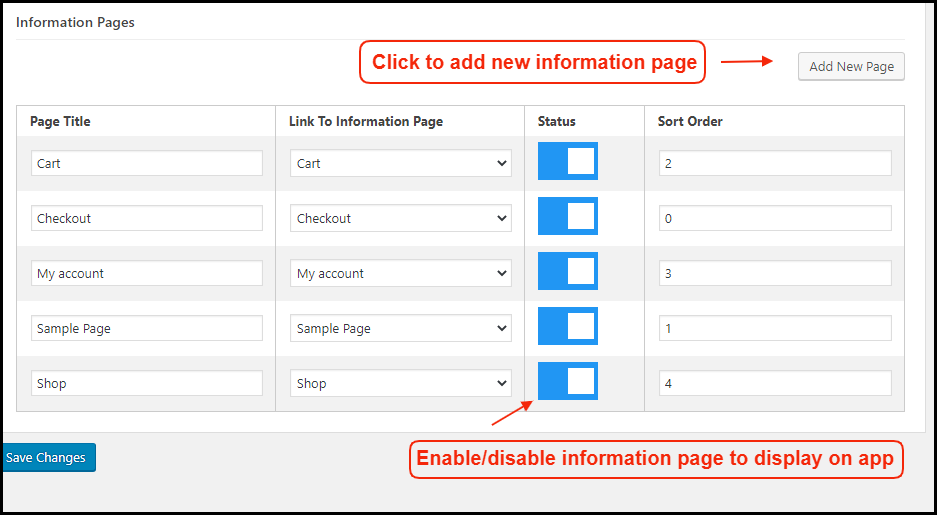
2.5 Information Pages:
Add CMS pages on the app and offer informative content to WooCommerce PWA Mobile App users.
How to get Facebook App details?
Facebook App can be created by following below-mentioned steps:-
Step 1: Go to given URL: https://developers.facebook.com/apps/
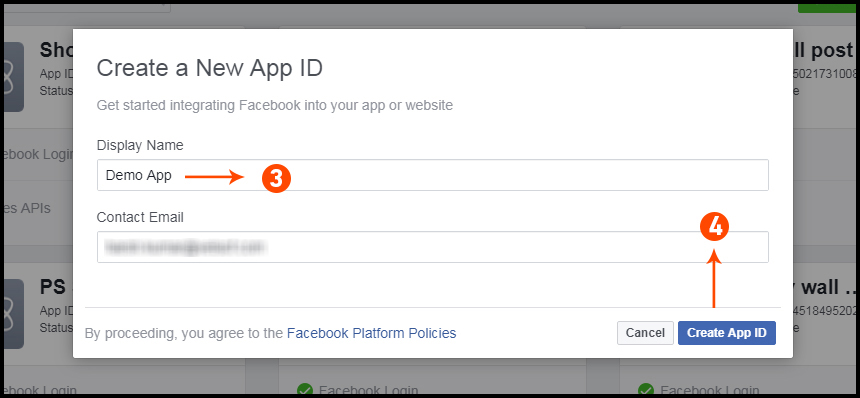
Step 2: Click on the “Add a New App” button.

Step 3&4: Enter your App name and email id, then click on “Create App ID” button.
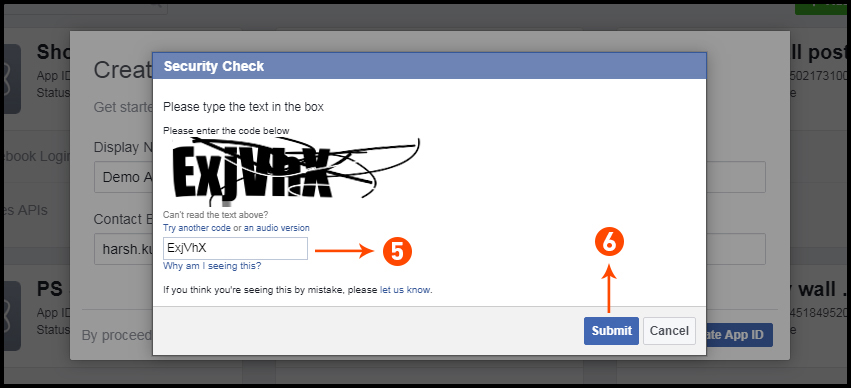
Step 5&6: After clicking on Create App ID you will have to go through a security check as shown:
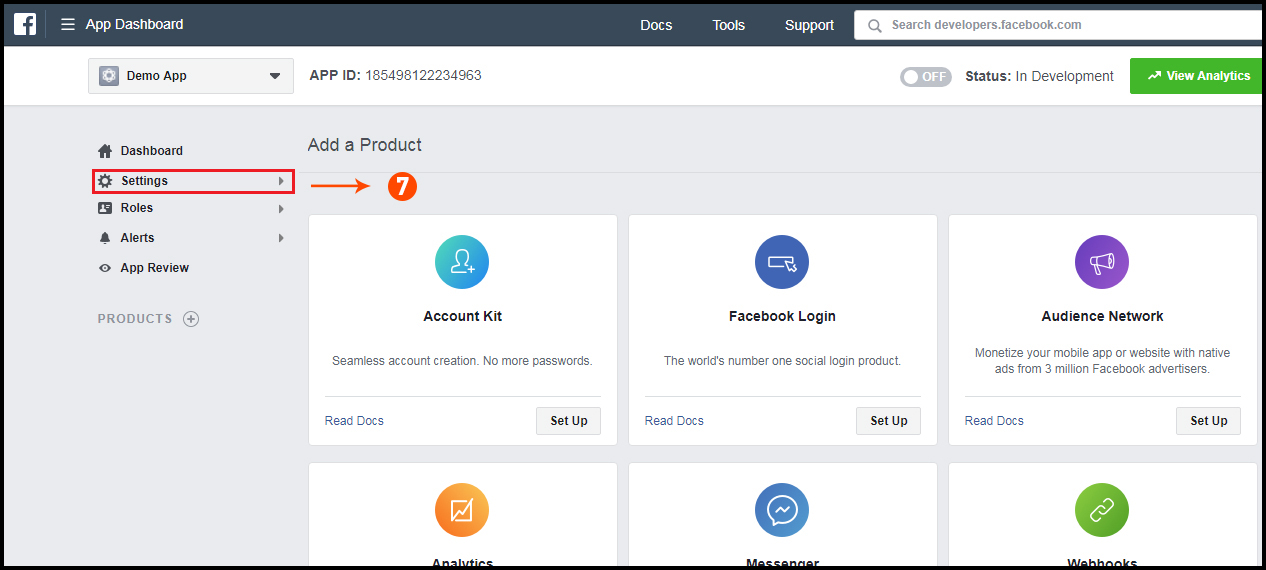
Step 7: Click on “Setting” tab.
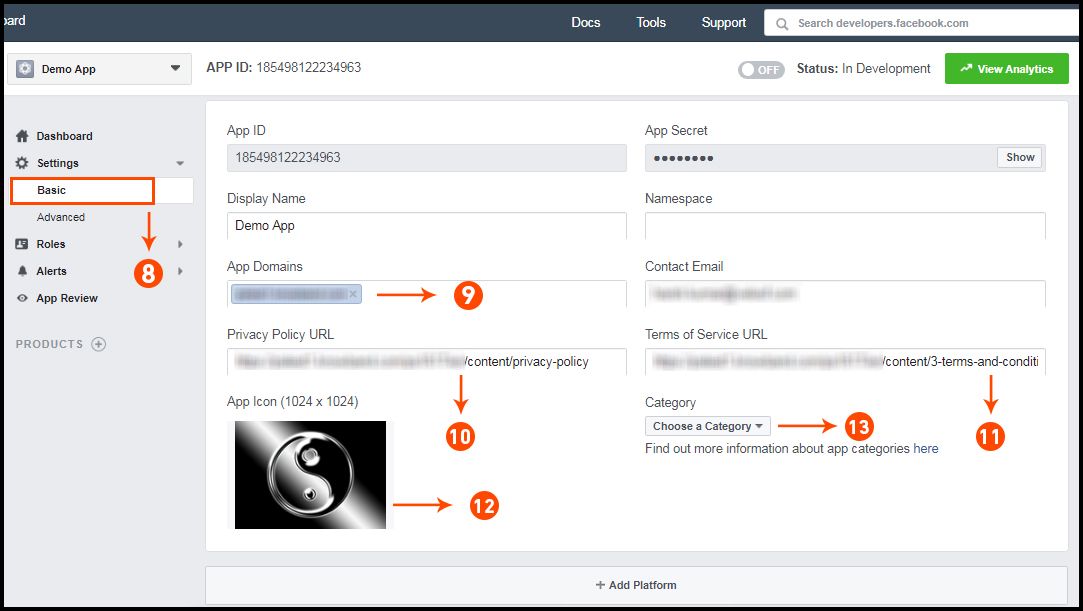
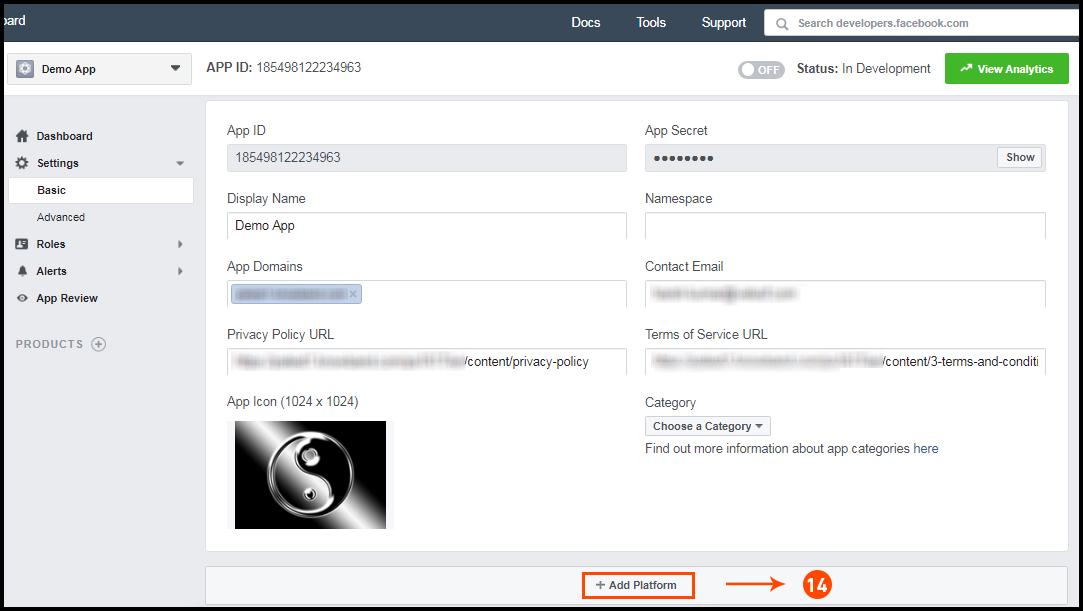
Step 8-13: Two option will be available in the dropdown, Basic and Advanced, click on “Basic”. And then enter your “App Domain”, “Contact Email”, ”Privacy URL”, ”Terms and Conditions URL”, ”Add Logo”, ”Select Category” and click on “Save Changes” button.
App Domains:
yourdomain.com is correct
yourdomain.com/store is incorrect
www.domain.com is incorrect
Step 14: Now click on “+Add Platform”.
Step 15: And select Website as Platform.
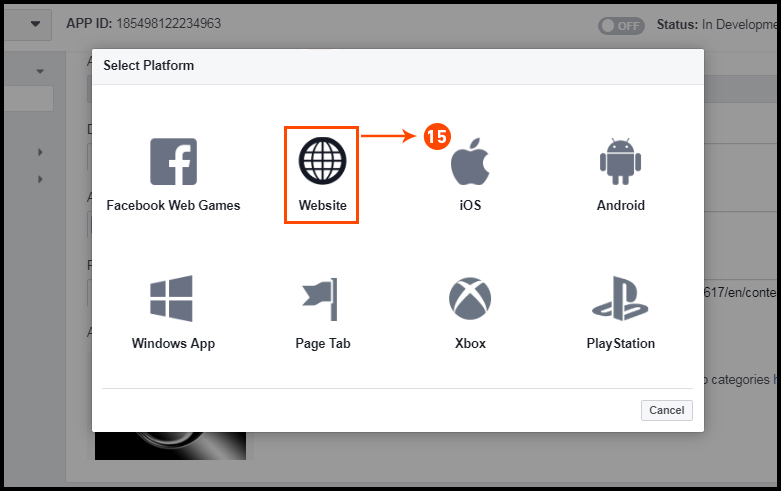
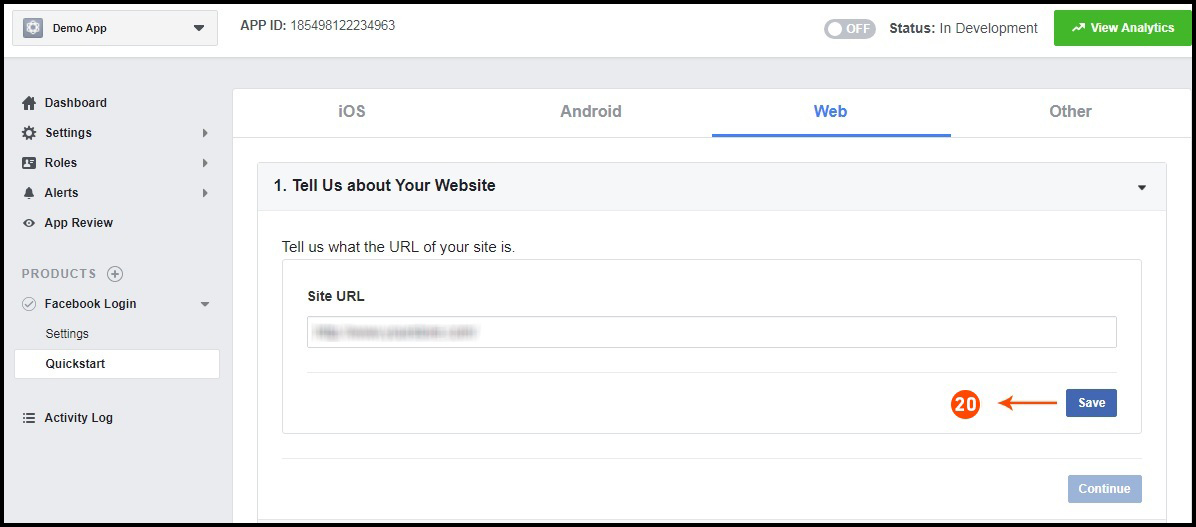
Step 16: Now Enter your site URL.

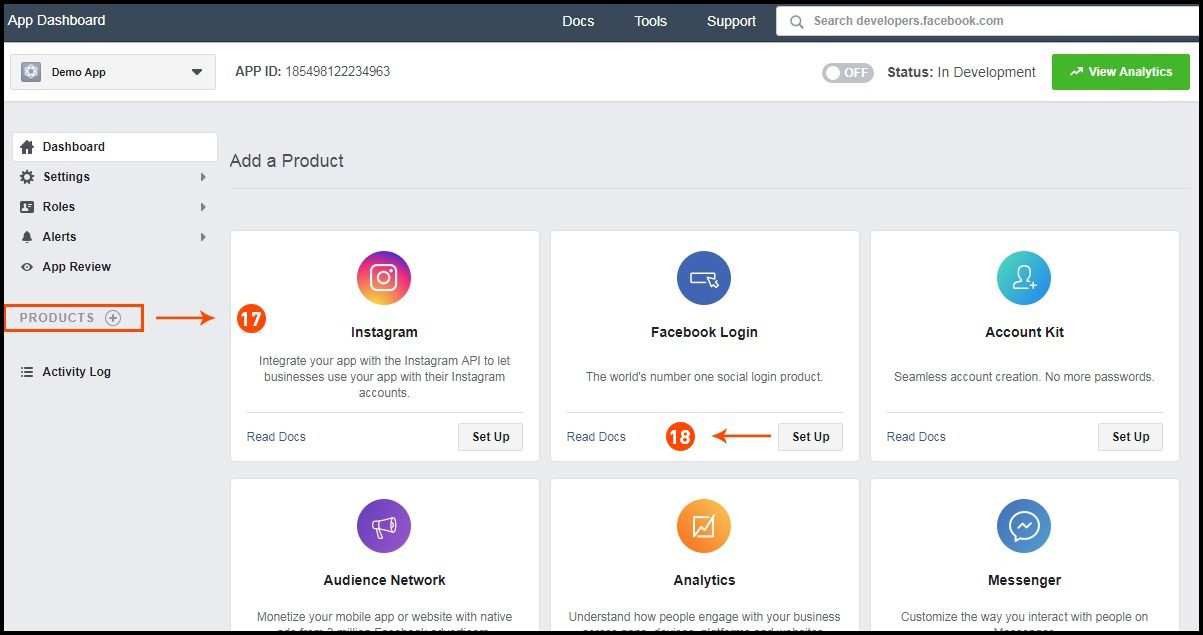
Step 17&18: Click on “Products+” and select Facebook login.
Step 19: Select web as the platform for the app.
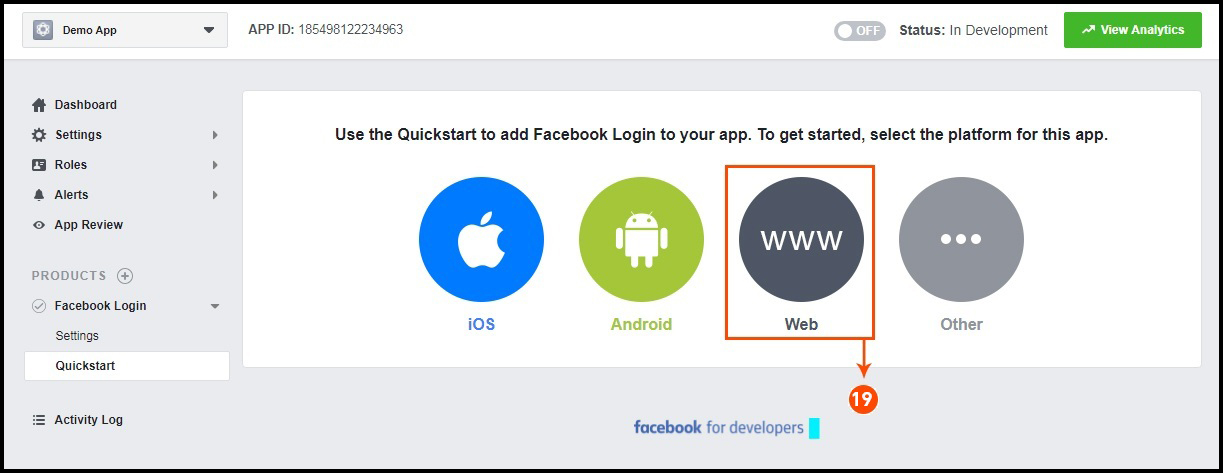
Step 20: Now click on save.
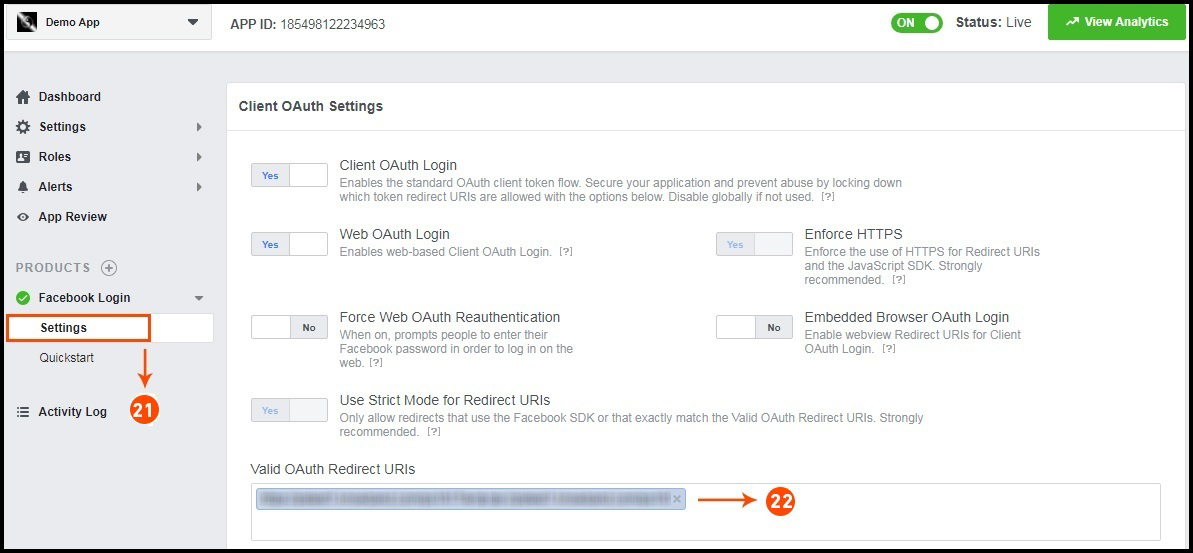
Step 21&22: Click on Settings and add a Valid OAuth Redirect URIs.
Valid OAuth Redirect URIs:
https://example.com/pwa-app/login
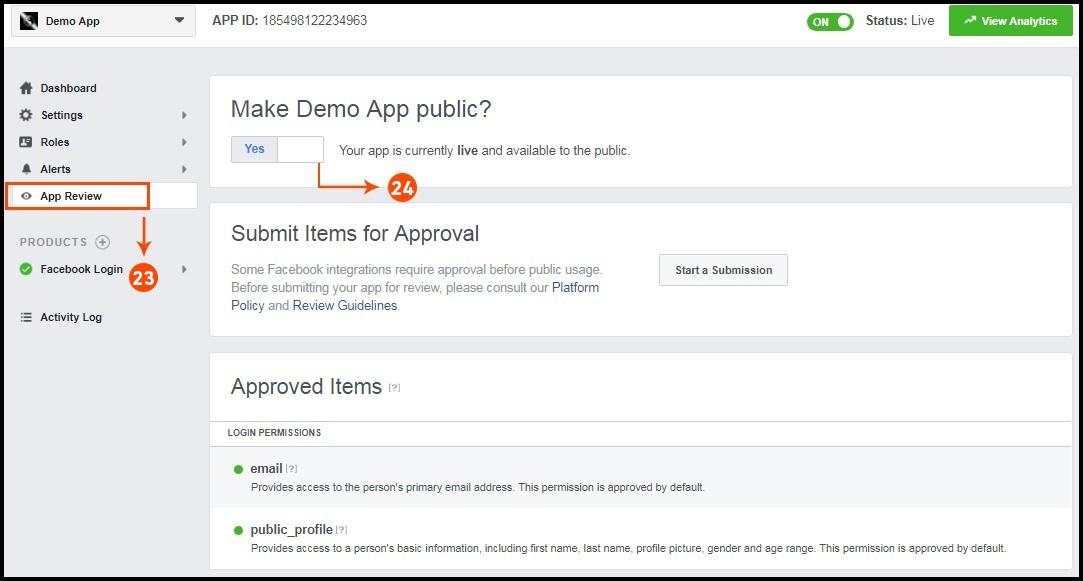
Step 23&24: Click on “App review”. And mark “Make ‘your app name’ Public” to Yes.
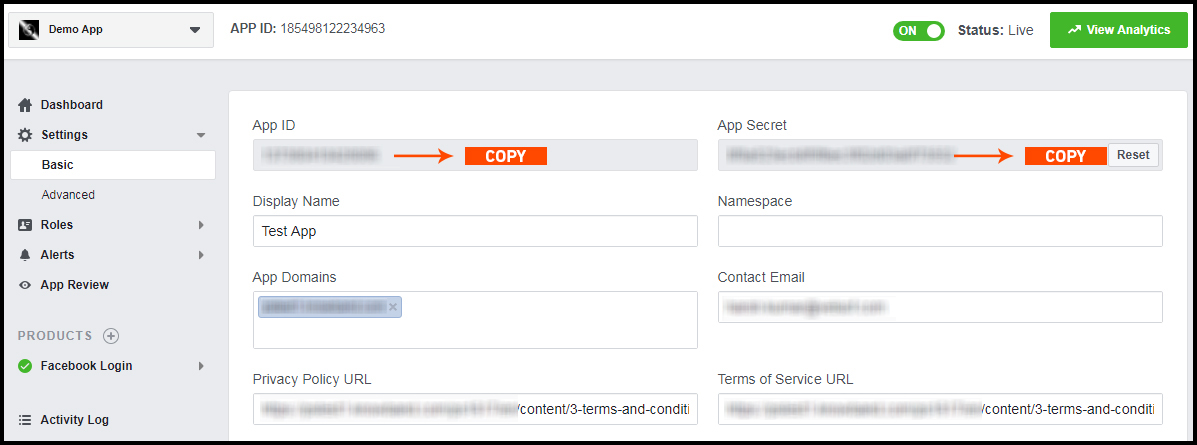
Final Step: Copy the App ID and App Secret and paste it into the fields provided in the module.
How to get Google App details?
- Go to Google Developers Console
(https://console.developers.google.com/project) or click on link given top right of the respective tab in module configuration page. - Now click on Create Project on the left of the page.
- Enter a name for your project and proceed to the next step.
- Now click on APIs and auth-> Credentials from the left menu as shown below.
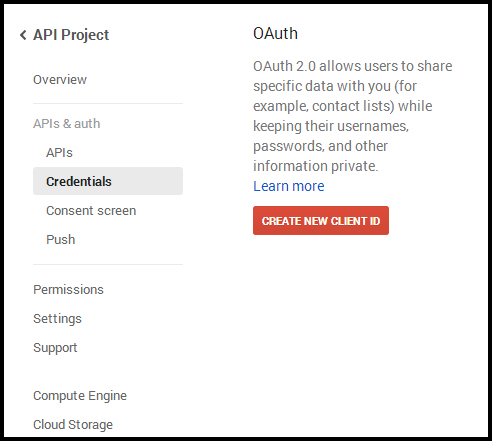
- Click Create New Client ID button from the right panel of the screen.
- You may have to fill the form for Consent Screen before proceeding. To do so, that you have to click on Consent Screen in the left menu as shown in the image above.
- Fill the pop-up form with below details:
Application Type: Web Application.
Authorized JavaScript Origins: Your store domain name (https://www.yourstore.com).
Authorized redirect URI or URI of Loginizer redirect page:
https://example.com/pwa-app/login

- Now click Create Client ID button to get your Client ID and Client Secret Key.
- Now you can use the client secret and client ID to let your customers login to your store using their Google account.
3.0 Front End PWA Screens:
3.1 Home Screen: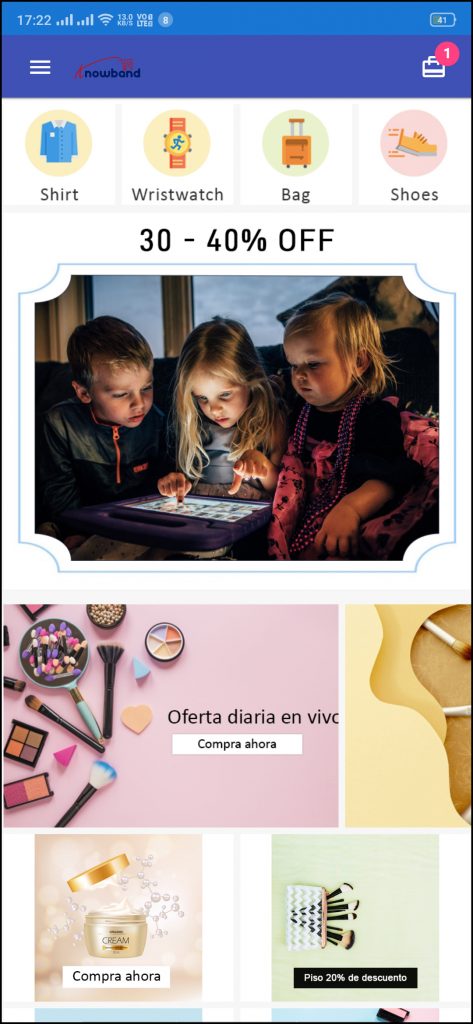
The home screen of the WooCommerce PWA Mobile App is fully customizable with the DIY editor as explained above in Admin Panel screens. Change app home screen look & feel anytime and offer more user-friendly & sale driven appearance.
1. Custom Layout:
Using various banner, slider, product elements, the store admin can create dynamic layout as per the need.
2. Brand Logo:
Use your store logo on the top header of the WooCommerce PWA app.
3. Shopping Cart Bag:
The shopping cart icon on the top-right corner of the home screen allows users to access cart screen and check added products.
4. Left Navigation Menu:
Browse the categories displayed in the PWA app with left navigation menu browsing.
3.2 Accordion Menu (Navigation Bar):
The WooCommerce PWA Mobile Apps comes with seamless and proper categorization available. The users can find relevant categories from the left navigation menu and browse products. Various CMS pages can also be added in the menu offering relevant content on App.
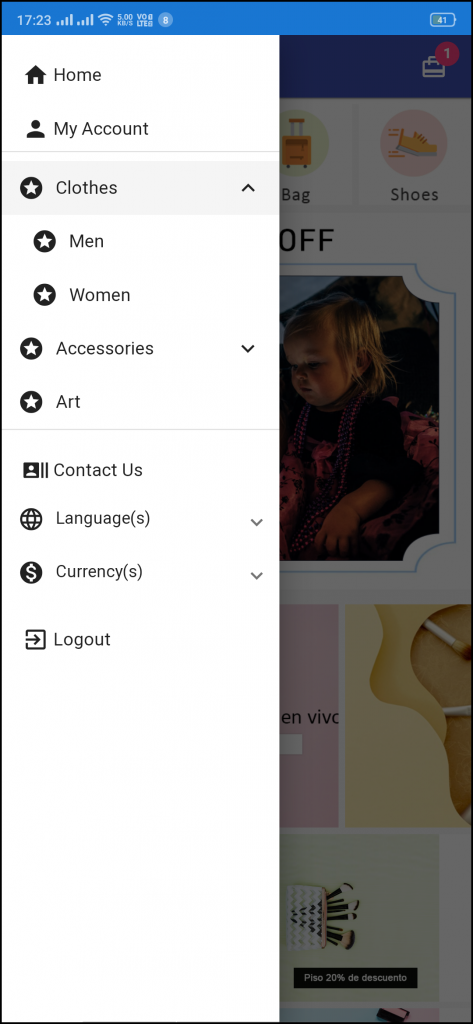
1. My Account
My Account option contains all the users’ personal information including shipping and order. The WooCommerce Progressive Web App shoppers can view and update the saved information.
2. Categories
Categories displayed in the left navigation menu of the WooCommerce Progressive Web App are the same as available on the eCommerce store.
3. CMS Pages
Various CMS pages like About Us, Contact Us, Terms & Conditions, etc. can be accessed from here. These information pages can be added from the admin panel of the extension.
4. Language(s)
The language option allows PWA app users to view the web-app in their desired language.
5. Currency(s)
All available currencies on your website are displayed here on the WooCommerce PWA app.
6. Login/Logout
Users can easily sign-in/sign-out from the WooCommerce PWA app via this option.
3.3 Category Screen: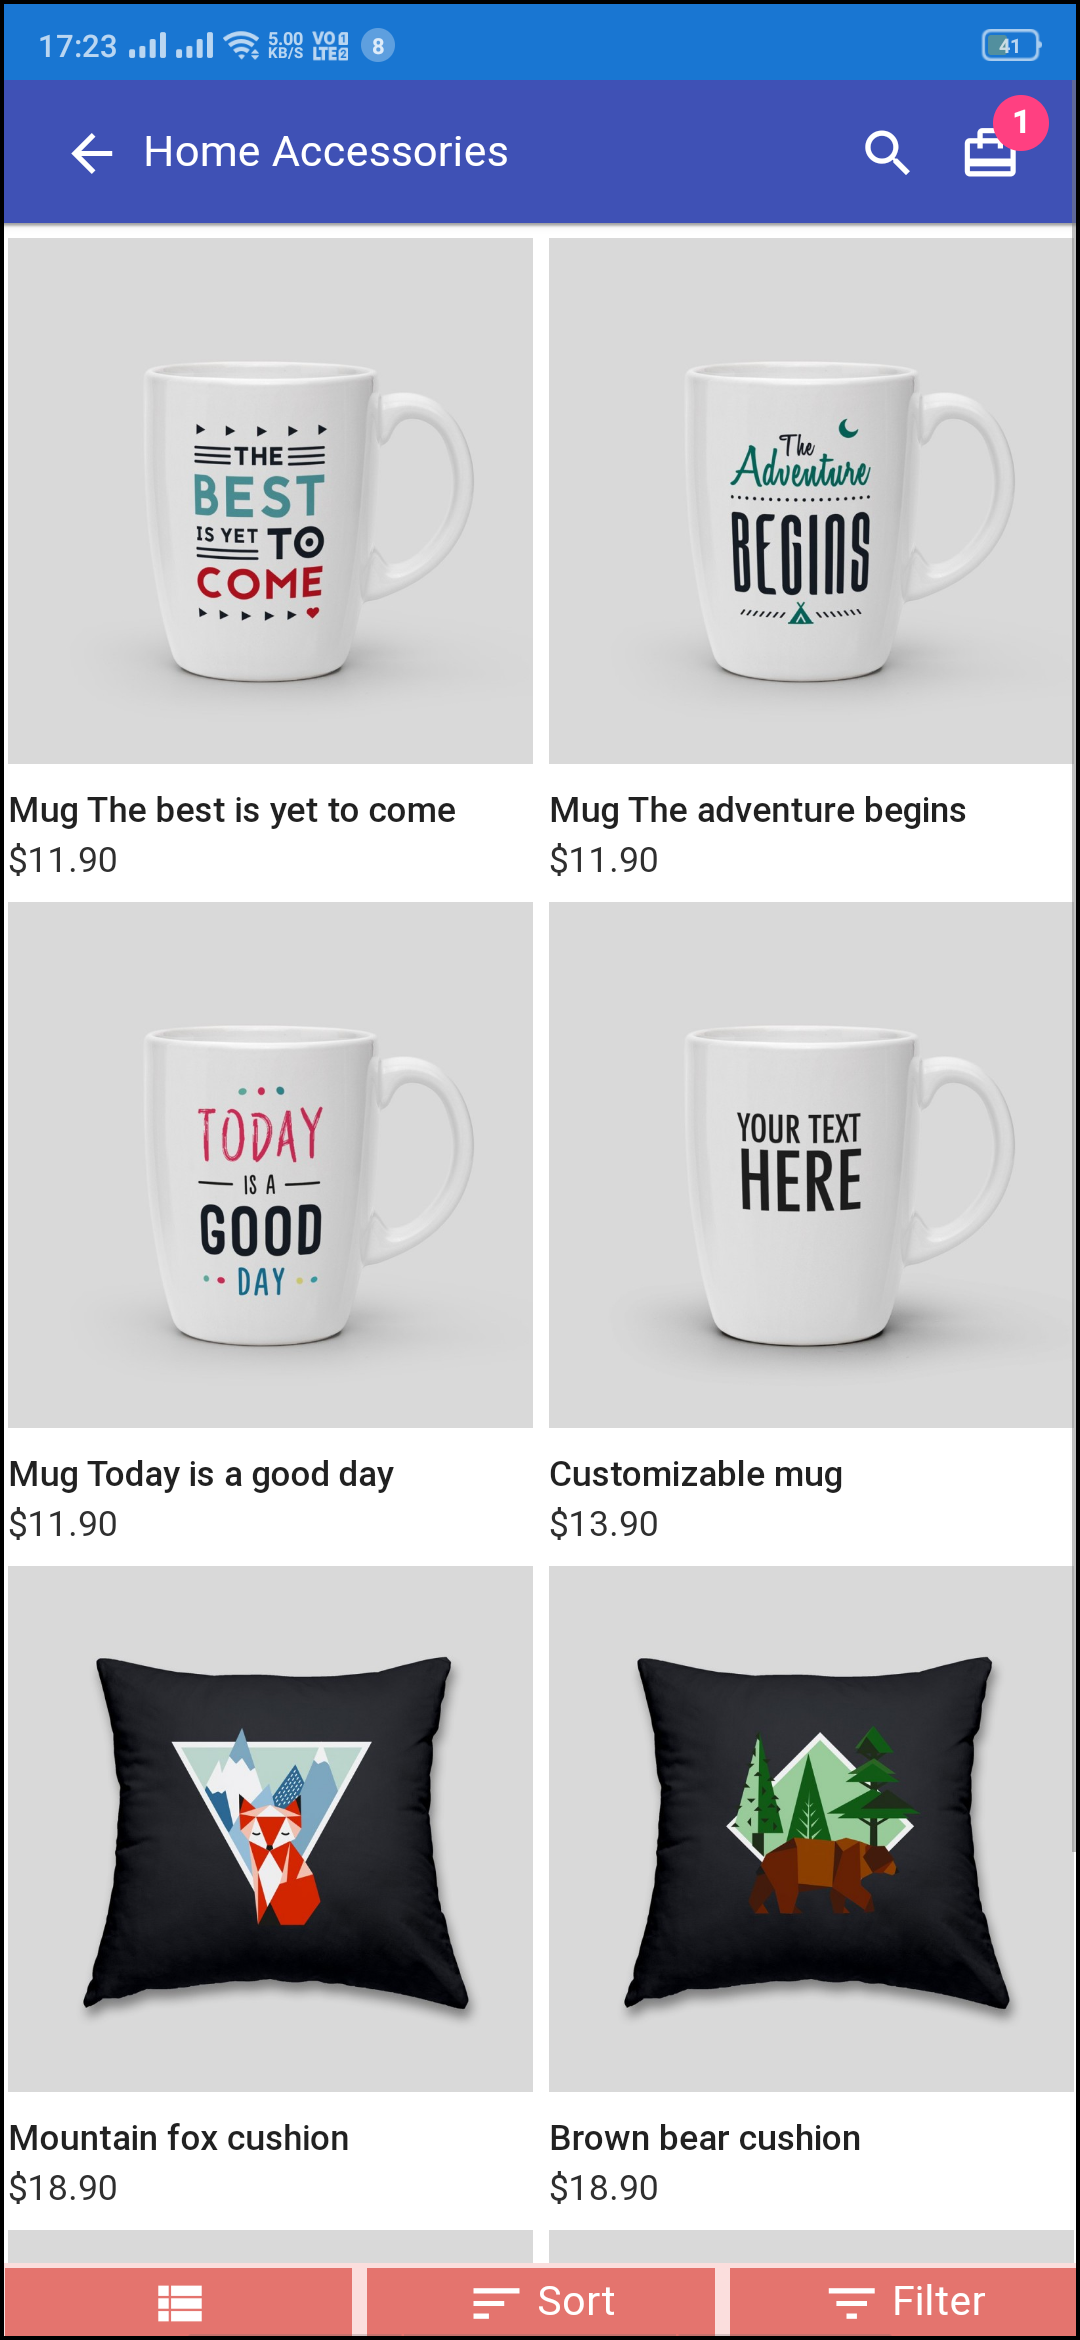
Clutter-free category screens with the list and grid view allow the users to choose what’s best for them from a specific category. The entire store inventory will remain in-sync with WooCommerce PWA Mobile App and new additions and changes even get updated in real-time.
1. List & Grid View:
The categories on the PWA app for WooCommerce can be browsed in both list and grid view.
2. Product Sorting:
The sorting option allows online shoppers to narrow down the products in the desired sort order and find the right one.
3. Product Filter:
The WooCommerce PWA Mobile App offers the option to filter products simplifying the product search. Online shoppers can find the desired products under categories using filters for various attributes like size, color, price, etc.
3.4 Product Screen:
The product screen of the WooCommerce Progressive Web App is as simple & intriguing as it could get. With all the necessary options and information about the product, it becomes a matter of minutes for users to be sure about the product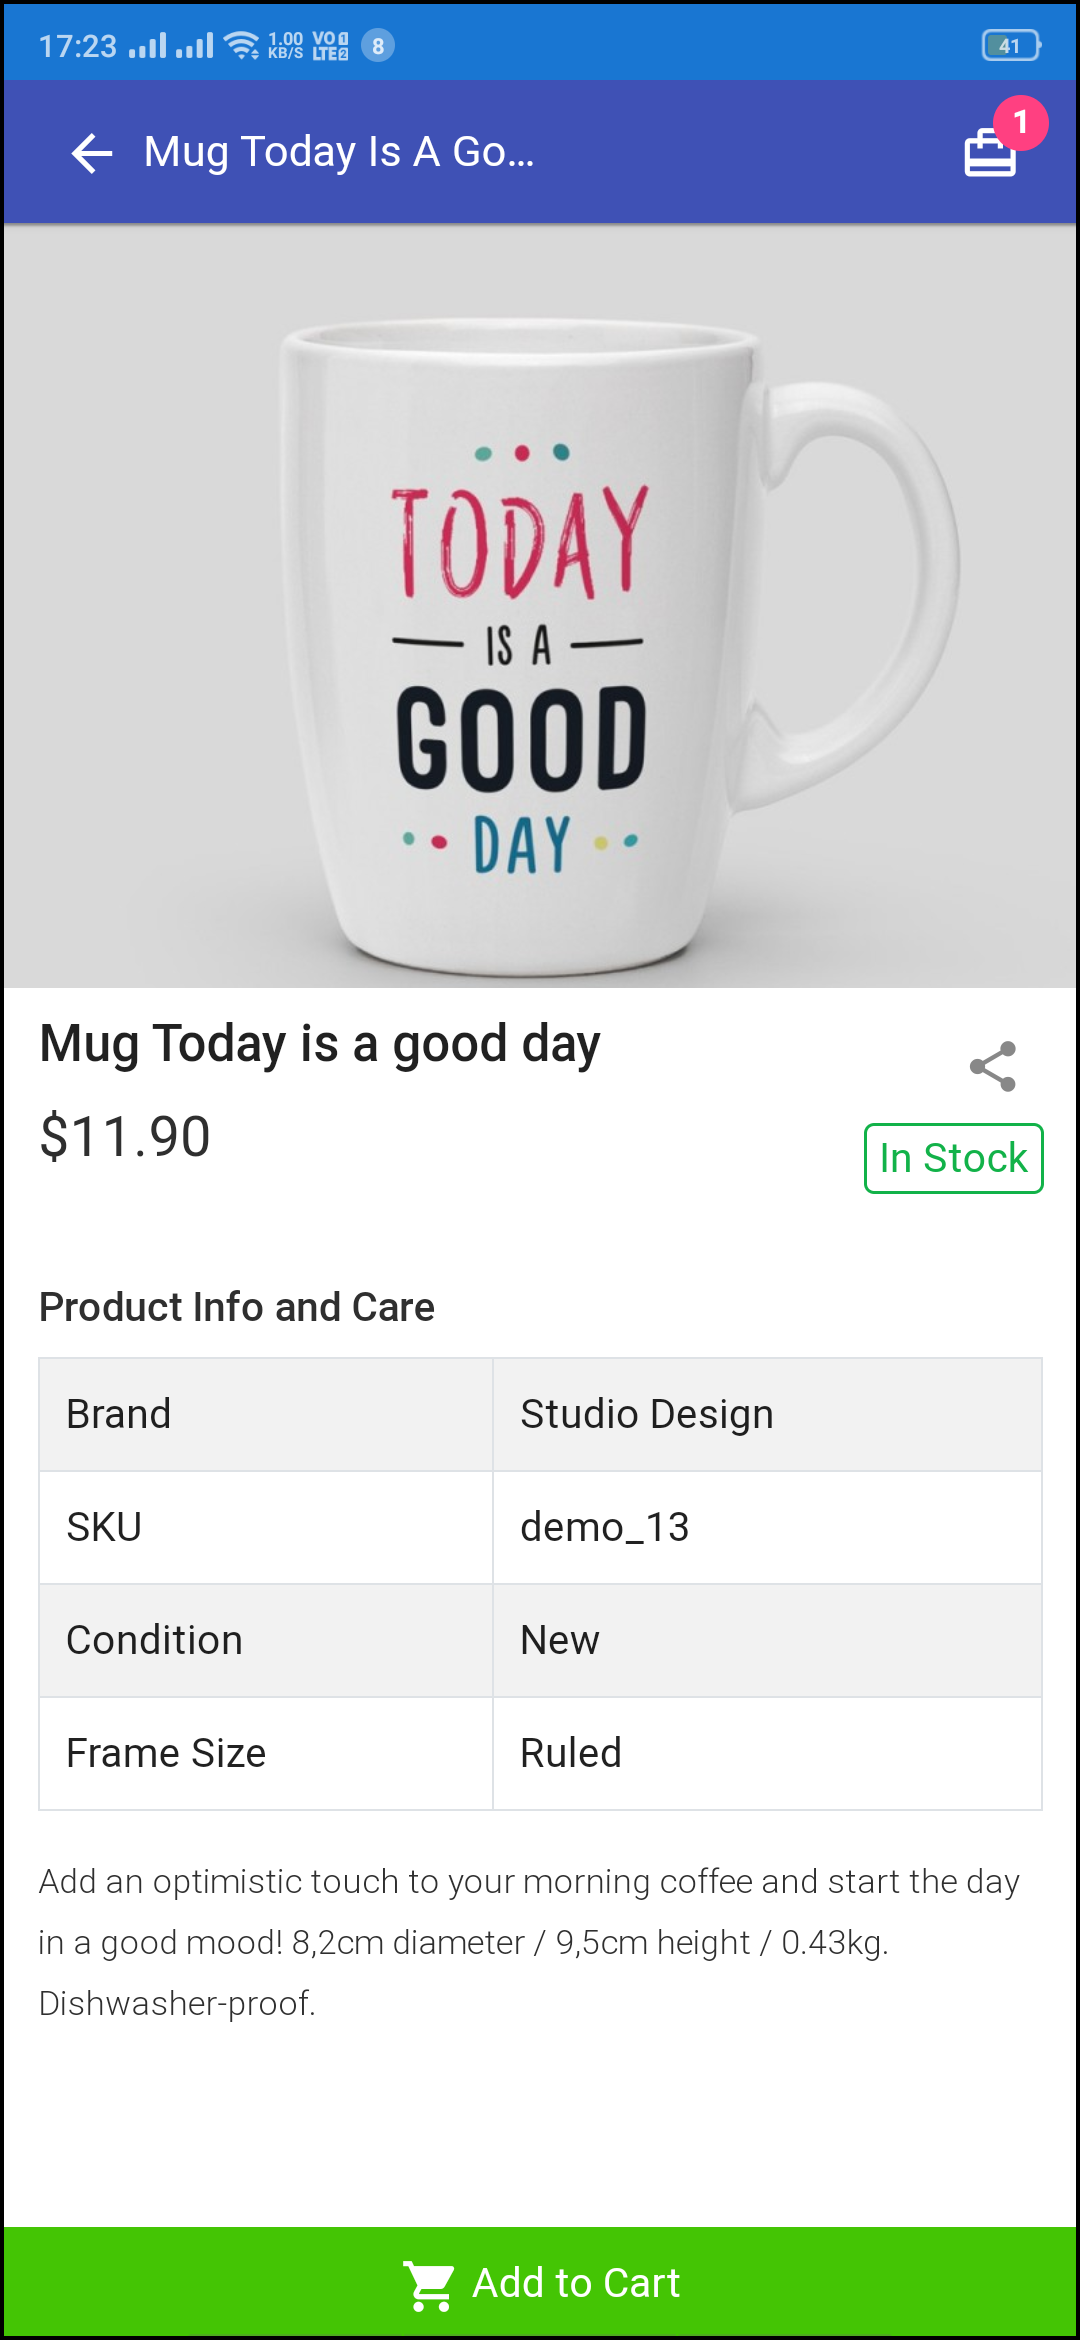 which he/she is about to purchase. Multi-images are available for the product with In stock and Out of stock options.
1. Product Info & Care:
The complete product information as available in the inventory will be displayed here.
2. Short Description:
Users get to read the short description of your product to quickly make up their minds about the purchase.
3. Product Options:
All the options related to the product like size, color, etc. are displayed here.
5. Add To Cart:
This button allows users to add products into the cart. The users can further process the cart for purchase.
6. Product Social Sharing:
The sharing option for the product allows users to share products on multiple social channels.
3.5 Login Screen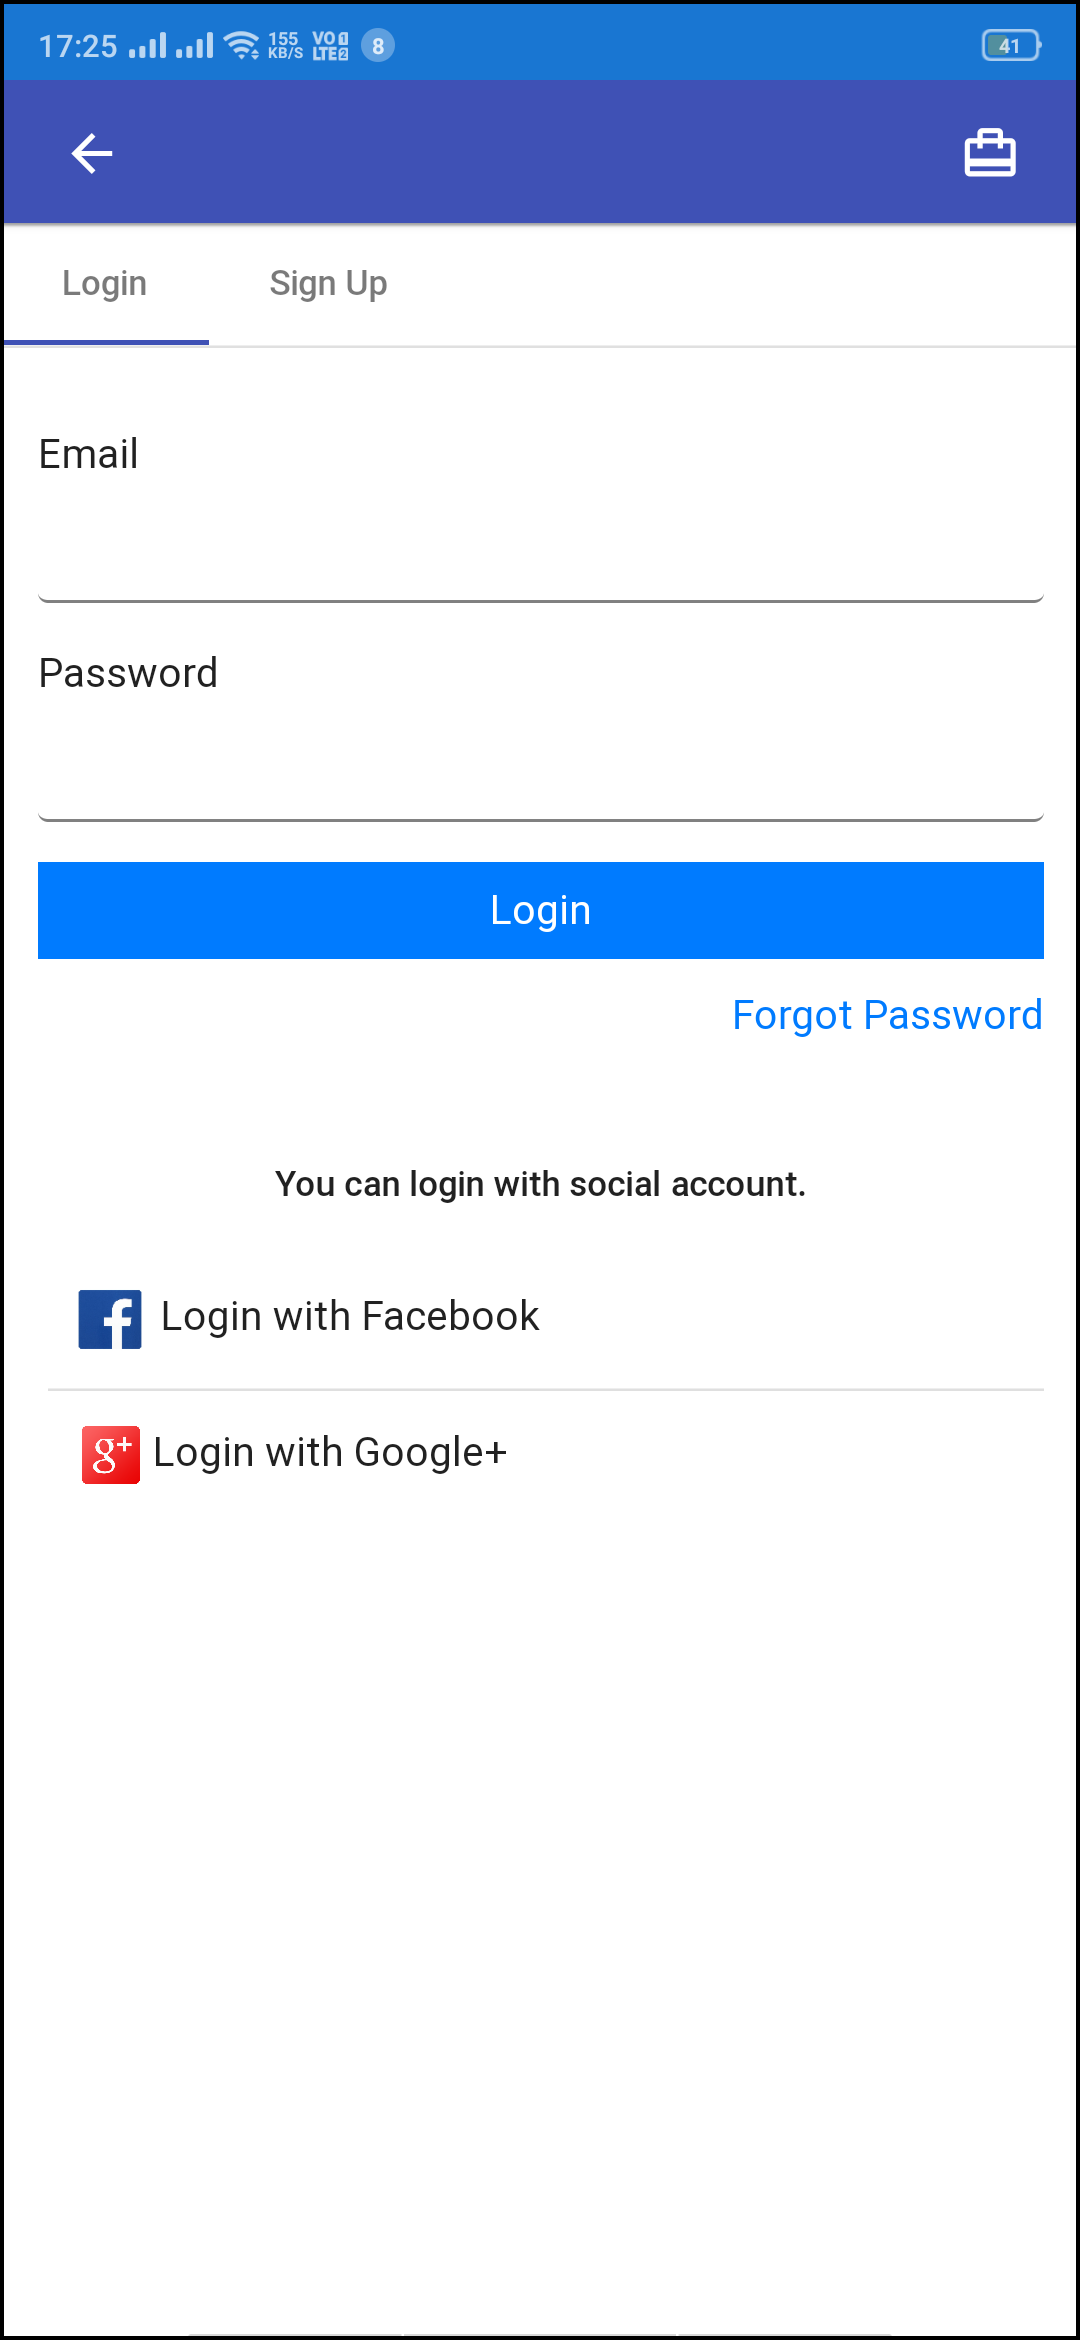
The WooCommerce PWA Mobile App offers one-tap social login options & make the sign-in/registration process more seamless. The WooCommerce Progressive Web App offers Google and Facebook login.
1. Login:
The app users can easily authenticate & login to PWA apps using their previous email login credentials.
2. Sign Up:
All the new app users can sign-up & create their account on the store from the WooCommerce PWA App. The sign-up form asks for only the necessary details to create an account.
3. Login with Facebook:
The users can log in to the PWA app using their Facebook Account Credentials.
4. Login with Google:
The users can log in to the PWA app using their Google Account Credentials.
3.6 Shopping Cart Screen:
The Shopping Cart screen of the WooCommerce PWA Mobile App will display all products added into the shopping cart. The app users can view Product name, quantity, total price & shipping cost. This screen has the following options: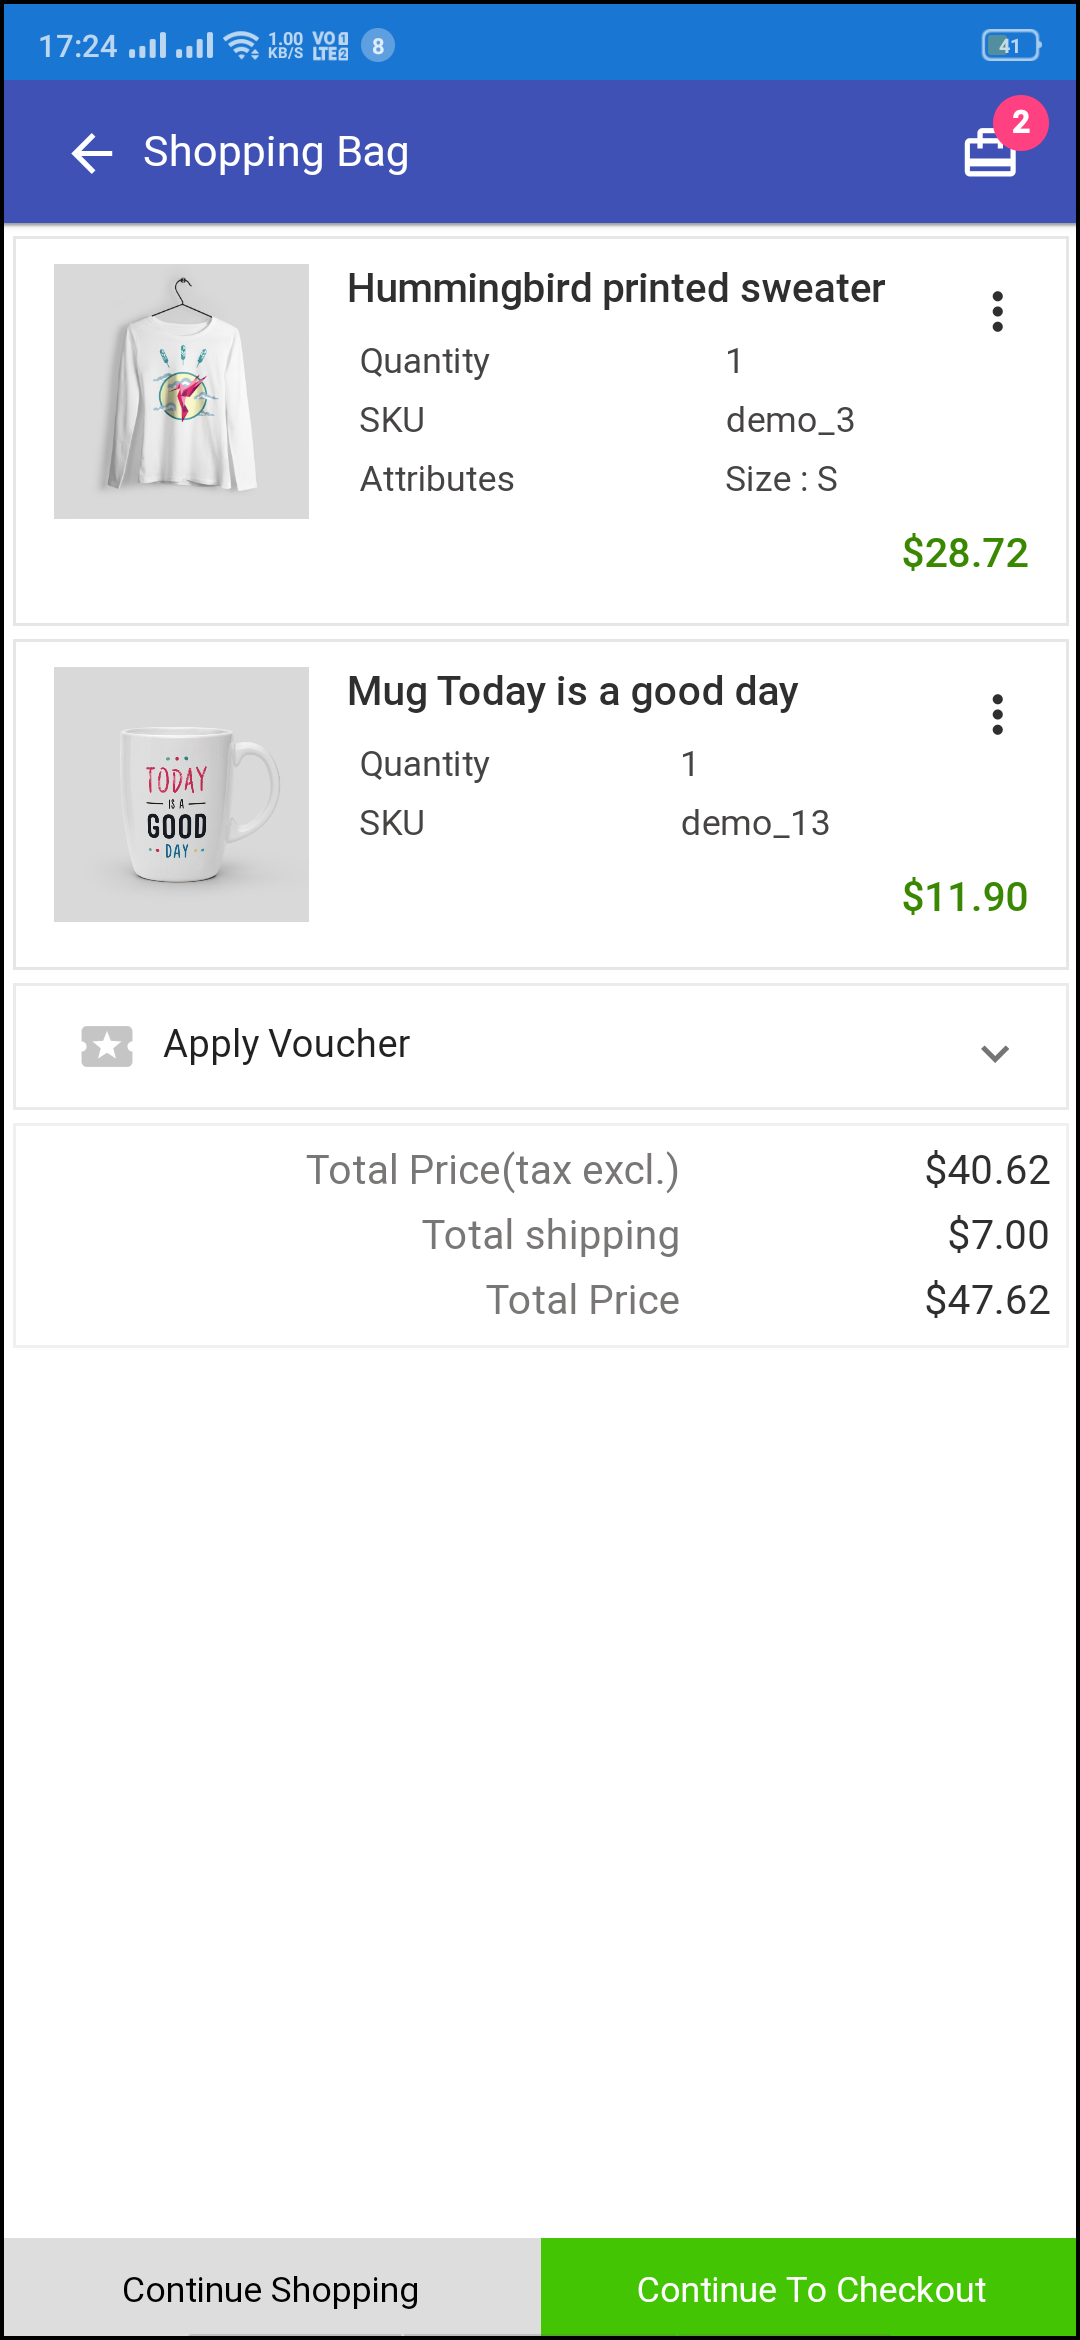
1. Apply Voucher:
This option allows users to use website coupons and grab discount offers.
2. Total Product Price:
The users get to view the complete cost of their shopping bag before proceeding further. It is automatically updated according to any update with product quantity or new addition.
3. Update Product Quantity:
The PWA app users can even update the product quantity with the “Update Quantity” option.
4. Remove Product:
The app users can simply remove the product from the cart by simply tapping the “Remove” option.
5. Continue Shopping:
The app users can leave the cart to browse more products on your app.
6. Continue To Checkout:
The PWA app users can proceed further to the checkout & payment screens just by tapping the “Continue To Checkout” option.
3.7 Checkout Screen
The Progressive Web App for WooCommerce has a simplified single-screen checkout with only relevant information. The app users can view complete checkout details like shipping details, billing details, order summary, order comment, payment summary.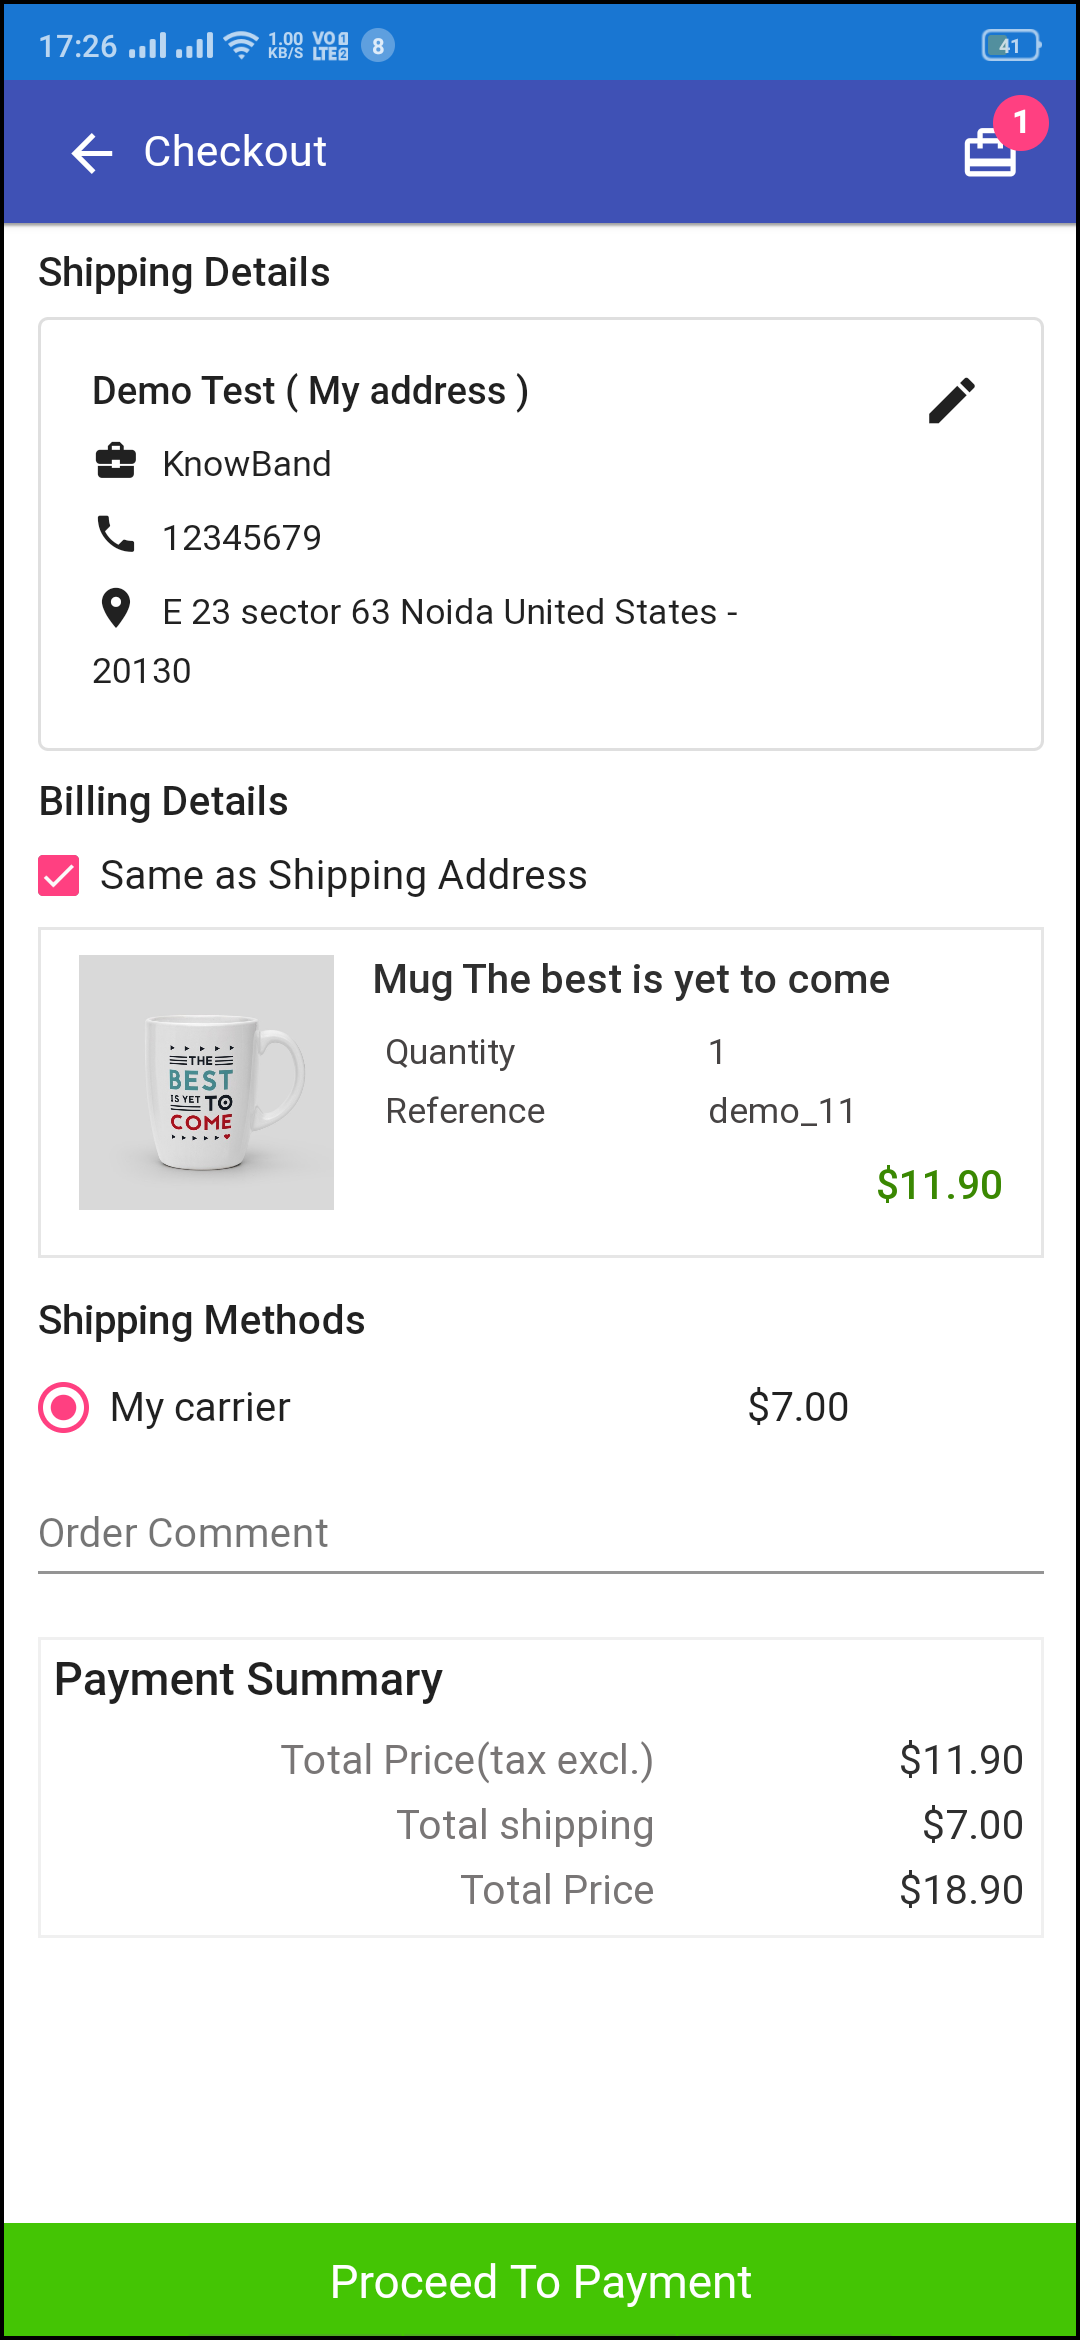
1. Shipping & Billing Details:
This screen provides details of the shipping & billing addresses saved by the user. The user can also edit/save the new shipping address if needed.
2. Order Summary:
The app users get to view product details before making payment.
3. Shipping Methods:
All available shipping methods are displayed here. Users can choose the one suiting their needs.
4. Order Comment:
Users can also add any comment related to their order which will be visible to store admin on the order web-page in the backend.
5. Payment Summary:
This section displays the complete breakdown payment details involved with the purchase.
6. Proceed To Payment:
The PWA app users will be re-directed to the Payment screen after tapping the “Proceed To Payment” button.
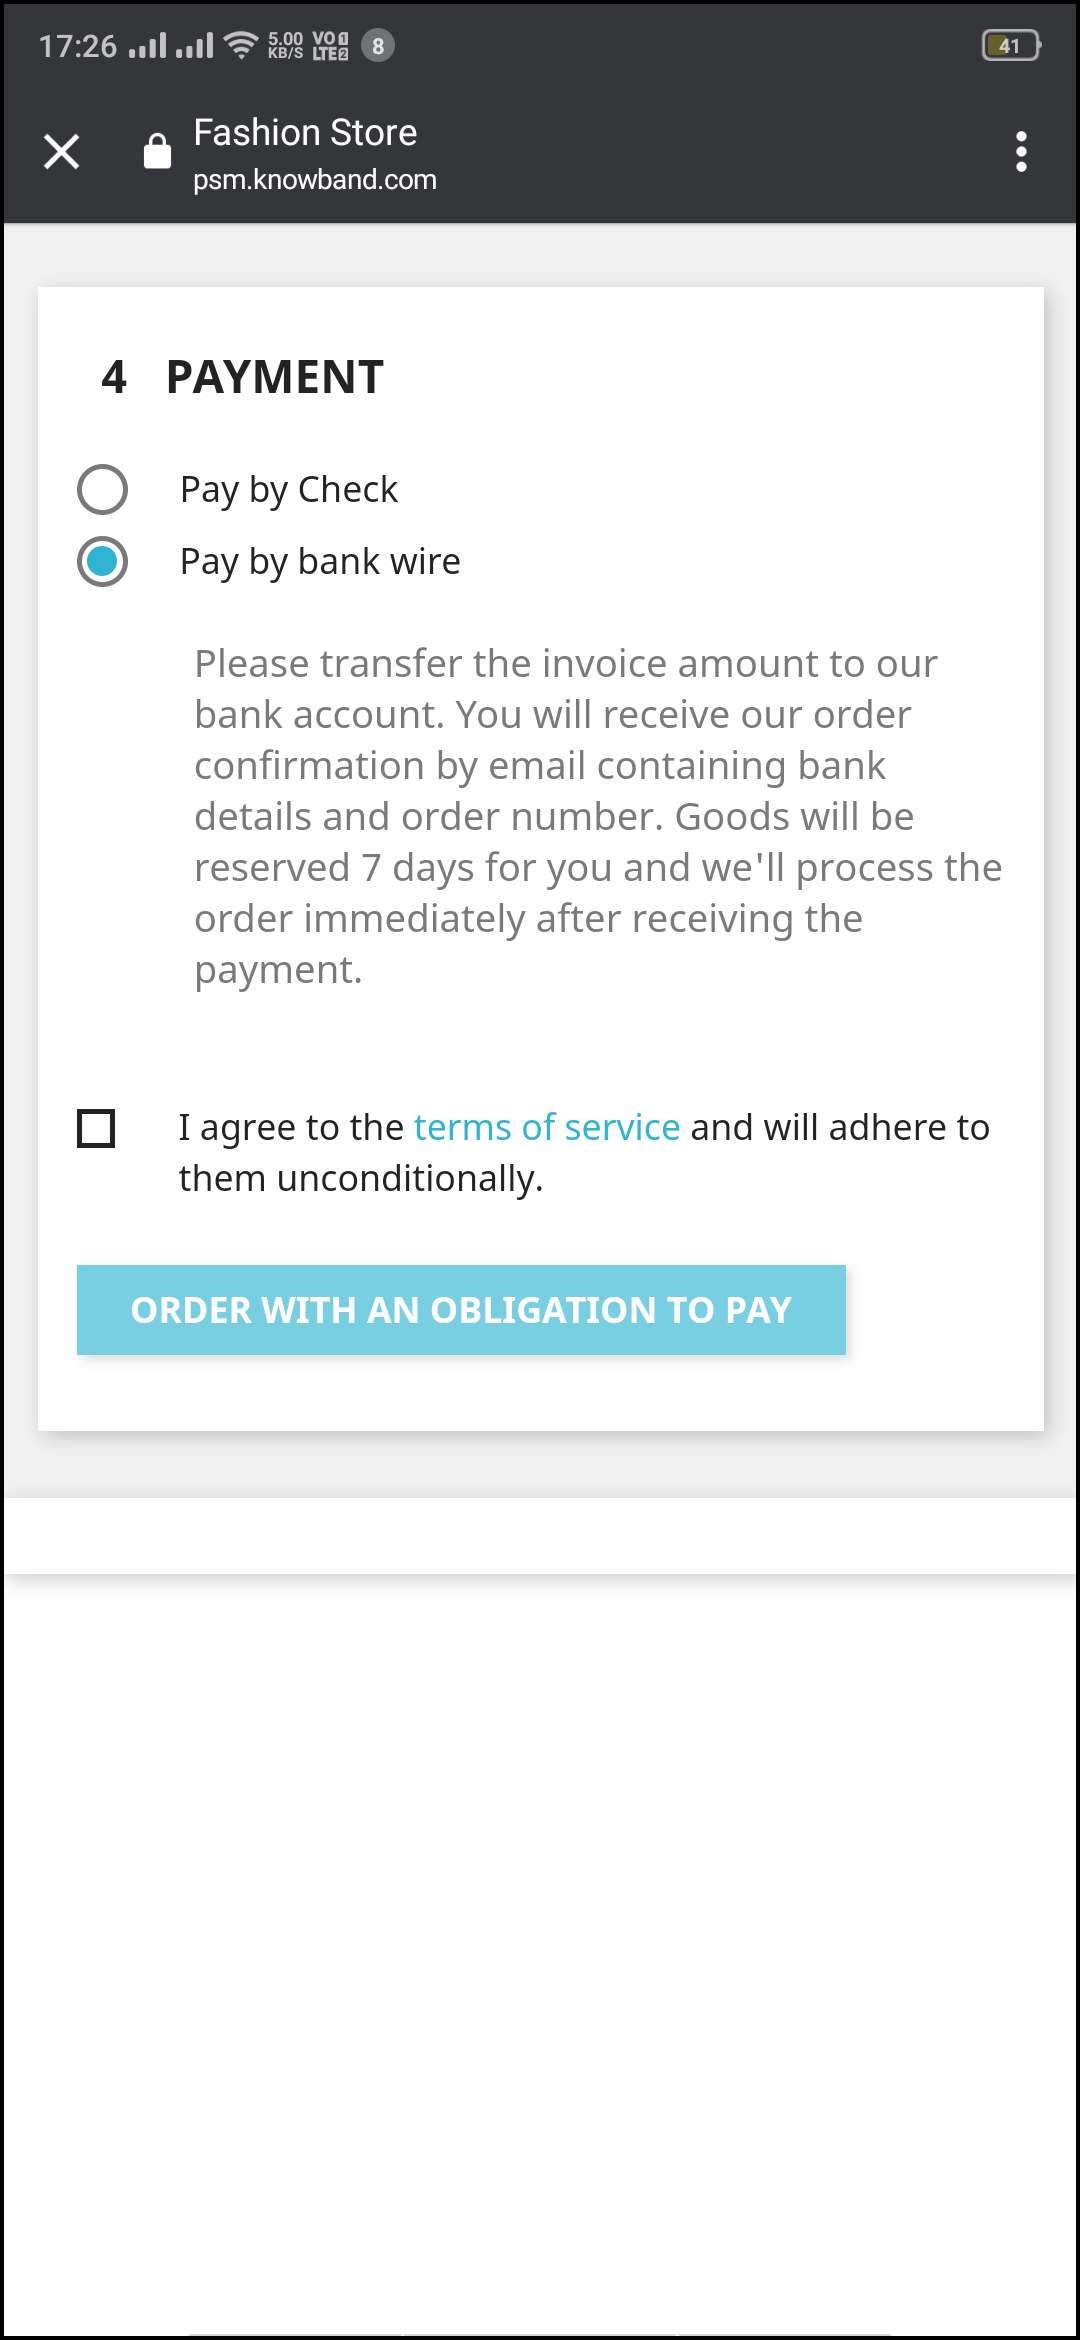
3.8 Payment Screen:
The payment screen of the WooCommerce PWA App has all web-view payments available on the store. Online shoppers can find similar payment experiences on both websites and apps.
3.9 My Account Screen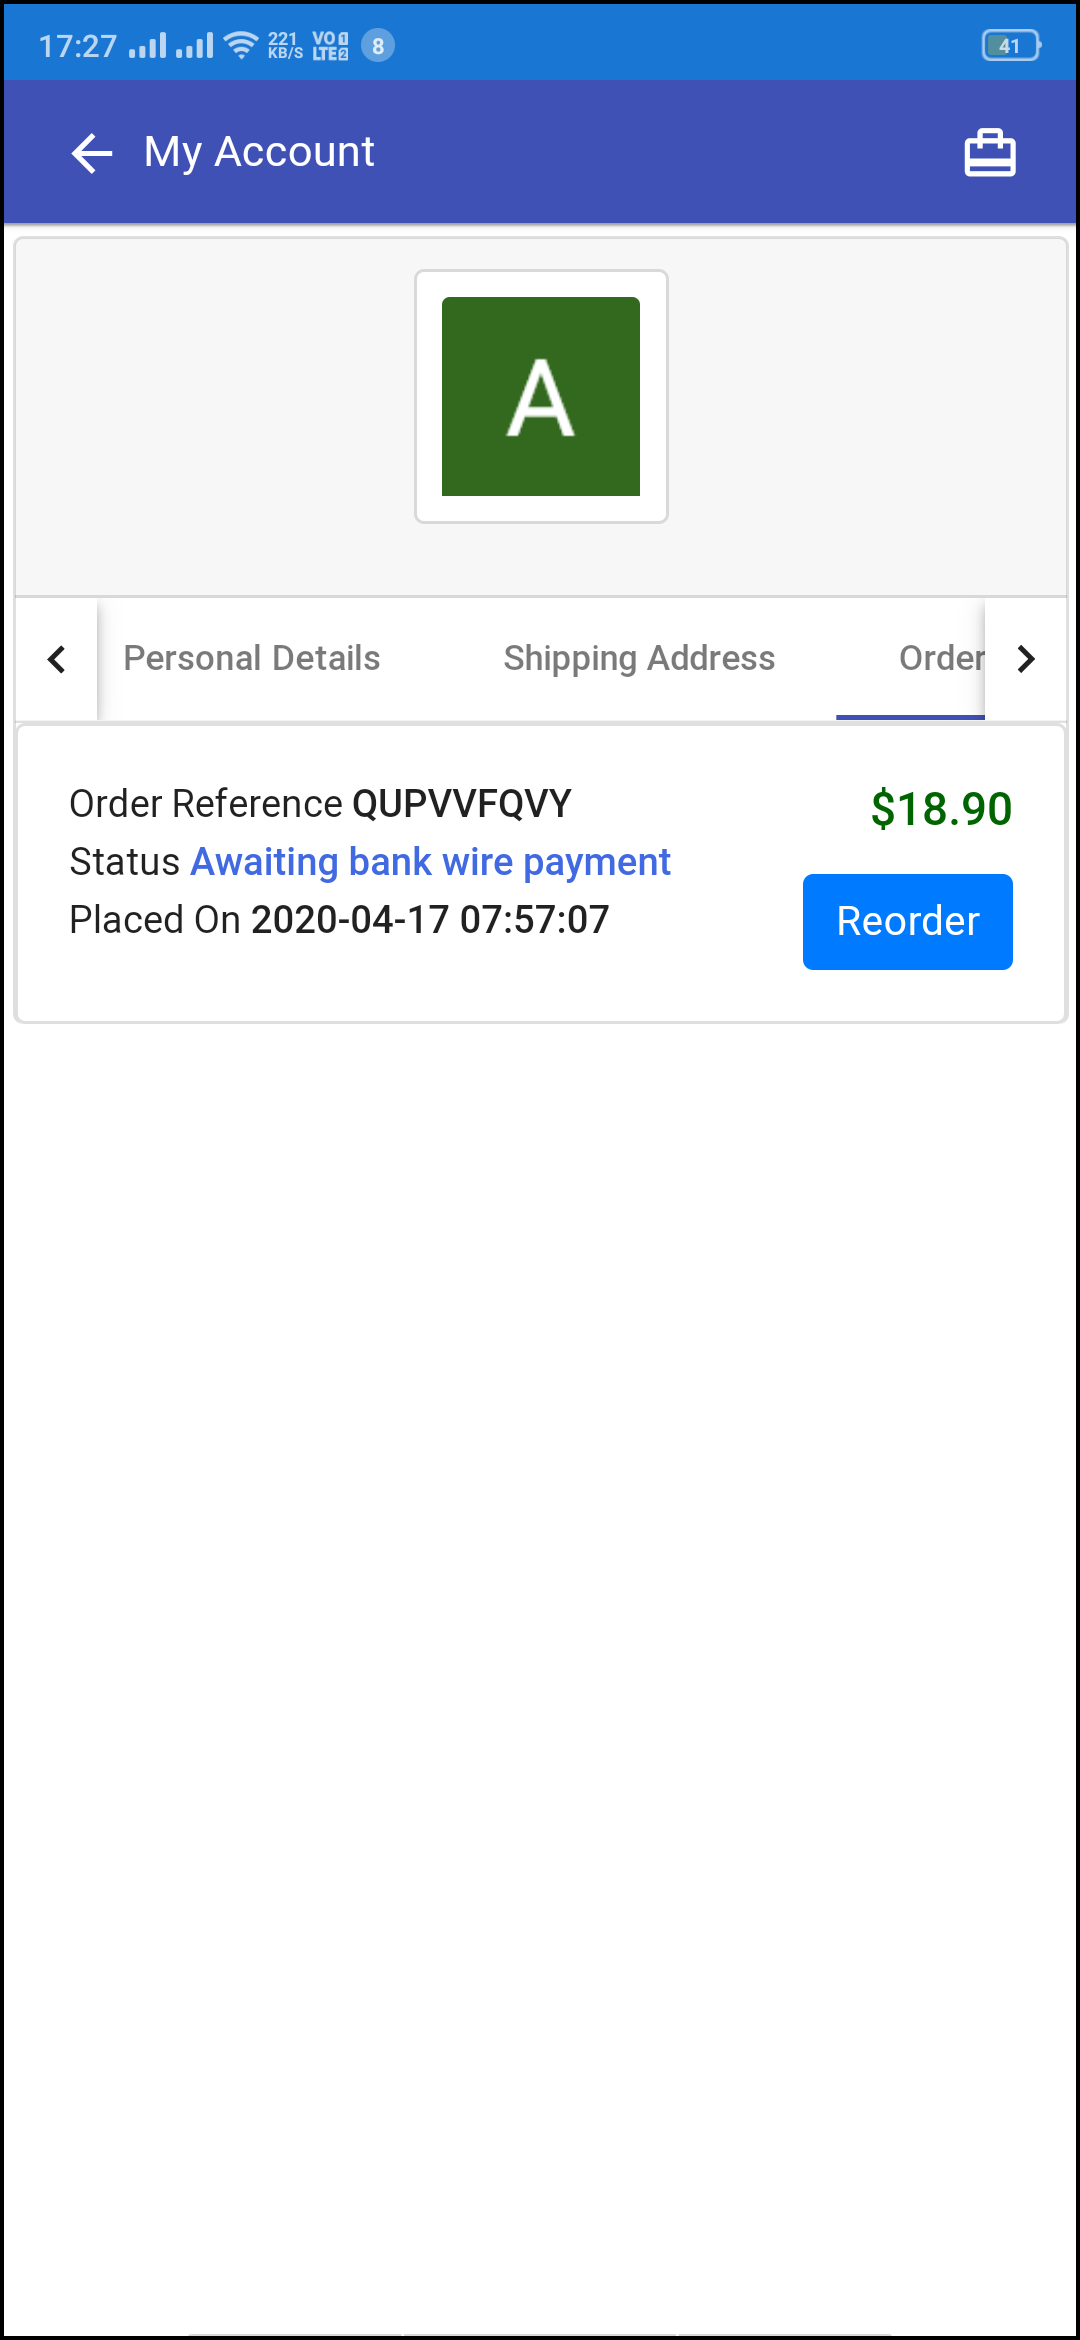
My account screen of the WooCommerce PWA Mobile App allows online shoppers to view their complete details saved on the Progressive Web App. This screen also displays a list of previous app orders as well.
1. Personal Details:
Users get to view & update their pre-saved personal details on PWA Mobile App.
2. Shipping Address(s):
The app users can see the complete list of pre-saved shipping addresses in the PWA app.
3. Order Details:
The app users can get to view the complete list of the previously placed orders from the PWA app and their details.
4. Re-order feature:
There is a direct re-order button on the My Account screen of the PWA app. All the previous products under this order will be added into the cart with just a single button.
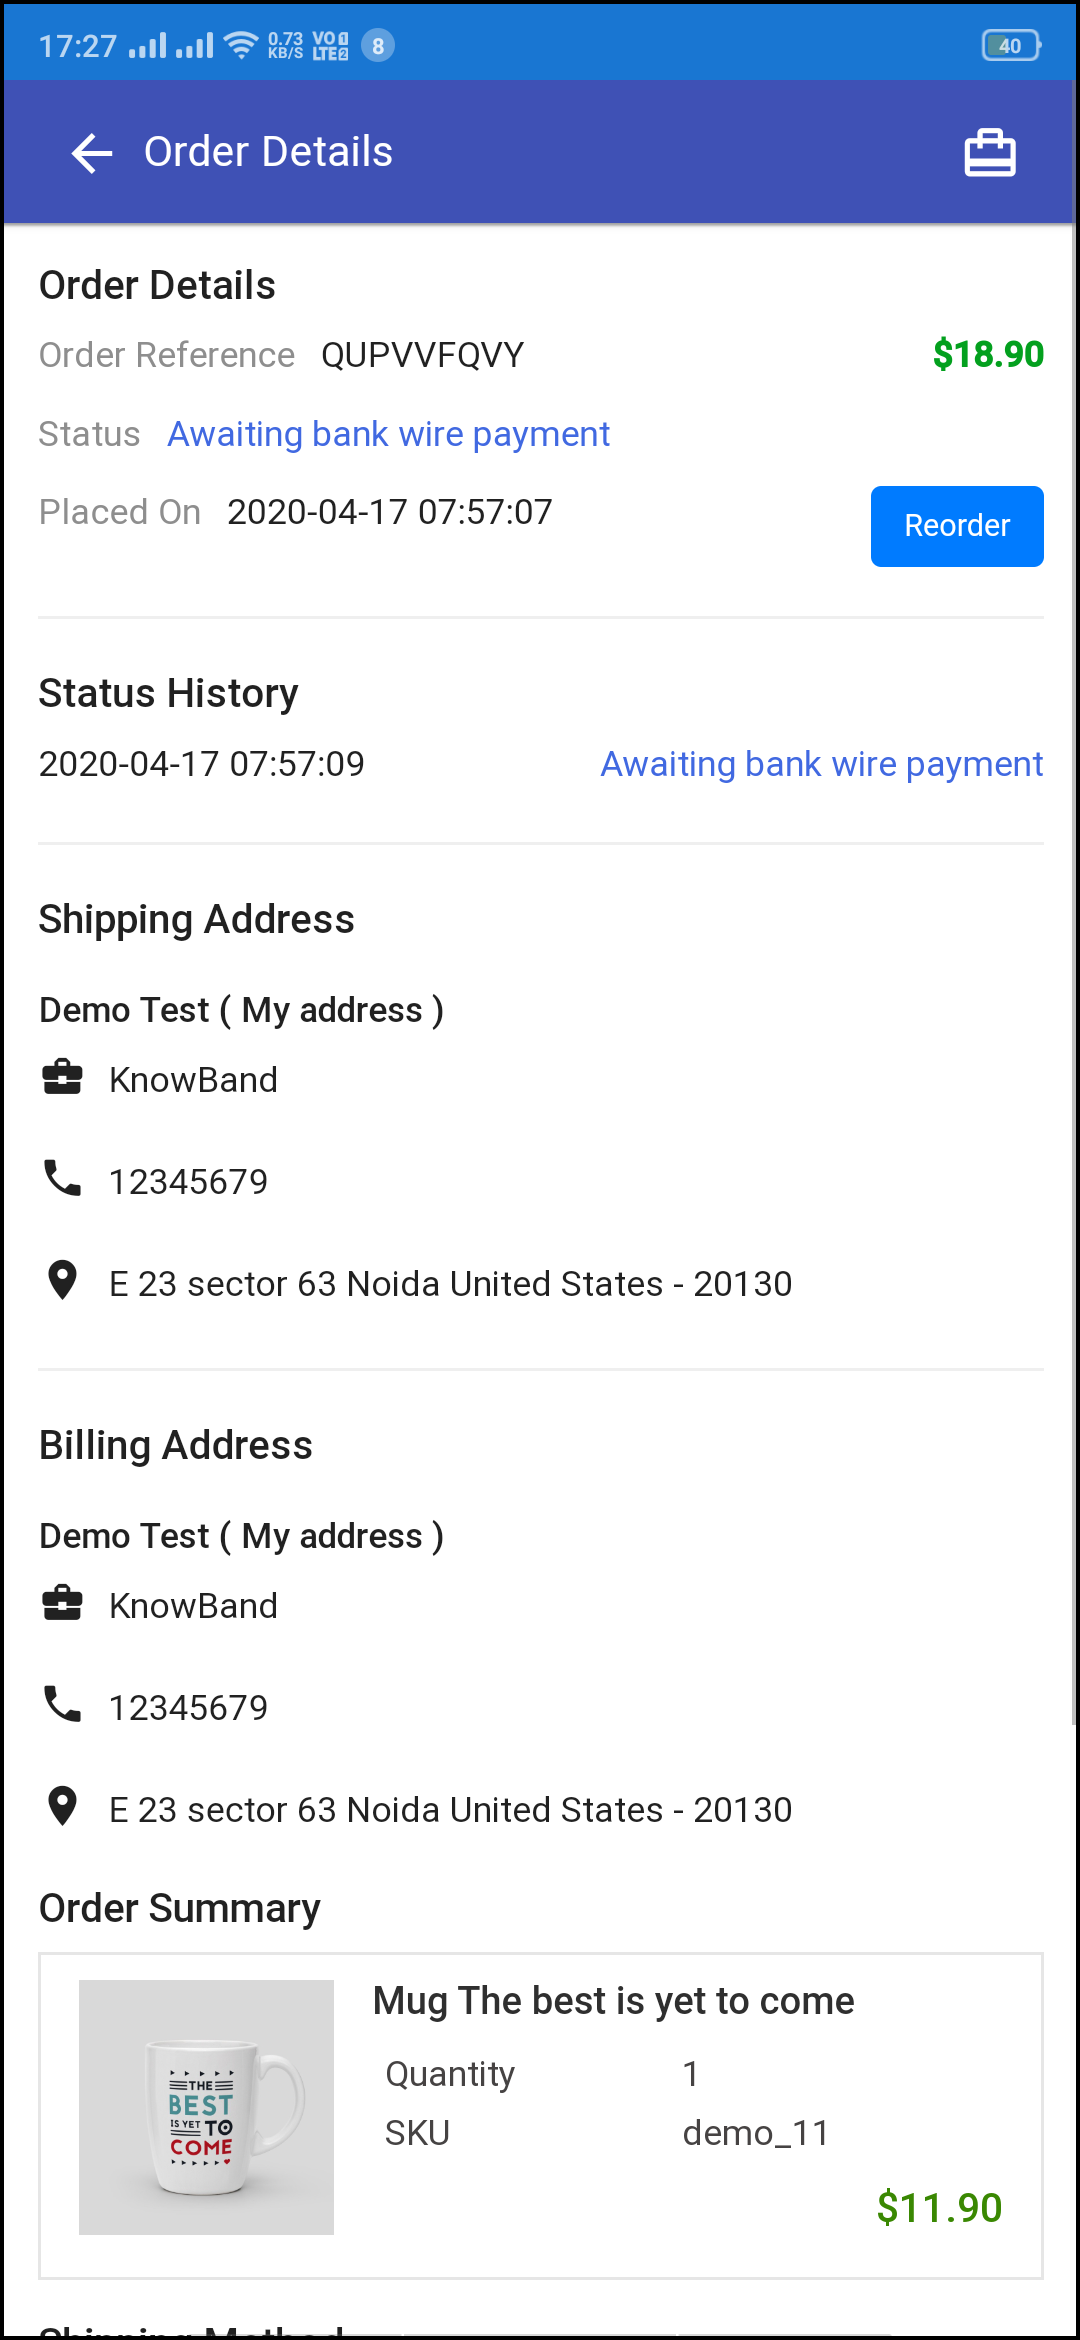
3.91 Order Detail Screen
The order details screen of the WooCommerce Progressive Web App provides complete details of specific orders from the PWA app. Users can easily view shipping address, product summary, shipping and payment method, and total cost summary, etc. It even offers the option to keep a track of status of order and delivery.