1.0 What is Google ReCaptcha?
Prestashop Google ReCaptcha Addon is an effective security solution that protects your website from spam entries while letting real people pass through with ease. The Prestashop addon can be used for login, registration, password recovery, popular contact forms, and other. Google ReCaptcha addon displays images to identify humans as part of their normal validation procedures. This Prestashop Google reCaptcha addon is highly customizable and offers flawless functioning. The e-merchant can easily customize this Prestashop Google reCaptcha addon from the back-end.
2.0 Introduction
The Prestashop Google reCaptcha addon has a functionality through which Prestashop website will be able to confirm that the user is not a robot. It’s easy for people and hard for bots.
The Prestashop addon provides a lot of features which are as follows:
- Admin can Enable/Disable the Prestashop Google reCaptcha addon without any hassle.
- Admin can display Prestashop human verification on the Customer Login Page.
- Prestashop Google reCaptcha addon allows the admin to display Google ReCaptcha on the Customer Registration Page.
- Admin can display Google ReCaptcha on the Customer Forget Password Page.
- Admin can display Google ReCaptcha on the Customer Contact Page.
- Admin can configure the number of attempts after which Google ReCaptcha will display.
- Admin can display Google ReCapcha on the Super Checkout Page.
- If a visitor opts for newsletter then admin can allow Google ReCaptcha verification for the confirmation of newsletter subscription.
- Prestashop Human Verification addon works for both v2 and v3 recaptcha systems.
- Admin gets an option to select the type of recaptcha for the different pages from the backend of Prestashop Google reCaptcha
- Advanced users can add Custom CSS (Cascading Style Sheet) and Custom JS (JavaScript) in the block for customization.
- Admin can configure the different Site Key and Secret Key for his/her different Prestashop domains.
- Admin can easily set the Site Key and the Secret Key on the official site of Google ReCaptcha for his domain by following the Steps to Configure.
- This Prestashop Google reCaptcha addon is compatible with SSL enabled stores.
3.0 Installation Manual
Follow the below-mentioned steps to install the Prestashop Google ReCaptcha addon by Knowband:
- Download the Prestashop addon package.
- Unzip the package in /modules directory of your Prestashop store via FTP manager (like Filezilla or WinSCP – download here: https://filezilla-project.org/). Folder structure for Google ReCaptcha addon inside /modules/googlerecaptcha directory is shown in the image below:

- You will be able to find the Prestashop Google ReCaptcha addon that is ready to be installed in the “Modules List” in your Prestashop store as shown below.

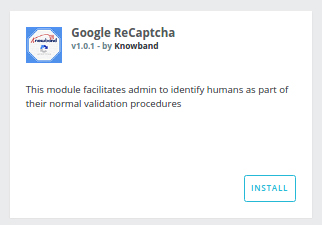
- Click on the “Install” link to install. Once the module is installed properly, the “Install” link will be converted to “Configure”.
4.0 Admin Interface of Prestashop Google reCaptcha addon
This User Manual will guide you through the Admin Module/Store Front settings and various features of this Prestashop Google ReCaptcha Addon.
The admin interface of Prestashop Google reCaptcha system consists of 4 tabs listed below:
- General Settings
- v2 ReCaptcha Settings
- v3 ReCaptcha Settings
- Look and Feel Settings
4.1 General Settings Tab
Following are the steps to configure the General Setting tab –
- Go to modules and services.
- Search Module ‘Google ReCaptcha.
- Click on the Configure button.
- Select ReCaptcha Setting Tab.

- Enable Plugin: By default, it will be OFF. This Prestashop human verification module will only work if this setting is ON.
- Enable GoogleReCaptcha for: By default, all the checkboxes would be selected. It is used to set the position of the Google ReCaptcha on a particular
- Recaptcha for Customer Login Page: When enabled, this setting will either show v2 or v3 ReCaptcha on customer login pages set by the admin.
- Recaptcha for Customer Registration Page: When enabled, this setting will either show v2 or v3 ReCaptcha on the customer registration page as set by the admin.
- Recaptcha for Supercheckout Page: When enabled, this setting will either show v2 or v3 ReCaptcha on the checkout page as set by the admin.
- Recaptcha for Contact us Page: When enabled, this setting will either show v2 or v3 ReCaptcha on the contact us page as set by the admin.
- Recaptcha for forgot password Page: When enabled, this setting will either show v2 or v3 ReCaptcha on the forgot password page as set by the admin.
- ReCaptcha for Newsletter: If enabled, this functionality will display the v2 or v3 ReCaptcha for newsletter subscription.
After you have set all the configuration options, click on Save button. By clicking this button, the Prestashop module will save setting into the database and return back with a success message.
4.1.1 How to activate module?
Follow these steps to activate the module –
- After installation of the module, go to the “Module and Services”.
- It would list all the modules of the store. Find “Google ReCaptcha” in modules list.
- Now, click on the “Configure” button given corresponding to the “Google ReCaptcha” module.
- It would redirect the admin to a “General Settings” tab.
- Go to “ReCaptcha Settings” tab and configure the “Site Key” and the “Secret Key” which you will get by following “Steps to Configure” below the text fields.
- After configuration “Site Key” and “Secret Key”, go to the General Settings tab and switch the “Enable/Disable” button to “Yes” and configure all other details as per your desire.
- Click the “Save” button.
4.2 v2 ReCaptcha Settings
This tab will contain all the necessary steps to setup Google ReCaptcha in the module.
Following are the steps to configure v2 ReCaptcha Setting tab –
- Go to modules and services.
- Search Module ‘Google ReCaptcha.
- Click on Configure button.
- Selectv2 ReCaptcha Setting Tab.
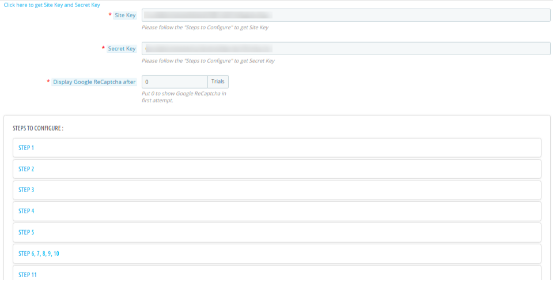
This Tab contains 3 fields, the first has link to set Google ReCaptcha and the next are steps to configure Site Key and Secret Key.
- Site Key: Admin will enter the Site Key to display the widget on the site. This field is mandatory to enable plugin.
- Secret Key: Admin will enter the Secret Key to authorize communication between the application and the reCAPTCHA server to verify the user’s response. This field is mandatory to enable the Prestashop Google reCaptcha plugin.
- DisplayGoogle ReCaptcha After: By default, it would contain 0. It would be used to display Google ReCaptcha after a certain number of attempts.
- Steps To Configure: This will contain all the steps to get Site Key and Secret Key for a particular domain name.
Click here to get Site Key and Secret Key: This link will redirect admin to the official website of Google ReCaptcha to get Site Key and Secret Key.
Following are the steps to visit Google ReCaptcha official site –
- Go to modules and services.
- Search Module ‘Google ReCaptcha.
- Click on Configure button.
- Select ReCaptcha Setting Tab.
- Click here to get Site Key and Secret Key.
4.2.1 How to get Site Key and Secret Key?
Follow these steps to get Site and Secret Key –
- Visit the URL: http://www.google.com/recaptcha/admin
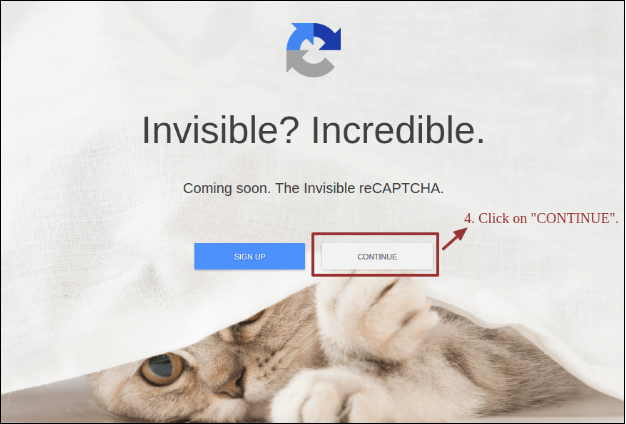
- Click on “SIGN UP” if you do not have a Gmail account.
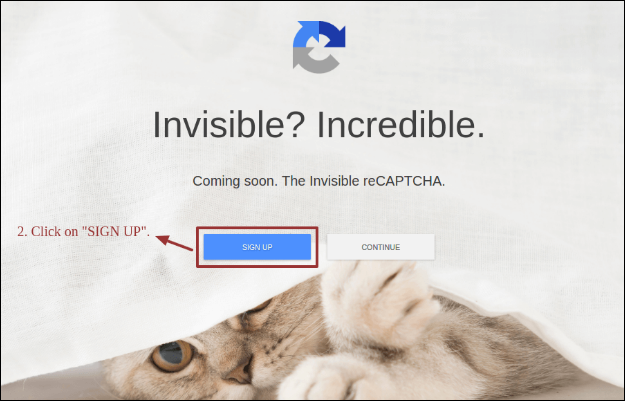
- Create/Login to your Gmail account.
- Click on “CONTINUE”.
- Click on “Get ReCaptcha”.

- Enter “Label” of your Domain.
- Enter “Domains” of your store.
- Click on “Register”.

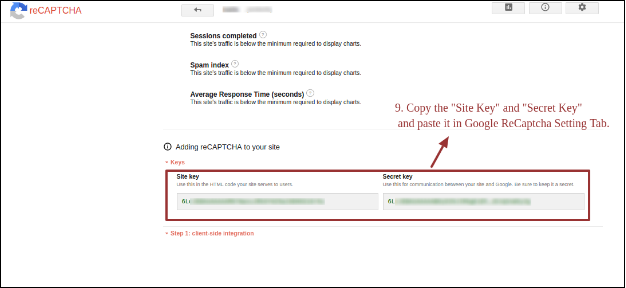
- Copy the “Site Key” and “Secret Key” and paste it into Google ReCaptcha Setting Tab.
4.3 v3 ReCaptcha Settings
This tab will contain all the necessary steps to setup Google ReCaptcha in the module.
Following are the steps to configure v3 ReCaptcha Setting tab –
- Go to modules and services.
- Search Module ‘Google ReCaptcha.
- Click on Configure button.
- Select v3ReCaptcha Setting Tab.

This tab contains 2 fields, the first has link to set Google ReCaptcha and the next are steps to configure Site Key and Secret Key.
- Site Key: Admin will enter the Site Key to display the widget on the site. This field is mandatory to enable plugin.
- Secret Key: Admin will enter the Secret Key to authorize communication between the application and the reCAPTCHA server to verify the user’s response. This field is mandatory to enable the Prestashop Google reCaptcha plugin.
- Steps To Configure: This will contain all the steps to get Site Key and Secret Key for a particular domain name. Follow the same procedure as for v2 Google reCaptcha.
4.4 Look & Feel Setting Tab
This tab will contain all the look and feel features of the Prestashop module.

Following are the steps to configure Look and Feel Setting tab-
- Go to modules and services.
- Search Module ‘Google ReCaptcha.
- Click on Configure button.
- Select Look and Feel Setting Tab.
Fields
- Theme: Admin will select the theme – Light or Dark for the Google ReCaptcha.
Following are the steps to configure Google ReCaptcha theme –
- Go to modules and Services.
- Search Module ‘Google ReCaptcha.
- Click on Configure button.
- Select Look and Feel Setting Tab.
- Select Theme.
- Custom CSS: Admin can use this option to add custom CSS if required.
Following are the steps to configure Custom CSS –
- Go to modules and Services.
- Search Module ‘Google ReCaptcha.
- Click on Configure button.
- Select Look and Feel Setting Tab.
- Enter Custom CSS.
Note: Enter CSS content excluding <style> — inner content– </style> Tags (only write inner content).
- Custom JS: Admin can use this option to add custom js if required (Only in version 1.6.x.x).
Following are the steps to configure Custom JS-
- Go to modules and Services.
- Search Module ‘Google ReCaptcha.
- Click on Configure button.
- Select Look and Feel Setting Tab.
- Enter Custom JS.
Note: Enter JS content excluding <script> –inner content– </script> Tags (only write inner content).
5.0 Front End Interface
If admin enables the plugin then Google ReCaptcha will be displayed for selected forms in the Front End as shown below.
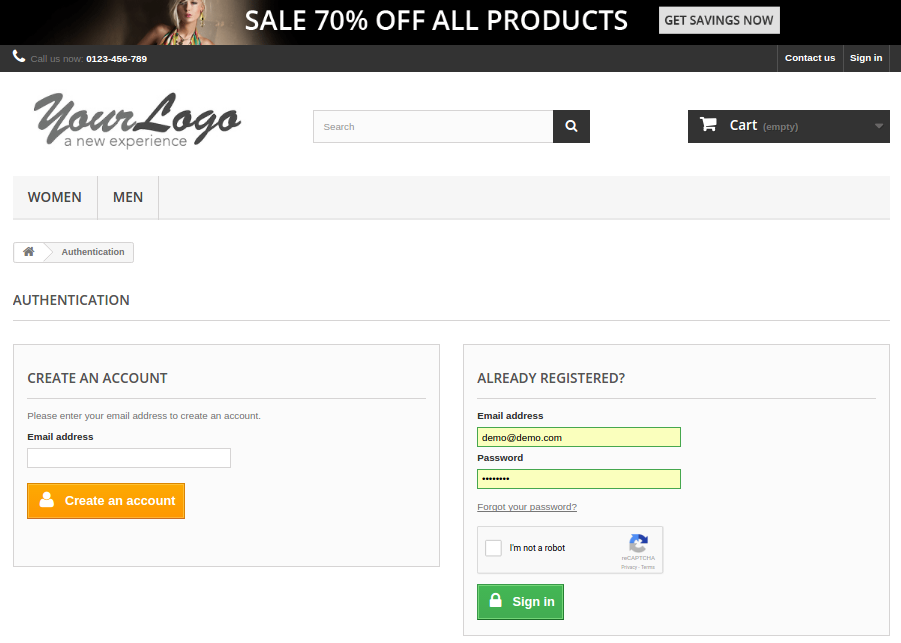
5.1 Customer Login Page
Following are the steps to visit Customer Login Page –
- Go to Front End Home Page.
- Click on the “Sign In” option.

5.2 Customer Registration Page
Version 1.6.x.x –
Following are the steps to visit Customer Registration Page in version 1.6.x.x –
- Go to Front End Home Page.
- Sign In.
- Click on the button “Create an Account”.

Version 1.7.0.x –
Following are the steps to visit Customer Registration Page in version 1.7.0.x –
- Go to Front End Home Page.
- Sign In Option.
- Click on the link “No Account? Create one here“.

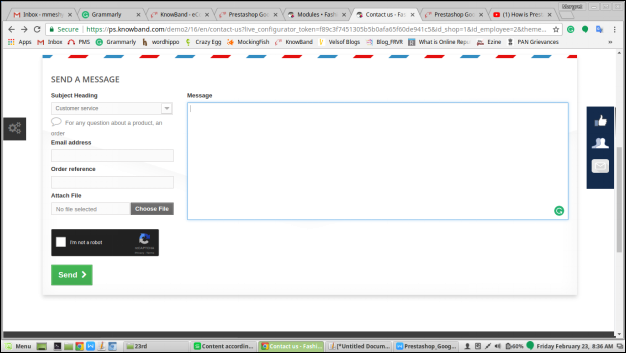
5.3 Customer Contact Page
Version 1.6.x.x –
Following are the steps to visit Customer Contact Page in version 1.6.x.x –
- Go to Front End Home Page.
- Click on “Contact Us” option.

Version 1.7.0.x –
Following are the steps to visit Customer Contact Page in version 1.7.0.x-
- Go to Front End Home Page.
- Click on “Contact Us” option.

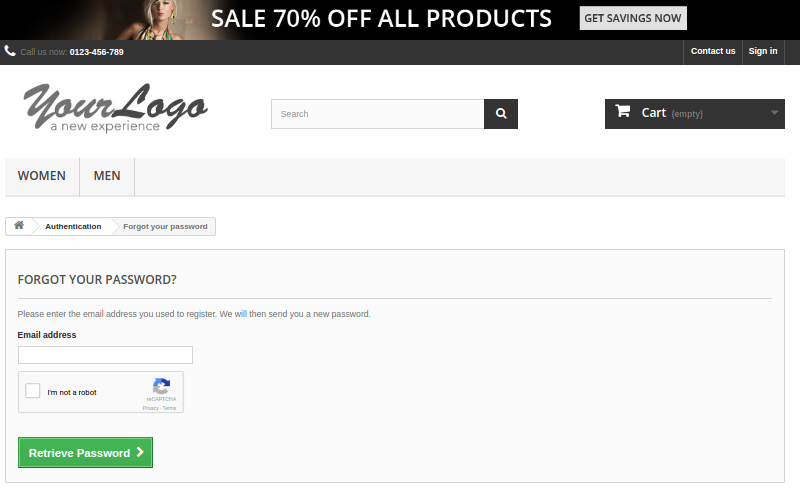
5.4 Customer Password Forgotten Page
Version 1.6.x.x –
Following are the steps to visit Customer Password Forgotten Page in version 1.6.x.x-
- Go to Front End Home Page.
- Sign In option.
- Click on “Forget Password?”.
Version 1.7.0.x –
The following are the steps to visit Customer Password Forgotten Page in version 1.7.0.x-
- Go to Front End Home Page.
- Sign In option.
- Click on “Forget Password?”.

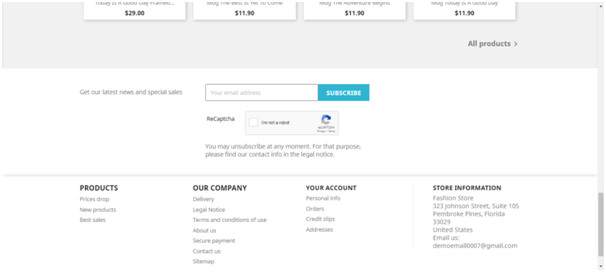
5.5 Newsletter
Version 1.6.x.x –
Following are the steps to visit Customer Password Forgotten Page in version 1.6.x.x-
- Go to Front End Home Page.
- Go to the newsletter subscription tab on the footer section
- Enter the email address and click on subscribe.
Version 1.7.0.x –
The following are the steps to visit Customer Password Forgotten Page in version 1.7.0.x-
- Go to Front End Home Page.
- Go to the newsletter subscription tab on the footer section
- Enter the email ID and click on the subscribe button.
Note: This Prestashop Google reCaptcha module by Knowband will work on the default form of the Prestashop store for the above-mentioned pages i.e. Customer Login Page, Customer Registration Page, Customer Contact Page, super checkout page, and Customer Password Forgotten Page and for Newsletter subscription. This module will not be applicable for the Guest Checkout Page.
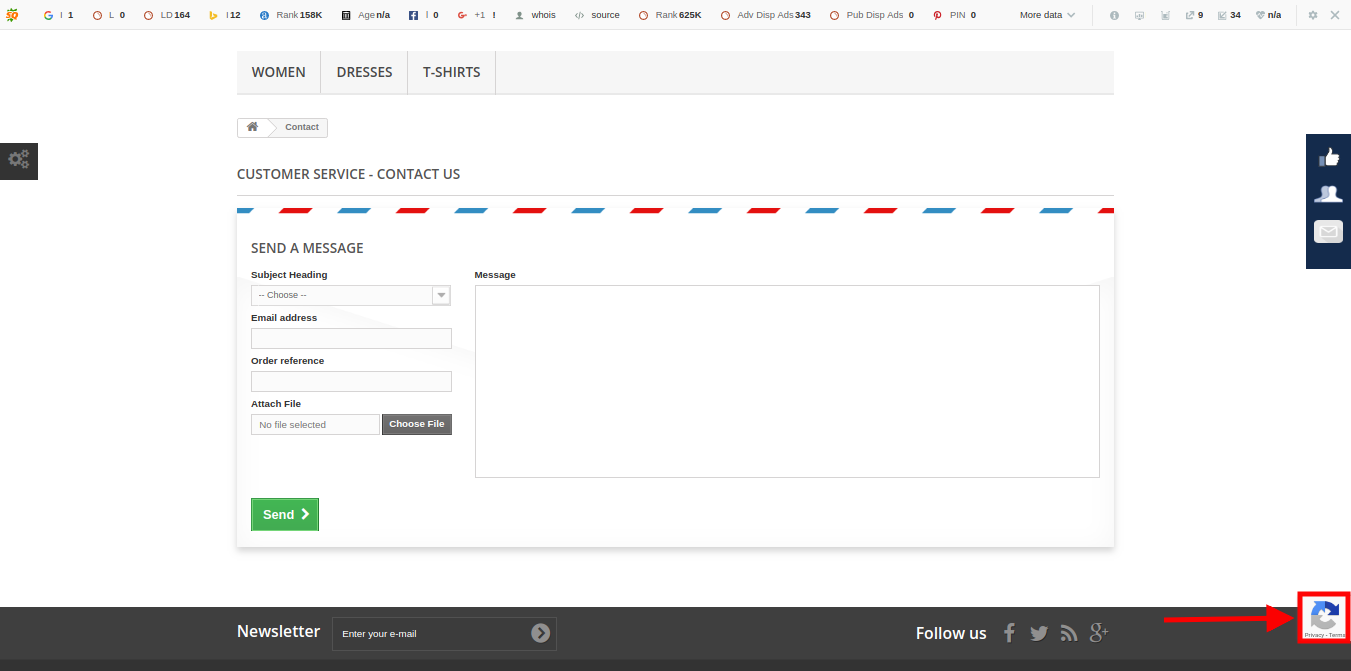
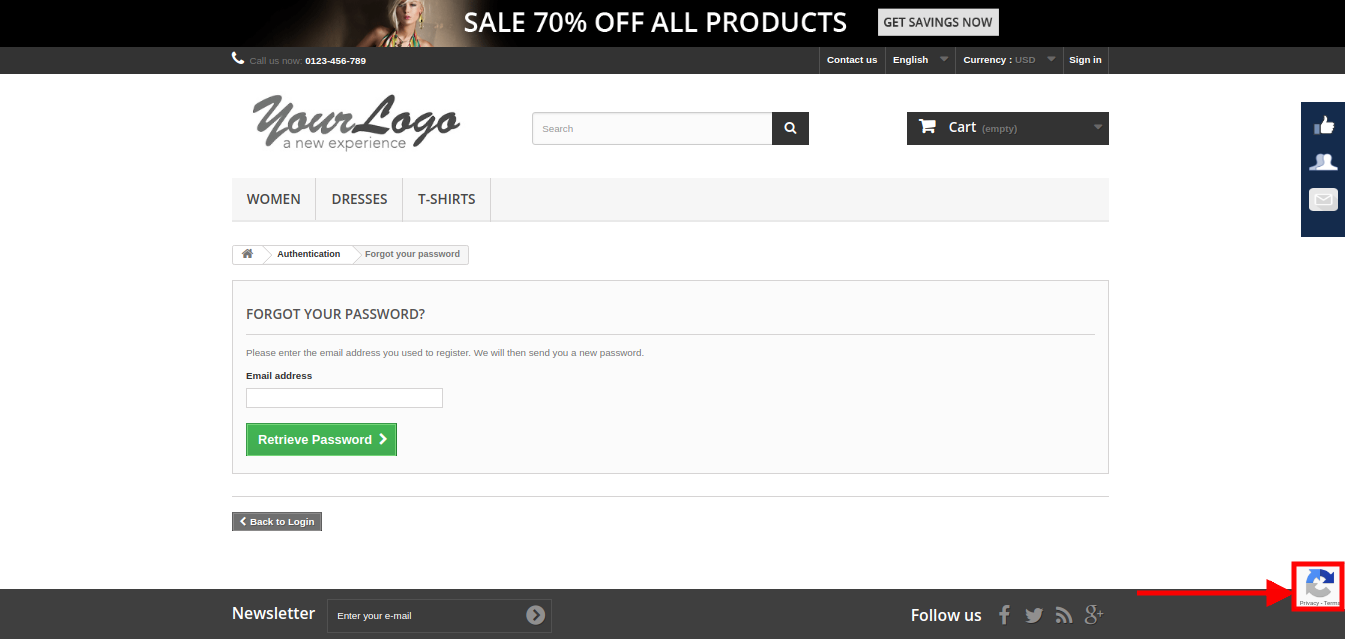
5.6 v3 Google ReCaptcha
- On Contact Us Page
2. On Forgot Password Page
Liked This? You’ll Like These Too
For more Prestashop addons please visit Knowband.
Prestashop Google reCaptcha addon Module Link.
Knowband human verification plugin Admin Demo Link.
Prestashop Google reCaptcha module Front Demo.
Prestashop human verification addon Youtube video link.
Prestashop Google reCaptcha module Addon Store Link.
Please contact us at support@knowband.com for any query or custom change request as per your business requirement.
