

OpenCart Google Tag Manager (gtag, GA4, GTM Events) Extension – User Manual
The Knowband's OpenCart GoogleTag Manager enhance tracking accuracy, improve marketing insights, events and streamline GA4 integration.

The Knowband OpenCart Google Tag Manager Extension is a powerful plugin designed to simplify the integration of Google Tag Manager (GTM) with your OpenCart store. With its intuitive interface, the Opencart Google Tag Manager Plugin enables store owners to add and manage various Google tags without requiring technical expertise. It allows you to monitor essential events such as product views, category, add-to-cart actions, remove-from-cart events, check-out events, payment events, shipping events, and order confirmations, giving you valuable insights into customer interactions.
Additionally, the OpenCart Google Tag Manager Plugin seamlessly captures UTM parameters, helping store owners to analyze the impact of their marketing campaigns. By leveraging the OpenCart Google Marketing Integration Plugin, e-merchants can identify which campaigns drive the most traffic and conversions, enabling smarter ad spend allocation and improved return on investment (ROI).
The Knowband’s OpenCart Google Tag Manager is Ideal for businesses looking to enhance tracking data or analytics about the stores and events, boost conversion rates, and improve the shopping experience. The Knowband OpenCart Google Tag Manager Extension supports Google Analytics, GA4, and other Google marketing tools, making data-driven decision-making easier and more efficient.
1.0 Key Features Offered by OpenCart Google Tag Manager Extension:
Seamless Google Tag Manager Integration: Easily connect Google Analytics, Google Ads, GA4, and other essential tracking tools to the OpenCart store without any coding skills required.
Live Event Tracking for Better Insights: The store owners can monitor key user actions in real time, such as Add to Cart, Product Views, Checkout events, applied coupons, as well as the payment& shipping methods, to gain instant insights into customer behavior.
Track Campaign Performance with UTM Parameters: Automatically capture UTM parameters to measure the success of your marketing campaigns and determine which channels drive the most traffic and conversions.
Advanced eCommerce Tracking for Data-Driven Decisions: Get in-depth analytics on product views, cart additions, and completed purchases to optimize your store’s sales performance.
Quick & Easy Setup – No Coding Required: With a user-friendly interface, the OpenCart GTM Extension makes tag management simple and stress-free, even for non-technical users.
Intuitive Admin Dashboard for Full Control: Manage and monitor all your tracking tags and events directly from your OpenCart admin panel with a clean, easy-to-use dashboard.
Multi-Language Support for Global Stores: The OpenCart GTM Extension supports multiple languages, allowing you to use it seamlessly in different regions and enhance the shopping experience for international customers.
2.0 Google Consoles IDs to Enable Functionality Knowband Opencart Google Tag Manager Plugin
2.1 Steps to Get the Google Tag Manager ID
Step 1: Create the Google Tag Manager account.

Step 2: Create a new container or choose an existing container.
Step 3: The Container ID will look in this format GTM-XXXXXX and can be easily seen in the top-right corner of the interface of Google Tag Manager

Step 4: Copy the Container ID and add it to the GTM container ID field in the configuration field.

2.2 Follow these steps to get the Google Measurement ID
Step 1: Visit the Google Analytics account.
Step 2: Select the property for which you want to get the Measurement ID.
Step 3: Navigate to Admin ->Data Streams and choose your web data stream.
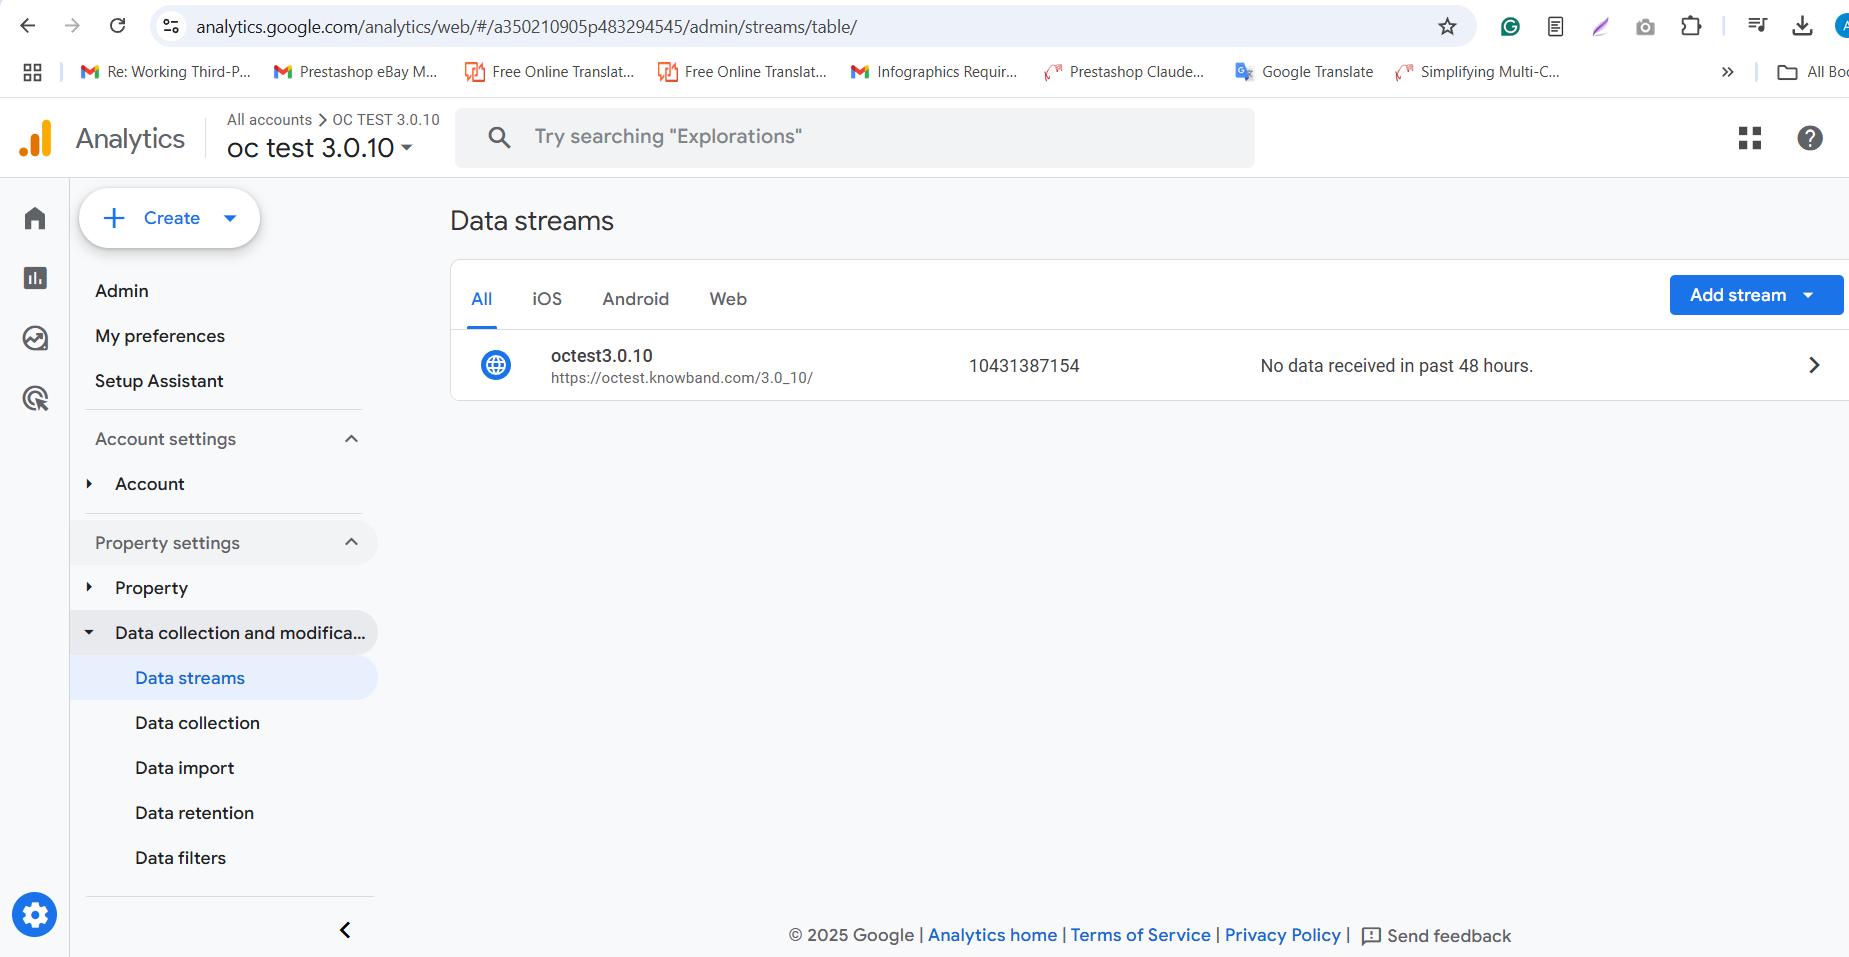
Step 4: The Measurement ID will be in this format- G-XXXXXXXXXX.
Step 5: Copy the Measurement ID and add it to the Google Measurement ID field in the module’s configuration.

2.3 How to Configure Events in Google Tag Manager?
Step 1: Download GTM Events from the module configurations. You can find the direct download link under Configurations > Instructions tab.

Step 2: Log in to your Google Tag Manager account.
Step 3: In Google Tag Manager, go to Admin > Import Container.

Step 4: Select the downloaded GTM Event file from your system.
Step 5: Choose the workspace where you want to import the events and select the “Merge” or “Overwrite” options as required.
Step 6: Click Confirm to complete the import process.
Step 7: Save and publish your container to activate the events in your Google Tag Manager.

3.0 Steps to Set Up OpenCart Google Tag Manager in 3 Simple Steps
Once you’re ready to integrate Knowband’s Opencart Google Tag Manager with your OpenCart store, follow these three simple steps to get started with the OpenCart Google Tag Manager Extension:
Purchase the OpenCart Google Tag Manager Extension from the Knowband store. You’ll get the following file: a Zipped File containing the source code of the module.
Follow the steps mentioned below to install the OpenCart Google Tag Manager plugin in your store:
Step 1: Purchase the Extension, and then you will receive a ZIP file containing the module’s source code.
Step 1: Extract and Upload Files
- Unzip the downloaded file – this will contain the kbgtag. OCMod file and necessary folders.
- Go to the upload folder and locate the admin and catalog files.
- Copy these files into the root directory of your OpenCart store

Step 2: Install and Activate the Module
Go to Extensions > Installer in your OpenCart admin panel.
- Upload the kbgtag.ocmod file in the installer.
- Go to Extensions > Modifications and click Refresh to apply the changes.

4.0. Admin Panel Overview:
The Google Tag Manager for OpenCart offers an easy-to-use admin dashboard for OpenCart store owners. The store admin can easily set up and manage all tags directly from the Opencart admin panel.

Enable or Disable Extension: The store admin can easily turn the module on or off whenever needed.
GTM Container ID: Enter the GTM Container ID in the box. The admin can find this ID by following the steps in section 1.1.
Google Analytics ID: Enter your Google Analytics Measurement ID here to connect Google Analytics with GTM for tracking.
Track Page Views: You can turn on or off the “Page View” tag to track when customers visit different pages.
Category Views: Control the “View Category” tag to track when customers view product categories on your site.
Product Details Page: Turn on the “View Product Details” tag to track when a customer looks at a specific product page.
Cart Removal: Enable or disable the tag that tracks when items are removed from the shopping cart.
Add to Cart: Turn the “Add to Cart” tag on or off to track when items are added to the cart.
Checkout Start: Turn on the tag to track when a customer begins the checkout process.
Checkout Page: Enable or disable the tag that tracks activity on the checkout page.
Address Selection: Turn on the tag to track when customers add or select their shipping address during checkout.
Shipping Method Choice: Enable the tag to track when customers choose their shipping method during checkout.
Order Confirmation: Control the “Order Confirmation” tag to track when a customer completes an order.
Discount Code Use: Turn on or off the “Apply Discount Code” tag to track when customers use a discount code.
Discount Code Removal: Enable or disable the tag that tracks when customers remove a discount code.
Cart Views: Use the “View Cart” tag to track when customers look at their shopping cart.
Customer Login: Enable or disable the tag that tracks when a customer logs into their account.
Customer Registration: Turn on or off the tag to track when customers create an account on your site.
Add to Wishlist: Enable the “Add to Wishlist” tag to track when a customer adds an item to their wishlist.
Track Remove from Wishlist: Turn on or off the tag that tracks when a customer removes an item from their wishlist.
Search Product Tracking: Manage the tags for products that customers search for on your store.
Capture UTM Parameters: The store admin can enable or disable the capture of UTM parameters using this toggle button.
5.0 Steps to Preview Events in Google Tag Manager Plugin
Steps to Preview an Event in OpenCart Google Tag Manager Extension
Step 1: Log in to your Google Tag Manager account.
Step 2: Select the container associated with your OpenCart store.
Step 3: Click on the Preview button in the top-right corner.
Step 4: Enter your OpenCart store URL in the Tag Assistant popup and click Connect.

Step 5: Perform the action you want to track (e.g., adding a product to the cart or completing checkout).
Step 6: Go back to the Tag Assistant window to check if the event is firing correctly.
Step 7: If the event appears in the Tag Assistant, it is working correctly. Otherwise, troubleshoot using the event details shown.

6.0 Configuration Instructions:
The OpenCart no-code Google Tag Manager integration offers simple instructions that require no technical expertise for module setup. The store admin can easily visit the Google Tag Manager and Google Analytics Consoles and follow the easy steps to obtain the necessary credentials.
These instructions will help the store admin with extension configuration. However, if you face any issues during the setup or with the extension, you can reach out to us by emailing [email protected] or by raising a ticket at knowband.com/helpdesk.