What to Choose for App Development: Firebase vs Supabase

When it comes to app development, at this fast pace, one factor that cannot be bypassed is to choose the right services for your backend. Now the world has two best options: Firebase, backed by Google; and Supabase, which is billed as an open-source alternative to Firebase. This blog goes through some of the features, advantages, and use cases of both platforms to make the right choice for developers.

Firebase: Features and Benefits

Firebase is one of the well-renowned players in the market. It has a very comprehensive suite of tools that caters to diverse dimensions when it comes to app development. Here are some key features:

Realtime Database and Firestore:

Firebase provides two options for cloud-hosted databases. These options allow for the storage and synchronization of user information in real-time.

Authentication: 

Support for authentication with passwords, phone numbers, and popular federated identity providers such as Google, Facebook, Twitter, and more.

Cloud Functions: 

Developers can let backend code run in response to events triggered by Firebase features and HTTPS requests without managing servers.

Analytics: 

Firebase integrates with Google Analytics, a free app measurement solution, to provide you with some insights on app usage and user engagement.

Firebase is great for developers who need solid, scalable solutions with good documentation and community support. It works perfectly for those scenarios where rapid development and deployment are needed, all thanks to the integrated environment.

Recommended Read: How to save data to Firebase in Android?

Supabase: Features and Benefits

Supabase bills itself as an open-source alternative to Firebase, duplicating most of its functionality and adding the following features:

Realtime Subscriptions: 

In the same way, Firebase offers real-time functionalities, but Supabase takes it a step further by integrating this into any PostgreSQL database, providing more flexibility.

RESTful and Postgres APIs: 

Automatically generate the RESTful APIs from your Postgres database schemas, which makes back-end development a piece of cake.

Row-level Security: 

Supabase directly leverages powerful row-level security capabilities by PostgreSQL, which enables fine-grained access control.

Open Standards-Based: 

Supabase has been built on top of open technologies, meaning developers interested in being vendor-agnostic and maintaining control of their stack may find it much more appealing to work with.

Supabase is perfect for developers who care about open-source solutions and who need all the PostgreSQL powers with traditional strengths but modern, real-time abilities.

Firebase vs. Supabase

When choosing between Firebase and Supabase, consider the following:

  • Ease of use: Firebase perhaps has a slight edge because of its comprehensive documentation and mature ecosystem. Besides, the fact that it integrates with other Google services can also be a determining factor for many developers. 
  • Control and Flexibility: The development of Supabase over the PostgreSQL engine adds a layer of freedom for users to do advanced database operations, which is critical for users with queries of the complexity above. 
  • Cost-effectiveness: While Firebase is free at the bottom line, its pricing can become pretty concerning once the application scales up. Supabase, on the other hand, being open-source, is generally cost-effective and suitable for a project of almost any magnitude. 

Conclusion: 

E-human Both Firebase and Supabase are wonderful. The project can always be adjusted, depending on the complexity of data operations and how much your team is already used to working with PostgreSQL or other NoSQL databases. 

In the case of an easy, prepacked, and quick setup, Firebase is your best bet, but if your projects are those that will find robustness in PostgreSQL and a more flexible, open-source setup, then Supabase is your pick. Both are living, so their updates and community feedback may give you some extra arguments on your side. 

Choose the tool that you think aligns best with your philosophy of development and with the technical specifications of your project.

In case you have queries/suggestions, you can reach out to our technical support portal at our email address support@knowband.com. or you can check our bestseller module Prestashop Mobile App and Prestashop One Page Checkout.

Also, take a look at our latest video here:


How to fetch data from Firebase in Swift Language (iOS)?

Objectives of the blog

After reading this blog we will be able to understand the process to fetch data from Firebase. This process includes installation of Firebase SDK and implementation of code to fetch data from Firebase.

Pre-requisites

We need to write swift code to fetch the data from Firebase. For this first we will have to create the Firebase project. Follow the steps given below to create the Firebase project –

1. Go to https://console.firebase.google.com

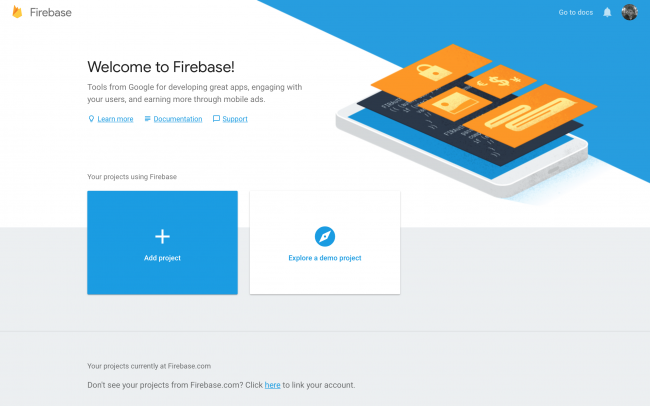
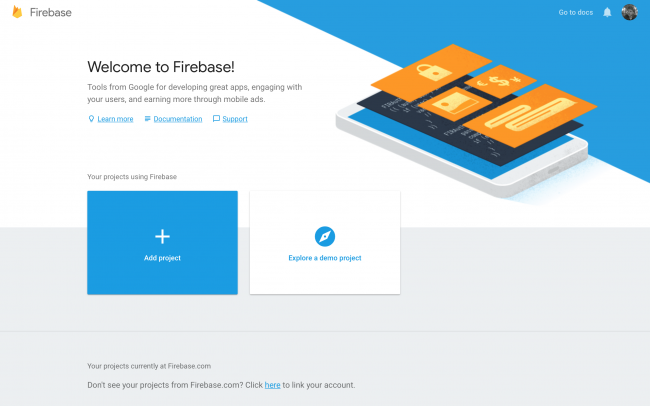
2. Then you will have to create Firebase project by clicking on “Add Project” button


3. You need GoogleService-Info.plist file for iOS SDK as this file contains the details of the Firebase project which are used by Firebase SDK

4. Then add the plist file in the project

5. Add the following code before the return statement within application(_:didFinishLaunchingWithOptions:) in AppDelegate.swift file

FirebaseApp.configure()

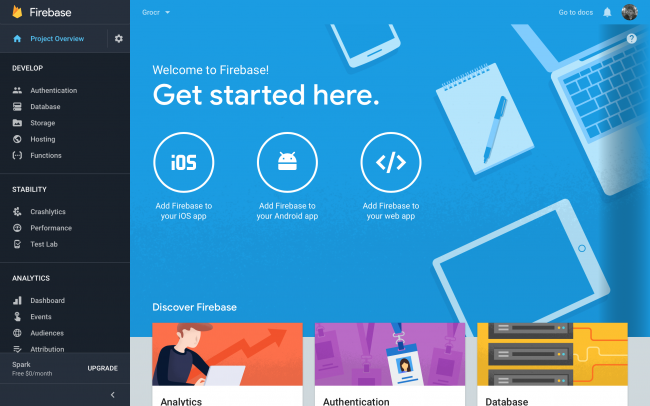
6. Then go to “Database” option from the left menu.


7. Select “Realtime Database” and that is the database for the Firebase project. All the data that is stored in or fetched from is from this location.

8. Firebase setup is completed

Now you will have to download Firebase SDK in the swift. For this you will have to install the following pods.

  1. pod ‘Firebase/Core’
  2. pod ‘Firebase/Database’

Let suppose you have the following data in the given structure in the Firebase database –

// The root of the tree
{
  // grocery-items
  "grocery-items": {
 
    // grocery-items/milk
    "milk": {
 
      // grocery-items/milk/name
      "name": "Milk",
 
      // grocery-items/milk/addedByUser
      "addedByUser": "David"
    },
 
    "pizza": {
      "name": "Pizza",
      "addedByUser": "Alice"
    },
  }
}


After successful installation of the pods, we can move on to the coding part.

Code Implementation

All the data points/nodes are used to access data from Firebase database. We create references to the nodes and then fetch data from that node.

In other words a Firebase reference points to a location in Firebase where data is stored.

First we will have to create reference to the root node of the database structure –

let ref = Database.database().reference(withPath: "grocery-items")

or the following way can be used –


let rootRef = Database.database().reference()
let ref = rootRef.child("grocery-items")

Reference to the child node which is “milk” can be created using the following code –

let milkRef = ref.child("milk")

Asynchronous listener can be attached to a reference in order to retrieve data from Firebase using observe(_:with:) method.

The following code will fetch the data and keep listening to the data changes on the database. As soon as any change is made in the database, the new snapshot of the node/reference is fetched and we get the updated data as soon as any change is made in the database.


ref.observe(.value, with: { snapshot in
  // This is the snapshot of the data at the moment in the Firebase database
  // To get value from the snapshot, we user snapshot.value
  print(snapshot.value as Any)
})

Then the snapshot values can be parsed and used in the app.

One big advantage of using observe method over observeSingleEvent method is that you don’t have to call the function again and again as the updated data is fetched from the database as soon as any value is changed in the database.

Summary

Now you should be able to fetch the data from the Firebase database in swift using Firebase SDK.

Please feel free to get in touch with us at support@knowband.com for any issues.

We also provide No Code Mobile App solutions for Prestashop, Opencart, Magento 2 and Woocommerce. Know more here:


How to save data to Firebase in Android?

Objectives:

The purpose of this blog is to inform readers on how to save data in Android’s Firebase Realtime database. Simple data kinds, such as strings, can be written to this database, as well as more complicated data types, like Java objects.

Pre-Requisites:

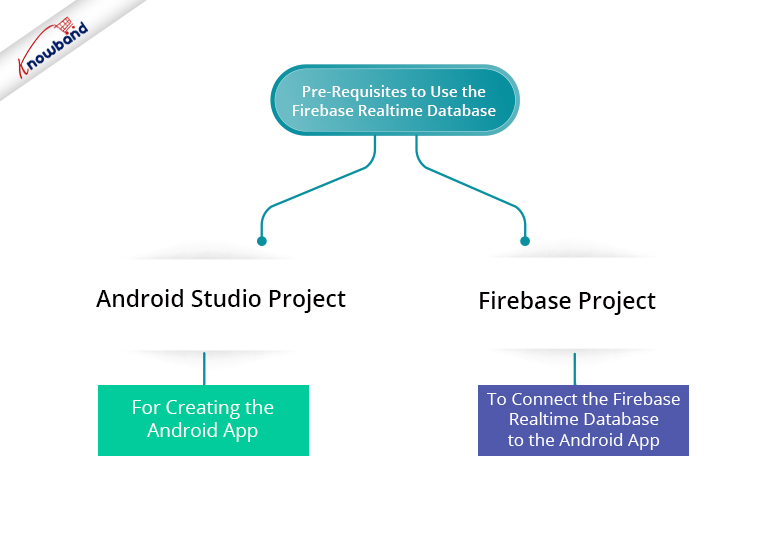
To use the Firebase Realtime Database in Android, we need to have an Android Studio project for creating the android app. Besides that, we need a Firebase project to connect the Firebase real-time database to the Android app.

To create a new Firebase project, follow the below-mentioned steps:-  

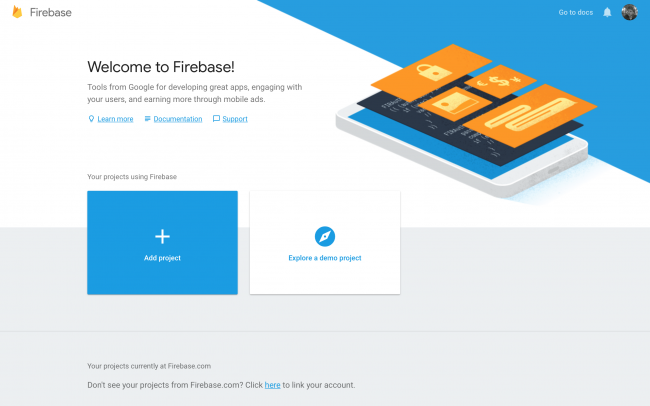
1. Open the URL – https://console.firebase.google.com

2. Then click on “Add Project”.

3. Next, enter the Firebase Project name and accept the conditions. After that, proceed by clicking on the “Continue” button.

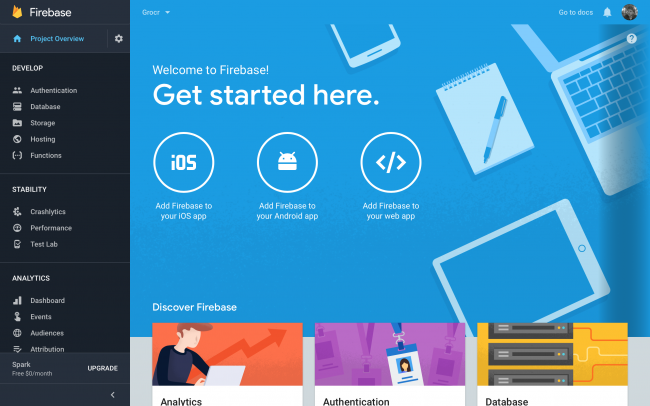
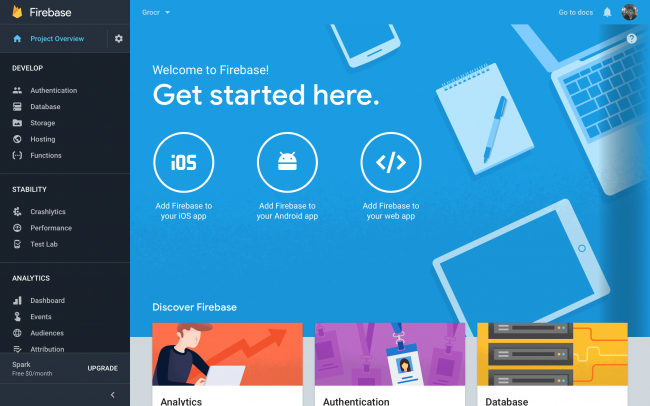
4. Then, on the next Welcome screen, click on “Add Firebase to your Android app“. In the same manner, enter the package name and click on Next.

5. Now, download the google-services.json file to your local system. Then, copy this file to the location in the Android Studio project as specified.

6. Follow the small process in the next step to add 3 lines of code to the build. Gradle files at project-level and app-level.

7. Then, finish adding the Android app to the Firebase project.

8. Open the Database section by clicking on the “Database” option in the left menu. Then, click on the “Create Database” link.

9. Now the process of creating the Firebase project is finished.

Recommended Read: How to fetch data from Firebase in Android?

Add the following line in the app-level build. gradle file to add the library to start using the Firebase Realtime Database.

implementation 'com.google.firebase:firebase-database:16.0.6'

Code Implementation

Before proceeding further, let us understand what is a Firebase reference?

In the Firebase database, the data is stored at a location. Hence, the pointer to that location is known as a Firebase reference. Multiple references point to the same location if they are initiated with the same path.

Create an instance of Firebase Database by writing the following line of code:

private FirebaseDatabase mDatabase = FirebaseDatabase.getInstance();

Now create references of the paths where the data would be stored in the Realtime Database. As the data is stored in the JSON format in the Firebase database, the paths specified in the references are the keys of the JSON object.

Recommended Read: How to fetch data from Firebase in Swift Language (iOS)?

The following line of code has to be added to create a reference to the root node in the database:

private DatabaseReference mDatabaseReference = mDatabase.getReference();

Next, create a child under the root node in the database and use this child key to add the corresponding data. After that, a string can be added to the database by following the below-mentioned lines of code:

mDatabaseReference = mDatabase.getReference().child("name");
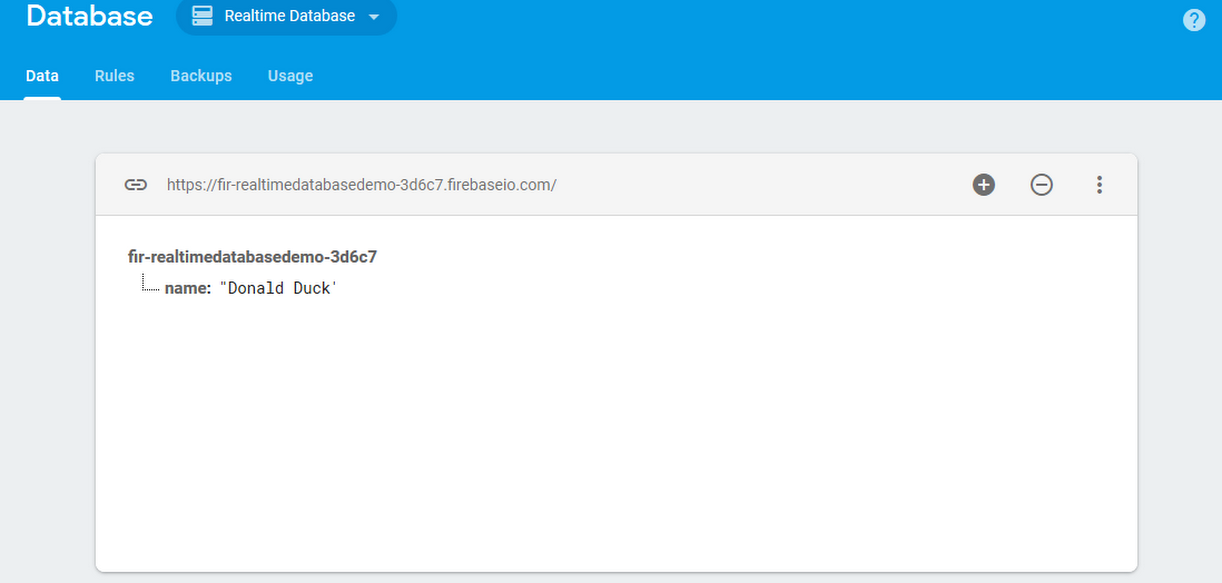
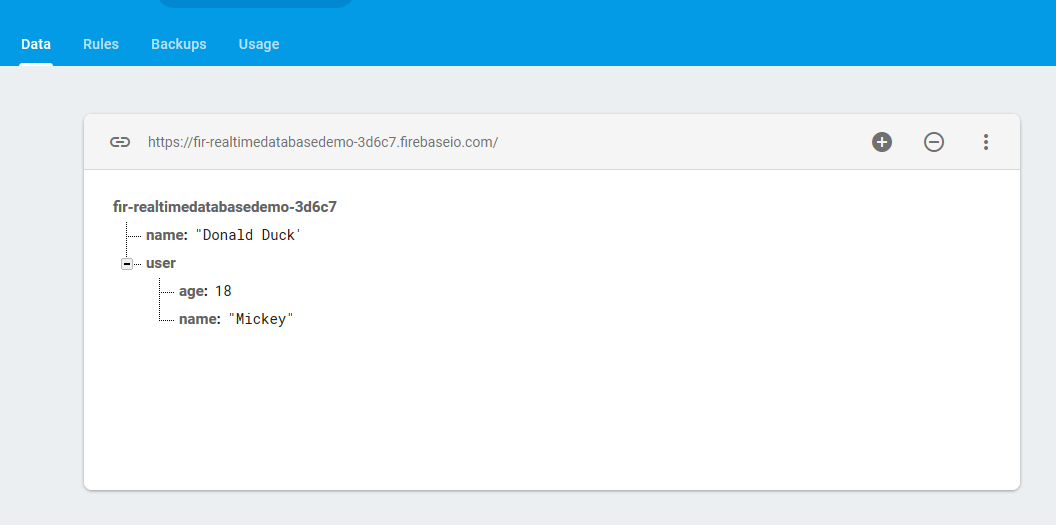
mDatabaseReference.setValue("Donald Duck");

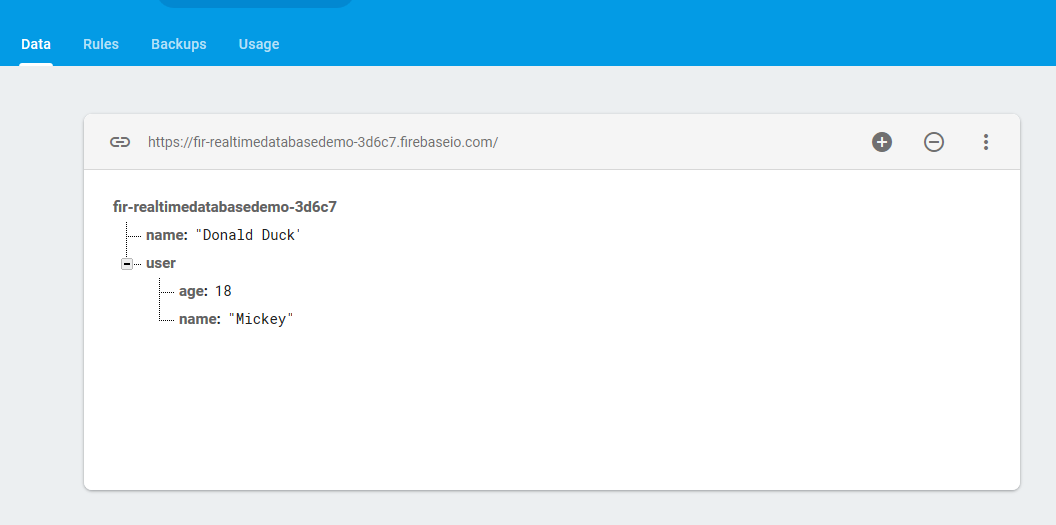
The above lines of code would insert the data into the database. The database in the Firebase project will look as follows:

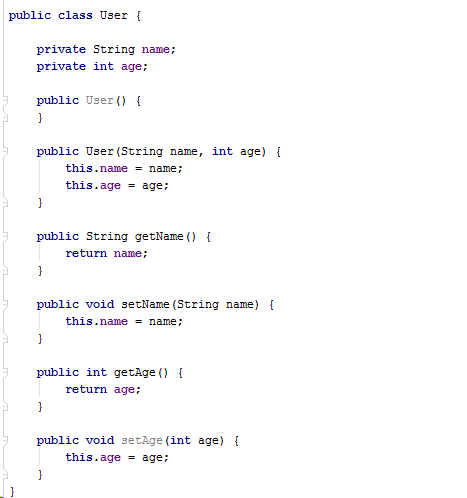
Firebase Realtime database also supports saving complex Java objects. Hence, a model class needs to be created first for saving the Java objects. Also, make sure to add an empty constructor and each attribute’s getters in the class.

Following is the code for a demo model class:

Following is the code to save an object of this class to the Firebase database:

User user = new User("Mickey", 18);
mDatabaseReference = mDatabase.getReference().child("user");
mDatabaseReference.setValue(user);

The above-mentioned code would insert the object data in the  Firebase database as follows:

Recommended Read: How to save data to Firebase in Swift Language (iOS)?

Conclusion:

Now you are knowing how to save data into the Firebase Realtime Database. Also, Knowband offers an eCommerce Mobile App Builder module for online Store owners. So, the mobile app Maker plugin is available for platforms like PrestaShop, OpenCart, WooCommerce and Magento 2. Thus, With just a few clicks and no difficulty, you can create your native, responsive app for smartphones and tablets.

How to fetch data from Firebase in Android?

Objectives of the blog

After reading this blog we will be able to fetch data from Firebase Realtime Database. This data may include simple data types, such as Strings, or complex data types such as Java objects.

Pre-requisites

We need to have a Android Studio project and Firebase project ready in order to use the Firebase Realtime Database. Create a new Android Studio project (or use any existing project). This Android Studio project will be used for working with the realtime database.

Follow the steps given below to create the Firebase project –

1. Go to https://console.firebase.google.com

2. Click on “Add Project” button.

3. Enter the Project name and accept the conditions and click on “Continue” button.


4. Then add Android app to your project. It requires entering the package name of the app. Click on Next.

5. Download the google-services.json file, and move this file to the location in the Android project in Android Studio as specified on the screen.

6. In the next step, there would be a small tutorial to add 3 lines of code in the project-level and app-level build.gradle files. Add them accordingly.

7. Then finish this process of adding the Android app to the project.

8. Then click on “Database” option from the left menu, and click on “Create Database” button.


9. Firebase setup is completed

Now add the Firebase library for using the Firebase Realtime Database in the app-level build.gradle file. This can be done by adding the following line:

implementation 'com.google.firebase:firebase-database:16.0.6'

Code Implementation

A Firebase reference points to a location in Firebase Database where data is stored. Even if you create multiple references, they all share the same connection provided you used the same path while creating the reference from the database instance.

Firstly we need to have an instance of the Firebase Database in order to use it. The instance can be created by the following line of code.


private FirebaseDatabase mDatabase = FirebaseDatabase.getInstance();


Now there is need to create references of the paths where the data is stored in the database. As the data in the Firebase database is stored in the JSON format, the keys of the JSON object are the paths specified in the references.

The reference to the root node can be created by the following line of code:


private DatabaseReference mGetReference = mDatabase.getReference();


After getting the reference of the database, an asynchronous listener has to be attached to the database reference which actively listens to any change done in the database. This listener returns a data snapshot of the database initially for the first time when it is attached. Then the data snapshot is returned when any change is done at the path where the database reference is pointing to.

Usually, the database contains same type of data, but suppose the database contains some data of different types. Below find the screenshot of the database containing some dummy data:


To fetch the database from this database, attach the ValueEventListener to the database reference. The listener can be added by the following code:


mGetReference.addValueEventListener(new ValueEventListener() {
   @Override
   public void onDataChange(@NonNull DataSnapshot dataSnapshot) {
 
       if (dataSnapshot.exists()){
           HashMap<String, Object> dataMap = (HashMap<String, Object>) dataSnapshot.getValue();
 
           for (String key : dataMap.keySet()){
 
               Object data = dataMap.get(key);
 
               try{
                   HashMap<String, Object> userData = (HashMap<String, Object>) data;
 
                   User mUser = new User((String) userData.get("name"), (int) (long) userData.get("age"));
                   addTextToView(mUser.getName() + " - " + Integer.toString(mUser.getAge()));
 
               }catch (ClassCastException cce){
 
// If the object can’t be casted into HashMap, it means that it is of type String.  
 
                   try{
 
                       String mString = String.valueOf(dataMap.get(key));
                       addTextToView(mString);
 
                   }catch (ClassCastException cce2){
 
                   }
               }
 
           }
       }
   }
 
   @Override
   public void onCancelled(@NonNull DatabaseError databaseError) {
 
   }
});

After attaching the listener, it is executed first initially returning all the data in the database at that time. This listener will be later invoked at the time when any change takes place in the database at the path pointed by the reference the listener is attached to.

Summary

After following the above procedure, you will be able to fetch data from the Firebase Realtime database in Android.

If you face any issues, please feel free to reach us at support@knowband.com.  We also provide custom development and modules for major CMS platforms like Prestashop, Opencart, Magento, Magento 2 and Woocommerce.

Take a look at our most popular Woocommerce No Code Mobile App builder: