Top 5 iOS App Development Languages in 2023!!

Modern users are preferring mobile apps over websites for online hovering. Moreover, other business areas such as OTT platforms, Social Media platforms, shopping apps, etc, are doing most of their business via mobile apps for the same reason.


Not only do Mobile apps provide a faster experience but also offer better optimization from websites especially iOS Apps. In the modern community, there is a huge number of iOS users. For the same reason, it is important to put every brick in its place while planning your iOS App development project. Furthermore, the iOS App development language defines the scope and user experience for the app users.

Top Languages for iOS App Development:
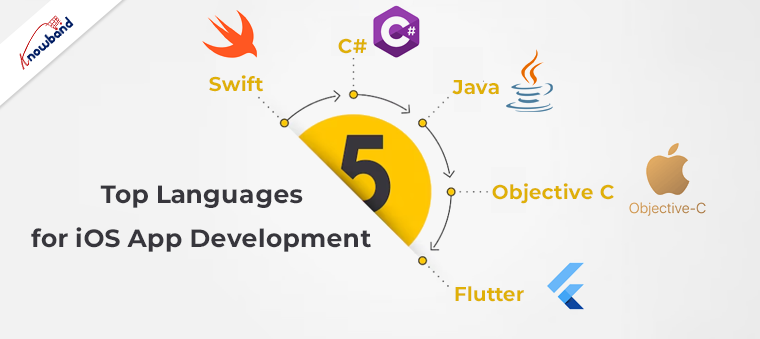
Various points should be on your checklist before starting your iOS App development. To help with this, we have compiled a concise yet useful checklist of essential elements to keep in mind while picking the app development language for the iOS App for your business.

Swift:

Swift is a programming language developed by Apple in 2014 to create solutions for macOS, iOS, iPadOS, watchOS, and tvOS. It was introduced as a successor to Objective-C and is optimized to work with frameworks like Cocoa, Cocoa Touch, and the vast codebase written in Objective-C for Apple products.
Swift is a highly suitable choice if you desire to create an application quickly and intend to expand it later. This programming language is simple to learn and enables rapid development, while also ensuring the safety and reliability of your code. Additionally, Swift receives regular updates, allowing for easy implementation of improvements to your application.

C#:

C# is a versatile, object-oriented programming language for general-purpose use. It was developed by Microsoft as an alternative to Java. C# has close integration with the .NET platform, which serves as both a framework and a runtime environment.

Originally intended for writing applications for Windows systems, C# has now expanded its reach to other platforms such as Linux and Mac through the .NET framework. As a result, developers can create native software in C# for almost any operating system, including iOS.

C# currently ranks as the 8th most popular programming language globally and 31.4% of worldwide software developers are using C#.
Java:

It might sound odd as Java is widely known as the mother language for Android app development. Java is a general-purpose programming language that follows the principles of object-oriented and class-based programming. One of its most significant advantages is that its code can run on any platform without requiring a recompilation. 

With over 9 million programmers utilizing it worldwide, Java is currently the 6th most popular programming language globally. It is also highly preferred for Android app development due to its suitability for the platform. However, its versatility also allows for the creation of cross-platform applications.

Objective C:
Objective-C, an object-oriented programming language extension of C, was developed in the early 1980s. As a general-purpose language, it is primarily used for programming Apple’s OS X and iOS operating systems, as well as their APIs: Cocoa and Cocoa Touch. However, despite its usefulness, Objective-C only ranks 27th on Stack Overflow’s popularity report, with a usage rate of 2.39% among developers worldwide, which is three positions lower than Swift. The reason behind the same is that the Objective-C developer community has very limited resources. Also, the language is hard to learn for beginners.

Flutter:

Last but not least, Flutter is the next iOS App development language we are going to discuss. Flutter, launched in 2017, is a comprehensive app Software Development Kit (SDK). It offers a wide range of ready-to-use widgets and tools. Google created this tool in 2015 to provide developers with an easy way to create visually attractive. Natively-compiled mobile, web, and desktop applications with just one codebase.

Flutter’s cross-platform capabilities make it a popular choice among developers, as it saves time and effort in writing separate codes for different platforms. With its vast range of features, Flutter has become one of the most widely used frameworks for building powerful and engaging mobile applications within very less time. Thus, in case you are running budget friendly and want to build both Android and iOS apps within less time, Flutter is the perfect option.

In the End,

In the following article, we have tried to narrow down the characteristics of the 5 most used languages for iOS App development. Although all languages have their pros and cons. Yet, picking the best language entirely depends on your project requirements and timeline. Moreover, at Knowband, we also offer Android and iOS App development solutions for eCommerce businesses. You can feel free to find us at our official email address support@knowband.com for the quotation.

How to Publish your Android App on Google Play Store?

After spending a substantial amount of time developing an Android application, the next step is to publish your Android app on Google Play Store. Currently, there are more than 1 billion active users of Android. Publishing your app on the Google Play Store will make your reach prospective audience base at ease. If we look at the following statistics, the number of available applications in the Google Play Store from December 2009 to June 2024 is gradually increasing:

With such a huge no of apps available in the Play Store, publishing an android app would be quite beneficial for your business. If you are a newbie in the field of app development or this is your first-time publishing an Android App on Google Play Store, here are some useful tips on that:

Recommended Read: Pre-Requisites to Publish App on the Google Play Store

1. Create a developer account in Google Play Console

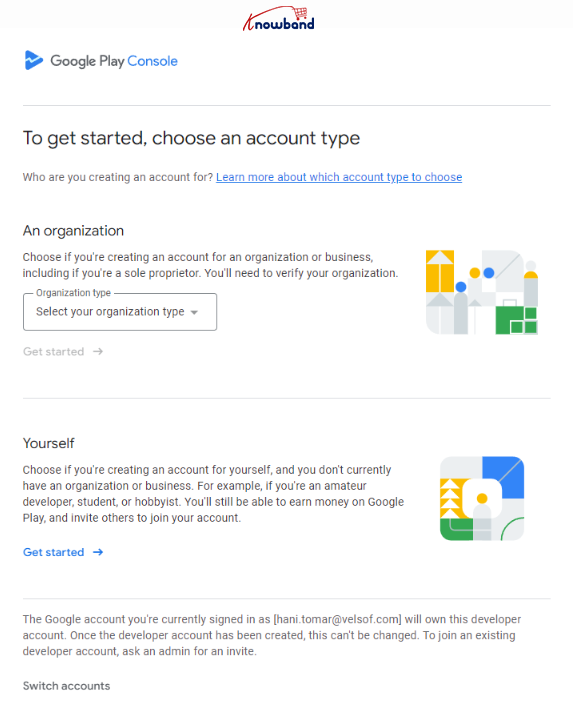
To begin with the app upload, the initial steps comes as creating a new developer account. Furthermore, there are 2 types of Google Play Console developer account: Individual and organizational.
Creating a new developer account starts with visiting the Google Play Developer Console sign-up page. You can only register a new Play Console developer account only if you have enabled 2-Factor authentication on your Gmail account.

Either you can select the option as an Individual registration, or if you are willing to register as a business, you can select the organization type from the dropdown list.

2. Submit the Details:

If you are registering into a new Play Console developer account, you are going to need a D-U-N-S number for your organization, A contact phone number and email address for Google Play users, A contact phone number and email address for Google, and a single time fee of $25 USD.

Once these details are submitted, you can get your Play Console Developer account approved within 3-5 business days.

3. Upload your app

Upload your android app with Add new application option.

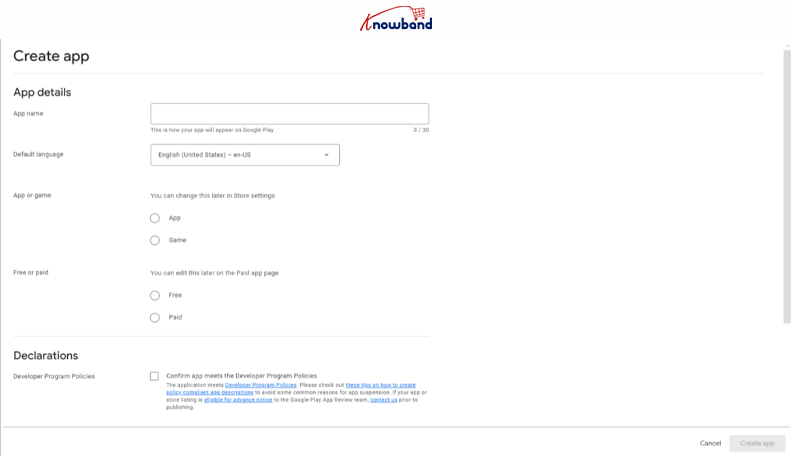
To submit a new app, click on the create app button shown in the above screenshot. Once done, you will have to fill in the basic details such as the App name, default language, selection between app and game, and the Play Console policy declarations.

Fill in the requested details and click on the create app button.

4. Set-up Your App:

Once the basic details are submitted, you will be redirected to the Play console account dashboard. For the next step, click on the dashboard tab visible in the side menu and visit the Set up your app section.

Here you will have to fill all the details that are mandatory to submit the app on the Play console. Start by one by one. Once you are done with the app content section, there comes the next step.

5. Enter Store listing details

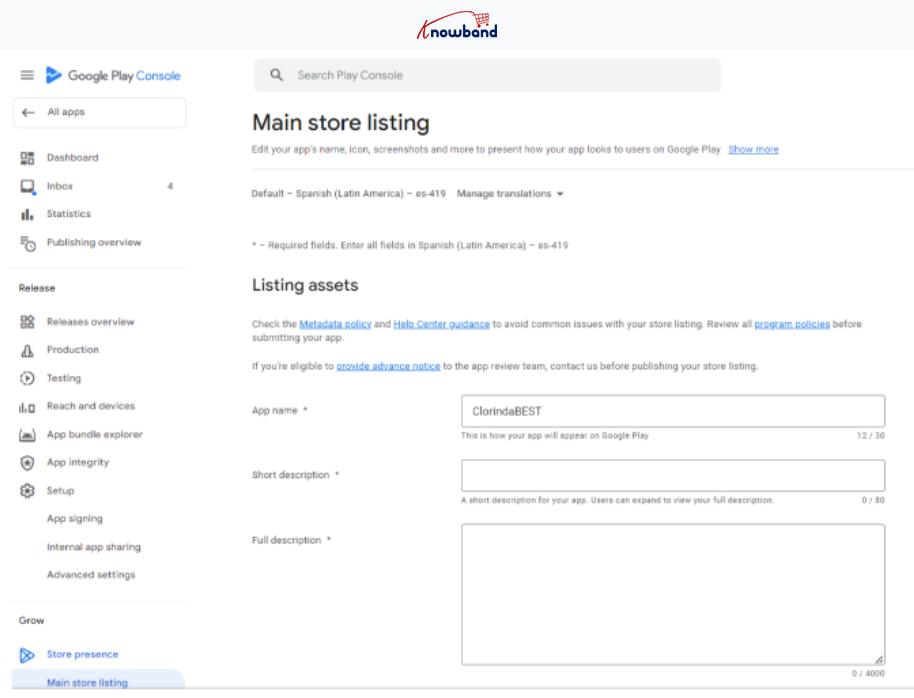
Your app page plays a very vital role in attracting Android users. Keep its details compact and precise. After uploading the APK file, go to the store listing page and add the following details related to your application:

  • Full description ( up to 4000 characters)
  • Short description( up to 12 to 80 characters)
  • App snapshots
  • Promo video
  • YouTube video URL (optional).
  • Chromebook Screenshots (Optional).

You can also provide details such as contact, category, and more. These store listing details can be updated whenever required.

6. Add pricing and distribution details

Now come pricing and distribution details. Enter the price of your app with the following steps:

  • Select whether your app is free or paid.
  • Select the targeted countries.
  • Check the boxes stating that your app complies with the content guidelines.

Save the details and further move on to the next step.

There are a few extra options are available that might not be mandatory while publishing the app, but they surely prevent your app from getting negative feedback. Also, you can manually filter non-compatible devices. So, use these options to curb any negativities and stay at the top of your game.

Recommended Reads: Alternatives to publishing your Android app on Google Play Store

Looking for native shopping apps for any of the following platforms as an owner of an online store?

Building Mobile Apps with PrestaShop

Mobile App Builder for OpenCart

Build Mobile Apps for Magento 2

Building Mobile Apps with WooCommerce

A Google Play Store App will be created and published using this ready-made tool from Knowband. Your store and the mobile apps are safely connected through the mobile app developer for iOS and Android. Any modifications you make on the website are automatically undone by the Android and iOS mobile apps. So, without the need for manual synchronization, flawlessly synchronized mobile apps handle the full task. The plugin includes a free app release and three months of unrestricted support.

Note: These steps are applicable only in case you have a registered account as “Organization” on the Play Console. If you have registered as an Individual, you will have to meet the closed testing requirements for app submission.
Check out our other article about “Google makes closed testing mandatory for the personal accounts“.
Once the closed testing is done, you can submit your Android app on Play console by following the same steps as mentioned in the article above.

In Conclusion

A well-crafted Google App page is a key to your app’s success. With the above-discussed points, it is quite clear that publishing an Android App on Google Play Store is a simple process and just requires a few minutes. So, go ahead, publish your app, and reap out benefits of the Google Play Store.

If your app somehow got rejected by Google regulators, don’t worry, we got you covered. There might be a few reasons behind Google declining your app which are discussed here along with proper solutions.

Knowband’s Mobile App Builder

Get the mobile app created for your store in few hours with Knowband Mobile App Builder Module.

SHOP NOW

At Knowband we provide no-code mobile app builders for Prestashop, Opencart, WooCommerce, and Magento 2 eCommerce platforms. Our apps come with a ton of richly loaded features that can help your business to grab the attention of your customers. If you have any queries/suggestions regarding app submission on the Play Console, feel free to reach out to our support team at support@knowband.com.


You can also find out: How to Publish your iOS App on Apple App Store?