Objetivo do blog
Depois de ler este blog, você poderá entender como o SQS é configurado e como o MWS é inscrito para qualquer notificação.
Vamos criar um Amazon SQS e habilitar isso para assinatura do MWS
A Amazônia
Criar o Amazon Simple Queue Service (Amazon Simple Queue Service)
1. Entrarhttps://console.aws.amazon.com/sqs/home?region=us-west-2#?URL?and credentials. Page will look like below image.
 2. Clique emCriar Nova Fila
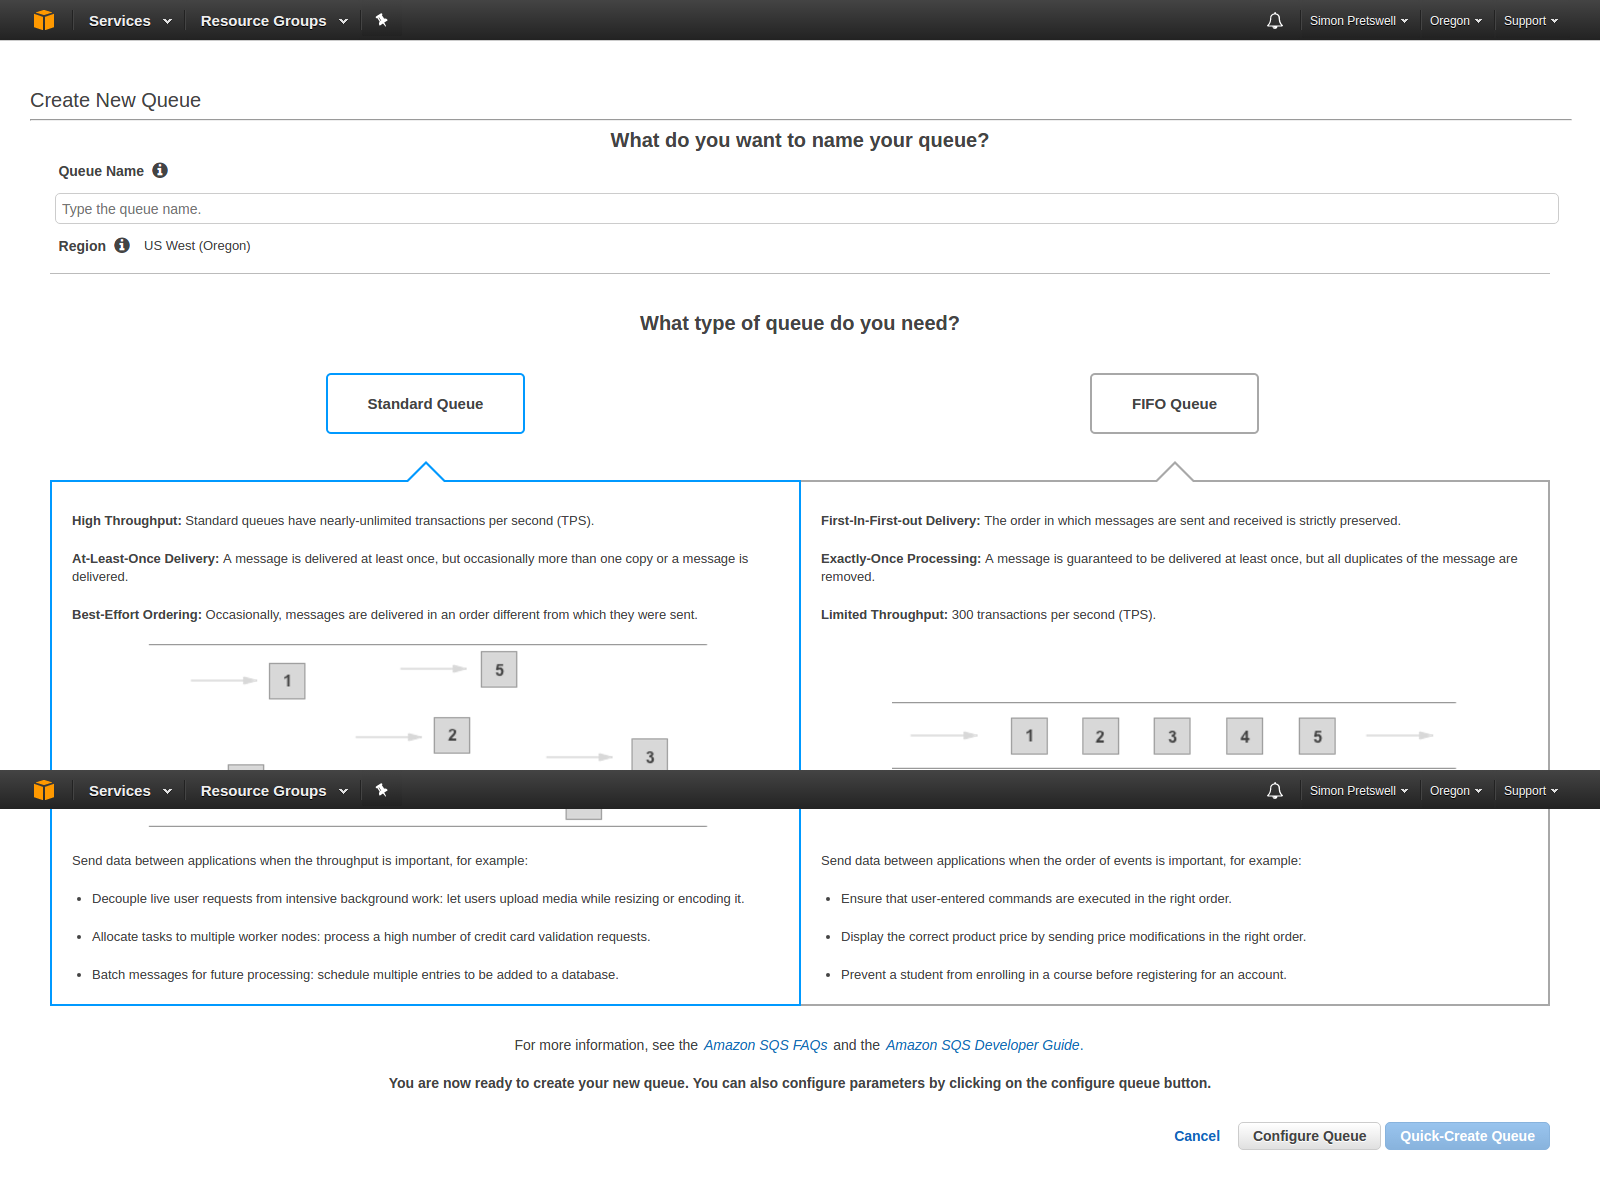 Aqui, digiteNome da Fila?which you want. Select queue type. By default,?Fila Padrão?will be selected. Now click on?Configurar fila?and after click on this, you will get the options to configure queue like below image.
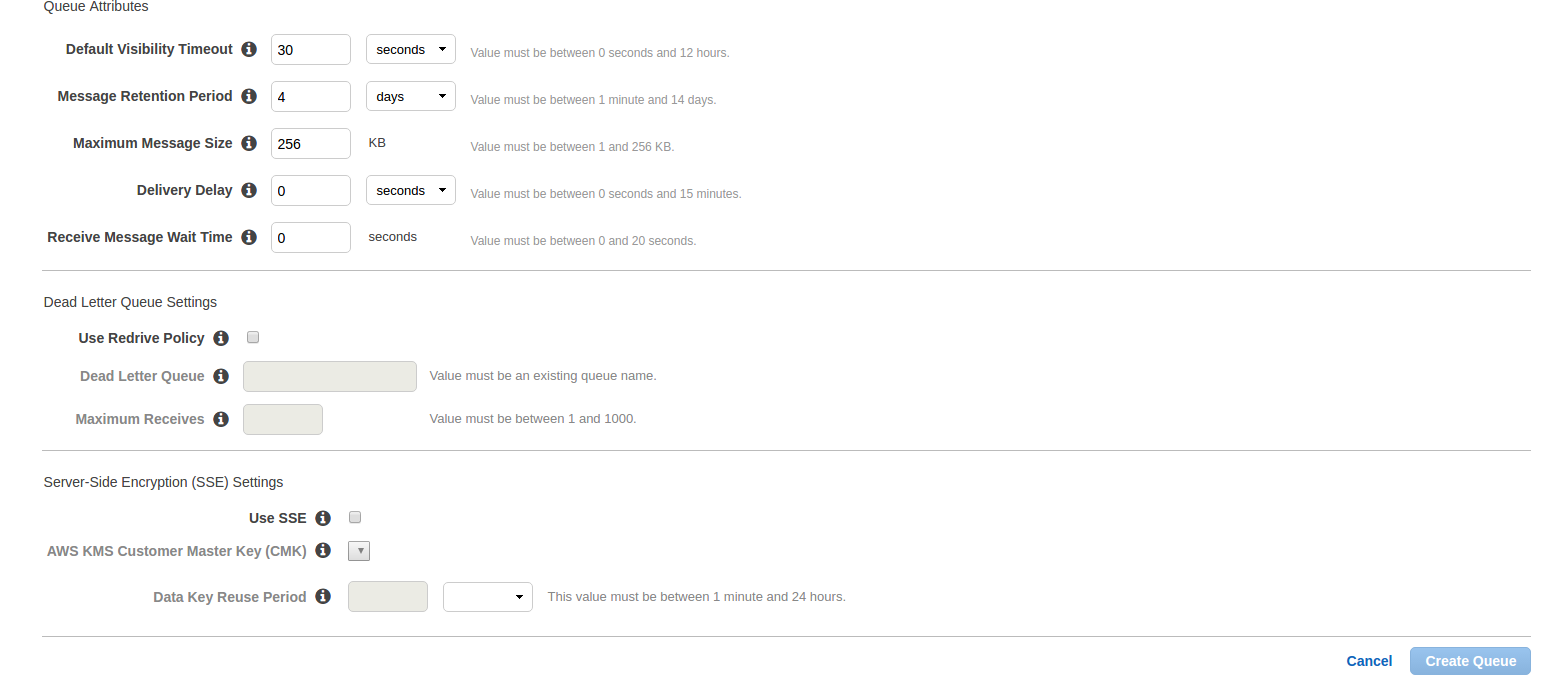
- Tempo limite de visibilidade padrão:Este é o horário para o qual uma mensagem recebida da fila não estará disponível para receber novamente.
- Período de Retenção de Mensagens: Esse é o horário durante o qual qualquer mensagem residirá na fila se essa mensagem não for excluída à força. Após a hora marcada, essa mensagem será automaticamente excluída da fila. Esses são dois campos mais importantes. Outros campos são:
- Tamanho Máximo da Mensagem:
- Atraso de entrega:A quantidade de tempo para atrasar a primeira entrega de todas as mensagens adicionadas a essa fila.
- Receba o tempo de espera da mensagem:A maior quantidade de tempo que uma chamada de recebimento de longa espera aguardará uma mensagem ser disponibilizada antes de retornar uma resposta vazia.
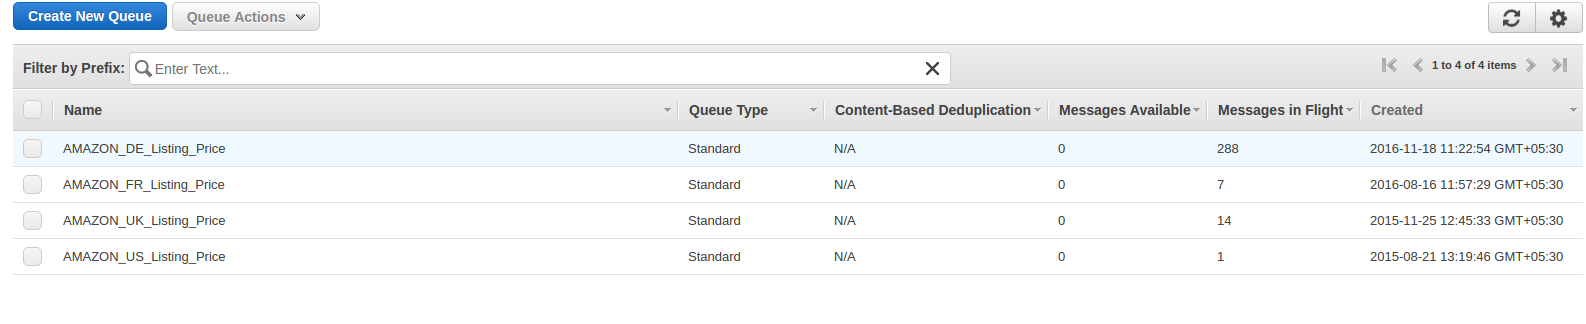
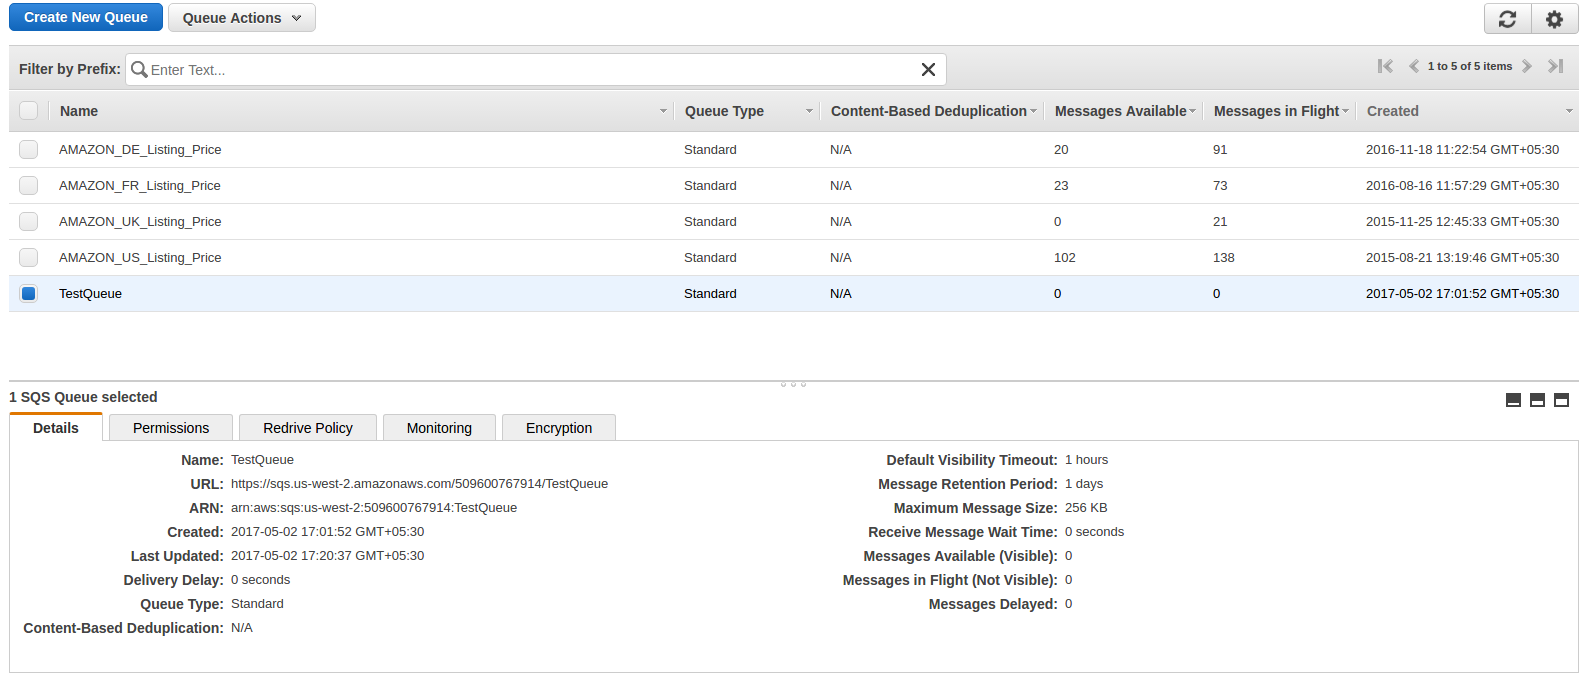
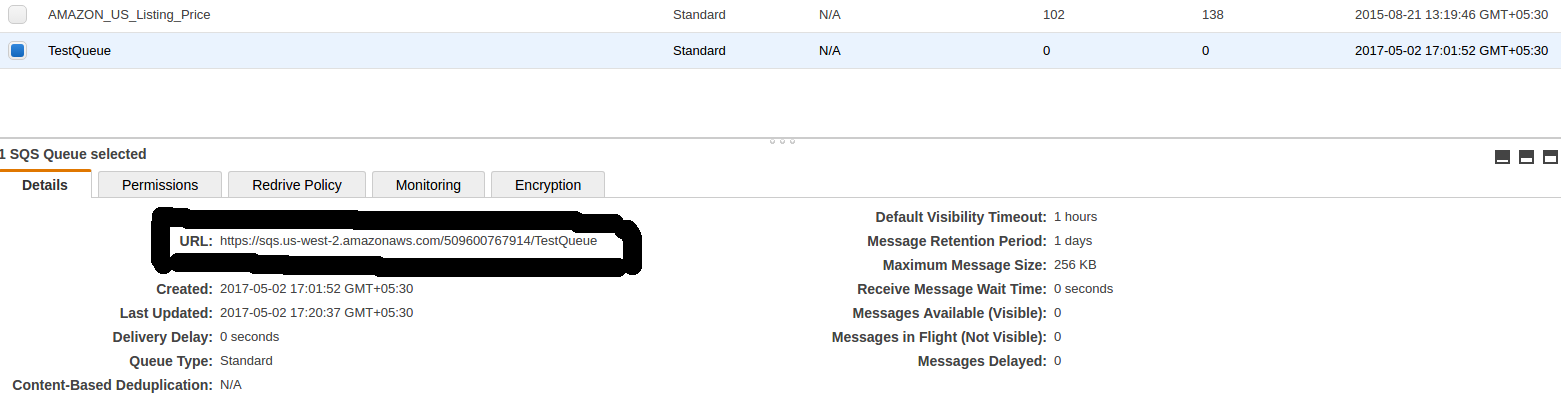
Depois de inserir detalhes, clique emCriar fila?button and you will be redirected on queue list page and your new queue will also be shown as shown in below image and basic detail of queue will also be displayed.
In basic detail, there is?URL?which is the most important attribute and this will be used to register and subscribe for notification.
Agora clique emAdicione uma permissão?button. A popup will be opened like below image. Enter your?AWS?account number and in action, check?Todos?Ações?checkbox and click on Add permissions.
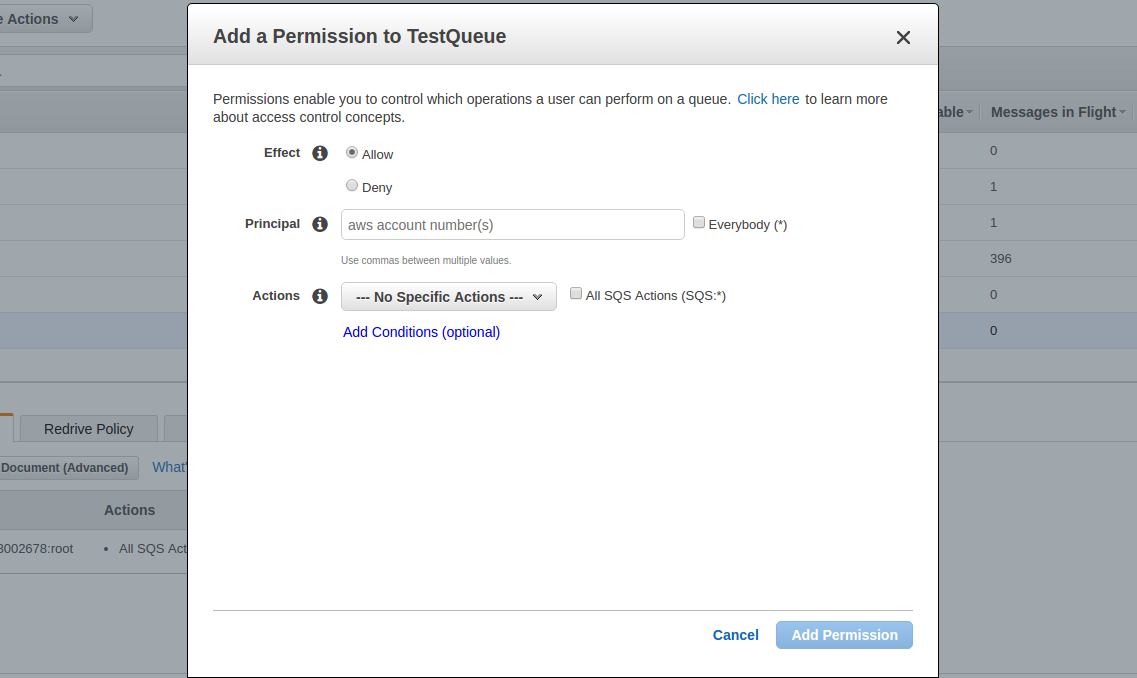
Você pode adicionar várias permissões conforme desejar.
Registrar um destino (fila criada)
Agora a fila foi criada e você precisa registrar essa fila para notificações. Para isso, você precisa usar a operação RegisterDestinationhttps://mws.amazonservices.co.uk/scratchpad/index.html?or?https://mws.amazonservices.com/scratchpad/index.html?depending on the marketplace. Select?subscriptions?from?API?Section and?RegisterDestination?from operation as below image.
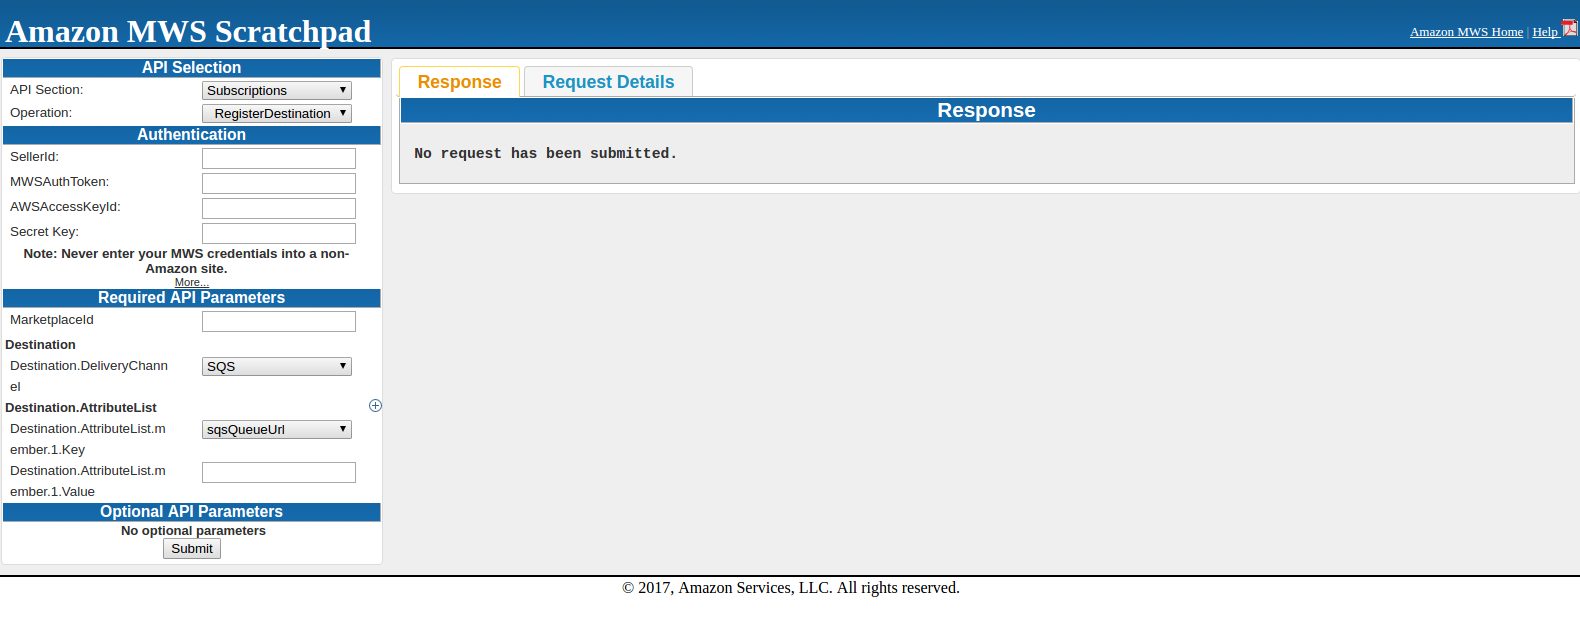
Aqui, insira SellerId, AWSAccessKeyId, Chave Secreta e MarketplaceI. No destino,sqsQueueUrl?and in Destination.AttributeList.member.1.Value, you need to enter?SQS?URL que estava sob detalhes em
Ao enviar a solicitação, você pode obter uma resposta de sucesso ou de erro. Se você ficar abaixo da resposta, significa que foi registrado com sucesso.
<? xml version = "1.0"?> <RequestReportResponse xmlns = "https://mws.amazonservices.com/doc/2009-01-01/"> <RequestReportResult> <ReportRequestInfo> <ReportRequestId> 2291326454 </ ReportRequestId> < ReportType> _GET_MERCHANT_LISTINGS_DATA _ </ ReportType> <StartDate> 2009-01-21T02: 10: 39 + 00: 00 </ StartDate> <EndDate> 2009-02-13T02: 10: 39 + 00: 00 </ EndDate> <agendada> false </ Scheduled> <SubmittedDate> 2009-02-20T02: 10: 39 00 00 </ SubmittedDate> <ReportProcessingStatus> _SUBMITTED _ </ ReportProcessingStatus> </ ReportRequestInfo> </ RequestReportResult> <ResponseMetadata> <RequestId> 88faca76-b600 -46d2-b53c-0c8c4533e43a </ RequestId> </ ResponseMetadata> </ RequestReportResponse>
Se uma solicitação não for bem-sucedida, o elemento de resposta principal será ErrorResponse, independentemente da ação solicitada, e os detalhes do erro também serão respondidos.
<ErrorResponse xmlns = "https://mws.amazonservices.com/doc/2009-01-01/"> <Erro> <Tipo> Emissor </ Type> <Código> InvalidClientTokenId </ Code> <Message> O acesso da AWS O código-chave que você forneceu não existe em nossos registros. </ Message> <Detail> com.amazonservices.mws.model.Error$Detail@17b6643 </ Detail> </ Error> <RequestID> b7afc6c3-6f75-4707-bcf4-0475ad23162c </ RequestID> </ ErrorResponse>
Após registrar o destino, tente a operação SendTestNotificationToDestination para verificar se as notificações estão sendo recebidas ou não. Esta operação envia uma notificação de teste para o destino que você especificar.
Inscreva-se para receber notificações
Para isso, você precisa usar a operação CreateSubscription e essa operação cria uma nova assinatura para o tipo e o destino de notificação especificados. Selecione
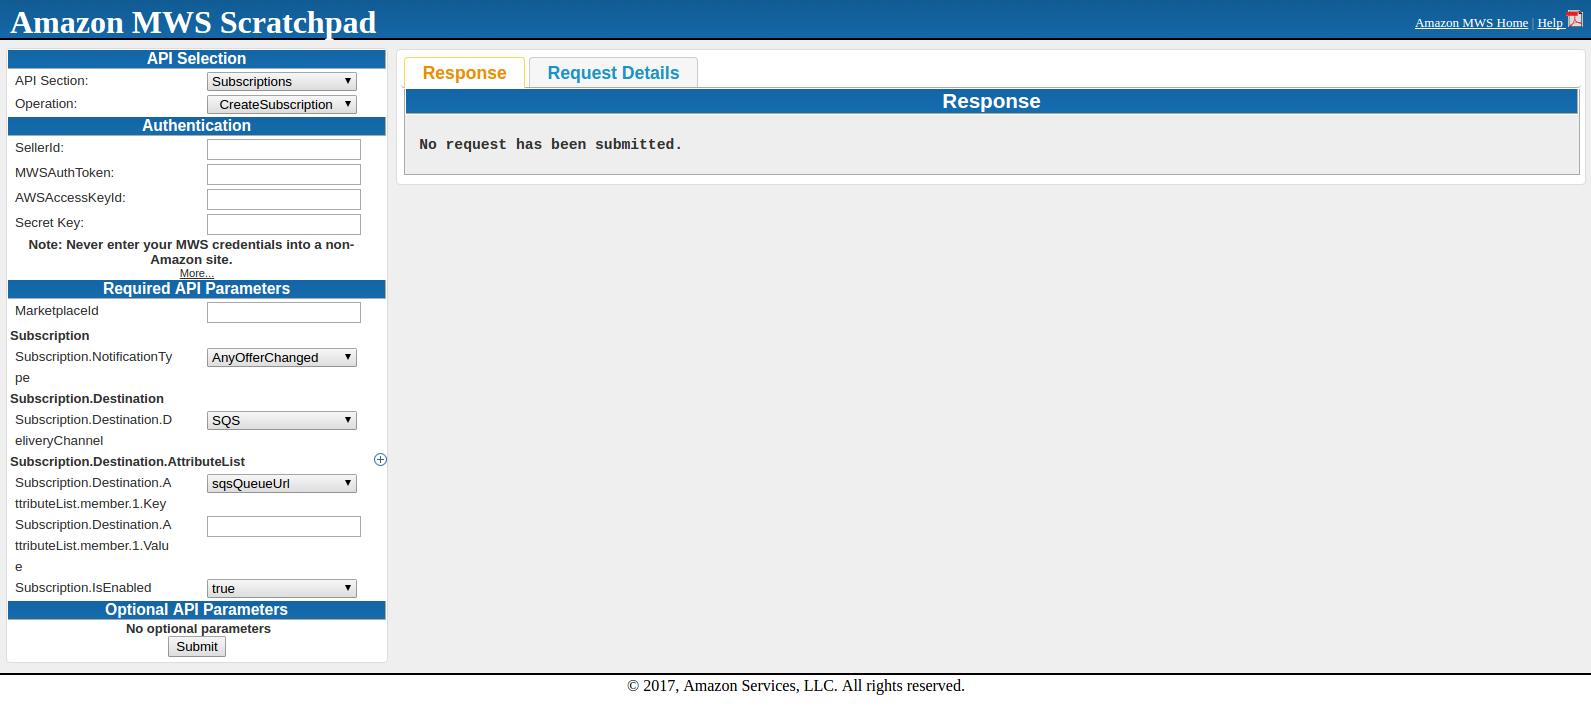
Aqui, insira SellerId, AWSAccessKeyId, Chave secreta e MarketplaceId. Subscription.NotificationType deve sersqsQueueUrl?and in Subscription.Destination.AttributeList.member.1.Value, you need to enter?SQS?URL which was under details in?SQS?Queue. Subscription.IsEnabled will be true.
When submitting the request, either you will get success or error in response. Once you get success in response, all is done to get notifications.
After this, you can fetch notification from SQS using CURL request.