Objetivo del blog.
Después de leer este blog, podrá comprender cómo se configura SQS y cómo se suscribe MWS para cualquier notificación.
Vamos a crear un Amazon SQS y habilitar esto para la suscripción de MWS
El Amazonas
Crear Amazon Simple Queue Service (Amazon
1. Iniciar sesiónhttps://console.aws.amazon.com/sqs/home?region=us-west-2#?URL?and credentials. Page will look like below image.
 2. Haga clic enCrear nuevo Cola
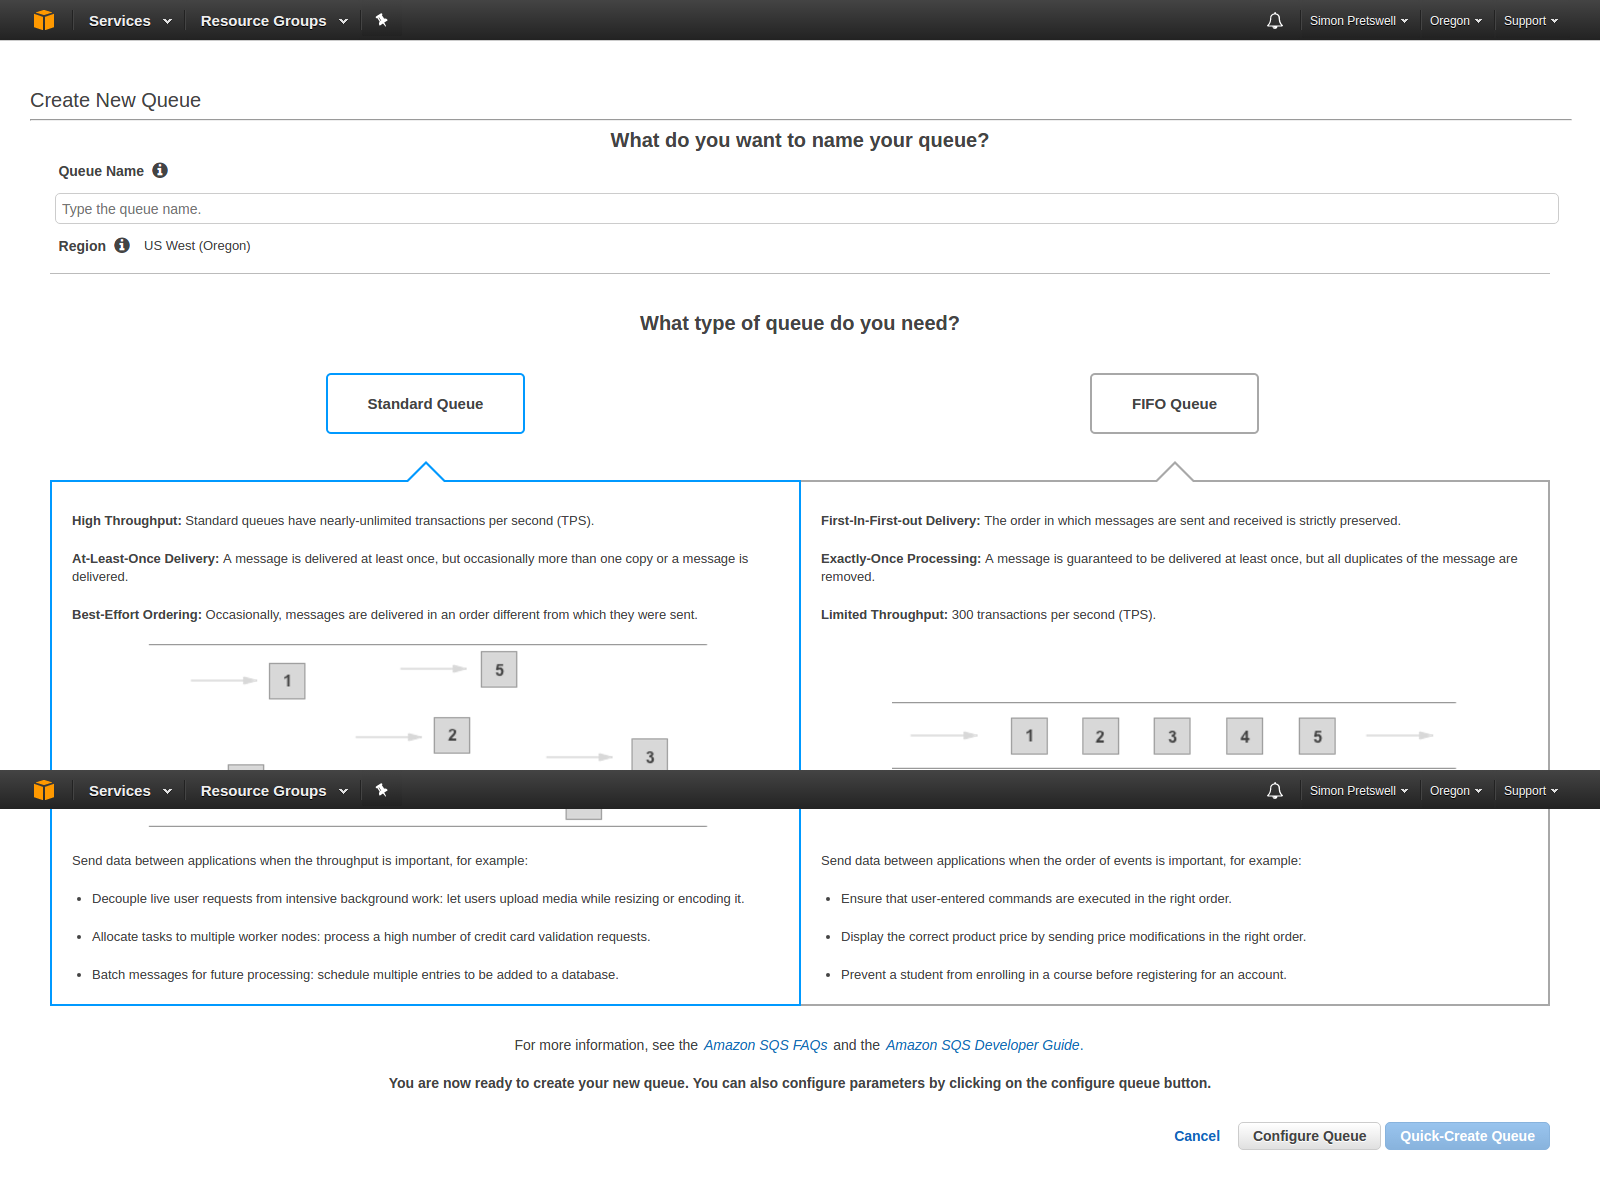 Aquí, entraNombre de la cola?which you want. Select queue type. By default,?Cola estándar?will be selected. Now click on?Configurar cola?and after click on this, you will get the options to configure queue like below image.
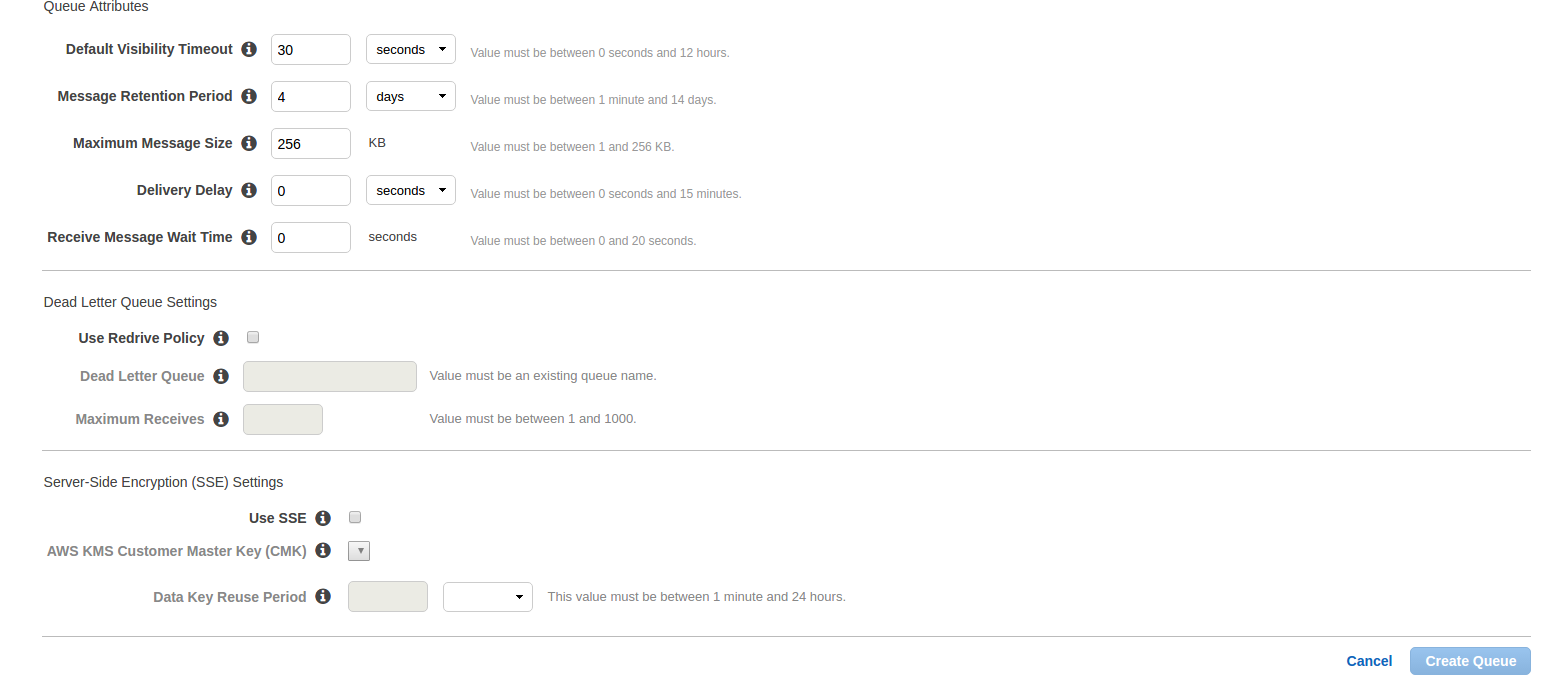
- Tiempo de espera de visibilidad predeterminado:Este es el tiempo durante el cual un mensaje recibido de la cola no estará disponible para recibirlo nuevamente.
- Período de retención del mensaje: Este es el tiempo durante el cual cualquier mensaje residirá en la cola si ese mensaje no se borra a la fuerza. Después del tiempo ingresado, ese mensaje se eliminará automáticamente de la cola. Estos son los dos campos más importantes. Otros campos son:
- Tamaño máximo del mensaje:
- Retraso en la entrega:La cantidad de tiempo para retrasar la primera entrega de todos los mensajes agregados a esta cola.
- Tiempo de espera del mensaje de recepción:La mayor cantidad de tiempo que una llamada de recepción de sondeo largo esperará a que un mensaje esté disponible antes de devolver una respuesta vacía.
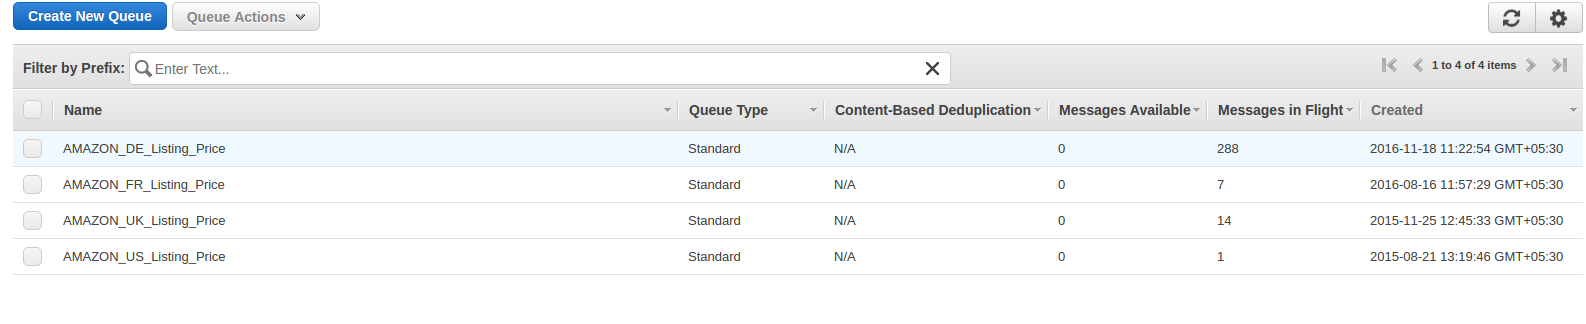
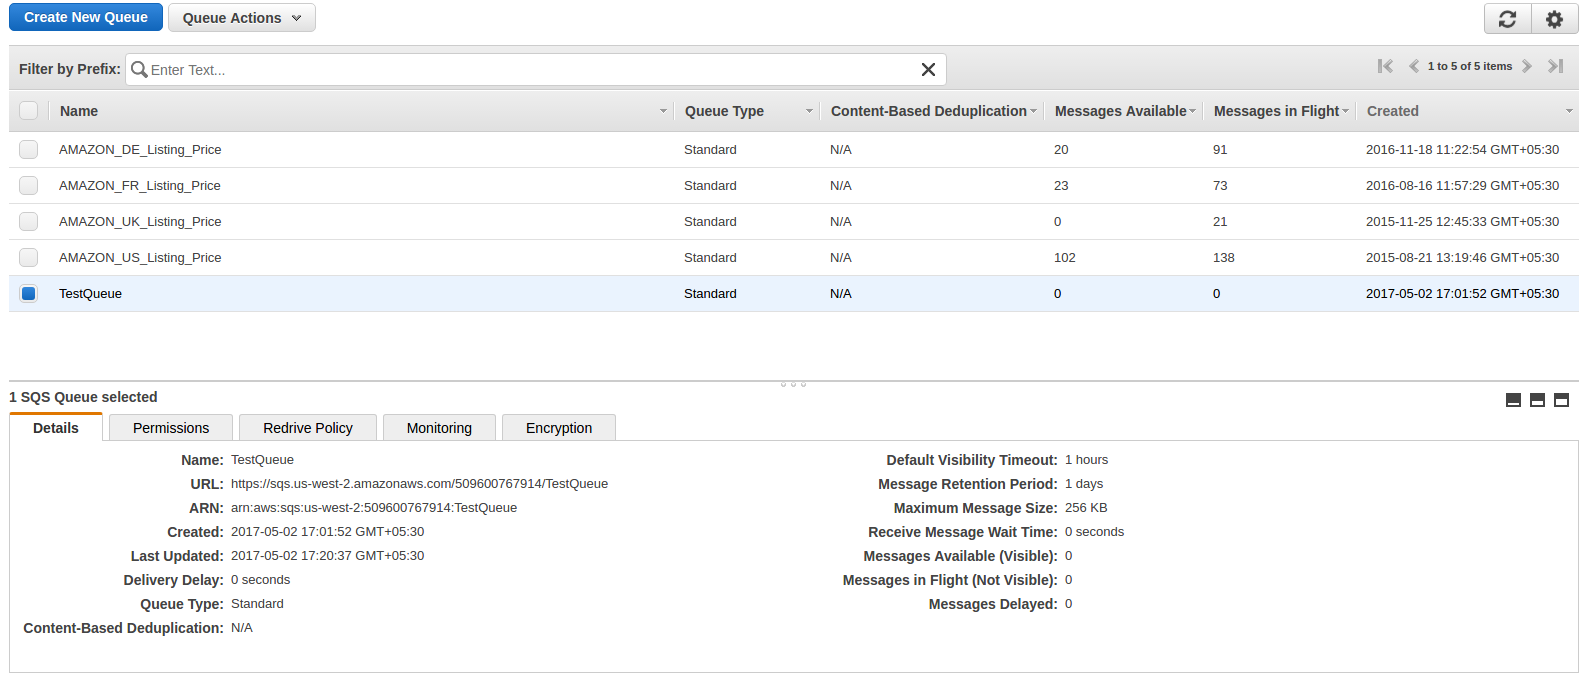
Después de introducir el detalle, haga clic enCrear cola?button and you will be redirected on queue list page and your new queue will also be shown as shown in below image and basic detail of queue will also be displayed.
In basic detail, there is?Enlance?which is the most important attribute and this will be used to register and subscribe for notification.
Ahora haga clic enAñadir un permiso?button. A popup will be opened like below image. Enter your?AWS?account number and in action, check?Todos?Acciones?checkbox and click on Add permissions.
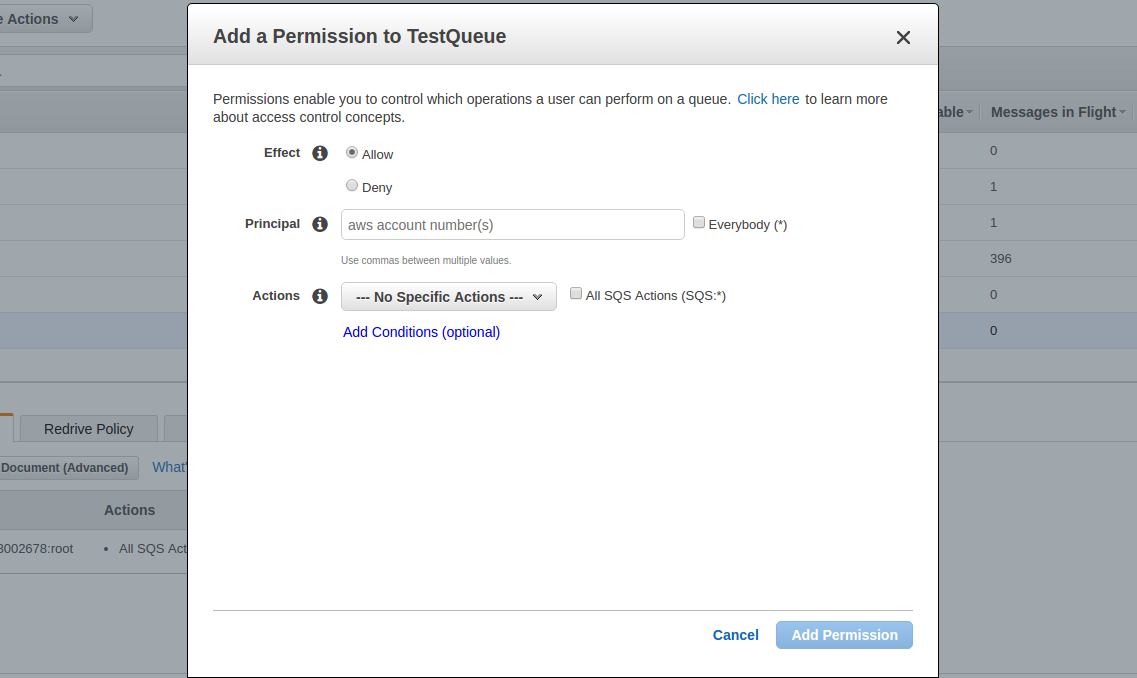
Puede agregar múltiples permisos como desee.
Registrar un destino (Cola creada)
Ahora la cola se ha creado y necesita registrar esta cola para las notificaciones. Para esto, necesita usar la operación RegisterDestination enhttps://mws.amazonservices.co.uk/scratchpad/index.html?or?https://mws.amazonservices.com/scratchpad/index.html?depending on the marketplace. Select?subscriptions?from?API?Section and?RegisterDestination?from operation as below image.
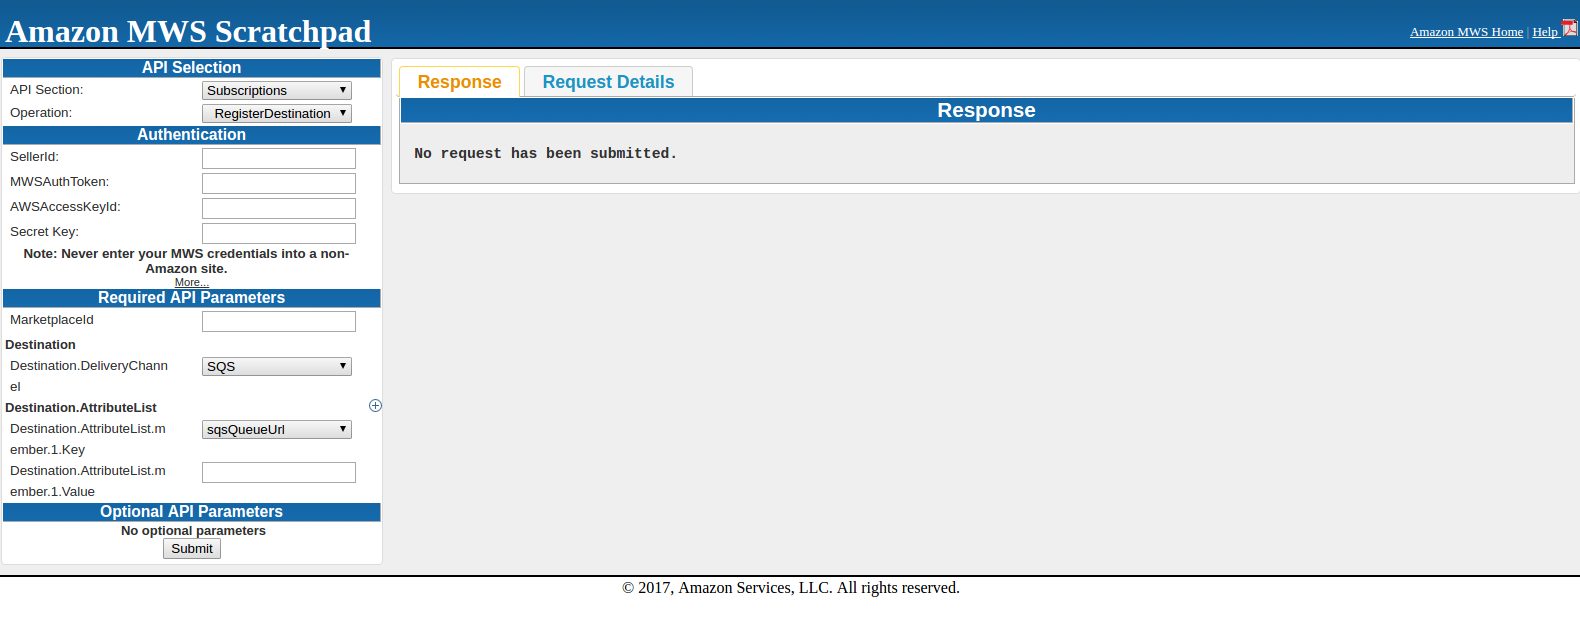
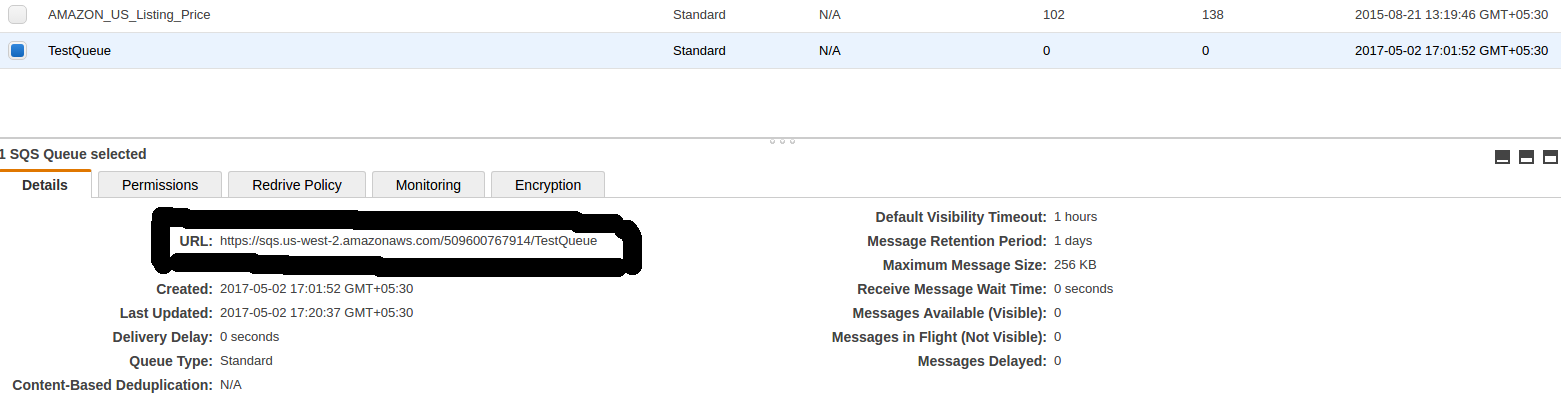
Aquí ingrese SellerId, AWSAccessKeyId, Secret Key y MarketplaceI. En Destino,sqsQueueUrl?and in Destination.AttributeList.member.1.Value, you need to enter?SQS?URL que estaba bajo detalles en
Al enviar la solicitud, puede obtener una respuesta correcta o una respuesta de error. Si obtiene una respuesta por debajo, significa que se registró con éxito.
<? xml version = "1.0"?> <RequestReportResponse xmlns = "https://mws.amazonservices.com/doc/2009-01-01/"> <ReportRequestId> Explicación de un artículo Tipo de informe> _GET_MERCHANT_LISTINGS_DATA_Reportar Estado, Tipo, Estado, Tipo, Tipo, Tipo, Nombre, Tipo, Icono, Tipo, Nombre, Tipo, Icono, Tipo, Tipo, Nombre, Tipo, Tipo, Tipo, Tipo de artículo false </Scheduled V -2291326454d2009-b01c-21c02c10e39a </RequestId> </ResponseMetadata> </RequestReportResponse>
Si una solicitud no tiene éxito, el elemento de respuesta principal será ErrorResponse, independientemente de la acción solicitada y los detalles de error también estarán en respuesta.
<ErrorResponse xmlns = "https://mws.amazonservices.com/doc/2009-01-01/"> <Error> <Type> Sender </Type> <Code> InvalidClientTokenId </Code> <Message> <AWS Access> La ID de la clave que proporcionó no existe en nuestros registros. </Message/espanol/Acceso de la vida de las personas a las que se les practican las siguientes actividades: <Message>
Después de registrar el destino, intente la operación SendTestNotificationToDestination para verificar que las notificaciones se estén recibiendo o no. Esta operación envía una notificación de prueba al destino que especifique.
Suscribirse para la notificación
Para esto, necesita usar la operación CreateSubscription y esta operación crea una nueva suscripción para el tipo de notificación y el destino especificados. Seleccionar
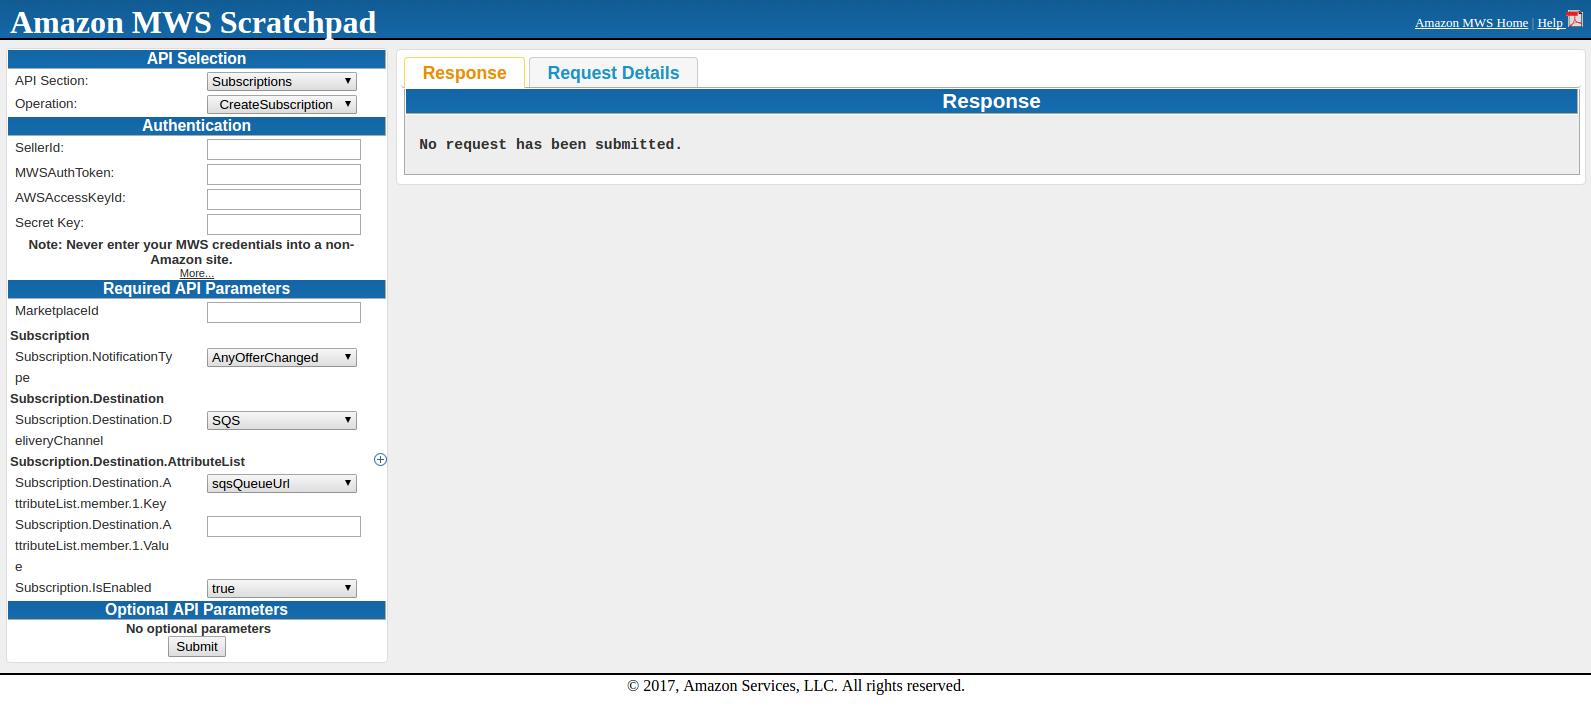
Aquí ingrese SellerId, AWSAccessKeyId, Secret Key y MarketplaceId. Suscripción.NotificaciónTipo debe sersqsQueueUrl?and in Subscription.Destination.AttributeList.member.1.Value, you need to enter?SQS?URL which was under details in?SQS?Queue. Subscription.IsEnabled will be true.
When submitting the request, either you will get success or error in response. Once you get success in response, all is done to get notifications.
After this, you can fetch notification from SQS using CURL request.