The relational database management system MySQL is free and open-source. The word “My” is a combination of “SQL,” the acronym for a structured query language, and “My,” the name of co-founder Michael Widenius’s daughter.
A relational database arranges data into one or more tables where it is possible for the data to be related to one another. The relational database’s data can be created, modified, and extracted using the SQL programming language, which is also used to manage user access to the database. An RDBMS, such as MySQL, works with an operating system to implement a relational database in a computer’s storage system, manages users, permits network access, and makes it easier to test database integrity and create backups.
Under the terms of the GNU General Public License, MySQL is free and open-source software. It is also accessible under a number of proprietary licences. Sun Microsystems acquired the Swedish company MySQL AB, which owned and sponsored MySQL (now Oracle Corporation).
Objectives of the blog
To learn how to fix the issue “The user specified as a definer (‘xyz’@’localhost’) does not exist” in MySQL. It can be any value in place of ‘xyz’.
This error has occurred because you have defined different users in Definer and using other accounts in MySQL.
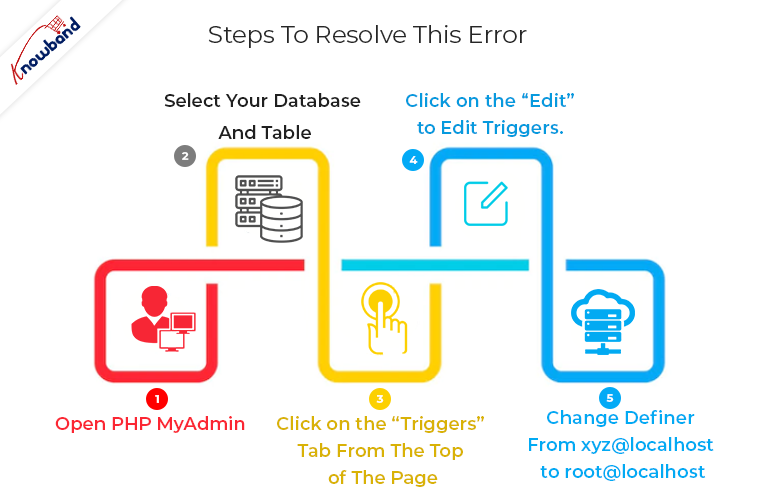
So while creating Triggers, you should use the “root@localhost” in the Definer. Follow the below steps to resolve this error:
Step 1: Open phpMyAdmin
Step 2: Select your database and table
Step 3: Click on the “Triggers” tab from the top of the page
Step 4: Click on the “Edit” to edit triggers.
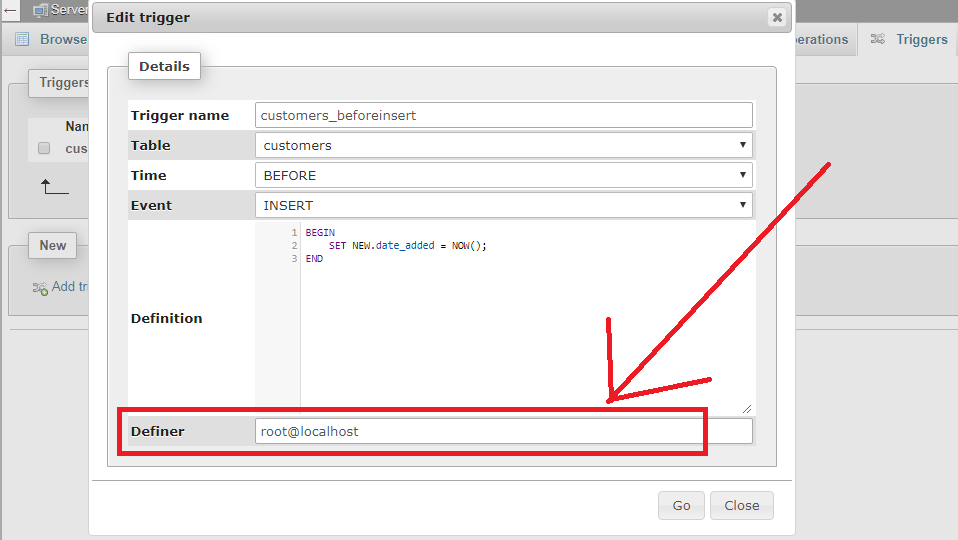
Step 5: Change Definer from xyz@localhost to root@localhost
For more details check this screenshot:
You can contact us at support@knowband.com if you have any questions. Best-in-class solutions for all things eCommerce are offered by Knowband. Additionally, we offer custom development services for a variety of platforms like Prestashop, Opencart, Magento 2, and Magento 2.
To learn how to select modified files to deploy on the server using GitAhead.
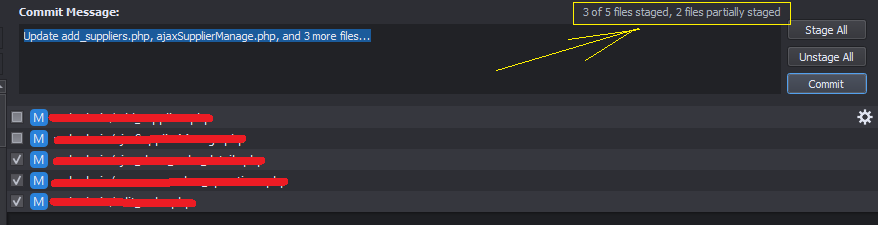
Generally, by clicking on the “Select All” button all the modified files selected and the “Select All” button disabled automatically.
But for some file, it will not select and if you try to do it manually it will not let you do. And it will also show those files as “partially staged”. You can see in the below screenshot:
To fix this issue you need to follow below steps:
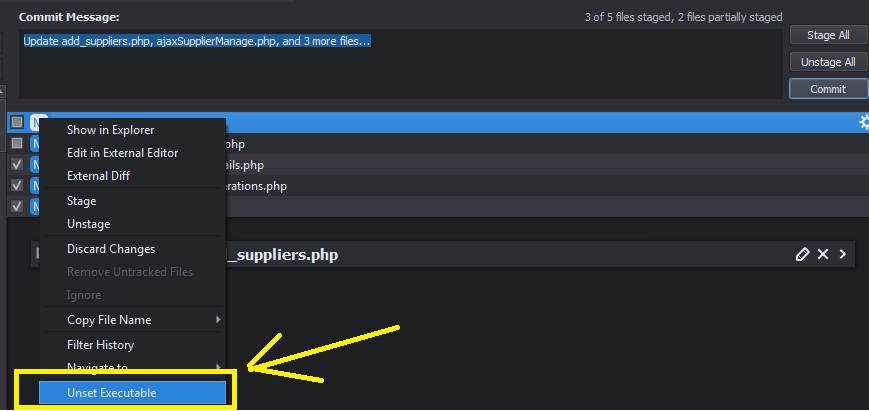
Step 1: Right-click on all that file and click on “Unset Executable” as shown in below screenshot:
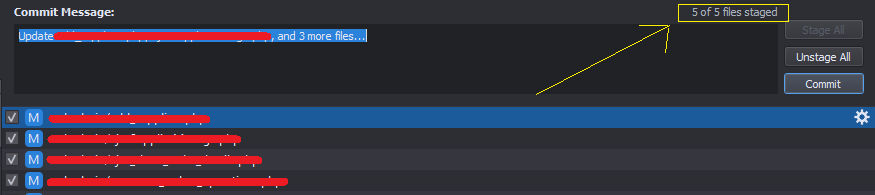
Step 2: Now click on the “Stage All” button, and now it will stage all the files. Now you will able to commit on server successfully.
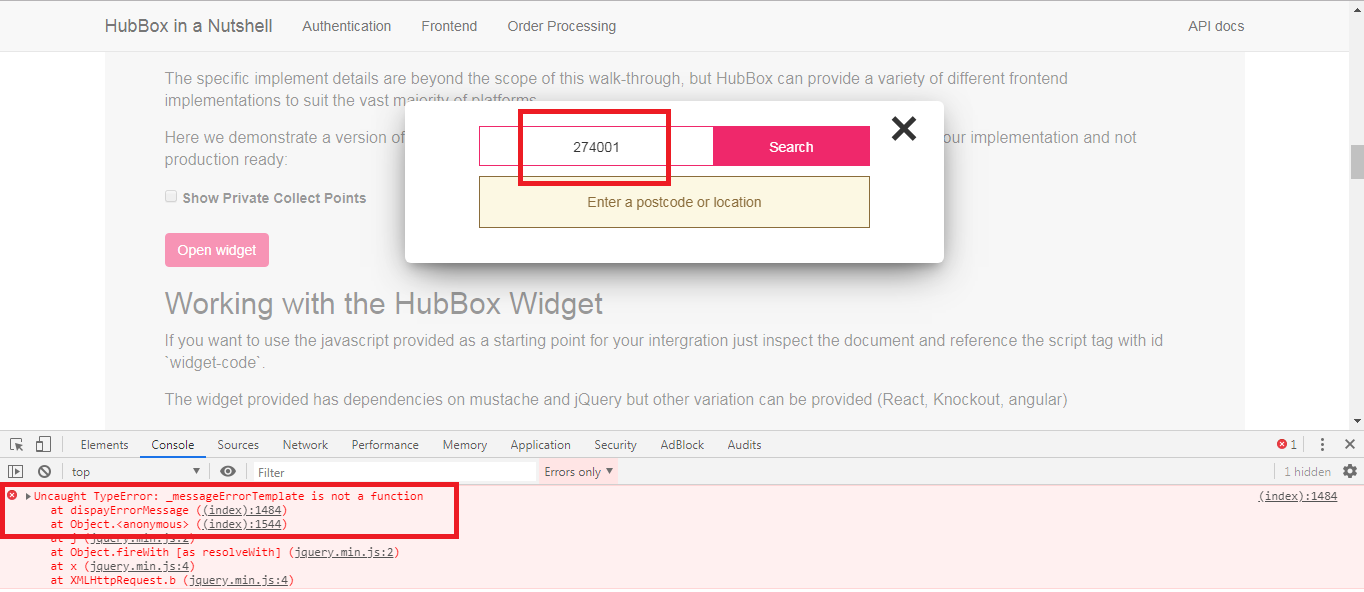
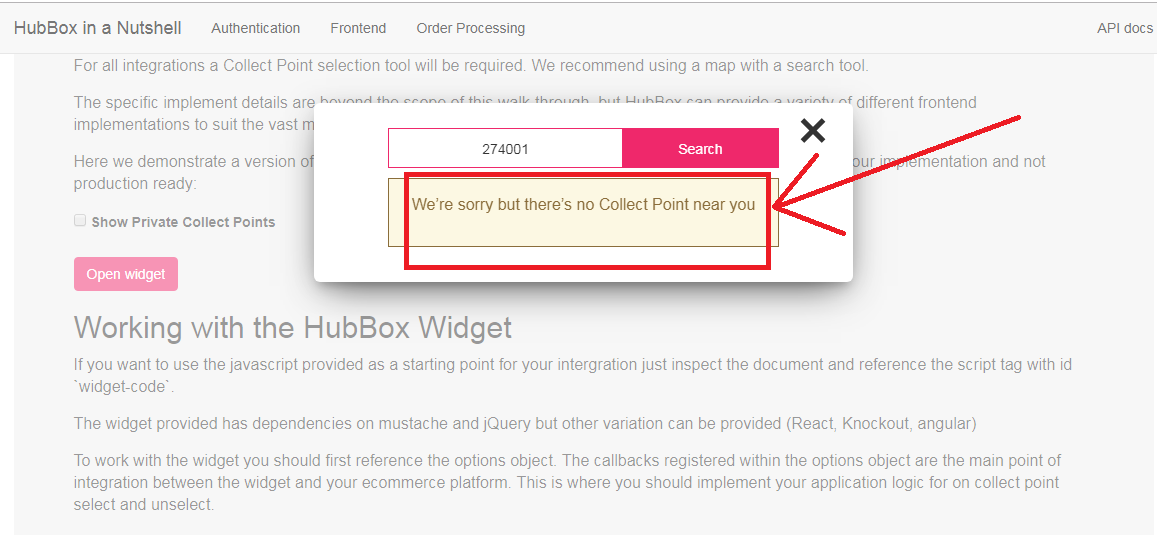
On searching the wrong address in the HubBox popup, there is no error message. When checked on the console, you are getting an error like “_messageErrorTemplate is not a function“.
Solution
The error: “_messageErrorTemplate is not a function” is coming because this function is not declared as function in the HubBox library.
To fix this issue you need to make some changes in the library of HubBox:
var _messageErrorTemplate = Mustache.render(_messageError || "");
var _messageWarning = $(selectors.messages.warning).html();
var _messageWarningTemplate = Mustache.render(_messageWarning || "");
and replace this with the below code:
var _messageErrorTemplate = function() { return Mustache.render(_messageError || ""); };
var _messageWarning = $(selectors.messages.warning).html();
var _messageWarningTemplate = function() { return Mustache.render(_messageWarning || ""); };
By declaring ‘_messageErrorTemplate‘ and ‘_messageWarningTemplate‘ as function, now you will get an error message on searching wrong address in the HubBox popup.
While using the library provided by HubBox, there is an error occurring-
require(C:\wamp64\www\HubBox\sample\src\public/../../vendor/autoload.php): failed to open stream: No such file or directory in C:\wamp64\www\HubBox\sample\src\public\index.php on line 14
Solution
This error occurred because of dependencies on files that are missed. You need to solve this issue by using below steps:
Step1: Delete the file sample/composer.lock from the library.
Step2: Make a folder with the name “vendor” under /sample/
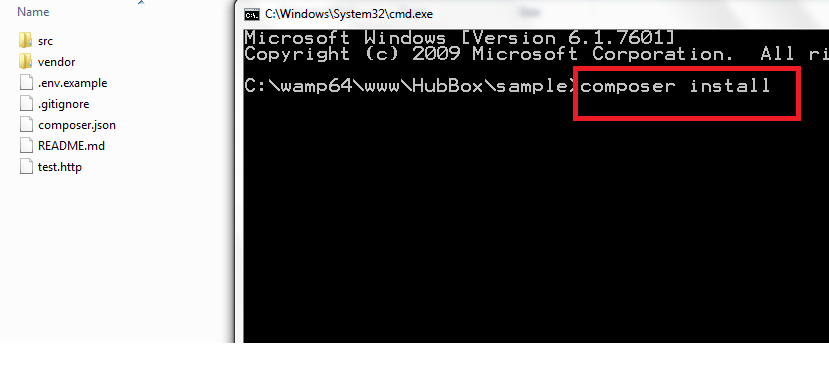
Step3: Run the command “composer install” in command prompt at /sample/
It will download all the dependency files which are required.
After successfully downloading all the dependencies, you will able to use the HubBox library.
Objective: To learn about how to create and read the cookie using JavaScript.
Cookie is small piece of data which is saved on user device by website. It is helpful in storing any data to identify the user or to track the user. When user again visits the website, stored data can be read easily.
Step 1: To set the cookie on user device
By the function createCookie(), you can easily create the cookie by passing the name, value (data which you want to store) and expiry date.
function createCookie(name, value, days) {
if (days) {
var date = new Date();
date.setTime(date.getTime() + (days * 24 * 60 * 60 * 1000));
var expires = ';expires=' + date.toGMTString();
} else {
var expires = '';
}
//setting cookie
document.cookie = name + '=' + value + expires + '; path=/';
}
Step2: To read the cookie
You can easily read the cookie using the below function by providing cookie name.
function readCookie(name) {
var nameEQ = name + '=';
//reading the cookie
var ca = document.cookie.split(';');
//processing to get the content
for (var i = 0; i < ca.length; i++) {
var c = ca[i];
while (c.charAt(0) == ' ') {
c = c.substring(1, c.length);
}
if (c.indexOf(nameEQ) == 0) {
//returning actual content
return c.substring(nameEQ.length, c.length);
}
}
return null;
}
Example: Example to store the user name in the cookie.
if (cookies == 'yes') {
jQuery('document').ready(function () {
//reding cookie
var cook = readCookie('YourWebsite');
if (cook != 'true') {
//calling to create the cookie if not found
createCookie('YourWebsite', 'user_name=akash', 30);
}
});
}
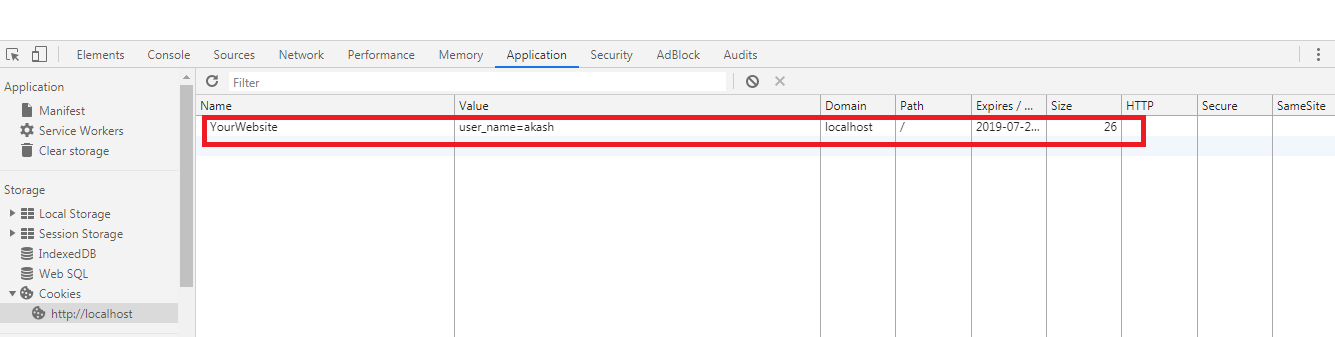
You can see the stored cookie in the console of the browser:
Dependency: You will need to include the jquery min js file to run the example. For this, you can use below line of code.
Objective: To learn how we can use same name of the class in PHP using namespace.
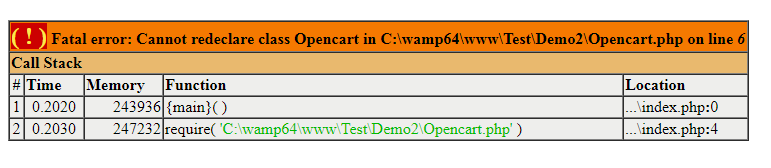
Generally we cannot use two or more class with the same name. It will give an error: “Cannot redeclare class” as shown below-
To handle this, we can use the namespace as shown in the example given below:
1. Defining the namespace Demo1 with Student class in the Demo1/Student.php
<?php
namespace Demo1;
class Student {
//All code will be here for this class
var $a = 10;
}
?>
2. Defining the namespace Demo2 with Student class (class with same name) in the Demo2/Student.php
<?php
namespace Demo2;
class Student {
//All code will be here for this class
var $a = 20;
}
?>
3. Now in the sample file index.php, we are able to use the both class without any error:
<?php
// including both of Student classes
require "Demo1/Student.php";
require "Demo2/Student.php";

//making an instance of Demo1\Student()
$ Student1 = new Demo1\Student();
//using the first class functionality
echo $Student1->a.'<br>';

//making another instance of Demo2\Student()
$Student2 = new Demo2\Student();
//using the second class functionality
echo $Student2->a;
Output Screen:
10 20
Both classes will have different functionality and we will be able to use both classes in a single file easily.
Note: We can make the code more easy by using the PHP use() function:
use Demo1\Student as Student1;
$Student1= new Student1();
echo $Student1->a.'<br>';

use Demo2\Student as Student2;
$Student2 = new Student2();
echo $Student2->a;
Objective: To learn how we can use any instance of class without including the class file.
Generally, If we want to use the instance of any class then first we need to include the class file by any of the 4 functions:
include
include_once
require
require_once
Like below,
// included all the classes
require "classes/Testing1.php";
require "classes/Testing2.php";

//now using the functionality of class
$testing1 = new Testing1;
echo $testing1->a;

$testing2 = new Testing2;
echo $testing2->a;
But if there are many classes which we want to use then we will have to include all files to be able to make the instance of the class. Suppose if there are hundreds of classes then we will have to include all and it will take lot of time and space. To overcome with this, we can use below code:
function auto_loader($class) {
$file = "classes/{$class}.php";    //path of all the classes
//this will check if file exist
if (is_file($file)) {
//finally if file exist then it will include the file
include $file;
}
}
// To register auto_loader() to call this function sequentially when a new class is declared
spl_autoload_register("auto_loader");

//now using the functionality of class
$testing1 = new Testing1;
echo $testing1->a;

$testing2 = new Testing2;
echo $testing2->a;
Using the above code, the required class will be included automatically while using the class. It will not include other classes which are not required.
File Structure:
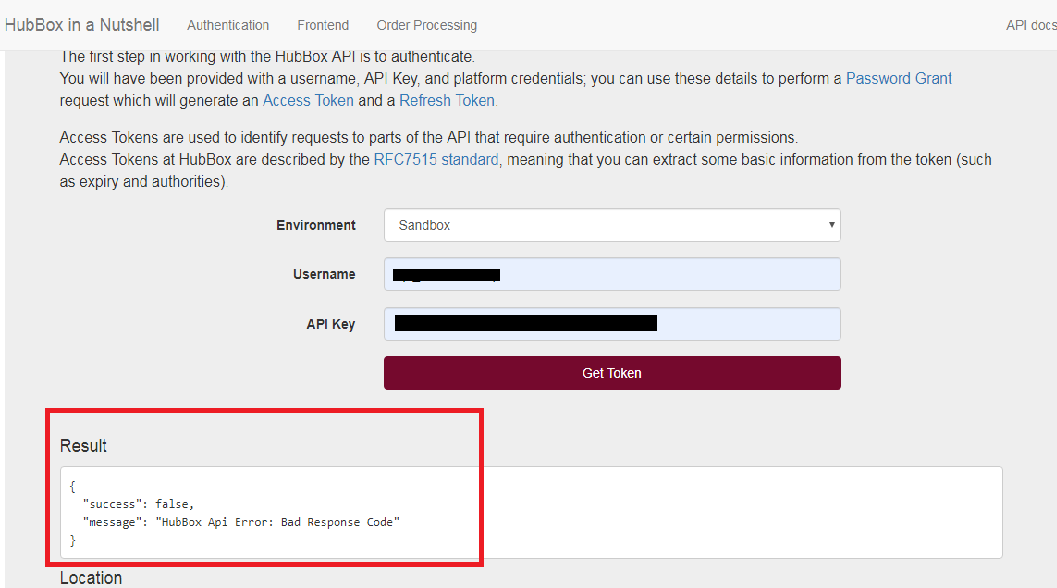
Problem Statement: Error coming in the response of Authentication API of HubBox ie. “HubBox Api Error: Bad Response Code”
Solution: If you are facing issue as shown below while you are checking Authentication API, it may be because of Authentication API is verifying SSL certificate for connection.
For this, you can turn off the SSL verification in the CURL request by adding below lines.
If this was the issue, you will need to add these lines in all APIs of HubBox Create Parcel, Cancel Parcel, Add Tracking and Collectpoint APIs as described below.
Create Parcel API: Make the change in the curl request of Create Parcel API in the function sendOrder() at HubBox/PHP/HubBox/Parcel.php as shown below:
Cancel Parcel API: Make the change in the curl request of Cancel Parcel API in the function cancelOrder() at HubBox/PHP/HubBox/Parcel.php as shown below:
Add Tracking API: Make the change in the curl request of Add Tracking API in the function addTracking() at HubBox/PHP/HubBox/Parcel.php as shown below:
Collectpoint API: Make the change in the curl request of Collectpoint API in the function getCollectPoint() at HubBox/PHP/HubBox/CollectPoints.php as shown below:
Problem Statement: Wrong product data coming in the response of Create Parcel API of HubBox Sandbox account.
Solution: If you are facing this issue in HubBox sandbox account as shown below, you can ignore this on the sandbox account as It will work fine in the Production account of HubBox.
Sent product data in the request of Create Parcel API:
Shipment is not being registered on the sent timestamp and also no error is reporting in the response.
Solution:
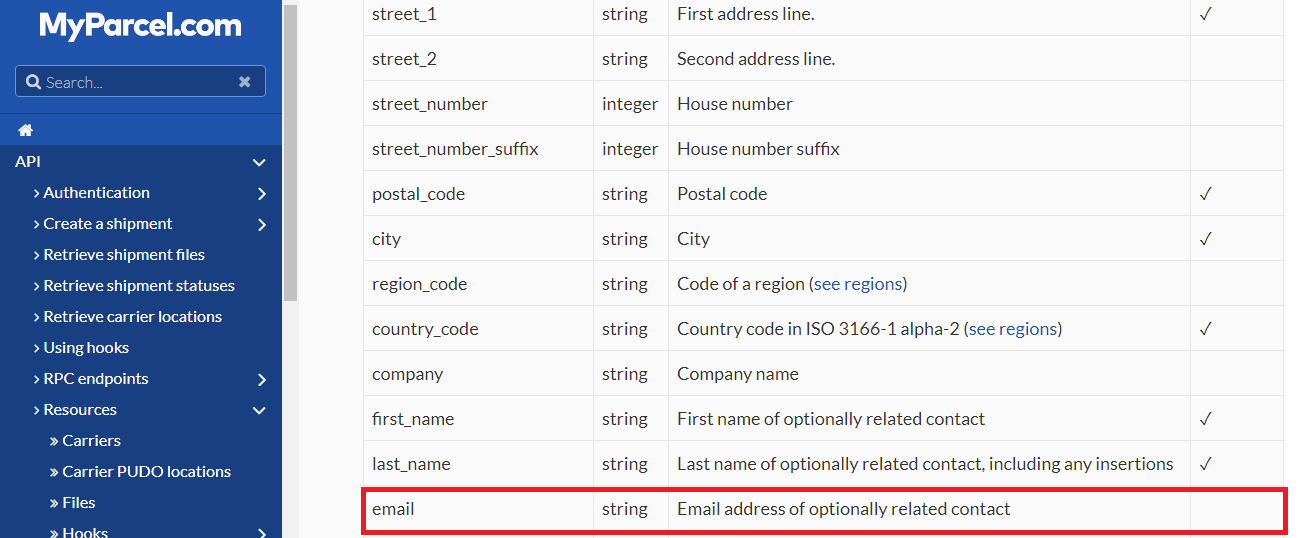
We have raised a ticket for the same and they replied that this issue was occurred because recipient’s email parameter was not sent in the Shipment API https://api.myparcel.com/shipments
According to the Spring Omni documentation, this email is optional parameter:
So, we raised a ticket again on Spring Omni regarding this and they replied: The shipment is failing to be created due to recipient email address not being populated. Although, the schema shows this as optional but Spring require the email address so the carriers can send notifications to the recipient (if they offer that service…)
So recipient email is required parameter in Spring Omni and need to be sent in shipment API.