A growing PrestaShop store can accumulate SEO problems faster than you notice them. Missing metadata, duplicate URLs, broken links, weak product content, indexing issues, and slow pages may sit unnoticed while your team focuses on products and sales.
It’s not a problem to find a PrestaShop SEO Module that boasts many features. The key point is to find a solution that will help you discover your problem, understand its essence, solve the problem, and track your progress towards solving it.
Start With Page-Level SEO Visibility
Checking each product and page of your large catalogue manually will hardly be an option.
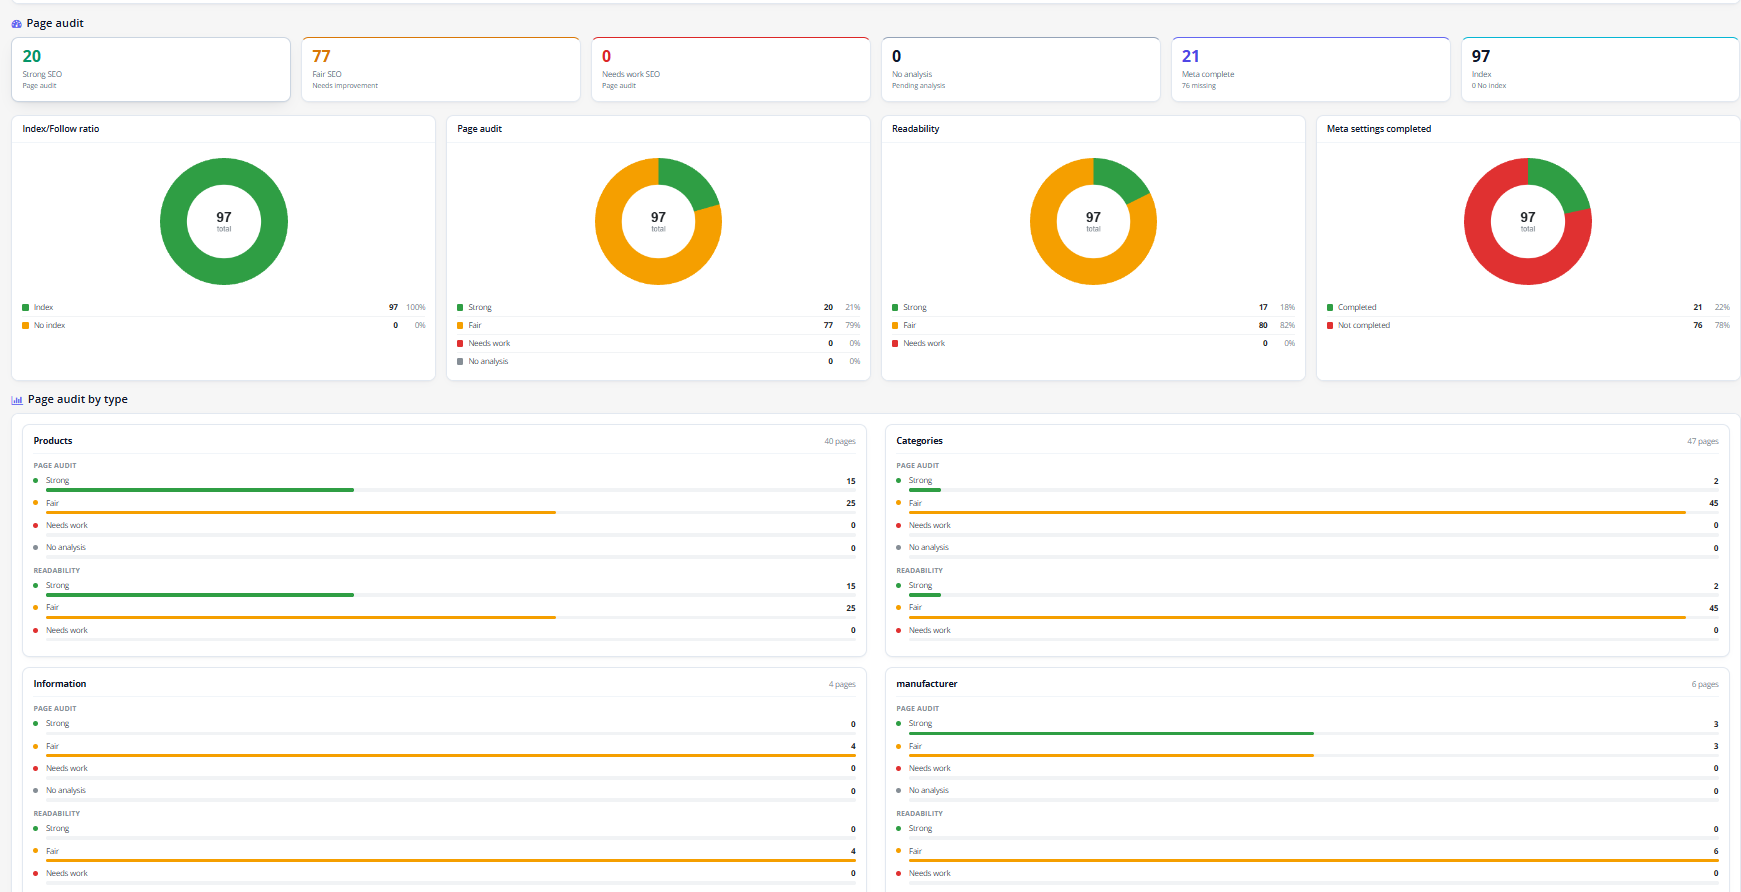
A useful PrestaShop SEO Analyser should allow you inspect individual products, categories, CMS pages, manufacturers, and suppliers. More importantly, the audit should explain what is wrong instead of simply showing a score.
For example, a product page might have a missing meta description, weak keyword placement, insufficient content, or missing image alt text. Knowing the exact issue gives your team something actionable to work on.
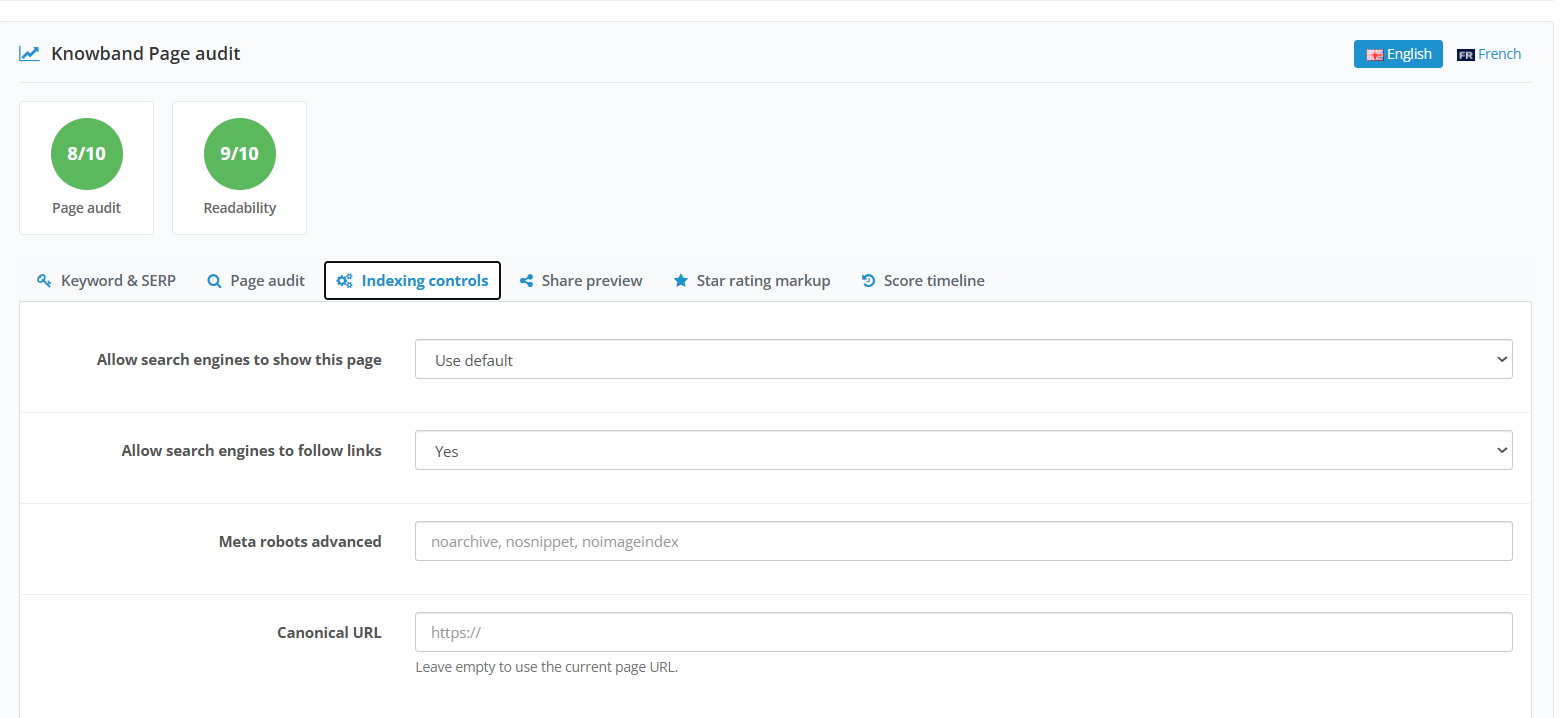
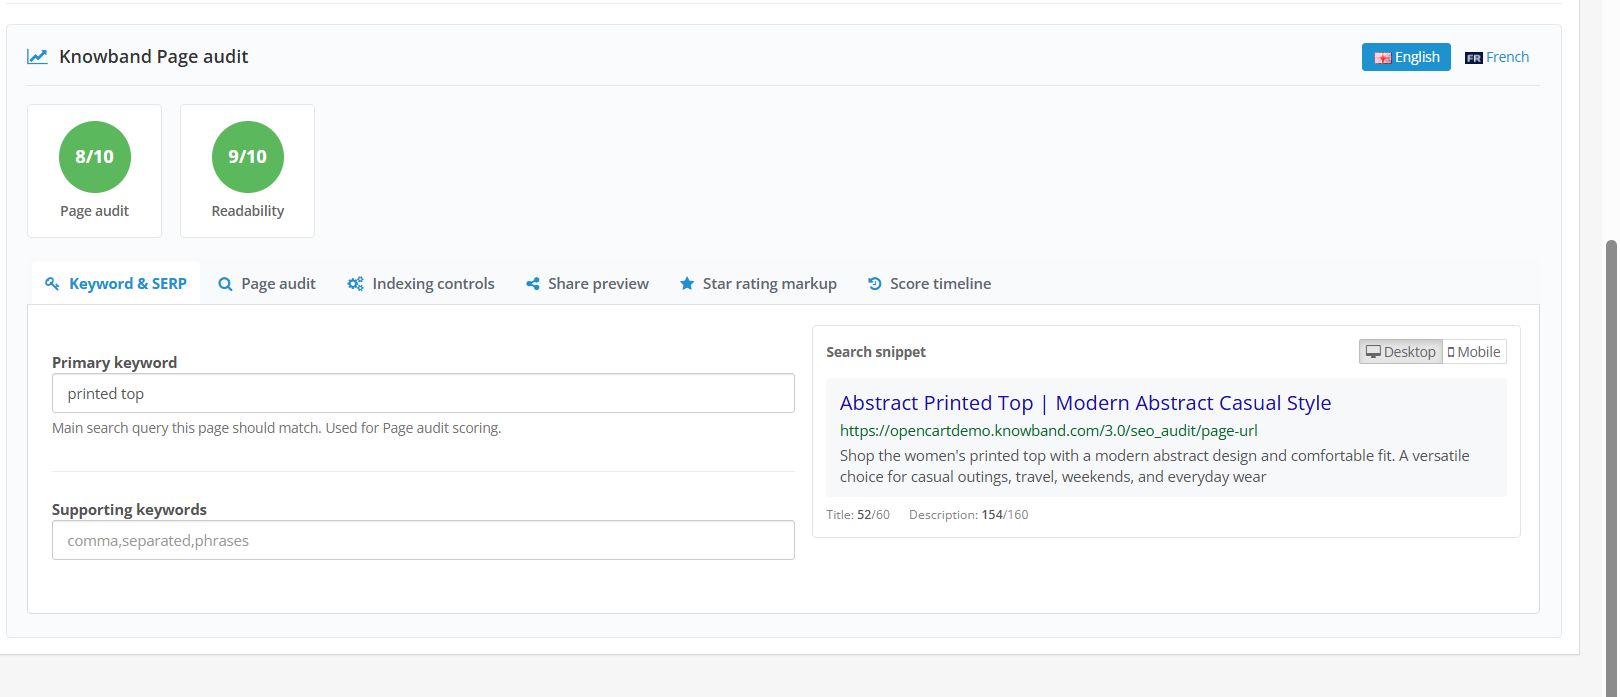
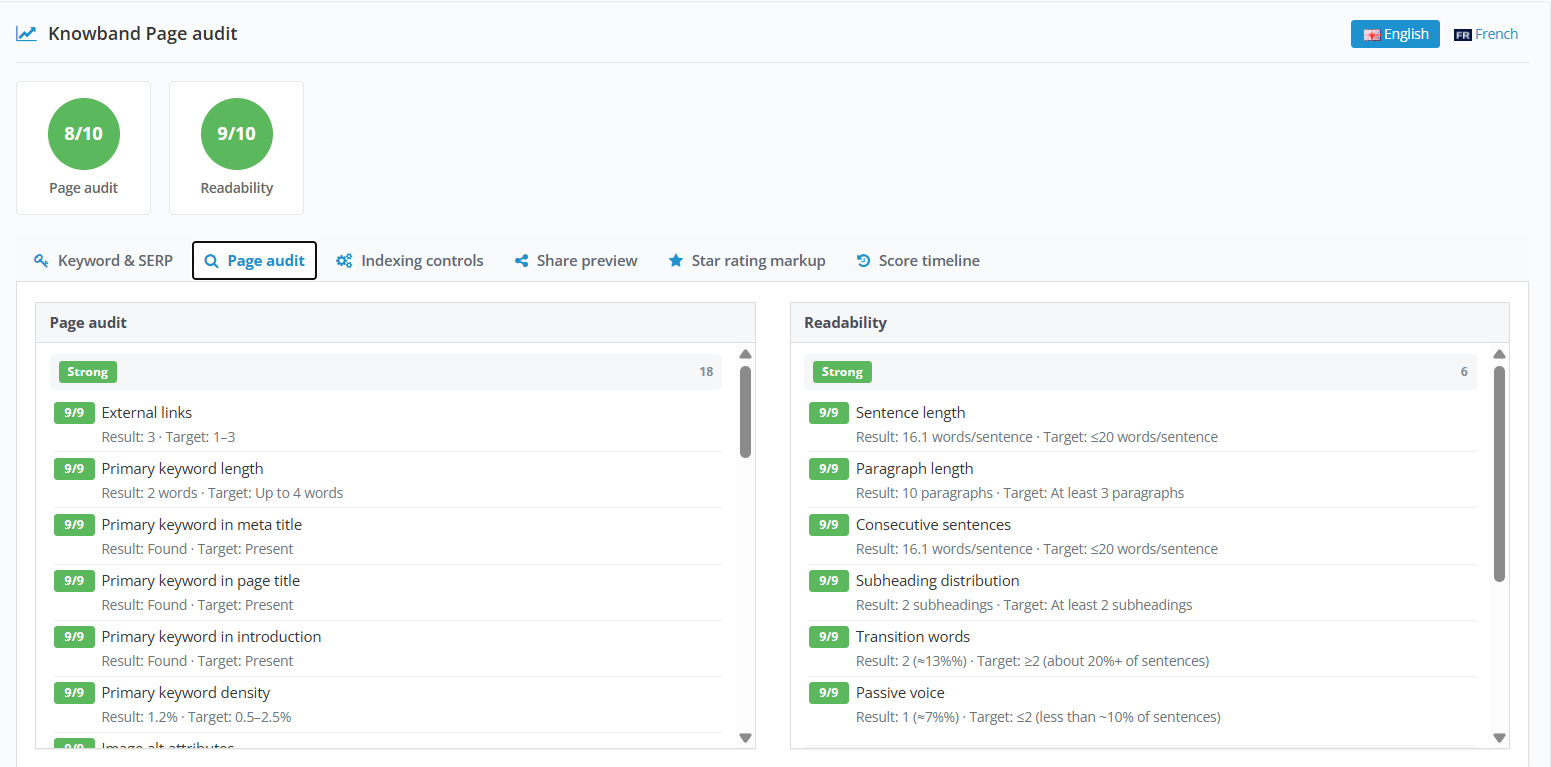
The PrestaShop SEO Audit Module provides separate SEO and readability scores and shows individual rules with the current result, target, and recommendations. The module can audit products, categories, information pages, manufacturers, and suppliers.
Don’t Overlook Technical SEO Issues
Although people care about content optimization, don’t overlook technical SEO issues.
Consider an old product URL that returns a 404. Or two pages that accidentally use the same friendly URL. However, if these problems are not monitored, the pages will become more difficult to reach, and at the same time, your team will not know about the problem.
While analyzing a PrestaShop SEO Optimizer, you should consider such features as:
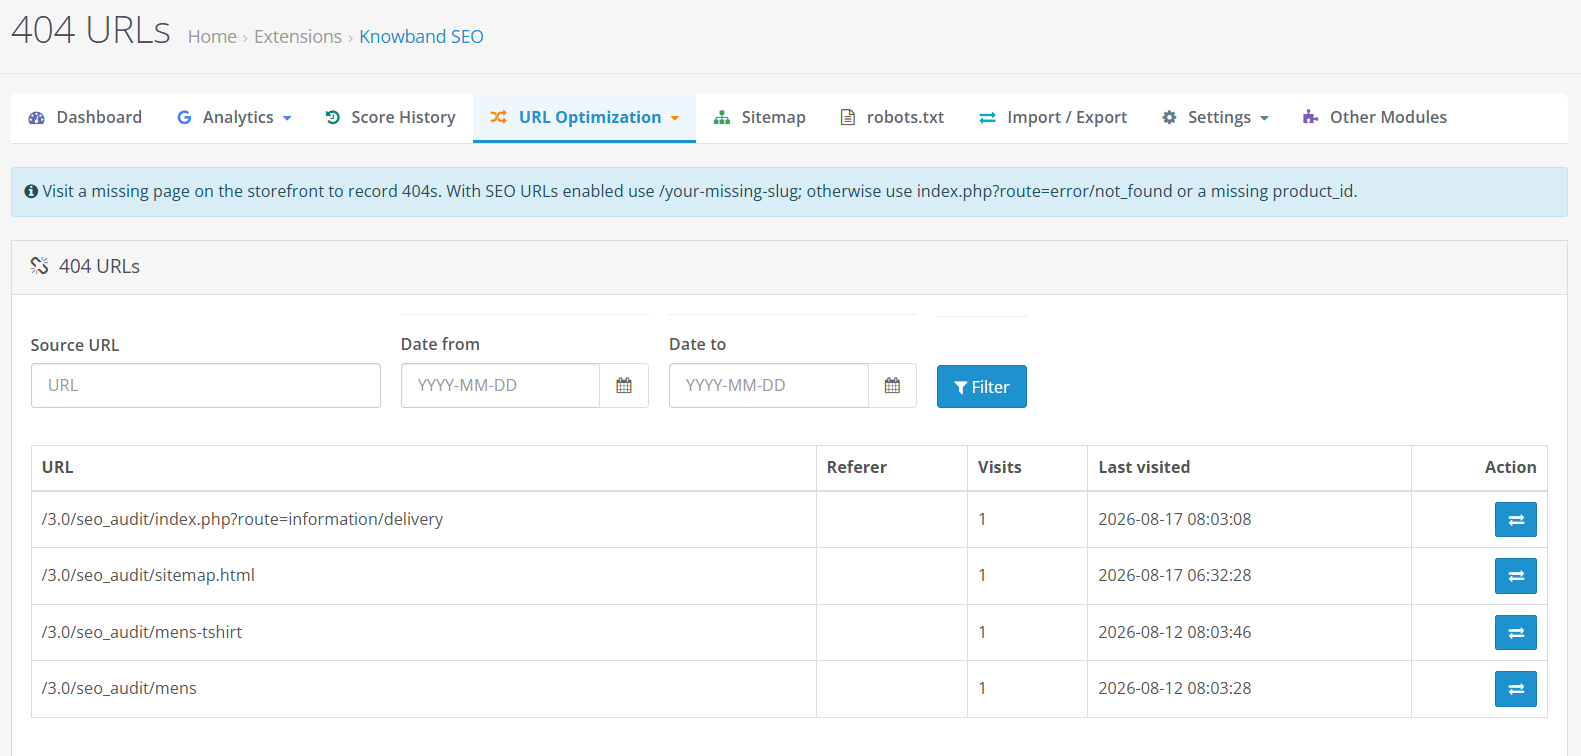
404 URL monitoring
Duplicate URL detection
Redirect management
SEO-friendly URL controls
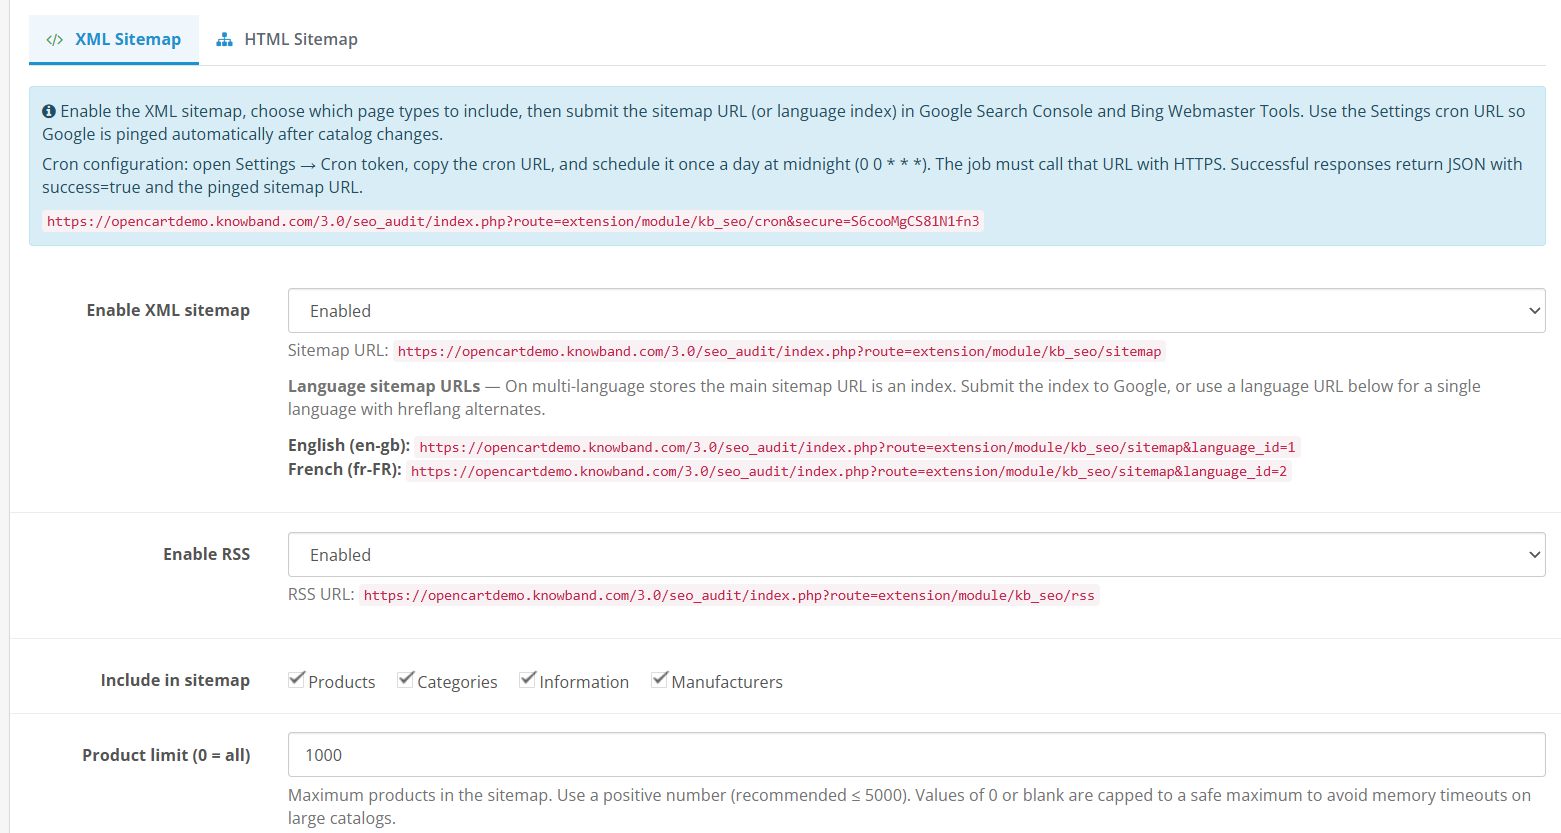
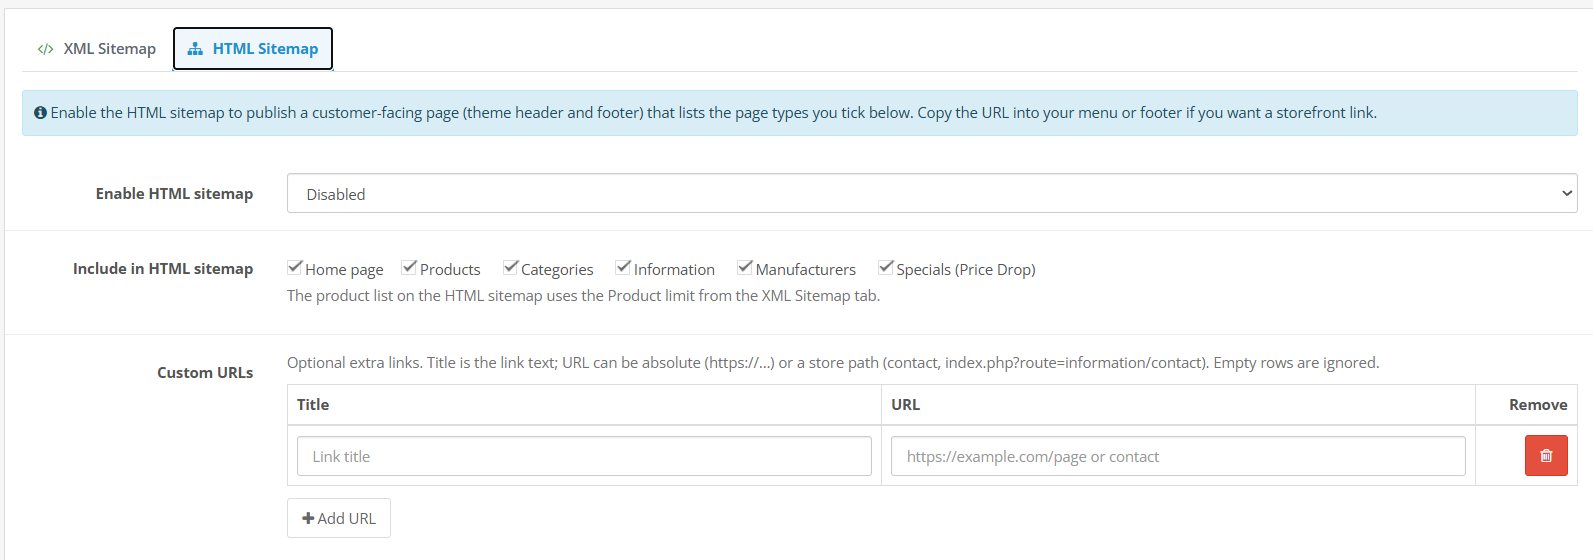
XML sitemap management
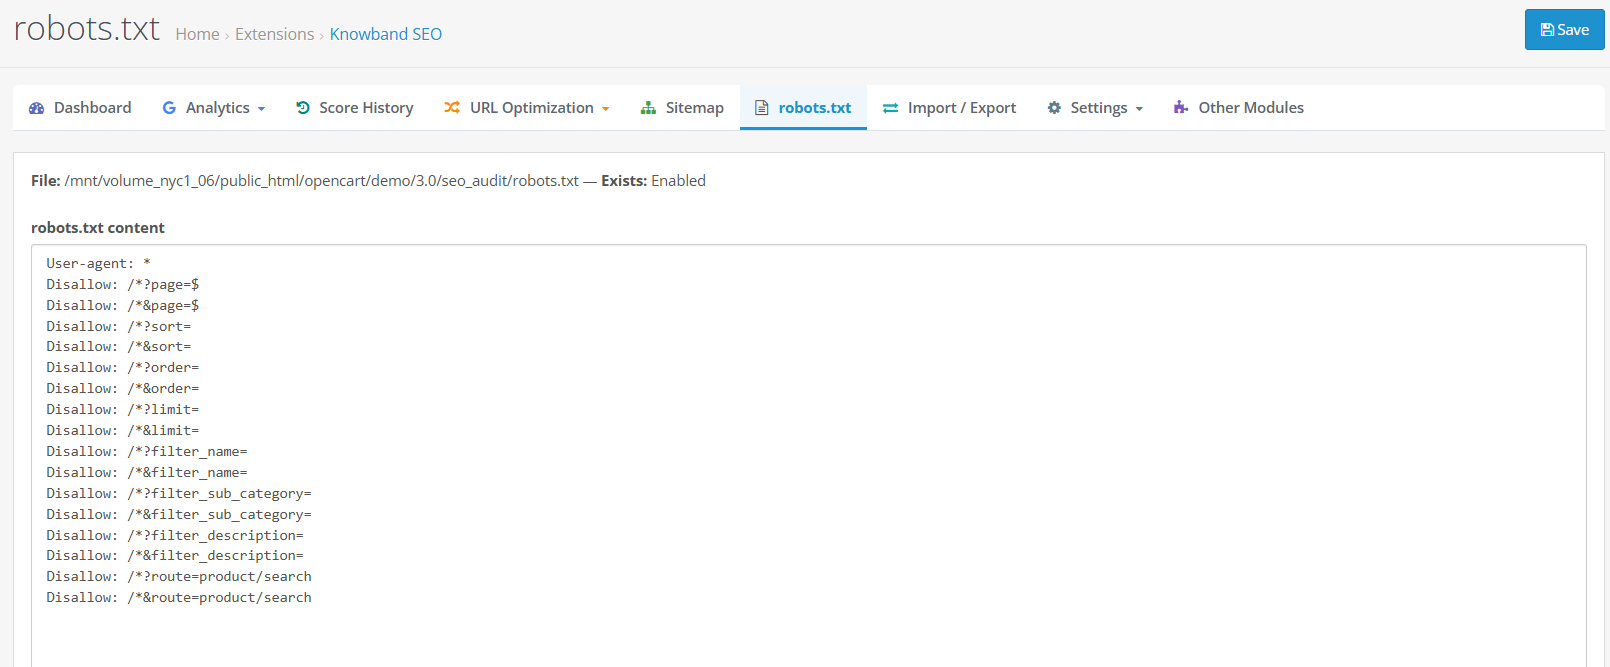
Robots.txt management
These aren’t isolated tasks. They form part of keeping a growing ecommerce website technically organized. The PrestaShop SEO Module brings these URL and technical SEO checks together instead of requiring merchants to handle every issue separately. You can find the module on PrestaShop SEO Addons.
What Should You Look for in a PrestaShop SEO Module?
All these features will help you to find problems that can negatively affect your valuable pages and what you need to fix.
Main aspects that you should pay attention to include:
SEO page-by-page analysis: This feature will allow you to review your product, category, CMS, manufacturer, and supplier pages separately, without relying solely on the SEO analysis of the whole store.
Identification of technical issues: This functionality should allow identifying such technical SEO problems as absence of metadata, broken 404 URLs, duplicate URLs, indexing issues, and other on-page SEO issues.
Content and readability analysis: SEO is not only about keywords. In addition to this, content should be reviewed according to such criteria as text length, sentence structure, heading usage, keyword placement, and readability.
URLs and sitemap management: It’s important for merchants to have an efficient way to control redirects and duplicate URLs, as well as manage their XML sitemaps and robots.txt.
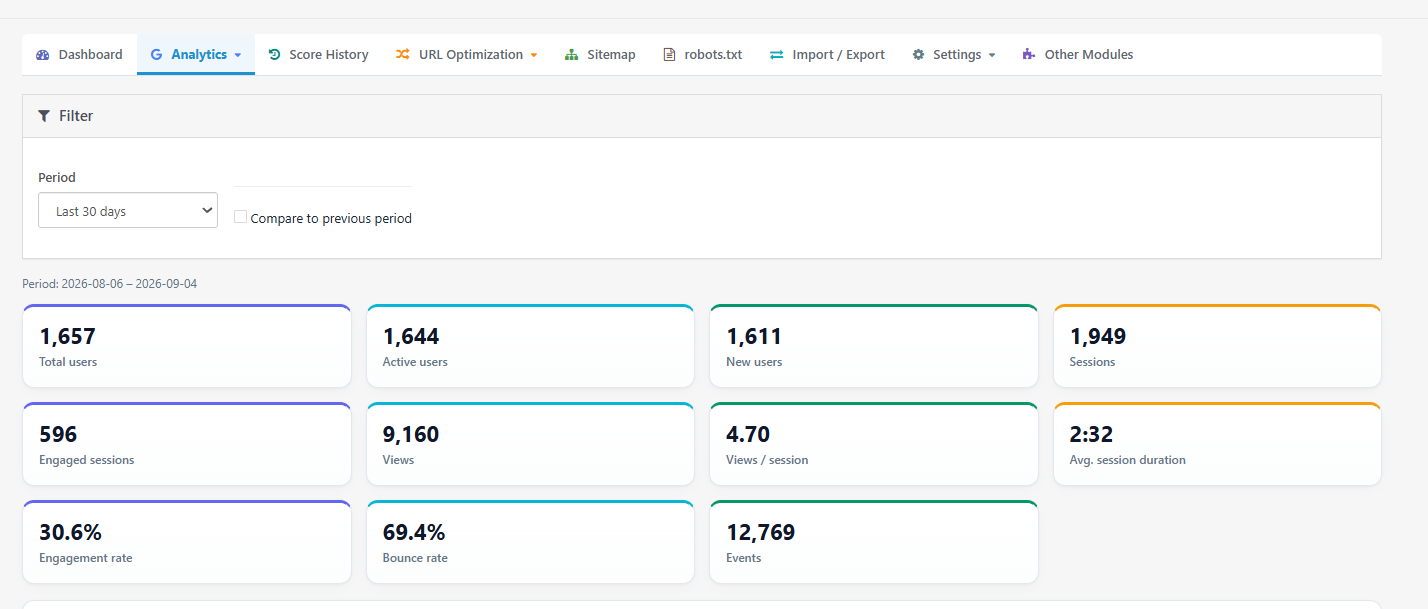
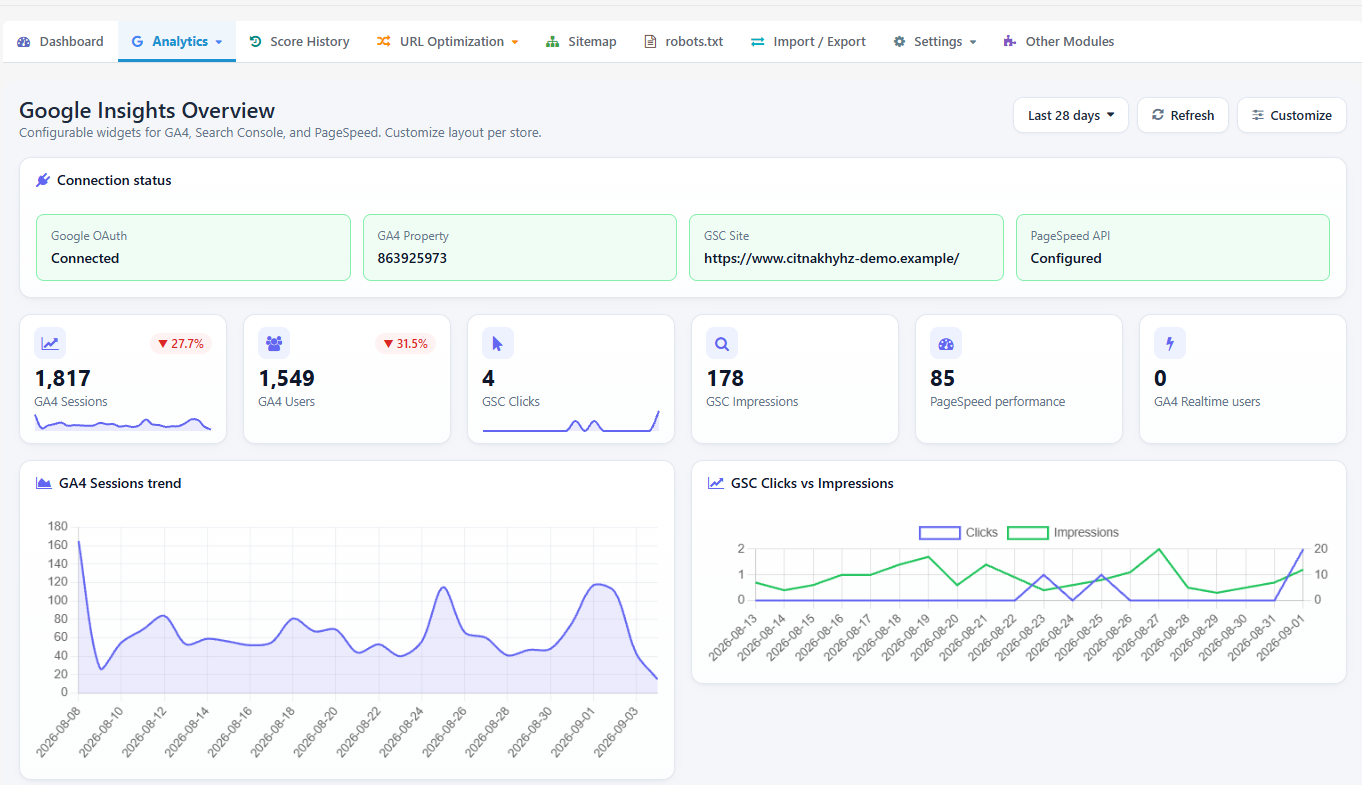
SEO performance and search data: Integration of SEO checks with Google Search Console, Google Analytics 4, and PageSpeed information will provide merchants with additional context regarding traffic, search visibility, and performance.
Progress tracking: SEO improvements need to be measured over time. History of the score and trends related to issues help identify if there are any improvements on the part of the store.
This includes page-level SEO, readability, and technical SEO, which includes a URL checker, 404 checker, redirects, sitemap/robots, Google Analytics 4, Google Search Console, PageSpeed Insights, score history, and AI-powered content optimization in PrestaShop.
The most important feature of a reliable PrestaShop SEO Module is that it not only identifies SEO issues but also explains their causes and provides actionable solutions. This guide explains how to conduct an effective SEO audit for your PrestaShop store.
Look Beyond Metadata: Can You Measure SEO Performance?
An SEO audit tells you what may be wrong. Performance data helps you understand what is happening after people search for your store.
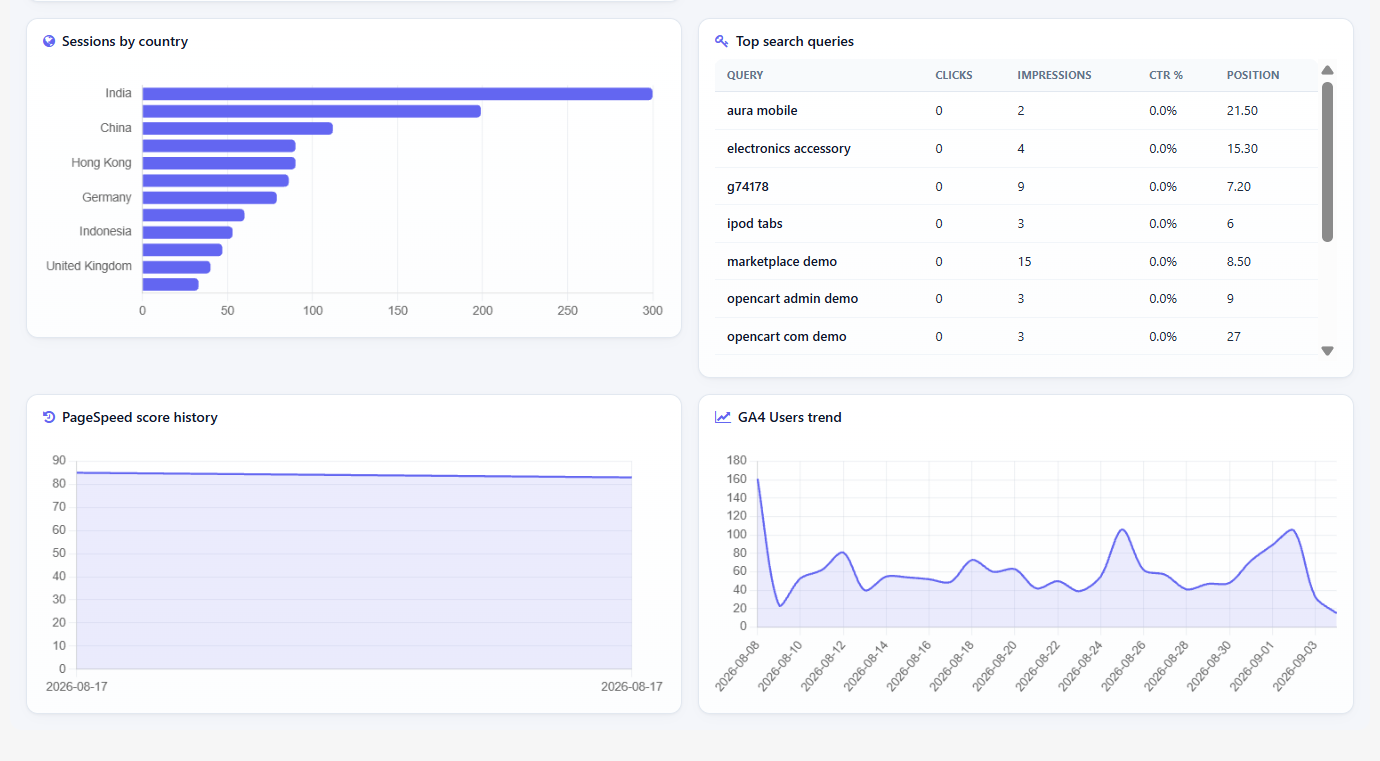
Suppose you improve the metadata on 100 product pages. What happens next? Are impressions increasing? Are clicks improving? Which search queries are bringing visitors? Did traffic change after the optimization?
A practical PrestaShop SEO Module such as Knowband’s should make it easier to answer these questions.
Google Analytics 4, Google Search Console, and PageSpeed Insights integration within the PrestaShop dashboard allows having all necessary traffic and visibility, query, and performance data available for SEO purposes.
And that is important, since SEO isn’t supposed to be a checklist that gets ticked off once everything is done. The key goal here is to find out whether your activity impacts the organic performance of the store.
Make SEO Progress Easy to Track
SEO changes rarely happen all at once. Product descriptions get updated, URLs are changed, redirects are added, technical issues are fixed, and new pages are published every week.
Without historical data, it becomes difficult to understand whether the overall store is improving or whether a recent change introduced new problems.
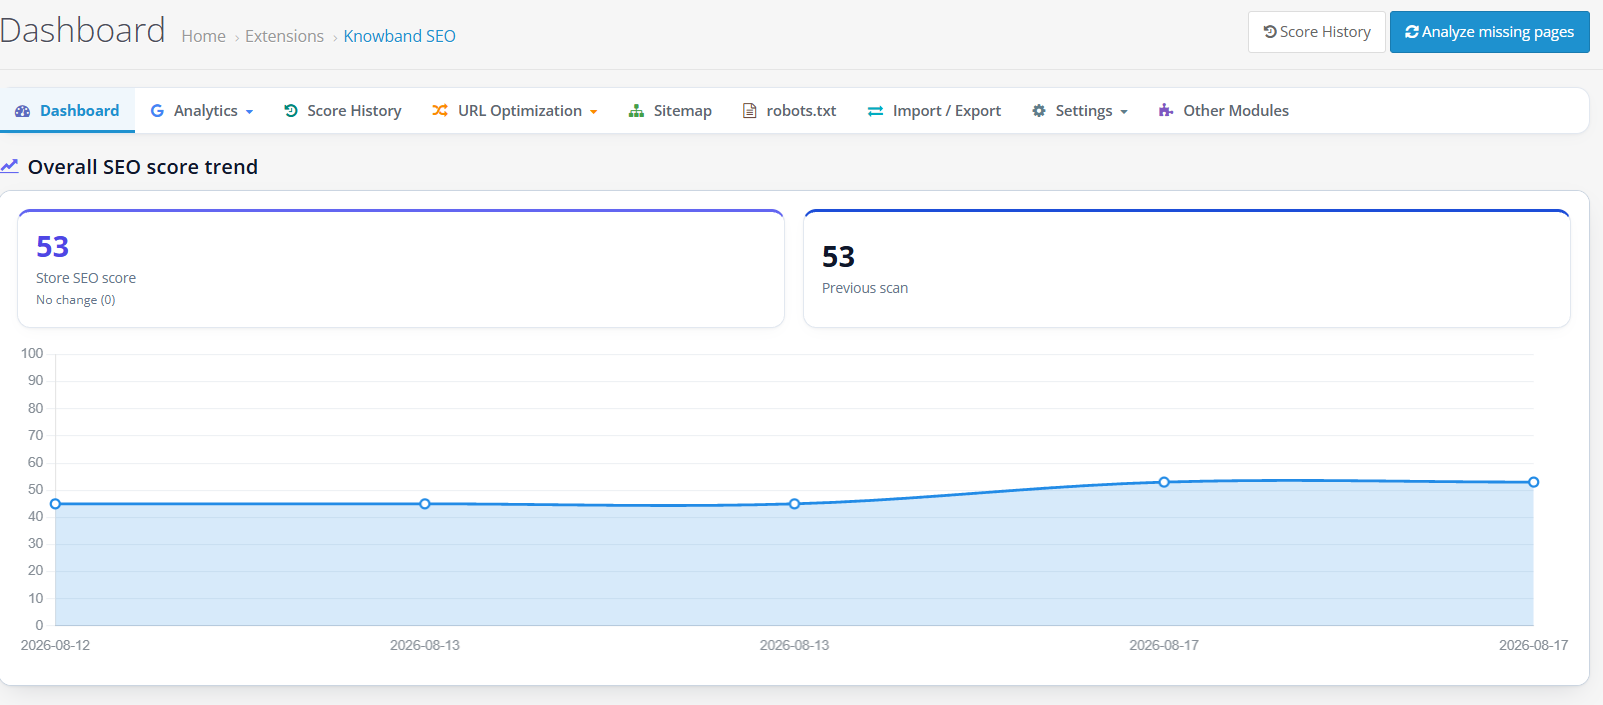
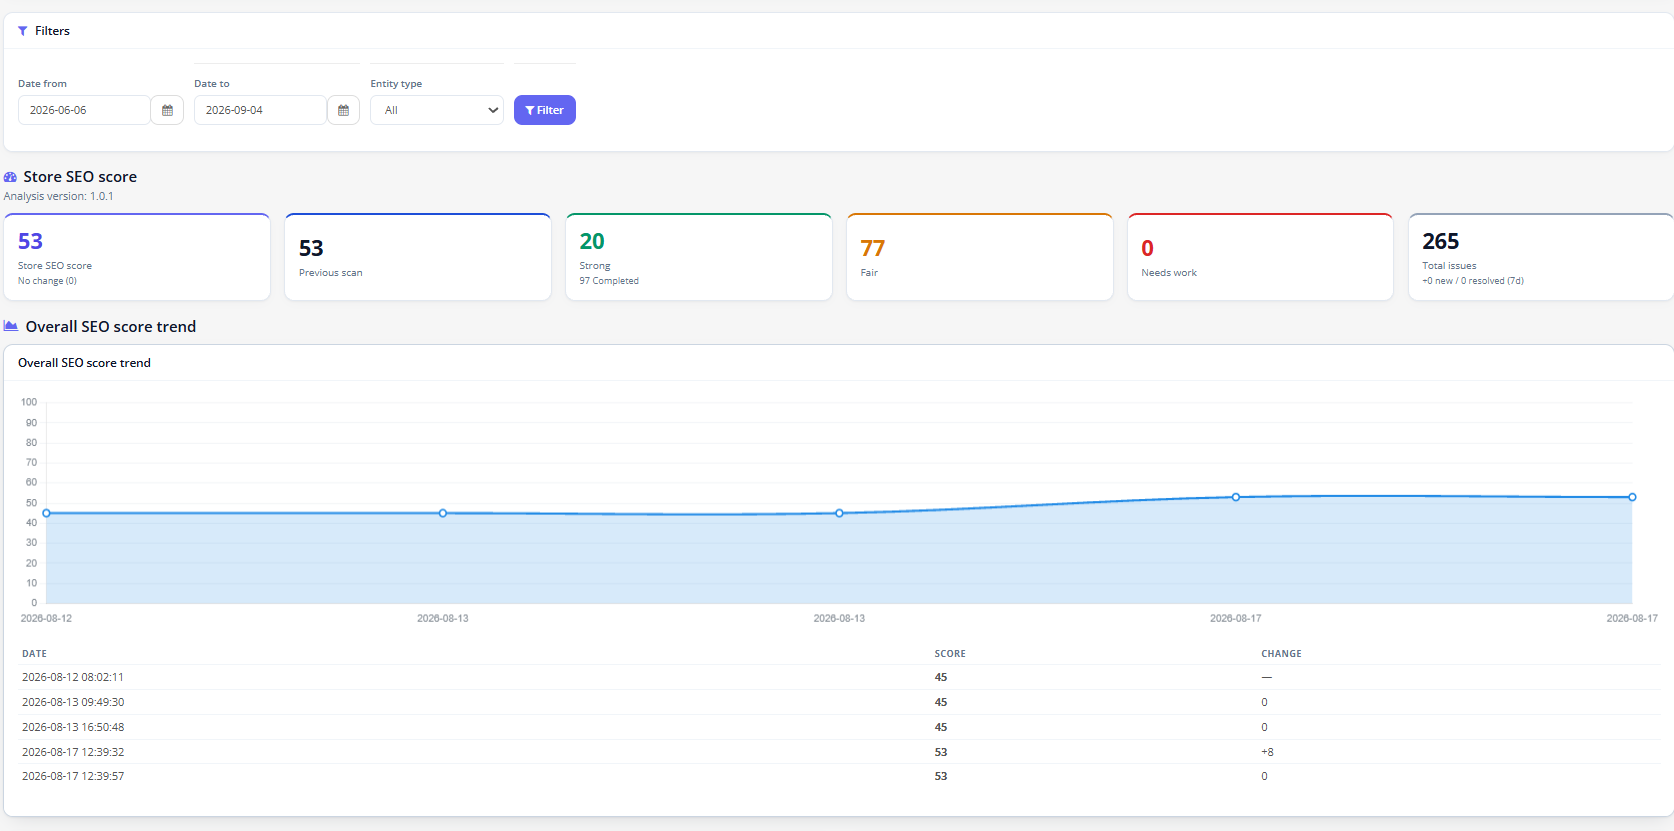
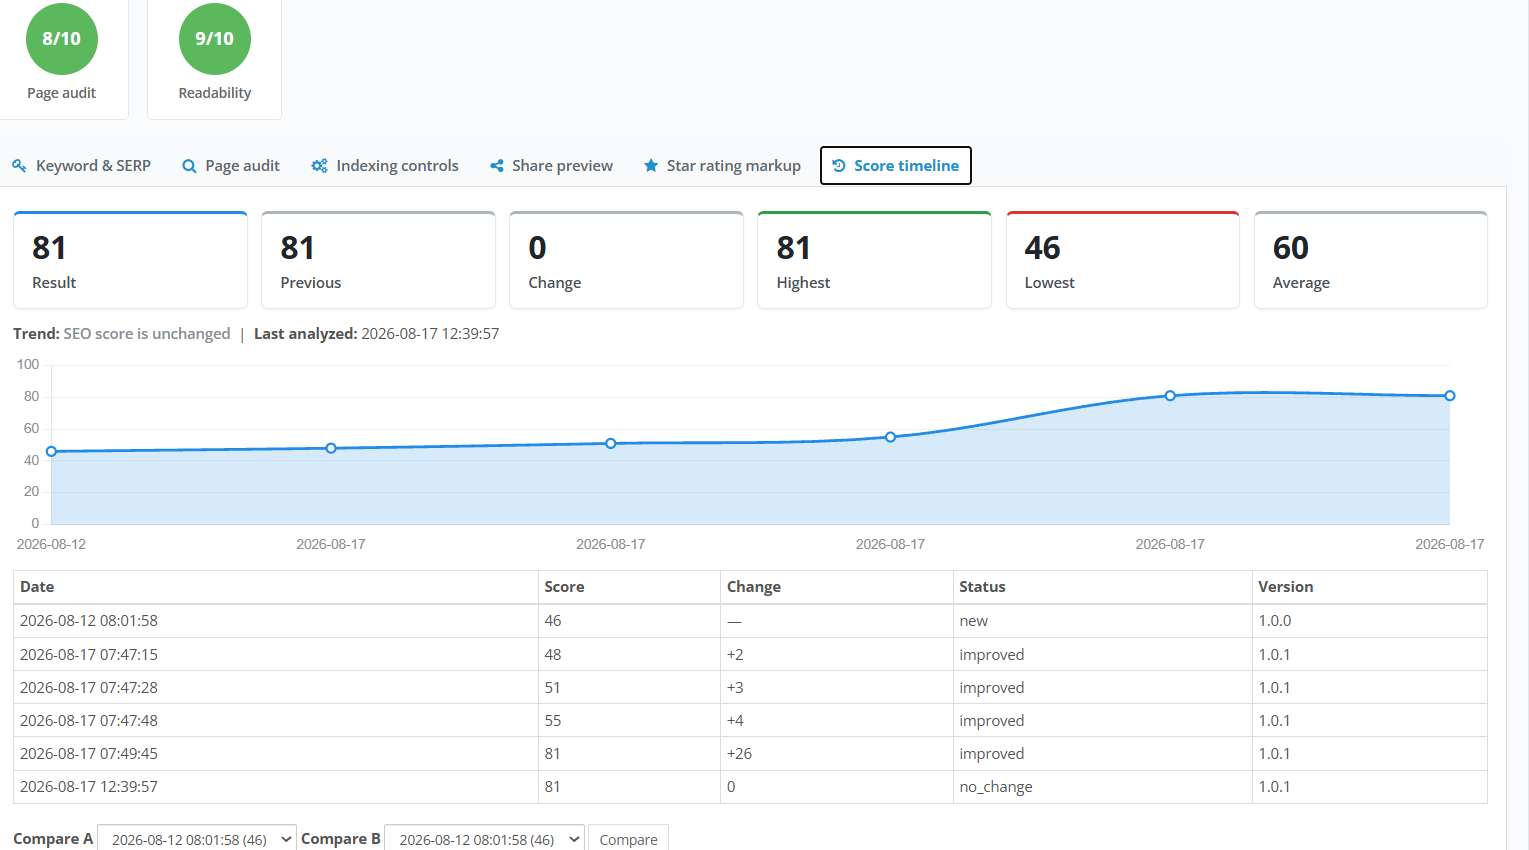
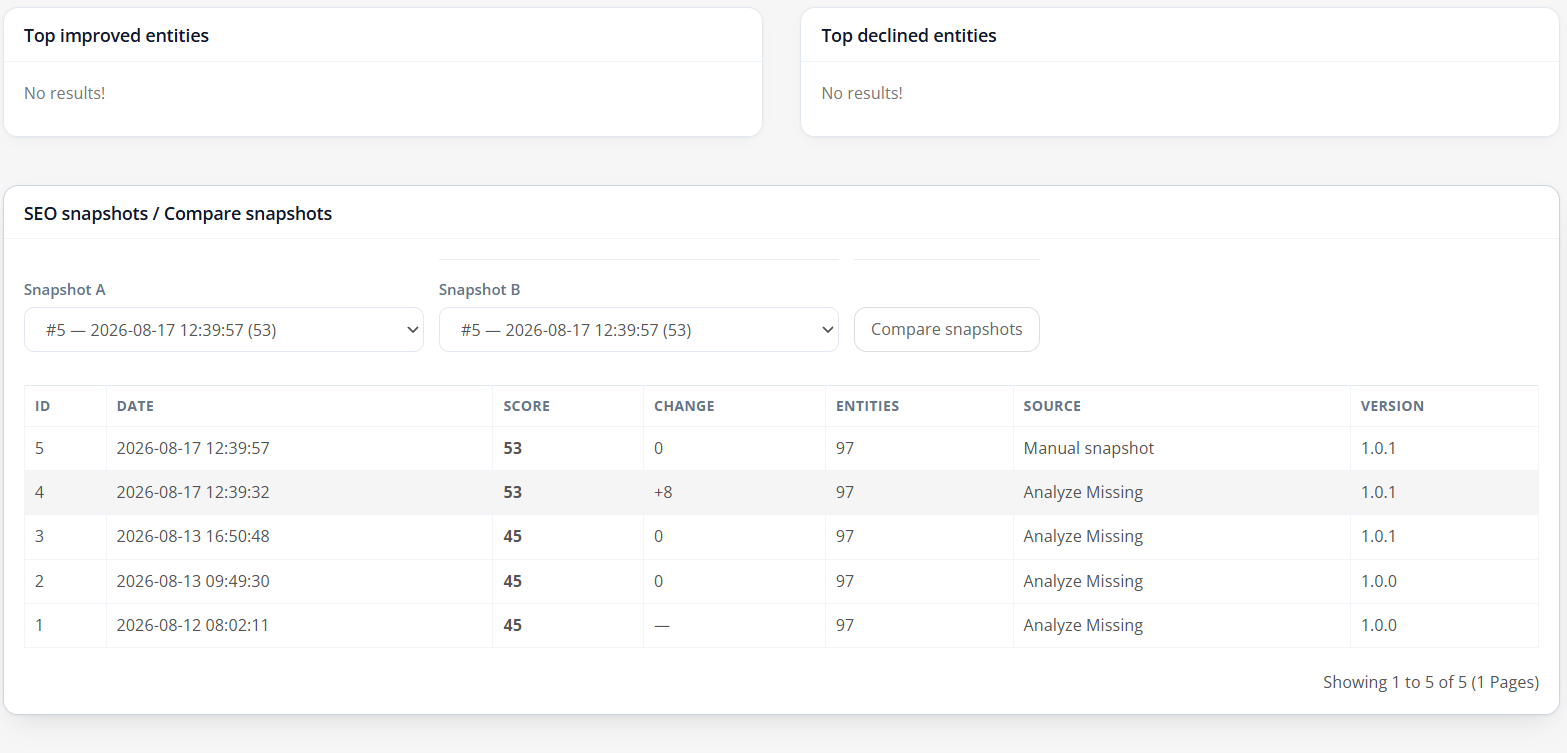
Look for a tool that can preserve SEO snapshots and show changes over time. Score History in the PrestaShop SEO Checker Module by Knowband tracks store SEO scores, issue trends, and page-level improvements or declines, while also allowing comparisons between snapshots.
This gives merchants a more useful question to ask than “What is my SEO score?”
The better question is: “What changed, and did it make the store better?”
Content Optimization Should Not Become a Bottleneck
When working with hundreds or thousands of items, ecommerce teams could spend much time on writing and updating metadata by hand.
An SEO tool may prove to be more helpful if it enables discovering content gaps and facilitates routine optimization processes without eliminating human review.
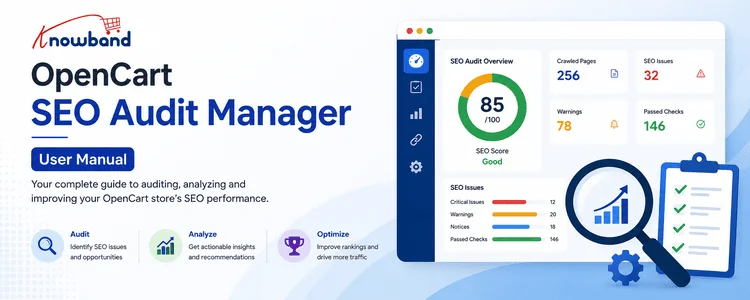
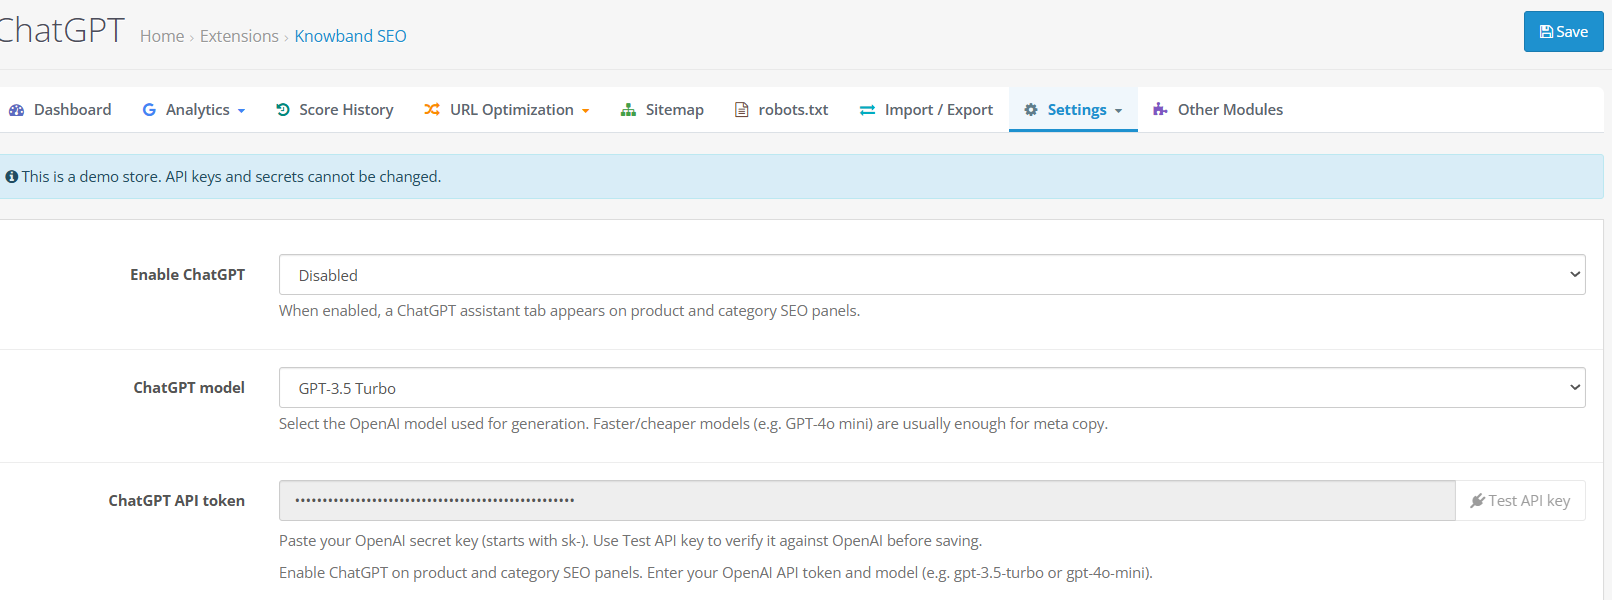
The Knowband PrestaShop SEO Audit Manager includes a ChatGPT-based assistant for generating SEO fields such as meta titles and meta descriptions. Generated content is written into the selected fields for review rather than being published automatically.
This is an essential thing that must be considered. Though artificial intelligence can help in the creation of the content, it is the merchant who decides what should be put on the website.
Choosing the Right SEO Solution for Your Store
When comparing a PrestaShop SEO Module, avoid choosing based only on the number of features listed on the product page. Instead, ask whether the solution covers the complete workflow:
Discover the issue → understand its implications → make the fix → evaluate the effect.
At the very least, it involves searching for page-level SEO analysis, finding technical issues, URL and redirect management, controlling sitemap and robots.txt files, getting performance statistics, and tracking history.
Additional features, such as content creation with the help of artificial intelligence, may come in handy when the store has an extensive product catalog and little time for optimization.
A Practical SEO Workflow for PrestaShop Stores
For merchants who want to keep SEO work closer to the PrestaShop back office,PrestaShop SEO Audit Manager brings these activities together in one environment. It can audit products, categories, CMS pages, manufacturers, and suppliers while combining SEO and readability analysis with URL optimization, sitemap management, Google Analytics 4, Google Search Console, PageSpeed Insights, score history, and AI-assisted content optimization.
What is needed is an approach to the workflow that will simplify detecting problems, prioritizing tasks, making improvements, and tracking their effect.
For an expanding PrestaShop store, this is the skill that is most valuable – transforming SEO into a continuous process of improvements rather than an isolated set of tasks.
A shopper adds three products, reaches the cart, and disappears. In relation to a PrestaShop store, an abandoned checkout may be indicative of potential sales that were close but never closed.
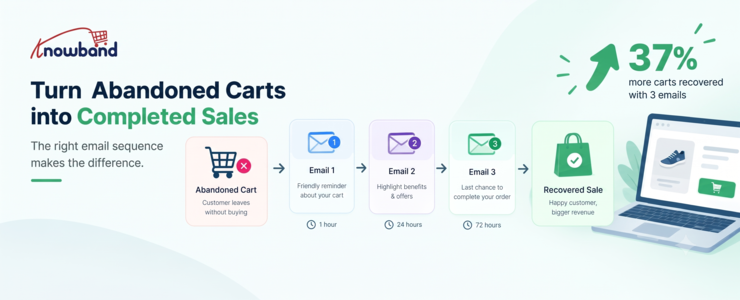
The case for a structured PrestaShop Abandoned Cart Module is straightforward: don’t treat every abandoned cart as a lost customer. A reported 2026 benchmark from Marketing LTB says sending three recovery emails recovers 37% more carts than sending one. That number should not be viewed as an absolute number for all stores, but it provides an interesting point: one reminder does not have to damage recoverable demand.
In the case of abandoned cart recovery of a PrestaShop store, what is recommended is to develop a process where each reminder has a distinct goal. The first is a reminder, the second is overcoming hesitation, and the last message offers a reason to buy. A dedicatedPrestaShop cart recovery addon makes it practical to run that sequence automatically.
Why one abandoned-cart email often isn’t enough
A cart abandonment is not always a checkout issue. Shoppers compare prices, check shipping costs, save products for future reference, or get distracted.
That distinction changes how recovery emails should be written.
Someone who bailed because of a delivery fee appearing out of nowhere requires a different sort of message than someone who just closed their browser while trying to complete the transaction. Using the same type of heavily discounted message for both customers will waste your margins and create an overly promotional brand image.
A proper message flow provides multiple chances for the visitor to come back within the context of the situation.
The three-email sequence worth testing first
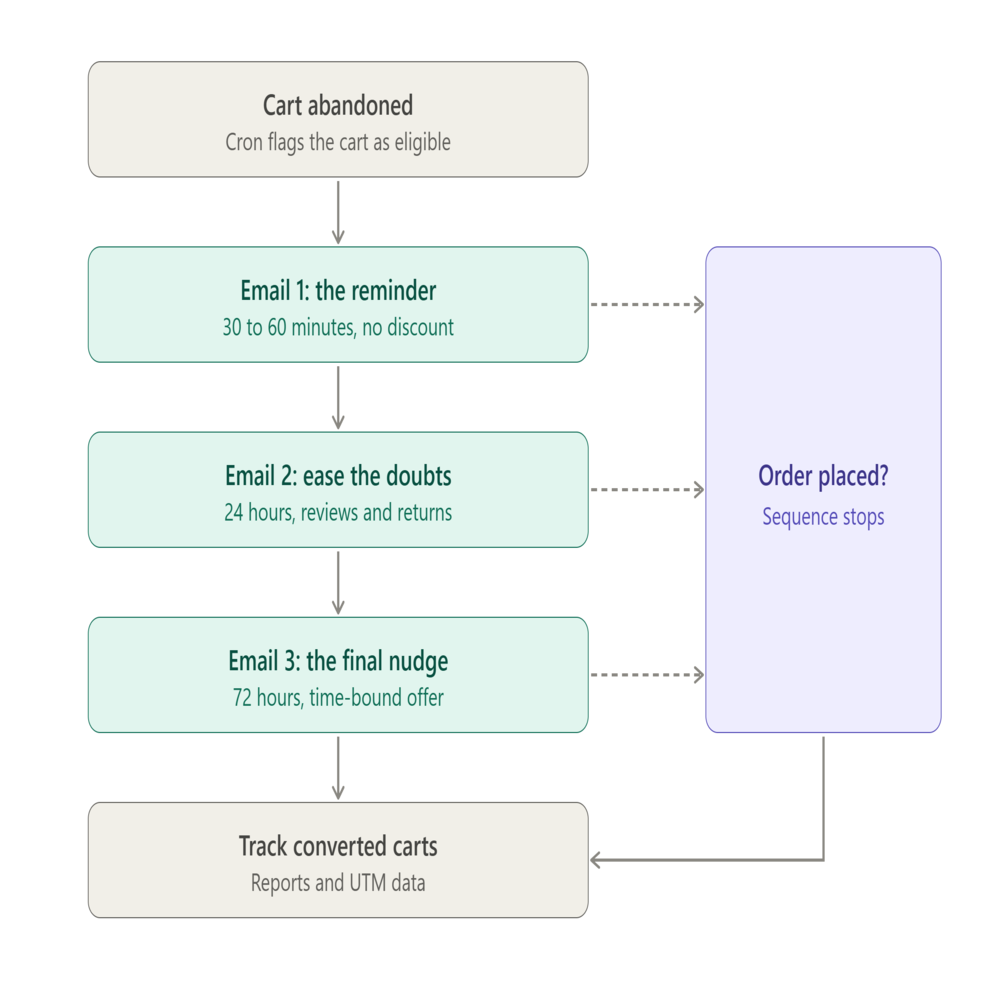
A three-email recovery sequence for PrestaShop: each reminder has a different goal, and the flow stops as soon as the shopper orders.
A useful starting point is a three-message flow spread across roughly three days. The Omnisend recommendations suggest sending the first email between 30 and 60 minutes after abandonment, with follow-up messages sent at 24 and 72 hours. These times will need to be tested according to your specific audience and purchasing process.
Email 1: Recover the interrupted shopping session
Send the first recovery email while the customer’s original shopping intent is still fresh.
Keep the message simple. Show the abandoned products, retain recognizable product names and pricing, and make the route back to checkout obvious. Don’t automatically assume that the customer needs some kind of discount.
A fashion retailer can send something like “Your cart is still waiting” as the subject line with the actual abandoned items included in the message. The call to action can simply return the shopper to the cart.
The objective here isn’t to overcome every possible objection. It’s to reconnect the shopper with a purchase they may have intended to complete.
Email 2: Address the reason they hesitated
The second message has more room to answer doubts.
Product reviews, shipping information, return terms, product benefits, or a reminder of what makes the item useful can all work here. If a shopper was comparing alternatives, this email gives you an opportunity to reinforce value without immediately cutting the price.
This is also where store-specific knowledge matters. A merchant selling expensive furniture may need to reinforce delivery and return information, while a cosmetics store might focus on product benefits or reviews.
Don’t judge this email purely by its open rate. The useful question is whether the message produces additional cart visits and completed orders from people who ignored the first touch.
Email 3: Give the final nudge
The third message can contain a call-to-action in the form of an offer when it makes sense economically.
This can be a one-time use discount code, free shipping, or another kind of time-bound incentive for your customers. Make sure that the offer is clearly defined, especially around minimum cart value and validity.
The point isn’t to discount every abandoned order. If customers learn that leaving a cart automatically produces a larger discount, your recovery strategy can start influencing behavior in the wrong direction.
The sequence should also stop when the shopper purchases. Sending another abandoned-cart message after an order is placed creates a poor customer experience and makes the automation look careless.
The practical challenge is not writing three emails. It is making sure that the store knows when the cart qualifies, which reminder should be sent, whether or not the user has converted, and whether or not automation was applied. A proper PrestaShop Abandoned Cart Module setup with a configured PrestaShop Abandoned Cart Reminder schedule is what makes this possible without manual intervention.
Knowband’s PrestaShop Abandoned Cart Module offers automated and manual follow-ups via email, reminder delay configuration, discounted and non-discounted templates, guest and registered customers monitoring, and abandonment vs. conversion cart reports. As of now, the product page indicates support for PrestaShop 9.x.
The included documentation verifies that the module utilizes serial reminders with discounted and non-discounted reminder types. Reminders can be set up with their own delays, whereas discounting can consist of a discount type, minimum cart value, coupons, a valid period, and free shipping.
That gives merchants enough control to build a sequence rather than repeatedly sending the same message.
For example:
Reminder 1 can use a non-discount email.
Reminder 2 can reinforce product value without an offer.
Reminder 3 can use a discount template with a defined expiry.
The module includes 20 ready-made email templates, split between discounted and non-discounted templates, while administrators can create and customize additional templates.
Timing depends on the store, not just the benchmark
A 30-minute or one-hour first email is a sensible test, not a law.
Omnisend’s 2026 research recommends a first abandoned-cart message around 30 to 60 minutes, followed by additional messages around 24 and 72 hours. It also recommends considering the customer’s local sending window because an email triggered late at night may perform differently from one delivered during active shopping hours.
A store selling inexpensive, frequently purchased products may recover quickly. A business selling high-ticket equipment could need more time because customers may research specifications, compare prices, or discuss the purchase before returning.
Watch the cart abandonment rate alongside recovery performance. A high abandonment figure doesn’t automatically mean the recovery flow is broken, particularly if your products naturally involve comparison shopping.
The better test is incremental performance: how many carts return after each message, how much revenue comes from recovered orders, and whether discounts are actually necessary.
Don’t make discounts the entire strategy
Discounting is easy to implement and difficult to undo.
If the first email always includes 15% off, customers have little reason to complete the purchase immediately. Some may start to view abandonment as part of the buying process.
A better sequence lets the customer return at full price before introducing an incentive. If the final reminder includes a coupon code, give it a clear purpose and a defined validity period.
The Knowband documentation supports both percentage and fixed discounts, minimum cart values, coupon validity periods, and free-shipping options for serial reminders.
That makes it possible to protect margins more carefully. For example, a store could reserve a discount for carts above a certain value rather than attaching an offer to every abandoned cart.
The technical layer matters more than the email copy
Even excellent email copy cannot recover a cart if the automation doesn’t execute.
The module’s workflow depends on cron processes that update abandoned carts and send reminder emails. The supplied manual explains that the cart-update and reminder-email crons run hourly, with the timing determining which carts enter each processing window.
That means developers and store managers should test the automation before judging campaign performance.
The module provides test mode and a cron log, allowing administrators to verify behavior and check whether scheduled processes have executed successfully.
Several implementation issues can prevent an apparently eligible cart from receiving an email. The documentation specifically mentions missing email addresses for guest shoppers, minimum cart-value conditions, reminder delays that have not yet been reached, carts with a zero value, and incorrectly configured cron jobs.
For a developer, this is an important troubleshooting checklist. Don’t rewrite the email template when the real problem is that the reminder job never ran.
Track recovered carts, not just email engagement
An open rate can tell you whether the subject line attracted attention. It doesn’t tell you whether the email generated a sale.
According to Omnisend’s abandoned-cart benchmark report for 2025, the open rate was 35.75%, click-through-to-send rate was 3.84%, conversion rate was 1.51%, and click-through-to-conversion rate was 39.46% among its users. This data provides useful information; however, different factors will affect results at your store.
The Knowband module also provides tracking for abandoned and converted carts and analytics comparing the two. Its documentation defines a converted cart as one where the customer places the order after receiving a reminder email.
That distinction matters.
Suppose Email 1 generates plenty of clicks but few purchases. The problem might be checkout friction rather than email copy. If Email 3 produces most of the recovered revenue but requires aggressive discounts, you may need to test a stronger value proposition earlier in the sequence.
Use UTM parameters as another layer of measurement. The module supports adding UTM parameters to its links so email performance can be tracked in Google Analytics.
Don’t forget shoppers who return to the site
Email doesn’t have to carry the entire recovery strategy.
A returning customer can also encounter a popup reminder showing the products they previously left in the cart. The module supports configurable popup templates and reminder delays, including discounted and non-discounted versions.
The module also supports a push notification channel for browser-based cart reminders. Administrators can configure and monitor web browser reminders separately from email.
Those options make sense when email alone doesn’t reach the customer at the right moment. They shouldn’t become an excuse to send every shopper every possible message. The goal is a coordinated recovery experience, not maximum message volume.
Build the flow around real abandonment reasons
A useful recovery strategy starts with the reasons customers leave.
Baymard’s findings indicate that there is abandonment due to checkout issues, and then there are cases of people abandoning their carts who are merely browsing and have no intention of purchasing.
That suggests a practical decision framework:
If the shopper was distracted: use a direct reminder.
If the shopper may have doubts: reinforce product value, reviews, shipping, or returns.
If price appears to be the barrier: test an incentive late in the sequence.
If the checkout itself causes abandonment: fix the checkout rather than relying on more emails.
This final statement should not be overlooked since recovery automation must serve to prevent lost revenue, but should not take the place of actually addressing any problems with payments, checkout forms that are difficult to understand, missing shipping details, or lack of mobile usability.
Where the PrestaShop Email Follow Up Module fits
For merchants who want this sequence without building the automation logic from scratch, the PrestaShop Email Follow Up Module provides the operational pieces needed to manage serial reminders, templates, automated sending, and cart conversion tracking.
The documentation also confirms support for GDPR-related customer-data deletion requests, test mode, guest and registered customer tracking, and analytics.
One implementation detail deserves attention: guest recovery depends on having an email address available. A store can have a large number of anonymous abandoned carts, but those carts cannot receive an email reminder without an identifiable email address.
That is why checkout design and recovery automation should be treated as connected systems.
A practical setup for a PrestaShop store
A sensible first version doesn’t need a dozen rules.
Start by defining when the cart becomes abandoned. Then create three reminders with different purposes rather than three versions of the same email. Each PrestaShop Abandoned Cart Reminder should earn its place by serving a different customer need.
The PrestaShop Cart Abandoned Addon supports configurable reminder delays and both discounted and non-discounted serial reminders, so merchants can build that progression directly in the module.
Before activating the flow, test the complete path:
Add a product to a test cart.
Confirm the cart becomes eligible after the configured abandonment delay.
Check that the first reminder is triggered.
Verify that subsequent reminders respect their delays.
Place an order and confirm that the customer is treated as converted.
Review the cron log if any step fails.
Check UTM data in analytics.
Test the emails on mobile devices.
This catches technical problems before real customers enter the sequence.
What the 37% figure should actually mean for a merchant
The reported 37% improvement should not become a target that every PrestaShop store is expected to hit.
Marketing LTB reports that three recovery emails recover 37% more carts than one, while other research points to strong performance from automated, behaviour-triggered messages more broadly.
The more useful lesson is that sequence design creates additional opportunities to recover customers who weren’t ready to buy after the first reminder.
Measure your own baseline. Compare one email against three, track recovered orders rather than just clicks, and examine the revenue generated after discounts. If the third message adds conversions without creating excessive discount dependency or complaints, it has earned its place.
Conclusion: Build a recovery sequence, then improve it
An effective PrestaShop Abandoned Cart Module strategy does not rely on sending as many messages as possible. It requires reaching out to the customer at just the right time, and giving a message relevant to why he might have abandoned his cart.
Here are three good emails to get you started. The reported 37% improvement from three recovery emails is a useful benchmark to investigate, not a promise to reproduce.
From there, the real work is measurement. Check converted carts, test timing, monitor discount usage, verify cron execution, and fix checkout friction that recovery emails can’t solve.
For stores that want to put this approach into practice, thePrestaShop Cart Abandoned Addon provides the serial reminders, email templates, automated sending, tracking, analytics, and related recovery tools needed to build and test the workflow. Also available on the Prestashop Addons.
The Knowband PrestaShop Auction Module (also called AuctionX) allow store owners to run live auctions on products and on individual product variants. This manual walks store admins through installing the PrestaShop auction extension, setting it up, creating auctions, and handling live bidding through to the winner’s order.
The PrestaShop Auction Module is a product bidding system for PrestaShop. With it you can run timed auctions, accept customer bids, keep a bid history, and move the winning bid into a normal order.
It includes a back office auction dashboard, a storefront auction listing, live countdown timers, customer bid history, an optional watchlist, winner selection, and auction email notifications.
How the PrestaShop Bidding System Works
The admin creates an auction for a product or a product combination, sets the bidding rules and dates, and publishes it.
Customers open the auction, place bids while it is running, and track results from their account.
When the auction closes, the module picks the winners automatically, or the admin picks them by hand.
A winner places the order at the winning amount before the set deadline.
These are the main features of the module. Together they let a merchant run controlled online auctions in PrestaShop, manage who takes part, choose winners, and finish the sale.
Product Auctions and Variant Bidding
Create an auction for any active product and, if needed, for one specific combination. The form covers starting price, bid increment, optional maximum bid, reserve price, waiting time between bids, visibility options, scheduling, and closing rules.
Live Bidding on the Product Page
Logged in customers bid straight from the product page. The module checks the minimum amount, bid increment, maximum bid, bidder status, stock, and the minimum time between bids. The live view updates through polling, shows a countdown, and displays the statistics the admin has chosen.
Auction Scheduling and Auto Extension
An auction can stay in Draft or be published to start at a later time. With Auto Extension on, a bid placed within the trigger period pushes the end time back.
Winner Selection and Order Completion
Winner Selection Mode can be Auto or Manual. In Auto mode the module ranks each bidder by their highest bid, leaves out blocked bidders, applies the reserve price, and settles ties in favor of whoever reached the amount first. In Manual mode the admin chooses winners from Live View once bidding has ended. Each winner gets an order deadline and a private order link under My Bids.
Watchlists and Auction Announcements
With the watchlist turned on, customers can save auctions to My Watchlist. Watchers can be emailed when other users bid and when an auction starts, as long as the matching email template is enabled.
Dashboard and Email Notifications
The dashboard has configurable KPI widgets, charts, and tables of recent activity. The Email Templates page holds subjects and bodies in several languages for bid confirmations, winning bids, auction announcements, order events, bidder blocks, cancellations, and other events.
3. Installing the PrestaShop Auction Module
Install and activate the module in the PrestaShop back office before you create any auction. Follow these steps in order.
Sign in to the PrestaShop Admin Panel.
Go to Modules > Module Manager.
Choose the upload option and upload the Knowband PrestaShop Auction Module archive.
Install the module and wait for PrestaShop to finish.
Go to Sell > Knowband PrestaShop Auction Module. During installation the module creates its database tables, default settings, email templates, CRON token, hooks, and back office tabs.
Open General Settings, enable the module, and set the storefront options.
Set up the CRON job shown on the General Settings page if you want scheduled status changes, automatic winner processing, and deadline processing to run without anyone visiting a page.
Uninstalling the module only removes its back office menu entries. Auction data, bids, winners, watchlists, email templates, logs, dashboard layouts, and settings stay in place, and they are still there if you reinstall.
4. Opening the Module in the Back Office
After installation, every auction function is under Sell > Knowband PrestaShop Auction Module. The pages are:
Dashboard
General Settings
Customization Settings
Email Templates
Auctions
Winners List
Other Modules
General Settings, Customization Settings, and Email Templates are also reachable from the in page Settings menu.
5. Admin Panel Overview
The admin area is split into separate sections, so settings, auction work, notifications, reports, and winner records can each be handled on their own.
Dashboard
Shows auction KPIs, charts, and recent activity for the current shop, so you can check how things are going without opening each auction. Widgets can be turned on or off, reordered, and resized.
General Settings
Turns the bidding system on or off and decides where auction summaries show on the storefront. It also holds the CRON URL and an example server crontab entry.
Customization Settings
Sets the colors used for auction boxes, buttons, progress bars, watchlist controls, body areas, and status badges.
Email Templates
Lists the fixed notification templates with their codes and status. Every template has one translation row for each installed language, with an editor for the subject and a rich text body. These emails keep admins, bidders, watchers, and winners informed during the auction.
Auctions
The place to view the auction list, apply filters, add or edit auctions, open Live View, block bidders, select winners, and run lifecycle actions.
Winners List
A read only history of closed auctions with winner and order details. Auctions that closed without a winner are included.
Other Modules
A catalog of other Knowband extensions. It has no auction settings.
6. PrestaShop Auction Module Configuration
This section covers each configurable area. Check these values before you publish an auction, because they affect bidding rules, what shows on the storefront, notifications, and winner processing.
General Settings
Enable Module. The main switch for the module. Leave it on No while you are still preparing things if you do not want customers to see auctions. Choose Yes to turn on storefront and bidding behavior. Options: Yes or No. Default: No.
Enable Watchlist. Allows logged in customers save auctions and come back to them. Turn this on after enabling the module. Options: Yes or No. Default: No. Customers must be logged in.
Show Recent Auctions on Home Page. Adds a block of recent auctions to the home page for extra exposure. Options: Yes or No. Default: No.
Number of Recent Auctions. Sets how many auctions the home page block lists. Enter a whole number from 1 to 20. It applies only when Show Recent Auctions on Home Page is Yes. Default: 5.
Display auction info on Category page. Adds auction status to product cards on category pages, so shoppers can spot products that are in an auction now or soon. Options: Yes or No. Default: No. The badge appears on category pages only, not on every page that reuses a product list template.
CRON URL. The server calls this URL to run scheduled auction tasks, which matters for auctions that must move forward without page visits. The page shows a generated URL and a crontab line that runs every minute and sends a silent curl request to that URL. Use Copy to copy either one. Regenerate CRON token makes the old URL invalid, so update your server crontab right after using it. The URL contains a secret token, so keep it private.
Customization Settings
These settings allows you match the auction look to your store theme. Every field is a color input, is required, and must be a six digit hex code such as #ffffff.
Setting
What it controls
Default
Header Background Color
Auction header background
#2456e7
Header Text Color
Text in the auction header
#ffffff
Button Color
Auction action buttons
#2456e7
Button Text Color
Text on auction buttons
#ffffff
Progress Bar Color
Bidding progress bar
#2456e7
Add to Watchlist Color
Watchlist control
#2456e7
Box Body Background Color
Auction box body
#ffffff
Box Text Color
Text in the auction box
#1f2430
Live / In Progress Badge Color
Live status badge
#dc2626
Upcoming Badge Color
Upcoming status badge
#4f46e5
Ended / Expired Badge Color
Ended and expired badges
#64748b
Click Save to apply the colors. Blank or wrongly formatted values are rejected.
Managing Auctions
The Auctions section is where you create, set up, publish, watch, and manage each auction from start to finish.
Auction List
The list allow you search, filter, and inspect auctions and run actions on them. Its columns are ID, Reference Number, Auction Title, Product, Status, Starting Price, Start Date, and End Date.
The Status filter offers Draft, Scheduled, Ongoing, Inactive, Completed, Winner Selected, Order Pending, Order Placed, Winner Expired, Reassigned, and Cancelled.
Available actions are Add New Auction, View, Edit, Publish, Duplicate, Pause, Resume, Force Cancel, Delete, and Bulk Delete, depending on the auction’s current status. Ongoing auctions cannot be deleted. Bulk Delete skips ongoing rows and tells you which IDs it skipped.
Basic Information
This part names the auction, links it to a product, sets its starting state, and defines the schedule and storefront behavior.
Auction Title. Required, up to 30 characters, and unique across the whole store setup.
Reference Number. Required, up to 64 characters, and unique. Use letters, numbers, hyphens, and underscores.
Select Product. Pick an active product. You may also pick a combination for variant bidding.
Auction Status. Draft or Publish. Publishing gives Scheduled status if the start time is ahead, and Ongoing status if the start time has already come.
Hide Product Price. Hides the normal product price while the auction box is shown.
Hide Add to Cart Button. Hides the normal Add to Cart button for the auction product.
Continue Selling. Decides whether normal selling can go on while the auction is set up.
Starting Date/Time and End Date/Time. Enter these in the form’s Asia/Kolkata timezone. The start cannot be in the past. The end must come after the start and, when editing, must be in the future.
Bidding Configuration
These are the money and participation rules that decide which bids are accepted and what bidders can see.
Starting Price. Required and above zero. The first bid must reach this amount.
Bid Increment. Required and above zero. Each later bid must be at least the current highest bid plus this amount.
Maximum Bid. Optional. Must be above the Starting Price. Once it is reached, no more bids are accepted.
Minimum Time Between Bids (minutes). Optional whole number. Sets a waiting period between bids from the same customer.
Reserve Price. Optional and hidden from bidders. It must be at least the Starting Price and no more than the Maximum Bid. Automatic winner selection only works if the reserve price is met.
Show Highest Bid. Allow customers see the current highest bid.
Show Bid Rank. Allow a bidder see their own rank.
Show Total Bids. Shows the total number of bids.
Show Bidder Information. Decides whether bidder details are shown.
Show Last Bid Time. Shows when the last bid was placed.
All the visibility switches use Yes and No.
Auction Extension
Auction Extension guards the final stretch of an auction by letting late bids move the end time.
Enable Auto Extension. Turns on extension when a bid comes in inside the trigger window.
Extension Trigger (minutes). Required and above zero when auto extension is on. This is the window before the scheduled end in which a bid causes an extension.
Extension Duration (minutes). Required and above zero when auto extension is on. This is how much time gets added when the trigger is met.
Winner Configuration
This part sets how winners are chosen and how long they have to buy.
Winner Selection Mode. Auto ranks bids and creates winners by itself. Manual lets you pick winners from Live View once bidding ends.
Number of Winners. Default 1. Must be at least 1 and cannot be more than the available stock. It is hidden or ignored in Manual mode.
Winner Order Deadline. Enter a number (default 48) and choose Hours or Days. Winners must order before this deadline.
Dashboard
The Dashboard gives a quick view of auction activity and results through KPIs, charts, and recent activity tables.
Use the period selector to choose Last 7 days, Last 30 days, Last 3 months, Last 6 months, or Last 12 months. Save Layout and Reset Layout are available.
KPI widgets: Total Auctions, Upcoming Auctions, Ongoing Auctions, Completed Auctions, Order Pending Auctions, Orders Placed, Total Bids, and Unique Bidders.
Charts: Auction Status, Auction Statistics, Bid Statistics, and Conversion Statistics.
Tables: Recent Auctions, Recent Bids, Recent Orders, Top Products, and Top Bidders.
Drag widgets to reorder them, switch them on or off in the Widget Library, and set their column span from 1 to 12. KPI values show the current state of the shop. The period selector affects the period based charts and the Top Bidders data.
Email Templates
Email Templates controls which messages go out at key points in an auction. Enable the ones you need and edit the text for each installed language.
The first grid shows ID, Title, Code, and Status, with a Manage Translations option. Status is Disabled or Enabled. All templates start out disabled, so turn on each notification your store should send.
The translation grid shows Language, Subject, Enabled or Disabled status, and Edit. The editor has a Subject, a rich text Body, a placeholder legend, and Save. The subject is required and limited to 255 characters. The body is required.
Built in notifications:
Email to Admin on Bid Place
Email to Customers on Bid Place by Other Users
Email to Watchers on Bid Place by Other Users
Email to Watchers on Auction Start
Email to Customer on Winning and Place Order
Email to Other Customers Who Placed a Bid but Did Not Win
Email to Admin on Order Place
Email to Admin on Auction Close or No Bid
Email to Admin on Auction Close and Winner Selected
Cancelled Auction: Notify Users Who Placed a Bid
Email to Users on Block/Unblock Bidding on Any Auction
Email to Admin on Maximum Bid Reached
Use only the placeholders listed in the editor’s legend. If a translation is missing, the shop default language is used. Each email attempt is saved in the email log. If an email fails, the bid, order, or auction step still goes through.
Winners List
The Winners List is a read only record of closed auctions with their winners and order details. Columns: Auction ID, Reference Number, Product, End Date, Actual End Date, Winner, Winning Bid, Order Status, Order Deadline, and Order Reference. Order Status can be Pending, Placed, Expired, or Reassigned.
An auction with no winner appears with empty winner fields and a no winner label. Use View Auction to open the related auction.
7. Field Types and Options
This summary shows what kind of input each part of the module uses.
General Settings: Yes/No switches and one number field.
Customization Settings: color inputs.
Auction form: text fields, a product and combination picker, status choice, date and time inputs, numeric price and duration fields, and Yes/No switches.
Winner Configuration: Auto/Manual choice, numeric winner count, numeric deadline, and an Hours/Days choice.
Lists: searchable, filterable tables with status, date, product, and reference filters where offered.
Dashboard: draggable widgets, an enable/disable library, a period selector, and column span controls.
Email Templates: status toggle, language table, text subject, rich text body, and a Save button.
8. Admin Actions
Admin actions either change an auction’s state or help you manage customers and winners. Which actions you see depends on the auction’s status.
Save stores settings, colors, dashboard layouts, or email translations, depending on the page.
Publish moves a Draft to Scheduled or Ongoing.
Pause moves a Scheduled or Ongoing auction to Inactive. Resume brings an Inactive auction back.
Force Cancel cancels an Ongoing auction.
Duplicate makes a copy of an auction.
Delete removes an eligible auction. Ongoing auctions are protected.
Bulk Delete deletes the eligible selected rows and skips Ongoing ones.
In Live View you can Refresh, Block or Unblock a bidder, Pause, Resume, Cancel Auction, Edit Auction, and select manual winners where it applies. In Manual mode, the order in which you select bidders sets their winner rank.
9. Storefront Behavior: What Customers See
This section describes the customer side of the PrestaShop bidding system: bidding, auction listings, account pages, and limits on winning orders.
Product Page Auction Box
The product page can show an auction box for auctions that are scheduled, ongoing, won, lost, no bid, no winner, ended pending, or inactive. For an ongoing auction, depending on your settings, the box can show the countdown, the current or next minimum bid, a progress bar, the bidder count, rank, total bids, last bid time, a bid field, the Place Bid button, a watchlist control, a blocked bidder message, and a maximum bid message.
Bidding Rules for Customers
Customers must be logged in to bid, and guests see a login prompt. A customer cannot right away outbid their own bid, and blocked bidders cannot bid. Stock levels and PrestaShop out of stock rules also affect whether a bid is accepted. The page polls every 10 seconds by default to refresh status, timing, minimum bid, statistics, winner state, and extension notices.
Auction List Page
The public Auction List has tabs for All, Upcoming, In Progress, and Expired. The Expired tab is optional. Ended cards are greyed out and do not link to the product. The home page block and category badges follow their General Settings switches.
Customer Account: My Bids and My Watchlist
The customer account has an Auction entry that opens My Bids. My Bids shows bid history, best bid, result, ranking where allowed, and a Place Your Order or View Order action. When the watchlist is on, My Watchlist lists scheduled and ongoing auctions, and Include past/cancelled shows older watched ones.
Quantity Limit for Winning Orders
Products bought at a winning price are limited to a quantity of 1 in the cart and at checkout. If the module corrects a higher quantity, it shows a notice explaining why.
10. Multi-language, Multi-store, and Currency Behavior
Auction, bid, watchlist, winner, and dashboard data belong to a shop. In single shop context, admin lists show only the current shop. In the All Shops context, nothing is restricted. Auction reference numbers and titles must be unique across all shops.
Email subjects and bodies are stored per language. Languages that exist at install time are seeded, and a missing translation falls back to the shop default language. A language added after installation may not get translation rows automatically.
Auction amounts are stored and compared in the shop default currency. Storefront values are converted to the customer’s chosen currency, while admin notification emails use the shop default currency. The auction form and admin dates use Asia/Kolkata time, and stored dates use UTC.
11. CRON Job and Automated Tasks
The CRON job handles time based work, so scheduled starts, closings, winner selection, and expired winner deadlines are processed even when nobody visits the store or admin pages.
Call the CRON web URL every minute with the token shown on the page. Each run can:
Move due Scheduled auctions to Ongoing and notify watchers.
Close expired Ongoing auctions.
Select winners for Auto auctions.
Process expired winner deadlines and reassign or expire winner slots.
Each run handles at most 200 records. Product views, bids, polls, and the Auctions list also do some limited just in time expiry processing, but CRON is needed for auctions that get no page visits.
12. External Services and API Settings
The module needs no external API connection. The CRON URL is an HTTP endpoint on your own PrestaShop installation, not an outside service. There are no external credentials to enter. Keep the token private, and regenerate it if it may have been exposed.
13. Troubleshooting the PrestaShop Auction Module
If an auction, bid, email, or winner order is not working as expected, check the causes and fixes below. If the problem remains, contact Knowband support.
The auction does not show on the storefront
Possible cause: The module is disabled in PrestaShop, Enable Module is No, or the auction is in Draft, is inactive, or belongs to a different shop or product combination. Fix: Enable the module in PrestaShop and in General Settings, check the auction status and dates, and confirm the selected product or combination.
Customers cannot use the watchlist
Possible cause: Enable Watchlist is No, or the customer is not logged in. Fix: Turn on the setting and test while logged in.
Scheduled auctions or winners are out of date
Possible cause: The CRON URL is not being called, the token was regenerated but the server job was not updated, or the module is disabled. Fix: Copy the current URL from General Settings, update the server crontab, run it every minute, and make sure Enable Module is Yes.
Email notifications are not sent
Possible cause: The template or the language translation is disabled or incomplete. Fix: Enable the template, edit the translation, make sure the Subject and Body are filled in, and look at the email log and PrestaShop logs. Email failures do not block bidding or order processing.
A bid is rejected
Possible cause: The bid is under the starting price or required increment, the maximum bid was reached, the bidder is blocked, the waiting period has not passed, stock rules reject it, or the auction is no longer ongoing. Fix: Review the auction’s bidding settings and status. The customer must be logged in and cannot immediately outbid their own bid.
A winning customer cannot place the order
Possible cause: The winner token or deadline is invalid, the product or combination does not match, the paid amount is different from the winning amount, or the cart quantity is not exactly 1. Fix: Have the customer open My Bids, use the active Place Your Order link before the deadline, pick the right product or combination, and keep the quantity at 1.
Category auction badges are missing or look wrong
Possible cause: The category display switch is off, the auction is not live or upcoming, or a heavily customized theme changes the product card selectors. Fix: Enable Display auction info on Category page, check the auction status, and review the theme’s product list markup if the styling is off.
14. Best Practices for Running PrestaShop Auctions
These tips help you avoid setup mistakes, keep automated tasks running, and give customers a steady auction experience.
Keep Enable Module off while you prepare auctions, then test one full auction before opening more.
Use unique, clear Reference Numbers and short Auction Titles.
Double check start and end times in the Asia/Kolkata admin timezone.
Pick a Bid Increment that suits the product’s value, and review Maximum Bid and Reserve Price together.
Turn on only the statistics and bidder details you want customers to see.
Set up CRON before publishing scheduled auctions.
Enable and review each email template in every language your store uses.
Treat the CRON URL as a secret and regenerate it if it leaks.
Test a winning order with the right product, combination, winning amount, and a quantity of 1.
Use Live View to watch for odd bidding, block bidders when needed, and keep a record of manual winner choices.
Update the module to the latest Knowband release for security and compatibility.
15. Conclusion
The Knowband PrestaShop Auction Module is a full bidding extension for scheduled product auctions, live bidding, customer bid history, watchlists, winner selection, and winner order handling. General Settings controls activation and storefront placement, Auctions defines each product auction, Customization Settings controls the look, Email Templates controls notifications, and the Dashboard and Winners List help with daily auction management.
A blog should do more than bring visitors to your store. Content built around customer questions can move readers from search discovery toward relevant products.
A PrestaShop Blog Module provides the infrastructure for that process inside the store. The commercial result depends on how the content is planned and connected.
Build a PrestaShop Blog Module Strategy Around Products
Start with the products or categories you want to grow.
Prioritize products that require comparison or research before purchase. Then list the questions customers ask. A skincare store, for example, could create a guide about choosing products for a specific concern and connect it to suitable products.
This gives each article a commercial context without making it promotional.
For merchants looking to implement this approach directly within their store, ablog module for PrestaShop can provide the publishing environment needed to connect content with the catalogue.
Match Every Article to a Real Search Intent
Match the article to the customer’s intent: informational, comparison-based, or purchase-focused.
Use a simple map:
Problem: What challenge is the customer looking to address?
Search: What might they type into Google?
Content: What answer would genuinely help?
Product: Which products solve the problem?
Next step: Where should the reader go after learning?
PrestaShop’s own SEO guidance recommends broader terms around categories and more specific long-tail expressions around products, supporting a funnel-based approach to ecommerce search.
A blog management workflow can support this process by letting merchants associate products with posts and display linked posts on product pages. The PrestaShop Blog Module by Knowbadn also provides related-product connections and linked blog posts on product pages.
Turn an Article Into a Product Discovery Journey
The article should not end when the reader gets an answer.
For example, a coffee grinder guide can explain grind size, brewing methods, and capacity before presenting relevant grinders.
Keep the product connection relevant. Recommend products because they solve the problem discussed. Answer the main question early, use descriptive headings, and cover the subquestions buyers are likely to have. This guide to AI search provides additional context on how ecommerce content can be structured for AI-driven discovery.
Build Content Clusters Around Commercial Categories
One article rarely answers every question around a category. Build a cluster.
For a home fitness store, a category could support:
How to choose resistance bands for beginners
Resistance bands vs free weights
How to build a home workout routine
Common mistakes when using resistance bands
Which resistance band strength should you choose?
These topics target different questions around the same category.
This is where a PrestaShop AI Content Addon can reduce production friction. Knowband’s PrestaShop Blog Module assists with post content, excerpts, tags, metadata, ALT text, and translations within the post workflow.
Use AI to accelerate execution, not to decide what customers need. The Module should remain a supporting part of that workflow, not the strategy itself. Review outputs for accuracy, originality, product relevance, and brand voice before publishing.
Make SEO Part of Publishing
A useful article can still underperform if its search presentation and structure are neglected.
Before publishing, check:
Does the title match the searcher’s question?
Is the URL clear and relevant?
Do H2 and H3 headings explain the structure?
Are metadata and image ALT text useful?
Are relevant articles and product pages internally linked?
Sitemap: Is the page included in the sitemap and accessible to search engine crawlers?
A PrestaShop SEO Blog Addon can support this process with controls for blog URLs, metadata, sitemap inclusion, RSS feeds, and content organization. The manual documents URL patterns, meta fields, sitemap controls, RSS settings, and related content options. Then connect SEO metrics with commercial behaviour. Search impressions and clicks show discovery, while product clicks, cart activity, and conversions reveal commercial impact.
Prepare Content for AI Search Without Writing for Machines
AI-driven search changes how shoppers may discover information, but the underlying principle remains useful content.
Answer the main question early, use descriptive headings, and cover the subquestions buyers are likely to have.
Google continues to emphasize helpful, people-first content, while current ecommerce content strategies increasingly map articles to different stages of the customer journey.
For a PrestaShop Blog Module, the practical goal is simple: make the page easy for people to understand and easy for search systems to interpret.
Use AI to Scale Execution, Not Strategy
Content teams often lose time on repetitive production work. Once the topic, search intent, product relationship, and editorial angle are decided, AI can accelerate execution.
Knowband’s PrestaShop AI Content Addon can assist with post content, excerpts, metadata, tags, image ALT text, and translations through configured AI providers.
Knowband also gives merchants a way to keep that work closer to the store administration. Publishing becomes easier to manage across categories or languages. The merchant still decides which products, questions, and actions matter.
Measure Revenue Paths, Not Just Blog Traffic
Traffic is an early indicator, not the final objective.
Monitor each content cluster for:
Organic visits
Search impressions and clicks
Clicks from articles to products
Product-page engagement
Add-to-cart activity
Assisted conversions
Revenue associated with content-assisted journeys
If an article gets traffic but little product engagement, revisit the intent match or internal journey. Repeat topics that consistently introduce shoppers to products.
Knowband’s PrestaShop Blog Manager can fit into this workflow by keeping posts, product relationships, SEO settings, publishing, and content organization within the PrestaShop administration environment.
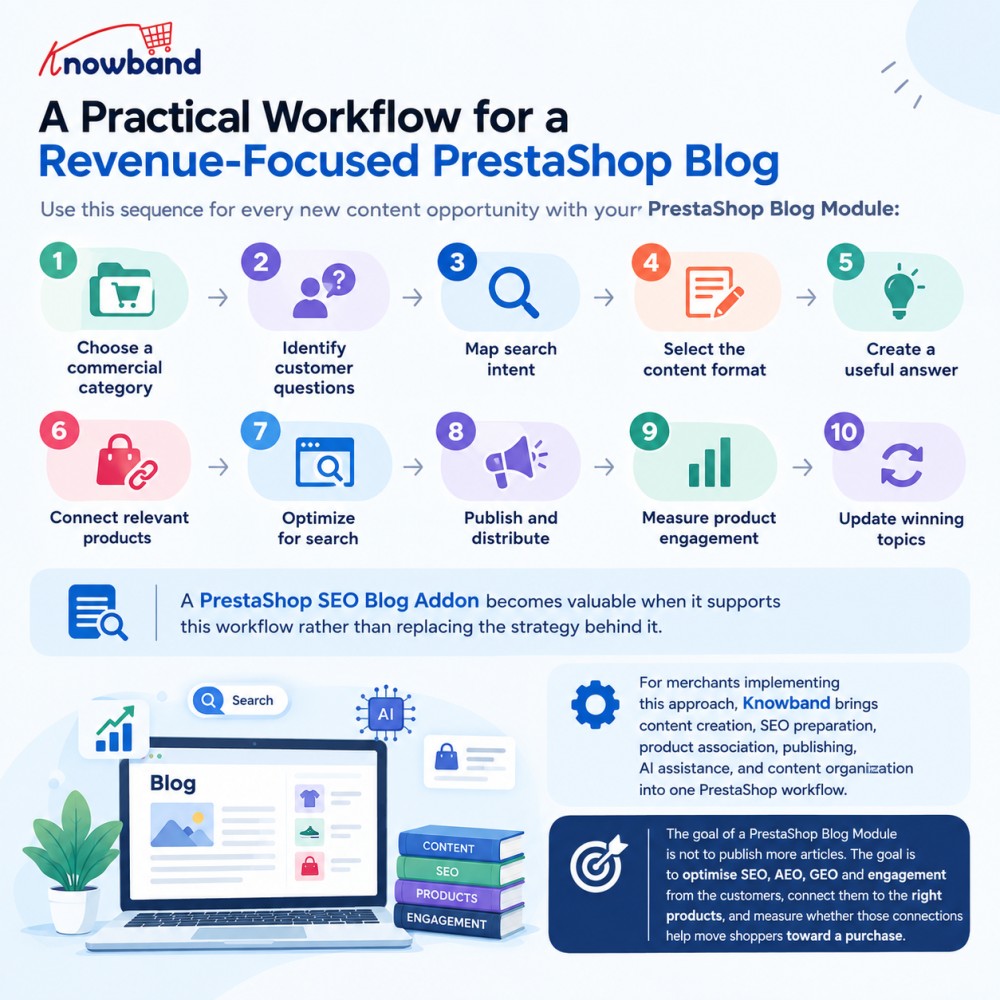
A Practical Workflow for a Revenue-Focused PrestaShop Blog
Use this sequence for every new content opportunity with your PrestaShop Blog Module:
A PrestaShop SEO Blog Addon becomes valuable when it supports this workflow rather than replacing the strategy behind it.
For merchants implementing this approach, Knowband brings content creation, SEO preparation, product association, publishing, AI assistance, and content organization into one PrestaShop workflow.
Explore PrestaShop Blog Manager also available on Prestashop Addons to see how this content-to-commerce workflow can be implemented in a PrestaShop store.
Explore this tutorial to learn how to add blogs to your PrestaShop website without any coding knowledge.
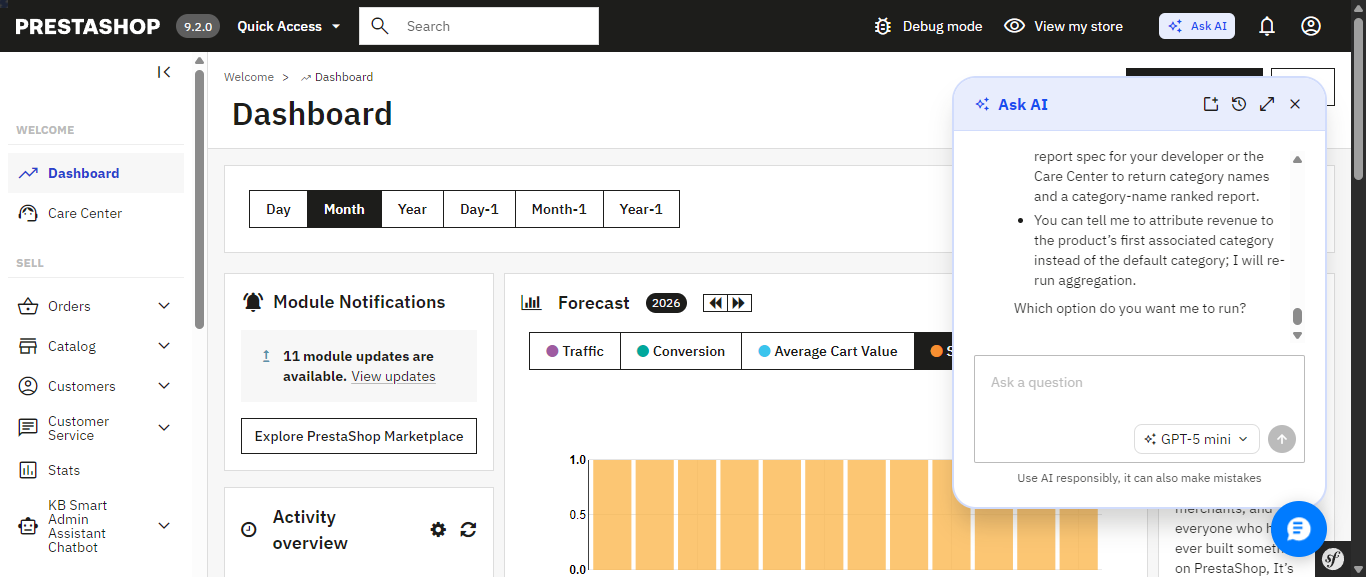
PrestaShop’s new AskAI, introduced with PrestaShop 9.2, is a promising sign of where the platform is headed a native assistant built right into the back office that lets you query your store in plain language. It’s tied to PrestaShop 9.2 specifically, and it relies on two companion modules, the PrestaShop MCP Server and MCP Tools, being installed and configured alongside it before it can see any of your store’s data.
In practice, opening Ask AI drops a chat panel into the corner of whichever admin page you’re on, and it remembers your previous conversation the next time you reopen it. Ask something like “Which products are out of stock right now?” and it doesn’t just answer quietly in the background it shows its work: the specific MCP tool it’s about to call, a “Tool approved” confirmation step, a stated goal, and its reasoning before handing back the answer as a formatted list. That’s a genuinely nice trust signal, though the trade-off is no visible SQL you see the tool call and the goal, not the underlying query.
PrestaShop’s native Ask AI panel, opened from the top admin bar it remembers the previous conversation across sessions.
Ask AI shows its work: the MCP tool it calls, a tool-approval step, and its stated reasoning before answering.
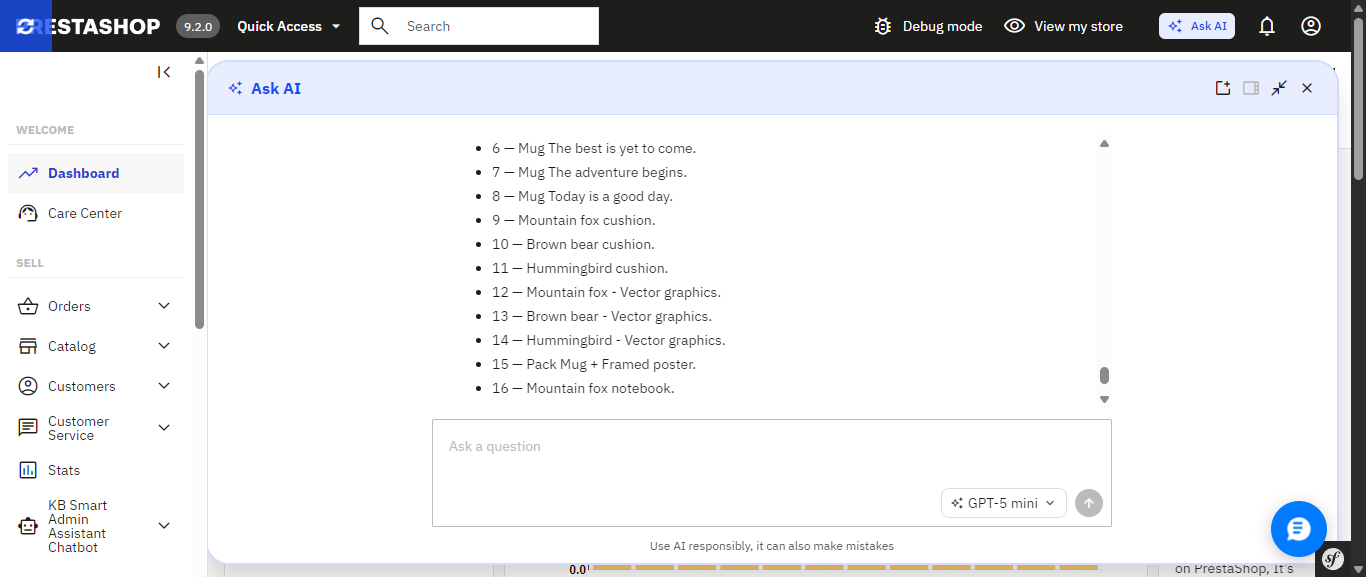
The finished answer, expanded to full width a plain list of out-of-stock products with a follow-up question box ready.
If you’d rather skip that setup, or you’re running an earlier PrestaShop version where Ask AI isn’t an option at all, there’s a module you can install today that already delivers a natural-language AI assistant and builds a good deal more around it, much of which Ask AI simply doesn’t include yet. It’s called Smart AI Admin Assistant.
PrestaShop Ask AI vs Knowband Smart AI Admin Assistant
Feature
PrestaShop Ask AI
Knowband Smart AI Admin Assistant
PrestaShop version support
9.2
1.7.x to 9.x.x
Setup requirements
Requires the separate PrestaShop MCP Server and MCP Tools modules
Install the module, add your API key, and start asking questions
How it accesses your data
Through the PrestaShop MCP Server using defined tool calls
Natural-language-to-SQL against curated, read-only database views
Taking action on your store
Can execute actions with explicit confirmation required
Read-only; blocks DELETE, DROP, UPDATE, INSERT and TRUNCATE
Query transparency
MCP tool calls; SQL is not directly visible
✓ View, edit and re-run the generated SQL
Built-in analytics dashboard
Not Available
✓ 44 widgets covering revenue, orders, stock, best sellers and more
Data export
Not Available
✓ Excel and CSV exports, including full-dataset exports
Voice input
Not Available
✓ Browser-based speech recognition
Quick-access shortcuts
Context-aware suggestions on Product, Order and Customer pages
✓ Editable quick-query chips for common questions
Employee access control
Not Available
✓ Role-based, per-employee configuration
Audit logging
30-day conversation history per user; no SQL or action-level log
✓ Timestamped query and audit log, including executed SQL
Ask AI’s confirmation-before-action design and its native integration into PrestaShop’s core are real strengths, and worth keeping an eye on. But most of what makes Smart AI Admin Assistant a complete toolkit the dashboard, the exports, the access control, the audit trail, the voice input is territory Ask AI hasn’t entered yet.
The Problem that AI Assistant
Every PrestaShop store owner knows this routine: check yesterday’s revenue, scroll through orders looking for anything stuck, check which products are running low, maybe export something to send to a partner. None of it is hard. All of it is repetitive, and all of it eats into the hours you’d rather spend on the parts of the business that actually need your judgment.
Smart AI Admin Assistant replaces that routine with a conversation. You type or speak a question the way you’d ask a colleague, and you get a precise, live answer straight from your store’s database. No dashboards to navigate. No report builder. No SQL. Just a question and an answer, in seconds.
Ask Anything, Get a Real Answer
And this is what the entire module is based upon: an engine that will help analyze the language in the question regarding orders, customers, products, sales, inventory, and coupons without requiring any technical background whatsoever. There’s no need to fill in forms or make choices from a drop-down menu; all one has to do is:
“How many orders were placed today?”
“Show me low stock products.”
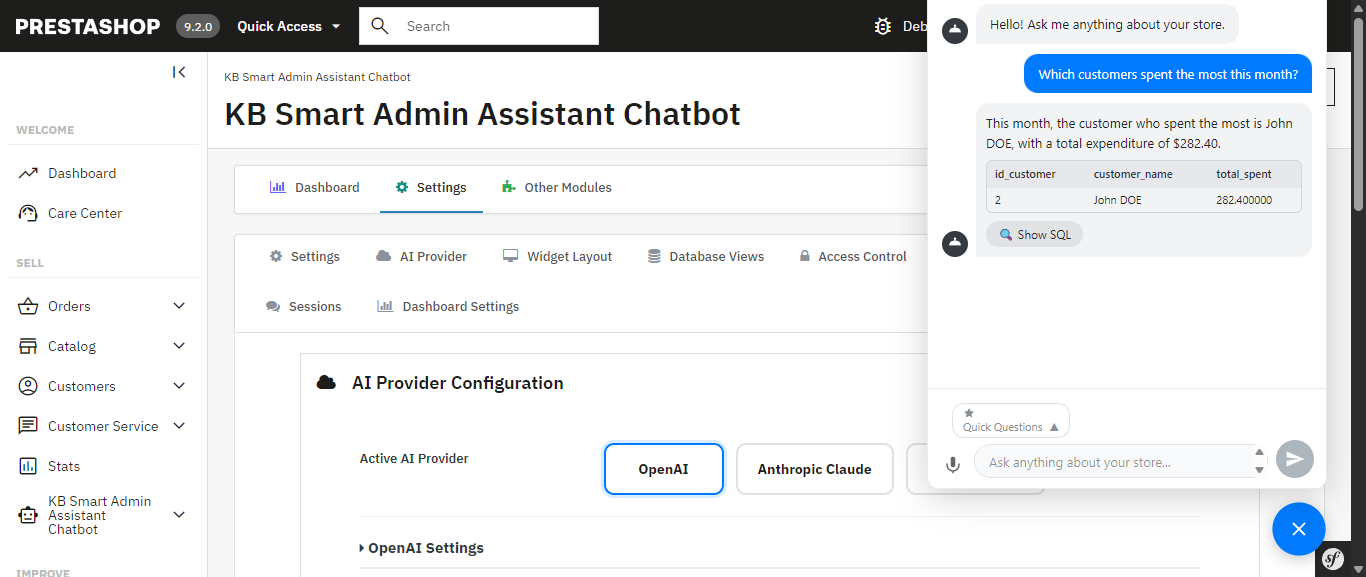
“Which customers spent the most this month?”
“What’s my revenue this week compared to last week?”
“Which products are missing descriptions or images?”
“What are my top 10 best-selling products this quarter?”
Both Ask AI and Smart AI Admin Assistant let you ask this kind of question in plain language that part isn’t unique to either one. The difference shows up in everything built around it, starting with how each one actually reaches your data.
Choose the AI Model That Fits the Question. Ask AI Doesn’t Offer This Level of Control
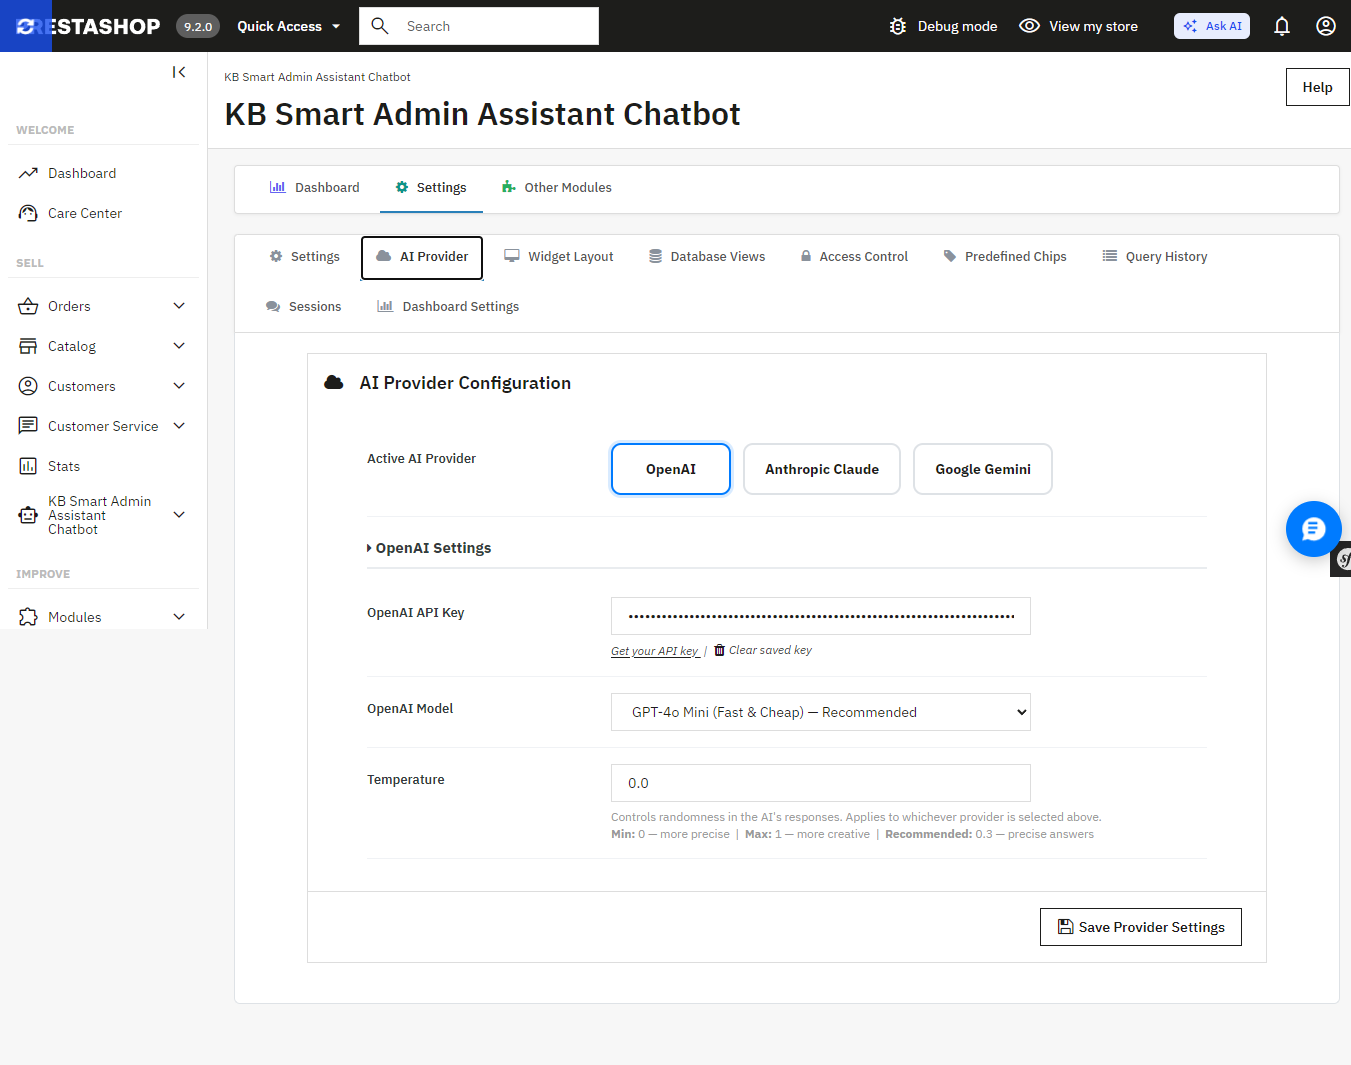
Smart AI Admin Assistant provides a true choice between the providers and the tier models without changing the code, using one settings panel:
OpenAI GPT-4o Mini, GPT-4o, or GPT-5.5
Anthropic Claude Haiku 4.5, Sonnet 4.6, or Opus 4.7
Google Gemini 3.5 Flash or 3.1 Flash-Lite
Want fast, low-cost answers for quick daily checks? Point it at a lighter model. Want the deepest possible breakdown of a slow sales month? Switch to a flagship tier for that one query. Ask AI, by contrast, connects to whichever single provider key you’ve configured it doesn’t offer this kind of tier-by-tier switching from within the assistant itself.
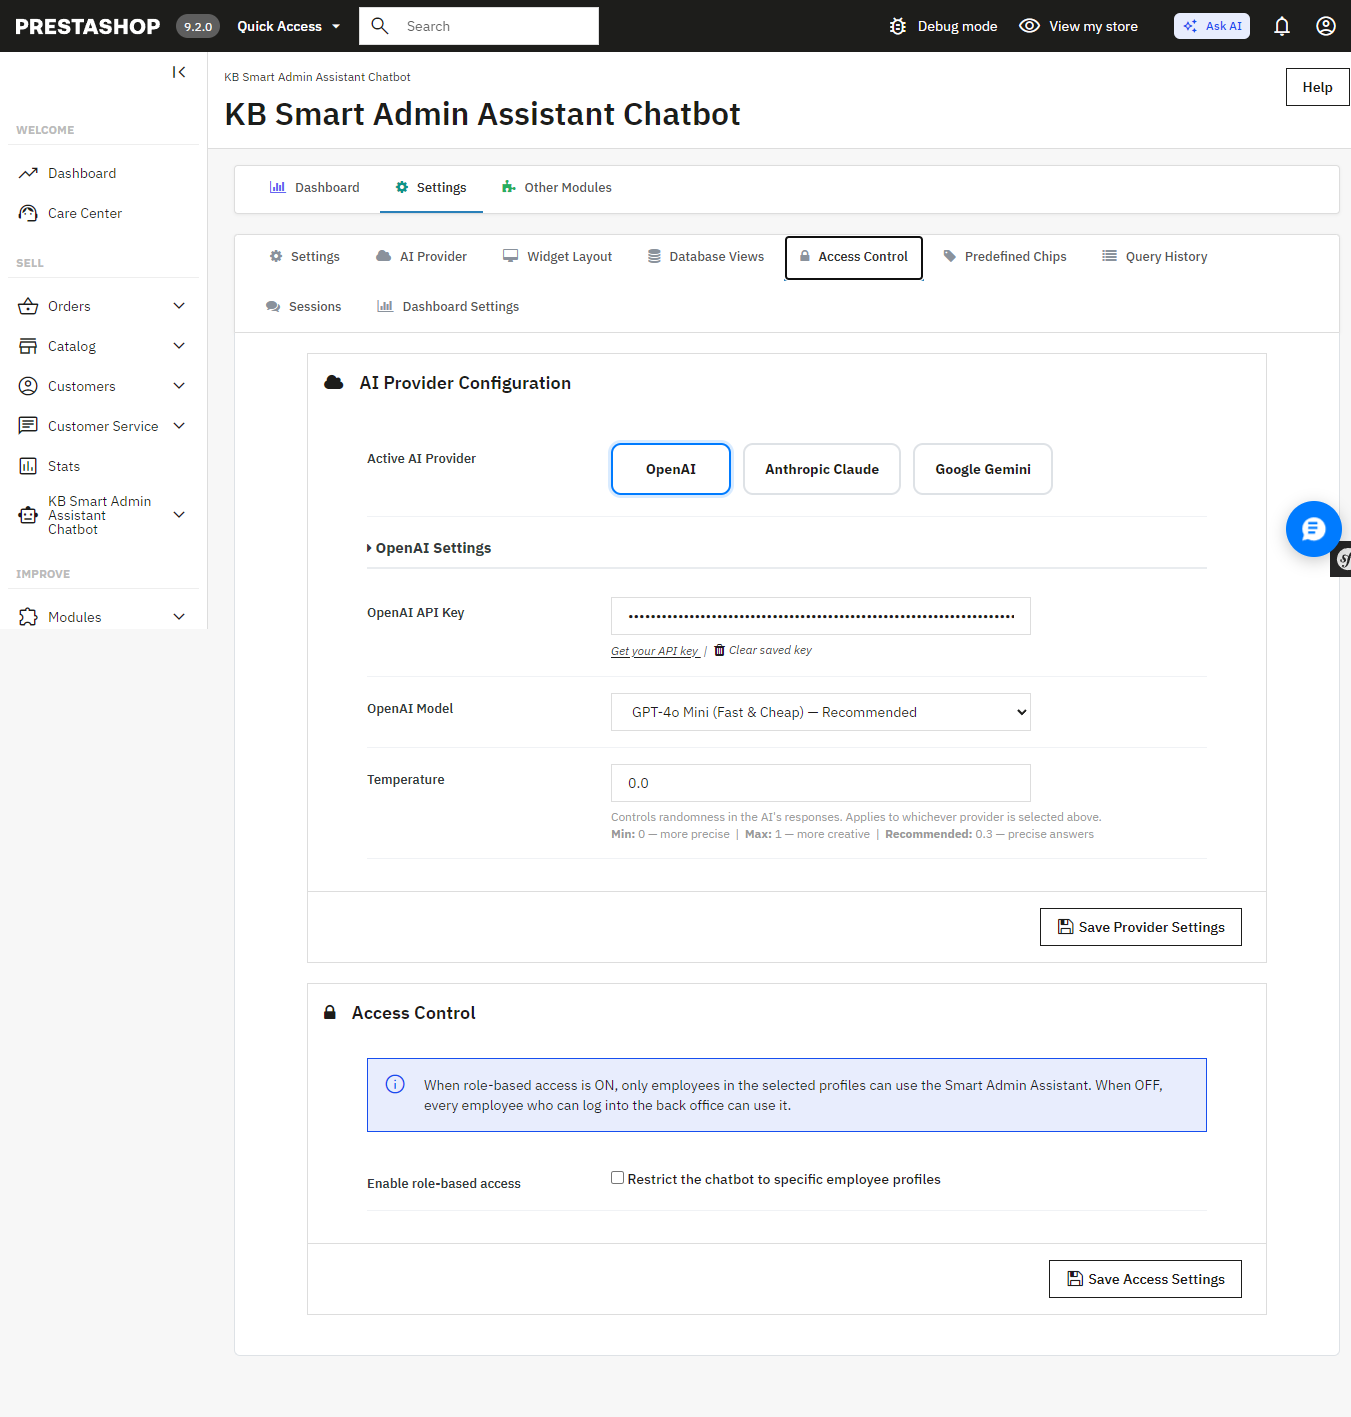
Smart AI Admin Assistant’s AI Provider settings switch between OpenAI, Anthropic Claude, and Google Gemini, and pick a model tier for each.
An Answer, Not Just a Table of Numbers
Every query comes back with more than raw data the assistant generates a plain-language summary alongside it, calling out the trend or number that actually matters. Ask about your inventory and you don’t just get a table; you get told which products are about to become a problem.
A Full Analytics Dashboard Comes Built In Something Ask AI Doesn’t Have
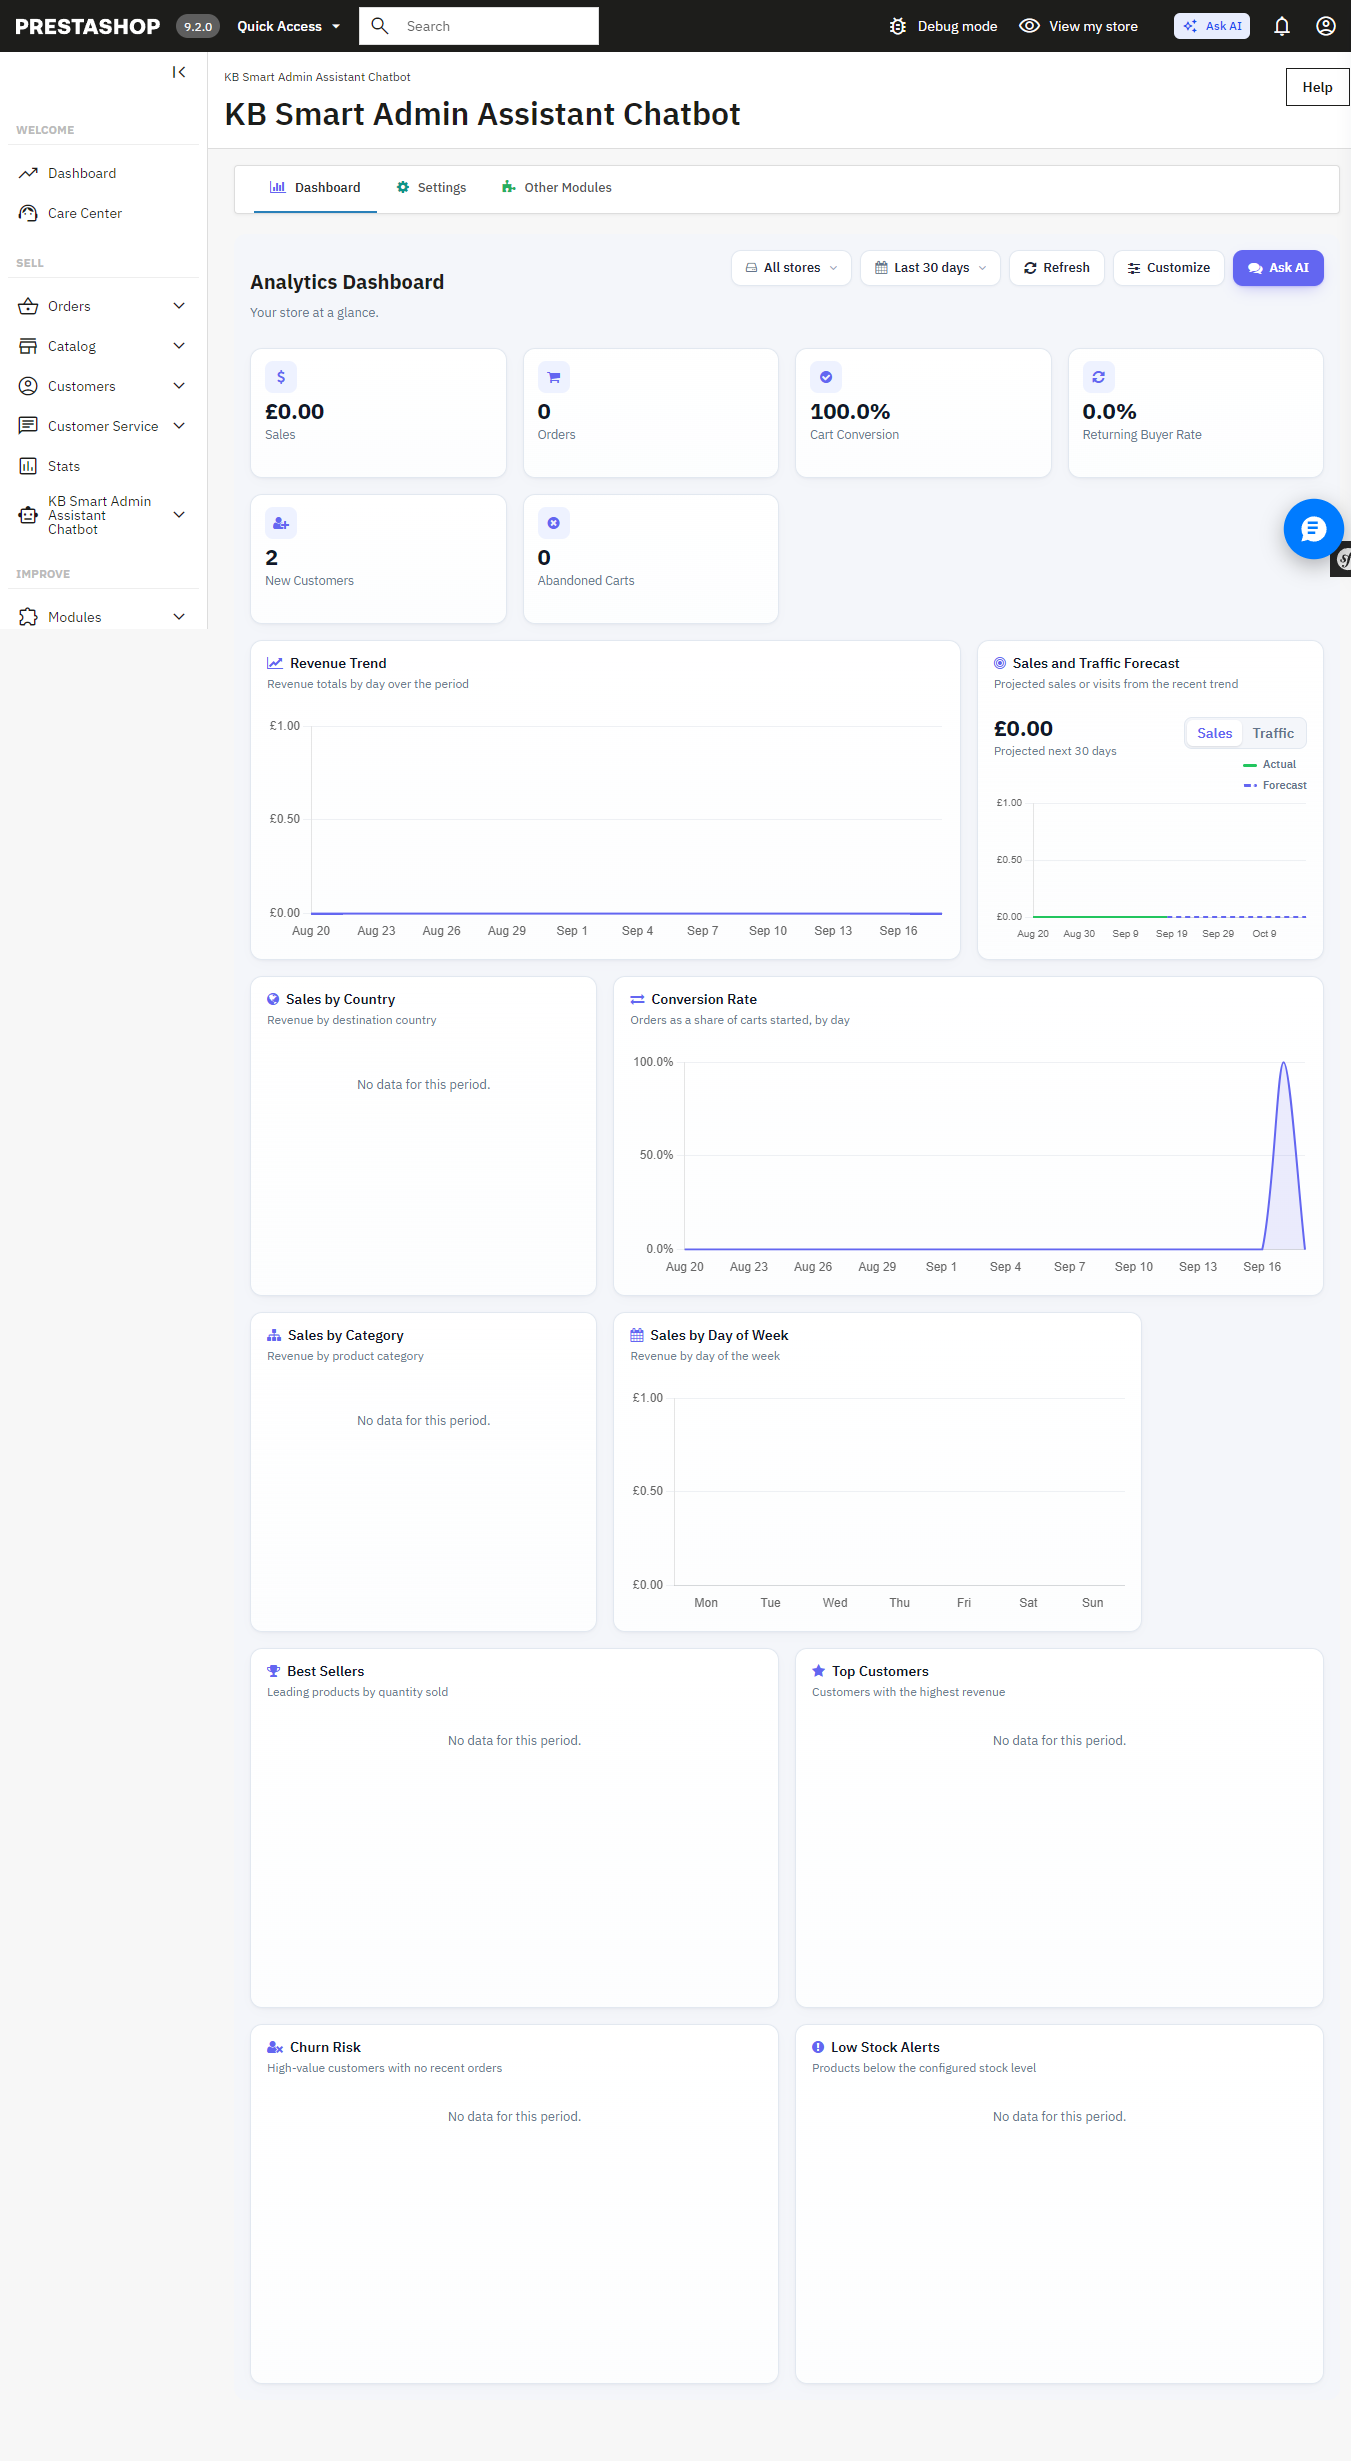
Beneath the chat interface is the full back office analytics dashboard with 34 widgets such as revenue analytics, order quantity, cart conversion rates, customer retention rates, inventory alerts at product level, best sellers, churn rate analytics, sales by countries, categories, payment methods, time slots, etc. Each of these widgets is easily toggleable and reorderable to create your perfect dashboard view. It can also be used as the PrestaShop back office home page.
The built-in Analytics Dashboard revenue, orders, cart conversion, and more, all on one page.
Answers You Can Export, Share, and Verify Not Available in Ask AI
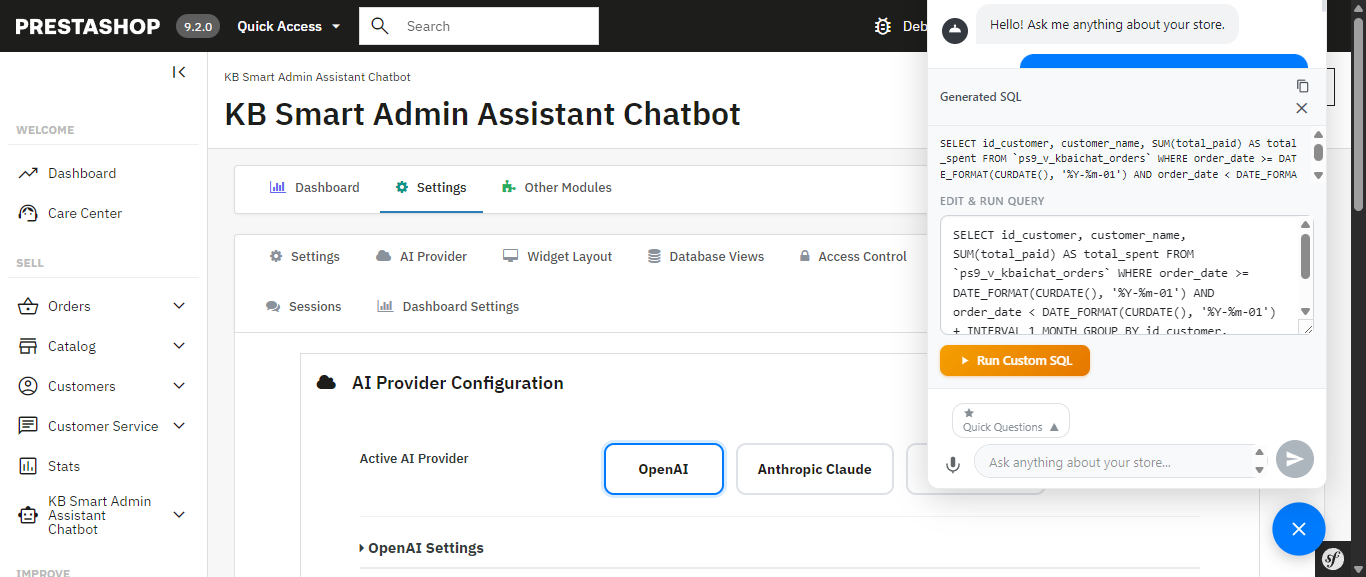
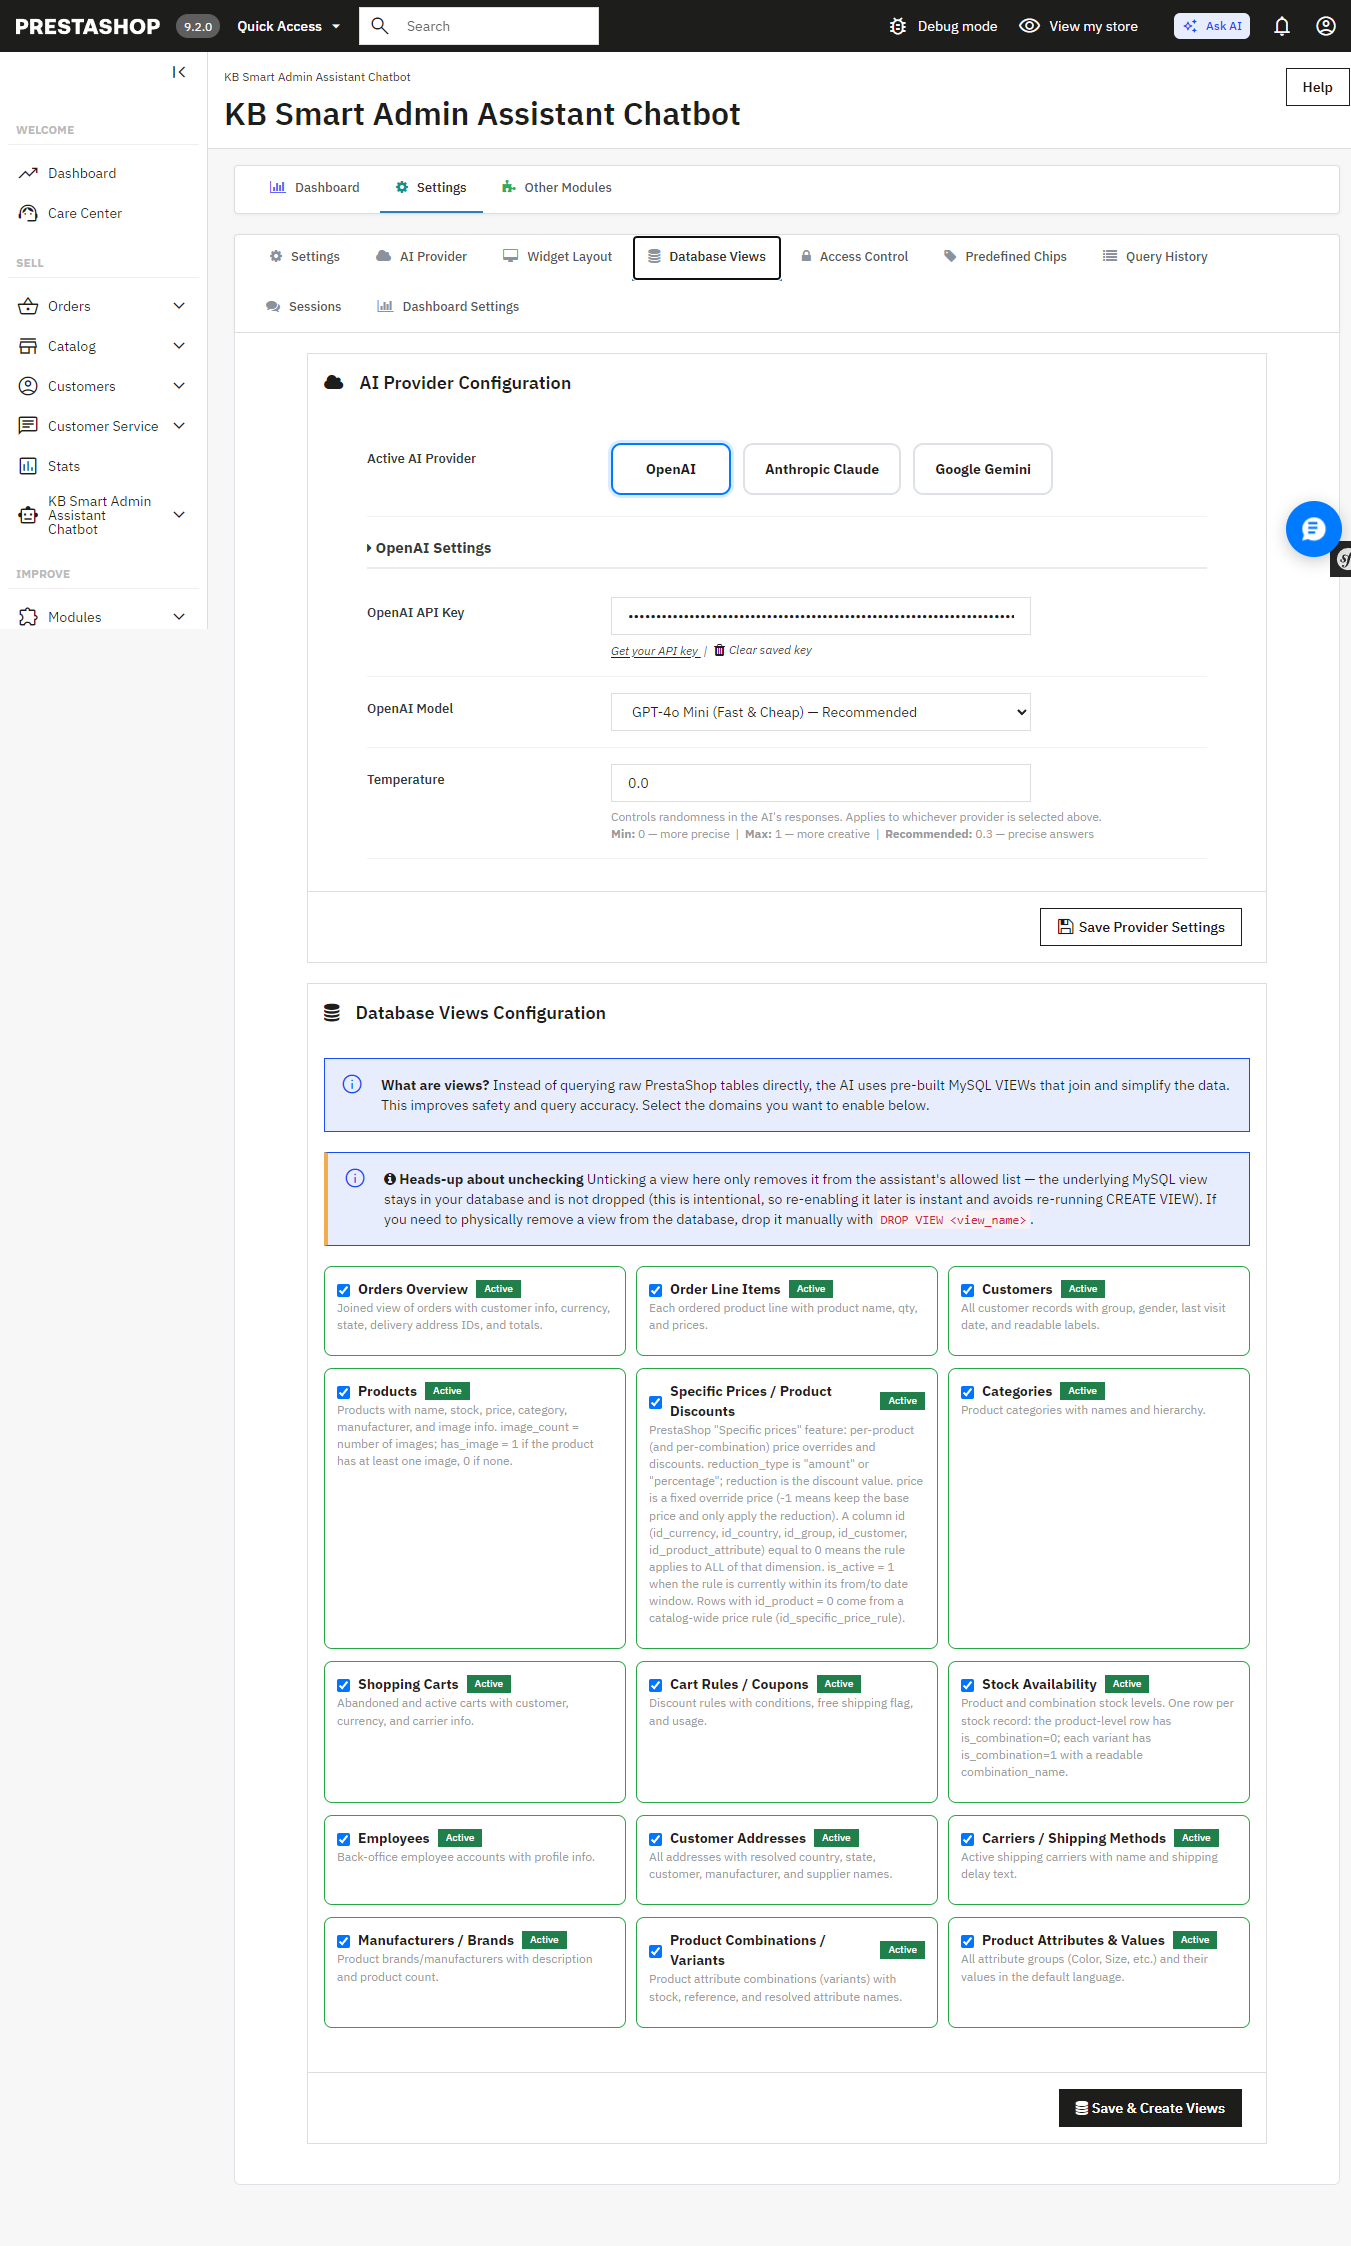
The exact generated SQL is visible, editable, and re-runnable nothing is a black box.Database Views configuration the AI queries curated, read-only MySQL views instead of raw tables I
Get a result you need to hand off? Export it instantly to Excel or CSV full datasets, not just the rows visible on screen. Ask AI has no export functionality; any data it surfaces stays inside the chat conversation.
Allowing the assistant access to your database must be carefully considered, and the module has been designed with this in mind: strict restrictions on DELETE, DROP, UPDATE, INSERT, and TRUNCATE ensure that the assistant can only access your information, not write to it.. Multi-statement execution is blocked and SQL-injection patterns are screened automatically and unlike Ask AI, which works through MCP tool calls with nothing to inspect, you can view, edit, and re-run the exact SQL Smart AI Admin Assistant generated yourself. Nothing runs as a black box.
The exact generated SQL is visible, editable, and re-runnable nothing is a black box.
Database Views configuration the AI queries curated, read-only MySQL views instead of raw tables.
Built for Teams, Not Just Solo Store Owners Ask AI Has No Equivalent
If you have a shop with several admins or you manage this on behalf of your clients as an agency, the module comes with role-based employee access controls, and you get to determine precisely which employees have access to the assistant and what they are permitted to ask. All queries will be timestamped and recorded to provide you with a full audit trail. The Ask AI platform provides 30 days of chat history for each individual; however, it does not provide user permissions and an audit trail per query.
Access Control restricts the assistant to specific employee profiles.
Query History a full, timestamped audit log of every question asked, including the generated SQL.
Speak Instead of Type Ask AI Doesn’t Support Voice Input
Voice input, built on the browser’s native speech recognition, lets you ask your question out loud instead of typing it useful on a warehouse floor, during a busy order-processing morning, or anytime your hands are full. Ask AI is text-only.
Quick-Access Shortcuts for the Questions You Ask Every Day More Flexible Than Ask AI’s Suggestions
The Prestashop AI Admin Assistant ships with ready-to-use “quick query chips”: Total Orders Today, Revenue This Month, Low Stock Products, Abandoned Carts (Last 30 Days), Top Customers by Revenue, and more that you can fully edit and customize. Ask AI offers contextual suggestions on Product, Order, and Customer pages, but they aren’t something you can edit or add to.
Get Started
If you’re ready to stop digging through admin screens and start just asking your store what you need to know, Smart AI Admin Assistant is available, with live admin and front-end demos and a full user manual so you can see exactly what you’re getting before you buy:
Having a blog is easy. Making it contribute to store growth is where most ecommerce businesses struggle. Article writing without a defined goal may get some visitors, but it won’t result in any sales automatically. The key is to create a content strategy that helps a customer go from having a problem to its solution, and then to the product.
Here is an effective workflow for making the OpenCart Blog Extension by Knowband your sales solution.
Step 1: Begin With Customers’ Needs
Identify the questions that people have when thinking about purchasing a certain product.
Analyze enquiries, questions, reviews, search queries, and objections, and divide them into the following topics: buying advice, comparison, education, use cases, and troubleshooting.
Implementation: Make a list of content ideas based on the customers’ needs and not based on your guesswork.
Expected impact: You build content around real search intent, giving your store more opportunities to reach potential customers before they are already comparing products.
Step 2: Give Every Article a Specific Job
Do not make every article responsible for “getting traffic.” Think about what you would like the reader to do next.
An awareness article might introduce a problem. A buying guide can help someone compare options. A product-focused article can remove doubts before purchase. A tutorial is used to enhance the experience of an existing customer by providing them with more value from the product.
Implementation: Assign each article a particular function – to attract, to inform, to compare, to convert, to support, or to retain.
Impact expected: Your blog will become a part of the customer journey strategy and not a bunch of random articles.
Step 3: Create Content at Various Purchasing Intent Levels
Once you know the purpose, create content for different levels of purchase intent.
For example:
Awareness: “What to Consider Before Choosing…”
Research: “How to Choose the Right…”
Consideration: “[Option A] vs [Option B]”
Decision: “Best [Product Type] for [Use Case]”
Post-purchase: “How to Set Up and Use…”
At this point, using an OpenCart Blog Builder can be beneficial for you. It allows you to arrange all kinds of content according to your purposes and publish accordingly.
Impact expected: The customers have several ways to come across your store in the purchasing process, and increase the likelihood of going from informational content to the discovery of a product.
Step 4: Associate Useful Content With Relevant Products
It’s great when a customer reads an article, but it’s much better if there is a way for them to shop for a product that really helps to solve their problem.
Suppose an article explains how to choose between different product types. Once the reader understands what to look for, introduce relevant products that match those requirements.
Do not turn the article into a catalogue. The product should appear because it is useful during the customer’s decision-making process.
Expected impact: Reduce the distance between organic traffic and your catalogue, giving informational visitors a clear route toward products.
Knowband’s OpenCart Blog Extension can support this connection between informational content and product discovery within the store.
Step 5: Create Content Using Customer Objections
Some of the most valuable content ideas might be sitting right there in your inbox.
Whenever you get asked by multiple people if a product will work for an application, how two products compare, or how something works, you need to provide a permanent answer.
Implementation: Use frequently asked questions to create FAQ posts, comparison articles, buying guides, tutorials, or articles related to a certain product.
Expected result: You handle objections before they prevent the purchase, but you also create content that covers topics that matter to your customers.
OpenCart Blog Extension approach to blog management can help merchants bring this content into the same store workflow instead of managing a separate publishing process.
Step 6: Build a Content Path Instead of Isolated Articles
One useful article should lead naturally to another.
A broad buying guide could link to a comparison. The comparison could point to a specific use-case article. That article could then introduce relevant products.
Think of it as:
Search → Article → Related Content → Product → Purchase
Use related posts and internal links where they genuinely help the reader continue researching.
Expected impact: Visitors have more reasons to explore your store, while your content develops stronger connections between related topics and important product pages.
This is one of the areas where the OpenCart Blog Plugin by Knowband can support a more organised content structure.
Step 7: Optimise Before You Publish, Not Months Later
Even a good article still needs to be easily readable for both search engines and customers.
Before publication, consider search intent, title, description, URL, headings, images, internal links, categories, and any product relation.
Do not stuff keywords into every paragraph. Create a clear page first, then add SEO elements that accurately describe its contents.
Expected result: Each piece of content gets more chances to be found and read instead of being SEO optimized after the fact.
Knowband’s OpenCart Blog Builder brings content and SEO management together so merchants can handle these publishing requirements within their OpenCart workflow.
Step 8: Use AI to Produce More Articles Without Losing Focus
AI could speed up content production, yet producing more articles should not be the purpose.
Utilize AI in those areas where it replaces routine work: writing the first draft, developing the outline further, translating content, or working on SEO features. Keep your strategy and the final check with your team.
Expected result: A small marketing team can keep a consistent schedule of publications without transforming its blog into an endless flow of generic articles.
The OpenCart Blog Plugin by Knowband provides assistance in content generation, translation, development, and optimization in the context of the blog workflow.
Step 9: Measure What the Content Actually Does
Do not judge the entire blog by page views.
Look at what happens after someone arrives:
Do visitors reach product pages?
Which articles assist conversions?
Which topics attract relevant traffic?
Which posts keep users exploring?
Which articles need updating?
What are other customer questions left unanswered?
Expected result: You will be able to spend more time on content that brings value to your business and less on low-value articles using the OpenCart Blog Extension.
Turn Your Workflow Into a Repetitive Process
The purpose is not to publish more. It is to create a system that improves with every cycle:
Research customer needs → Plan content → Create → Optimise → Connect to products → Publish → Measure → Update → Repeat
Updated September 30, 2026: The OpenCart Blog Manager helps you organize categories, tags, authors, related posts, and linked products from your store’s admin panel. It also includes SEO fields, multilingual publishing, AI-powered content generation with OpenAI and Google Gemini, and an auto-updated XML sitemap for your blog posts. Read our guide on how to organize OpenCart blog categories, tags, authors, and related posts to see the full introduction and features.
With an OpenCart Blog Extension, this process can become part of your regular ecommerce workflow rather than a separate content project.
The full OpenCart Blog Manager – AI Content & SEO Optimization by Knowband is designed to support this kind of workflow, bringing content management, SEO, product connections, multilingual publishing, imports, and AI-assisted content work into the OpenCart environment.
The important part, however, is not the number of tools available. It is what you do with them.
Ask the right question. Create the right content. Connect it to the right product. Measure the result. Then improve the next piece.
This is how the blog for a store can transform from just posting articles to a useful channel of discovery, consideration, and profit generation.
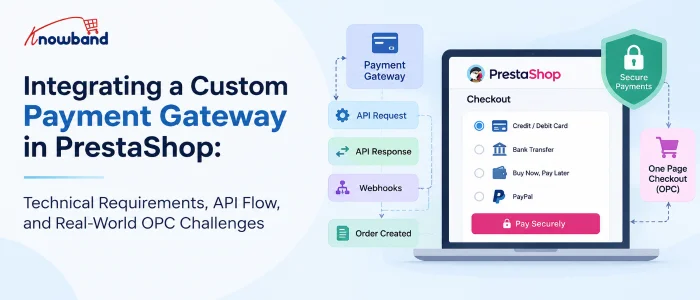
Integrating a payment gateway into PrestaShop can look straightforward on paper.
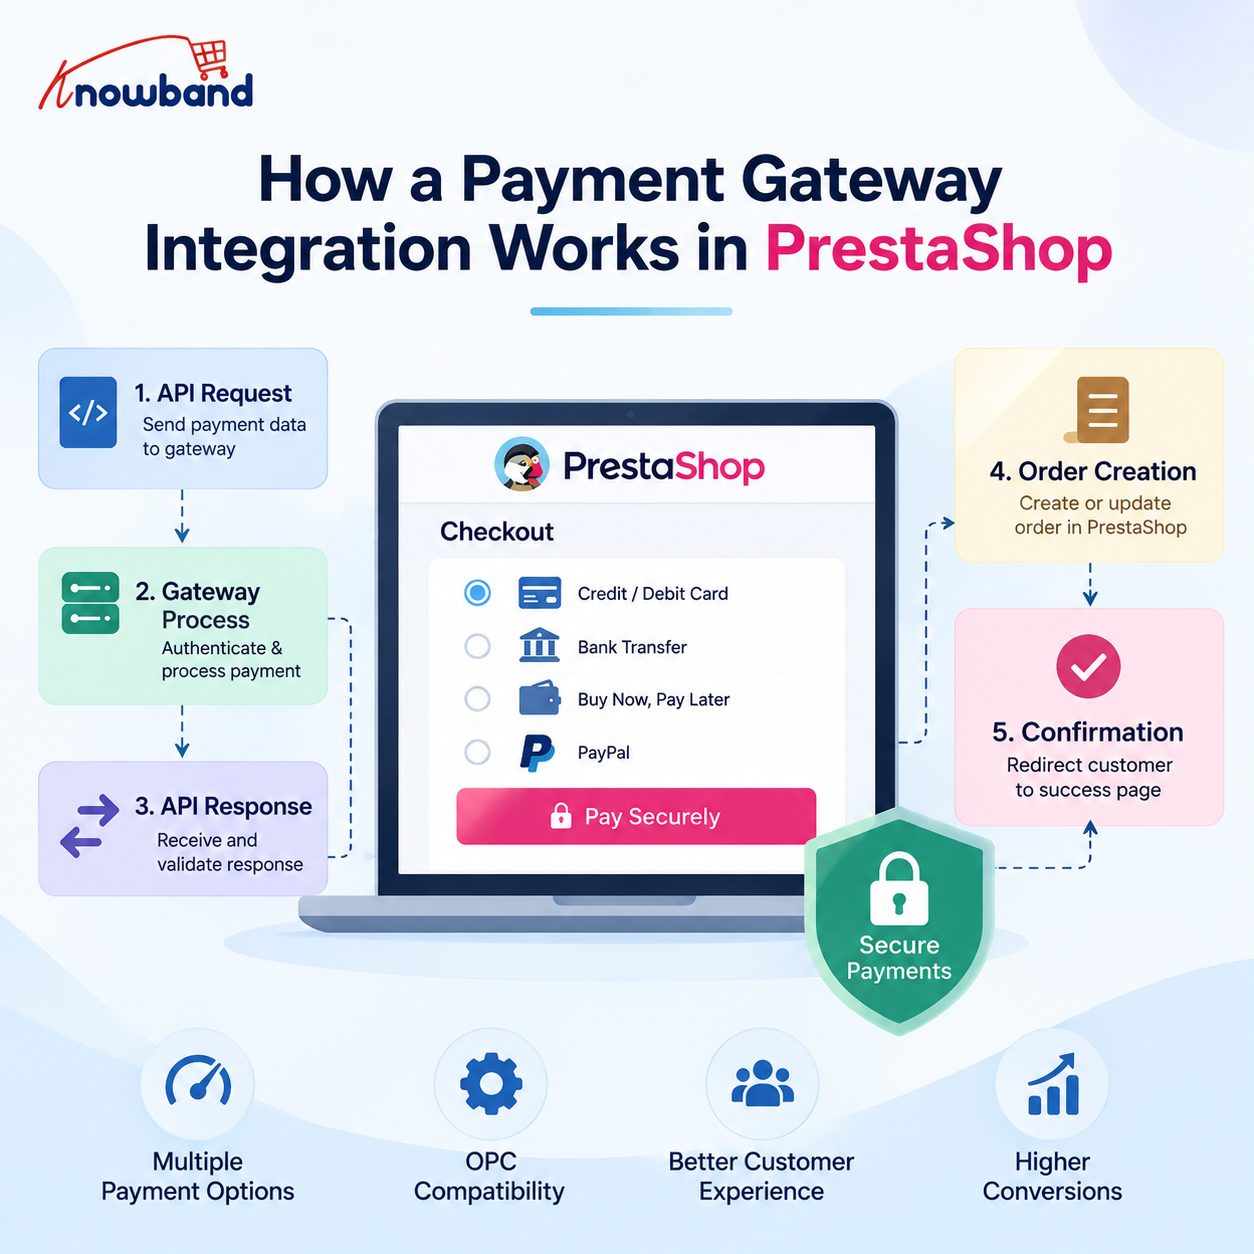
The gateway provides API documentation, sandbox credentials, authentication keys, callback URLs, and a few endpoints. The PrestaShop module then sends the payment request, receives the response, creates the order, and redirects the customer to the confirmation page.
In a real PrestaShop store, however, the payment gateway is rarely working alone.
The moment a store uses a One Page Checkout (OPC) module such as SuperCheckout, multiple payment modules, custom payment flows, iframes, JavaScript-based payment methods, and additional checkout customizations can all interact with each other.
This is where many payment integrations become difficult.
During payment gateway compatibility work, we have encountered cases where a payment method worked perfectly with PrestaShop’s default checkout but behaved differently inside OPC. For example, a payment provider could display correctly on the standard checkout while options such as BLIK, bank selection, or BNPL disappeared inside SuperCheckout.
The important lesson was that integrating a payment gateway is not only about making the API call work. It is about making the entire payment lifecycle work correctly inside the PrestaShop checkout.
1.0 What Does a Custom Payment Gateway Actually Need?
At a high level, a PrestaShop payment integration needs to handle five things:
Display the payment method at checkout.
Send the customer or payment data to the gateway.
Receive and validate the gateway response.
Create or update the PrestaShop order correctly.
Return the customer to the appropriate confirmation or error page.
A typical payment module extends rather than the base class.
The payment module normally works with hooks such as:
The hook is responsible for making the payment method available to the checkout.
The hook handles what the customer sees after returning from the payment process.
For example:
public function hookPaymentOptions($params)
{
if (!$this->active || !$this->checkCurrency($params['cart'])) {
return [];
}

$paymentOption = new PaymentOption();

$paymentOption
->setCallToActionText($this->l('Pay by Card'))
->setAction(
$this->context->link->getModuleLink(
$this->name,
'redirect',
[],
true
)
);

return [$paymentOption];
}
The important point is that this hook should not simply assume that the payment method can always be displayed.
Currency, country, carrier, customer state, cart amount, module configuration, and gateway availability can all affect whether the payment method should be shown.
2.0 The Part That Changes Everything: OPC
The default PrestaShop checkout and a Prestashop One Page Checkout module do not necessarily process payment methods in exactly the same way.
This was one of the most important lessons from working with multiple payment modules.
With the default checkout, a payment module generally controls its own payment option rendering and payment flow.
With an OPC, the checkout module becomes another layer between the payment module and the customer. That means the following can interact:
A payment module can therefore be completely correct from an API perspective and still fail to behave correctly inside an OPC.
This is why payment compatibility testing should always include both:
PrestaShop default checkout
The actual OPC used by the store
Testing only the default checkout can give a false sense that the integration is complete.
3.0 A Real-World Example: PayU Options Missing Inside OPC
One of the practical issues we encountered involved PayU payment options.
On the standard PrestaShop checkout, PayU was able to display its available payment methods correctly. However, inside SuperCheckout, some payment options were missing.
For example, depending on the configuration and cart:
BLIK was not consistently visible.
The bank-selection list did not expand correctly.
Some BNPL/payment rows were missing.
In some cases, BLIK appeared and then disappeared.
At first glance, this looked like a PayU API problem. It wasn’t.
The important diagnostic step was comparing the payment flow between the default checkout and SuperCheckout.
When the same payment module works on the default checkout but fails inside OPC, the investigation should move beyond the gateway API.
We need to check how the OPC builds the payment methods and what information it passes to the payment modules.
4.0 Payment Amount Can Affect Payment Method Visibility
One particularly important part of this investigation was the cart amount. Payment gateways frequently have minimum and maximum transaction limits. For example:
Payment Method↓Check cart amount↓Minimum amount? Maximum amount?↓Eligible / Not eligible
During the PayU compatibility investigation, we traced the payment-method filtering logic to the cart amount being passed through the payment-method checks.
The relevant flow involved PrestaShop’s cart calculation and payment-method filtering, including logic around:
Cart::BOTH
and:
PayMethodsCache::checkMinMax
This matters because a payment option can disappear from checkout without the API itself returning an error.
The gateway may simply be considered ineligible for the amount received by the payment module. That gives us an important debugging rule:
If a payment option disappears from an OPC, don’t immediately assume that the payment API is broken. First verify the cart amount, currency, minimum/maximum limits, and the values reaching the payment-method eligibility checks.
This becomes even more important when discounts, shipping costs, taxes, vouchers, or custom checkout calculations are involved.
5.0 Why Payment Methods Can Work in Default Checkout but Fail in SuperCheckout
A useful way to investigate these problems is to compare the two checkout environments.
Different gateways require different combinations.
6.1 Redirect-based gateway
The customer clicks the payment method and is redirected to the gateway.
Checkout↓PaymentOption↓Module controller↓Gateway
6.2 Embedded payment form
The payment fields are displayed directly in the checkout.
Checkout↓PaymentOption↓Card/payment form↓Gateway API
6.3 Iframe-based payment
The gateway’s interface is embedded into the checkout.
Checkout↓PaymentOption↓Iframe↓Gateway
The last two approaches require additional attention because JavaScript, DOM manipulation, iframe loading, and OPC refreshes can affect the payment interface.
7.0 JavaScript Becomes Critical with OPC
This is one area that generic payment-integration guides often overlook.
An OPC can dynamically refresh portions of the checkout when the customer changes:
delivery address
country
carrier
payment method
billing information
shipping method
When that happens, payment-related HTML can be replaced.
A JavaScript event that worked during the initial page load may therefore stop working after an AJAX refresh.
For example:
Initial checkout load↓Payment JS initialized↓Customer changes payment/shipping information↓OPC refreshes payment section↓Original DOM replaced↓Payment JS no longer attached
This can produce confusing symptoms.
The payment method may appear initially, but clicking it does nothing. An iframe may disappear.
A bank list may stop expanding.
A payment option may appear and disappear after another checkout field changes.
Therefore, compatibility work often requires changes not only in PHP but also in the payment module’s JavaScript.
8.0 A Real Example: SimplyLease + SuperCheckout
Another example involved SimplyLease integration with SuperCheckout. The problem was not limited to the gateway API.
Some SimplyLease information and calculator elements were part of the checkout/payment presentation and needed to work correctly inside the SuperCheckout flow.
The compatibility changes involved both module templates and SuperCheckout-side JavaScript integration. The files involved included:
This is a good example of why payment compatibility sometimes requires changes outside the payment gateway module itself.
The payment provider may expose the correct data, but the checkout still has to:
Render it.
Preserve it during checkout refreshes.
Initialize the required JavaScript.
Keep the payment information synchronized with the current cart.
9.0 Another Common Problem: Payment Method Not Appearing
We also encountered cases where a payment method such as Comfino did not appear in SuperCheckout even though the payment module itself was installed and configured.
This type of issue should be investigated systematically.
Check:
9.1 Is the module active?
$this->active
9.2 Is the currency supported?
$this->checkCurrency($params['cart'])
9.3 Is the country supported?
Some gateways restrict payment methods based on the customer’s country.
9.4 Is the cart total within the gateway limits?
Minimum and maximum transaction values can prevent a method from being displayed.
9.5 Is the carrier supported?
Some payment modules restrict payment methods by carrier.
9.6 Is OPC filtering the method?
The payment module can return valid methods that are collected, filtered, or rendered. But the OPC can still modify how payment
9.7 Is JavaScript hiding or replacing the element?
A payment method can technically be returned by PHP but still not be visible in the final checkout.
This is why browser developer tools are as important as PHP logs when debugging payment integrations.
10.0 Hooks We Actually Need to Pay Attention To
A custom payment integration should not be treated as a single-hook implementation.
The exact hooks depend on the gateway and checkout architecture, but some are especially important.
10.1 paymentOptions
This is the primary hook for exposing the payment method to the checkout.
It is responsible for returning paymentOptions objects.
Typical checks include:
if (!$this->active) { return [];}if (!$this->checkCurrency($params['cart'])) { return [];}
Additional gateway-specific restrictions can then be applied.
10.2 paymentReturns
This is used after the customer has completed or returned from the payment flow. It can display:
order reference
payment status
additional payment instructions
gateway-specific information
10.3 actionPresentPaymentOptions
This hook becomes particularly interesting when multiple payment modules and an OPC are involved.
It operates on the assembled payment options and can be useful when the checkout needs to inspect or modify the complete payment-option collection.
This is different from implementing a single gateway’s paymentoptionshook.
The distinction is important:
aymentOptions↓Each payment module contributes its optionactionPresentPaymentOptions↓The assembled payment options can be processed
When debugging OPC compatibility, understanding where payment options are collected versus where they are finally presented can make the difference between finding the issue quickly and spending hours inside the gateway module.
11.0 Order Creation: Never Trust the Browser
Once payment reaches the gateway, the next critical step is order creation. The most important PrestaShop method here is:
If the integration creates an order every time it receives a webhook, duplicate orders become possible. Therefore, the callback should check whether the cart already has an order before creating another one. Conceptually:
if ($cart->OrderExists()) {// Already processed// Return successful response}
The webhook handler should be designed to safely process repeated notifications.
The customer may return before the final payment confirmation arrives.
Customer↓Gateway↓Return to store↓Pending order↓Webhook↓Verify payment↓Change order state↓Payment accepted
For asynchronous gateways, using a dedicated pending order state is often safer than immediately marking the order as paid.
Once the webhook confirms the payment:
$history = new OrderHistory();$history->id_order = (int) $order->id;$history->changeIdOrderState( Configuration::get('PS_OS_PAYMENT'),$order);$history->addWithemail(true);
This ensures that the order-state transition goes through PrestaShop’s order-history mechanism instead of simply changing the database value.
14.0 One of the Most Useful Debugging Techniques: Compare the Checkout Flows
When a payment method works in the default checkout but not in OPC, we recommend comparing the complete flow.
Step 1: Check PHP
Is hookPaymentOptions() executed?
Step 2: Inspect the returned options
Does the payment module actually return a paymentOption?
Step 3: Check the cart
Compare:
total
currency
customer
country
carrier
discounts
taxes
shipping
Step 4: Check the browser
Look for:
JavaScript errors
missing DOM elements
AJAX requests
failed requests
iframe errors
Step 5: Check the OPC
Determine whether SuperCheckout is:
filtering the payment option
replacing its HTML
refreshing the payment section
changing the cart before the payment module runs
Step 6: Check the gateway
Only after the local checkout flow is confirmed should the investigation move deeper into:
API authentication
request payload
signature
response
webhook
gateway logs
This layered approach is much faster than starting with the gateway API every time.
15.0 Common Payment Integration Problems We Have Seen
Real-world compatibility work usually exposes problems that aren’t obvious from the gateway documentation.
15.1 Payment option disappears
Possible causes:
unsupported currency
country restriction
cart amount outside gateway limits
carrier restriction
OPC filtering
payment module configuration
JavaScript hiding the method
15.2 BLIK or another payment option appears and disappears
Possible causes:
checkout AJAX refresh
payment-option re-rendering
JavaScript initialization
cart total changing
gateway eligibility being recalculated
15.3 Bank list does not expand
Often investigate:
JavaScript errors
dynamically replaced DOM elements
event handlers attached before OPC refresh
payment provider’s JavaScript initialization
15.4 Iframe disappears
Investigate:
checkout refresh
iframe initialization
DOM replacement
JavaScript execution after AJAX updates
15.5 Payment succeeds, but order remains pending
Check:
webhook URL
webhook delivery
signature verification
cart/order lookup
order-state transition
callback authentication
15.6 Payment method works in default checkout but not OPC
This is a strong indication that the problem may be in the interaction between the payment module and the OPC rather than the gateway API itself.
16.0 Security Requirements for a Payment Module
Payment modules handle sensitive operations, so security cannot be treated as an optional improvement. At minimum:
Validate callback signatures.
Validate the cart/customer relationship.
Use HTTPS.
Validate TLS certificates.
Never trust payment status supplied only by the browser.
Never store raw card information unless the architecture and compliance requirements explicitly support it.
Do not log sensitive payment information.
Avoid serialize() and unserialize () / for untrusted external data.
Validate and cast incoming values.
Protect custom AJAX and callback endpoints.
Use secure tokens where appropriate.
Make webhook processing idempotent.
A payment success page is not proof of payment.
The gateway’s verified server-side response is what should determine whether the order is considered paid.
17.0 What Changes When Supporting Multiple Payment Modules?
Another lesson from OPC compatibility work is that adding a second or third payment module can expose problems that were not visible when only one payment method existed.
For example:
PayPal PayUComfinoSimplyLeaseBank transfer
may all contribute payment options to the same checkout. The checkout therefore has to deal with different:
HTML structures
JavaScript
iframe requirements
redirects
API flows
eligibility rules
minimum/maximum amounts
asynchronous callbacks
A change made for one payment method can accidentally affect another. This is why payment compatibility fixes should be narrowly scoped.
For example, instead of changing the entire payment-option processing logic globally, identify the specific payment method and apply the compatibility handling only where required.
18.0 Testing Should Include Real Cart Scenarios
Testing a payment gateway with a simple €10 product is not enough. A proper test matrix should include:
Scenario
What to verify
Single product
Payment option appears
Multiple products
Correct amount reaches gateway
Discount
Final payable amount is correct
Shipping charge
Gateway receives correct total
Tax
Gateway amount matches order
Minimum gateway amount
Method appears/disappears correctly
Maximum gateway amount
Method appears/disappears correctly
Unsupported currency
Method is hidden
Unsupported country
Method is hidden
Default checkout
Payment works
OPC
Payment works
Mobile checkout
UI works
Failed payment
Correct order/payment state
Successful payment
Order is created correctly
Webhook retry
No duplicate order
Customer abandonment
No incorrectly paid order
Gateway timeout
Correct pending/error handling
For OPC integrations, also test checkout refreshes. Change the:
address
carrier
country
payment method
quantity
discount
and verify that the payment options remain correct after every refresh.
19.0 A Practical Development Approach
Based on the issues that commonly appear in real integrations, a safer development order is:
19.1 Make the gateway work with default PrestaShop checkout
And eventually the payment provider changes something that breaks an otherwise stable integration.
For mainstream gateways, an established and maintained module can therefore be significantly cheaper than maintaining custom payment code for several years.
21.0 The Bigger Lesson From PrestaShop Payment Integration
The biggest lesson from working with payment gateways is that the API is often not the hardest part. Sending:
A payment integration is successful only when the entire chain behaves consistently.
This is also why an issue such as “BLIK is missing” or “the bank list does not open” should not immediately be treated as a gateway API problem.
The actual cause could be a cart-total calculation, payment-method eligibility check, OPC rendering, JavaScript initialization, or an AJAX refresh replacing the payment interface.
22.0 Final Checklist for a Custom PrestaShop Payment Gateway
Before considering the integration complete, verify:
Payment module extendsPaymentModule.
paymentOptions is implemented correctly.
paymentReturn is implemented where required.
Payment options use paymentOptions.
Currency restrictions are checked.
Country and carrier restrictions are checked where applicable.
Cart totals are validated.
Gateway responses are verified.
Callback signatures are validated.
ValidateOrder() is called only after successful payment verification.
The amount used for the order is validated against the gateway response.
Webhooks are idempotent.
Duplicate notifications do not create duplicate orders.
Correct order states are used.
Failed and pending payments are handled separately.
Sensitive payment data is never unnecessarily logged or stored.
HTTPS is enforced.
Default PrestaShop checkout has been tested.
OPC has been tested separately.
JavaScript has been tested after AJAX checkout refreshes.
Iframes and interactive payment elements have been tested.
Multiple payment modules have been tested together.
Realistic carts with discounts and shipping have been tested.
Conclusion
A custom payment gateway in PrestaShop is more than an API integration.
The API is only one piece of the implementation. The real engineering challenge begins when the payment module has to coexist with PrestaShop’s checkout, an OPC such as SuperCheckout, other payment modules, dynamic JavaScript, cart recalculations, and asynchronous gateway callbacks.
Our experience with payment compatibility issues reinforced one important approach: always isolate where the failure occurs before changing code.
If the payment method is not returned by PHP, investigate the payment module and its eligibility rules. If PHP returns it but the customer cannot see it, investigate the OPC and frontend rendering. If the UI appears but does not respond, investigate JavaScript and AJAX refreshes. If the payment succeeds but the order remains pending, investigate the callback and order-state flow.
This approach is much more reliable than assuming every payment problem is an API problem.
For developers working on PrestaShop payment integrations, the goal should not simply be to make a gateway accept a transaction. The goal is to make the entire payment lifecycle reliable—from the first checkout render to the final verified order state—even when multiple payment methods and a customized OPC are involved.
If you have questions or need assistance with your website performance or migration, our experts are here to help. Contact the Knowband team at support@knowband.com today for reliable eCommerce plugins tailored to your eCommerce needs.
Knowband PrestaShop Point of Sale Module is an all-in-one PrestaShop Multiple Store POS module that is specially designed for merchants who have one or multiple physical stores in addition to their online store. The Knowband PrestaShop POS module comes in handy for such merchants as it integrates functionalities like store-level sales, stock management, and employee management directly into their PrestaShop back-end, making it a viable PrestaShop POS Module Alternative to other POS systems.
The module is built around Multi-Outlet POS approach. Every physical location, which is called an outlet in admin terms, is configurable on its own using its own unique address, currency, language, and sales regulations, but all outlets will still work under one single PrestaShop website. Thus, the Prestashop Point of sale Addon is appropriate for Multi-Outlet Retail business models including but not limited to boutique chains, franchise counters, pop-ups, and warehouses with retail activity in addition.
Knowband Point of Sale is not a payment method in itself. It records POS sales through its own internal order flow and always uses a fixed internal payment method for POS transactions; the order status applied once a sale is paid is configurable in Settings, and shipping, discounts, and commission are layered on top of that flow.
1.1 What the module includes
The Prestashop Point of Sale Module includes functionalities like dashboard, multi-outlet creation, commission tracking, inventory sync and many more.
Sales dashboard module for PrestaShop: a customizable, draggable widget grid for reviewing outlet performance, oversold orders, and sales trends
Outlet management: creating, editing, and activating individual outlets, each with its own address, currency, language, and override rules
PrestaShop sales agent management: assigning PrestaShop employees to outlets as cashiers, and flagging specific employees as POS managers
Commission tracking: recording salesperson commission per sale, with reporting broken down by employee and outlet
POS Customer Management for PrestaShop: Searching, creating and configuring guest check-out behavior based on outlet
PrestaShop Barcode Scanner Module: Matching the barcodes entered through the scanner with a user configurable barcode field such as EAN13, UPC, ISBN, MPN, and Reference
Inventory Synchronization for PrestaShop: Maintaining the correct stock visibility while assigning, selling and returning products in various outlets
Offline order module for PrestaShop: queuing sales when the connection drops and syncing them automatically once connectivity returns, using idempotency keys to prevent duplicate orders
PrestaShop POS with receipt printing: generating printed receipts through standard browser-based HTML printing, with configurable discount line display
Return and refund POS trail: order-level visibility into paid amounts, order status, and oversold flags so that returns and refunds can be traced back to the original outlet and salesperson
PWA-style panel access: a public POS panel URL, optionally customised, that can be opened in a browser tab or installed as an app-like shortcut on a desktop device
2.0 Requirements and Compatibility for Prestashop Point Of Sale Addon
2.1 PrestaShop compatibility
The module is compatible for Prestashop 1.7, Prestashop 8.x. and Prestashop 9. x.x. Store owners can use it feel free, in case if you face any issue, our team is always available at supprot@knowband.com
2.2 Module dependencies
The Multi-Outlet POS system creates and relies on its own database tables for outlets, product-to-outlet assignment, stock allocation, discount logs, offline order queues, and commission records, in addition to standard PrestaShop tables for employees, customers, carriers, and orders.
2.3 Required permissions
The administrator installing or configuring the module needs valid PrestaShop back-office access with rights to manage modules, products, carriers, customers, employees, and orders. Outlet management in particular touches products and carriers directly, so an store adins without those permissions will not be able to complete outlet setup.
3.0 Installation and Activation of Prestashop Multi Outlet POS System
3.1 Installing the module
Install Knowband PrestaShop Point of Sale from the PrestaShop module list in the back office, the same way any standard PrestaShop module is installed.
Navigate to Module Manager > Modules
Click on the Upload option and upload Knowband Prestashop Point of Sale
After installation, click on configure, this will redirect you to the configuration module.
3.2 Activation
Installing the module is not the same as activating it for live sales. Enable the module from the Enable POS module Tab.
4.0 Module Tabs Structure in POS
After installation, you will see the module Knowband Prestashop Point of Sale under the PrestaShop SELL menu.
The Dashboard is the landing page of the sales dashboard module for PrestaShop and gives the administrator an outlet-scoped overview of POS activity as soon as they open the Knowband Prestashop Point Of Sale menu.
5.1.1 Purpose
Review recent sales activity and trends across outlets.
Check individual outlet performance.
See oversold order counts, which relate directly to inventory sync accuracy.
Open the POS panel quickly from a single screen.
Customise the widget layout to match how the store owner or manager wants to review data.
5.1.2 Fields and controls
Outlet selector: switches the dashboard view to a specific outlet or to all accessible outlets, central to multi-outlet management
Period selector: changes the reporting period used by the dashboard widgets
Widget customise controls: allow enabling, rearranging, and saving the widget layout
Oversold orders quick link: opens the Orders screen filtered to orders flagged as oversold
5.1.3 Buttons and actions
Open POS: opens the POS panel in a new browser tab
Reset dashboard layout: returns the widget arrangement to the default layout
Demo mode toggle: switches the dashboard to a demo dataset instead of live data, useful for screenshots or training
5.1.4 Important behavior
Widget data loads through AJAX rather than a full page reload.
Dashboard content is always outlet-specific once an outlet is selected.
The widget layout and demo mode setting are saved per shop, so multi-shop PrestaShop installs keep separate dashboard preferences.
5.2 General Settings
Settings is the main configuration area for the module’s behaviour and is organised into five sub-tabs: General, Product, Customer, Payment, and Shipping.
5.2.1 General
It controls the core operational behaviour of the PrestaShop POS module: whether it is active, how discounts and offline mode work, panel colours, and the public panel URL.
Enable POS module: turns the entire module on or off; when disabled, the POS panel becomes unavailable
Display voucher input on the cart panel: shows or hides the voucher field in the POS cart
Allow manual discounts at the till: enables cashier discounting
Max discount %: maximum manual discount percentage a cashier may apply
Max discount fixed amount: maximum fixed discount amount a cashier may apply
Panel accent colour: main colour used by the POS interface
Panel gradient colour: secondary colour for the POS background gradient
Button fill colour: main colour for action buttons in the POS panel
Button hover colour: button hover state colour
Enable offline mode: activates the offline order module for PrestaShop, allowing sales to be queued while connectivity is lost and synced automatically once it returns
Idempotency retention window (days): number of days to retain de-duplication keys for offline sales, preventing the same offline sale from being recorded twice
Custom Sell-page URL path: This option allows the POS panel use a custom public URL path, such as /pos/, and supports PWA-style shortcut installation
Note: Changing the custom panel path can break already-installed desktop app shortcuts, because an installed shortcut points to the URL it was created with.
5.2.2 Product
Controls how products are searched, displayed, assigned, and managed in the POS, and is the main configuration point for both the barcode scanner module for PrestaShop and the inventory sync module for PrestaShop.
Maximum characters shown per product name: truncates long product names in the POS interface
Low stock alert threshold: flags low stock when allocated stock falls to or below the chosen value
Search result cap (products / customers): maximum number of rows returned in product or customer searches
Product search fields: selects which product fields are text-matched in POS search, from Name, Reference, EAN, ISBN, UPC, MPN, and Tags
Barcode field to match: selects which barcode field the barcode scanner module for PrestaShop uses when scanning or typing a code, from EAN13, UPC, ISBN, MPN, and Reference
Auto-drop disabled products from an open cart: removes disabled or de-assigned products from an open cart automatically
Flag products that have combinations: marks products with variants so the cashier knows a choice is required before completing the line
Enable POS status on new assignment: makes newly assigned products immediately available for POS sale
Show original price alongside a discount: displays both original and discounted pricing for price-reduced products
Auto-assign new or edited products to outlets: automatically assigns products to active outlets, supporting the inventory sync module for PrestaShop
Default/starting category ID: category the POS panel opens to by default; set to 0 to use the shop root category
Show product image thumbnails in search results and cart: displays small product images
Show available quantity in search rows: displays outlet stock in product search results
Show SKU/reference in search rows: shows product reference text under the product name
5.2.3 Customer
Handles the global portion of PrestaShop POS customer management. Most customer-related configuration now lives at the outlet level rather than here.
Let cashiers pick customer groups on creation: shows a customer group selection box when a cashier creates a customer from the panel
5.2.4 Payment
Controls the payment status applied to POS sales and the salesperson commission rules that drive commission tracking.
How POS sales are paid: a display-only field explaining that all POS sales use one fixed internal payment method
Status applied once paid: the order status assigned once a sale is marked paid
Enable salesperson commission tracking: turns commission calculation on or off for commission tracking
Commission rate (% of order total): percentage of each sale total used for salesperson commission
5.2.5 Shipping
Controls shipping behaviour for POS orders, including which carriers a cashier can offer.
Allow shipping a POS sale to the customer: enables shipping at the POS
Carriers available at the till: multi-select list of all carriers a cashier may choose from
Pre-selected carrier: default carrier chosen when a cashier enters shipping mode
5.3 How to add Multi Outlets in Prestashop Point of Sale
Outlets are the core of Multi-Outlet Retail configuration. This section covers the outlet listing, the add and edit outlet form, and the outlet products panel used for inventory sync.
5.3.1 Outlets listing
Lists every outlet configured for the current shop and is the entry point for outlet management.
Listing columns: ID, Store/outlet label, Post code, Country, Override Payment, Override Shipping, Status
Edit: opens the outlet configuration form
Status toggle: enables or disables the outlet
Open POS: opens the POS panel for that context in a new tab
Add new outlet: creates a new outlet record
5.3.2 How to Add an Outlet using PrestaShop Point of Sale System
Creates or edits a single outlet, defining its physical profile plus its local payment, shipping, and guest checkout rules.
Core fields: Outlet is active, Store/outlet label, Address Line 1, Address Line 2, City, Postal code, Country, State, Contact phone number, Currencies accepted at this outlet, Pre-selected currency at the till, Languages available at this outlet, Pre-selected language at the till
5.3.3 Payment override group
Override Payment Settings: turns the outlet payment override on or off
Status applied once paid: order status assigned to paid POS sales at this outlet
Enable salesperson commission tracking: enables commission tracking at the outlet level
Commission rate (% of order total): commission percentage specific to this outlet
5.3.4 Shipping override group
Override Shipping Settings: turns the outlet shipping override on or off
Allow shipping a POS sale to the customer: enables shipping at this outlet
Carriers available at the till: allowed carriers for this outlet
Pre-selected carrier: default shipping carrier for this outlet
5.3.5 Guest checkout group
This group is the outlet-level half of PrestaShop POS customer management.
Allow sales without a registered customer: enables guest sales at this outlet
Guest customer handling: selects whether guests use an existing customer record or a new guest customer created per sale
Guest checkout customer email: email of the existing customer used for guest sales
Ask for the customer’s name: shows name fields on the guest form
Ask for the customer’s address: shows address fields on the guest form
5.3.6 How to Assign Products to Outlet
Appears when editing an existing outlet and is the working screen for the inventory sync module for PrestaShop at outlet level.
Assign product to outlet
Assign all products to outlet
Manage quantity for assigned products
Remove a product from this outlet
5.4 Employees
The Employees screen is the PrestaShop sales agent management view, listing every PrestaShop employee assigned to a POS outlet.
Edit: opens the employee record in the standard PrestaShop employee editor
The Employee tab provides functionality for the creation of employee accounts and configuring of permissions and outlets that employees will have access to.
First Name: Provide the first name of the employee.
Last Name: Provide the last name of the employee.
Avatar: Upload the avatar image of the employee.
Enable Gravatar: Specify whether you want to use the employee’s Gravatar image (Yes/No).
Email Address: Provide the employee’s email address. This email can be used as a login and account information exchange channel.
Password: Provide a password of at least 8 characters for the employee.
Language: Provide the language used by the employee in the administration panel.
Access and Permissions
Active: Select Yes if you want to give the employee access to the Admin panel; otherwise select No.
Role: Choose the role of the employee. Based on the chosen role, the employee gets permission and access to functions.
Default Page: Choose the page that should be opened right after logging in by the employee.
POS Access
POS Outlet Assigned To: Choose the POS outlet that belongs to the employee.
If this field is left blank/uninitialized, the employee is not considered a cashier and hence does not get POS access.
Employee Image: Choose the photo/image of the employee. It could help in recognizing the employee in the system. Once all the necessary data is entered, save the employee’s record.
5.5 How to sync orders in POS
The Orders screen lists all POS-originated orders and is the primary place to review sales history and the starting point for any return and refund POS trail investigation.
Filters: Outlet filter, Salesperson filter, Date filter
View: opens the detailed order view for that sale, including outlet, salesperson, and payment detail useful for tracing a return
CSV export is available through the standard PrestaShop helper list export mechanism, which makes it straightforward to pull a return and refund POS trail or a reconciliation file for accounting.
5.6 How to Analyse Reports
The Reports parent tab groups the two reporting screens used for commission tracking and discount oversight.
5.6.1 Discount Report
Summarises discount activity by employee and outlet, helping administrators identify cashiers who discount heavily or frequently.
Listing columns: Employee ID, First name, Last name, Outlet, Times discounted, Total discounted, Per-item discounts, Per-item total, Whole-cart discounts, Whole-cart total, Last discount
Filters: Employee name filters, Outlet filter, Last discount date range
This is a read-only report. It is based on discount activity logged by the module and does not include voucher-related discount rows.
5.6.2 Commission Report
The primary screen for commission tracking, summarising commission earned by a salesperson at each outlet.
Listing columns: Employee ID, First name, Last name, Outlet, Sales with commission, Total sales value, Total commission, Average per sale, Last commission
Filters: Outlet filter, Last commission date range
View orders: opens the Orders page filtered to the related salesperson and outlet
Note: This report is grouped by salesperson and outlet, which matters when a single employee works across multiple outlets under Multi-Outlet POS operations.
5.7 Receipt Settings
Controls how PrestaShop POS with receipt printing displays discounts and whether new customers receive a welcome email.
Print each line’s own discount: prints a separate discount line for each discounted product on the receipt
Print the whole-cart discount total: prints a separate total line for cart-level discounts
Email new customers a welcome message: sends a welcome email when a cashier creates a new customer from the POS.
6.0 Conclusion
Knowband PrestaShop Point of Sale also called as PrestaShop Multi-Outlet Point of Sale (POS) module for stores that need genuine multi-outlet management inside PrestaShop rather than a bolted-on third-party system. It gives admins the tools to create outlets, assign employees through sales agent management. Also, this module keep stock accurate with the inventory sync module for PrestaShop, scan products with the barcode scanner module for PrestaShop, take sales while offline through the offline order module for PrestaShop, configure shipping and payment behavior, print receipts, and monitor discount and commission trends from a single sales dashboard module for PrestaShop. If you find any issue with the module, please feel free to contact us at support@knowband.com
Watch the video tutorials below to learn how to configure and use the PrestaShop Point of Sale Module step by step.
Having an OpenCart website requires much more than just adding your products and completing orders. Search engines need to know what is on the web page, customers require faster-loading pages, and there are also broken links that have to be detected before they start bringing losses to you. An OpenCart SEO Audit Manager developed by Knowband provides all these functions from one dashboard instead of using different add-ons, Excel sheets, and manual checks. An OpenCart SEO Audit Extension indeed does all these things at once.
The fundamental principle behind the operation of the OpenCart SEO Audit Extension is to rate products, product categories, informational pages, manufacturers, and blogs that are compatible with OpenCart. Every single page will get its own quality rating, taking into account such aspects as meta tags, readability, keyword inclusion, linking, and more. For those store owners who do not know much about SEO, this is a good checklist.
Apart from scoring, the Extension includes functionalities such as OpenCart Google Analytics 4 Analysis, OpenCart Google Search Console, and OpenCart PageSpeed Insights for traffic analysis, search analysis, and page speed information to be found in one dashboard. In addition, it takes care of redirect management using the OpenCart URL Redirect Extension. This extension also identifies any 404 URL that might ruin users’ experience and detects duplicate SEO URLs.
This module acts as an OpenCart Technical SEO plugin, which allows you to edit your robots.txt file using OpenCart Robots.txt Editor and creates XML and HTML sitemaps using OpenCart Sitemap Generator. With the optional OpenCart AI Content Generator based on ChatGPT, it drafts such important elements as meta titles, meta descriptions, product descriptions, and social media tags.
This manual describes the functionality of the Knowband OpenCart SEO Audit Extension on the basis of its actual navigation, features, and performance. This document does not give any guarantees concerning the ranking of the page in search results, since no on-page service can control the search engine ranking of a page. It gives an explanation of each feature’s function, usage, and relevance. The manual is written for those OpenCart store owners who have the knowledge of OpenCart but do not know how to perform an OpenCart SEO audit.
2. Key Features of OpenCart SEO Audit Manager
OpenCart SEO Audit Manager, a complete OpenCart SEO audit extension for OpenCart stores, combines several distinct capabilities under one module. Together, they cover most of the recurring SEO maintenance tasks an OpenCart store needs:
SEO and readability scoring for products, categories, information pages, manufacturers, and supported blog content
Score history with trend charts, snapshots, and comparisons over time
Issues grouped by rule, so administrators can fix one problem across many pages at once
OpenCart Google Analytics 4 integration with sessions, users, eCommerce, and behavior reporting
OpenCart Google Search Console integration covering performance, sitemap submission, and URL indexing checks
PageSpeed Insights integration with mobile and desktop testing, plus historical trend tracking
An OpenCart Redirect Manager supporting OpenCart 301 Redirects plus 302 and 303 redirect types, including bulk CSV import
404 URL detection that records missing storefront requests for review
Duplicate URL checking, effectively an OpenCart SEO Checker for SEO keywords assigned to more than one page
XML and HTML sitemap generation through the module’s OpenCart Sitemap Generator, along with RSS feed support
robots.txt management via the built-in Robots.txt Editor, directly from the admin panel
An OpenCart AI Content Generator (ChatGPT-assisted) for meta titles, descriptions, product copy, and social metadata
Import/export for bulk SEO data backup, restore, and AI-assisted enhancement
Social Cards for Open Graph and X (Twitter) card metadata, plus structured data support
Each of these areas is documented in detail in the sections that follow, using the exact tab names and fields found in the OpenCart SEO Audit Module.
3. Installation of the Extension
Step 1: Download the module. Download the OpenCart SEO Audit Manager, an OpenCart SEO plugin developed and extract it on your local machine.
Step 2: Copy the files to your server. Upload the contents of the files’ upload (admin, system, catalogue) directory into your store, keeping the existing folder structure intact.
Step 3: Install or refresh the OCMOD modification. The module includes an OCMOD modification that adds the Knowband SEO group to the admin sidebar. In OpenCart, go to Extensions > Modifications and refresh the modification list so the OpenCart SEO Extension appears correctly. If the sidebar entry does not appear immediately, the extension also includes an event-based fallback that adds the menu automatically once the extension is installed.
Step 4: Install the extension. Open the OpenCart administration panel, go to Extensions, locate Knowband SEO, and install it.
Step 5: Confirm user permissions. Installation grants the installing user group access and modification permission for the module’s routes. If other administrator groups also need to use the module, add their access and modify permissions manually under System > Users > User Groups.
4. Admin Overview of OpenCart SEO Audit Extension
The OpenCart SEO Audit Extension organises its tools under a dedicated admin menu. The navigation includes Dashboard, Analytics (includes GA, GSC & PageSpeed Insight dashboards), Score History, URL Optimisation, Sitemap XML, and HTML. This extension also includes updating products in bulk using import/export settings. Also allow you to edit sitemap.xml, sitemap.html, and robots.txt.
4.1 Dashboard
The dashboard is the summary view of your store’s overall SEO condition. It is usually the first place to check when reviewing how your catalog is performing from a content and metadata POV.
You can view the current and previous overall SEO scores, review several breakdown charts, run a bulk analysis of pages that have not yet been scored, and jump straight into Score History.
Current website score / Previous score: The overall SEO score of the store as of its latest audit, presented in relation to the previous period’s score to track if there was an improvement or decline.
Trend of the overall SEO score: A graph showing the performance of your website over time that will help understand whether the improvements made had any lasting impact or just an initial positive response.
Index/Follow ratio: The ratio of pages marked for indexing and following versus those marked noindex and nofollow, will allow to detect the pages that were mistakenly blocked from search engines’ crawling.
Pages by scores distribution: A chart reflecting the number of pages with strong, moderate, and poor SEO scores.
Readability: a chart summarizing readability scores across analyzed content, separate from the SEO score.
Meta settings completed: a chart showing how many pages have complete metadata (title, description, and similar fields) versus how many are missing it.
SEO checklist: a list of store-wide technical items, including SEO URLs enabled, SSL enabled, XML sitemap enabled, robots.txt existence, maintenance mode status, webmaster verification, URL redirects, RSS, and blog detection where relevant. Each row shows whether the item is in place and may include an edit or external link to fix it directly.
Score History (header action): a shortcut that opens the Score History tab without using the main menu.
Analyze missing pages (header action): opens the bulk analysis tool described below, used to score pages that have not yet been analyzed.
4.2 Analytics
Analytics contains the tabs, including Analytic Dashboard, Settings, GA4 Analytics, Search Console, and PageSpeed.
4.2.1 Analytics Dashboard of the OpenCart SEO Audit Manager
This is a customizable widget dashboard that pulls together GA4, Search Console, and PageSpeed data in one place, so you do not need to open each integration separately for a quick check. These widgets are included from Google Analytics 4, Google Search Console and PageSpee
Period selector: The Store owner can set the reporting window for every widget on the page, with choices of Last 7 days, Last 28 days, Last 30 days, or Last 90 days.
Sessions: Select GA4 sessions recorded in the selected period.
Users: total Unique users recorded in the selected period.
Page views: Total page views recorded in the selected period.
Realtime users: The number of users currently active on the storefront, updated close to live.
Sessions trend / Users trend: Line charts showing how sessions and users changed day by day across the selected period.
Sessions by country: A breakdown of sessions by visitor country.
Sessions by device: A breakdown of sessions by device category, such as desktop, mobile, or tablet.
Top traffic sources: The channels or sources sending the most sessions to the store.
Clicks: total Search Console clicks in the selected period.
Impressions: total times your pages appeared in Google search results.
CTR: click-through rate, calculated as clicks divided by impressions.
Avg position: the average ranking position of your pages in Google search results for the period.
Clicks vs Impressions: a combined chart plotting clicks and impressions together so you can see how they move relative to each other.
Top search queries: the search terms generating the most clicks or impressions.
Top landing pages: the pages receiving the most traffic from search.
PageSpeed performance: a widget summarizing your most recent PageSpeed test scores.
Refresh: reloads the data for all currently displayed widgets.
Customize: opens the widget library so you can add, remove, or reorder widgets.
Save layout: stores your current widget selection and arrangement for this store.
Cancel: closes the customization view without saving changes.
Reset layout: restores the default widget selection and order.
4.2.2 Settings of GA4, GSC and PageSpeed
This includes holds every configuration value the Analytics area needs, organized into General, Credentials, Properties, Access, PageSpeed Cron, and Notifications sections.
General
Analytics Status: turns Analytics data collection and dashboards on or off for this store.
Default Period (days): the reporting window used by dashboard widgets when no other period has been chosen.
API Cache TTL (minutes): how long API responses are cached before the Extensionrequests fresh data from Google, which reduces API usage but delays how quickly new data appears.
Search Console Data Lag (days): the number of most recent days excluded from Search Console reporting, since Google typically finalizes that data a few days after it occurs.
History Retention (days): how long PageSpeed test history is kept before older records are removed.
Credentials
PageSpeed API Key: your Google PageSpeed Insights API key, required to run performance tests.
Google OAuth Client ID: the Client ID from the Web application OAuth client you created in Google Cloud.
Google OAuth Client Secret: the matching Client Secret; leaving this field blank when editing keeps the value already stored.
Connect with Google: starts the OAuth authorization flow using the Client ID and Secret above.
Disconnect Google: removes the stored Google connection for this store.
Refresh: reloads the list of available Google properties after a successful connection.
Properties
Search Console Property: the specific Search Console property this store’s data should be pulled from.
GA4 Property: the specific GA4 property ID this store’s data should be pulled from.
PageSpeed Test URL: the default URL used when running a PageSpeed test without specifying a custom one.
Custom Test URL: an optional alternate URL available when a custom PageSpeed target is selected instead of the default.
PageSpeed Cron
Enable Scheduled Checks: turns on automatic, recurring PageSpeed tests.
Pages To Test: which page targets are included in the scheduled checks.
Cron URL: the unique URL your server scheduler should call to trigger scheduled PageSpeed checks.
Last Run: the date and time the scheduled check last executed.
Regenerate: creates a new security token for the Cron URL; any existing scheduled job still using the old URL will stop working until it is updated.
Run now: triggers a scheduled check manually, without waiting for the next scheduled time.
Notifications
Enable Email Alerts: turns on email notifications for score or performance changes.
Alert Recipient: the email address that receives alerts.
Alert Threshold (points): the score-change amount that triggers an alert.
Also Notify On Recovery: sends an additional alert when a score that previously dropped recovers.
Notify When Core Web Vitals Fail: sends an alert specifically when Core Web Vitals metrics fail their thresholds.
Send test email: sends a sample alert to the configured recipient so you can confirm delivery is working.
Steps to Create Google Client ID & Secret ID
Enable the required APIs. Inside that project, turn on the Google Analytics Admin API, Google Search Console API, and PageSpeed Insights API.
Configure the OAuth consent screen. Google requires this before it will let your project request access to Analytics and Search Console data.
Create an OAuth 2.0 Client ID. Choose “Web application” as the type.
Add the redirect URI. Copy the exact redirect URI shown by the module and paste it into the OAuth Client’s settings.
Save the Client ID and Client Secret. Copy both values from Google Cloud and paste them into the matching fields here.
Click Connect with Google. This starts the authorization process using the credentials you just saved.
Click Refresh. This loads the list of Google properties available to your account.
Select the correct properties. Choose the right Search Console property and GA4 property for this store.
Create a PageSpeed Insights API key. Generate this in the same Google Cloud project.
Paste the key into the PageSpeed API Key field. This connects PageSpeed testing to the module.
4.2.3 GA4 Analytics
This is inclusive of visualization of your Google Analytics 4 metrics including traffic, engagement, and eCommerce activities.
Period Selector: Last 2 days, Last 7 days, Last 28 days, Last 30 days, or Custom that shows Date start, Date end, and an Apply button for a particular period.
Compare to previous period: this will add a second line to your charts and cards in order to indicate the corresponding period SEO score of fStore, this way you can tell whether there has been an improvement.
Overall SEO score trend: This is a graph of website score trend overtime, and it will help in knowing whether the changes that you have made recently are working or not.
Index/Follow ratio: This will show the number of pages that are marked as index and followed against the number of pages that are noindexed and nofollowed. This way you can know the pages hidden from the search engines
Page audit: a chart showing how many pages fall into strong, fair, and weak score bands, giving a quick sense of catalog-wide health.
Total users: everyone who visited the store in the period.
Active users: users counted by GA4 as actively engaged during the period.
New users: first-time visitors in the period.
Sessions: total sessions recorded in the period.
Engaged sessions: sessions that met GA4’s engagement criteria, such as lasting a minimum duration or including a conversion event.
Views: total page or screen views.
Views per session: average number of views per session.
Avg. session duration: average length of a session.
Engagement rate: the share of sessions that were engaged sessions.
Bounce rate: the share of sessions that were not engaged.
Events: total events recorded, such as clicks or scroll triggers configured in GA4.
Realtime panel: shows active users from the last 30 minutes, broken down by country, device, or page.
Traffic over time: a chart of sessions, users, and views across the selected period, with a previous-period comparison line when enabled.
Sessions by hour of day: a chart showing which hours typically bring the most sessions.
Revenue: total eCommerce revenue recorded by GA4.
Purchases: total completed purchase events.
Transactions: total recorded transactions.
Average order value: revenue divided by the number of orders.
Items purchased: total quantity of items sold.
Purchase funnel: a step-by-step view of Add to cart, Begin checkout, and Purchase, plus the conversion rates between them (Cart to checkout, Checkout to purchase, and Cart to purchase).
Top items: the best-selling products by revenue or quantity in the period.
4.2.4 Search Console
This Google Search Console Integrations in OpenCart includes performance and sitemap & URL check options. Together they show how your store appears in Google search results and whether Google has indexed your pages correctly.
Available Options
Clicks: how many times a search result led to a click on your site.
Impressions: how many times your pages appeared in search results, whether clicked or not.
CTR: click-through rate, clicks divided by impressions.
Average position: the average ranking position of your pages for the queries measured.
Comparison toggle: adds a previous-period series alongside the current data.
Period / date range selector: sets the reporting window for the Performance data.
Search type filters: narrows results to Web, Image, Video, or News search.
Queries table: search terms, with Clicks, Impressions, CTR, Position, Previous, and Change columns.
Pages table: individual URLs, with the same metric columns as Queries.
Countries table: performance broken down by visitor country.
Devices table: performance broken down by device type.
Search appearance table: performance broken down by the type of search result shown (for example, a normal listing versus a rich result).
Clicks vs impressions chart: plots both metrics together over time so you can see whether visibility and clicks are moving in the same direction.
Sitemaps & URL Check
Sitemap: the submitted sitemap’s URL.
Last submitted / Last downloaded: when the sitemap was last submitted to Google and when Google last downloaded it.
Status: Google’s current processing status for the sitemap.
Warnings / Errors: counts of issues Google found while processing the sitemap.
Submitted URLs: how many URLs the sitemap contains.
Submit/Delete sitemap: actions to add a new sitemap to Search Console or remove one that is no longer needed.
Google Index Checker: URL filter: enter a specific URL to check its indexing status.
Google Index Checker: Indexed filter: narrows results to indexed or not-indexed URLs.
Details: opens the full inspection result for a checked URL, which can show Indexed by Google, Not indexed, Listed in a submitted sitemap, or Not found in any submitted sitemap.
Check new URL: runs a fresh indexing check on a URL and stores the result in history for future reference.
Open in Search Console to request indexing: opens Google’s own URL Inspection tool, since Google does not provide an API for requesting indexing of ordinary pages.
Submit your XML sitemap here after configuring the Sitemap tab, and revisit the Sitemaps table periodically to check for warnings or errors rather than assuming a one-time submission is enough.
4.2.5 PageSpeed
PageSpeed brings Google PageSpeed Insights testing into the admin, with Run Test, Results, and History areas.
Run Test
Home page: runs the test against the storefront’s home page.
Category page: runs the test against a selected category page.
Product page: runs the test against a selected product page.
Custom URL: runs the test against any URL you specify.
Mobile / Desktop: every test runs on both device types, since performance often differs between them; a full test can take up to 90 seconds.
Results
Field data: real-world performance measured from actual Chrome users, when enough data exists in the Chrome User Experience Report.
Lab data: performance measured in a controlled, simulated test environment, useful when field data is unavailable.
Lighthouse scores: the overall category scores Google’s Lighthouse tool assigns.
Metrics: individual timing measurements such as load and rendering speed.
Insights: guidance describing what is affecting performance.
Diagnostics: additional technical detail about performance issues.
Passed audits: checks the page already satisfies.
Failed audits: checks the page does not satisfy, each with an explanation of the issue.
History
Target: filters history by which page type was tested (Home page, Category page, Product page, Custom URL).
Device: filters history by Mobile or Desktop.
From / To: date range filters for the history list.
Date: the date a specific test was run.
URL: the exact URL that was tested.
LCP: Largest Contentful Paint, a Core Web Vitals loading metric.
INP: Interaction to Next Paint, a Core Web Vitals responsiveness metric.
CLS: Cumulative Layout Shift, a Core Web Vitals visual stability metric.
Source: whether the test was run Manually or by a Scheduled check.
Export CSV: downloads the filtered history as a CSV file.
4.3 Score History
Score History in OpenCart SEO Audit Extension tracks how your store’s overall SEO score, and individual entity scores, change over time. This is where you confirm whether your SEO efforts are actually moving the needle..
Use Create snapshot to capture the store’s current state manually, for example before a large content update. To compare two points in time, select one snapshot as Snapshot A and another as Snapshot B, then click Compare snapshots; the two selections must be different from each other.
Best practice is to enable automatic snapshots and configure a retention policy in General Setting so that history builds up on its own, rather than depending on manual snapshots that are easy to forget.
4.5 URL Optimisation in Prestashop
This OpenCart SEO Audit Extension includes features like a redirection feature, 404 URL fixing and Duplicate URL detection.
A 301 redirect signals a permanent move and is generally the right choice when a page has been renamed or merged and the old URL should never be used again, this is the most common use case for OpenCart 301 Redirects. A 302 redirect signals a temporary move, useful for short-term changes such as a seasonal category being swapped out and back. A 303 redirect is typically used to point a request elsewhere after an action, such as a form submission, and is less commonly needed for straightforward catalogue URL changes.
Import CSV: this includes adding a bunch of URLs directly at once from a sheet.
Add Redirect: Type in a redirect’s name, its source URL, or its target URL, and click Filter to narrow the list down, handy once you’ve got more than a handful of redirects saved.
Redirect entry type: Individual for a single redirect, or Bulk for a CSV upload; Bulk mode is available only when adding, not editing.
Redirect name: an optional label to help you identify the redirect later, such as “mens-tshirts.”
Source URL: the old address to redirect from; this can be an SEO path (for example, old-category/old-product), an OpenCart route such as information/contact, or a path without the domain. This field is required.
Target URL: the destination address, entered as a relative path or a full http(s) URL. This field is required, and unsafe schemes such as javascript: or data: are rejected.
Redirect type: 301, 302, 303, or 404; new individual forms default to 301.
Active: Enabled or Disabled; new individual forms default to Enabled.
Save: stores the redirect and returns to the list with a success message.
The file must stay under 2 MB and 2,000 rows. Invalid rows are skipped, and the import result reports how many rows were imported and how many were skipped.
Editing and managing redirects. Use Search redirects to locate an entry by name, source, or target, then use Edit or Delete from the row actions. Bulk mode is available only when adding redirects, not when editing an existing one.
Avoiding mistakes. Redirects do not run on the storefront unless both the module’s master Status and Enable URL redirects are turned on in General Setting. Base redirect decisions on an actual URL change, such as a renamed product or a restructured category, rather than redirecting pages speculatively. A chain of redirects pointing to other redirects should generally be avoided; point each source directly to its final destination where possible.
Example. If a product URL changes from /product/old-name to /product/new-name after a rename, add a 301 redirect from the old path to the new one so that existing links and bookmarks continue to work.
10. 404 URL Detection
A 404 URL is a storefront request for a page that no longer exists or never existed at that address. Left unaddressed, these broken links frustrate visitors and waste any traffic or link value the old page had earned.
This module detects the 404 URLs and allow the store owners to redirect the 404 URL by following redirect feature.
4.6 Robots.TXT
Robots.txt is a plain text file at your store’s root address that tells well-behaved search engine crawlers which parts of the site they should avoid crawling.
A misconfigured robots.txt file can accidentally block important pages from being crawled, while a well-configured one keeps crawlers away from admin and system directories that offer no value in search results.
File path: the server location of the robots.txt file, for reference.
Exists: shows Enabled when a robots.txt file is already present, or Disabled when it is not.
robots.txt content: an editable text area containing the file’s directives. If no file exists yet, this area is pre-filled with a starting version that disallows the /admin/ and /system/ directories.
Save: writes the edited content to the file.
4.7. XML Sitemap
An XML sitemap is a structured list of your store’s URLs that helps search engines discover and prioritize pages for crawling.
The module’s OpenCart XML Sitemap tool, part of its broader OpenCart Sitemap Generator, allows you to configure the following under Sitemap > XML Sitemap:
Enable XML sitemap: turns on the public XML sitemap endpoint.
Sitemap page URL: displays the public URL once the sitemap is enabled.
Per-language sitemap URLs: shown for each enabled storefront language, since each language can have its own sitemap address.
Enable RSS: turns on the RSS feed endpoint alongside the sitemap.
Include in sitemap: checkboxes for Product, Category, Information, and Manufacturer, controlling which content types are listed in the sitemap.
Product limit: the maximum number of products included; the Extension recommends a positive value of 5,000 or lower, and treats zero or a blank value as a safe maximum.
Priority (per content type): a value from 1.0 down to 0.0 indicating relative importance within your own site; saved values are clamped to this range.
Change frequency (per content type): Always, Hourly, Daily, Weekly, Monthly, Yearly, or Never, describing how often that page type typically changes; invalid values are normalized to Weekly.
Save: stores the configuration.
The HTML Sitemap sub-tab works alongside the XML version, publishing a customer-facing sitemap page instead of a machine-readable file. Its fields are:
Enable HTML sitemap: publishes the customer-facing sitemap page.
Sitemap page URL: shown only once the HTML sitemap is enabled.
Per-language HTML sitemap URLs: shown for each enabled storefront language.
Include in HTML sitemap: checkboxes for Home page, Product, Category, Information, Manufacturer, and Specials (Price Drop).
Custom URLs: an optional table of additional links, each with a Title and a URL (an absolute https:// address or a store path such as contact).
Add URL: adds a new blank row to the Custom URLs table.
Remove: deletes a row from the Custom URLs table.
Save: stores the configuration; the extension returns to the HTML tab if it was the active tab when you saved.
The HTML sitemap’s product list reuses the Product limit set on the XML Sitemap tab.
4.8 Settings
4.8.1 General Setting
General Setting is the module’s central configuration page, and Status here is the master switch that everything else depends on. This is also where the extension functions as an OpenCart Metadata Manager, letting you define default meta title and description templates for products and categories.
Master and analysis controls
Status: the master switch for the entire module; storefront metadata, redirects, panels, and score columns only work when this is enabled. Default: Disabled.
Enable Page audit: shows SEO score cards, the Page audit tab in catalog forms, and SEO Score columns in catalog lists. Default: Disabled.
Enable readability analysis: shows readability score cards and lists alongside the SEO scores. Default: Disabled.
Enable auto analysis on edit: reruns analysis automatically while a page is being edited; scores are also saved when the catalog form is saved. Default: Disabled.
Record 404 requests: records missing storefront URL requests for the 404 URLs report. Default: Disabled.
Enable URL redirects: applies active redirects on the storefront. Default: Enabled, though the master Status must also be enabled for redirects to actually run.
Enable XML sitemap: turns on XML sitemap functionality store-wide. Default: Disabled.
Enable RSS: turns on RSS functionality store-wide. Default: Disabled.
Search and metadata defaults
Title separator: the character or text used between parts of a generated title, such as -; referenced by the {title_separator} shortcode. Default: -.
Show products in search by default: whether new products appear in the storefront search index by default. Default: Enabled.
Show categories in search by default: whether new categories appear in the storefront search index by default. Default: Enabled.
Show manufacturers in search by default: whether new manufacturers appear in the storefront search index by default. Default: Enabled.
Show information pages in search by default: whether new information pages appear in the storefront search index by default. Default: Enabled.
Product meta title template: the default meta title pattern for products, using shortcodes. Default: {product_name} {title_separator} {shop_name}.
Product meta description template: the default meta description pattern for products. Default: blank.
Force product meta templates: when enabled, the template is applied even if a product already has its own meta title or description. Default: Disabled.
Category meta title template: the default meta title pattern for categories. Default: {category_name} {title_separator} {shop_name}.
Category meta description template: the default meta description pattern for categories. Default: blank.
Force category meta templates: when enabled, the template is applied even if a category already has its own meta title or description. Default: Disabled.
Supported shortcodes across these templates include {product_name}, {category_name}, {shop_name}, {title_separator}, {brand}, {og_meta_title}, and {og_meta_description}.
Cron and verification
Cron secure token: the secret value used in the module’s cron URL to authenticate scheduled requests; a token is generated by default.
Google verification code: the content value from Google Search Console’s HTML-tag verification method; it can be left blank if verification is already completed another way.
Bing verification code: the content value from Bing Webmaster Tools verification; it can also be left blank if verification is already completed another way.
Score History
Enable SEO score history: turns on score tracking and snapshots. Default: Enabled.
History retention: Keep all history (default), Delete older than X days, Keep only daily snapshots, or Keep only weekly snapshots.
Retain history for (days): the number of days to keep when the day-based retention option is selected. Default: 365.
Automatic snapshot schedule: Manual only, Daily (midnight) (default), Weekly, or Monthly; automatic snapshots also require a scheduled request to the module’s cron URL.
4.8.2 Social Cards
Social Cards controls the Open Graph and X (Twitter) card metadata added to storefront pages, along with basic structured data settings.
Enable Facebook Open Graph: turns Open Graph metadata on or off. Default: Enabled.
Enable X Card: turns X (Twitter) card metadata on or off. Default: Enabled.
X card type: summary or summary_large_image, controlling how a shared link’s preview card is laid out. Default: summary_large_image.
Site type: Organization, WebSite, or LocalBusiness, used in the structured data describing your store. Default: Organization.
Site name: the name used in site-level metadata.
Breadcrumbs: turns breadcrumb structured data on or off. Default: Enabled.
Facebook: your store’s Facebook profile URL.
Twitter: your store’s Twitter/X profile URL.
Instagram: your store’s Instagram profile URL.
LinkedIn: your store’s LinkedIn profile URL.
YouTube: your store’s YouTube channel URL.
Pinterest: your store’s Pinterest profile URL.
Save: stores the settings.
4.8.3 ChatGPT Content Generator
Knowband OpenCart SEO Audit Extension also includes the feature of an AI Content Generator as an additional tab inside product and category SEO panels, and as a bulk tool within Import/Export.
Enable ChatGPT: turns the assistant on or off across the module. Default: Disabled.
ChatGPT model: GPT-4o, GPT-4o mini, GPT-4 Turbo, GPT-4, or GPT-3.5 Turbo; the controller falls back to gpt-4o-mini and the installation default is gpt-3.5-turbo.
ChatGPT API token: your OpenAI secret key, which must begin with sk-.
Test API key: sends a live validation request to OpenAI to confirm the token works.
Single-page fields (SEO panel > ChatGPT tab).
Prompt templates: a set of ready-made prompts you can select instead of writing your own.
Your prompt: a free-text box for a custom prompt, supporting shortcodes such as {product_name}, {brand}, {category_name}, {meta_title}, and {meta_description}.
Generate: sends the prompt to ChatGPT and returns a draft.
Generated content: displays the draft returned by ChatGPT for review.
Apply: places the generated content into the relevant field (the catalog form must still be saved afterward for the change to take effect).
Apply to: chooses which field the generated content should be applied to.
Clear history: clears the recent generation history for this page.
Recent history: a list of previous prompts and results for this page.
Bulk fields (Import/Export > ChatGPT enhance).
Field checkboxes: choose which fields to generate, from Meta title, Meta description, Meta keywords, Social title, Social description, Product tags, SEO URL, Primary keyword, Supporting keywords, and Product description (readability).
Select all / Select none: quickly selects or clears every field checkbox.
Process all products: generates content for the entire catalog.
Max products: an alternative to Process all products, capping the run at a specific number, up to 5,000 distinct catalog products across all languages for each product.
Products per API call: how many products are sent together in a single request, from 1 to 5; the Extension forces this to 1 whenever Product description (readability) is selected.
Start / progress indicator: begins the enhancement run and shows live progress.
Maximise SEO & readability scores (download JSON): the action that runs the enhancement and produces a downloadable file; it does not save directly to the catalog.
That downloaded file must then be brought back in through the Import panel described below; the bulk ChatGPT tool never writes to the catalog on its own.
4.9. Import/Export
Import/Export handles product SEO data as a JSON file: meta title, description, keywords, and tags; the SEO URL, primary and supporting keywords, robots and canonical settings, social title, description, and image; SEO and readability scores and analysis data; and rating markup fields. This is used in updating multiple product in bulk.
Supported format. The exported file uses JSON format at version 1.2 and includes an export timestamp and field list along with the product data.
Export fields.
Export: the single action button that generates and downloads the current product SEO data as a JSON backup file, versioned 1.2 and including an export timestamp, field list, and product data. This same file can also serve as a baseline before running the ChatGPT enhancement tool described in Section 14.
Import fields.
Choose file: selects the .json file to import; the extension must be .json, the content must be valid JSON, it must contain a products array, and it must stay under 5 MB with no more than 5,000 rows.
Import: runs the import; product and language IDs in the file must be positive numbers matching the current store. Successful imports report the number of updated product and language rows.
Other Modules is a shared Knowband catalogue page reachable from the Knowband SEO menu. It lists other Knowband extensions available for OpenCart rather than SEO configuration options specific to this module.
5. SEO Audit and Scoring
The scoring system is the foundation of Knowband’s OpenCart SEO Audit Extension. Every product, category, information page, manufacturer page, and supported blog entity can receive an SEO score and a separate readability score once the relevant analysis settings are enabled in General Setting , the core of what makes this an effective OpenCart SEO Analyzer.
Supported page types. Scoring covers Products, Categories, Information pages, and Manufacturers by default. Blog posts, Blog categories, Blog tags, and Blog authors are included only when a supported Knowband Blog integration is connected to the store.
What the score measures. Running this OpenCart SEO Audit means the rule library evaluates content length, sentence and readability quality, heading structure, internal links, image alt attributes, title and description length, and the placement and density of your primary and supporting keywords in the page’s content and URL slug. Any rule that scores below 7 is logged as an issue and grouped under the Issues tab.
What the score means. A high score indicates that a page has covered the fundamentals: a reasonably descriptive title and description, readable content, sensible heading structure, and keyword usage that matches the page’s stated focus. A low score does not mean a page is invisible to search engines; it means specific, correctable gaps exist. Since the Extensioncannot see how Google actually ranks a page, the score should be read as a content quality checklist rather than a ranking prediction.
Why the score matters. Search engines reward pages that clearly answer a search intent with well-structured, readable content. A low score often points to the same weaknesses that make a page harder for a human shopper to read, so fixing them tends to help both audiences.
What to do about a low score. Open the page from the catalog list, review its Page audit panel, and check the specific rules it failed. Alternatively, open the Issues tab, filter by the relevant entity type, and work through rules that affect multiple pages at once. After making changes, save the page (or rely on Enable auto analysis on edit) so the score updates. This ongoing review is the heart of OpenCart SEO Optimization within the module.
How to improve a page. Set a clear primary keyword and, where relevant, supporting keywords that reflect what a shopper would actually search for. Write a meta title and description that describe the page honestly rather than stuffing keywords. Break long content into sections with headings, add descriptive alt text to images, and link to related products or categories where it makes sense for the shopper, not purely for the score.
Throughout this process, remember that an OpenCart SEO Audit is only useful when it leads to real edits. The module’s role is to surface what needs attention; the administrator’s role is to decide how to phrase and structure the fix, using the OpenCart SEO Audit Extensionas a guide rather than a final authority.
5. Frequently Asked Questions
I found several 404 URLs. How can I redirect them? Open URL Optimization > 404 URLs, review the list ordered by visit count, and click Redirect next to the entry you want to fix. This opens the redirect form with the old URL already filled in as the Source URL; enter the correct destination as the Target URL, choose the redirect type, and save. Only redirect to a page that is genuinely relevant to the original content.
How should I handle a URL that is no longer available? If a replacement page exists, add a 301 redirect from the old URL to the new one through URL Optimization > URL Redirects. If no relevant replacement exists, it is reasonable to leave the URL as a 404 rather than redirecting visitors somewhere unrelated.
How can I improve a page with a low SEO score? Open the page’s Page audit panel, or open Issues and filter by entity type, to see exactly which rules the page failed. Address specific gaps, such as a missing meta description, thin content, or missing image alt text, then save the page so the score updates. Score History will then show whether the change moved the page’s score in the right direction.
Can I use the Extensionto generate meta titles and descriptions? Yes. Enable and configure ChatGPT under Settings > ChatGPT, then use the ChatGPT tab inside a product or category’s SEO panel to generate a meta title or description from a prompt. Review the result, click Apply, and save the catalog form. For many products at once, use the bulk ChatGPT tool inside Import/Export instead.
How can I check duplicate URLs? Open URL Optimization > Duplicate URLs to see which SEO keywords are assigned to more than one page in the same store and language. Click Update on a conflicting row, edit each keyword so it becomes unique, and save.
How can I check my XML sitemap? Open Sitemap > XML Sitemap, confirm Enable XML sitemap is turned on, and open the displayed public sitemap URL to verify it loads. Submit that same URL under Analytics > Search Console > Sitemaps & URL Check to confirm Google has received it and to monitor for warnings or errors afterward.
Can I connect Google Search Console? Yes. Set up a Google Cloud project with the Search Console API enabled, configure OAuth credentials under Analytics > Settings, click Connect with Google, and select the correct Search Console property for the store. Once connected, the Search Console tab shows Performance data and lets you manage sitemap submissions and URL indexing checks.
Can I view Google Analytics data inside the module? Yes. After connecting Google and selecting the correct GA4 property in Analytics Settings, the GA4 Analytics tab displays sessions, users, engagement, eCommerce, and breakdown data directly in the admin panel, without needing to open Google Analytics separately.
How can I identify SEO issues on product or category pages? Use the Dashboard’s Page audit by type chart to see which content type has the most low-scoring pages, then open Issues and filter by entity type to review specific rules affecting those pages. Alternatively, open an individual product or category and review its Page audit panel directly.
Does the Extensionguarantee better search rankings? No. The OpenCart SEO Audit Manager measures on-page content quality, technical configuration, and available Google data, all of which support good SEO practice. It does not control, and cannot guarantee, how any search engine ranks a specific page.
Is a blog required to use the module? No. Blog-specific scoring, trends, and entity types appear only when a supported Knowband Blog integration is connected to the store. Every other feature works fully without a blog installed.
Do I need Google or OpenAI accounts to use the core module? No. Analytics, Search Console, PageSpeed, and ChatGPT are optional integrations that require their own external credentials. The scoring system, redirects, 404 detection, duplicate URL checking, sitemap generation, and robots.txt management all work independently of those connections.
Balancing the time spent on content and the time spent on running an eCommerce store is difficult for many merchants. With the newPrestaShop Blog Manager by Knowband, the process becomes more manageable because merchants can post articles, work with AI, and manage SEO from their PrestaShop account.
That makes the development worth looking at from two angles. The first is practical: how much content work can store admins handle themselves? The second point is related to strategy. Where does AI assist, and where do humans have to stay in charge?
Where AI-Assisted Blogging Is Important for PrestaShop Stores
Every eCommerce store has enough information about its products on the website, but it is not always sufficient to satisfy the needs of potential customers who are making search queries to get some information before purchasing.
For example, if a person is searching for a coffee machine, they can type questions into Google concerning different aspects such as brewing methods, machine cleaning tips, grinding settings, and so on. Thus, there is an opportunity to prepare relevant informational content to draw the customer’s attention.
AI boosts informational content creation, which is the reason why it was highly appreciated in the content workflow. A recent study conducted by Ahrefs demonstrated that 74.2% of 900,000 newly found English-language webpages in April 2025 were at least partially produced with the help of AI. Most of those pages cannot be referred to as purely AI-written, as they were a combination of the latter and human-created content.
However, it does not mean that the human role was completely replaced by AI. It is possible to optimize the work process by eliminating repetitive steps and entrusting topic selection, product expertise, fact-checking, and final editing to people.
What the New PrestaShop Blog Manager Adds
The PrestaShop Blog Manager is developed as a blogging area in the Back Office of the store. After installing the plugin, the administrator gets the opportunity to manage posts, categories, tags, authors, comments, images, SEO and sitemap settings, AI configuration, and content importation all in one place. It totally changes the workflow of the store team.
It is not necessary for the content manager to write the article elsewhere and upload the finished article to PrestaShop manually. The posts can be created, edited, scheduled, categorized, and associated with the relevant products in the store.
The module’s AI functionality adds another layer to this workflow. According to the user manual, administrators can connect either OpenAI’s ChatGPT or Google Gemini and use the configured tools from the post editor. The result is less about replacing a writer and more about shortening the distance between an idea and a usable first draft.
AI Can Help With More Than Writing the Article
A common assumption is that an AI feature simply generates a block of text. The available workflow is broader than that.
Once an AI provider is configured, the editor can provide tools for:
Generating the main post content
Creating an excerpt from existing content
Translating content into another language
Suggesting relevant tags
Generating SEO metadata
Creating ALT text for the featured image
These capabilities are documented in the module manual.
That matters because much of the work involved in publishing an article isn’t the article itself. A writer still has to prepare the excerpt, metadata, tags, image information, and translated versions when a store operates across multiple markets. Automating some of those repetitive tasks can make a small eCommerce team more productive.
At the same time, do not consider generated metadata as being automatically accurate. The AI must have enough context to understand the article, but the store team knows more about their products, customers, terminology, and business needs.
How the Module Fits Into the Existing Store Workflow
The usage of a separate blogging platform works great, but adds one more system to manage. There are issues like content migration, user roles, design consistency, links from articles to products, and the operations gap between the blog and the eCommerce platform.
The PrestaShop Blog Module keeps the publishing workflow closer to the catalogue. Posts can contain related-product links, and the module can optionally display blog content on product pages.
Take a gardening equipment store as an example. In an article on how to prepare a lawn for summer, soil preparation, irrigation, mowing, and equipment selection. Relevant products can then be attached to the article without making each section an advertisement.
That relationship is particularly useful for eCommerce because informational content and commercial pages serve different purposes. The article answers the customer’s question. The product page handles the purchase decision.
SEO Controls Are Part of the Publishing Process
The addition of AI to a blog does not automatically result in the search engine optimization of content. It depends on the fulfillment of search intent, covering the subject properly, using good page titles, and quality visitor experience.
There are editable SEO URL slugs and meta title, description, and keyword fields available at the post level in the Knowband module. Featured images can also have ALT text.
That means SEO work doesn’t need to happen after publication as a completely separate task. A content manager can address the meta title and meta description while preparing the article. The same principle applies to headings and structure. A long article can use a generated table of contents based on H2 and H3 headings, helping readers move through larger pieces of content.
The SEO controls are useful, but they don’t replace SEO judgment. A perfectly filled metadata field cannot compensate for an article that doesn’t answer the searcher’s actual question.
What Current AI Research Says About Search Performance
The growing use of AI has created a reasonable concern for store owners: can AI-assisted content perform in search?
The answer to the question of whether AI takes the place of human beings is far more complicated than ‘yes’ or ‘no’. In 2026, Semrush analyzed 42,000 blog posts ranking for 20,000 keywords. According to their results, only 9% of the pure AI-written posts were in the first position compared to 80% of the human-written ones. The study showed that 64% of the surveyed SEO professionals used the human-led and AI-assisted approach.
Those findings point toward a practical approach for eCommerce teams. AI can help with speed, but the published article needs something beyond generic generated text. That might be direct product knowledge, first-hand experience, original examples, store-specific information, expert commentary, or a clearer explanation of a problem customers actually face.
Ahrefs reached a related conclusion in its research and process guidance: AI works best when it supports research, ideation, outlining, and drafting while people add the original thinking that makes content useful.
A Better Workflow for Using AI in Your PrestaShop Blog
The most straightforward way to misuse AI is using it from a blank prompt and publishing whatever comes back. A stronger workflow starts before the AI tool is opened.
Choose the Topic From Your Customers’ Questions
Read reviews, FAQs, searches, and objections before purchasing. For instance, an eCommerce store selling air purifiers might find out that potential customers ask whether a particular purifier is applicable for a bedroom. That question can become a focused article rather than another generic post about “home air quality.”
Give the AI a Defined Job
The AI will become more helpful if the request has a clear purpose. Instead of ordering “a blog about air purifiers,” it is better to explain to the AI what specific topic, intended audience, related products, key aspects, tone, and unchangeable facts should be covered. The AI can then help produce a working draft rather than deciding the entire editorial strategy from scratch.
Review the Draft Against Real Store Knowledge
Check specifications, product names, compatibility information, measurements, warranties, and claims. A generated article can sound convincing while still getting a small technical detail wrong. Those errors are particularly damaging in eCommerce because readers may use the information to make a purchasing decision.
Optimize the Article Before Publication
Review the URL, headings, metadata, image ALT text, links, and related products. A good PrestaShop Blog Addon should make these publishing tasks accessible from the same administration environment instead of requiring separate technical work.
Use the Data After Publishing
Publishing is only the midpoint. Once articles begin receiving visitors, store teams should look at which topics are attracting attention and whether those visitors are taking useful actions afterward.
Google Search Console can show search queries, clicks, impressions, pages, and other search-performance dimensions. Those reports help identify articles that are appearing for relevant searches but may need stronger titles or more closely aligned content.
Another analytics tool will help you analyze visitor behavior once they reach those pages. Google Analytics 4 is useful for investigating on-site activities and what users do upon landing on a page. The two data sources solve different aspects of the same problem. Search data explains how people find the content. Analytics data helps explain what happens after the visit begins.
For a store owner, that can reveal something more valuable than raw traffic. An article with modest organic traffic might attract highly relevant visitors who continue to product pages, while a high-traffic article could bring people who have little purchasing intent.
Don’t Let Blog Content Slow Down the Store
Adding more content also adds images, scripts, embeds, and page elements. A blog page that contains several large images or embedded videos can behave very differently from a simple product page. That’s why performance should be checked on actual published articles rather than assumed from the homepage.
PageSpeed Insights can help identify performance issues and provides both laboratory and real-user information when field data is available.
Take a look at the Core Web Vitals within the context of your website analysis, but don’t make this process a quest for perfection. An extremely fast page with poor content will fail to satisfy a search user, and vice versa. Image optimization is also important. With the module, admins can set up image sizes for posts, categories, and authors, and regenerate thumbnails in case of any changes in dimensions.
Organize AI-Assisted Content Before It Becomes a Mess
AI makes it easier to produce drafts. That creates a different problem: having too many drafts and not enough editorial direction. Set a clear role for categories and tags. Keep categories broad enough to remain useful as the blog grows, while tags can describe more specific subjects.
The module supports nested categories, tags, author profiles, scheduled posts, and related posts. A simple editorial calendar can then separate content into practical groups such as buying guides, product education, tutorials, industry information, and seasonal topics.
Here’s where an AI-powered PrestaShop Blog Builder comes into the game. This tool will handle the publishing process infrastructure, while the decision on which content to publish is left to the editorial team.
AI Has to Enhance the Process, but Not Replace the Editor
It’s quite appealing to measure the productivity of AI by the speed of creating 2,000 words. That’s the wrong benchmark. The more useful question is how much time the technology saves between identifying a good topic and publishing a genuinely useful article.
According to the Semrush research conducted in 2026, 70% of the respondents among SEO specialists saw the main benefit in speed of content creation by AI, while only 19% claimed AI helped improve content quality. This gap has to be acknowledged. Faster production has value only when the editorial standard remains high.
For a PrestaShop merchant, AI can handle repetitive writing assistance while the store team supplies the details that make an article worth reading. That is especially important for product-specific content, where generic information is easy to generate but useful expertise is harder to replicate.
A Practical Content Setup for Store Owners
When using AI-assisted blogging for the first time, make sure that the process stays manageable. Limit the number of themes to a few topics related to the key products of your business. Give each article one clear search intent and one clear reader outcome.
Then build the page around that purpose:
Choose a specific topic
Create a useful outline
Generate or draft sections with AI where appropriate
Add store-specific expertise and examples
Check every factual product claim
Review the SEO fields
Add relevant products and contextual links
Optimize images
Publish or schedule the article
Monitor its search and engagement performance
The PrestaShop Blog Builder functionality is most useful when these activities form one repeatable workflow rather than a collection of disconnected tasks.
Where the New PrestaShop Blog Manager Makes the Most Difference
The strongest use case is probably not a merchant who wants hundreds of automatically generated articles. It’s the store team that already knows it needs useful content but doesn’t want content production to become a technical project.
With the Knowband module, the administrative side of blogging can stay within PrestaShop. The AI tools can assist with writing and optimization, while the store team retains control over publication, structure, metadata, product connections, and final approval. That workflow also leaves room for existing content. The module supports WordPress and RSS imports, which can be useful for stores moving an established blog into their PrestaShop environment.
The result is a more practical publishing setup for teams that want to build a content channel without maintaining an entirely separate system.
Conclusion: Use AI to Make Better Store Content, Not Just More of It
The PrestaShop Blog Manager integrates several functions related to the blog: from article writing to SEO optimization, publication management, product connection, and work with AI.
What really matters is not only the ability to generate articles faster. What makes the blog helpful is the ability to use it as an additional platform for answering customers’ questions and promoting the product range.
When it comes to using AI as an assisting technology, remember that generated content is just the beginning. Review it, bring real expertise related to your products, optimize the structure, verify the information, and see what happens after publication.
For merchants who want that workflow inside PrestaShop, thePrestaShop Blog Module provides the publishing and AI tools needed to manage the process from the store’s Back Office. The PrestaShop Blog Addon can be a practical option when the goal is to keep content creation closer to the eCommerce operation instead of building another disconnected publishing system.