1.0 Introduction
The online store owners can now decorate their stores for different occasions like Christmas, New Year or Valentine’s Day. In this winter season, set the themes according to the occasions and grab the customer’s focus and attention. Website decoration is one of the smartest strategies to optimize the UI of the site and keep the customers engaged in the store. The visual effects can make your site look better and occasion ready.
Knowband offers the PrestaShop Website Decoration Effects module which decorates the website with respect to different occasions. This way the store admin can create a positive first impression. The store merchant can customize the PrestaShop Website Decoration Effects plugin for any holiday like Christmas, New Year and many others. We have also added Extra effects for New Year.
Now, the online store admin can also set up header, footer and random elements in the new version of our PrestaShop Website Decoration Effects module. Store merchants can show/hide snow effects. Now we offer multiple different decoration elements. The store merchant can set the elements according to the requirements. The updated PrestaShop Website Decoration Effects extension also allows showing customized elements from the admin interface. There is an option to show a discount coupon strip on selected website pages.
1.1 Features Offered by Advance Prestashop Christmas Effects Addon
- Using PrestaShop Website Decoration Effects addon, the online store admin can decorate the store as per the occasion like New year, Christmas and Valentine’s day.
- The PrestaShop Website Decoration Effects addon allows admin to show various snow effects, header elements, footer elements and random elements on all the website pages or selected website pages.
- The online merchant has an option to show or hide snow effects, display effects on a mobile device also and set the display frequency of these effects.
- The online store admin can also select a specific date and time duration for showing the special effects on the website pages.
- Four different snow effects are available for decorating the store. Admin can use any of it as per the requirements.
- In the second decoration effect, the online store merchant can show different shapes like heart, diamonds or other characters.
- Admin can show different header elements on the selected page and duration. There are 4 header elements from which admin can select any element. The PrestaShop Website Decoration Effects plugin also allows admin to add new elements.
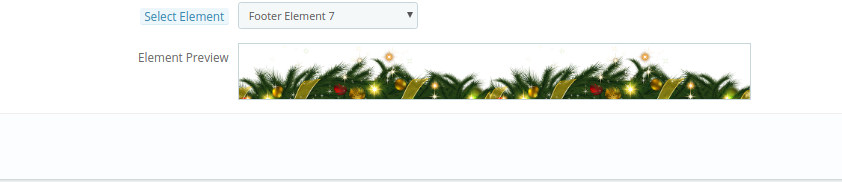
- Admin can show different footer elements on the selected page and duration. There are 8 footer elements available for decoration. The PrestaShop Website Decoration Effects plugin also allows admin to add new footer elements.
- The Special decoration effects plugin has some random elements for light decorations. Admin can set the element movement type as static or moving. The Snowflakes effect module allows the setting position of elements.
- The online merchant can show a discount coupon strip for showing discounts on occasions in a different way.
- Admin can also set the look and feel of a discount strip.
2.0 Steps for Installation
After purchasing the PrestaShop Website Decoration Effects addon from the store you’ll get these files:
1. A zipped file consists of the source code of this PrestaShop Website Decoration Effects addon.
2. User Manual
The store admin can follow these steps to install the PrestaShop Website Decoration Effects addon:
Follow these steps to install the PrestaShop Website Decoration Effects addon:
- The admin needs to unzip the zipped file. This file includes some files and folders.
- After that, the admin can copy the overall content of the folder and paste them into the “Modules” folder of the store’s directory.
The admin can follow the path – Root Directory/modules/.
3. As a store admin, you can install the PrestaShop Website Decoration Effects extension. You can find that in Store Admin -> Modules and Services. It would be shown as below –

Now, you just need to click on the “Install” button to install this PrestaShop Website Decoration Effects extension. A confirmation pop-up will be shown. Click on “Proceed with the installation” option. This step will install the PrestaShop Website Decoration Effects module and show notification – “Module(s) installed successfully”.
3.0 Admin Settings
The online store merchant can apply settings for showing special decoration effects from the admin section. Here, the admin can get these configuration settings:
- General Settings
- Header Element Settings
- Footer Element Settings
- Random Element Settings
- Discount Coupon Settings
3.1 General Settings
In the General Settings tab, the online merchant can apply basic settings for showing decoration effects on the website front-end interface. These are the available customization options: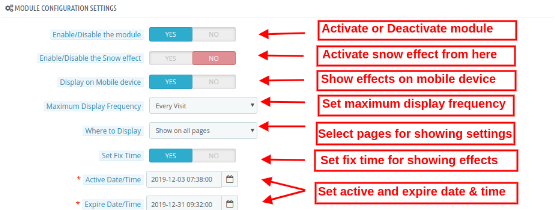
- Enable/Disable the module: Toggle the button for activating or deactivating the PrestaShop Website Decoration Effects module.
- Enable/Disable the Snow effect: Activate or Deactivate the settings to display/hide the snow effects on website pages.
- Display on a mobile device: Admin can enable this tab for showing decoration effects on mobile devices.
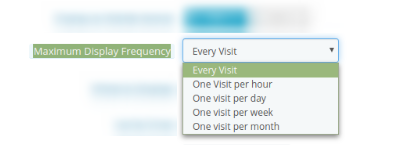
- Maximum Display Frequency: Admin can set the frequency of showing decoration effects. Admin can show decoration effects on every visit of customers or one visit per hour/day/week/month.
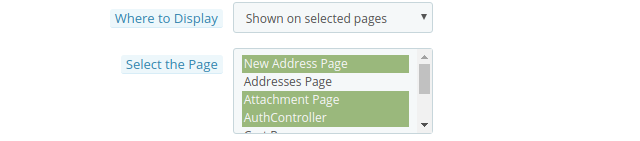
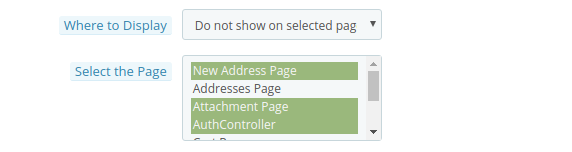
- Where to display: Admin can select the pages for showing/hiding decoration effects. The PrestaShop Website Decoration Effects module also allows showing decoration effects on all the pages.
- Show on all pages: Select this if you want to display these decorative effects on all the website pages.
- Show on selected pages: You can select this option if you want to display the effects on particular webpages of the sites. On selecting this option, a new customization menu will be displayed for selecting the pages.
- Do not show on selected pages: In this menu option, you need to select the pages on which you don’t want to display the snowflake effects.
While Enabling the snow Effects, Admin will get 4 available snow effects as shown below:
- Select Snow Effect type: There are 4 snow effect types available in PrestaShop online store effects module. Admin can select the snow effects as per the requirements:
Snow Effect 1
On selecting Snow effect 1, you will get these customization options:
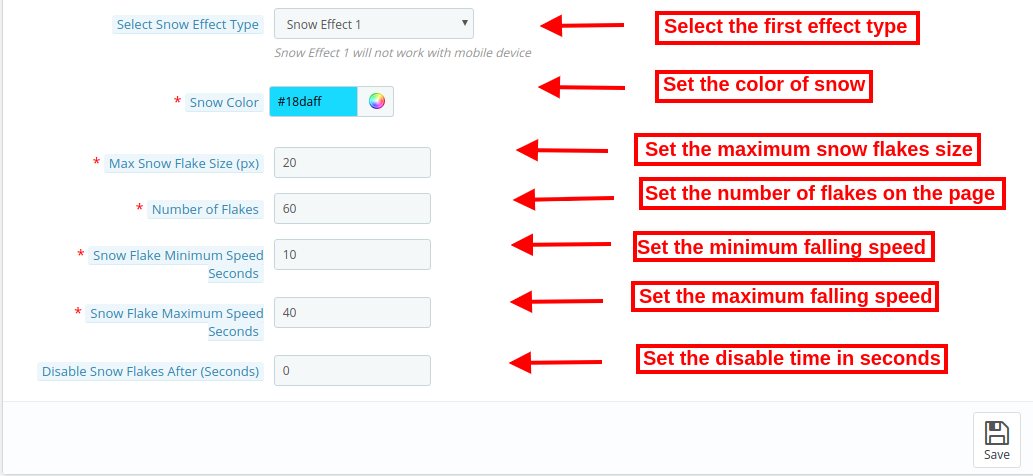
- Snow color: There is a color picker tool by which you can set the color of the snow. In this effect, snowflakes will be displayed in the store.
- Maximum snowflake size: In this menu option, you can set the maximum size of a snowflake. The PrestaShop Website Decoration Effects plugin will show the snowflakes as per the selected flake size.
- Number of Flakes: Here, you can set the number of flakes for decorating the website. For dense effects, you can set a higher number but the recommended number of flakes is 25 according to the Advance PrestaShop Christmas Effects module.
- Snowflake Minimum speed seconds: You can set the minimum speed of snowflakes in seconds.
- Snowflake maximum speed seconds: Set the maximum snowflakes falling speed in seconds.
- Disable snowflakes after: In this menu option, you can set the seconds after which you want to stop showing the snowflakes effect.
In the front-end interface the effect will look like the below-mentioned image:
Snow Effect 2
There will be different customization options available in snow effect 2.
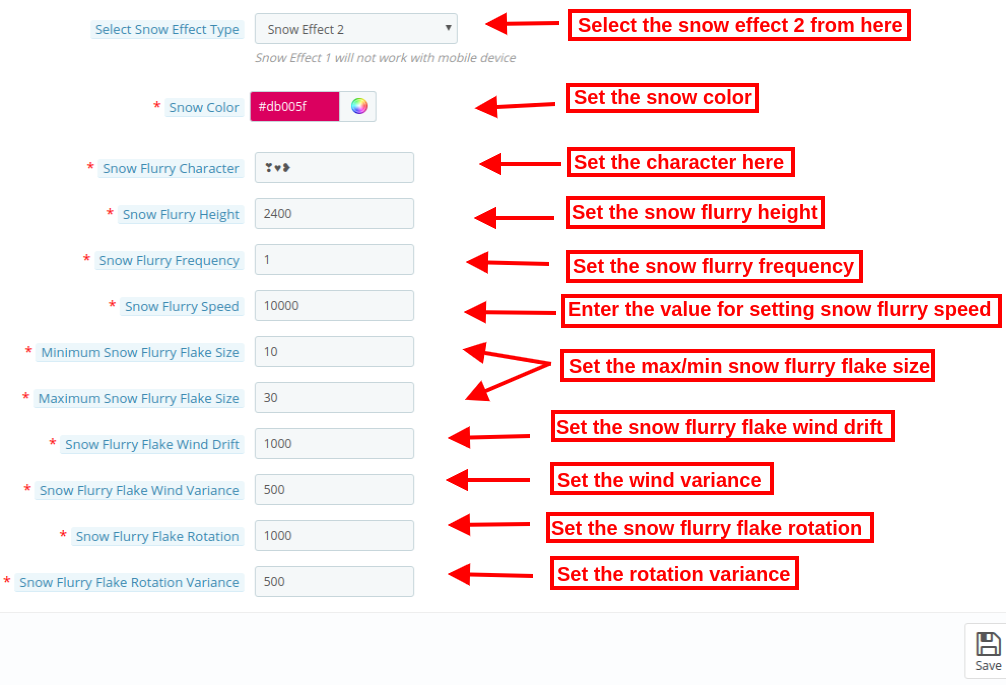
- Snow color: You can select the color for the effects using the color picker tool.
- Snow flurry characters: In this menu option, the store admin can enter any character. For example during Valentine’s Day, the admin can show roses or hearts (like ♥❥) for decorating the website. These shapes will fall down on the website pages.
- Snow flurry height: Set the height of the flurry from the admin interface. Admin can set it (in pixels) to control the height for which the snow flurry will fall. The admin can increase the snow flurry height for showing it all over the page.
- Snow Flurry Frequency: Set the frequency of generating new snow flurries on the website. The lower number will create more snow flurry.
- Snow Flurry Speed: Set the falling speed of snow flurries. You can set a lower number for faster snow flurry falling speed.
- Minimum Snow Flurry Flake Size: Here, you can set the smallest size of the snow flurry flakes.
- Maximum snow flurry flake size: In this menu option, you can set the maximum size of snow flurry flake.
- Snow Flurry Flake Wind Drift: This value will control how far each snow flurry will drift in pixels in the left direction. Admin can enter a negative number to make the flow on the right side of the page.
- Snow Flurry Flake Wind Variance: This value will control the drift of every snow flurry flake using the wind drift as the base value. A lower value will create less drift.
- Snow Flurry Flake rotation: This value controls how much a snow flurry flake will rotate in degrees while falling.
- Snow Flurry Flake Rotation Variance: How much a flurry flake will rotate while it falls. A lower value will offer fewer random rotations.
The effect will look as shown below:
Snow Effect 3
In this effect, you will find the below-mentioned settings:
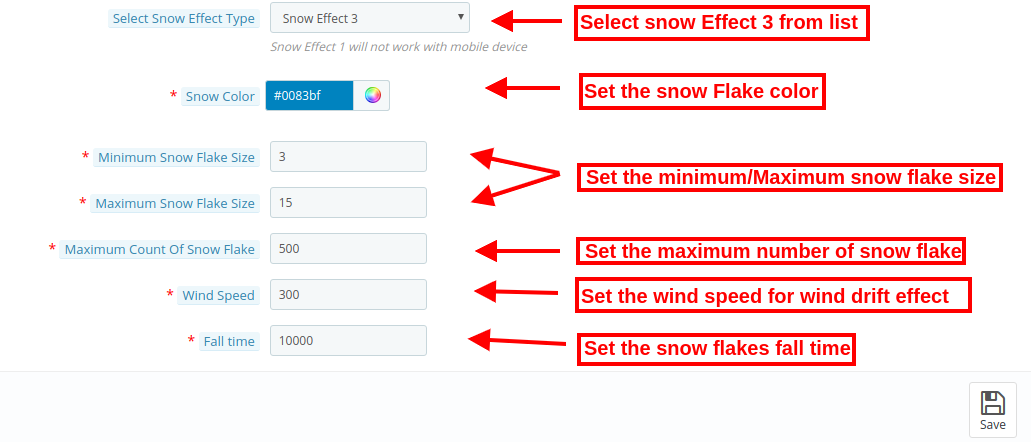
- Snow color: There is a color picker tool by which you can set the color of the snow.
- Minimum snowflake Size: Set the smallest size of the snowflakes from the admin interface of this Special decoration effects plugin.
- Maximum snowflake size: In this menu option, you can set the maximum snowflake size.
- Maximum count of snowflake: Set the maximum number of the snowflake from the admin interface of this PrestaShop Website Decoration Effects addon.
- Wind Speed: Admin can set the wind speed value i.e., 300. The wind speed effect will show a wind drift in snowflakes. If the admin sets this value as 0, the snowflakes will fall in a straight line.
- Fall time: Here, you can set the time taken by each snowflake. If admin sets the time 10,000 then the snowflakes will fall faster. For normal speed, the admin can set the lesser value as 1000.
View the effects:

Snow Effect 4
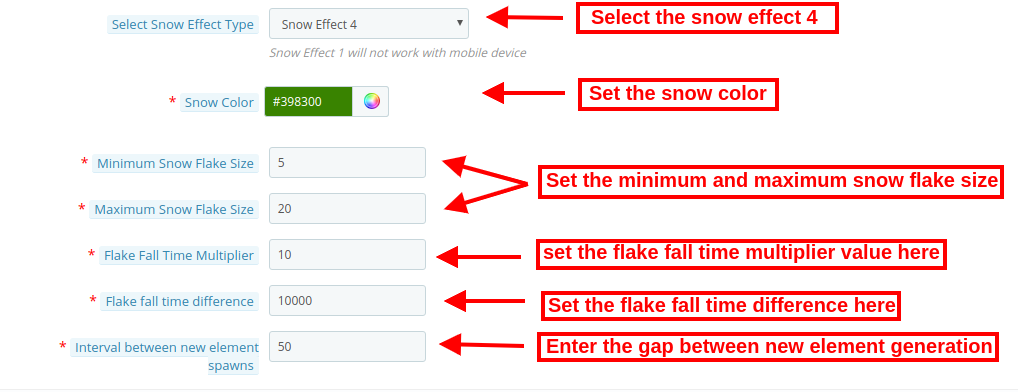
- Snow color: You can set the color of the snow using a color picker tool available in the PrestaShop Website Decoration Effects addon.
- Minimum Snowflake Size: Set the smallest size of the snowflakes from the admin interface of this Special decoration effects plugin.
- Maximum snowflake size: In this menu option, you can set the maximum snowflake size.
- Flake falls time multiplier: Here, the store admin can enter the fall time multiplier value. The higher value will show a lower speed.
- Flake fall time difference: Here, the admin can set the value of a difference between flakes to fall time.
- Interval between new element spawn: The store admin can also set the difference value for the next element generation. If the value will be less, more flakes will display on the website pages.
The effect will look as shown in the image below:
3.2 Header Element Settings
Apply header element settings and setup website header decorations:
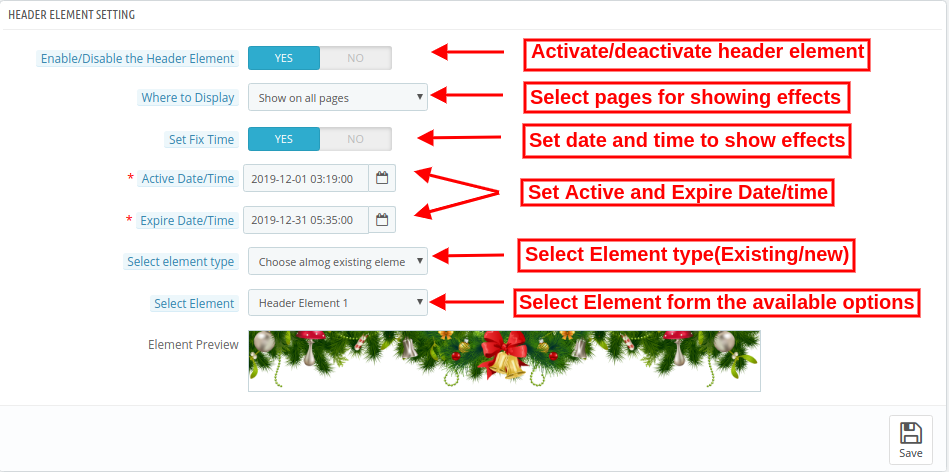
- Enable/disable the header Elements: Activate or deactivate the option to show/hide header elements.
- Where to display: Select the pages on which you want to show/hide header elements effect.
- Set Fix Time: You can set a specific time for showing decorative effects.
- Active Date/time: Set start time from here.
- Expire Date/time: Enter expire date and time
- Select Element Type: Admin can select from available element types or upload customized elements.
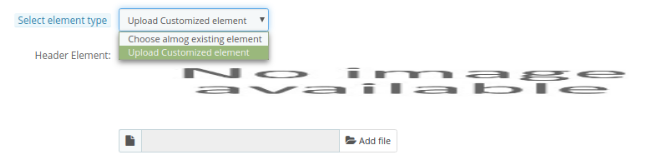
- Choose among existing elements: Admin can select from available elements.
- Upload customized elements: Upload customized elements from the admin interface of this PrestaShop online store effects module.
- Select Element: Select from available header elements. These are the available elements.


After applying these settings the store admin can view the impact on the website front-end interface.
3.3 Footer Element Settings
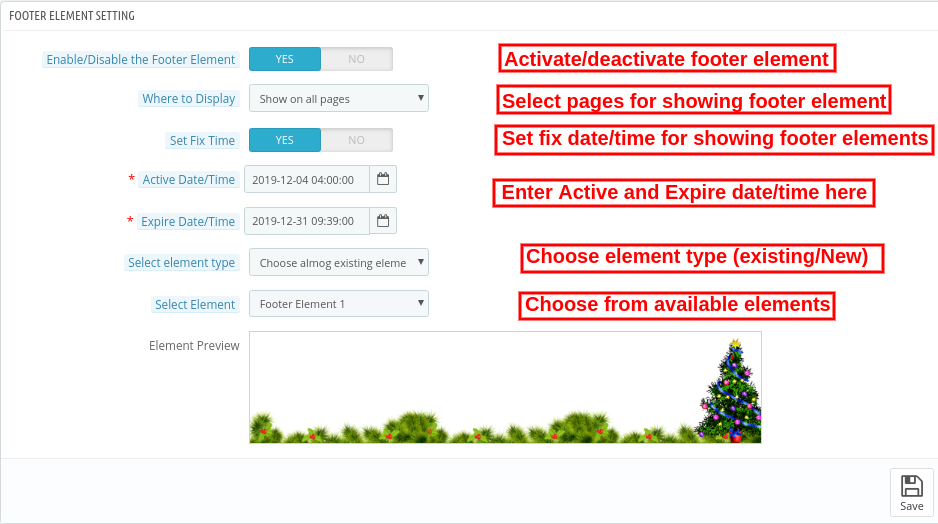
- Enable/disable the Footer element: Activate or Deactivate the footer elements settings for showing/hiding footer decorations.
- Where to display: Admin can either show footer decoration effects on alpages or show the effects on selective pages.
- Set Fix Time: Admin can also set a specific time for showing header effects on the website.
- Active Date/time: Enter start date and time here.
- Expire Date/time: Set Expire date/time effects.
- Select Element Type: Admin can select from available options and or upload new elements.
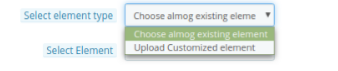
- Choose among existing elements: Admin can select from available elements.
- Upload customized elements: Admin can also upload new elements from the admin interface.
- Select Element: Select from available header elements.
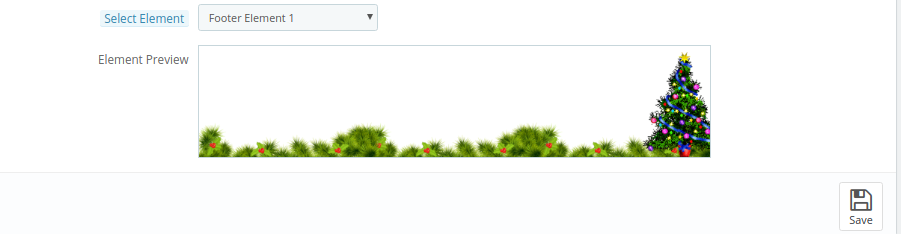
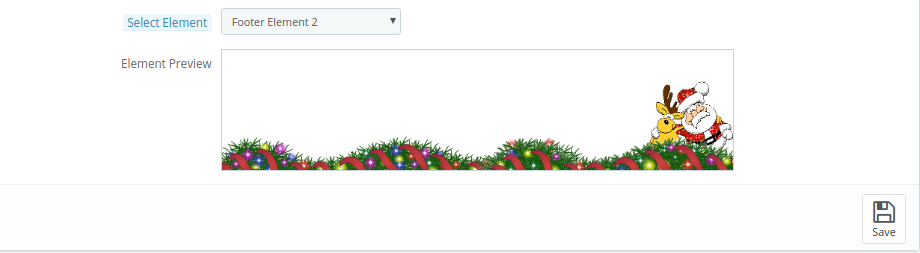
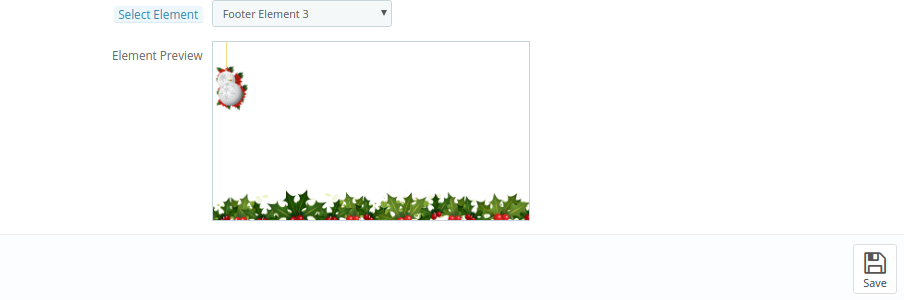


 The effect will look as shown below:
3.4 Random Element Settings
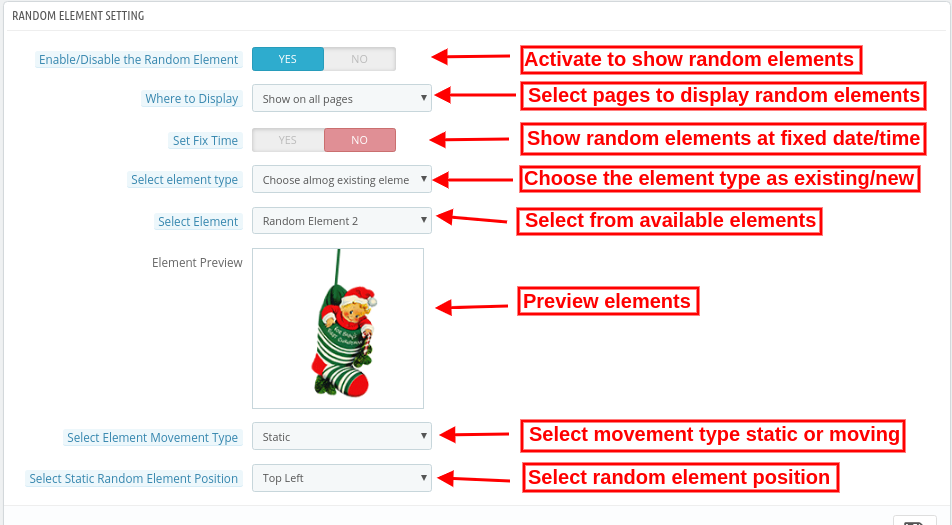
- Enable/disable the Random Element: Admin can also show random decoration elements on the website front-end interface.
- Where to display: Show on all the website pages or select pages for showing/hiding random elements.
- Set Fix Time: Enter specific date/time on which you want to show random elements.
- Active Date/time: Set start time here.
- Expire Date/time: Set End date time here.
- Select Element Type: Choose the element type as available or customize.

- Choose among existing elements: As a store merchant, you can select from available elements.
- Upload customized elements: You can also upload new elements from the admin interface.
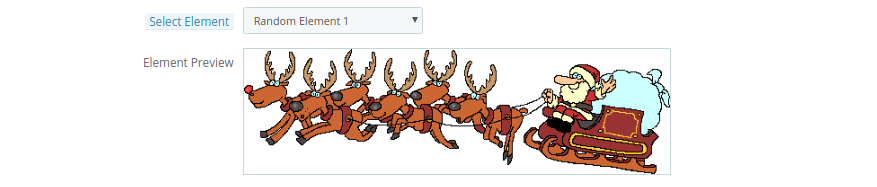
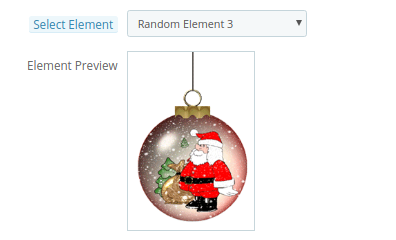
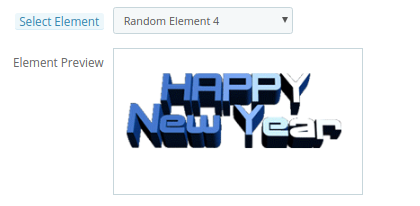
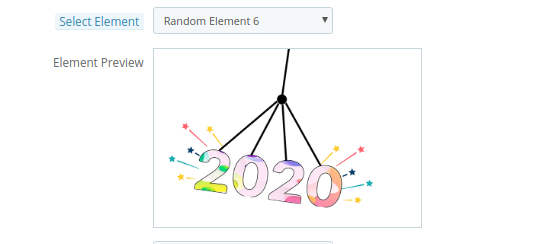
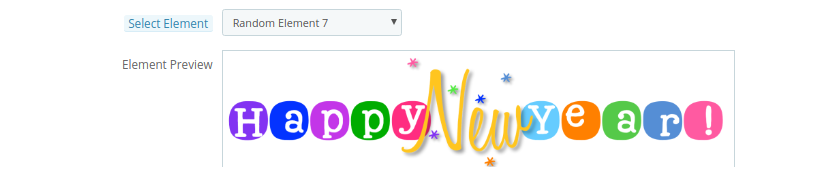
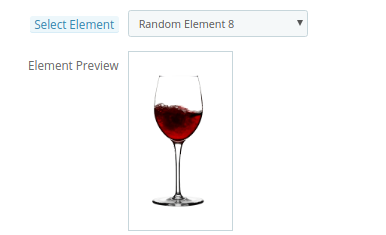
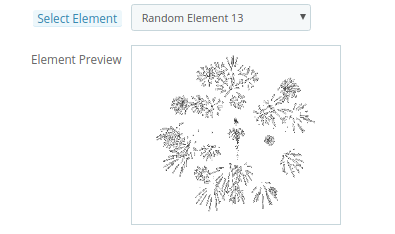
- Select Element: Select from available header elements.

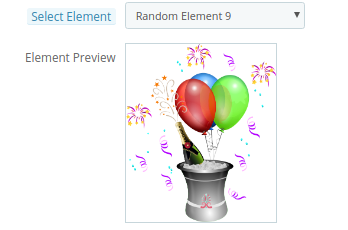
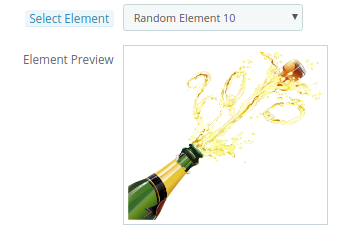
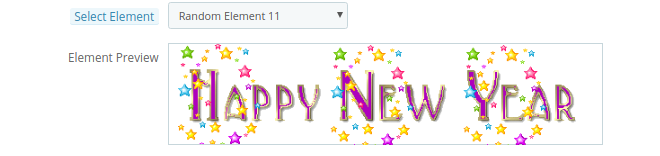
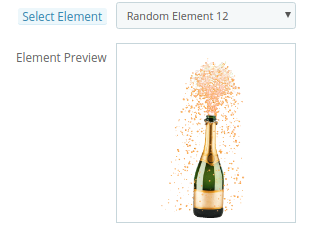
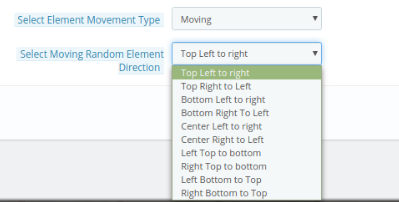
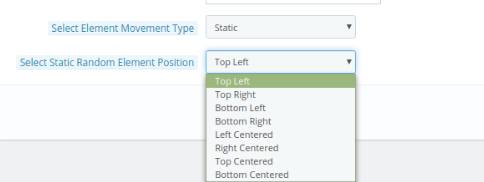
- Select Element movement Type: Set movement type static or dynamic.

- Select moving random element direction: Set moving random element direction.
- Select Static Random Element Position: Set static random element direction.
The impact of these random elements will be as shown below:
3.5 Discount Coupon Settings
The PrestaShop Website Decoration Effects plugin allows offering discount coupons on special occasions via an attractive footer bar interface.
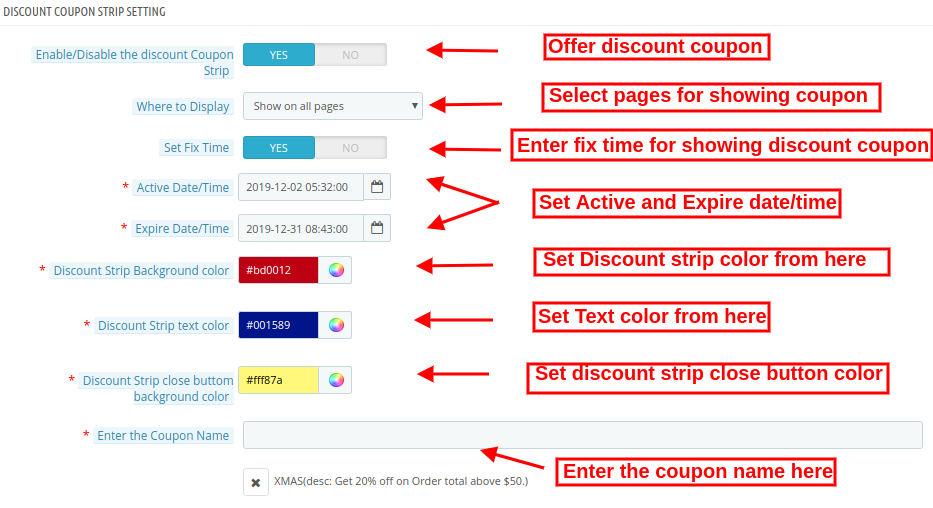
- Enable/Disable the Discount strip: Activate/deactivate this option to show a discount strip on the website front-end interface.
- Where to display: Admin can select the pages on which he wants to show these discount coupons.
- Set Fix time: Set a specific time for showing the discount coupon.
- Active Date/time: Enter the start date/time here.
- Expire Date/time: Enter the end date/time here.
- Discount Strip Background color: Set the color for showing as a background color of discount strips.
- Discount Strip text color: Set text color of the discount strip.
- Discount strip close button background color: Set close button background color of the discount strip.
- Enter the coupon Name: Enter the coupon name here.
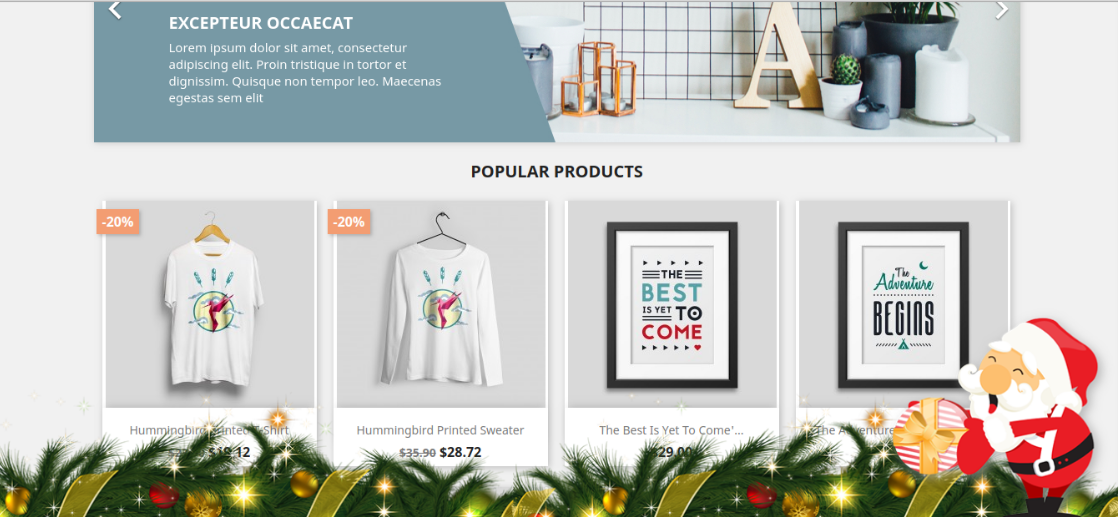
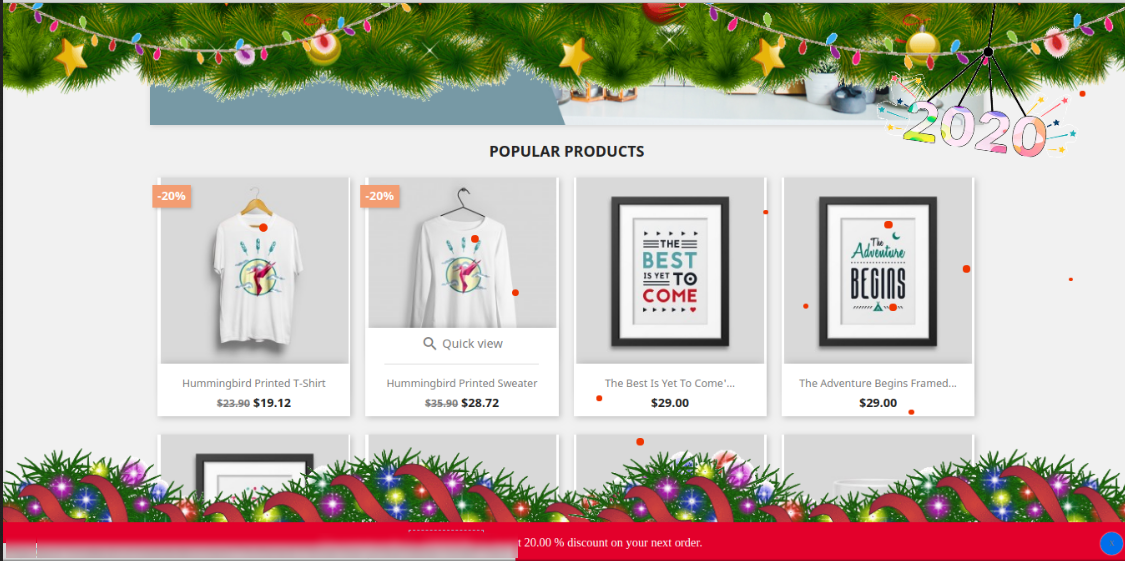
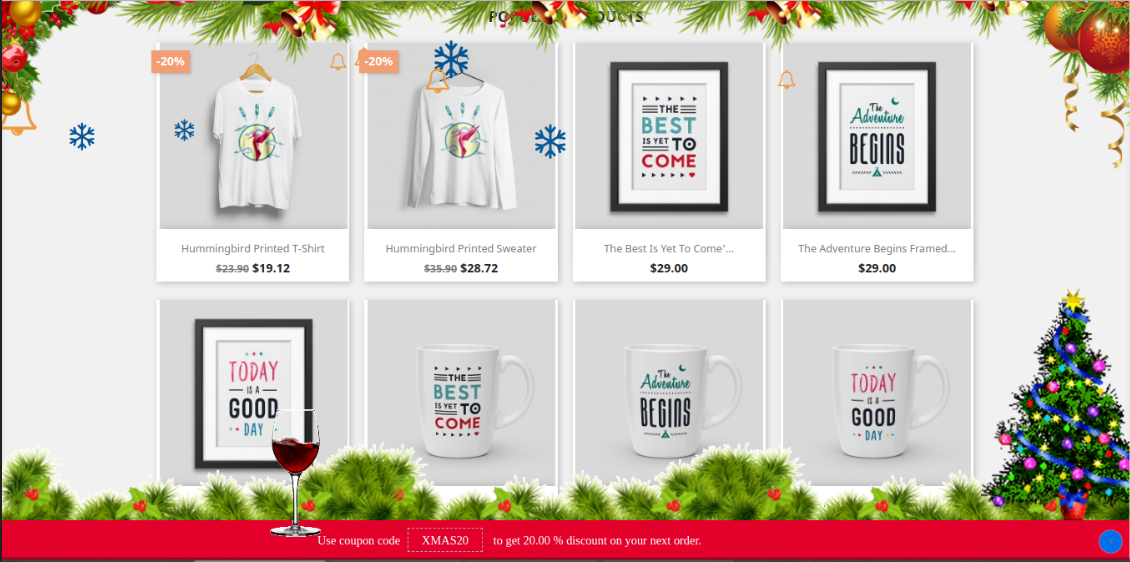
4.0 Front-End Interface
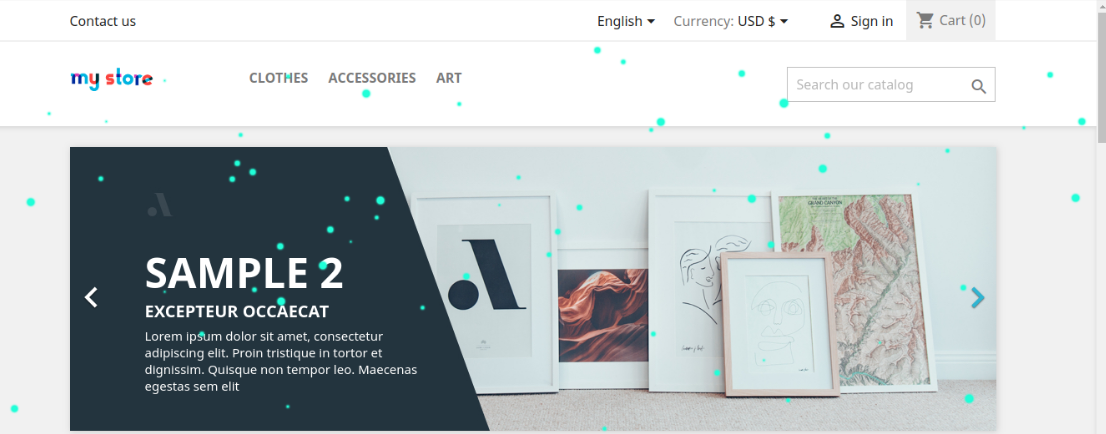
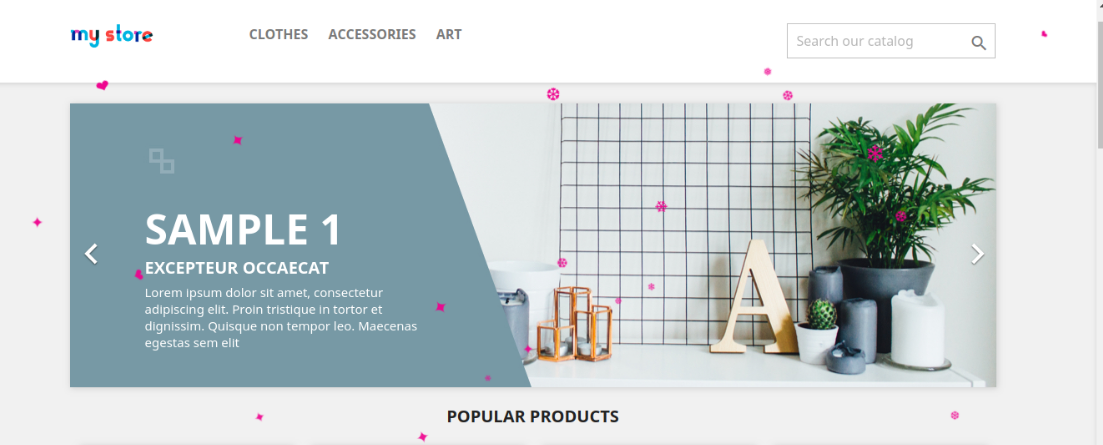
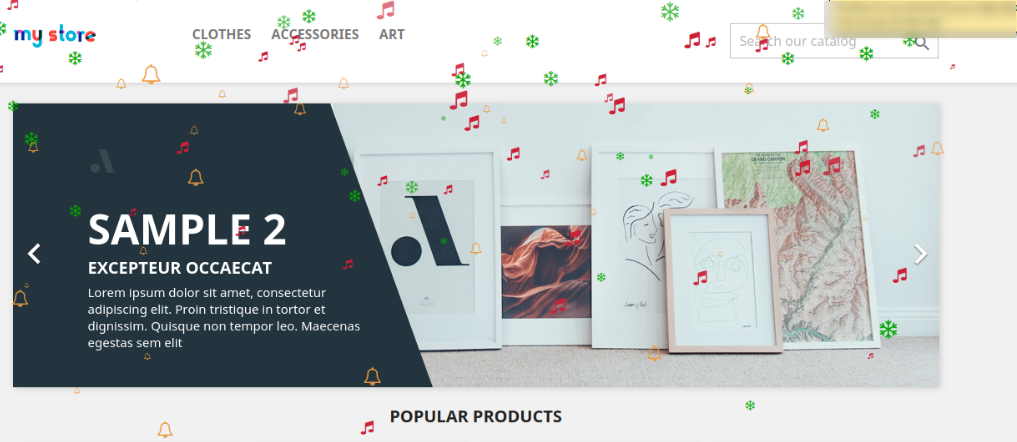
The online store merchant can decorate the online store using the Advance PrestaShop Christmas Effects plugin. The online store merchant can customize the PrestaShop Snow Flurry effect addon according to the various occasions like Christmas, New Year and many others.
Different snow effects offer a variety of decorations. The online store visitors and the customer can view the decorated store.
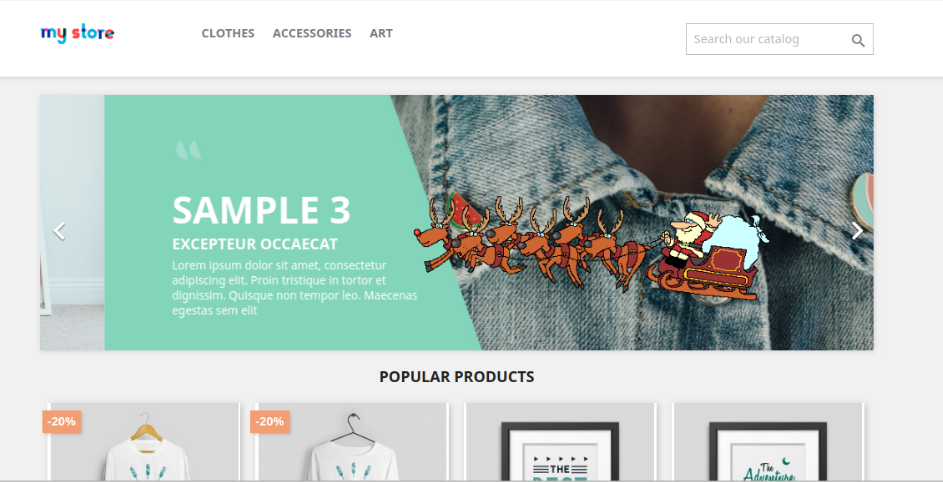
Fist Snow Effect with Elements: Here, in the image, you can view the beautiful impact of first show effect. You can also set different header, footer and random elements as per your website theme.
Second Snow Effect with Elements: In the Second snow effect, admin can show characters and set the flowing speed and other effects related settings.
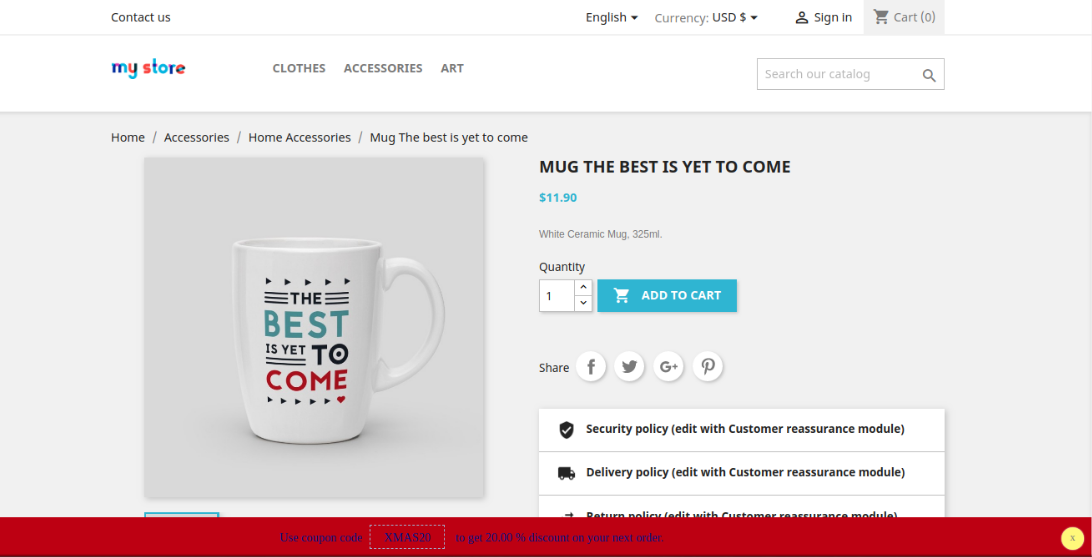
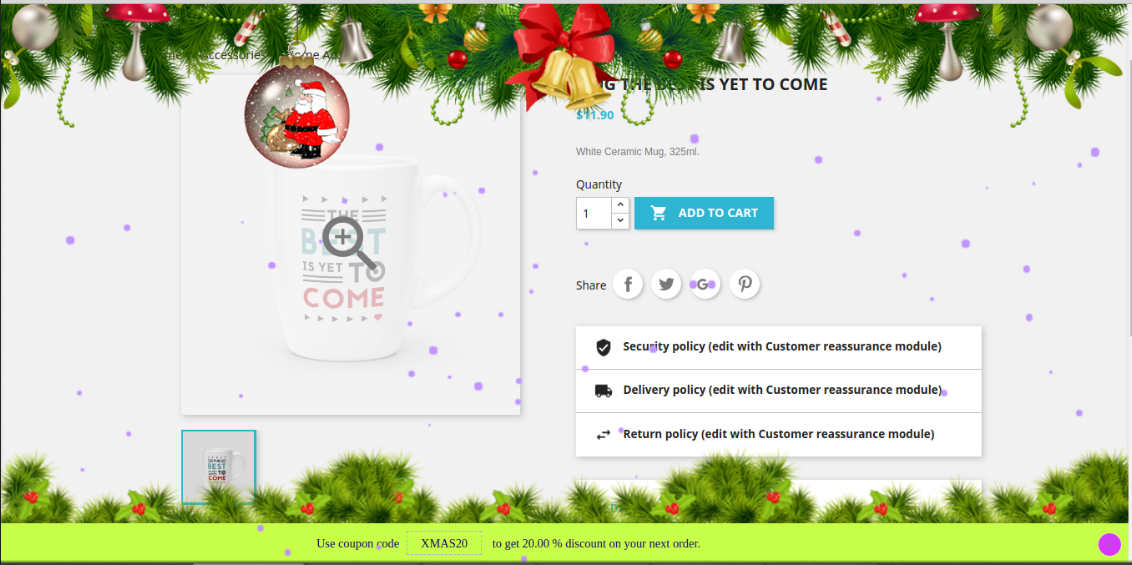
Third Snow Effect with Elements: In the third snow Effect, you can show snow flacks with different header and footer elements. Online users can view the discount strip.
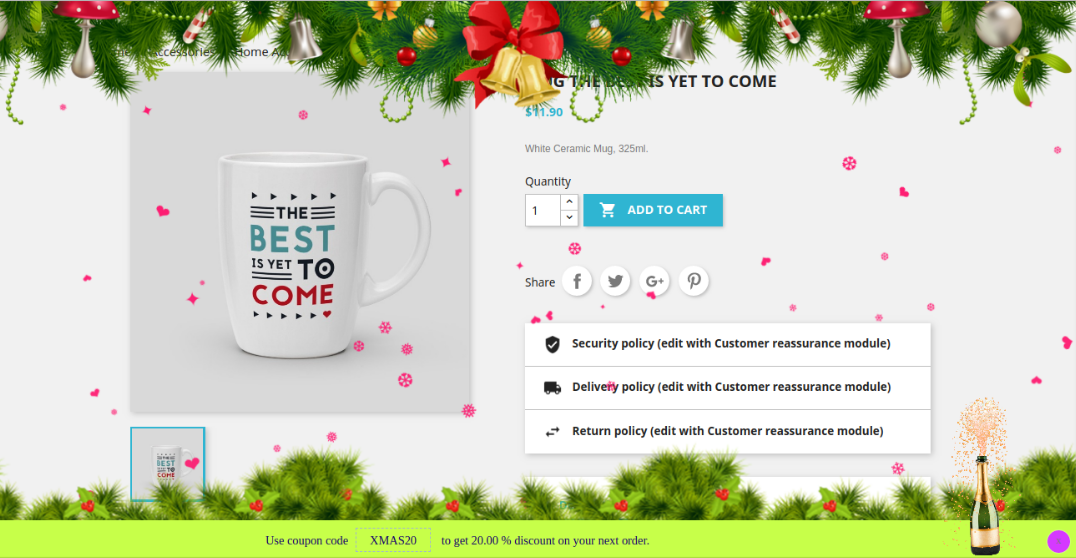
Fourth Snow Effect with Elements: In the fourth effect, online users can view colorful snow flurries with the attractive header, footer and random elements.
This way, the online store merchant can decorate the website and attract online customers. There are multiple decoration options, admin can use various options on different occasions.
For more Prestashop addons visit Knowband.
For more details, visit here:
Prestashop Website Decoration Effects plugin Product page Link
