
Prestashop Mailigen & MailChimp Integrator Addon
1.0 Introduction
Prestashop Mailigen & MailChimp Integrator Addon by Knowband is a Prestashop module that allows the system to automatically sync customers email addresses of your store on Mailigen Account or MailChimp Account or both accounts. Mailigen and Mailchimp both are email service providers through which you can send newsletters or emails related to your services and offers to your customers. Also, Both provides number of email templates which you can select as per your need.
1.1 Benefits of the Admin:
1. This Prestashop Mailigen and MailChimp Integrator addon allows the store admin to enable/disable the module as per need.
2. Smart sync feature allows admin to subscribe users to his/her Mailigen and MailChimp account.
3. The Prestashop Mailigen and MailChimp Integrator extension offers the smart sync feature. However, the module synchronizes of email as soon as focus is blurred from email field.
4. The Prestashop Mailigen extension allows the store admin to sync the Mailigen account by entering the Mailigen API Key.
5. The Prestashop MailChimp integrator module allows the store admin to sync the MailChimp account by entering the MailChimp API Key.
6. The Store admin can easily synchronize the Mailigen & MailChimp account with your store without any hassle.
7. With the help of this Magento Addon, The Online retailers can send email campaigns to all the customers either they have registered to the site or not.
8. The advanced feature of this Prestashop extension, the admin can also include Field Id and Class Id to sync emails from the non-default email fields.
9. The Prestashop addon helps the Prestashop merchant in email marketing.
10. The Admin can boost the website revenue.
2.0 Installation
After purchasing the Prestashop Mailigen and MailChimp Integrator extension, you will get following files as listed below:
1. Compressed File in ZIP format (contains source code of the module)
2. User Manual
Follow the following steps to install the extension:
1. Unzip the compressed file. It would contain files and folders as shown below –

2. Copy all the files and folders of unzipped folder into your store “modules” directory on the path – Root Directory/modules/.
3. Now Prestahsop extension is ready to be installed on your store and you can find that in Store Admin -> Modules and Services. It would shown as below –
For Prestashop 1.6.x.x

For Prestashop 1.7.x.x

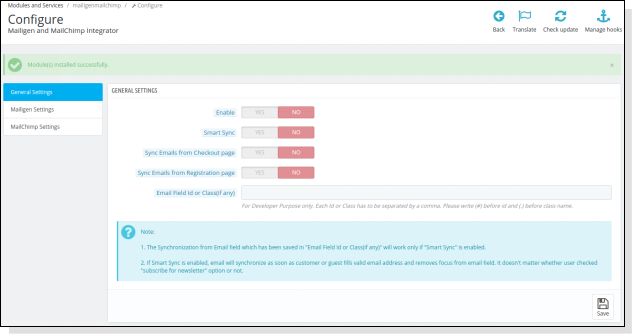
4. Click on “Install” button to install the Prestahsop MailChimp integartor addon. It would show a pop-up for your confirmation. Click on “Proceed with the installation” option. This step will install the Prestashop addon and show notification – “Module(s) installed successfully”.
3.0 How to configure module ?
This Prestashop Mailigen and MailChimp integrator extension is configurable and the Store Owner can setup or configure this Prestashop module through Admin Panel of store by following steps given below –
1. Go to Store Admin -> Modules and Services
2. Find “Mailigen and MailChimp” and click “configure” button given corresponding to the module.
3. It would open a new page as shown below –
4.0 Admin Panel
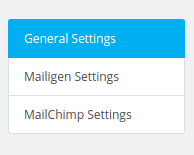
The admin panel will have 3 tabs for configuring this plugin, as listed below:
- General Settings
- Mailigen Settings
- MailChimp Settings
4.1 General Settings
This section the Prestashop Mailigen and MailChimp integrator extension allows the online retailers to enable/disable the Prestashop addon with some more configurations.
You have to follow steps given below to configure General Settings –
1.Goto the Prestashop Module and Services -> Module and Services
2.It would list all the modules of store. Find ‘Mailigen and MailChimp’ in modules list.
3.Now click on ‘Configure’ button given corresponding to the ‘Mailigen and MailChimp’ module.
4.It would redirect eCommerce merchant to a new page as shown below –
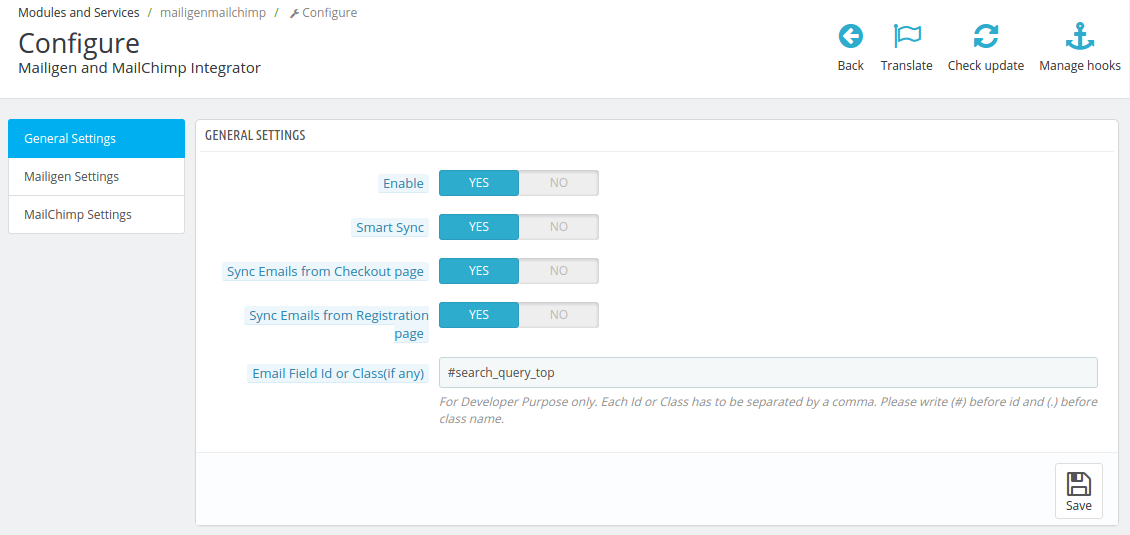
5.Update the values of given fields corresponding to ‘General Settings’ as per need.
6. Now click on ‘Save’ and it would validate and save the provided values.
That’s it.
From here admin can enable/disable Prestahsop extension Also he/she can set the page ( registration and checkout ) from where to sync e-mail id.
General Settings tab will have following options:
1. Enable: From this button admin can enable/ disable the Knowband’s Prestahsop Mailigen and MailChimp module. By default, it will be off.
2. Smart Sync: This option when enabled, email id after validation will be synchronized if visitor/guest/customer remove focus after filling email field irrespective of the fact if the user have submitted the form or not or user have opted for newsletter subscription or not. If it is disabled the email will be synced only when form is submitted and if customer has opted for newsletter subscription.
3. Sync Email from Checkout page: From this button admin can set whether to sync email from checkout page or not. If enabled, email will be synced from the checkout page to accounts configured in admin panel. If customer chooses guest checkout then only email address filled at the time of checkout will sync.
4. Sync Email from Registration page: From this option the Prestashop store Admin can set whether to sync email from registration page or not. If enabled, email will be synced from the registration page to accounts configured in admin panel. If guest chooses to create account on checkout page or guest sign up in both cases, email will be synced if he/she chooses “subscribe for newsletter”.
5. Email Field Id or class (if any): This text field is for developer purpose only. From this option the Online retailers or his/her developer can set the fields of email or newsletter from which he/she wants email to sync. The field id name or class name should be followed by (#) or (.) respectively. The purpose of this field is to make module compatible with other newsletter forms which comes with theme or some third party module.
4.2 Mailigen Settings
This section allows the store admin to enable/disable Mailigen functionality which allow system to sync emails on Mailigen system.
You have to follow steps given below to configure Mailigen Settings –
1. Goto the Module and Services -> Module and Services
2. It would list all the modules of store. Find ‘Mailigen and MailChimp’ in modules list.
3. Now click on ‘Configure’ button given corresponding to the ‘Mailigen and MailChimp’ module.
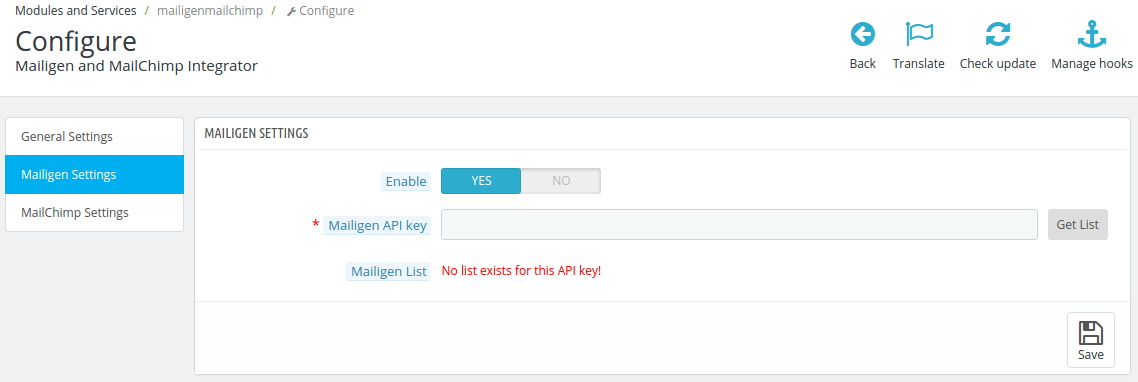
4. It would redirect Store Owner to a new page. Click on “Mailigen Settings” tab and it would open a new section as shown below -\
5. Update the values of given fields as per need.
6. Now click on ‘Save’ and it would validate and save the provided values.
7. That’s it.
Mailigen Settings tab will have following options.
Enable: From this option admin can enable/disable the Mailigen settings. Initially it will be off.
Mailigen API Key: Mailigen API key is the key that the user created on his/her Mailigen account at www.mailigen.com. This API key will be used to connect to the Mailigen API. Fill API field with correct API and click Get List button. Lists drop down will be visible containing all the lists related to that Mailigen API key.
Mailigen Lists: Mailigen Lists will be available when the Mailigen API key is provided.
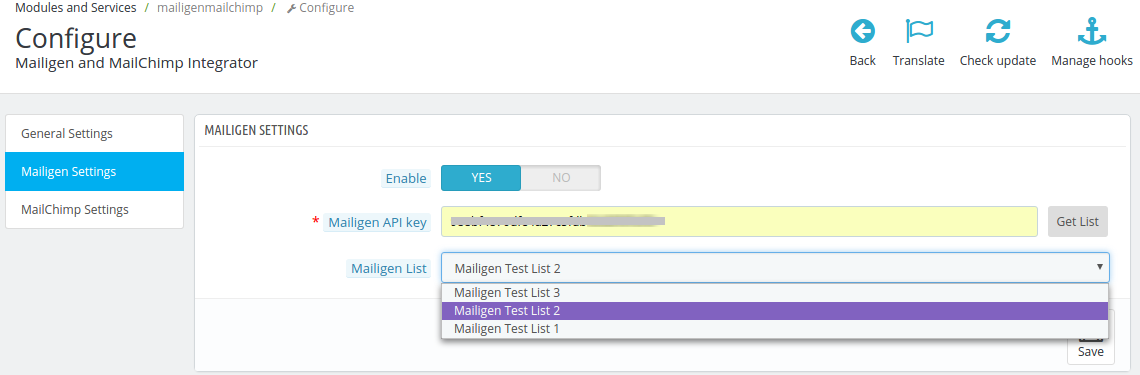
NOTE : If the Mailigen Settings > Mailigen API key field is empty then no lists will be shown , but an error message will be shown instead saying ‘No lists exist for this API key !’ as shown in screen above.
To Set up Mailigen Account
- Visit mailigen and create account. After account creation, login to your account.
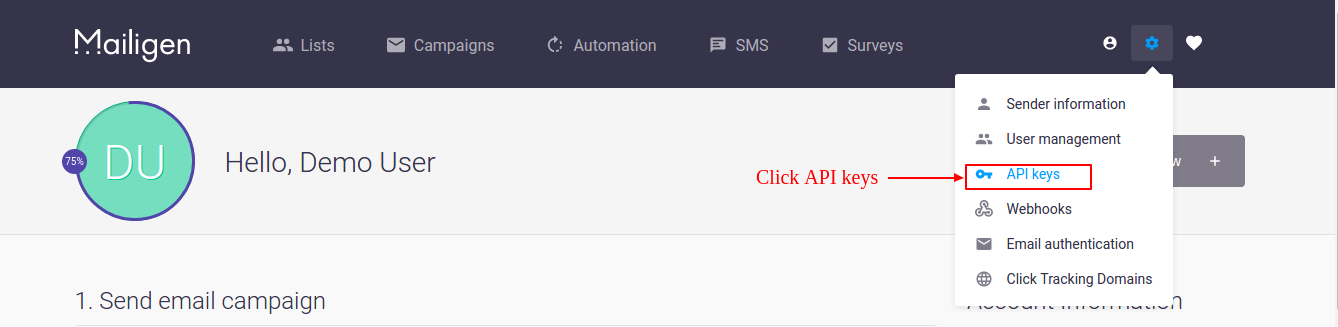
- On Dashboard, click settings icon on upper right corner of dashboard as seen in screen below.

- After clicking settings icon drop down will open, click API keys in that menu. Screen is given below:
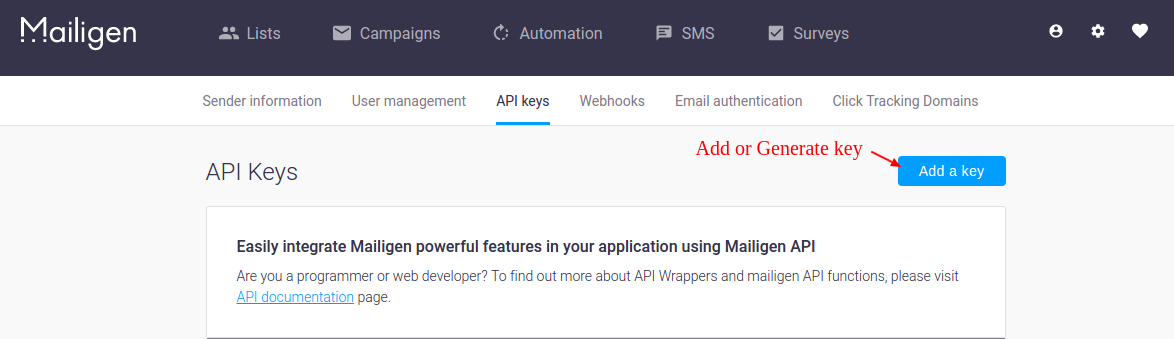
- After clicking “API keys” link, admin will be redirected to new page where he/she can add API key. Click Add a key link to create API.
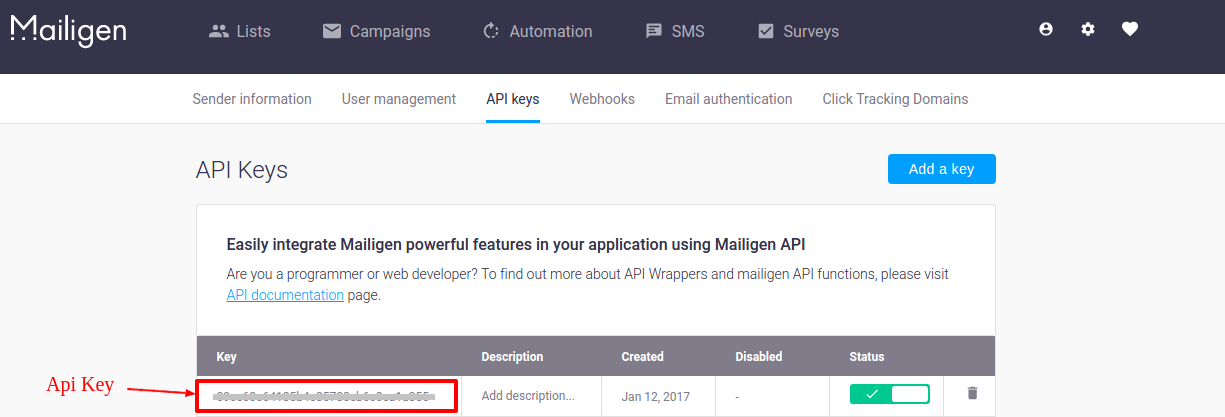
- After generation of key, your API key will be visible in list as shown below. Use this key load your lists in plugin.
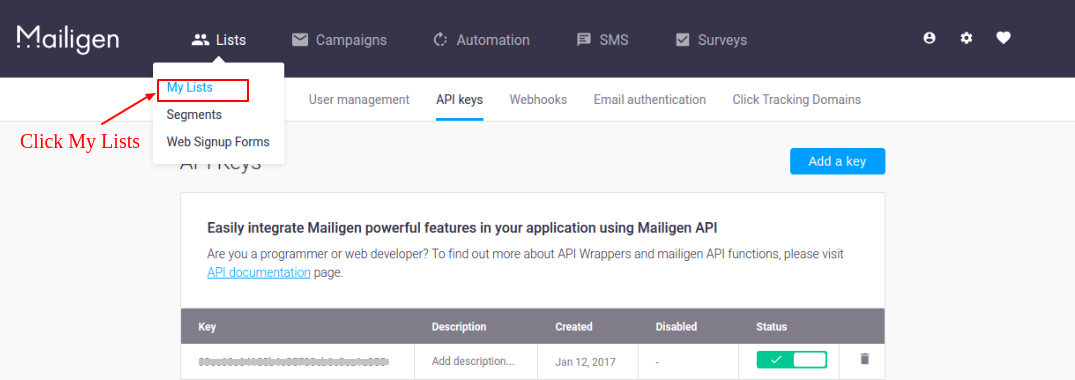
- Now to create list, Go to Lists tab in upper menu. Drop down will open. Click “My Lists”link to view you lists or to create lists.
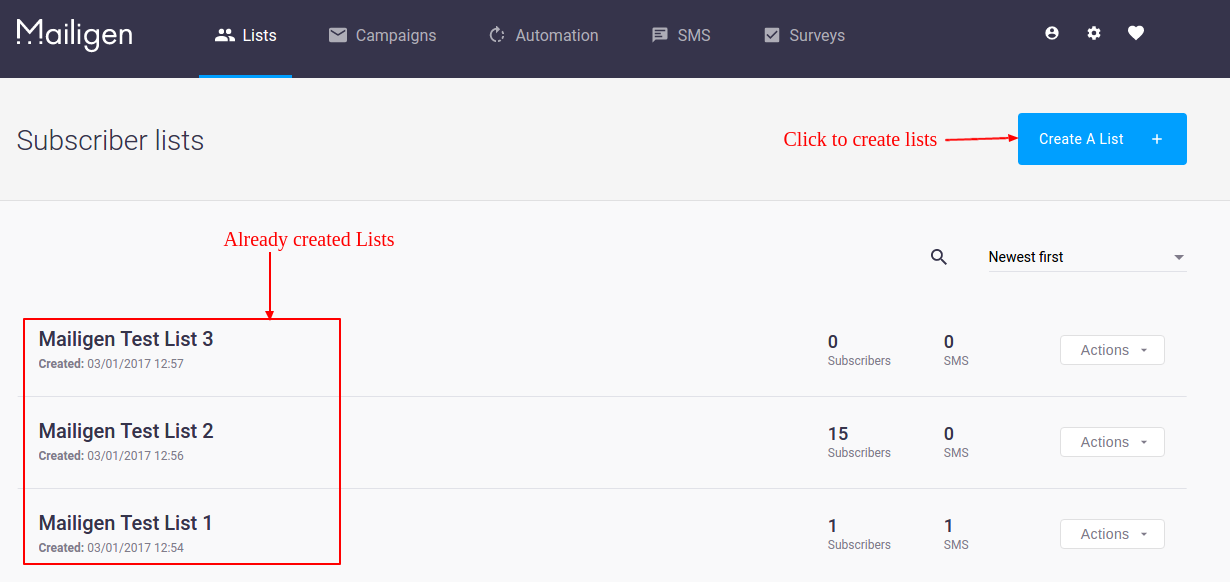
- On My Lists page, Click “Create a list” to create new list. After creation lists will be visible on My Lists page as shown in screen below.
4.3 MailChimp Settings
This section allows admin to enable/disable MailChimp functionality which allow system to sync emails on MailChimp system.
You have to follow steps given below to configure MailChimp Settings –
1. Goto the Module and Services -> Module and Services
2. It would list all the modules of store. Find ‘Mailigen and MailChimp’ in modules list.
3. Now click on ‘Configure’ button given corresponding to the ‘Mailigen and MailChimp’ module.
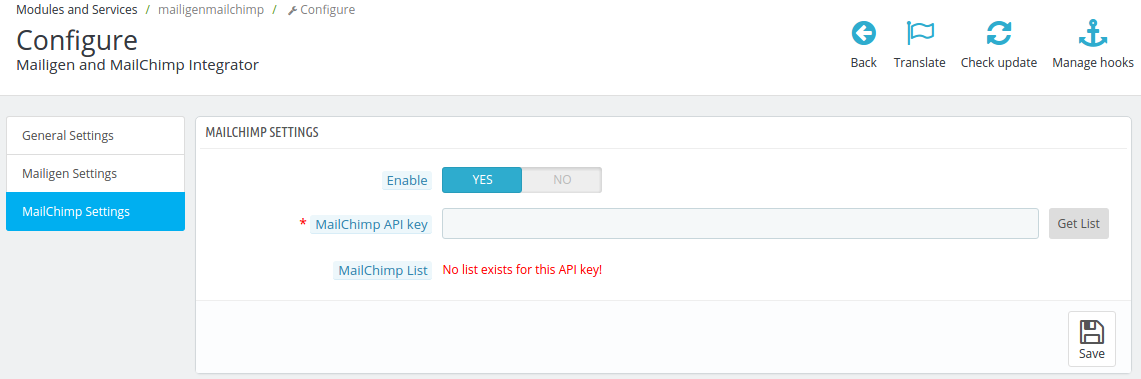
4. It would redirect Store Owner or Admin to a new page. Click on “MailChimp Settings” tab and it would open a new section as shown below –
5.Update the values of given fields as per need.
6.Now click on ‘Save’ and it would validate and save the provided values.
7.That’s it.
MailChimp Settings tab will have following options.
Enable/Disable: From this option admin can enable/disable the MailChimp settings. Initially it will be off.
MailChimp API Key: MailChimp API key is the key that the user created on his/her MailChimp account at www.mailchimp.com. This API key will be used to connect to the MailChimp API. Fill API field with correct API and click Get List button. Lists drop down will be visible containing all the lists related to that MailChimp API key.
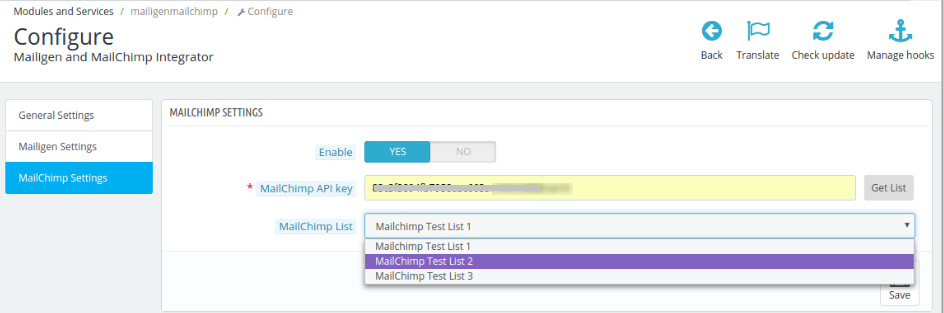
MailChimp Lists: MailChimp Lists will be available when the MailChimp API key is provided.
NOTE : If the MailChimp Settings >MailChimp API key field is empty then no lists will be shown , but an error message will be shown instead saying ‘No lists exist for this API key !’ as shown in screen above.
To Set up MailChimp Account
- Visit mailchimp and create account. After account creation, login to your account.
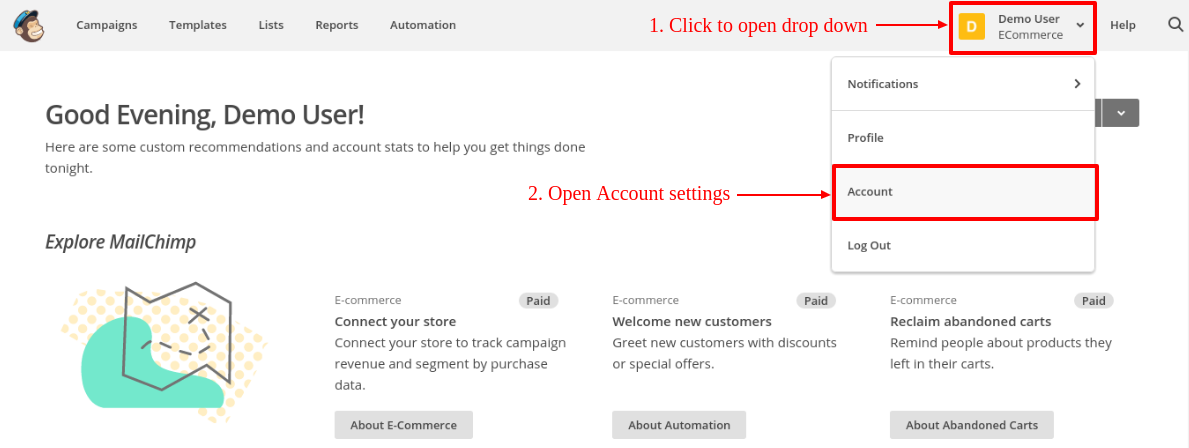
- On Dashboard, click button on upper right corner of dashboard. Drop down menu will open, click Account link in that menu as seen in screen below.
- On Account settings page, some sub menus will be visible. Click “Extras” sub-menu to open drop down menu. Click “API keys”as shown in screen below:

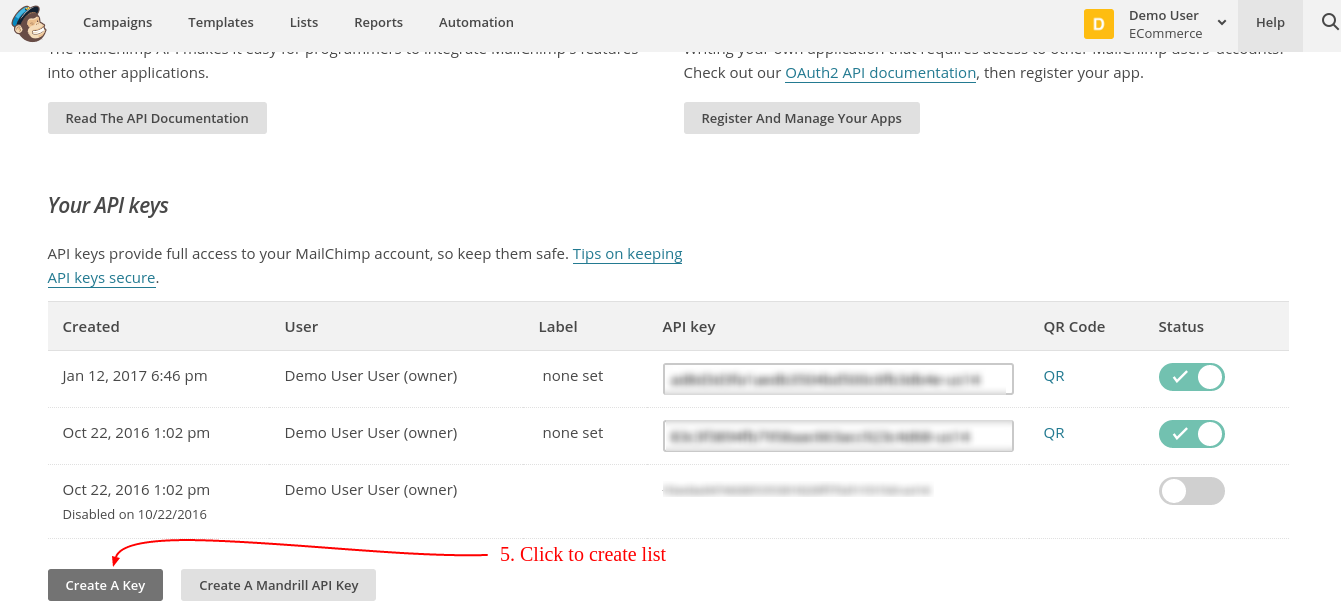
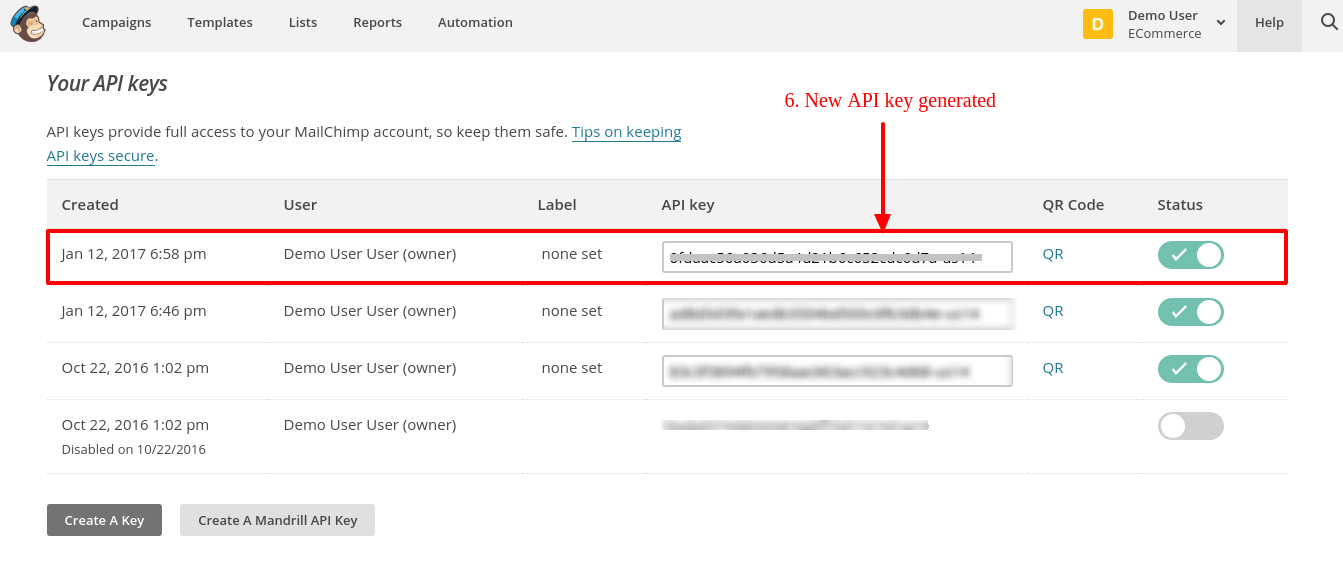
- On API keys page, click “Create a key”to generate API key. After creation, a new API key will be added to your API keys list. Screen is given below:
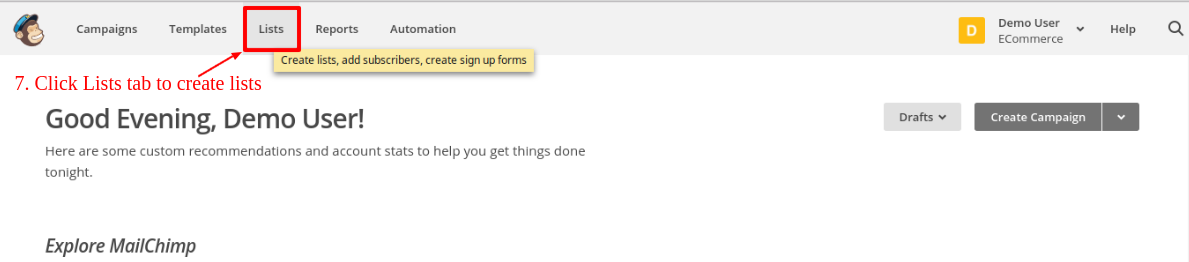
- Now to create list, click Lists tab in upper menu. Admin will be redirected to new page where he/she can view lists and create lists also. Screen is given below:
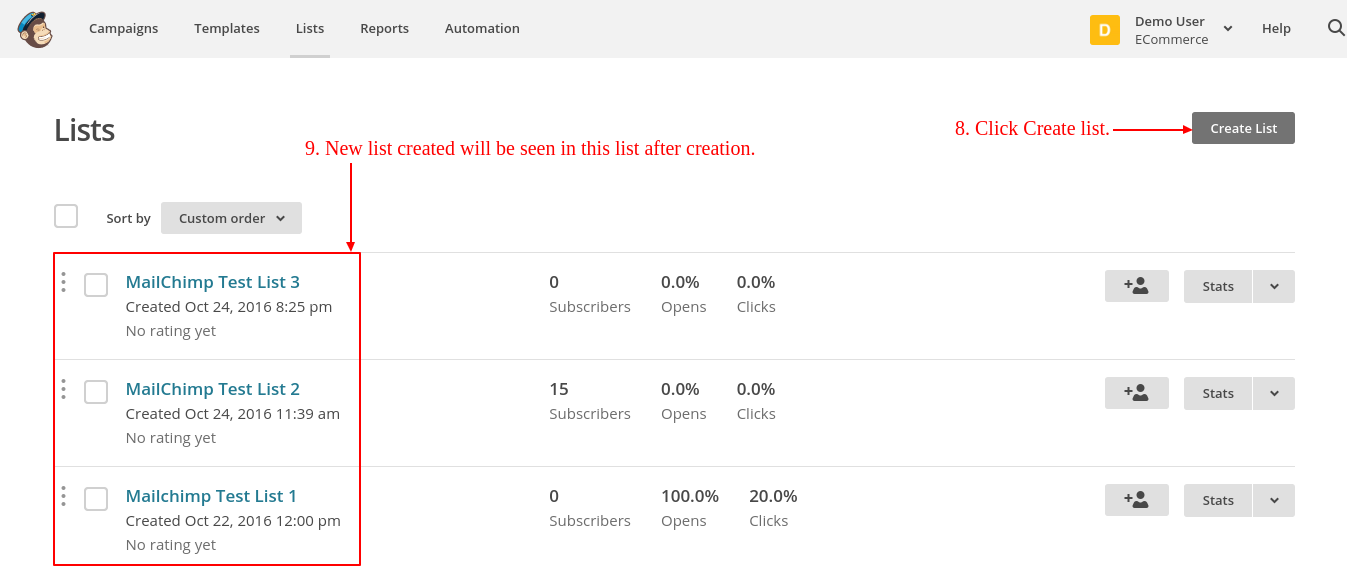
- On Lists page, Click “Create list” to create new list. After creation lists will be visible on Lists page as shown in screen below.
5.0 Front End
Newsletter Subscription
If Smart sync is disabled and customer or guest enters email in newsletter field and click submit, email will be added to the lists configured in admin panel. If smart sync is enabled, email( if valid) will be added to lists on removing focus from email field. It doesn’t matter whether user clicked submit button or not.

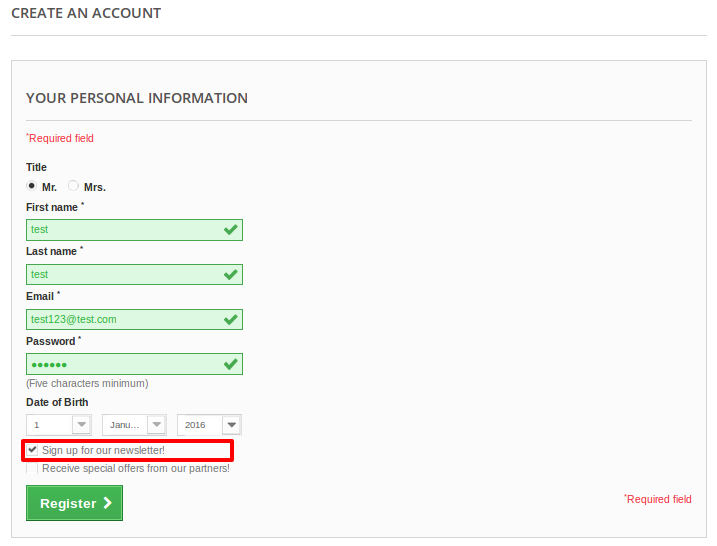
Registration Page
If the ‘Sync Email from Registration Page’ setting is enabled in Admin panel, then after registration customer’s email address will be synchronized to the configuration lists if he/she chooses the option to subscribe to newsletter. If “Smart Sync” is also enabled then email will be synchronized with lists on removing focus from email field. It doesn’t matter whether user registered or not.
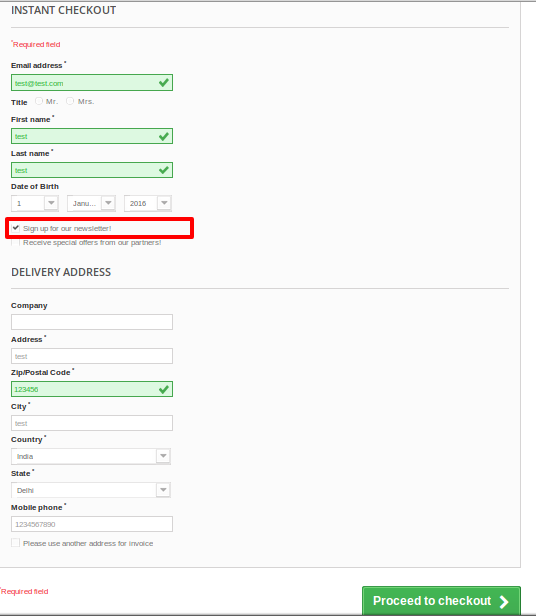
Checkout Page
If the ‘Sync Email from checkout page’ is enabled in admin panel, then on the guest checkout page after checkout, guest’s email address will be synchronized to the configuration lists if he/she chooses the option to subscribe to newsletter. If “Smart Sync” is also enabled then email will be synchronized with lists on removing focus from email field. It doesn’t matter whether user checkout successfully or not.
Note: If “Smart Sync” is enabled then it doesn’t matter whether customer or guest checked “Sign up for newsletter” or not, synchronization will take place on blur event from email input field.
You can try Prestashop Mailigen and MailChimp Integrator addon for on your Prestashop website. KnowBand’s Prestashop Mailigen and MailChimp Integrator extension helps you in email marketing to your eCommerce store & boost th website traffic.
Module Link: https://www.knowband.com/prestashop-mailigen-mailchimp-integrator
Admin Demo Link: https://ps.knowband.com/demo3/16/admin1/index.php?controller=AdminLogin&token=ffa17b0c72ff8c0ab7cf3e344c5ae4fc&redirect=AdminModules&demo_lang=en
Front Demo Link: https://ps.knowband.com/demo3/16/en/login
Please contact us at support@knowband.com for any query or custom change request as per your business requirement.
