
1.0 Introduction
Magento 2 Social Login extension allows the customers to login/signup using their social media accounts like Facebook, Google, Yahoo and 9 other options. This Magento 2 Social Login module will add a new link ‘Quick Log In’ next to the default login link. This text can be customized. On the click of this link, a login popup will be opened.
The Magento 2 Social Login plugin gives the freedom to the eCommerce store admin to enable or disable login through several platforms, the admin can also change the behavior of the Magento 2 Social Media Login extension at the front-end and also enables or disable login through any available social platform.
1.1 Features offered by Magento 2 Social Login Extension
- With this Magento 2 Social Login extension, admin can offer a simple and hassle-free login/signup option to the customers.
- Using this Magento 2 Social Login module, the store merchant can set up 12 different social media buttons for offering simple login/registration to the customers.
- The store admin can select small/large and circular/rectangular icons for showing social login options.
- The Magento 2 Social Login module allows setting different animation in social login buttons like zoom/highlight/rotate.
- The store merchant can set a header link on the website for providing a popup login/signup option.
- Facebook login, Google login, Yahoo login, Paypal log in, Instagram login, Twitter login, Amazon login, Linkedin login, Live login, Dropbox login, Foursquare and WordPress login options are available for login/signup.
- By offering a simple and hassle-free way, the store merchant can increase customer registration on the website.
- The store merchant can also change the position of social login buttons by the following drag and drop function.
- Admin can set up API for various social login options from the admin interface of this Magento 2 Social Login extension.
- The Magento 2 Social Login module is mobile responsive and offers smooth functioning.
- Magento 2 Social Media Login extension is multi-lingual compatible and offers hassle-free implementation.
2.0 Installation
After purchasing Magento 2 Social Login extension, the store admin will get the following files:
1. zip which has the source code of this Magento 2 Socialloginizer program plugin.
2. User Manual, with all the basic details and information.
The steps to install the Magento 2 Social Loginizer Program Extension are mentioned below:
- Buy the Magento 2 Social Loginizer Program module from Knowband. You can download the extension package.
- The package has a zipped file that contains the user manual and the source code of the Magento 2 Social Loginizer Program module. Now, Unzip this package.
- Create a folder {Magentoroot}/app/code/Knowband/Socialloginizer
- Upload the extracted content in the above folder via FTP manager (like Filezilla or WinSCP – download here: https://filezilla-project.org/).
- Now run below commands to install the plugin:1. php bin/magento module:enable Knowband_Socialloginizer2. php bin/magento setup:upgrade3. php bin/magento setup:di:compile
- The extension is now installed and ready for use. In Admin Panel go to “Knowband Extensions -> Social Loginizer ”.
You can now configure and use the Knowband Magento 2 Social Login extension.
3.0 Admin Settings
Log into your Magento Admin, then goto Stores -> Configuration -> Knowband -> Social Loginizer and configure the plugin.
To access Knowband plug-in, go to Stores -> Configuration -> Knowband -> Social Loginizer. Store admin will have various settings options categorized as follows:
Admin can easily configure the Magento 2 Social Login module and show social login options on the website easily.
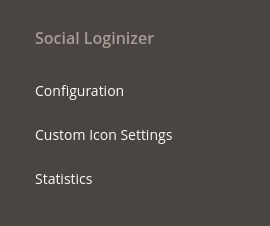
3.1 Configuration
In configuration section, the store admin can configure the module and apply basic settings. Admin can also apply website settings from this section.
3.1.1 General Settings
Admin can customize the general settings by using the following settings options:
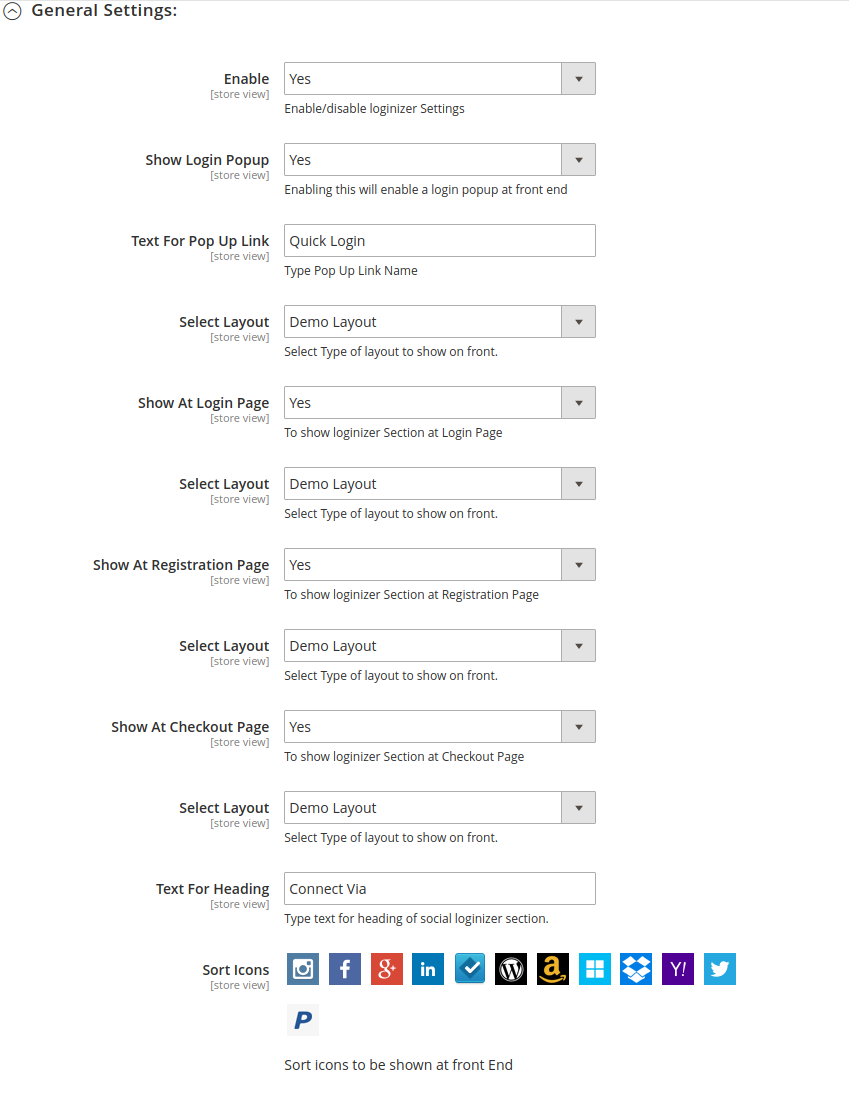
- Enable: Activate or deactivate the Social Login Magento 2 module functionality from here.
- Show Login Popup: Enabling it will create a link saved in “Text for popup link”. On clicking this link, a popup will appear with a login option and a social loginizer section.
- Text for Pop Up Link: This text will appear as a link for login popup at the header in the front end.
- Select Layout: Admin can select a layout for showing login buttons in the popup.
- Show At Login Page: By enabling this configuration option, admin can show social login buttons on the login page.
- Select Layout: Admin can select the layout for showing social login options on the login page.
- Show At Registration Page: By activating this option, admin can show social login buttons on the customer registration page.
- Select Layout: The store merchant can choose from available layouts for showing social login buttons at the registration page.
- Show At Checkout Page: Admin can also show social login options at the checkout page.
- Select Layout: Admin can choose from available layouts for showing social login options on the checkout page.
- Text For Heading: This text will appear before the social organizer block.
- Default Visible Option: It will be the no of icons that will be shown by default at the social loginizer block.
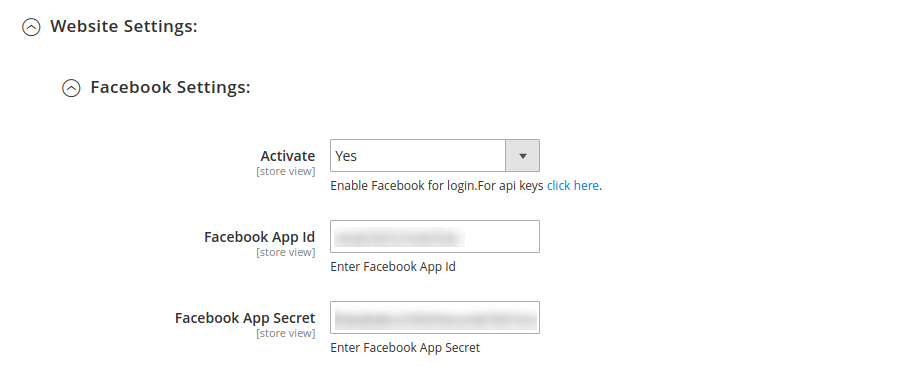
3.1.2 Websites Settings
Admin can add websites setting here.For each website, there will be similar settings like as below:-
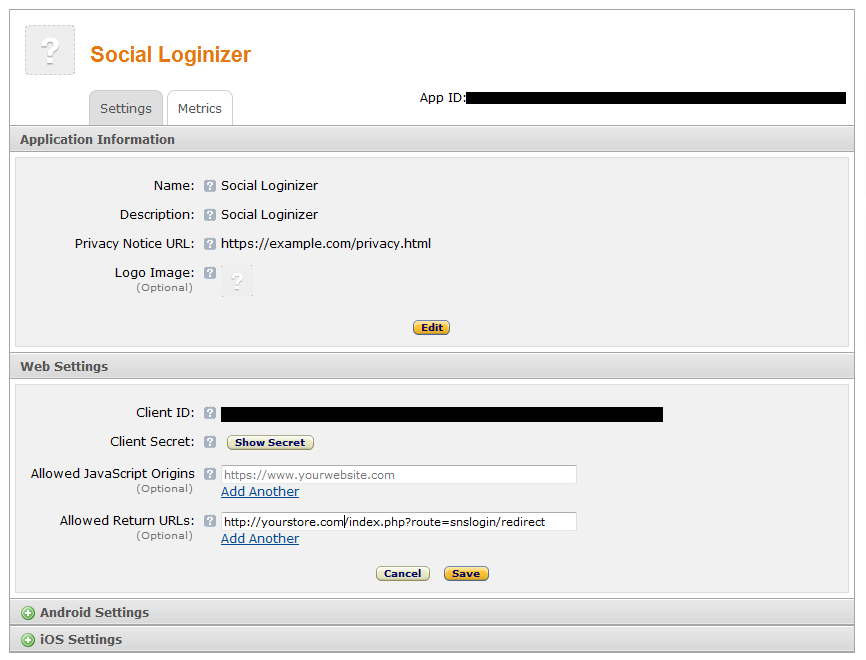
- Active: To enable the website for login and signup, select Yes.
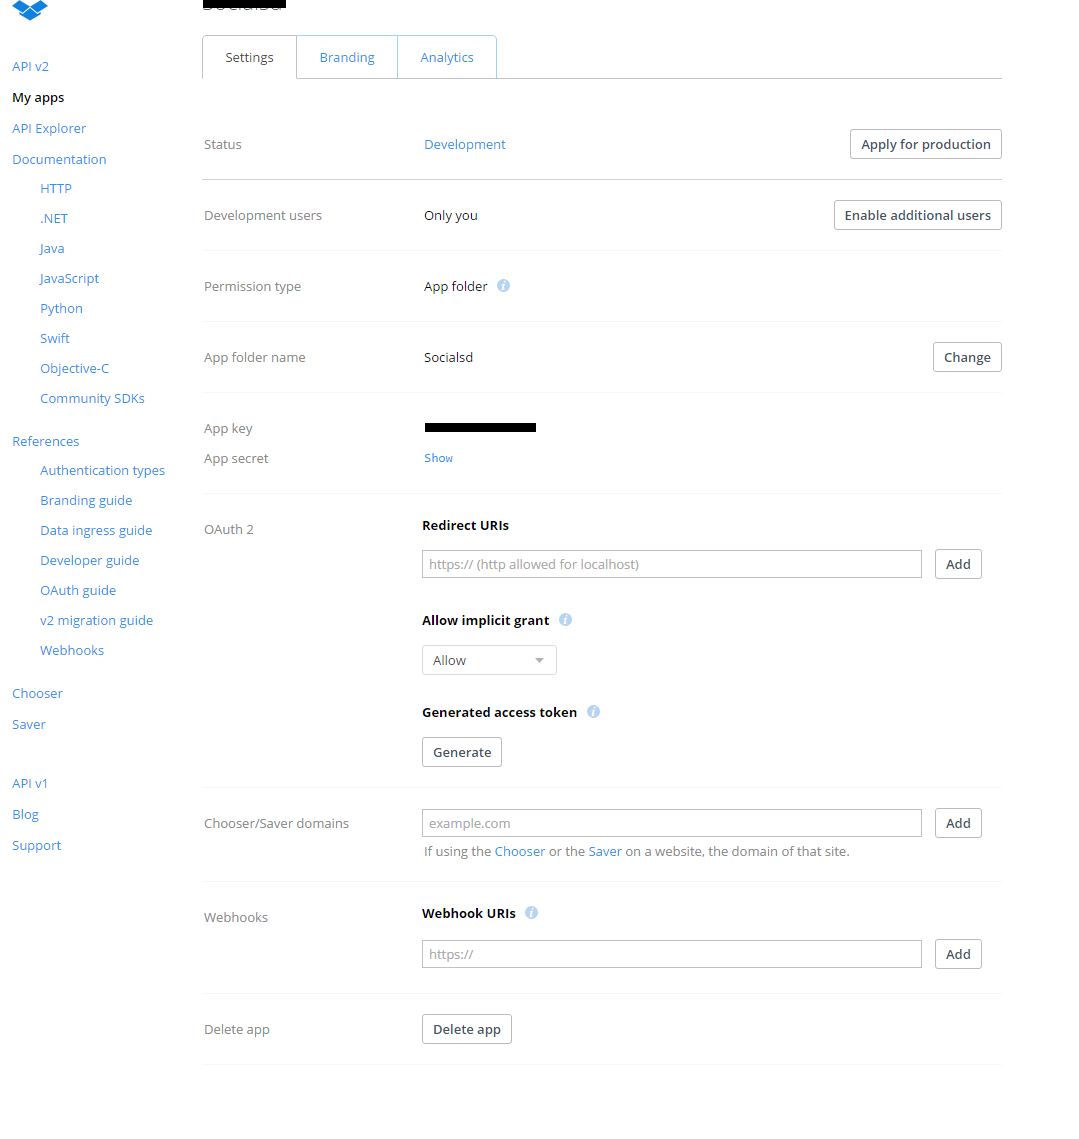
- App ID (eg. for Facebook: Facebook App Id) : Enter your Application ID/Client. ID/Consumer ID is provided by corresponding website.
- App Secret (eg. for Facebook: Facebook App Secret) : Enter your Application Secret/Client .Secret /Consumer Secret is provided by the corresponding website.
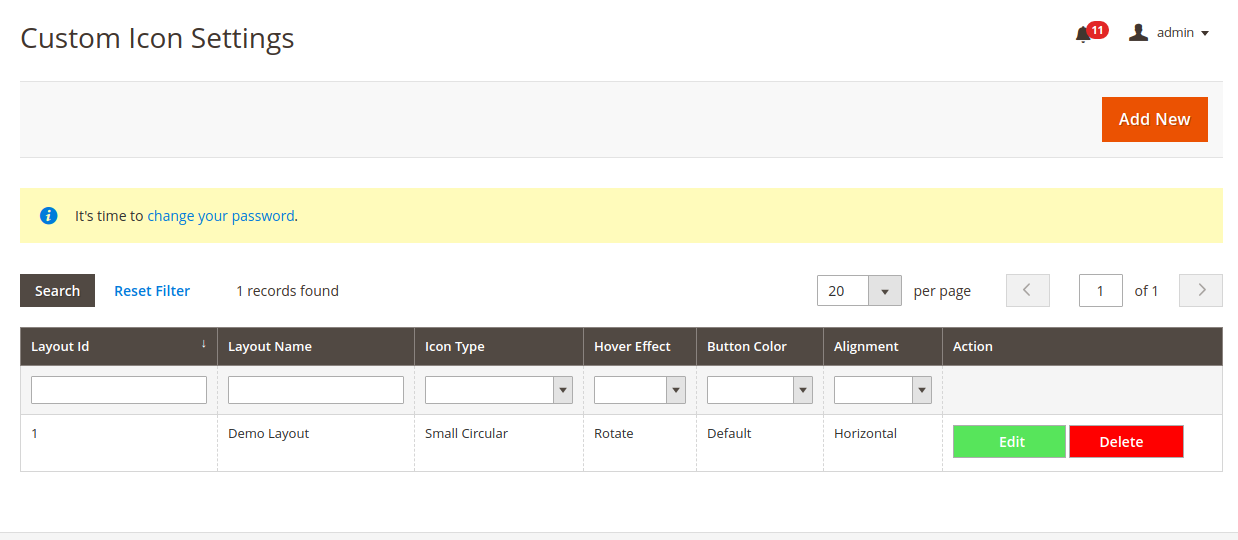
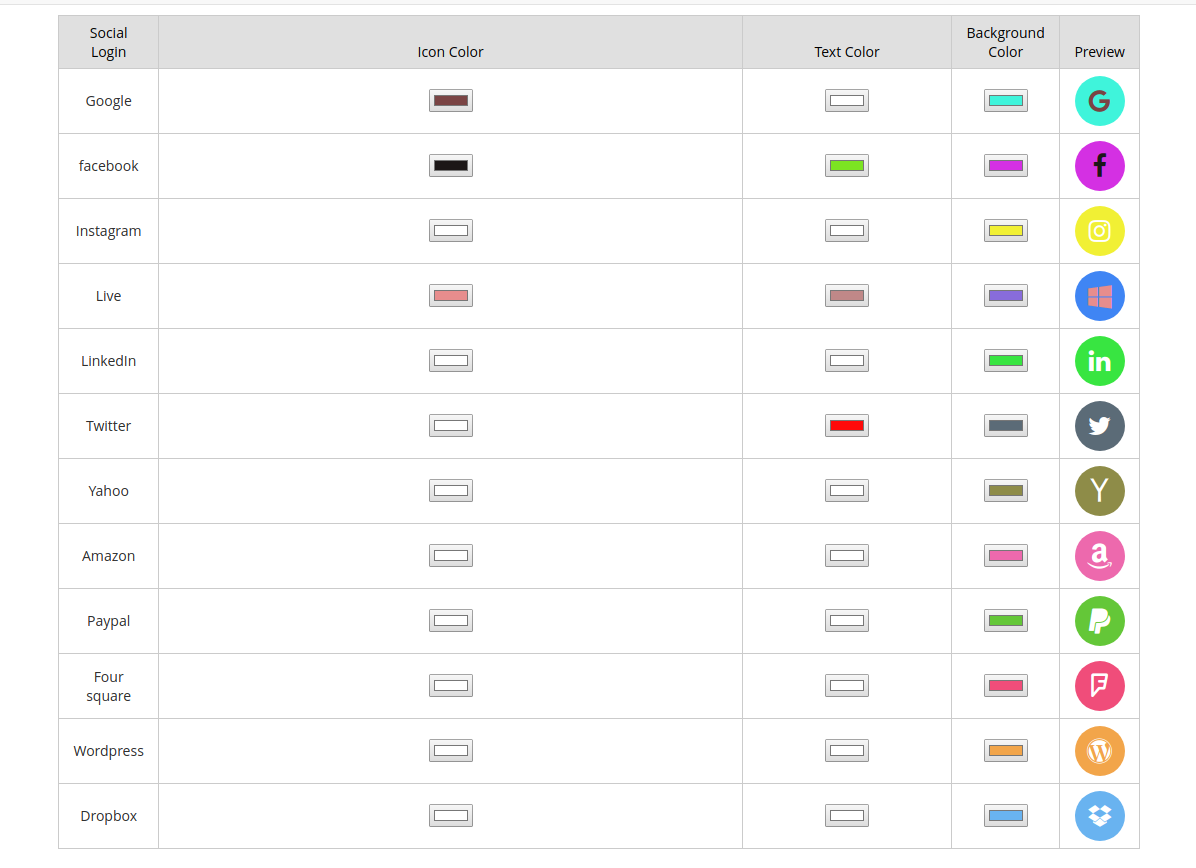
3.2 Custom Icon Settings
In the custom icon set, the admin can add, edit and delete the social login button layout. The Magento 2 Social Login extension allows the store admin to apply layout settings and show social login options in an attractive manner.
3.2.1 How to Add New Layout?
Admin can click on add new button and apply these settings for adding new layout:

- Layout Name: Admin can set layout names from here.
- Enable Social Login Options: Select the social login options from the available list which you want to show in this layout.
- Hover Effects: Admin can select from different hover effects like highlight, zoom and rotate.
- Alignment Option: The online merchant can set login option alignment as vertical or horizontal.
- Icon Types: Admin can select icon type as small circular, small rectangular, small rounded, large rounded and large rectangular.
- Button Type: Admin can select button type as default or customized.
In Customizable option, admin can apply these settings:
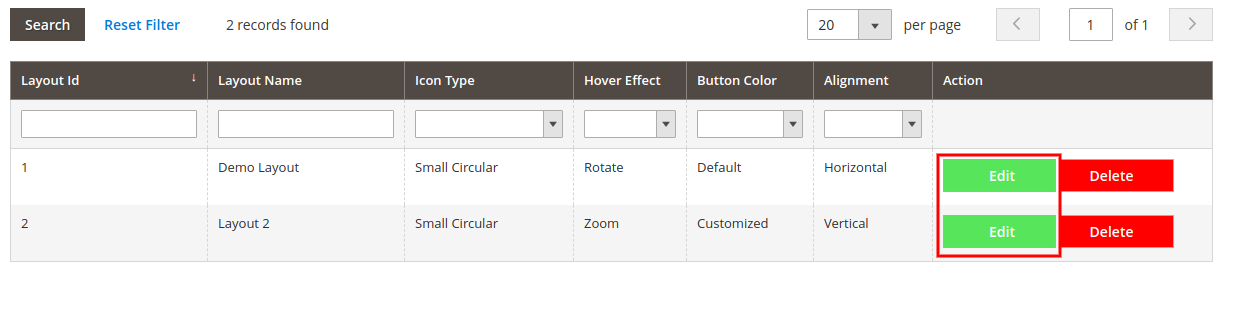
3.2.2 How to Edit Layout?
Admin can click on the edit button for editing the layout settings.
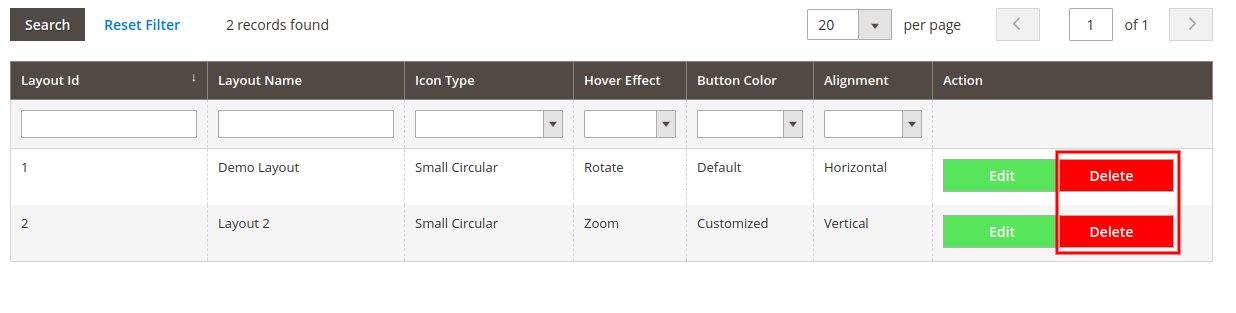
3.2.3 How to Delete Layout?
For deleting any layout admin just need to click on the delete button.
 3.3 Statistics
There is a “Statistics” tab in the menu from where admin can view the report.
3.3.1 Website Graphical Report
It shows social login and registration data in graphical form.
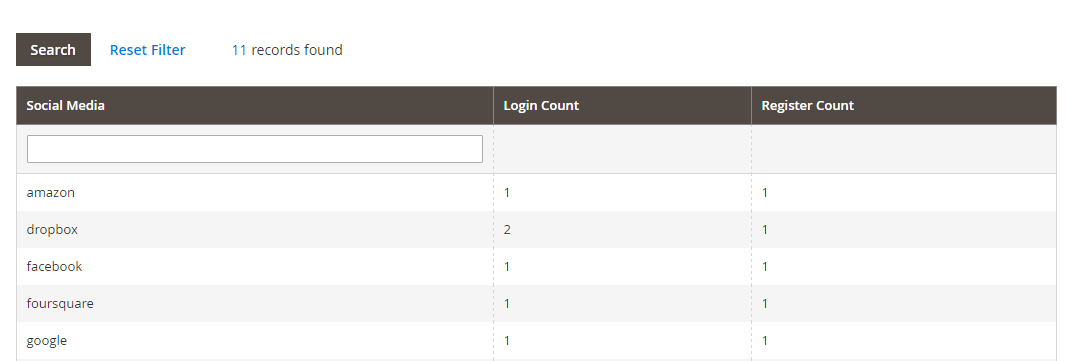
 3.3.2 Social Login report
It shows a table containing data related to each social login website like login count, registration count etc.
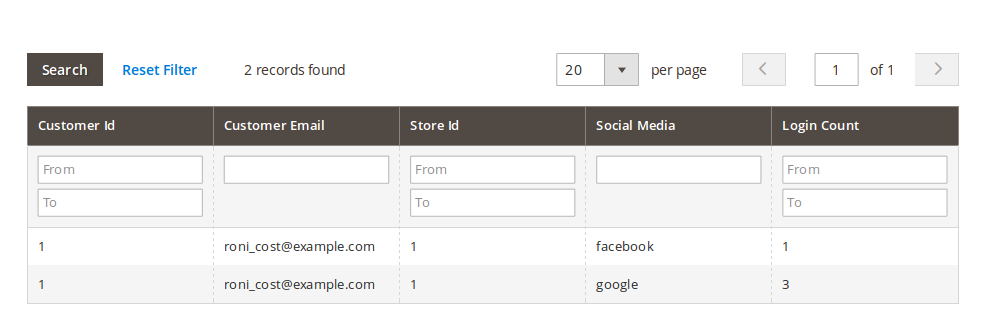
3.3.3 Social Login User Report
It shows a table containing data related to customer and social login sites like customer email, login count etc.
Reset Database:- There is a “Reset Database” Button. On clicking this button all the social login plugin related data will be deleted.
4.0 Front-end Interface
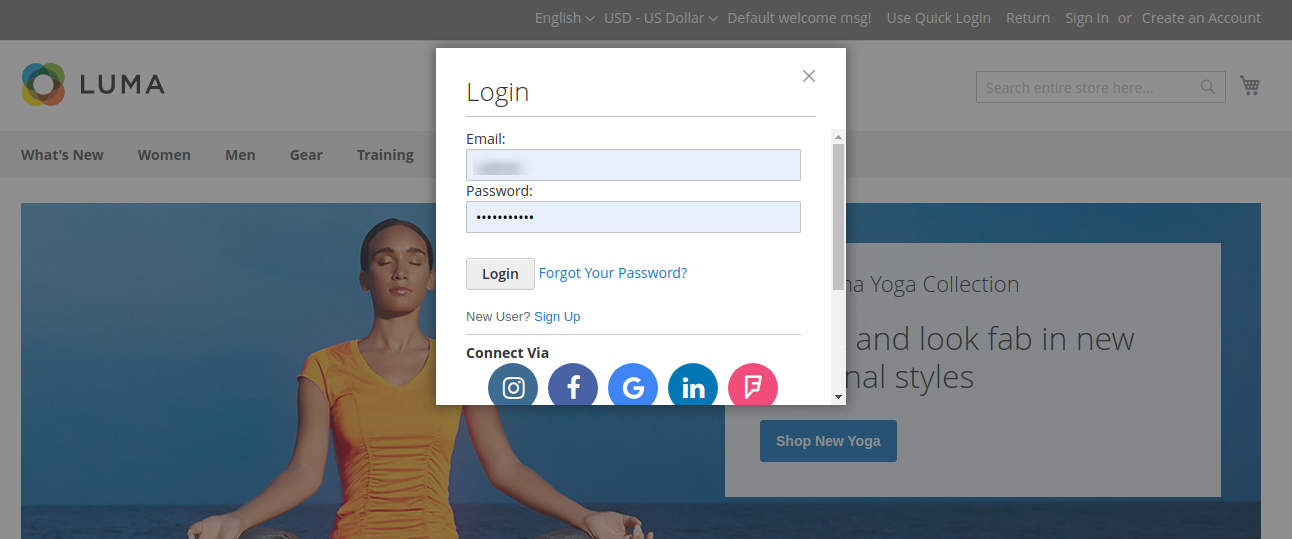
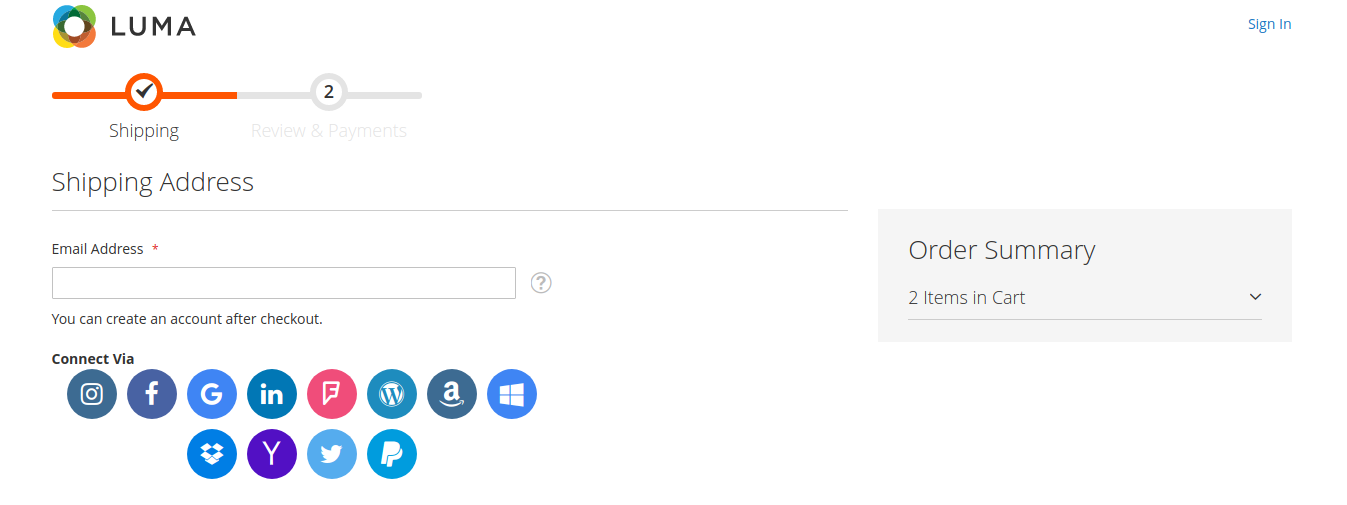
Login Popup: On enabling login Pop Up a link will appear with text as fixed in the admin interface.

On clicking this link a popup appears with a social login option.
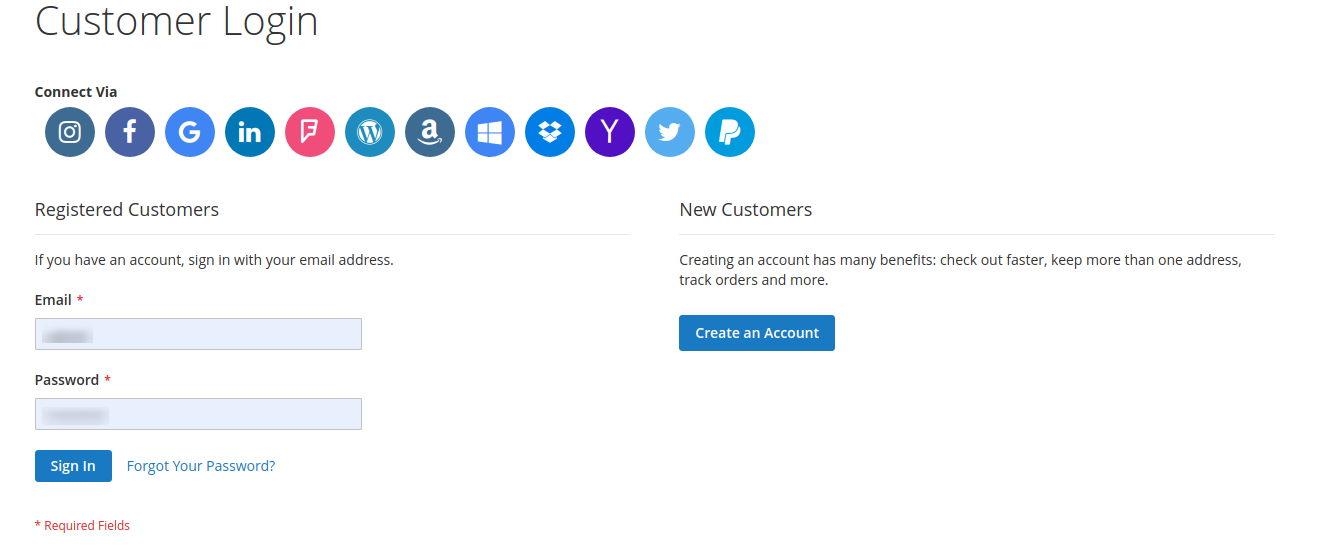
Login Page: If enabled Social Login Block will appear at Customer Login Page.
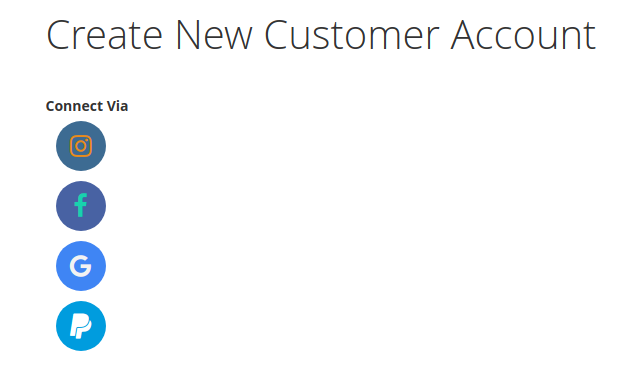
Registration Page: If enabled Social Login Block will appear at Customer Account creation Page.
- Checkout Page:- If enabled Social Login Block will appear at checkout Sign In Popup.
Appendix
How to set Redirect Url?
Let your website URL be ‘www.example.com’. and social login site is “Facebook”.
If Url Rewrite is enabled in your website then redirect URL will be
Unsecured Url: https://www.example.com/socialloginizer/index/vssSoloApi Facebook /
- Secured Url: https://www.example.com/socialloginizer/index/vssSoloApi Facebook /
If Url Rewrite is disabled in your website then redirect URL will be
- Unsecured Url: https://www.example.com/index.php/socialloginizer/index/vssSoloApi Facebook /
- Secured Url: https://www.example.com/index.php/socialloginizer/index/vssSoloApi Facebook /
Note: For Yahoo, URLS will be
Unsecured Url: https://www.example.com/socialloginizer/index/vssSoloApi /
- Secured Url: https://www.example.com/socialloginizer/index/vssSoloApi /
1. How to get Facebook App details?
Steps:
- Go to Facebook Developers Website (https://developers.facebook.com) or click on the link given top right of respective tab in the module configuration page.
- Click on Apps -> Create a new App.
- Follow the instructions on the screen.
- You will get the App ID and App Secret (Click “Show” button).

- Now, go to Settings from left menu.

- Click on “Add Platform” button.
- Select Website.
- Enter your App Domain and Site URL.
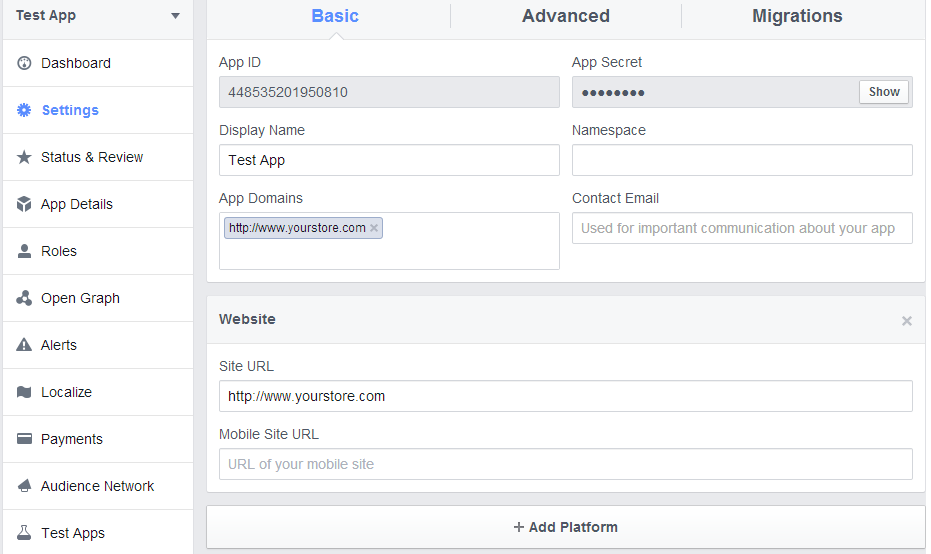
Application Type: Web Application.
Authorized JavaScriptorigins: Your store domain name. (https://www.example.com)
- Click the “Save Changes” button.
- Now, go to the “Status & Review” tab from the left menu and make the Application Live.
2. How to get Google App details?
Steps:
- Go to Google Developers Console (https://console.developers.google.com/projectselector/apis/library)or click on create project link given top left dropdown of the page or at the center of the page.

- Provide name of the project.
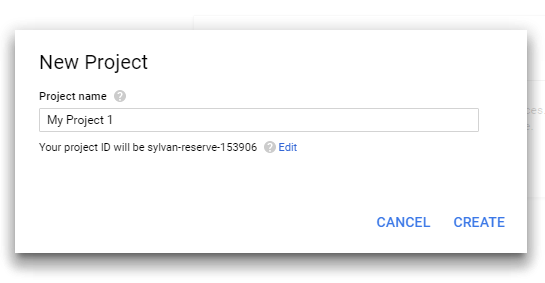
- Create credentials by clicking on “Create Credentials” Button and selection oAuth client id.
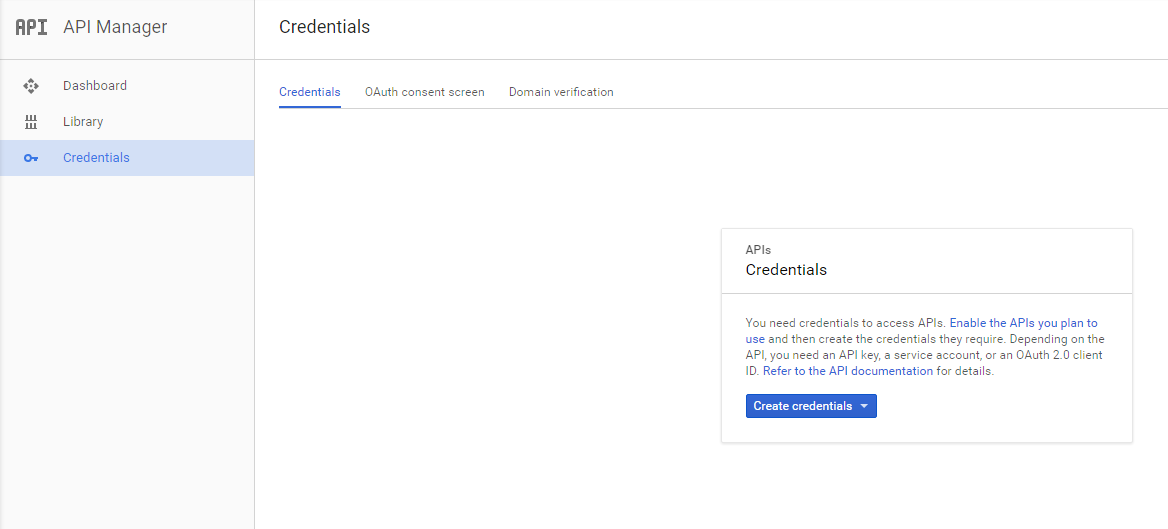
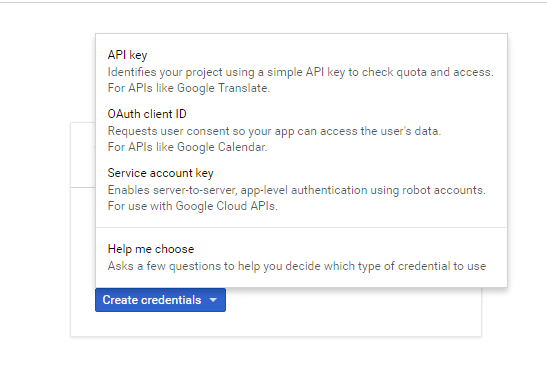
- Credentials can be created only after providing details in oAuth form. Click same and now credentials can be found.
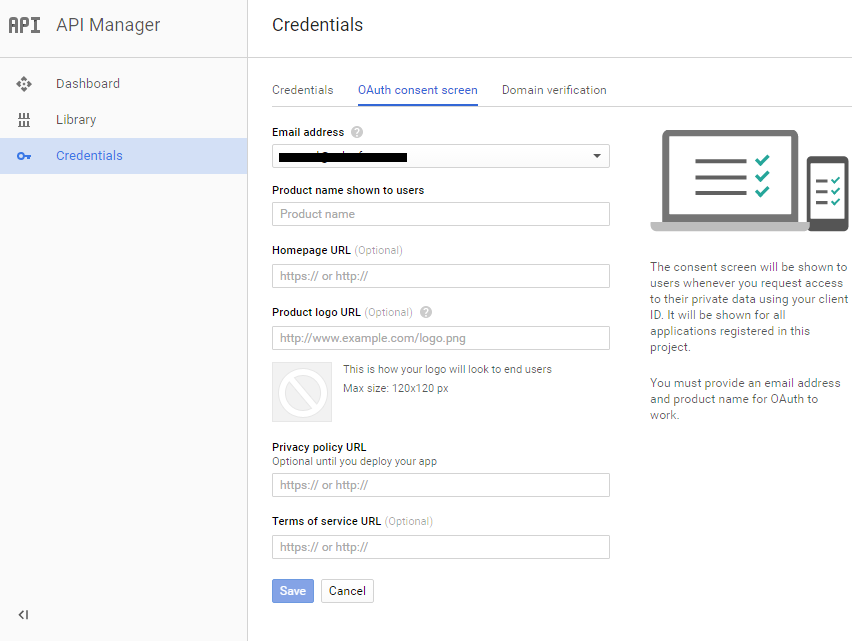
- Redirection URL can be set at credentials screen

3. How to get LinkedIn App details?
Steps:
Go to LinkedIn Developers (https://www.linkedin.com/developer/apps) or click “Create Application” and follow the steps.
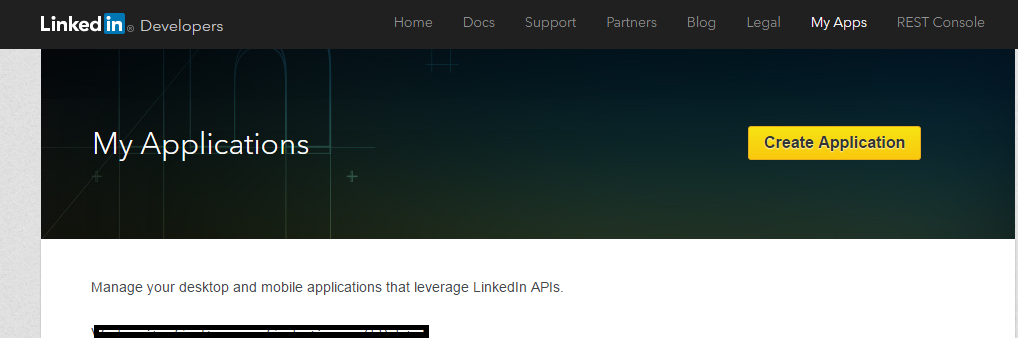
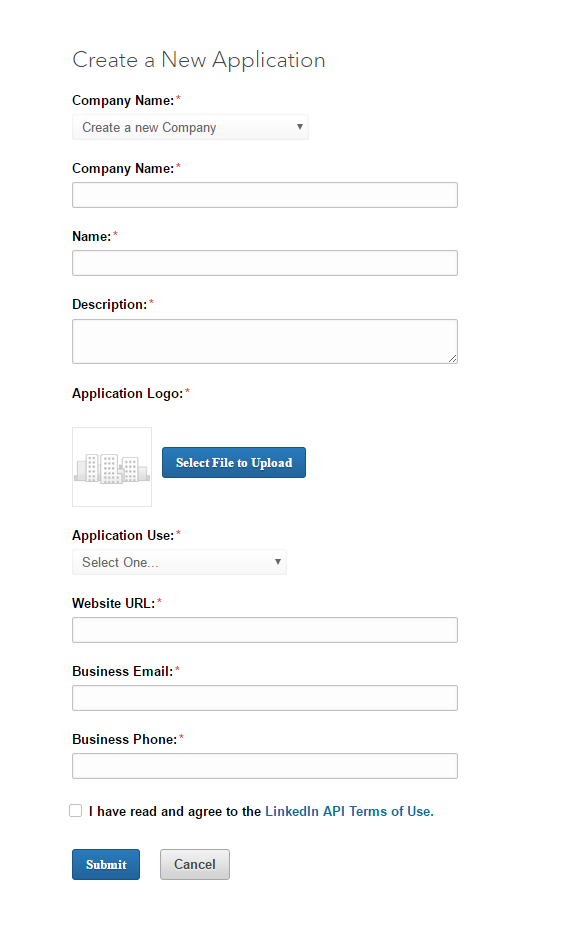
Authentication details can be added in authentication tab.
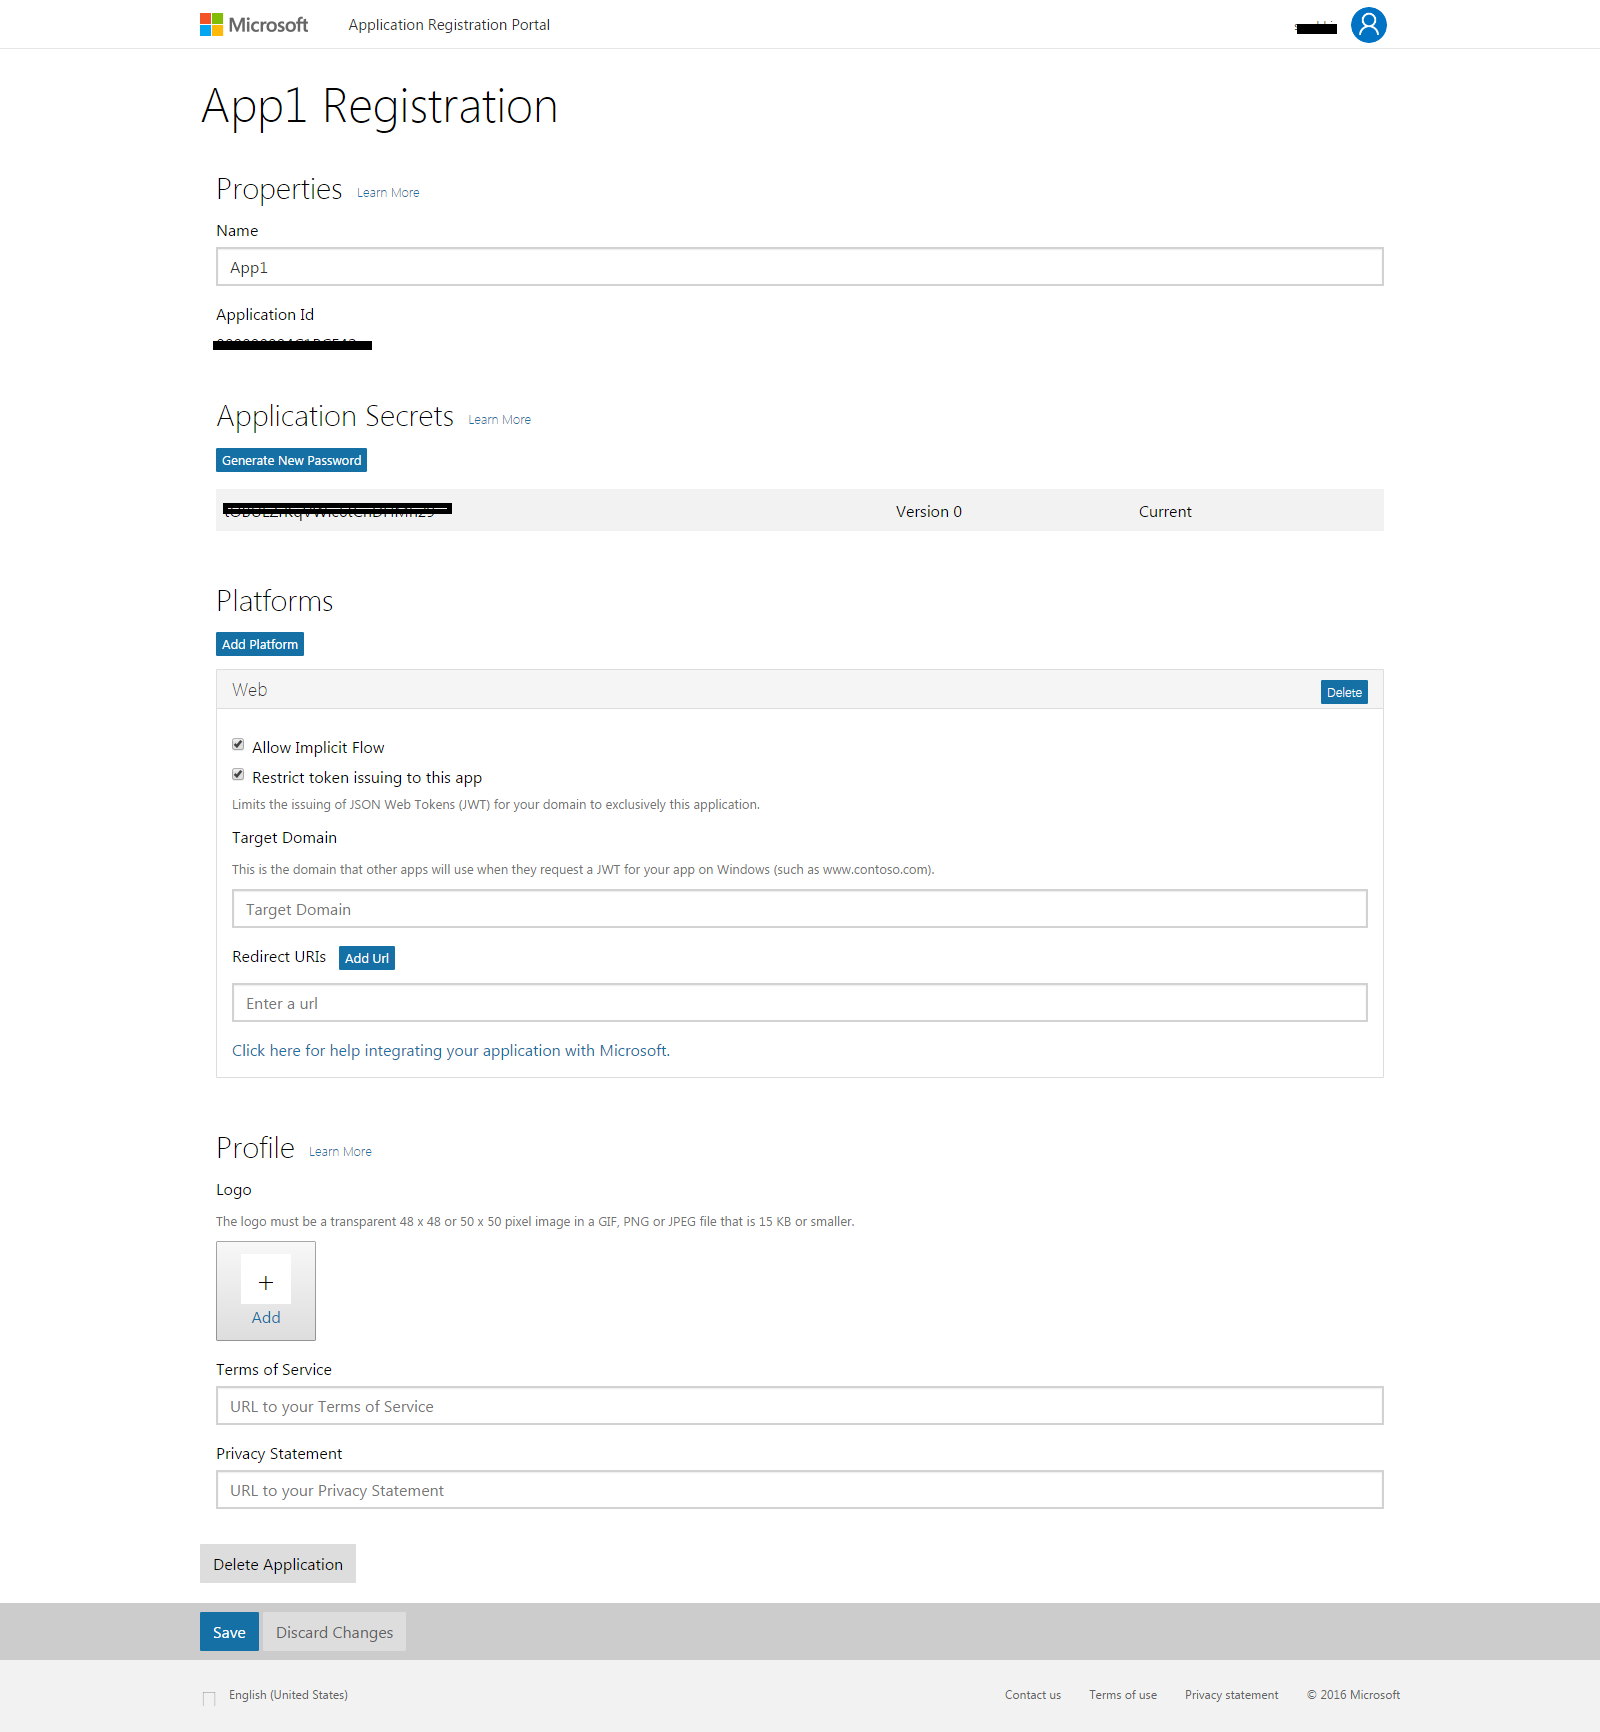
4. How to get Live App details?
Steps:
- Go to Microsoft Development Center (https://apps.dev.microsoft.com/#/appList) or click on Add an App.
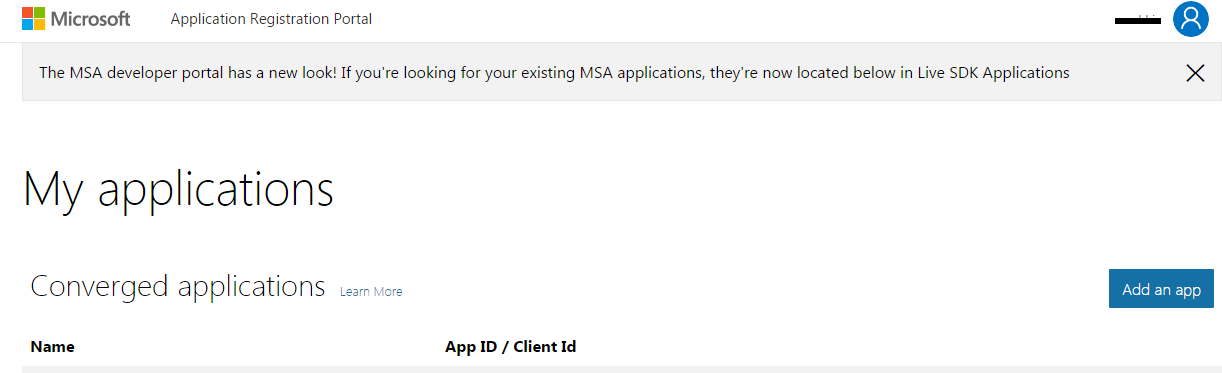
- Fill details in form and click on save.
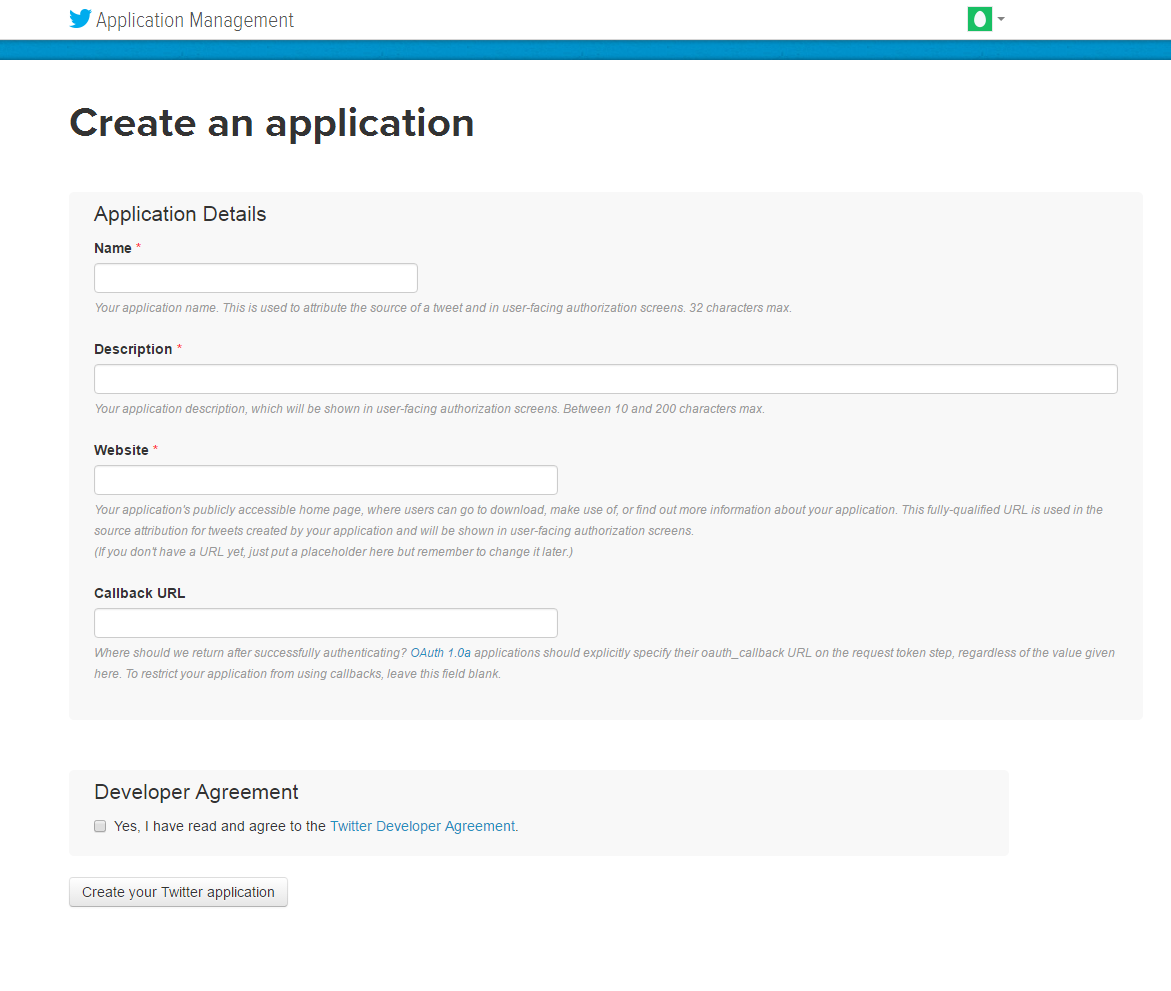
5. How to get Twitter App details?
Steps:
- Go to Twitter App Management (https://apps.twitter.com/) or click on the link given top right of respective tab in the module configuration page.

- Click the “Create New App ”button.
- Enter the Application Details as follows:
- Application Name: Name of your Application.
- Description: 10 to 200 characters description of your application.
- Website: Your store URL.
- Callback URL: Loginizer redirects the page URL of your store.
- Now, Click “Yes, I agree” and then click “Create your Twitter application”.
- Now, select the “API Keys” from the menu below your Application Name and copy your API Key and API Secret.

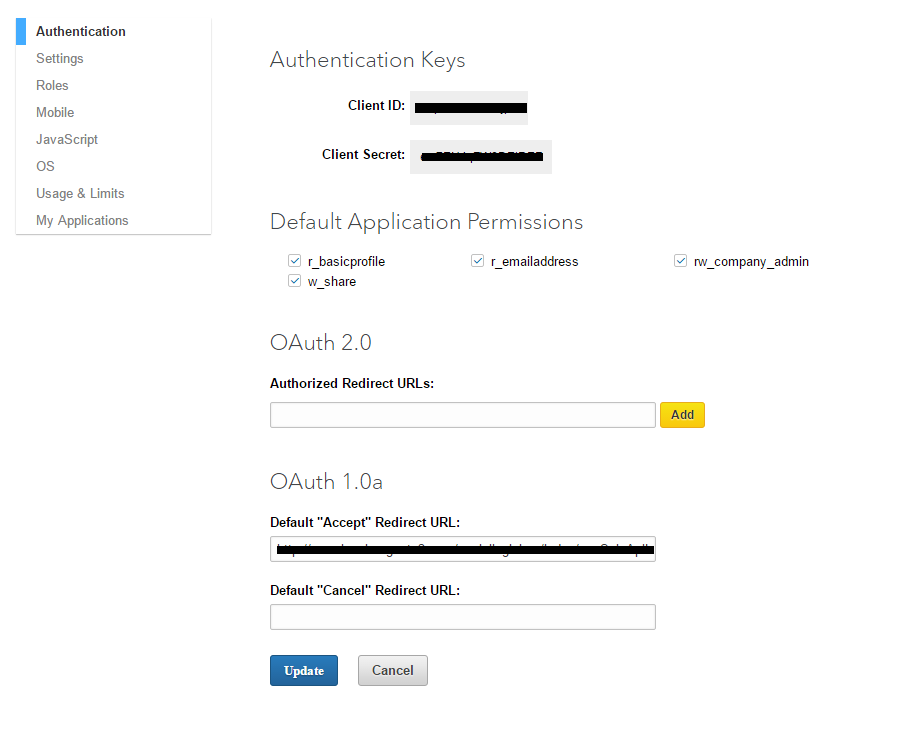
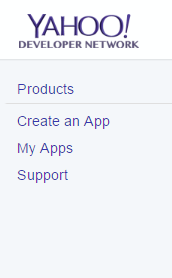
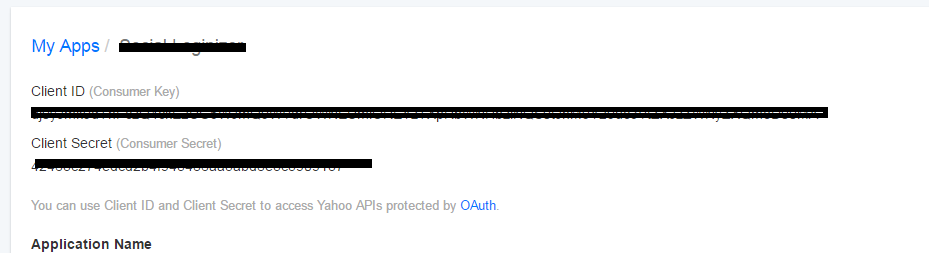
6. How to get Yahoo App details?
Steps:
- Go to Yahoo Developer Network (https://developer.yahoo.com/apps/) and click on the “My Apps” link given top right and header menu of the configuration page.

- Click “Create An App”.
- Fill the required details as per instructions
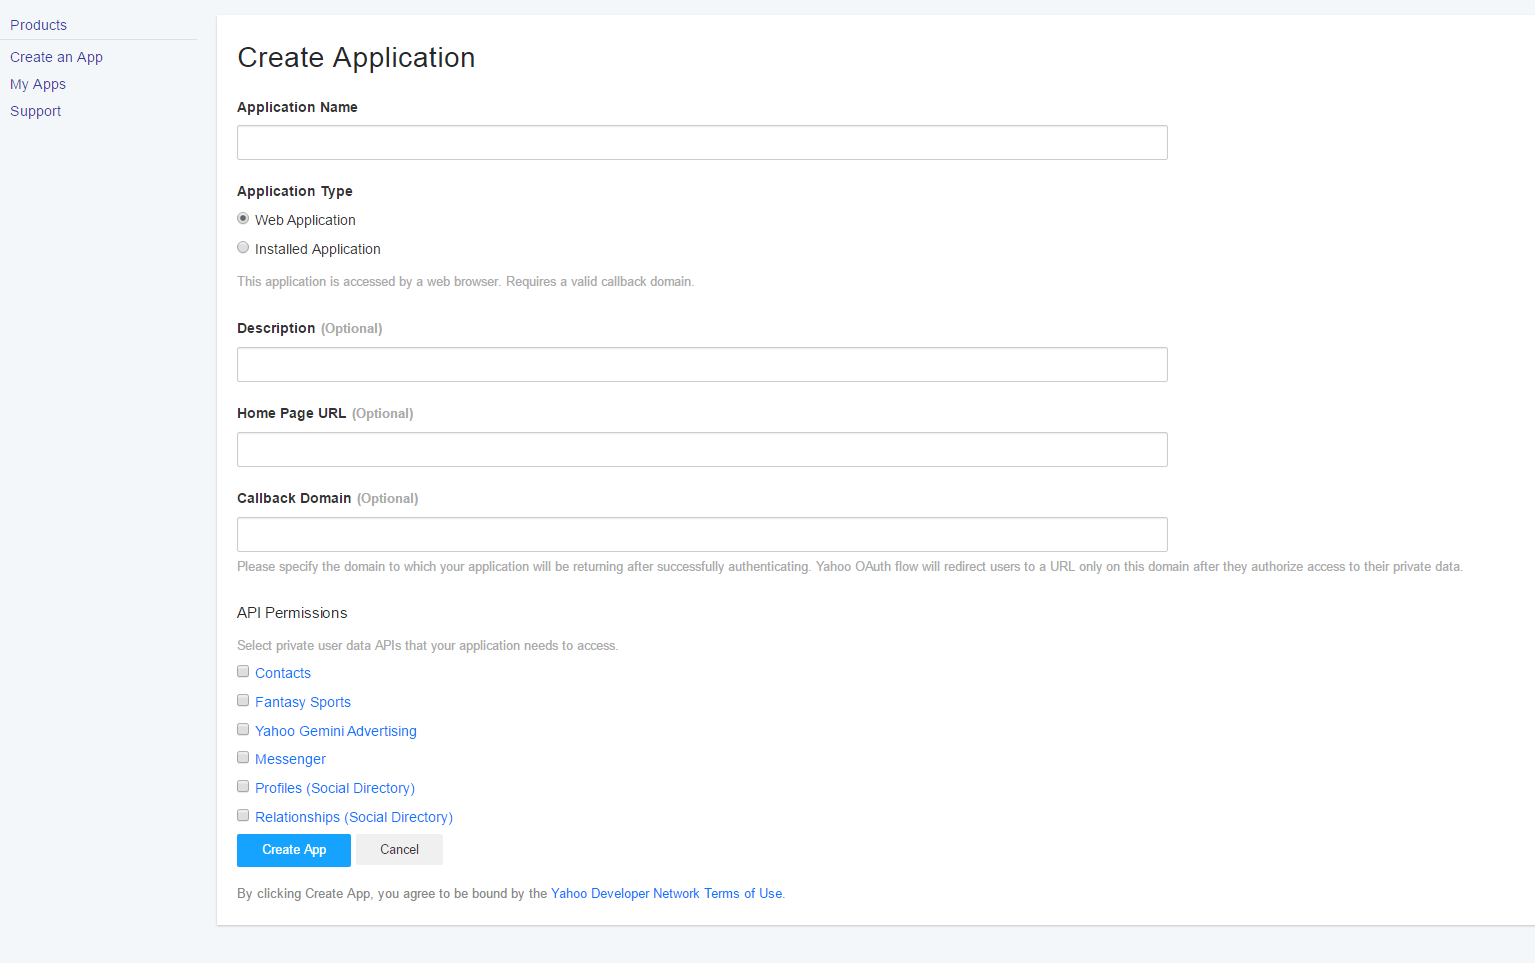
- Copy your “Client Id” and “Client Secret”.
7. How to get Amazon App details?
Steps:
- Go to Amazon Developer Network (https://login.amazon.com/manageApps) or click on link given top right of respective tab in module configuration page.
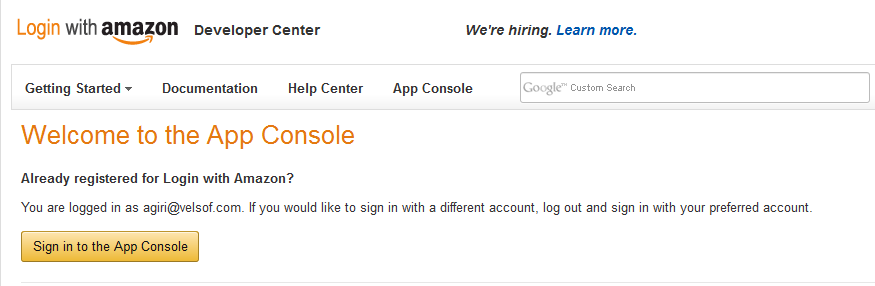
- Click on Sign in to App Console button.
- After successful login to App Console click on Register’s new application button in the top right of the page and you will be redirected to the following page.

- Enter the Application Details as follows:
- Name: Name of your Application.
- Description: Description of your application.
- Privacy Notice URL: Url of privacy policy page of your store.
- Logo Image: Select the optional logo image of your store.
- Click the Save button.
- Now click on Web Settings to get your client id and secret.
- Allowed Return URL: Loginizer redirects the page URL of your store.
Note: To enable Amazon to login into your website, your website “must be secure with HTTPS” otherwise Amazon login will not work.
8. How to get Instagram App details?
Steps:
- Go to Instagram Developer Network (https://instagram.com/developer/clients/manage/#) or click on the link given top right of respective tab in the module configuration page.
- Click on Register a New Client button on the top right of the page.

- Fill the following form
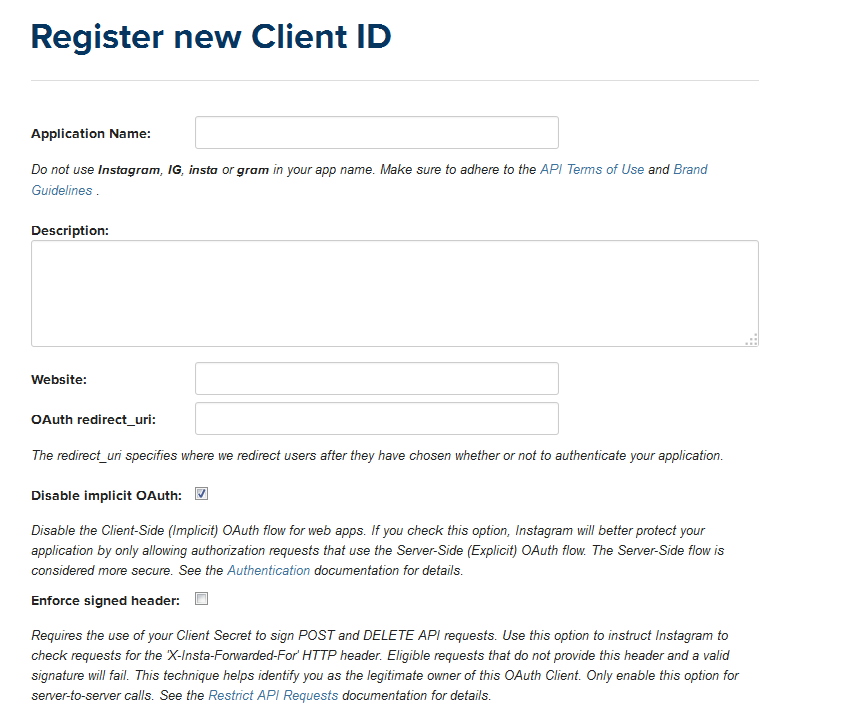
- Set OAuth redirect_uri as Loginizer redirect page URL of your store. (https://www.example.com/module/socialoginizer/index/vssSoloApiInstagram).
- Click Create button then copy and paste Client Id and Secret in the admin panel of the plug-in.
9. How to get Paypal App details?
Steps:
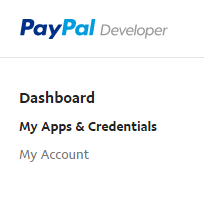
- Go to Paypal Developer Network (https://developer.paypal.com/developer/applications/) and log in.
- Click My Apps and Credentials.
- Now enter name of your Application and click Create App Button.
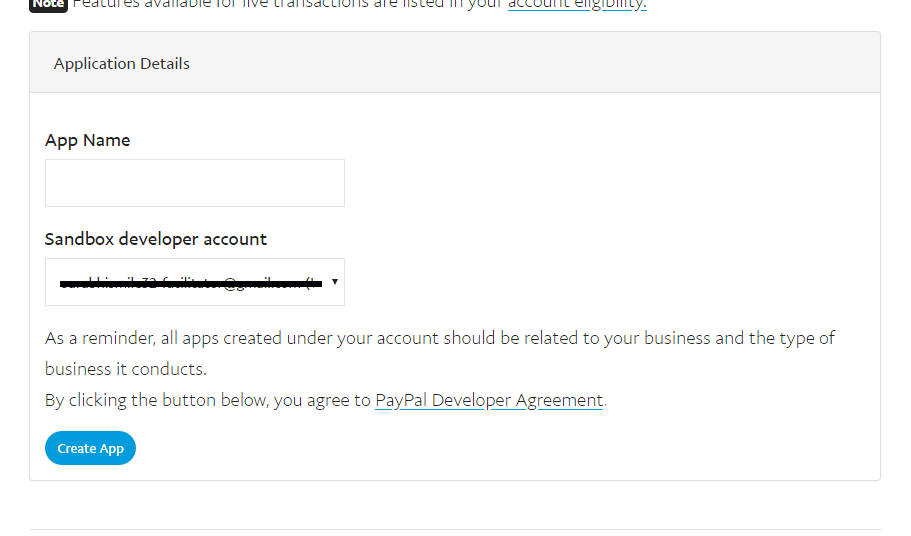
- By default sandbox details is selected, switch it to live and input other app details.
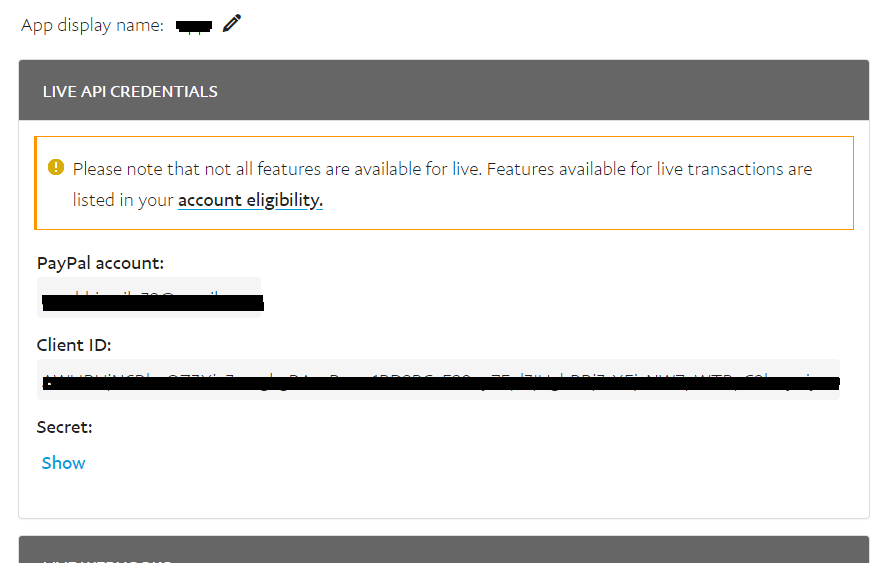
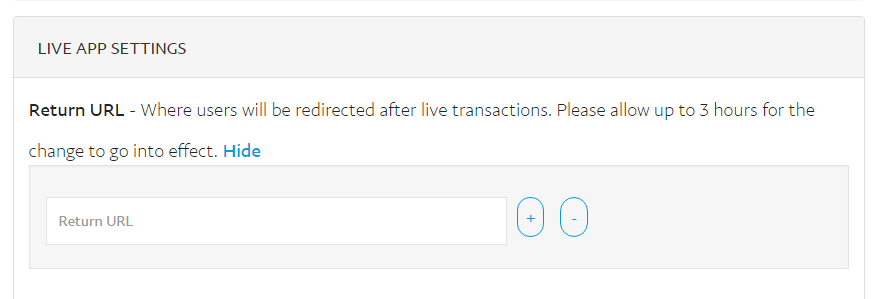
- Now set the redirection URL in live App Settings.
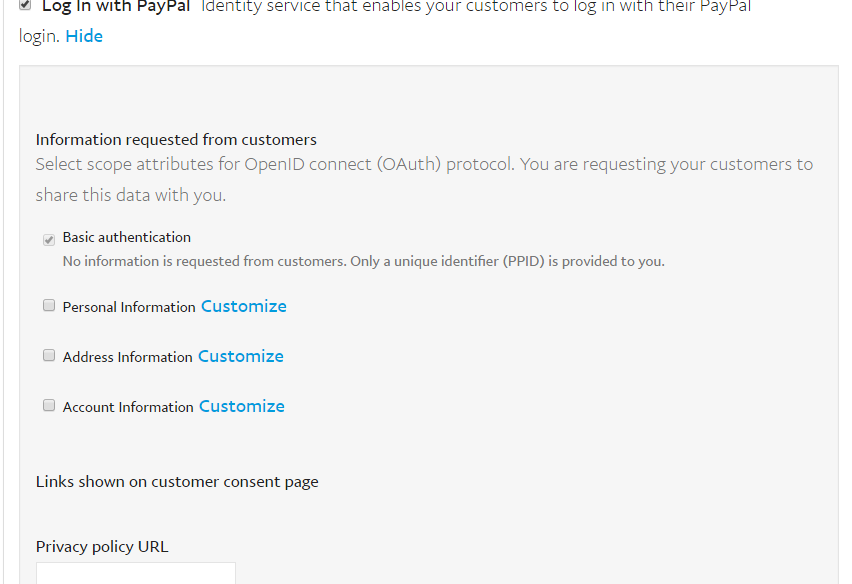
- Check Login with PayPal and save details.
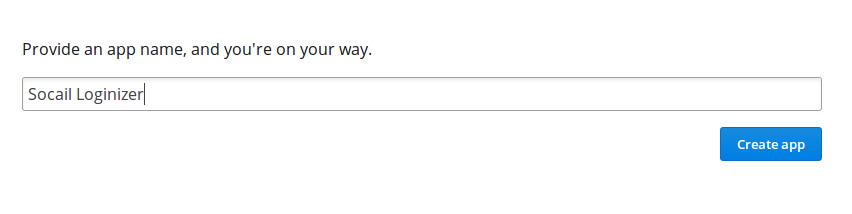
10. How to get Dropbox App details?
Go to Steps:
Note: To enable Dropbox login into your website, your website “must be secure with HTTPS” otherwise Dropbox login will not work.
Go to Dropbox Developer Website (https://www.dropbox.com/developers/apps) or click on link given bottom of the respective tab in the module configuration page.
- Click On the Create App button and provide a name for Application.
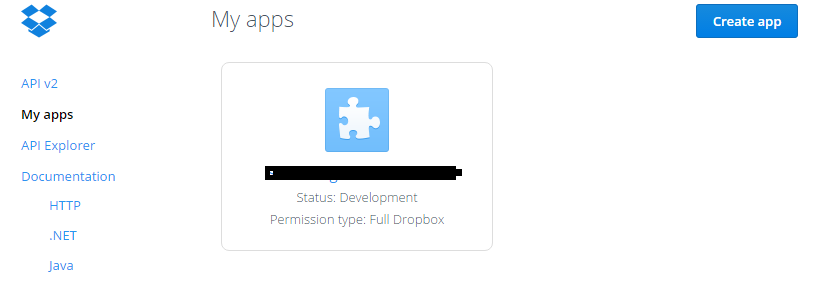
- Fill up the details , set redirect url and save the settings.
- Copy and paste the key and secret in plugin admin panel.
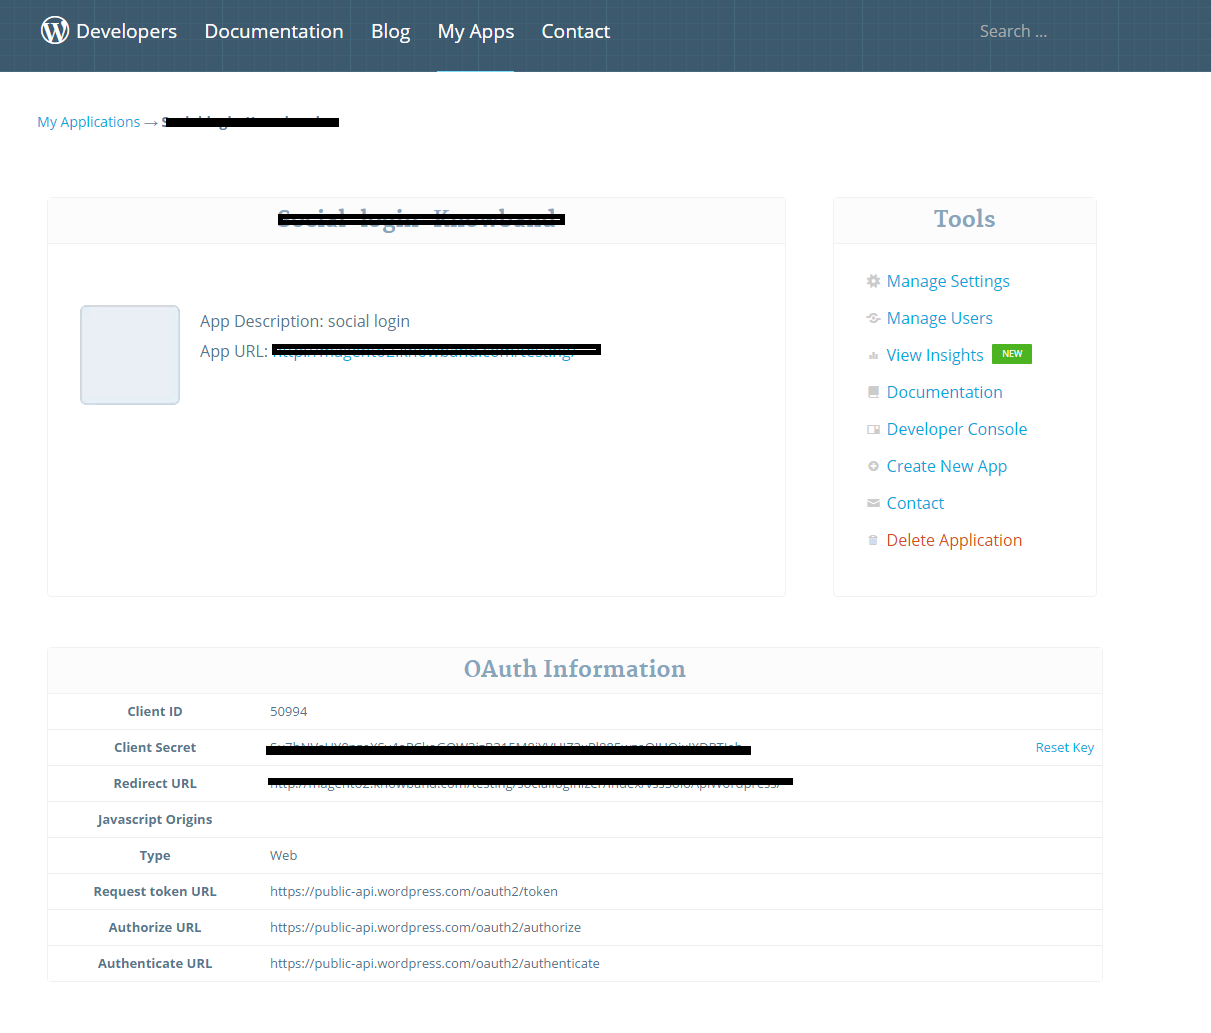
11. How to get WordPress App details?
Steps:
1. Go to WordPress Developer Website (https://developer.wordpress.com/apps/) or click on link given bottom of respective tab in module configuration page.
2. Click On the “Create New Application” button and provide a name for Application.
- Fill up the details and save the application.
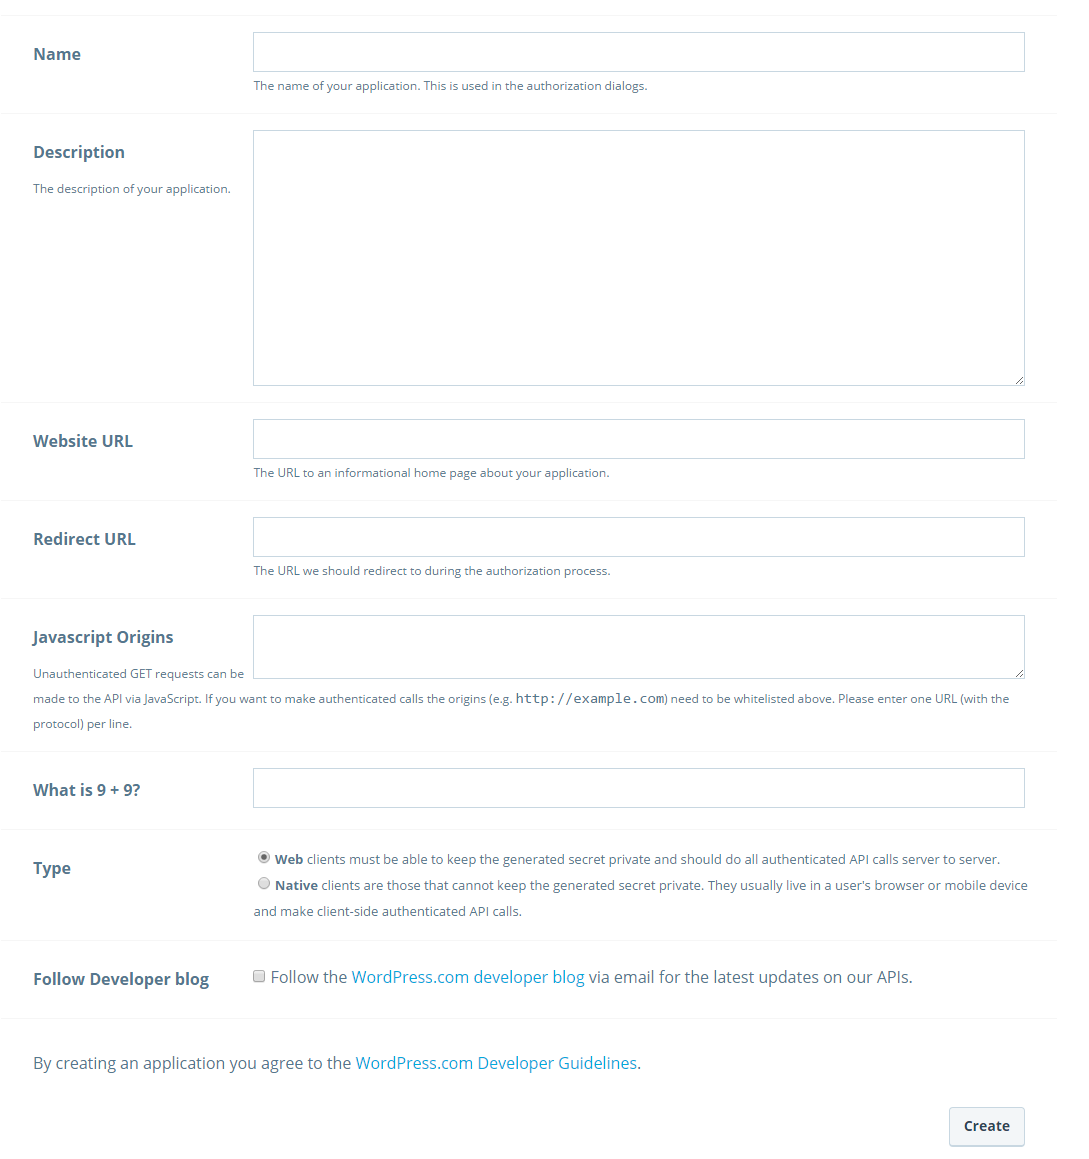
- Copy and Paste the credentials in plugin admin console.
12. How to get FourSquare App details?
Steps:
- Go to the foursquare developer website(https://foursquare.com/developers/apps) or click on the bottom link in the Plugin admin console.
- Click on the ‘Create a new app’ button.
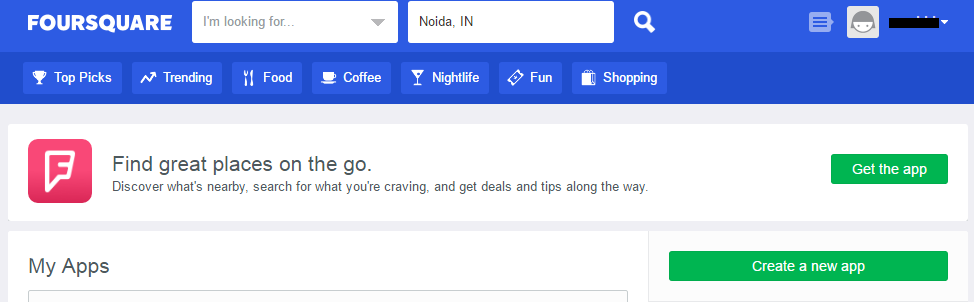
- Fill the details , set the redirect URL and save the application.

- Copy the credentials.

For more details about this Magento 2 Facebook Login plugin, visit here:
Magento 2 Social Login Module link
Magento 2 Social Login module Admin Demo Link
Magento 2 Social Login plugin Front Demo Link
For more support and information, feel free to contact us via email at support@knowband.com anytime.
