Introduction
Knowband offers Magento 2 auto subscribe extension which allows the store admin to showcase an attractive subscription pop-up or subscription box on the eCommerce store. Now the e-merchant can get more email subscribers for sending the email newsletter. By showing an attractive subscription popup on the homepage the admin can improve the chances of more subscription. If you are an eCommerce store admin and want to get more email subscriptions then you can apply for this Magento 2 email newsletter extension. The advance feature of this Magento 2 Mail Chimp extension is that it can subscribe the store visitors while checkout or registration.
This module will let you add Email ID of the customers, automatically into your MailChimp and Constant Contact’s contact list as soon as they register themselves or checkout items at your online store. Visitors can also subscribe themselves through auto-subscribe box or through pop up that appears on the home page.
Features:
- Easy to install and configure.
- It is easy for the admin to activate this Magento 2 auto subscribe extension.
- This Magento 2 email subscribe module is highly customizable.
- There is no need to change codes for implementation.
- You don’t need any technical help for applying this functionality.
- The Magento 2 newsletter subscribe module allows the store owner to show subscription box on every page or selective pages.
- There is an option in Magento 2 newsletter pop up to show subscription box in content or sidebar as per the requirement.
- This Magento 2 module offers the admin to design form as per the requirement.
- You can set the look and feel of this subscription box and subscription popup without any code changes.
- The admin can set the subscription pop-up display interval from the admin panel.
- The store admin can display a success message just after completion of subscription process.
- This Magento 2 Mail Chimp extension supports MailChimp and constant contact API.
- The Magneto 2 MailChimp extension automatically passes the email id information from the eCommerce store to the MailChimp/Constant Contact account.
- The e-merchant can auto subscribe the store visitors while checkout, registration or guest checkout.
- Fully customizable email templates are available for sending personalized emails.
- The Magento 2 Mail Chimp extension offers a user friendly interface.
- Magento 2 email subscription popup offers mobile responsive layout.
- This email newsletter extension is theme compatible.
Installation Guide of Magento 2 Auto Subscribe
- Download the zip from our Magento Plugin Store & unzip it.
- Open the extracted directory & you will see following folder structure.
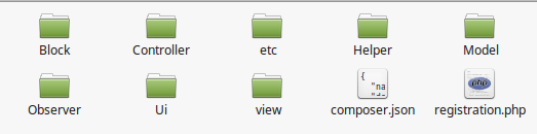
3. Create a folder {Magento root}/app/code/Knowband/Autosubscribe.
4. Copy the extracted content in the above folder.
5. Run the following command in Magento root
- composer require constantcontact/constantcontact
- composer require drewm/mailchimp-api
Enable Autosubscribe
Enable Autosubscribe Run the following commands in your terminal to enable autosubscribe plugin
- php -f bin/magento module:enable –clear-static-content Knowband_Autosubscribe
- php -f bin/magento setup:upgrade
Configure Autosubscribe
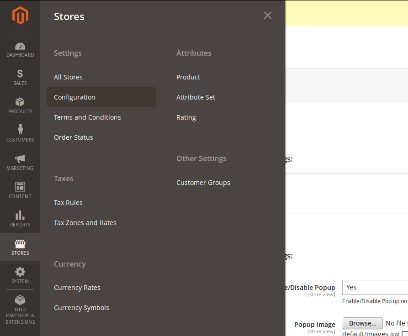
Log into your Magento Admin, then goto Stores -> Configuration -> Knowband -> Autosubscribe and configure the plugin as shown below:
User Manual
Prerequisites
Php version 5.6 or greater
To access the API of constant contact, one must use the php version equal or higher than 5.6 . Unless your server is running the required php version, you will not be able to successfully install this plugin.
MailChimp
Before you may use this module, you must have a valid account with MailChimp and one or more lists created into it. Note that, you must also have the access right to alter your email subscribers list. Below we have mentioned the data which plugin needs for successful installation –
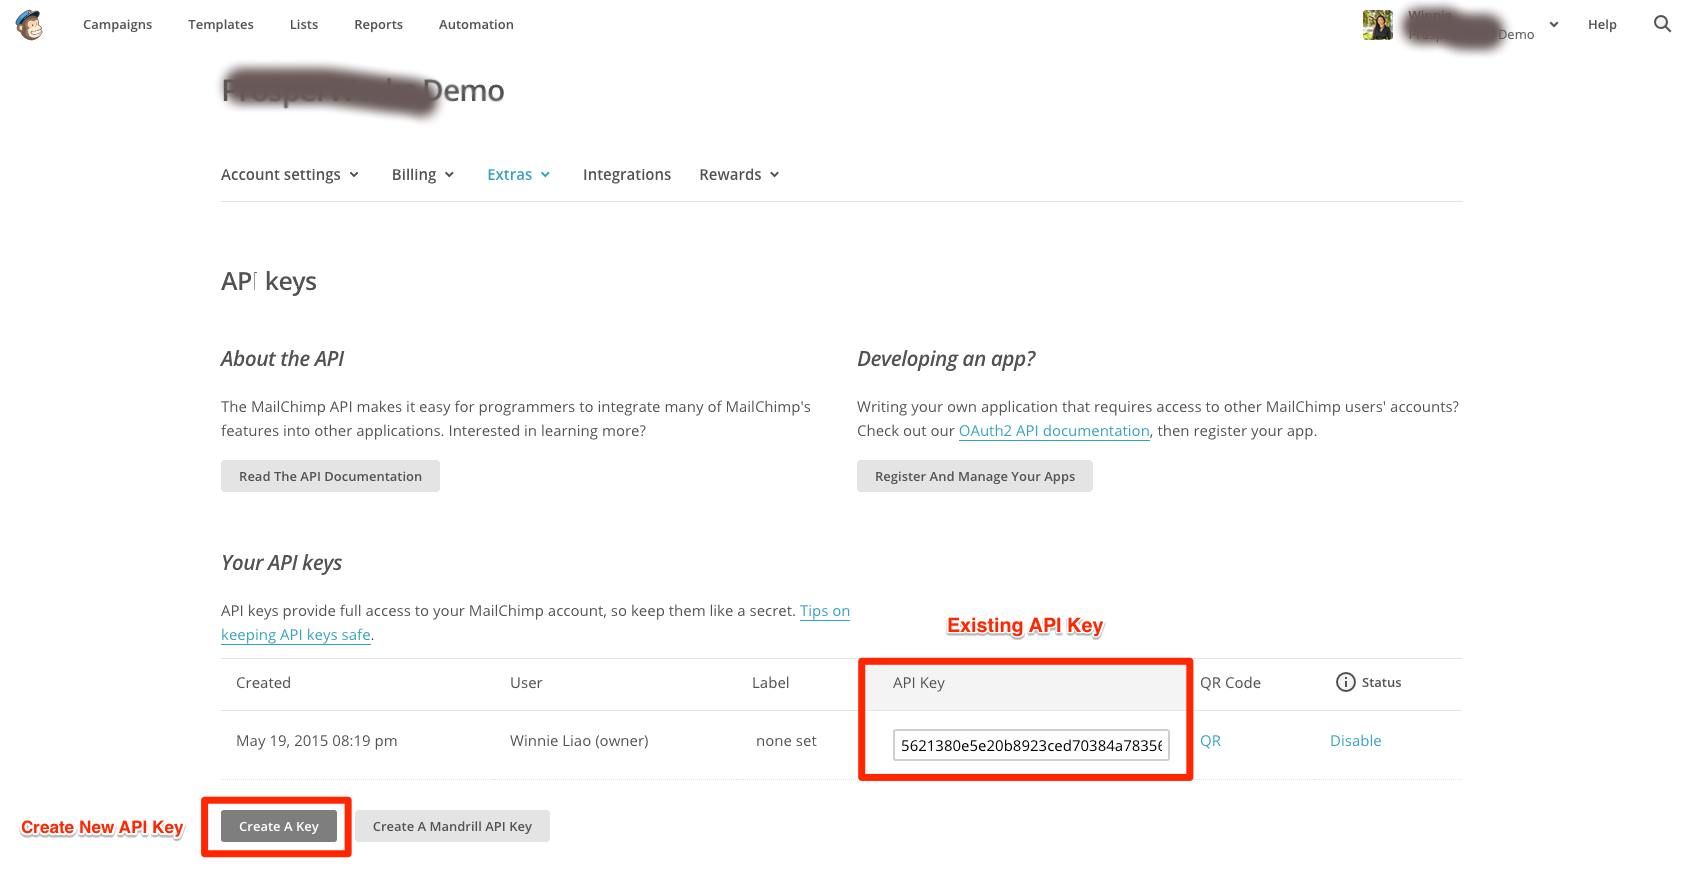
API Key: In MailChimp, users with Manager permissions can generate and view their own API keys.
- Click your profile name to expand the Account Panel, and choose Account.
- Click the Extras drop-down menu and choose API keys.
- Copy an existing API key or click the Create A Key button.
- Name your key descriptively, so you know what application uses that key.
Constant Contact
You need to have a valid account with constant contact and one or more lists created into it. Note that, you must also have the access right to alter your email subscribers list. You will need to provide these for this module to work.
API Key: You can get API Key as follows
- Open the Constant Contact API Key Management Portal (powered by Mashery) https://constantcontact.mashery.com/
- Log in using your Mashery ID or create one by clicking “Register” for a user account.
- Click the API Keys tab.
- Click Get API Keys.
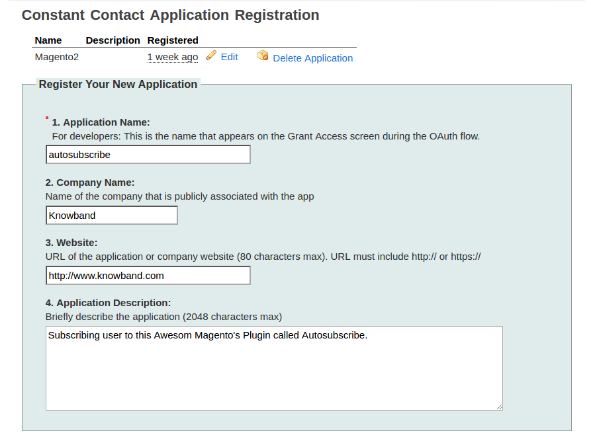
- Fill out the Constant Contact Registration Application.
- Click Register Application.
Enter the app details on registration form as shown below:
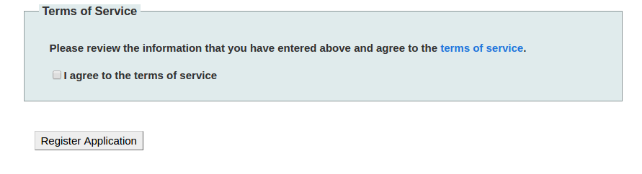
Check the I agree to terms of service and click Register Appliation as shown below:
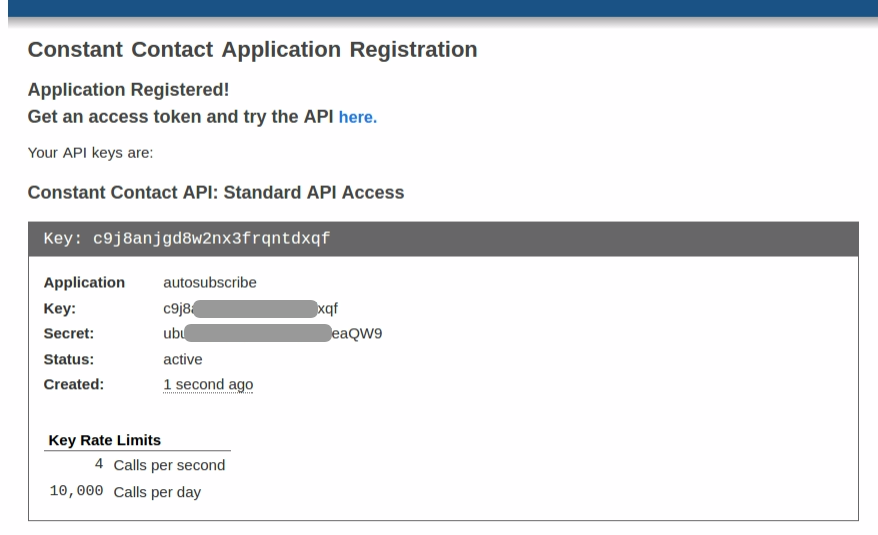
After successful registration, API-Key will be shown as follows:
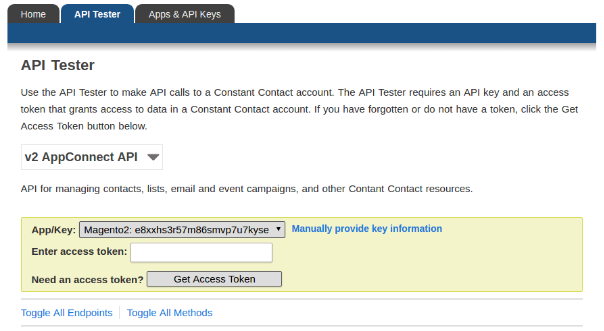
Access Token: To get access token. Click API Tester, enter you API Key and click Get Access Token as shown in the screenshot below:
In case you are still facing problem with getting your API Key and Access Token, please follow the instructions as mentioned in link https://developer.constantcontact.com/api-keys.html
Admin Settings
To access Autosubscribe plug-in, go to Stores -> Configuration -> Knowband -> Autosubscribe
Store admin will have various settings options categorized as follows:
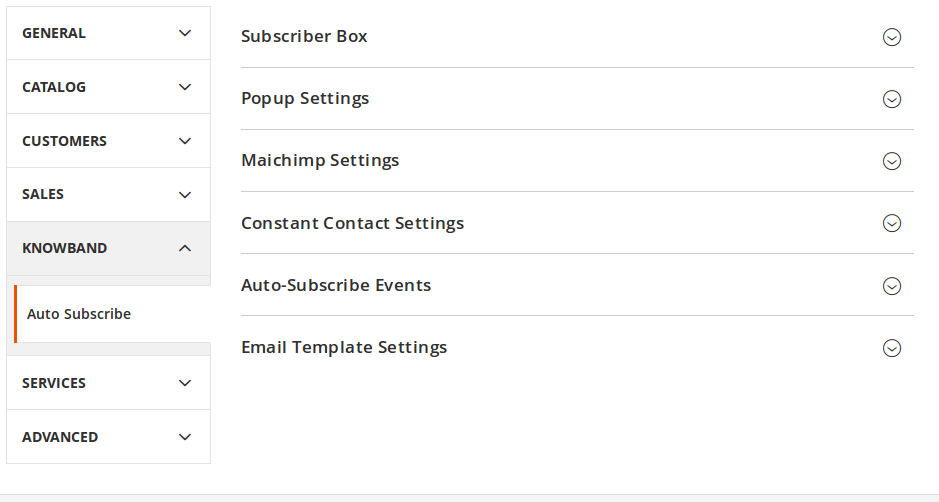
Subscriber Box Settings
Admin can customize the subscription box to be displayed in store front by using the following settings option available.
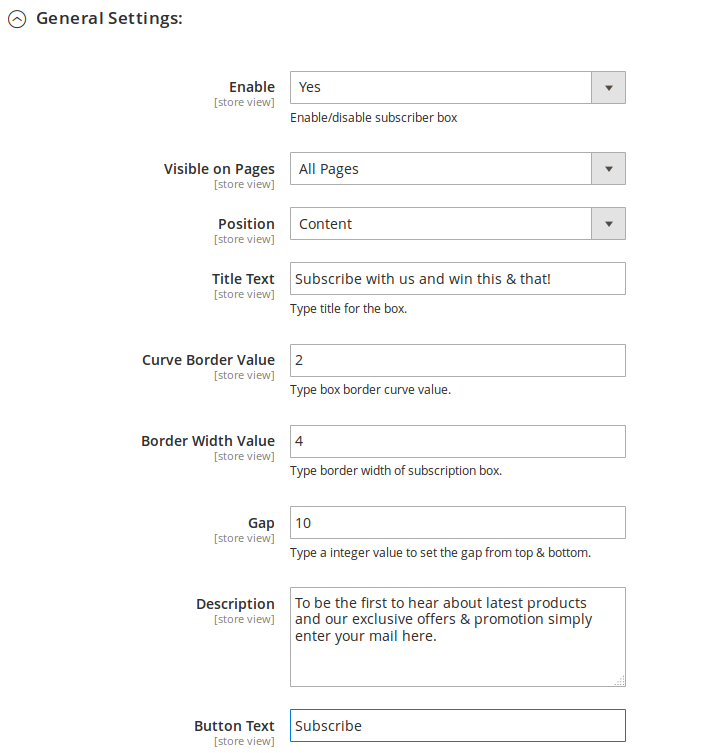
Enable/Disable: Admin can choose to enable or disable the subscription box by turning this button on or off. One cannot view subscription box on front.
Visible on Pages: Admin can choose whether the subscription box should be visible on all pages or specific pages. On selecting specific page user will be shown a list of pages from which user can select.
Position: Admin can select the position of box. We can show the box either on main content box or in the sidebar.
Title Text: Admin can enter the text to be shown for the title of box. By default, it is set to “Subscribe”.
Curve Borders Value: You can enter the radius for curve borders. This value will be applied to the four corners of the subscription box on front.
Box Border Width: You can set the border width for box.
Description: You can enter the text for describing to visitors, the advantages of subscribing to your email list here.
Button text: You can change the text for button in this text box.
We have also added the code snippet of module in case admin wants to add the subscription box manually on CMS or any other page.
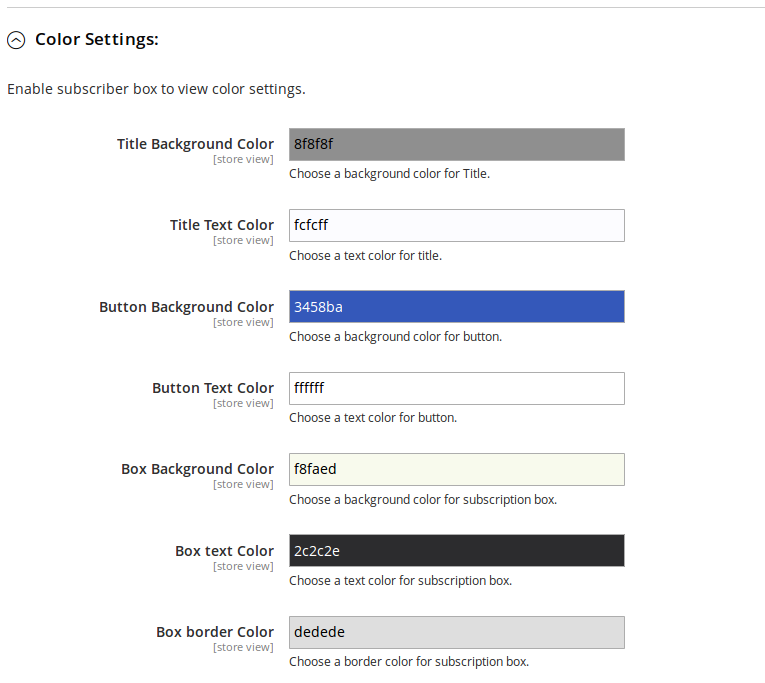
Color Scheme
We have added the color picker option to set the background color and text color for different sections of subscription box.
Pop up Settings
Admin can customize the pop up box too. If this box is enabled then it will show on home page only.
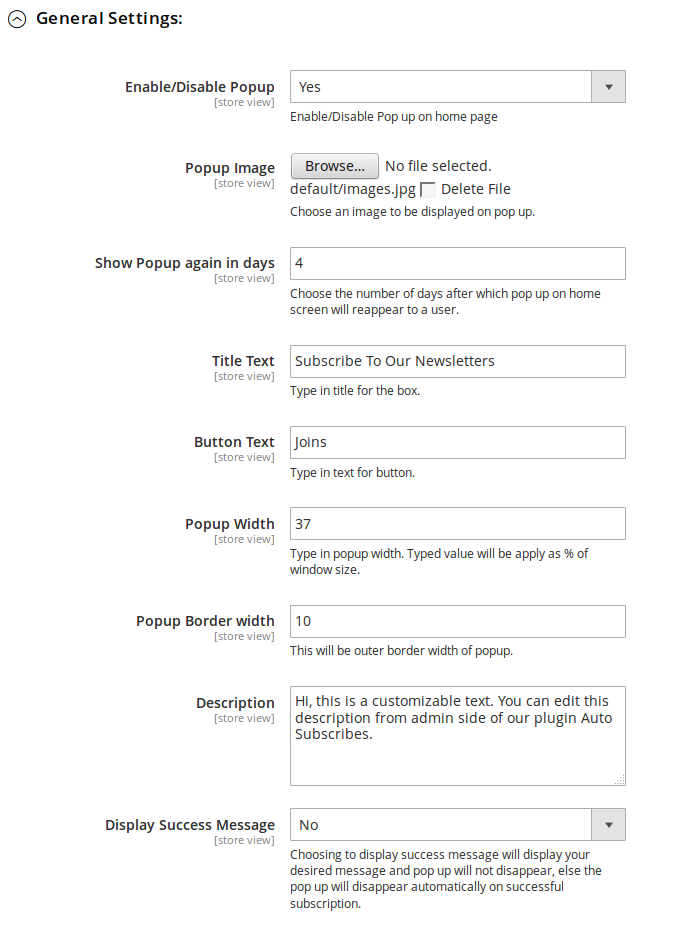
Enable/Disable Pop up: Admin can choose to enable or disable the pop up display on home page. One cannot view subscription pop up on front until this is enabled.
Pop up Image: Admin can choose to show any image on the pop up box, or choose to not show any image at all.
Show pop up again in (days): You can choose the duration (in days) for which the pop up will not reappear from the day the pop up appeared first time on a user’s system. If you want pop up to appear only once in a lifetime, type in a large number of days, for say 999. If you want it to appear every time a user lands home page, you should choose to type value as 0.
Title Text: You can change title of your pop-up from this option.
Description Text: Description appearing on the pop up can also be customized by adding desired text .
Button Text: Button text and its font color can also be set from admin panel.
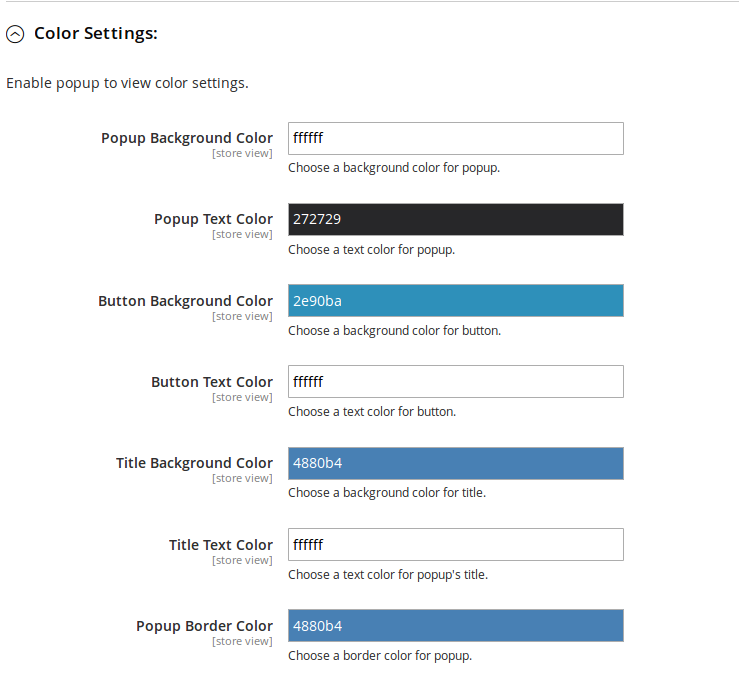
Button background color: You can also change the background color of your button to go with your theme.
Display Success Message: Turning it off means that the moment a successful subscription takes place through this pop up, it will get automatically closed without showing any success message to the user. Turning it on will display a customized success message on the pop up box after successful subscription.
Success Message: Here you must enter the text to be displayed and choose the desired color for the text.
Color Scheme: We have added the color picker option to set the background color and text color for different sections of popup box.
MailChimp
In this tab, admin can choose from the lists in his/her MailChimp account where emails should be added. Initially the Default List dropdown will contain “No options found”.
MailChimp API key: Admin needs to enter API key to fetch lists from his/her account. As soon as admin enters the key and clicks outside the text box or press enter button, request is sent and lists (if any) are fetched and displayed in a drop down box.

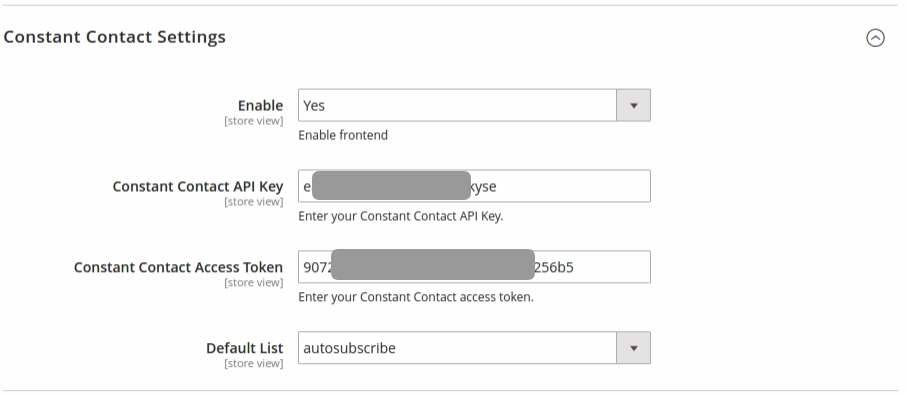
Constant Contact
In this tab, admin can choose from the lists in his/her Constant Contact account where emails should be added. IInitially the Default List dropdown will contain “No options found”.
Constant Contact API key: Admin needs to enter API key. As soon as admin enters the key and clicks outside the text box, request is sent and lists (if any) are fetched and displayed in a drop down box.
Constant Contact Access Token: Admin needs to enter access token along with API Key. As soon as admin enters the token and clicks outside the text box, request is sent and lists (if any) are fetched and displayed in a drop down box.
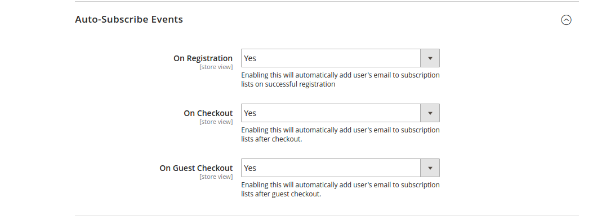
Auto Subscribe Events
Auto-subscribe events are the events on which the users can be subscribed to the configured lists in admin automatically. On such events, user will not be notified of being added to the subscription lists you have chosen in admin.
Register: Turn Register to ‘on’, if you want a user to be automatically added to your list on successful registration.
Checkout: Turn Checkout to ‘on’, if you want a user to be automatically added to your list on successful checkout.
Guest Checkout: Turn Guest Checkout to ‘on’, if you want a user to be automatically added to your list on successful guest checkout.
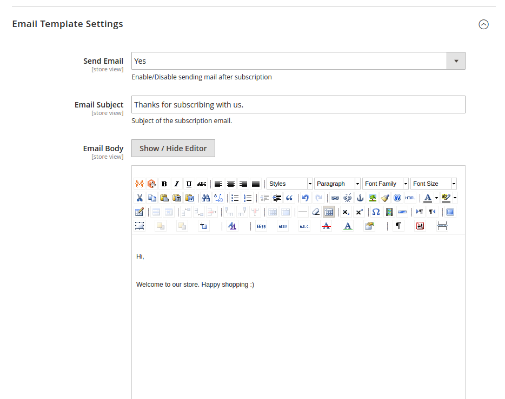
Email Settings
Email settings will be used to set the email template that will send to customer after successful subscription. Admin can disable/enabled the email if he don’t want to send the email to customer.
Store Front
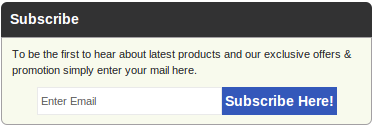
Auto-subscribe Module
On the front end, users will have the option to subscribe themselves by clicking on subscribe button. The module will look like following screen with default settings.
In content section

In sidebar
Pop up
On the user’s end, pop up will appear something like this screen below, depending upon your chosen display settings.
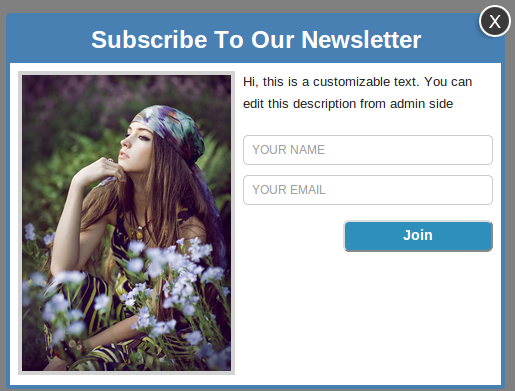
To subscribe through this pop up, type in your email (required) and name (optional), and then click on the button below. On successful subscription, either the pop up will disappear automatically or a custom message provided by you in admin settings will start appearing on the pop up.
For more details about Magento 2 extensions visit Knowband store.
Knowband Magento 2 auto subscribe extension link.
Knowband Magento 2 email subscription popup admin demo link.
Knowband Magento 2 MailChimp extension front demo link.
Magento 2 email subscribe user manual link.
Please contact us at support@knowband.com for any query or custom change request as per your business requirement.
