ChatGPT-Powered Content Creation and Translation for Opencart Made Simple

Running an online store with Opencart can be a rewarding experience, but creating quality content and translating it into multiple languages is often time-consuming and challenging. Especially, when it comes to bulk store management.

That’s where Knowband’s new Opencart ChatGPT content generator comes in. This powerful extension simplifies content creation and translation, making it effortless to generate engaging product descriptions, category descriptions, product & category titles, and more—all while ensuring seamless translations for global audiences.

If you’re an Opencart store owner, this tool could be a game-changer. Let’s explore how the ChatGPT Extension for Opencart can revolutionize your store’s content strategy and improve your workflow.

Why Content Matters in eCommerce?

Content plays a crucial role in any eCommerce store. Furthermore, high-quality product descriptions and well-crafted meta tags can boost search engine rankings and engage customers. However, manually writing all this content can be tedious, especially when managing a large inventory.

Therefore, for the store owners targeting international markets, the challenge doubles. Translating content into multiple languages while maintaining accuracy and tone is a significant hurdle. Fortunately, with the AI-powered translation Extension for Opencart, you can overcome these obstacles easily and efficiently.

Introducing the Opencart ChatGPT Content Generator Extension:

Knowband’s Opencart ChatGPT content generator Extension is designed to make content creation and translation simple, fast, and effective. Furthermore, powered by OpenAI’s ChatGPT Engine v3.5 and v4, this extension can help you create high-quality, SEO-optimized content for your Opencart store in just a few clicks.

Whether you need detailed product descriptions, category descriptions, or optimized meta tags, the AI content generator Opencart is equipped to handle it all.
Moreover, with its user-friendly interface, even non-technical users can take advantage of its capabilities.

Key Features of the Opencart ChatGPT Content Generator Plugin:

AI-Driven Content Generation: Quickly generate SEO-friendly content for product pages, categories, and blogs.

Seamless Translation: Translate your store’s content into multiple languages with the Opencart ChatGPT content translator Extension.

Customizable Output: Tailor the tone and style of the generated content to suit your brand voice.

SEO Optimization: Ensure your content aligns with search engine best practices for better rankings.

Time-Saving Automation: Focus on growing your business while the plugin handles content creation and translation.

Why Choose ChatGPT Extension for Opencart?

If you’re wondering why this extension stands out, here are a few compelling reasons:

1. Improved Efficiency:

The Opencart ChatGPT content generator Plugin allows you to save hours of work by automating content creation. Instead of spending time brainstorming and writing, let the AI handle it for you.

2. Global Reach with Translations:

With the Opencart ChatGPT content translator Plugin, you can break language barriers effortlessly. Moreover, the AI ensures accurate and contextually appropriate translations, helping you cater to customers worldwide.

3. Boosted SEO Performance:

Search engines favor stores with fresh, relevant, and keyword-rich content. Thus, the Opencart ChatGPT SEO Content Generator helps you create such content, improving your chances of ranking higher in search results.

4. Cost-Effective Solution:

Hiring professional writers and translators can be expensive. The AI content generation Opencart extension offers a budget-friendly alternative without compromising on quality.

Practical Applications of the Opencart ChatGPT Content Generator Plugin!

1. Product Descriptions and Titles

Struggling to write compelling product descriptions and titles? The Opencart ChatGPT content generator can create detailed and persuasive descriptions and product titles that highlight the features and benefits of your products.

2. Meta Tags and SEO Content:

Improve your store’s visibility with optimized meta titles and descriptions for products and categories generated by the Opencart ChatGPT SEO Content Generator.

3. Multilingual Store Management:

Expand your reach with the Opencart ChatGPT content translator Extension. Translate your content into multiple languages, ensuring accuracy and cultural relevance.

The ChatGPT Content Generator is also Available for Prestashop

SHOP NOW

Benefits of Using the Opencart ChatGPT Content Translator Plugin

Faster Time-to-Market: Launch products and campaigns faster with automated content generation.

Enhanced Customer Experience: Provide clear and engaging information to your customers in their preferred language.

Scalable Solution: Manage content for hundreds or thousands of products effortlessly.

SEO-Friendly Content: Improve your store’s search engine rankings with AI-optimized content.

Final Thoughts!

The Opencart ChatGPT Content Generator/Translator Extension is more than just a plugin; it’s a powerful tool that can transform the way you manage content on your Opencart store. Whether you need help with creating engaging product descriptions or translating content for global customers, this extension has you covered.

Embrace the future of eCommerce with the ChatGPT Extension for Opencart and take your store to the next level. Simplify your workflow, save time, and deliver exceptional experiences to your customers with this innovative solution.

Ready to revolutionize your store’s content strategy? Install the Opencart ChatGPT content generator Plugin today and experience the difference AI-powered tools can make!

How to Create a Custom Tab in the Back Office Product Page in PrestaShop

PrestaShop, with its powerful and flexible framework, allows developers to customize various aspects of the platform to meet specific business requirements. One such customization is adding a custom tab in the back office product page. In this blog, we will walk through the step-by-step process to achieve this by creating a sample module called kbcustommodule.

We can create the custom Tab in the back office product page in two ways:

  1. Using Symfony components.
  2. Using displayAdminProductsExtra Hook

Method 1:

This tutorial is applicable for PrestaShop version 8.1 and above, utilizing Symfony components.

Step 1: Create Your Module

kbcustommodule/

|– composer.json

|– config/

|   |– services.yml

|– src/

|   |– Form/

|   |   |– Modifier/

|   |   |   |– ProductFormModifier.php

|   |   |– Type/

|   |   |   |– CustomTabType.php

|– kbcustommodule.php

Start by creating a folder named kbcustommodule under the modules directory of your PrestaShop installation. Inside this folder, create the kbcustommodule.php file, which will contain the main class for your module. The module class initializes the module and registers the required hooks.

Here’s an example of the kdcustommodule.php file:

Run the command composer dump-autoload in your module’s root directory to enable namespace autoloading.

Step 2: Define Services

Create a services.yml file under the config directory of your module (kbcustommodule/config/services.yml). This file defines the Symfony services required for form customization.

Step 3: Create the Custom Tab Form Type

Create a CustomTabType class in the src/Form/Type folder of your module. This class defines the fields that will appear in the custom tab.

Step 4: Create the ProductFormModifier Class

The ProductFormModifier class defines how the custom tab integrates with the existing product form.

Final Step: Install and Test

  1. Install the module via the back office or manually place it in the modules directory and enable it.
  2. Navigate to the back office product page. You should see a new tab labeled “Custom Tab” with a field labeled “Custom Field.”
  3. Test the functionality by adding data to the custom field and ensuring it saves correctly.

After successfully installation of the above module. You will get the result as follows.

Integrate Google Tag Manager with Prestashop

SHOP NOW

Method 2:

The displayAdminProductsExtra hook allows you to add custom content or tabs to the product edit page in the Back Office. This method avoids the complexity of defining Symfony services and is easier for developers not familiar with Symfony.

Step 1: Create the Module

Start by creating a basic module structure. For example:

Kbcustommodule/

|– config/

|– translations/

|– views/

|   |– templates/

|       |– admin/

|           |– products/

|               |– custom_tab.tpl

|– Kbcustommodule.php

Step 2: Define the Module Class

In the Kbcustommodule.php file, define your module and register the displayAdminProductsExtra hook.


Step 3: Create the Template File

In the views/templates/admin/products/custom_tab.tpl file, define the HTML and content for your custom tab.

Step 4: Save the Data

To save the custom data, use the actionAdminControllerSetMedia hook along with JavaScript or PHP. Alternatively, you can use the actionProductUpdate hook in PHP.

Example in Kbcustommodule.php:

Step 5: Add the Field to the Database

Modify the database to store your custom data. For example:

————————————————————————

ALTER TABLE ps_product ADD custom_field TEXT NULL;

————————————————————————

After successfully installation of the above module. You will get the result as follows


For further assistance, feel free to reach out or leave a comment below. Or you can also reach out to us on Knowband Helpdesk.

Simplify Your Marketing with Google Tag Manager for Opencart

Managing and analyzing marketing data is a vital part of running a successful online store. To help store owners streamline this process, we are excited to introduce the Google Tag Manager (GTM, gtag, GA4) – OpenCart Extension. This powerful tool integrates seamlessly with your Opencart store, enabling efficient data tracking, advanced analytics, and custom event tracking without the hassle of manual coding.

If you’ve been searching for a comprehensive solution to enhance your eCommerce analytics, the Opencart Google Tag Manager Module is the ultimate answer. Let’s dive deeper into how this module works and why it’s a must-have for your Opencart store.

Why Use Google Tag Manager for Opencart?

Google Tag Manager (GTM) is an essential tool for digital marketing. It simplifies the process of managing tags, tracking eCommerce events, and integrating analytics tools. With the Opencart GTM Module, you can effortlessly configure tags and scripts to capture valuable customer insights.

By using the Opencart Google Analytics Integration Extension, you gain access to detailed performance data, enabling you to make informed decisions about your marketing strategies. Additionally, this extension offers support for the latest GA4 Integration for Opencart, ensuring your analytics are future-proof.

Key Features of the GTM Opencart Extension!

The GTM Opencart Extension offers a wide range of features designed to simplify tracking and analytics for store owners. Here are some highlights:

Seamless Google Tag Manager Integration: Easily integrate GTM with your store to manage tags and scripts for Google Analytics, remarketing, and other marketing tools.

Support for GA4 eCommerce Events: Track advanced eCommerce events like product views, add-to-cart actions, and purchases using the Opencart GA4 Integration Module.

Custom Event Tracking: The Custom Event Tracking Opencart Plugin lets you define and monitor unique events that matter most to your business.

Comprehensive Analytics: With the Opencart Google Analytics Integration Plugin, you can access detailed insights into your store’s performance, customer behavior, and campaign results.

No Coding Required: The Opencart gtag Integration Plugin makes it easy to manage tags and tracking codes without any technical expertise.

How Does the Opencart Google Tag Manager Module Work?

Using the Opencart GTM Module is straightforward, thanks to its user-friendly interface. Here’s how you can get started:

Install the Module: Download and install the extension from the Opencart marketplace or your admin panel.

Configure GTM Settings: Add your GTM container ID to enable seamless integration.

Define Custom Events: Use the module’s interface to set up specific tracking events tailored to your store’s needs.

Activate GA4 Integration: Enable the latest Opencart GA4 Integration Addon for comprehensive analytics.

Monitor Performance: Use Google Analytics and GTM dashboards to track data and gain actionable insights.

Benefits of Using the Opencart Google Analytics Integration Plugin!

Enhanced Marketing Campaigns:

By integrating with Google Analytics and GTM, you can measure the effectiveness of your marketing campaigns. The Opencart eCommerce Measure Module provides detailed insights to help you optimize campaigns for better ROI.

Advanced eCommerce Tracking:

Track every step of the customer journey, from product impressions to conversions, with the Opencart GA4 eCommerce Events feature.

Improved Decision-Making:

The Opencart Google Marketing Integration Plugin gives you the data needed to make informed decisions about inventory, promotions, and user experience.

Save Time and Resources:

With the Opencart gtag Integrator, you can quickly implement and manage tracking codes without hiring developers or spending hours coding manually.

Stay Ahead with GA4:

As Google transitions to GA4, the Opencart GA4 Integration Module ensures you’re fully prepared to adapt to the latest analytics standards.

Integrate GTM with Prestashop Code-Free

SHOP NOW

Key Event Offered by the GTM Opencart Extension!

  •   Page View
  •   View Category
  •   View Product Detail Page
  •   Add to cart
  •   Remove from cart
  •   Checkout Begins
  •   Checkout Page
  •   Add/Select address on checkout
  •   Shipping Method Selected
  •   Order Confirmation
  •   Apply Discount Code
  •   Remove Discount Code
  •   View Cart
  •   Customer Login
  •   Customer Registration
  •   Add to Wishlist
  •   Remove From Wishlist
  •   Search Product
  •   Capture UTM Parameters

Why Choose the Opencart Google Marketing Integration Plugin?

If you’re still on the fence about adopting the GTM Opencart Extension, consider these advantages:

Comprehensive Features: From basic tag management to advanced event tracking, this module has everything you need.

Ease of Use: Its intuitive design makes it accessible for all users, regardless of technical expertise.

Cost-Effective Solution: Save time and money by managing analytics and marketing integrations in one place.

Future-Proof Analytics: With GA4 support, you’re prepared for the future of data tracking and measurement.

Conclusion!

Knowband’s Opencart GTM Plugin is a game-changing tool for store owners looking to enhance their analytics and marketing strategies. Whether you want to track custom events, analyze eCommerce performance, or integrate the latest GA4 features, this extension has you covered.

Take the hassle out of managing analytics and focus on growing your business. Install the Opencart Google Analytics Integration Plugin today and unlock the full potential of your store with advanced tracking and insights.

Boost Your eCommerce Tracking: Introducing the Prestashop Google Tag Manager Addon

As an eCommerce store owner, understanding your customers’ behavior is critical for driving sales, improving the customer experience, and optimizing your marketing efforts. But, you are just flying blind without proper data tracking. This is where Knowband’s newly introduced Prestashop Google Tag Manager Addon comes in. This powerful tool simplifies the integration of Google Tags into your store, helping you track key user actions effortlessly. Thus, we’ll explore how the Prestashop Google Tag Manager Module can transform your eCommerce tracking and enhance your overall store performance.

Knowband Prestashop Google Tag Manager Addon:

The Prestashop Google Tag Manager Addon is a robust tool designed for store owners who want to seamlessly integrate Google Tags with their Prestashop store. By integrating various available tags, the addon ensures you have complete control over your store’s tracking system.

Furthermore, with the Prestashop GTM Module, store owners can capture valuable customer data, track events, and optimize their marketing efforts—without the headache of manual implementation. The Prestashop Google Tag Manager Addon offers a streamlined, user-friendly interface, enabling easy management of all your tags in one place.

Key Features of the Prestashop Google Tag Manager Addon!

Seamless Integration with Google Tags:

The Prestashop Google Tag Manager Module enables effortless integration of essential Google Tags. Furthermore, these tags help track website traffic, conversions, user behavior, and more, making it easier to measure the effectiveness of your campaigns and optimize your store’s performance.

Custom Event Tracking PrestaShop:

The Prestashop Google Event Tracker Module empowers you to track specific user actions like product views, add-to-cart, and checkout. Thus, by integrating Custom Event Tracking in PrestaShop, you can measure interactions that matter most to your business, allowing you to fine-tune your strategy.

Google Analytics and GA4 Integration:

With the Prestashop Google Analytics Integration Module, store owners can directly integrate their Prestashop store with Google Analytics and GA4. Furthermore, the addon provides detailed insights into customer behavior, sales data, and other critical metrics.
The Prestashop GA4 Integration Addon specifically allows tracking of GTM eCommerce Events, which are essential for businesses looking to future-proof their tracking system.

Real-Time Tracking and Optimization:

With the Prestashop GTM Addon, you can track actions in real-time, including Add to Cart, Checkout, Order Confirmation, and more. This data allows you to optimize the customer journey by understanding where users drop off and where your store needs improvement.

How Does the Prestashop Google Tag Manager Addon Work?

Installing the Prestashop Google Tag Manager Module is simple. Once the addon is installed, it automatically integrates with your Prestashop store. You just need to follow a few quick steps to generate the GTM and GA 4 API keys. Moreover, you can also take the reference from the easy instructions provided in the module admin panel.

Therefore, you don’t need any coding knowledge to set up tags, as the module provides an intuitive interface for managing Google Tags directly from the Prestashop admin panel. This eliminates the need for a developer to handle the integration, saving you both time and money.

Once integrated, you can use the Prestashop Google Analytics Integration Addon to start tracking a variety of customer interactions. From page views to product searches, this addon helps you gather the data you need to make smarter business decisions. With Prestashop

GA4 Integration Module, you can also track eCommerce-specific events such as Add to Cart, Checkout Begins, and Order Confirmation, giving you a complete overview of your customer journey.

Benefits of Using the Prestashop Google Tag Manager Addon!

No Coding Required:

One of the biggest advantages of using the Prestashop GTM Addon is that you don’t need any coding knowledge. The module provides a simple, user-friendly interface that allows store owners to manage and integrate tags without relying on a developer.

Improved Tracking and Analytics:

The Prestashop Google Event Tracker Module ensures that you are capturing all the important data points, from Page Views to Search Product actions. Thus, this comprehensive tracking allows you to make data-driven decisions, optimize marketing efforts, and improve the customer experience.

Easier Marketing Campaign Optimization:

By integrating with tools like Google Ads and Google Analytics, the addon allows you to track the effectiveness of your campaigns. Moreover, you can measure conversions, monitor the success of discounts or promotions, and optimize your ads for better results.

Integrate Google Tag Manager with Prestashop

SHOP NOW

Streamlined eCommerce Tracking:

The Prestashop GA4 Integration Addon makes it easier to track essential eCommerce events, such as Add to Cart, Remove from Cart, Checkout, and Order Confirmation. This ensures that you’re capturing every key action along the buyer’s journey, giving you deep insights into customer behavior and conversion funnels.

Optimized Customer Experience:

With real-time tracking of user behavior, you can identify pain points in the customer journey and optimize your store to reduce cart abandonment and improve overall sales performance. Thus, by monitoring events like Add/Select Address on Checkout and Shipping Method Selected, you can further streamline the checkout process to increase conversions.

Conclusion!

The Prestashop Google Tag Manager Addon is more than just a tracking tool—it’s a game-changer for optimizing the eCommerce store. By integrating with Google’s powerful suite of marketing tools, this addon enables store owners to track key events, gather actionable insights, and ultimately drive better business outcomes. Start using the Prestashop Google Tag Manager Module today and see how easy it is to boost your eCommerce tracking.

Prestashop Google Tag Manager (gtag, GA4, GTM Events) Addon – User Manual

The Knowband Prestashop Google Tag Manager Addon is the ultimate solution for integrating Google Tag Manager (GTM) with your Prestashop store. This user-friendly module allows store owners to easily integrate and manage various Google tags without needing any technical skills. The add-on empowers you to track key events, such as Add to Cart, Product Views, Checkout Begins, Order Confirmation, and much more, providing deep insights into customer behavior.

With seamless integration, you can also capture UTM parameters, enabling you to track the effectiveness of your marketing campaigns. Furthermore, the Prestashop Google Marketing Integration Module helps you understand which campaigns are driving traffic and conversions, so you can optimize your ad spend and improve your ROI.

The Prestashop GTM Addon is perfect for those who want to enhance their tracking capabilities, optimize conversion rates, and improve the user experience. Whether you’re using Google Analytics, GA4, or other Google marketing tools, this addon streamlines the process, giving you more time to focus on growing your business.

1.0. Key Features Offered by Prestashop GTM Addon:

Seamless Google Tag Integration: Easily integrate Google tags like Google Analytics, Google Ads, and GA4 into your Prestashop store without the need for coding.

Real-Time Event Tracking: Track real-time user actions such as Add to Cart, Product Views, and Checkout Initiation to understand customer behavior instantly.

UTM Parameter Tracking: Capture UTM Parameters to track the effectiveness of your marketing campaigns and identify the best-performing channels.

Enhanced eCommerce Tracking: Track advanced eCommerce events such as Product Detail Views, Add to Cart, and Order Confirmations for in-depth sales performance analysis.

Easy Setup and Configuration: No technical expertise required! The module’s user-friendly interface allows quick and easy setup, making tag management hassle-free.

User-Friendly Dashboard: Manage and monitor all your tags and events directly from the Prestashop admin panel with an intuitive and easy-to-use dashboard.

Multi-Lingual Support: The Prestashop GTM addon comes with multi-lingual language support, allowing store admin to use the module for multiple different languages.

1.1. How to Get Your Google Tag Manager Container ID

Step 1: Go to your Google Tag Manager account.

Step 2: Create a new container or select an existing one.

Step 3: The Container ID will look like GTM-XXXXXX and is visible in the top-right corner of the Tag Manager interface.

Step 4: Copy the Container ID and paste it into the GTM Container ID field in this module’s configuration.

1.2. How to Get Your Google Analytics Measurement ID?

Step 1: Go to your Google Analytics account.

Step 2: Select the property for which you want to retrieve the Measurement ID.

Step 3: Navigate to Admin > Data Streams and choose your web data stream.

Step 4: The Measurement ID will look like G-XXXXXXXXXX.

Step 5: Copy the Measurement ID and paste it into the Google Analytics Measurement ID field in this module’s configuration.

1.3. How to Configure Events in Google Tag Manager?

Step 1: Download GTM Events: You can find a direct download link under module configurations>>Instructions tab.

Step 2: Go to your Google Tag Manager account.

Step 3: In Google Tag Manager, navigate to Admin > Import Container.

Step 4: Select the downloaded JSON file from your system.

Step 5: Choose the workspace where you want to import the events and select the “Merge” or “Overwrite” options as required.

Step 6: Click Confirm to complete the import process.

Step 7: Save and publish your container to activate the events in your Google Tag Manager.

By following the above steps, you can successfully configure the module. However, if you face any issues, please feel free to contact us at support@knowband.com.

2.0. Installation Guide for Prestashop GTM Addon:

Once you purchase the addon, follow the below steps:

  • Go to the Store Admin -> Modules and Services.

  • Click on “Upload a module”. You can drag or drop the file or can simply select the file from the system.

3.0. Admin Panel Overview:

The Google Tag Manager for Prestashop provides an easy and intuitive admin dashboard to Prestashop retailers. The store admin can configure and manage all the tags from the Prestashop admin dashboard itself. Here is a brief overview:

3.0.1. Configurations:

Enable/Disable: The store admin can enable/disable the module with this option.

GTM Container ID: Insert the GTM Container ID in this text field. The admin can get the container ID by following the steps mentioned in section 1.1.

Google Analytics Measurement ID: Enter the Google Analytics Measurement ID here.

Page View: Enable/Disable “Page View Google Event”.

View Category: Manage the “View Category” tag from here.

View Product Detail Page: Enable the “View Product Details Page” tag from here.

Remove from the cart: Enable/Disable the “Remove from Cart” Google tag.

Add to cart: Enable/Disable the “Add to Cart” Google Tag.

Checkout Begins: Enable the tag for checkout initiatiation tracking.

Checkout Page: Enable/Disable the event for “Checkout Page”.

Add/Select address on checkout: Enable/Disable the tag for the “Add/Select Address on Checkout” page.

Shipping Method Selected: Enable the tag for “Shipping Method Selection”.

Order Confirmation:Manage the “Order Confirmation” tag from here.

Apply Discount Code: Enable/Disable the “Apply Discount Code” tag.

Remove Discount Code: Enable/Disable the “Remove Discount Code” Google event.

View Cart: Manage the “View Cart” Google tag with this enable/disable switch.

Customer Login: Enable/Disable the “Customer Login” Google Tag from here.

Customer Registration: Enable/Disable the “Customer Registration” tag.

Add to Wishlist: Manage the “Add to Wishlist” tag from here.

Remove from Wishlist: Enable/Disable the “Remove from Wishlist” tag from here.

Search Product: Manage the tags for “Searched Products”.

Capture UTM Parameters: The store admin can enable capturing UTM parameters with the help of this switch button.

3.0.2. Configuration Instructions:

The Prestashop no-code Google tag manager integration comes with straightforward instructions that eliminate the need for any technical expertise for the module connections. The store admin can simply visit the Google consoles and get the required credentials by following the simple steps mentioned below:

These instructions are going to help the store admin in the module configurations, however, if you face any issue with any connect step or module, you can also drop us a mail at support@knowband.com or raise a ticket on knowband.com/helpdesk.

Say Goodbye to Cart Abandonment with One Page Supercheckout for Prestashop

Cart abandonment is one of the most pressing challenges for online store owners. Customers add items to their carts but fail to complete their purchases for various reasons. A major culprit?
A complex or time-consuming checkout process. That’s where the Prestashop One Page Supercheckout comes to the rescue. This revolutionary solution simplifies the checkout process, boosting conversions and ensuring a seamless shopping experience.

In addition to simplifying checkout, it also introduces conversion-focused features like a Free Shipping Progress Bar and customer-specific checkout profiles to further encourage order completion.

In this article, we’ll explore how the Prestashop One Page Supercheckout helps tackle cart abandonment and why it’s the perfect tool for every Prestashop store owner.

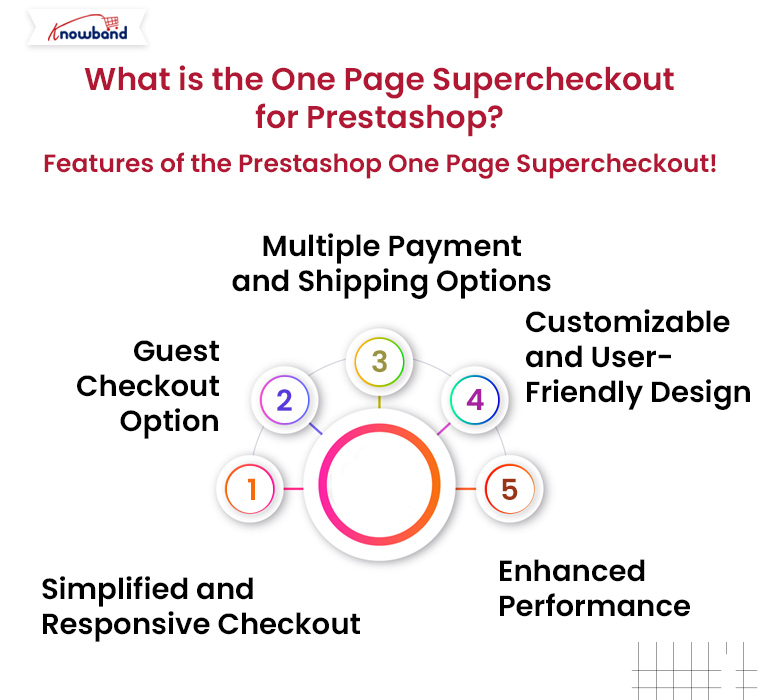
What is the One Page Supercheckout for Prestashop?

The Prestashop One Page Supercheckout is a feature-rich module designed to streamline the checkout process on your Prestashop store. Unlike traditional multi-step checkouts that require users to navigate through several pages, this Prestashop One Step Checkout Addon consolidates all checkout steps into a single page.

The module also allows store owners to create multiple customer profiles and configure specific input fields for each profile, making the checkout experience more relevant for different customer types such as B2B and B2C users.

Thus, with this responsive one-page checkout Prestashop solution, customers can complete their purchases quickly and efficiently, reducing the chances of abandonment.

Why Do Customers Abandon Their Carts?

Cart abandonment can occur due to several reasons, but the most common ones include:

  • A lengthy or confusing checkout process.
  • Mandatory account creation.
  • Unexpected shipping costs.
  • Lack of payment options.

The Prestashop One Page Checkout Extension addresses these issues by simplifying the process and enhancing user convenience.

To further reduce abandonment caused by unexpected shipping costs, the module also offers a Free Shipping Progress Bar that motivates customers to add more products to qualify for free shipping.

Features of the Prestashop One Page Supercheckout!

1. Simplified and Responsive Checkout:

The Prestashop simplified checkout addon brings everything—cart details, shipping options, and payment methods—onto a single, responsive page. Moreover, the customers can review and update their order details in one place, ensuring a hassle-free experience.

With its responsive design, this module works flawlessly on all devices, making it the ideal Prestashop responsive one-step checkout addon for mobile shoppers.

2. Guest Checkout Option:

Mandatory account creation often drives potential customers away. The One Page Checkout Prestashop module includes a guest checkout feature, allowing users to complete their purchase without signing up.

3. Multiple Payment and Shipping Options:

A lack of diverse payment methods can also lead to cart abandonment. The Prestashop One Page Checkout Extension supports a variety of payment gateways and shipping options, catering to the preferences of a global audience.

Additionally, the Free Shipping Progress Bar visually informs customers how close they are to unlocking free shipping, encouraging higher cart values and reducing drop-offs at checkout.

4. Customizable and User-Friendly Design:

The Prestashop One Step Checkout Addon offers extensive customization options, allowing store owners to tailor the checkout page to their branding. Therefore, the clean and intuitive layout ensures a smooth user experience, keeping customers engaged.

Admins can also create multiple customer profiles and assign different checkout fields to each profile, ensuring a personalized and clutter-free checkout experience for different user groups.

5. Enhanced Performance:

The Prestashop fast checkout addon is optimized for speed, ensuring a quick and seamless experience for your customers. On top of that a faster checkout process means fewer chances for customers to second-guess their purchase or get distracted.

Provide Hassle-Free Checkout Experience to Your Customers.

Get the Addon from Addon Marketplace

SHOP NOW

Benefits of Using the One Page Supercheckout!

1. Reduced Cart Abandonment:

By offering a Prestashop Quick Checkout Addon, you eliminate unnecessary steps and reduce friction during the checkout process, addressing one of the top reasons for cart abandonment.

2. Improved Conversion Rates:

A simplified checkout process provided by the Prestashop simplified checkout addon encourages more customers to complete their purchase, boosting your store’s conversion rates.

3. Better Mobile Shopping Experience:

The Prestashop responsive one-step checkout addon ensures a seamless experience for mobile users, which is critical given the rise of mobile eCommerce.

4. Higher Customer Satisfaction:

The convenience and speed of the quick checkout extension Prestashop enhance customer satisfaction, increasing the likelihood of repeat purchases.

Prestashop One Page Supercheckout Free Version!

For store owners looking to test the waters, the Prestashop One Page Checkout Free Version is a great starting point. While the free version offers essential features, upgrading to the premium One Step Checkout Prestashop Extension unlocks advanced functionalities for a superior shopping experience.

With so many checkout solutions available, you might wonder what sets the Prestashop One Page Supercheckout apart. Here’s why it’s the ultimate choice:

Ease of Integration: The Prestashop fast checkout addon integrates seamlessly with your existing Prestashop store, requiring minimal setup.

Comprehensive Features: From guest checkout to multiple payment options, this module offers everything you need for a streamlined checkout process.

Scalability: Whether you’re running a small store or a large-scale eCommerce site, the quick checkout addon Prestashop can handle your needs.

Cost-Effective Solutions: The availability of the Prestashop free one page checkout addon ensures that even budget-conscious store owners can benefit from its features.

Conclusion!

The Prestashop One Page Supercheckout is more than just a checkout solution—it’s a tool to enhance customer satisfaction, boost conversions, and reduce cart abandonment. Whether you’re using the free version or the premium Prestashop One Page Supercheckout free version, this addon is a must-have for any Prestashop store looking to stay ahead in the competitive eCommerce landscape.

Say goodbye to cart abandonment and hello to increased sales with the Prestashop One Page Checkout Extension. Transform your checkout process today!

Level Up Your Mobile Apps with PrestaShop Mobile App Builder Addon v6.1

The eCommerce landscape is evolving rapidly, and having a dedicated mobile app is no longer a luxury—it’s a necessity. With the release of PrestaShop Mobile App Builder Addon v6.1, Knowband empowers PrestaShop store owners with advanced features that make mobile app creation easier, more customizable, and more profitable. Whether you’re new to mobile apps or looking to enhance your existing setup, this update has something for everyone.

Why Mobile Apps Are Crucial for PrestaShop Stores?

A mobile app is an essential tool for modern eCommerce businesses. Furthermore, with the rise of mobile shopping, having a PrestaShop Mobile App ensures a seamless shopping experience for your customers. Thus, using an App Maker like Knowband’s PrestaShop Android and iOS Mobile App Builder Addon, you can create user-friendly apps tailored to your brand’s identity.

Let’s dive into how the latest v6.1 update helps you take your PrestaShop eCommerce Mobile App to the next level.

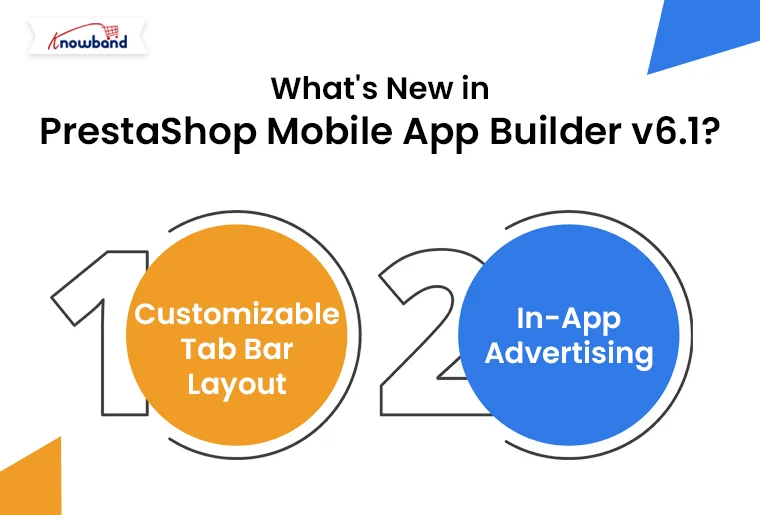
What’s New in PrestaShop Mobile App Builder v6.1?

The new features in the PrestaShop Android and iOS Mobile App Builder Module are designed to give store admins greater control over their apps.

Here’s what’s included in the v6.1 update:

1. Customizable Tab Bar Layout:

With v6.1, you can now customize your app’s tab bar layout. This feature allows you to:

  • Add unique icons for each tab.
  • Rename tabs to align with your brand tone.
  • Create a seamless navigation experience for your users.

Customizable tab bars not only improve the look of your Mobile App for PrestaShop but also enhance user engagement. Your app can now reflect your brand’s personality in every detail.

2. In-App Advertising:

Monetizing your PrestaShop Mobile App just got easier! With the in-app advertising feature, you can:

  • Display advertisement banners in strategic locations within the app.
  • Manage ads easily from the module backend.
  • Earn additional revenue without disrupting the shopping experience.

This update transforms your PrestaShop Android and iOS Mobile App Creator Addon into a revenue-generating tool, making it a win-win for both you and your users.

How Does PrestaShop Mobile App Builder Help Store Owners?

Knowband’s Mobile App Builder Addon for PrestaShop simplifies app creation and management for store admins. Here’s why it’s a must-have:

1. User-Friendly Interface:

The PrestaShop Free Mobile App Maker provides an intuitive backend interface. Moreover, the admins can easily customize their app’s layout, colors, and features without requiring technical expertise.

2. Supports Android and iOS Platforms:

Whether your customers use Android or iOS devices, the PrestaShop Android and iOS Mobile App Maker Addon ensures a seamless shopping experience. It supports:

  • PrestaShop Android App Builder for creating apps compatible with Android devices.
  • PrestaShop iOS App Maker for apps that cater to Apple users.
  • No Coding Required:

Don’t know how to code? No problem! The PrestaShop Free Mobile App Builder for Android and PrestaShop Free Mobile App Creator for iOS lets you design professional apps without writing a single line of code.

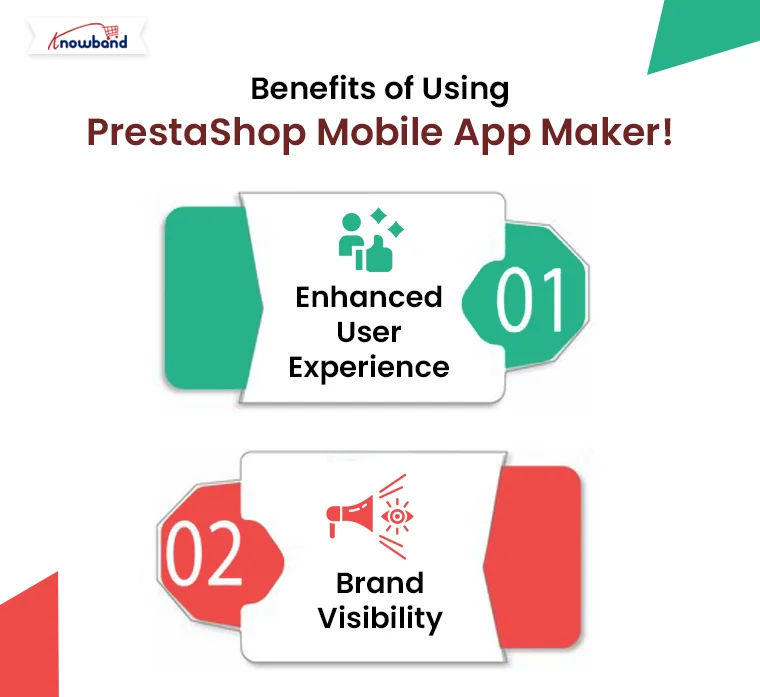
Benefits of Using PrestaShop Mobile App Maker!

Using the Android and iOS App Maker for PrestaShop gives you a competitive edge in the eCommerce market. Here are some key benefits:

Enhanced User Experience:

Apps built with the Prestashop App Maker are optimized for mobile devices, offering faster load times and better navigation compared to mobile websites.

Increased Sales:

Mobile apps encourage repeat purchases by providing a convenient shopping experience. Therefore, features like push notifications and a smooth checkout process can significantly boost sales.

Brand Visibility:

Having a PrestaShop Free Mobile App ensures your brand stays on customers’ devices, increasing visibility and fostering customer loyalty.

Build Android and iOS App for Your Store

No Coding Skills Required

SHOP NOW

Why Choose Knowband’s Mobile App Builder Addon?

Knowband’s Prestashop Android and iOS Mobile App Builder Addon stands out for its flexibility, affordability, and ease of use.

Features That Set It Apart:

  • Seamless integration with your PrestaShop store.
  • Fully customizable templates and themes.
  • Regular updates, including the new tab bar customization and in-app advertising.

Conclusion!

The release of PrestaShop Mobile App Builder v6.1 brings game-changing features that make app creation more dynamic and profitable. With customizable tab bars and in-app advertising, store admins can now create a truly unique PrestaShop eCommerce Mobile App while generating additional revenue.

Whether you’re a seasoned PrestaShop user or just starting out, the PrestaShop Free Mobile Apps created with this module will elevate your business to new heights.
Don’t miss out on the opportunity to reach your audience with a professional, user-friendly app built using the PrestaShop Free eCommerce Mobile App Maker. 

AI at Your Fingertips: Prestashop ChatGPT Content and Translator Addon

In the fast-paced world of eCommerce, creating engaging content and managing translations can be time-consuming and challenging. To help Prestashop store owners streamline these tasks, Knowband has introduced an innovative solution: the Prestashop ChatGPT Content and Translator Addon. This powerful tool, powered by AI, simplifies content creation and translation, making it easier than ever to manage your online store.

What Is the Prestashop ChatGPT Content Generator?

The Prestashop ChatGPT Content Generator is an advanced addon that leverages artificial intelligence to create high-quality content for your eCommerce store. Whether you need product descriptions, meta titles, or category content, this module can handle it all. Furthermore, with AI capabilities at your fingertips, you no longer need to spend hours crafting engaging content.

This AI content generator for Prestashop ensures that your content is optimized for search engines and resonates with your audience. Thus, from improving your website’s SEO to saving valuable time, this addon provides the ultimate content management solution.

Key Features of the Prestashop ChatGPT Content Generator Addon!

AI-Powered Content Generation:

The Prestashop ChatGPT SEO Content Generator uses advanced AI algorithms to produce SEO-friendly and engaging content. Furthermore, with just a few clicks, you can create professional-quality text that boosts your store’s online visibility.

Customizable Outputs:

Store owners can define specific keywords, tone, and structure, ensuring the content aligns with their branding and marketing strategy.

Time and Cost Efficiency:

Say goodbye to hiring professional writers or spending hours creating content yourself. Therefore, the Prestashop ChatGPT Content Generator Addon delivers high-quality results in seconds.

Introducing the Prestashop Translator Addon!

Running an international eCommerce store requires accurate and effective translation. The Prestashop ChatGPT Content Translator Addon is designed to address this need. Powered by AI, this module translates product descriptions, category pages, and other essential content with precision. It eliminates the hassle of manual translations, helping you expand your business globally.

Why Choose the Prestashop ChatGPT Translator Module?

The Prestashop ChatGPT Translator Addon is a game-changer for multi-lingual eCommerce. Here’s why it stands out:

AI-Powered Translation: This module delivers accurate, context-aware translations that maintain the original meaning and tone of your content.

Multilingual Support: Translate your store into multiple languages, breaking down language barriers and reaching a wider audience.

SEO Compatibility: Translated content is optimized for search engines, ensuring better rankings in international markets.

User-Friendly Interface: The module is easy to install and use, requiring no technical expertise.

Benefits of Using the Prestashop ChatGPT Content Generator and Translator Addon

Combining the power of the Prestashop ChatGPT Content Generator Module with the AI-powered translation addon for Prestashop gives store owners a significant edge. Here are some notable benefits:

1. Improved Productivity:

Both add-ons save time by automating the repetitive tasks of content creation and translation. This allows you to focus on other critical aspects of your business, such as sales and customer service.

2. Enhanced SEO:

The Prestashop ChatGPT SEO Content Generator creates content that aligns with search engine best practices. Thus, by using AI to generate keyword-rich descriptions and titles, the module helps improve your website’s visibility and drive organic traffic.

3. Global Reach:

With the Prestashop ChatGPT Content Translator Addon, expanding into international markets becomes seamless. Furthermore, you can offer a localized shopping experience for your customers, boosting trust and sales.

4. Cost Efficiency:

By using these AI-driven tools, you can significantly reduce the costs associated with hiring writers and translators, making it an affordable solution for small and large businesses alike.

5. Consistency and Accuracy:

AI ensures consistency in tone, language, and style across all content and translations, creating a cohesive brand identity.

How the Prestashop ChatGPT Addons Work?

Installation and Setup:

Install the module through your Prestashop back office. The user-friendly interface ensures a smooth setup process.

Content Generation:

Use the Prestashop ChatGPT Content Generator Addon to create content for specific pages, products, or categories. Customize the outputs by providing guidelines such as keywords or tone.

Translation:

Enable the Prestashop ChatGPT Content Translator Module to translate your store’s content into multiple languages. The AI ensures accurate and context-aware results.

SEO Optimization:

The addon works seamlessly to generate and translate SEO-friendly content, improving your store’s rankings in local and global markets.

Why Choose Knowband’s AI Addons for Prestashop?

Knowband is a trusted name in eCommerce extensions, known for delivering high-quality solutions that meet the evolving needs of online retailers.

Therefore, the Prestashop ChatGPT Content Generator Addon and the Prestashop ChatGPT Content Translator Addon are the latest innovations in their portfolio. Designed with user convenience and efficiency in mind, these addons are the perfect tools for any Prestashop store owner looking to simplify operations and enhance customer experience.

Generate and Translate the Content Effortlessly with AI

Read More..

SHOP NOW

Final Thoughts!

In today’s competitive eCommerce landscape, managing content and translations effectively is crucial for success. With Knowband’s Prestashop ChatGPT Content Generator Module you can harness the power of AI to streamline these tasks and take your store to the next level.

Whether you’re a small business owner or a large-scale retailer, these AI-driven addons offer unmatched value by saving time, reducing costs, and improving your store’s SEO performance. Don’t miss out on this opportunity to revolutionize your Prestashop store with AI content generation for Prestashop.

Prestashop ChatGPT Content Generator/Translator Addon – User Manual

The Prestashop ChatGPT Content Generator/Translator Addon is an innovative solution designed to revolutionize content management for your Prestashop store. This powerful module leverages advanced AI to streamline content creation and translation tasks, making it an indispensable tool for modern eCommerce businesses. Furthermore, with the Prestashop ChatGPT Content Generator Module, you can effortlessly create engaging product descriptions, product titles, and SEO-optimized content, enhancing your store’s visibility and customer experience.

The AI Content Generator for Prestashop goes beyond simple text creation by offering seamless integration with Prestashop ChatGPT Furthermore, the SEO Content Generator capabilities, ensure your content is not only unique but also search engine friendly. Additionally, the module includes a Prestashop ChatGPT Content Translator, which serves as an AI-powered translation addon for Prestashop, enabling store owners to expand their reach into new markets with accurate, context-aware translations.

Whether you’re managing content in multiple languages or aiming to improve the quality and efficiency of your content strategy, the Prestashop ChatGPT Content Generator Addon simplifies the process. Furthermore, the Prestashop ChatGPT Content Translator Module combines cutting-edge AI with user-friendly features, empowering merchants to save time and elevate their online store with high-quality, multilingual content.

1.0. Key Features Offered by Knowband’s Prestashop ChatGPT Content Generator/Translator Addon!

Effortless Content Creation: Generate high-quality product titles, detailed descriptions, and optimized meta tags effortlessly with the Prestashop ChatGPT Content Generator Module, saving time and ensuring consistency across your store.

Dual AI Engines: Powered by the latest ChatGPT 3.5 and 4.0 models, the Prestashop AI Content Generator module provides advanced options for generating creative content and translating it accurately to meet diverse store needs.

SEO-Friendly Content: Easily create SEO-optimized content for your Prestashop store using Knowband’s AI Content Generator, helping improve search engine rankings and driving more traffic to your store.

AI Translation Made Simple: Translate your store’s content into multiple languages seamlessly with the AI-Powered Translation Addon for Prestashop, enabling you to expand your business globally with minimal effort.

User-Friendly Setup: The Prestashop AI Content Creator offers a straightforward setup process, making it easy to use for all store admins, even those without technical expertise, ensuring a smooth onboarding experience.

Category and Meta Tags: Quickly generate and translate category names and meta descriptions with precision, ensuring consistency and professionalism in just a few clicks using this addon.

Bulk Content Generation: Ideal for stores with extensive catalogs, the module supports batch content generation, allowing you to process multiple items in one go and significantly boost efficiency.

Enhanced Store Management: Streamline your store’s content management tasks, enabling quicker product updates and improving operational efficiency for both small and large-scale businesses.

Multi-Language Support: With support for all languages, including right-to-left (RTL) scripts, and compatibility with various Prestashop versions, the module ensures flexibility and usability for global businesses.

2.0 How to Generate the ChatGPT Key for Module Configurations?

To enable ChatGPT functionality in your PrestaShop module, you must configure an API Key. Follow the steps below for a seamless setup process.

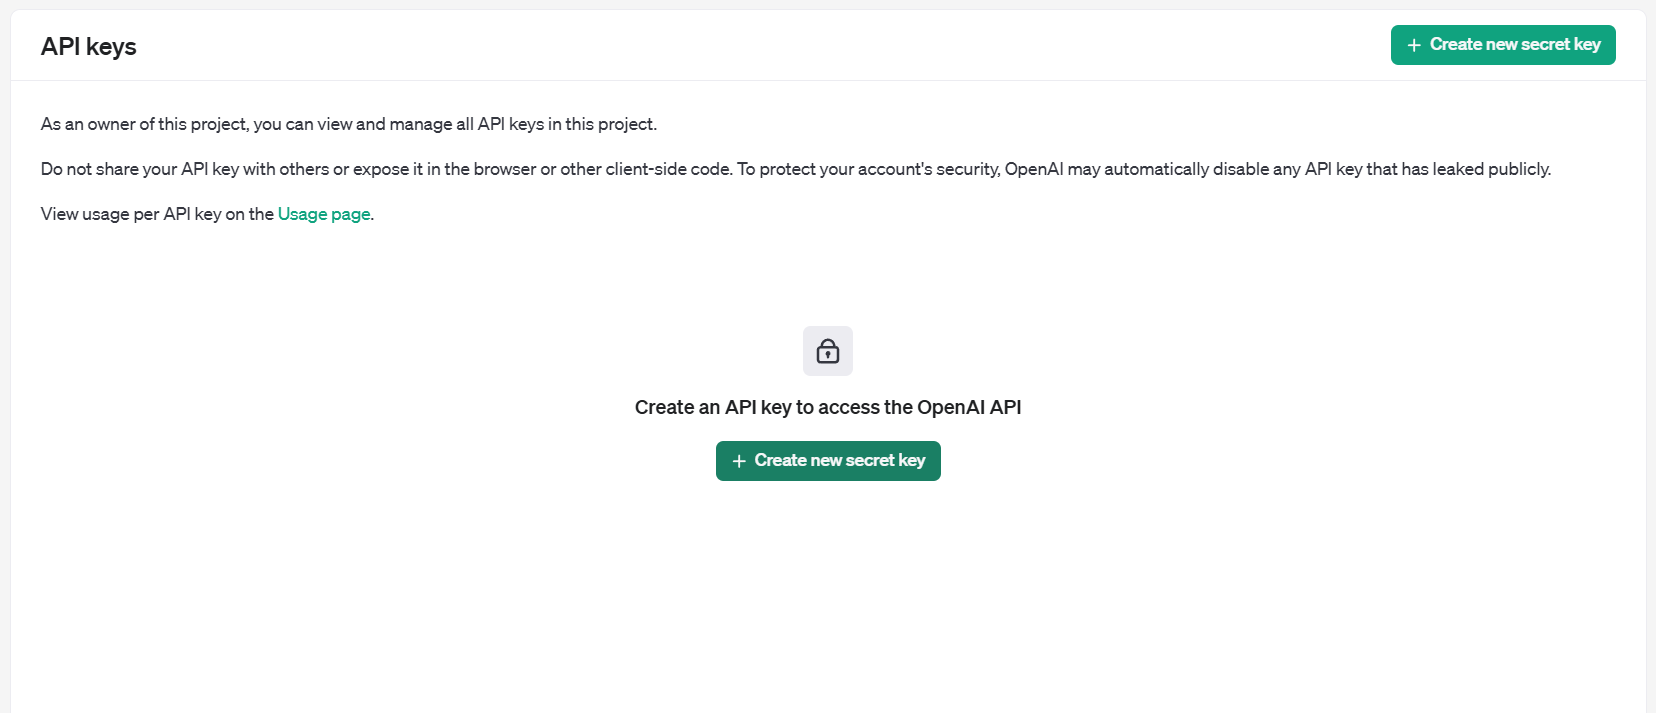
Step 1: Obtain an API Key

  • Visit the OpenAI API Key Generation Page.
  • Log in to your OpenAI account. If you don’t have one, create a new account to proceed.Once logged in, click the “Create new secret key” button.

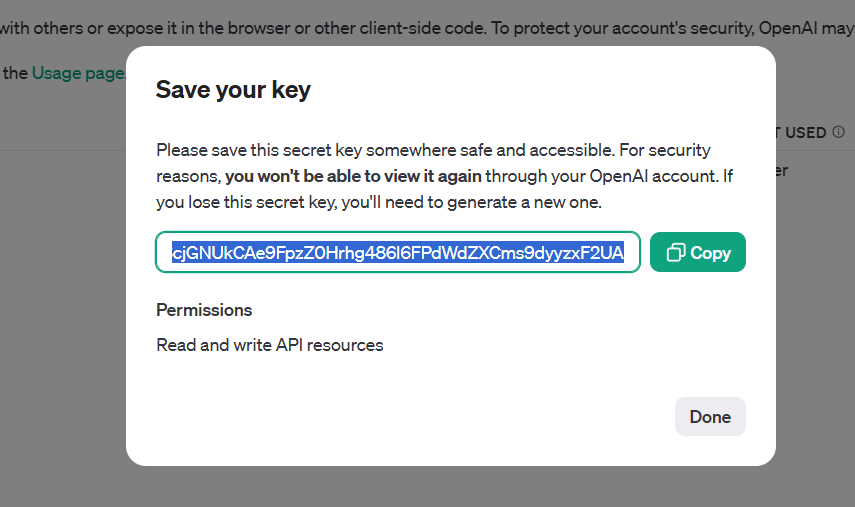
  • A unique API Key will be generated. Copy this key as you will need it in the subsequent steps.

Important: This is the only time the key will be displayed, so save it securely. The ChatGPT module will now be ready to interact with the OpenAI API, enabling its features within your PrestaShop store.

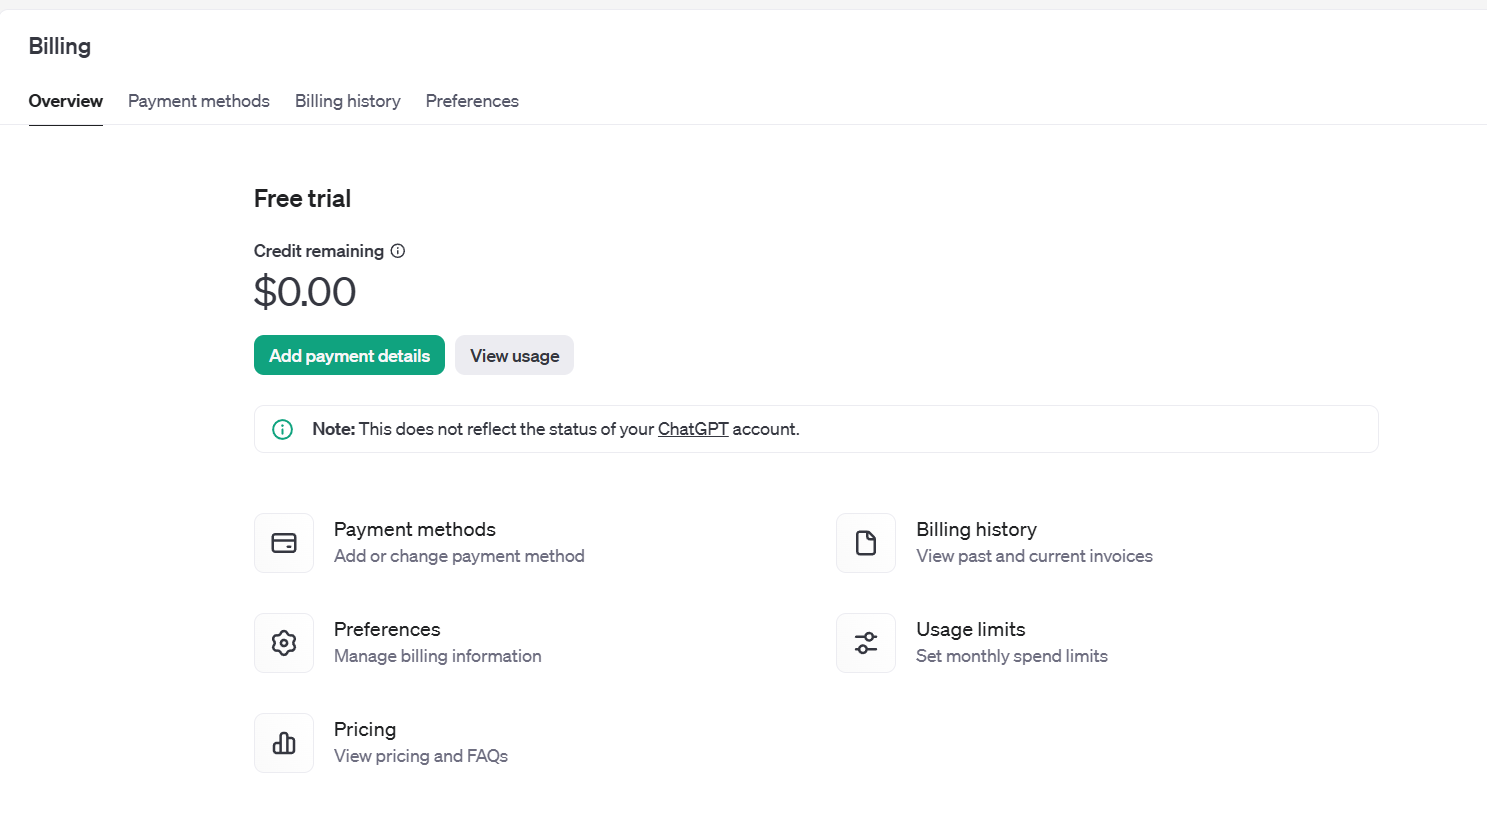
Important: Verify Billing Requirements!

To ensure uninterrupted functionality, confirm that your OpenAI account has an adequate credit balance:

  • Check your current balance and add funds if necessary.
  • Note: If your account balance is depleted, API requests from the ChatGPT module will fail.

3.0 Installation Guide for Prestashop AI Content Creator Addon:

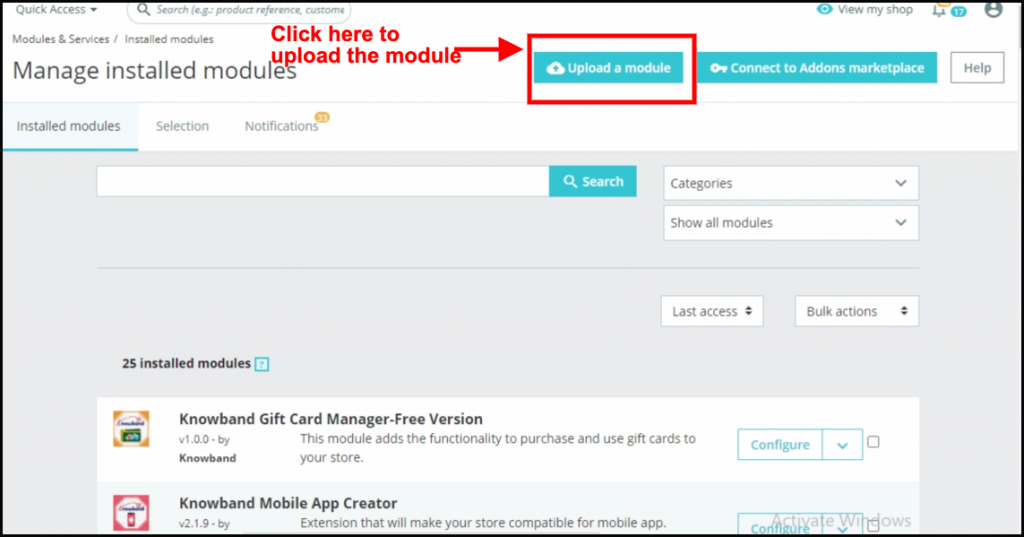
Once you purchase the addon, follow the below steps:

  • Go to the Store Admin -> Modules and Services.

  • Click on “Upload a module”. You can drag or drop the file or can simply select the file from the system.

4.0 Admin Interface Overview:

4.0.1 General Setting:

The module comes with an easy to manage admin dashboard that allows the admin to manage the module efficiently even without any technical skills.

Here is a Brief Overview:

Enable/Disable the Module: The store admin can enable/disable the module with the help of this button.

API Key for ChatGPT: Here, you need to enter the ChatGPT API key that will be responsible for the smooth operations. Please follow the steps mentioned above to generate the API key in just a few clicks.

ChatGPT Engine for Content Generation: The Prestashop AI Content Generator Addon comes with 2 powerful ChatGPT engines 3.5 and 4.0. Where the GPT-3.5-turbo is a cost-effective, suitable solution for general tasks, on the other hand, the GPT-4-turbo is an Advanced model with improved accuracy and context handling.

Choose the suitable module from the dropdown.

ChatGPT Engine for Translations: Select the ChatGPT engine for content translation.

Default Language for Translation/Content Generation: Choose the default language for content generation.

Languages to Translate Content: Choose the additional languages you would like to generate the content for.

4.0.2. ChatGPT Prompts:

The module comes with 14 in-built ChatGPT Prompts that are useful for handling various tasks. Here is a list of the Prompts and what they do:

Generate Product Description: Generate a detailed SEO-Friendly and engaging product description for the following product {product_name}. Make sure the description includes the main features, benefits, and use cases of the product. Please use HTML tags for formatting so the content is ready for a web page. The product is listed in the {category} category

Generate Product Meta Title: Generate a concise and catchy meta title for a product named “{product_name}” in the “{category}” category. Keep the title under 60 characters. Avoid using double quotes. The title should include the main keyword and attract potential customers.

Generate Product Meta Description: Generate a compelling meta description for the product named {product_name} which lies in the category {category}. Limit the description to about 140 characters.

Translate Product Title: Translate the following product title and make sure to give translated content only

Translate Product Description: Translate the following product description and preserve the HTML structure and tags, and only translate the visible text content and make sure to give translated content only.

Translate Product Meta Title: Translate the following product Meta Title and make sure to give translated content only.

Translate Product Meta Description: Translate the following product Meta Description and make sure to give translated content only.

Generate Category Description: Generate the SEO-Friendly Category Description for the {category} Generate a detailed, SEO-friendly category description for the “{category}” category. Please use HTML tags for formatting so the content is ready for a web page.

Generate Category Meta Title: Generate a concise and catchy meta title for a “{category}” category. Keep the title under 60 characters. The title should include the main keyword, attract potential customers, and avoid using double quotes.

Generate Category Meta Description: Generate a compelling meta description for the category {category}. Limit the description to about 140 characters and avoid using double quotes.

Translate Category Title: Translate the following category title and make sure to give translated content only.

Translate Category Description: Translate the following Category description and preserve the HTML structure and tags, and only translate the visible text content and make sure to give translated content only

Translate Category Meta Title: Translate the following Category Meta Title and make sure to give translated content only.

Translate Category Meta Description: Translate the following category meta description and make sure to give translated content only.

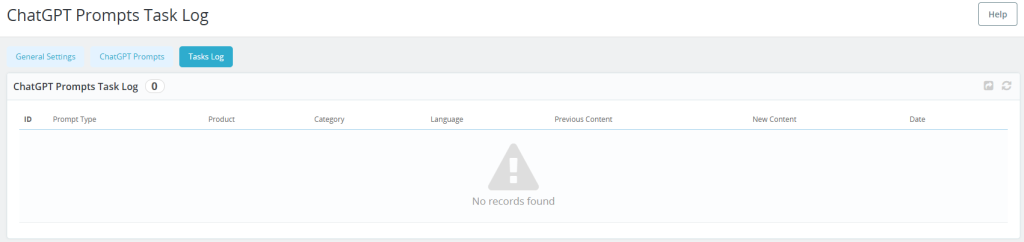
4.0.3. ChatGPT Prompts Task Log:

This tab provides the details of all the prompts that are executed. Here, you can find all the details such as Prompt Type, Product, Category, Language, Previous Content, New Content, and Date.

 5.0. How to Execute ChatGPT Prompts?

To execute the ChatGPT prompts, the store admin can find the options under Catalog>>Products.

Select the products and click on the bulk actions tab as shown in the above screenshot. Here you can select different prompts for various actions.