You can create straightforward applications that only retrieve the order information you require using the Orders API section of the Amazon Marketplace Web Service (Amazon MWS). This makes it possible for you to create unique applications quickly, easily, and adaptably in fields like demand-based decision support tools, order synchronisation, and order research.
Important: The role Amazon assigns you after you submit the Developer Registration and Assessment form determines your access to Amazon MWS data. See Registering to Use Amazon MWS for more details.
Objective of the blog
After reading this blog, you will be able to understand how sellers can get the Amazon orders using API.
Let’s know about the order’s API
Amazon orders API helps the sellers to get the order’s details and synchronized the Amazon orders on their custom application. This is very helpful for retrieving order updates in real-time and the sellers can also get the order status (shipped or unshipped) information easily for all orders by using API.
How to synchronized Amazon orders on custom application
First of all, you need the credential of Amazon MWS (Market Place Web Service) API. If you still don’t have, you can get the help from this blog
To fetch Amazon orders on your end, you need to follow the below steps:
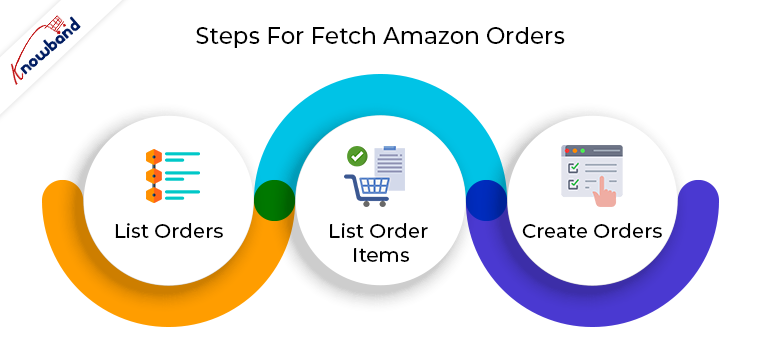
1. List Orders – In this step, you need to send a request to Amazon to get the orders from Amazon for a particular time interval.
You need to send the following data given below in the request:
mws.amazonservices.co.uk/Orders/2013-09-01
?AWSAccessKeyId=XXXXXXXXXXXXXXX
&Action=ListOrders
&SellerId= XXXXXXXXXXXXXX                                // Here write your merchant id
&SignatureVersion=2                                             // Here write your signature version
&Timestamp= gmdate("Y-m-d\TH:i:s\Z", time())     // Write the time stamp &Version=2013-09-01
&Signature=1234Knowband1234example1234                              // Here you need to write the signature
&SignatureMethod=HmacSHA256                     // Here write your signature method
&LastUpdatedAfter=date("Y-m-d\TH:i:s\Z", strtotime('-24 hour'));  //request to get orders for last 24 hours only from Amazon
&OrderStatus.Status.1=Unshipped                // Here you need to add the status for which you want to fetch the orders
&OrderStatus.Status.2=PartiallyShipped
&OrderStatus.Status.3=Shipped
&MarketplaceId.Id.1= XXXXXXXXXXXXX
AWSAccessKeyId=XXXXXXXXXXXXXXXXXXXX
In the response, you will get an order feed file which will contain the list of orders which are placed on Amazon in the last 24 hours and have the requested order status.
Here is the sample order feed file.
<?xml version="1.0"?>
<ListOrdersResponse xmlns="https://mws.amazonservices.com/Orders/2013-09-01”>
    <ListOrdersResult>
        <Orders>
            <Order>
                <LatestShipDate>2018-03-09T07:59:59Z</LatestShipDate>
                <OrderType>StandardOrder</OrderType>
                <PurchaseDate>2018-03-07T01:15:57Z</PurchaseDate>
                <AmazonOrderId>112-5028700-7051869</AmazonOrderId>
                <BuyerEmail>knowband@marketplace.amazon.com</BuyerEmail>
                <IsReplacementOrder>false</IsReplacementOrder>
                <LastUpdateDate>2018-03-07T10:05:30Z</LastUpdateDate>
                <NumberOfItemsShipped>1</NumberOfItemsShipped>
                <ShipServiceLevel>Std US D2D Intl</ShipServiceLevel>
                <OrderStatus>Shipped</OrderStatus>
                <SalesChannel>Amazon.com</SalesChannel>
                <ShippedByAmazonTFM>false</ShippedByAmazonTFM>
                <IsBusinessOrder>false</IsBusinessOrder>
                <LatestDeliveryDate>2018-04-06T06:59:59Z</LatestDeliveryDate>
                <NumberOfItemsUnshipped>0</NumberOfItemsUnshipped>
                <PaymentMethodDetails>
                    <PaymentMethodDetail>Standard</PaymentMethodDetail>
                </PaymentMethodDetails>
                <BuyerName>George</BuyerName>
                <EarliestDeliveryDate>2018-03-21T07:00:00Z</EarliestDeliveryDate>
                <OrderTotal>
                    <CurrencyCode>USD</CurrencyCode>
                    <Amount>49.44</Amount>
                </OrderTotal>
                <IsPremiumOrder>false</IsPremiumOrder>
                <EarliestShipDate>2018-03-07T08:00:00Z</EarliestShipDate>
                <MarketplaceId>ATVPDKIKX0DER</MarketplaceId>
                <FulfillmentChannel>MFN</FulfillmentChannel>
                <PaymentMethod>Other</PaymentMethod>
                <ShippingAddress>
                    <City>Hong Kong</City>
                    <Phone>XXXXXXXXXX</Phone>
                    <CountryCode>HK</CountryCode>
                    <Name>Khattak Muhammad S.B</Name>
                    <AddressLine1>D, Block 2, Example </AddressLine1>
                    <AddressLine2>H Address Example</AddressLine2>
                </ShippingAddress>
                <IsPrime>false</IsPrime>
                <ShipmentServiceLevelCategory>Standard</ShipmentServiceLevelCategory>
        </Order>
        <Order>
            <LatestShipDate>2018-03-09T07:59:59Z</LatestShipDate>
            <OrderType>StandardOrder</OrderType>
            <PurchaseDate>2018-03-06T20:23:38Z</PurchaseDate>
            <AmazonOrderId>114-8648933-7253863</AmazonOrderId>
            <BuyerEmail>knowband1@marketplace.amazon.com</BuyerEmail>
            <IsReplacementOrder>false</IsReplacementOrder>
            <LastUpdateDate>2018-03-07T10:05:31Z</LastUpdateDate>
            <NumberOfItemsShipped>2</NumberOfItemsShipped>
            <ShipServiceLevel>Std US D2D Dom</ShipServiceLevel>
            <OrderStatus>Shipped</OrderStatus>
            <SalesChannel>Amazon.com</SalesChannel>
            <ShippedByAmazonTFM>false</ShippedByAmazonTFM>
            <IsBusinessOrder>false</IsBusinessOrder>
            <LatestDeliveryDate>2018-04-06T06:59:59Z</LatestDeliveryDate>
            <NumberOfItemsUnshipped>0</NumberOfItemsUnshipped>
            <PaymentMethodDetails>
                <PaymentMethodDetail>Standard</PaymentMethodDetail>
            </PaymentMethodDetails>
            <BuyerName>George</BuyerName>
            <EarliestDeliveryDate>2018-03-21T07:00:00Z</EarliestDeliveryDate>
            <OrderTotal>
            <CurrencyCode>USD</CurrencyCode>
            <Amount>98.87</Amount>
            </OrderTotal>
            <IsPremiumOrder>false</IsPremiumOrder>
            <EarliestShipDate>2018-03-07T08:00:00Z</EarliestShipDate>
            <MarketplaceId>ATVPDKIKX0DER</MarketplaceId>
            <FulfillmentChannel>MFN</FulfillmentChannel>
            <PaymentMethod>Other</PaymentMethod>
            <ShippingAddress>
                <City>Hobe Sound</City>
                <AddressType>Residential</AddressType>
                <PostalCode>2101</PostalCode>
                <StateOrRegion>FL</StateOrRegion>
                <Phone>XXXXXXXXXX</Phone>
                <CountryCode>US</CountryCode>
                <Name> SMITH</Name>
                <AddressLine1>Knowband </AddressLine1>
            </ShippingAddress>
            <IsPrime>false</IsPrime>
            <ShipmentServiceLevelCategory>Standard</ShipmentServiceLevelCategory>
        </Order>
        <LastUpdatedBefore>2018-03-08T06:58:45Z</LastUpdatedBefore>
    </ListOrdersResult>
    <ResponseMetadata>
    <RequestId>7fc9364b-a296-4380-954d-1b0355b9ccea</RequestId>
    </ResponseMetadata>
</ListOrdersResponse>
2. List Order Items – From the first step, you will only get order details (like Amazon orders id, purchase date, etc) not order item details (ordered product detail). To get the order’s item details, you will need to send a separate request to Amazon. You need to send request corresponding to each order. If you need details for 5 Amazon orders then you will need to send 5 requests.
The request is given below:
e.g $Amazon_order_id = 112-5028700-7051869
mws.amazonservices.co.uk/Orders/2013-09-01
?AWSAccessKeyId=XXXXXXXXXXXXXXXXXXXX
&Action= ListOrderItems
&SellerId=‘XXXXXXXXXXXXXX’;           // Here write your merchant id,
&'AmazonOrderId'=$Amazon_order_id       // Here write the order id for which you want to get detail
// Here you need to write the signature, when you send HTTP requests to AWS, you need to sign the requests so that AWS can identify who sent the request
&Signature=1234Knowband1234example1234
&SignatureVersion=2                                 // Here write your signature version
&SignatureMethod=HmacSHA256               // Here write your signature method
&Timestamp=gmdate("Y-m-d\TH:i:s\Z", time())      // Write the time stamp
&Version=2013-09-01
In response of the request, you will get the descriptive detail of the order. The sample is given below:
mws.amazonservices.co.uk/Orders/2013-09-01
<?xml version="1.0"?>
<ListOrderItemsResponse xmlns="https://mws.amazonservices.com/Orders/2013-09-01">
<ListOrderItemsResult>
<OrderItems>
<OrderItem>
<QuantityOrdered>1</QuantityOrdered>
<Title>Manchester United Kids Third Shorts 2017/18</Title>
<ShippingTax>
<CurrencyCode>USD</CurrencyCode>
<Amount>0.00</Amount>
</ShippingTax>
<PromotionDiscount>
<CurrencyCode>USD</CurrencyCode>
<Amount>0.00</Amount>
</PromotionDiscount>
<ConditionId>New</ConditionId>
<IsGift>false</IsGift>
<ASIN>B072N7QV69</ASIN>
<SellerSKU>x-96909-266</SellerSKU>
<OrderItemId>22621871528658</OrderItemId>
<ProductInfo>
<NumberOfItems>1</NumberOfItems>
</ProductInfo>
<GiftWrapTax>
<CurrencyCode>USD</CurrencyCode>
<Amount>0.00</Amount>
</GiftWrapTax>
<QuantityShipped>0</QuantityShipped>
<ShippingPrice>
<CurrencyCode>USD</CurrencyCode>
<Amount>19.95</Amount>
</ShippingPrice>
<GiftWrapPrice>
<CurrencyCode>USD</CurrencyCode>
<Amount>0.00</Amount>
</GiftWrapPrice>
<ConditionSubtypeId>New</ConditionSubtypeId>
<ItemPrice>
<CurrencyCode>USD</CurrencyCode>
<Amount>29.49</Amount>
</ItemPrice>
<ItemTax>
<CurrencyCode>USD</CurrencyCode>
<Amount>0.00</Amount>
</ItemTax>
<ShippingDiscount>
<CurrencyCode>USD</CurrencyCode>
<Amount>0.00</Amount>
</ShippingDiscount>
</OrderItem>
</OrderItems>
<AmazonOrderId>112-5028700-7XXX</AmazonOrderId>
</ListOrderItemsResult>
<ResponseMetadata>
<RequestId>7b5d934c-cce7-45e6-ab99-d49da35c0a41</RequestId>
</ResponseMetadata>
</ListOrderItemsResponse>
3. Create Orders – This step is the final step and from step 1 & 2, you got all the details of the Amazon orders which you need to create orders on your application. By parsing the above XML feeds (list order and list order item), you can create orders on your application.
If an Amazon order is already created on your application then you can use the step 1 to update the order status of that order.
If you require any assistance or custom development, please feel free to reach us at support@knowband.com.
You can also check out marketplaces integration modules for Prestashop, Opencart, Magento, and Magento 2 here.
Convert your store into a native Android and iOS app with our No Code Mobile App Builder solution. Know more here: