Copy to clipboard in JavaScript

Objectives of the blog

After the reading of this blog, you will be able to know how data can be copy to clipboard with help of java script.

Benefit of copy to clipboard functionality

In the current web world, it’s all about the user experienced from your site. During our work on any site we copy content from one place and paste at another place. It will be really helpful to the user if a site give a functionality of click to copy. It saves the time and effort of the user to select and copy the content.

Implementation of copy to clipboard functionality

Let’s see how we can add this functionality:

Step 1:

Create a HTML with a paragraph having some content and button to click. You can use any relevant element instead of paragraph for example textbox, textarea, hidden fields etc.

<body>
    <p id="txt_knoband">KnowBand boasts of the best in the industry plugins for eCommerce systems and has years of experience working with eCommerce websites.</p>
    <button onclick="onClickCopy()">Copy Text</button>
</body>

Step 2:

You will need to create a function onClickCopy() which will copy the data of the paragraph. Function will simply run “document.execCommand(“copy”)” to copy the data to the clipboard.

function copyOnClick() {
    var tempInput = document.createElement("input");
    tempInput.value = document.getElementById("txt_knoband").innerHTML;
    document.body.appendChild(tempInput);
    tempInput.select();
    document.execCommand("copy");
    document.body.removeChild(tempInput);
    alert("value copied");
}

In the last line of the script, we have simply added an alert action to inform the user that the data has been copied.

So finally when you click on the button “Copy Text”, data will be copied to the clipboard and you can simply paste by using CRTL + V.

Related Article: How to set Cookie using JavaScript
How to set Cookie using JavaScript

Objective: To learn about how to create and read the cookie using JavaScript.

Cookie is small piece of data which is saved on user device by website. It is helpful in storing any data to identify the user or to track the user. When user again visits the website, stored data can be read easily.

Step 1: To set the cookie on user device

By the function createCookie(), you can easily create the cookie by passing the name, value (data which you want to store) and expiry date.

function createCookie(name, value, days) {
if (days) {
var date = new Date();
date.setTime(date.getTime() + (days * 24 * 60 * 60 * 1000));
var expires = ';expires=' + date.toGMTString();
} else {
var expires = '';
}
//setting cookie
document.cookie = name + '=' + value + expires + '; path=/';
}

Step2: To read the cookie

You can easily read the cookie using the below function by providing cookie name.

function readCookie(name) {
var nameEQ = name + '=';
//reading the cookie
var ca = document.cookie.split(';');
//processing to get the content
for (var i = 0; i < ca.length; i++) {
var c = ca[i];
while (c.charAt(0) == ' ') {
c = c.substring(1, c.length);
}
if (c.indexOf(nameEQ) == 0) {
//returning actual content
return c.substring(nameEQ.length, c.length);
}
}
return null;
}

Example: Example to store the user name in the cookie.

if (cookies == 'yes') {
jQuery('document').ready(function () {
//reding cookie
var cook = readCookie('YourWebsite');
if (cook != 'true') {
//calling to create the cookie if not found
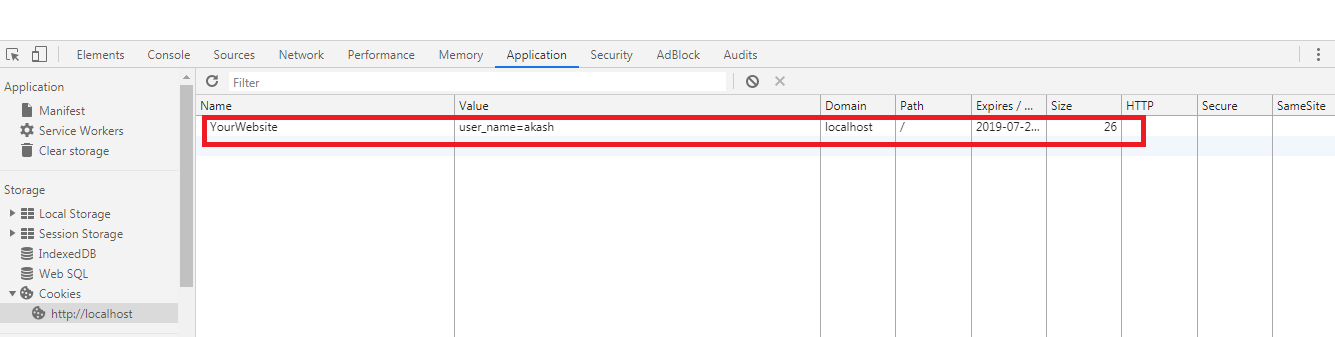
createCookie('YourWebsite', 'user_name=akash', 30);
}
});
}

You can see the stored cookie in the console of the browser:

How to set Cookie using JavaScript

Dependency: You will need to include the jquery min js file to run the example. For this, you can use below line of code.

Related Blogs: Copy to clipboard in JavaScript

JavaScript Desktop Notification

Objectives of the blog

After reading this blog, you will able to setup the desktop notification for your site. You will also be able to customize your notification by your own message, image, icon etc.

Benefit of Desktop Notification

Suppose you want to notify your customer outside the webpage then we can use the desktop notification as if you have enabled desktop notification for email, you don’t need to check emails regularly. In every email, you got a notification.

Code for Desktop Notification

Add the below function in the script tag in the head of the HTML.

function showNotification() {
    // Verify if the user's browser supports notifications or not
    if (!("Notification" in window)) {
        alert("Your browser does not support the desktop notification");
    }
    // Verify if notification's permissions have already been granted or not
    else if (Notification.permission === "granted") {
 
        // Create Notification
        var options = {
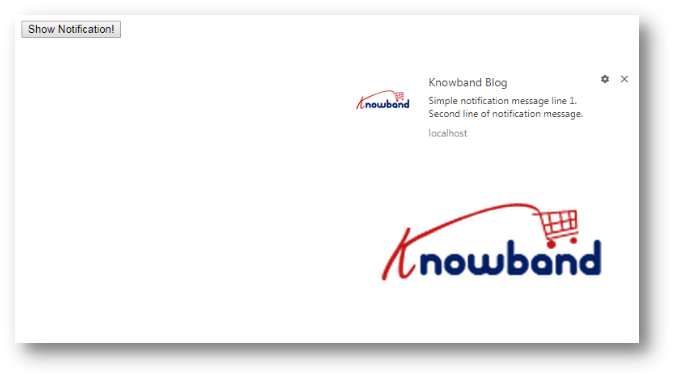
            body: 'Simple notification message line 1.\nSecond line of notification message.', // body of the notification
            dir: 'ltr', // direction of message ltr: left to right. rtl : right to left.
            image: 'https://www.knowband.com/blog/wp-content/uploads/2016/09/cropped-knowband_logo-v2.png', // Add image if required to show
            icon: 'https://www.knowband.com/blog/wp-content/uploads/2016/09/cropped-knowband_logo-v2.png', // Add icon if required to show
        }
 
        var title = "Knowband Blog";
        var notification = new Notification(title, options);
 
 
        //Add the notification click link
        notification.onclick = function (event) {
            event.preventDefault(); // prevent the browser from focusing the Notification's tab
            window.open('https://www.knowband.com/blog/', '_blank');
            notification.close();//Close the notification after click
        }
    }
 
    // If no permissions, ask the user for permission
    else if (Notification.permission !== "denied") {
        Notification.requestPermission().then(function (permission) {
            // If the user accepts, let's create a notification
            if (permission === "granted") {
                var notification = new Notification("Hi there!");
            }
        });
    }
}

You can trigger this function through event as you wish. For testing purpose, you can check this by adding a button. Use below code for button in the body

<button onclick="showNotification()">Show Notification!</button>

Note: If you are running this code on the local system then use the local sever i.e. localhost.

Output Screen