Objective of the blog
After reading this blog, you will be able to understand how SQS is setup and how MWS is subscribed for any notification.
Let’s Create an Amazon SQS and Enable this for MWS Subscription
The Amazon MWS Subscriptions section enables us to subscribe to receive notifications. To receive notifications, you must first create and register a Destination, such as an Amazon Simple Queue Service (Amazon SQS) queue. Then, you will need to create a Subscription for the NotificationType that you want to receive.
How the queue is created and how MWS Subscription is done for the NotificationType are described below.
Create Amazon Simple Queue Service (Amazon SQS) queue
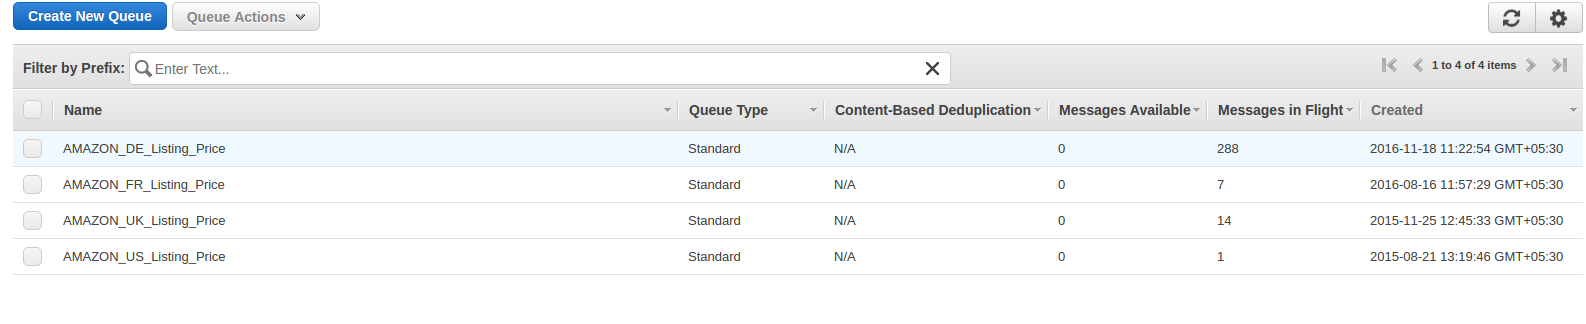
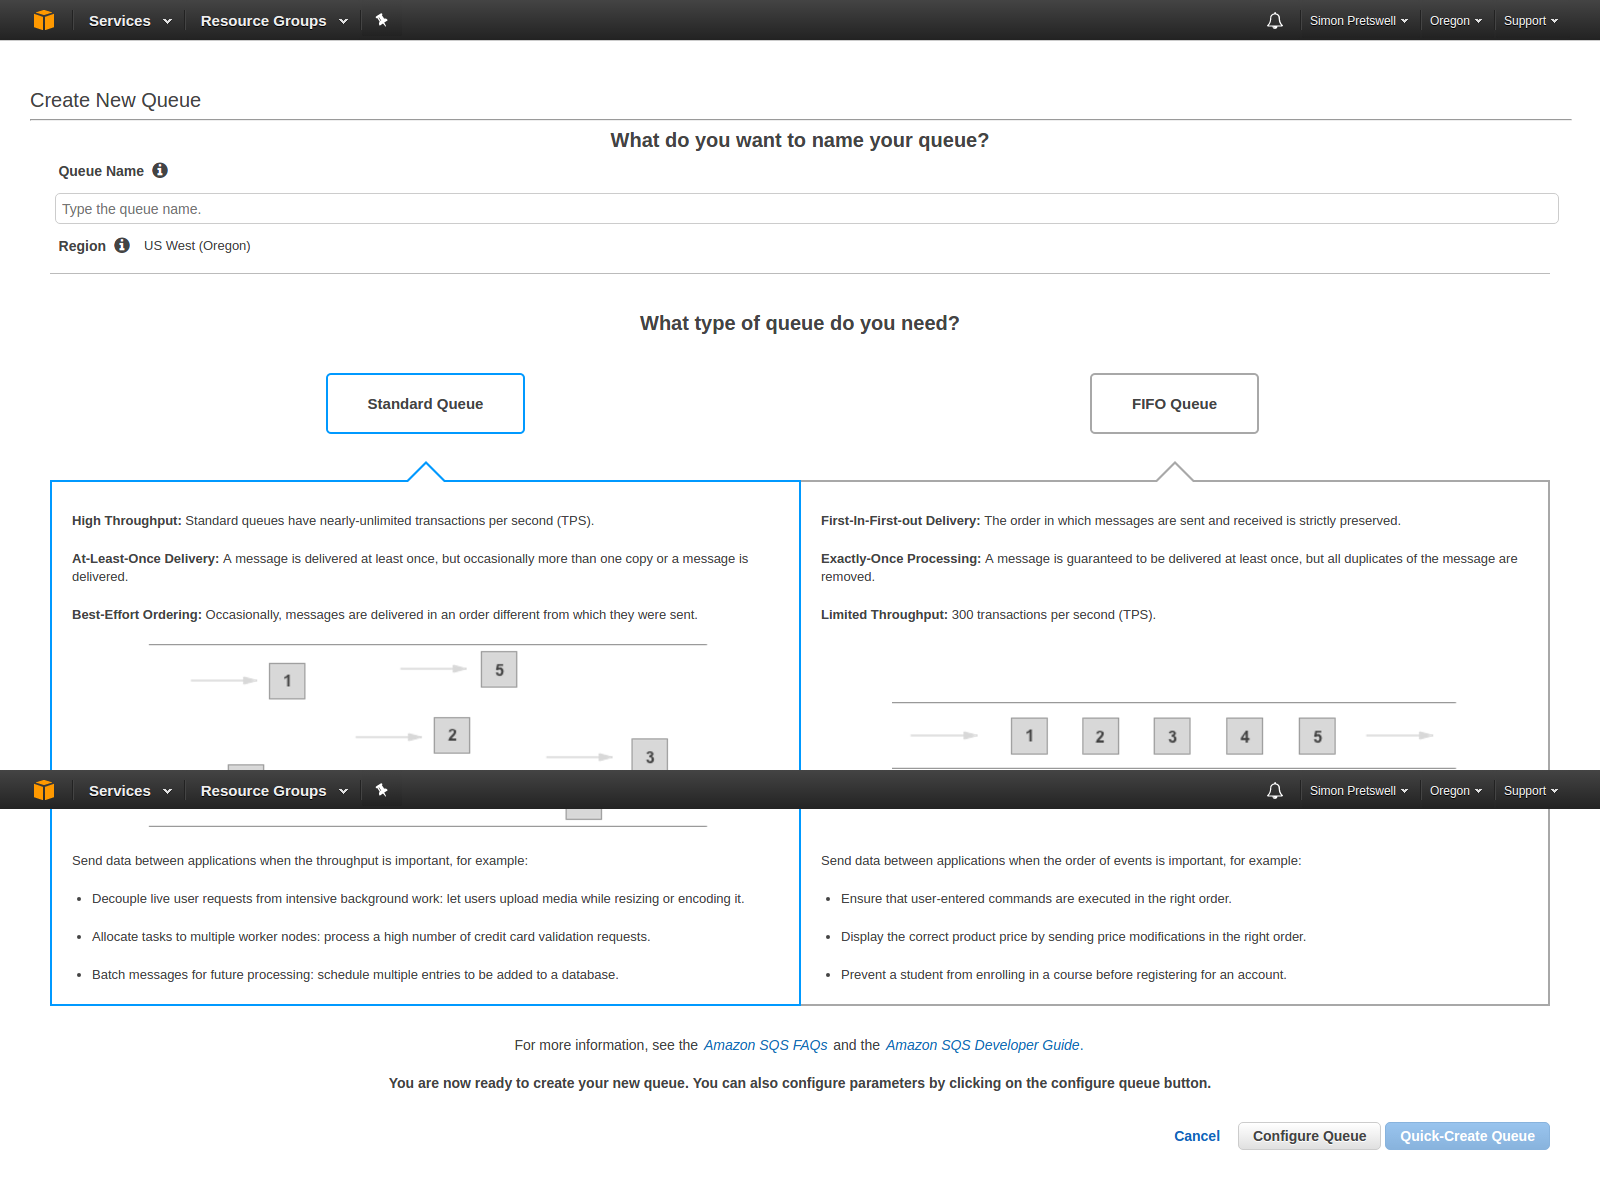
1. Login SQS Management Console using https://console.aws.amazon.com/sqs/home?region=us-west-2# URL and credentials. Page will look like below image.
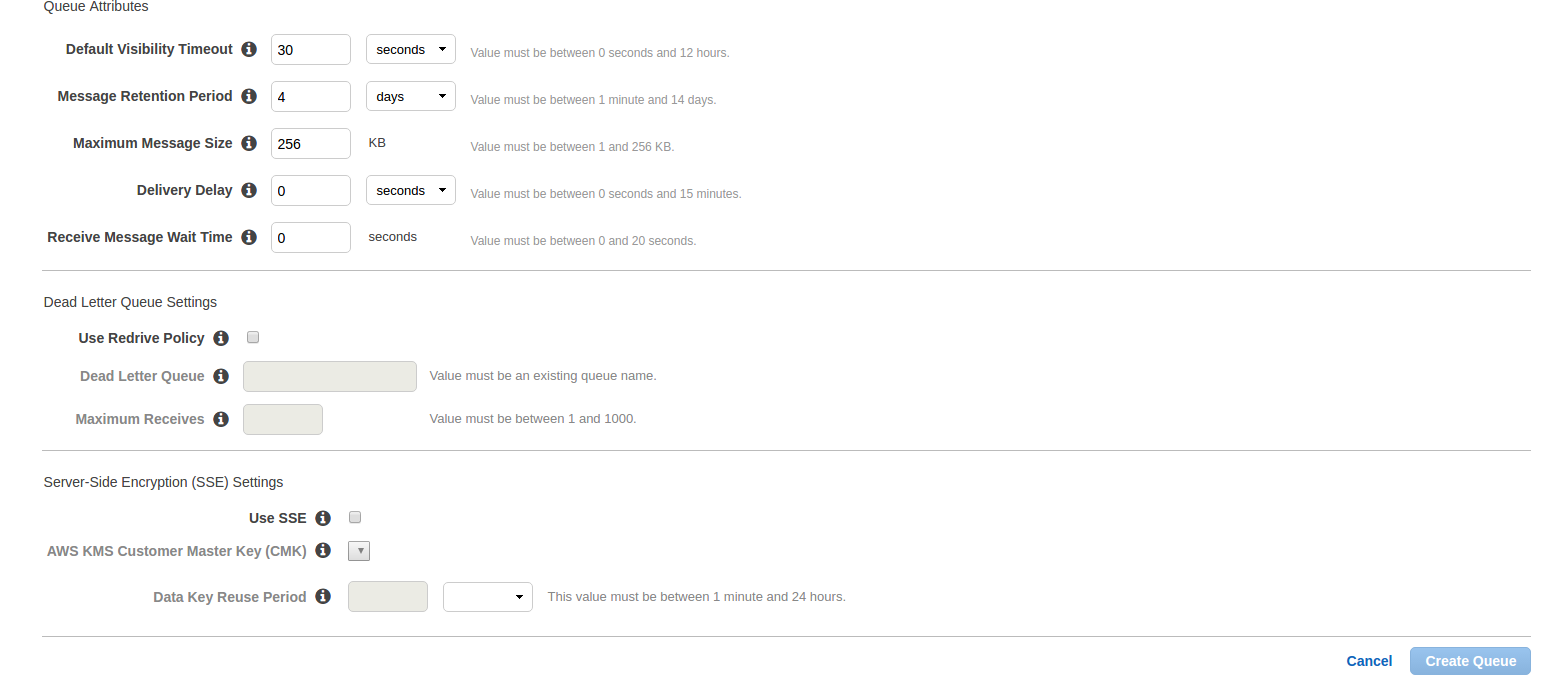
- Default Visibility Timeout: This is the time for which a received message from the queue will not be available to receive again.
- Message Retention Period: This is the time for which any message will reside in the queue if that message is not forcefully deleted. After entered time, that message will be automatically deleted from the queue.
These are two most important fields. Other fields are:
- Maximum Message Size: Highest message size (in bytes) accepted by Amazon SQS.
- Delivery Delay: The amount of time to delay the first delivery of all messages added to this queue.
- Receive Message Wait Time: The highest amount of time that a long-polling receive call will wait for a message to become available before returning an empty response.
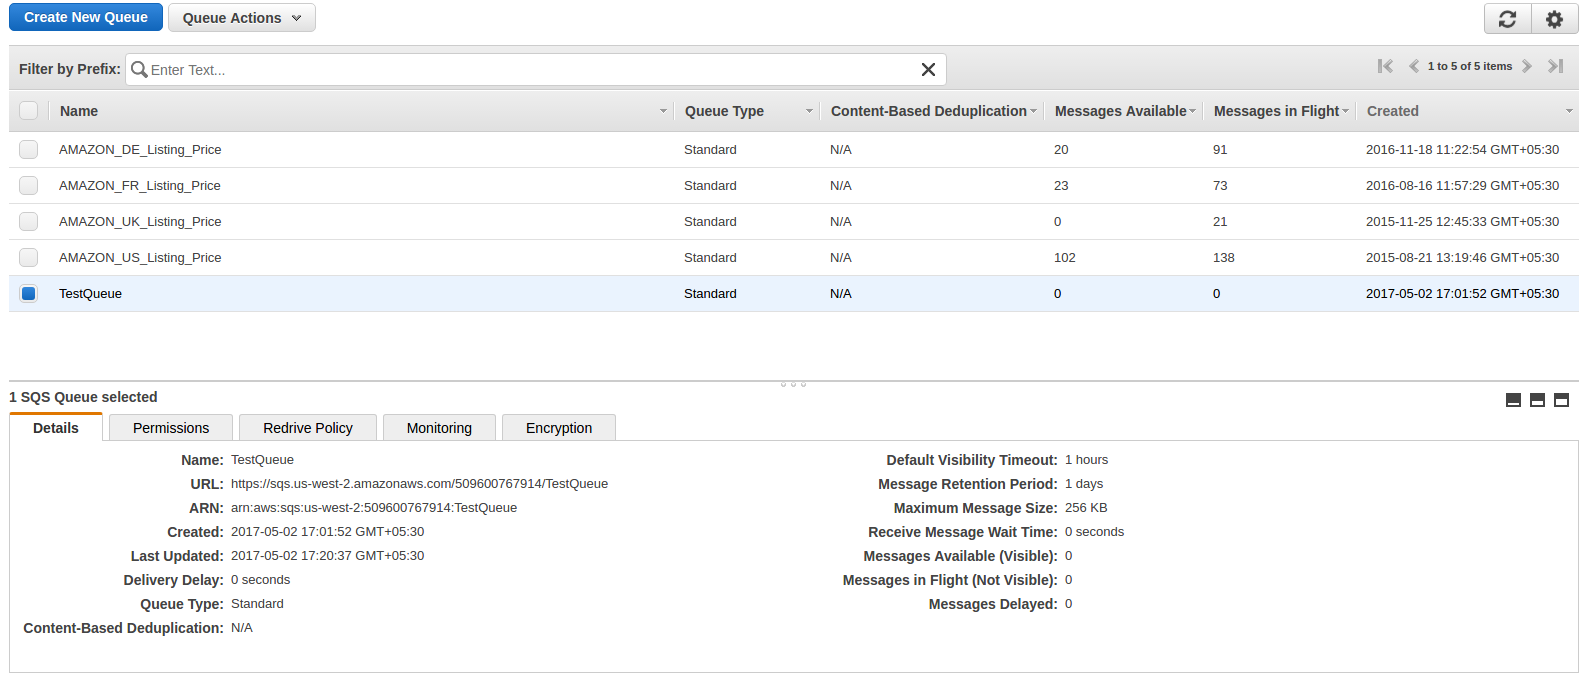
After enter detail, click on Create Queue button and you will be redirected on queue list page and your new queue will also be shown as shown in below image and basic detail of queue will also be displayed.
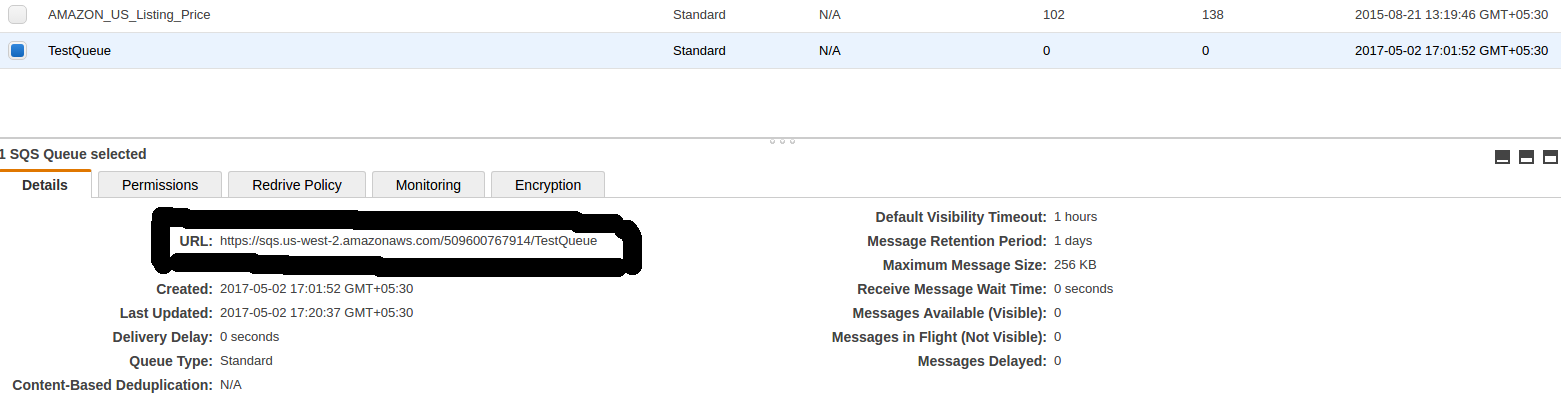
In basic detail, there is URL which is the most important attribute and this will be used to register and subscribe for notification.
Now click on Permissions tab and click on Add a Permission button. A popup will be opened like below image. Enter your AWS account number and in action, check All SQS Actions checkbox and click on Add permissions.
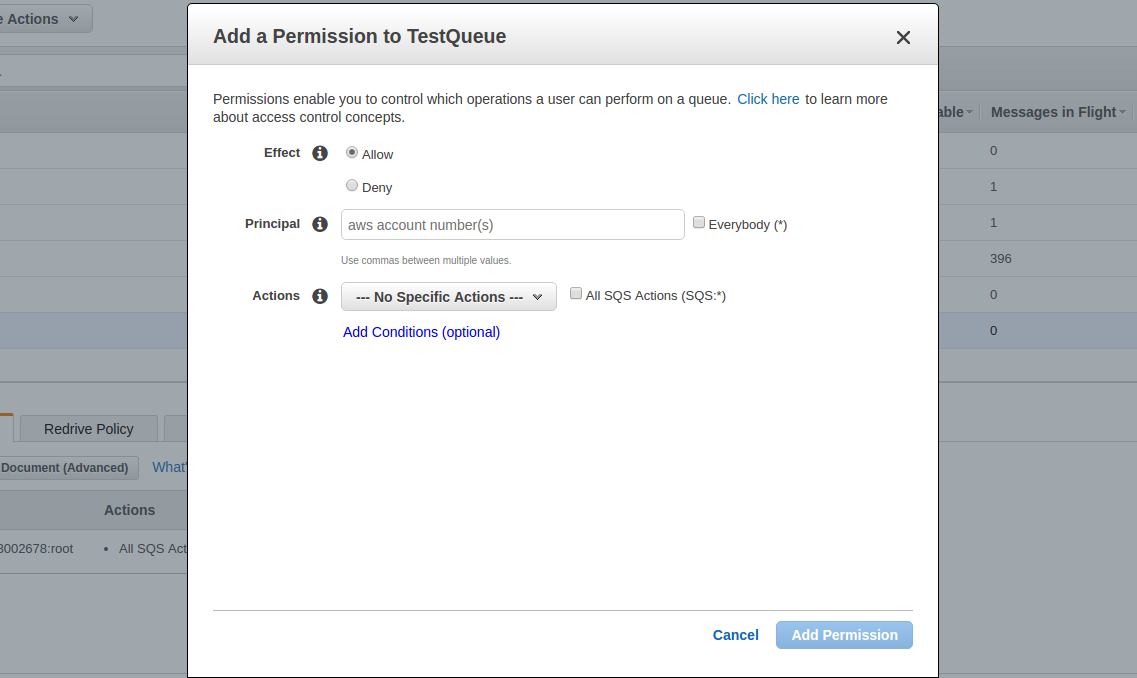
You can add multiple permissions as you want.
Register a Destination (Created Queue)
Now queue has been created and you need to register this queue for notifications. For this, you need to use RegisterDestination operation on MWS. The RegisterDestination operation specifies a location where you want to receive notifications and adds it to the list of registered destinations.
For this, open https://mws.amazonservices.co.uk/scratchpad/index.html or https://mws.amazonservices.com/scratchpad/index.html depending on the marketplace. Select subscriptions from API Section and RegisterDestination from operation as below image.
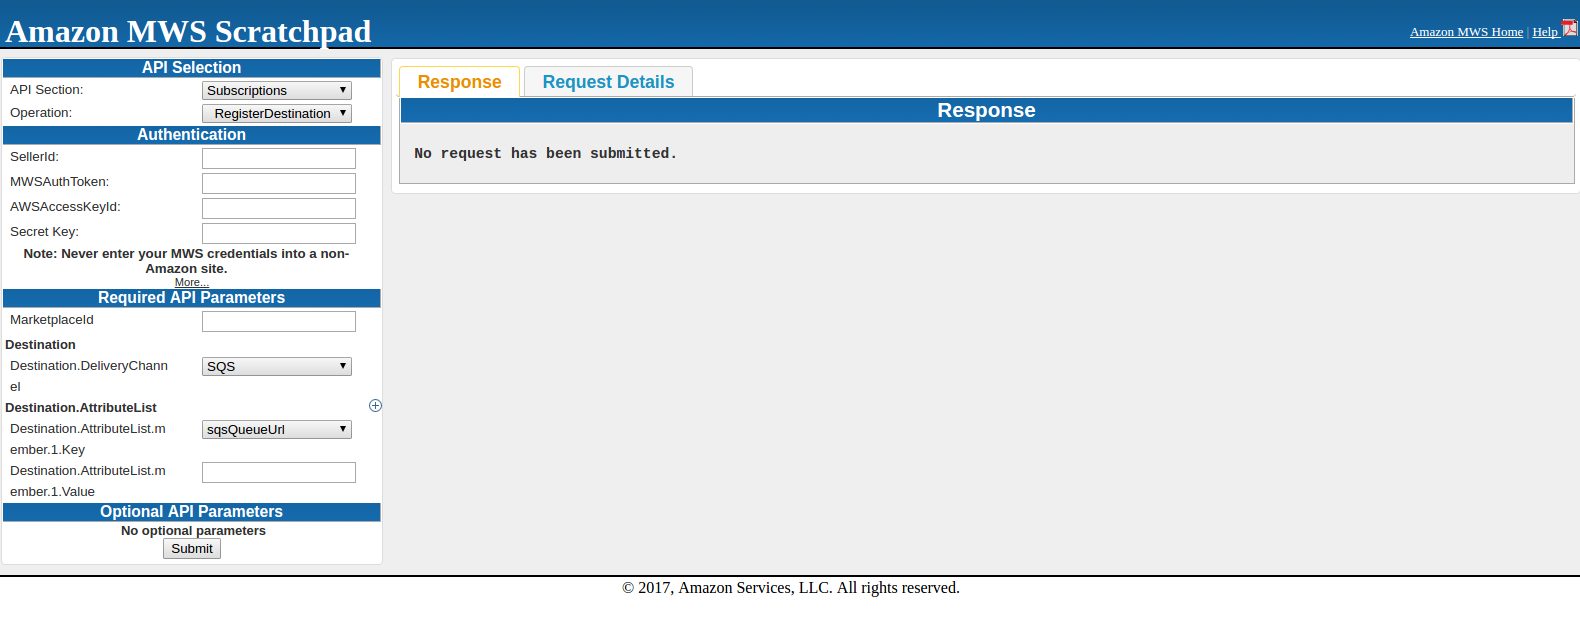
Here enter SellerId, AWSAccessKeyId, Secret Key and MarketplaceI. In Destination, SQS should be selected because you are using SQS queue as destination. Destination.AttributeList.member.1.Key should be sqsQueueUrl and in Destination.AttributeList.member.1.Value, you need to enter SQS URL which was under details in SQS Queue like below image.
When submitting the request, either you can get success response or error response. If you get below response, it means registered successfully.
<?xml version="1.0"?>
<RequestReportResponse xmlns="https://mws.amazonservices.com/doc/2009-01-01/">
    <RequestReportResult>
        <ReportRequestInfo>
            <ReportRequestId>2291326454</ReportRequestId>
            <ReportType>_GET_MERCHANT_LISTINGS_DATA_</ReportType>
            <StartDate>2009-01-21T02:10:39+00:00</StartDate>
            <EndDate>2009-02-13T02:10:39+00:00</EndDate>
            <Scheduled>false</Scheduled>
            <SubmittedDate>2009-02-20T02:10:39+00:00</SubmittedDate>
            <ReportProcessingStatus>_SUBMITTED_</ReportProcessingStatus>
        </ReportRequestInfo>
    </RequestReportResult>
    <ResponseMetadata>
        <RequestId>88faca76-b600-46d2-b53c-0c8c4533e43a</RequestId>
    </ResponseMetadata>
</RequestReportResponse>
If a request is unsuccessful, the main response element will be ErrorResponse, irrespective of the action requested and error detail will also be in response.
<ErrorResponse xmlns="https://mws.amazonservices.com/doc/2009-01-01/">
    <Error>
        <Type>Sender</Type>
        <Code>InvalidClientTokenId</Code>
        <Message> The AWS Access Key Id you provided does not exist in our records. </Message>
        <Detail>com.amazonservices.mws.model.Error$Detail@17b6643</Detail>
    </Error>
    <RequestID>b7afc6c3-6f75-4707-bcf4-0475ad23162c</RequestID>
</ErrorResponse>
After register Destination, try SendTestNotificationToDestination operation to verify that notifications are receiving or not. This operation sends a test notification to the Destination that you specify.
Subscribe for Notification
For this, you need to use CreateSubscription operation and this operation creates a new subscription for the specified notification type and destination. Select subscriptions from API Section and CreateSubscription from operation as below image.
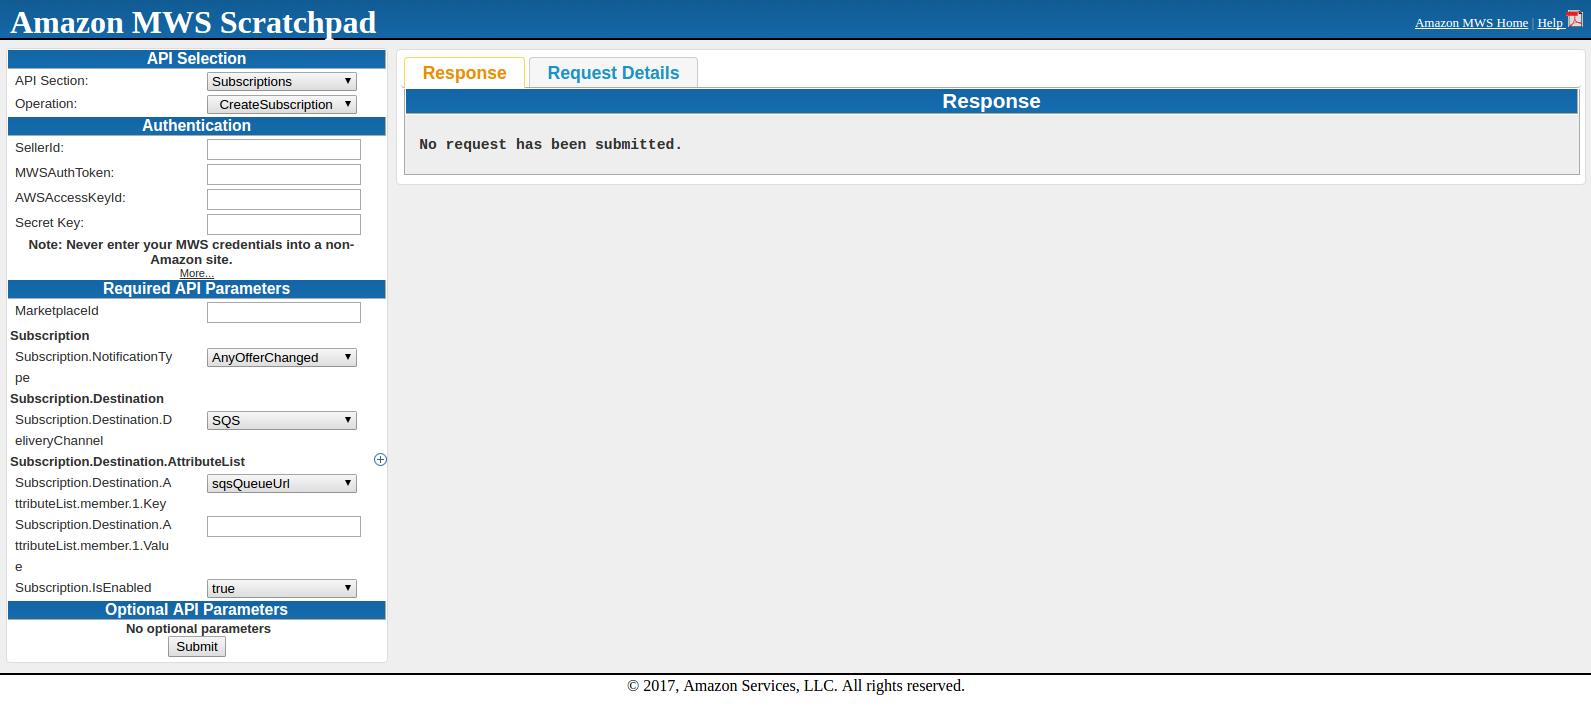
Here enter SellerId, AWSAccessKeyId, Secret Key and MarketplaceId. Subscription.NotificationType should be AnyOfferChanged if you want to get other seller offer price. In Subscription.Destination.DeliveryChannel, SQS should be selected because SQS queue is being used as destination. Subscription.Destination.AttributeList.member.1.Key should be sqsQueueUrl and in Subscription.Destination.AttributeList.member.1.Value, you need to enter SQS URL which was under details in SQS Queue. Subscription.IsEnabled will be true.
When submitting the request, either you will get success or error in response. Once you get success in response, all is done to get notifications.
After this, you can fetch notification from SQS using CURL request.