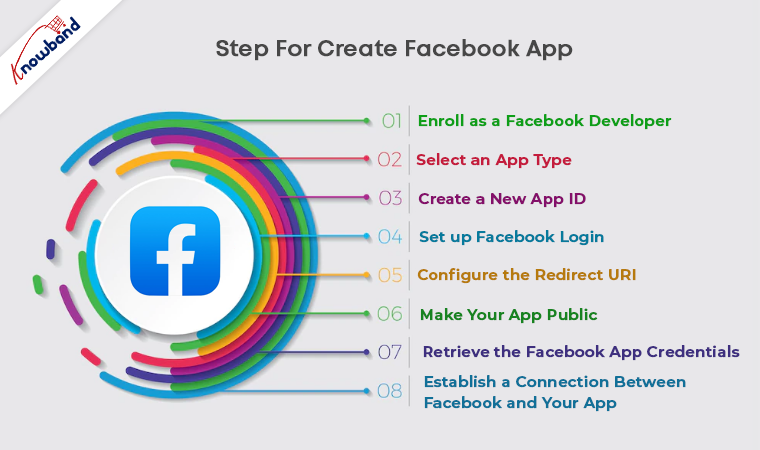
Modern applications do rely on social media platforms for login as well as sharing purposes. Allowing Facebook login option while creating an eCommerce mobile app would not only save the users from having lengthy and time taking form fillings but will also provide a secure and convenient site access. To enable Facebook authentication, first, we need to create the Facebook app. Let’s see the step by step process of how to create Facebook App:
Step 1: Enroll as a Facebook Developer
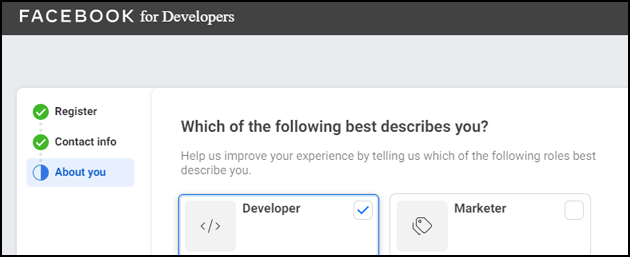
In order to create a Facebook app, open Facebook Developer and login to your account. Follow simple steps of the registration process and you will be required to add your contact info along with your role.
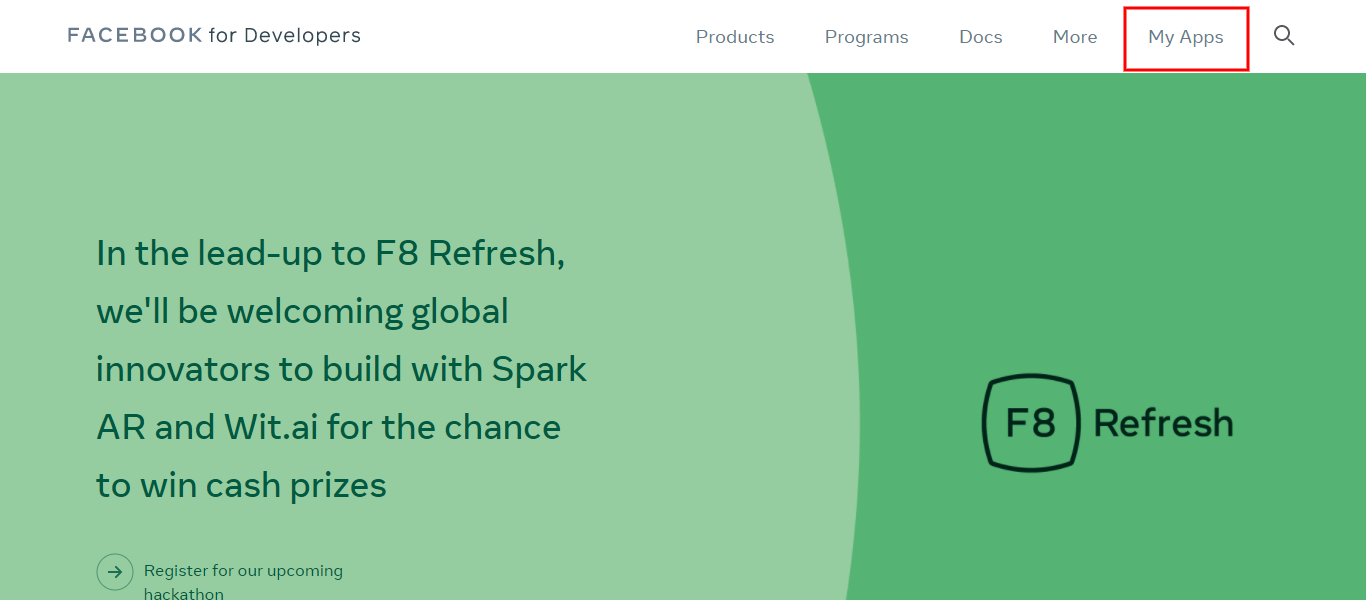
If you are not already enrolled, create a new account. After log-in, select My Apps option from the menu in the upper right corner.
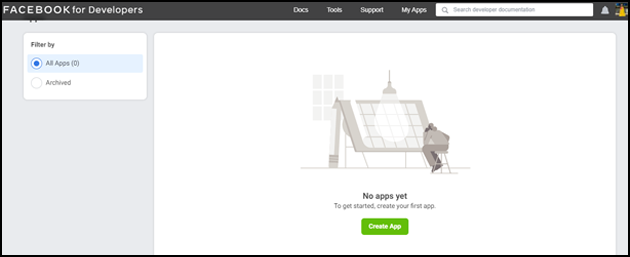
You will be redirected to a new page where you need to select Create App option.
Step 2: Select an App Type
Once you click on the Create App option, you will have to select the App type from the options provided in the apperared pop-up.
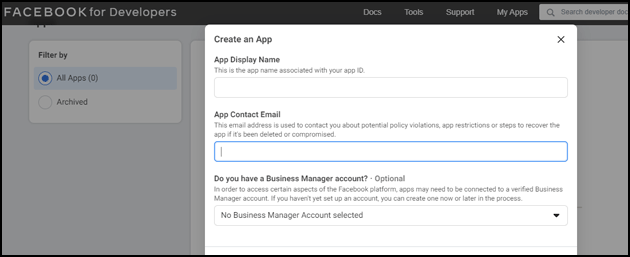
Step 3: Create a new App ID
After selecting the App Type option, a pop window will appear requiring App Display Name and Contact e-mail details. Enter the details and create App ID.
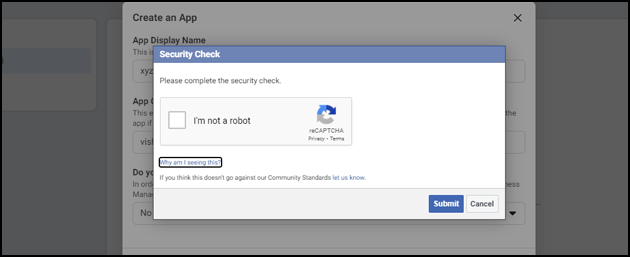
As you click on Create App ID, Facebook will ask for a security check as shown in the snapshot below:
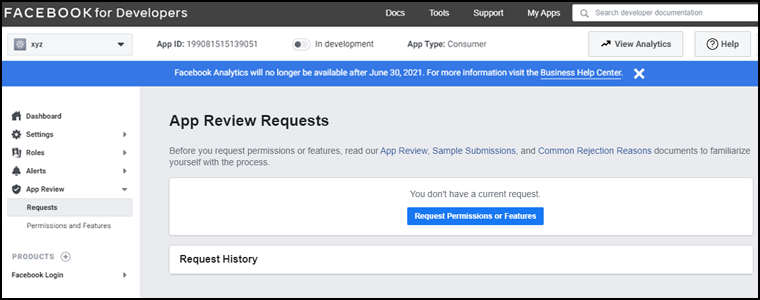
Step 4: Set up Facebook Login
Now it’s time to set up Facebook login after completing the security check. This is the landing page for the Facebook application to which we will add a Facebook login product. The Facebook Login is just one of the many products that can be added to your Facebook app.
Once the App ID is created, Add a Product webpage opens. Click set up option under Facebook login.
Now, it’s time to choose the type of your application. Select the platform of your application.
Once you have chosen the platform, download the latest Facebook SDK file if you haven’t already installed it.
Step 5: Configure the Redirect URI
You’ll find Settings option appearing on the left side of the screen under Facebook Login. Select this option.
Enter the following URL in the redirect URIs field: https://YOUR_AUTH0_DOMAIN/login/callback and save the changes. (Domain name should be correct)
Note: If your domain name is not displayed above, log in to the dashboard to find your tenant name in the top right corner. It is the domain name.
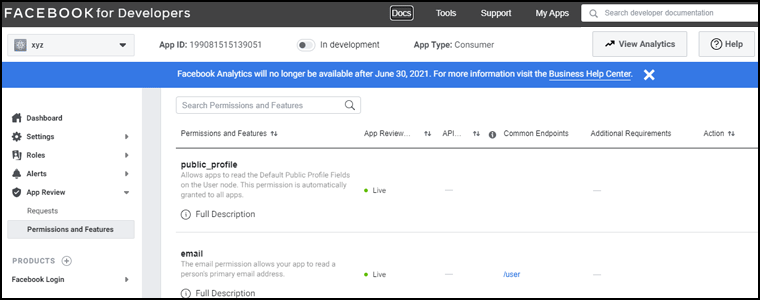
Step 6: Make your App public
Now, from the left navigation bar, click the App review option. After this, on the top of the page,’ Make (Your App Name) App public?’ will appear. Toggle the button to enable it.
Step 7: Retrieve the Facebook App Credentials
Open basic settings from the left navigation bar. On this web page, you can retrieve your App ID and App Secret. Click show to reveal the App Secret (you may be asked to re-enter your Facebook password).
All right! Now is the time for the final step.
Step 8: Establish a connection between Facebook and your app
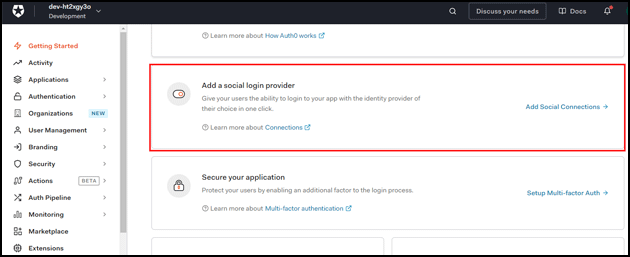
In a separate tab or window, go to the Connections > Social and choose Add a Social Login Provider option.
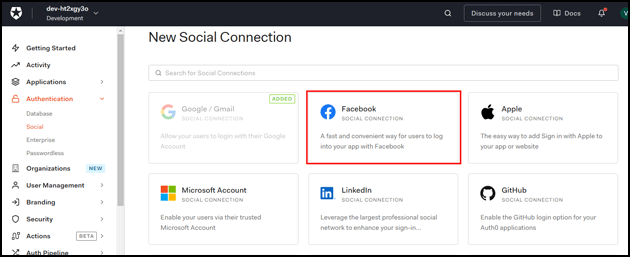
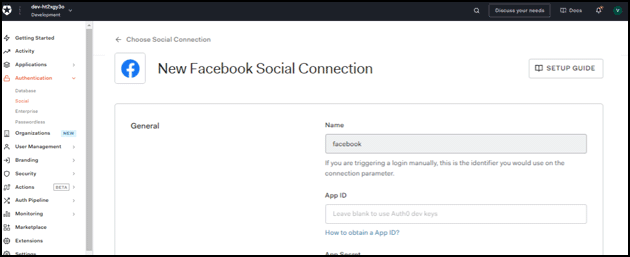
and click on the box with the Facebook logo. This will bring up the Facebook connection settings. Copy the App ID and App Secret from the Settings of your app on Facebook:
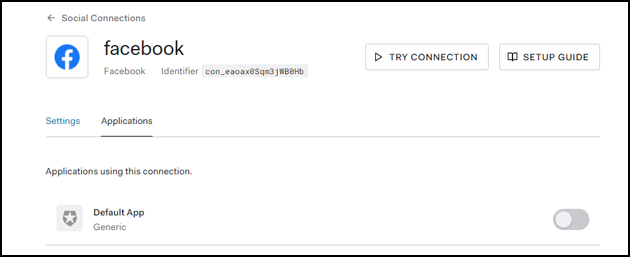
Select all the attributes and permissions to enable them. Now, click the Applications tab and select the applications you wish to enable for this connection, and save them.
Wrap up
I hope this write-up had made the process of creating a Facebook App for the authentication process pretty clear. You can even find more details from here.
If you face any issues, please feel free to reach us at support@knowband.com for any queries. We also provide Facebook Store module for major CMS platforms like Prestashop and Magento. Know more here:
Suggested Reading: How to create Google Firebase Key for Push Notification?