How to setup Encryption and Decryption between Android and ASP.Net Web Application?

In this encryption, we are going to use a secret key for encrypting the string. The algorithm used will be AES with CBC (Cipher Block Chaining) mode.
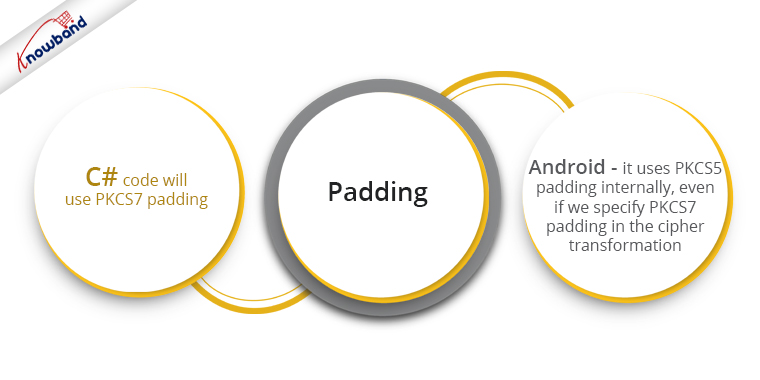
The C# code will use PKCS7 padding, as PKCS5 is not available there. In Android, it uses PKCS5 padding internally, even if we specify PKCS7 padding in the cipher transformation. So, we’re also specifying the PKCS5 padding mode. When tested, they both produce the same correct results.

In this encryption method, a single key is used for both the secret key and the salt.
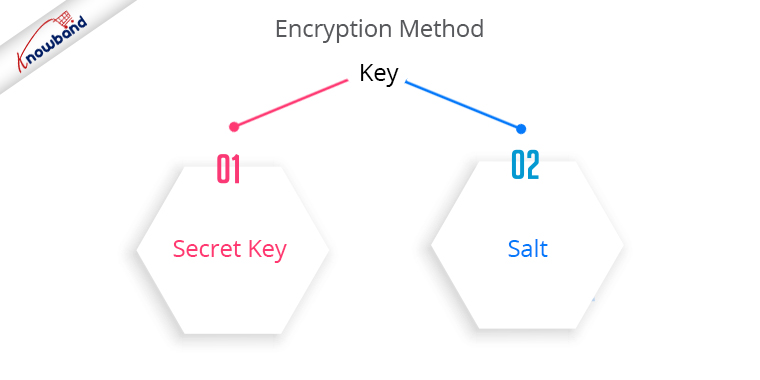
When using different keys for the secret key and salt, there was some difference between the Base64 encoded versions of the salt (or Initialization Vector). The Base64 encoded versions were created by Android and C# codes, and they were different from one another.

To overcome this, we’ve used a single key that will serve as both the secret key and the salt.

The code for the Android part is as follows:

public class EncryptionUtils {

   private final String characterEncoding = "UTF-8";
   private final String cipherTransformation = "AES/CBC/PKCS5Padding";
   private final String aesEncryptionAlgorithm = "AES";

   public String encrypt(String plainText, String key) throws UnsupportedEncodingException, InvalidKeyException, NoSuchAlgorithmException, NoSuchPaddingException, InvalidAlgorithmParameterException, IllegalBlockSizeException, BadPaddingException {
       byte [] plainTextbytes = plainText.getBytes(characterEncoding);
       byte [] keyBytes = getKeyBytes(key);
//        return Base64.encodeToString(encrypt(plainTextbytes,keyBytes, keyBytes), Base64.DEFAULT);
       return Base64.encodeToString(encrypt(plainTextbytes,keyBytes, keyBytes), Base64.NO_WRAP);
   }

   public String decrypt(String encryptedText, String key) throws KeyException, GeneralSecurityException, GeneralSecurityException, InvalidAlgorithmParameterException, IllegalBlockSizeException, BadPaddingException, IOException {
       byte [] cipheredBytes = Base64.decode(encryptedText, Base64.DEFAULT);
       byte[] keyBytes = getKeyBytes(key);
       return new String (decrypt(cipheredBytes, keyBytes, keyBytes), characterEncoding);
   }

   public  byte [] decrypt( byte[] cipherText, byte[] key, byte [] initialVector) throws NoSuchAlgorithmException, NoSuchPaddingException, InvalidKeyException, InvalidAlgorithmParameterException, IllegalBlockSizeException, BadPaddingException
   {
       Cipher cipher = Cipher.getInstance(cipherTransformation);
       SecretKeySpec secretKeySpecy = new SecretKeySpec(key, aesEncryptionAlgorithm);
       IvParameterSpec ivParameterSpec = new IvParameterSpec(initialVector);
       cipher.init(Cipher.DECRYPT_MODE, secretKeySpecy, ivParameterSpec);
       cipherText = cipher.doFinal(cipherText);
       return cipherText;
   }

   public byte[] encrypt(byte[] plainText, byte[] key, byte [] initialVector) throws NoSuchAlgorithmException, NoSuchPaddingException, InvalidKeyException, InvalidAlgorithmParameterException, IllegalBlockSizeException, BadPaddingException
   {
       Cipher cipher = Cipher.getInstance(cipherTransformation);
       SecretKeySpec secretKeySpec = new SecretKeySpec(key, aesEncryptionAlgorithm);
       IvParameterSpec ivParameterSpec = new IvParameterSpec(initialVector);
       cipher.init(Cipher.ENCRYPT_MODE, secretKeySpec, ivParameterSpec);
       plainText = cipher.doFinal(plainText);
       return plainText;
   }

   private byte[] getKeyBytes(String key) throws UnsupportedEncodingException{
       byte [] keyBytes= new byte[16];
       byte [] parameterKeyBytes= key.getBytes(characterEncoding);
       System .arraycopy(parameterKeyBytes, 0 , keyBytes, 0, Math.min(parameterKeyBytes.length, keyBytes.length));
       return keyBytes;
   }
}

<strong>Recommended Read: </strong><a href="https://www.knowband.com/blog/tips/copy-clipboard-javascript/">Copy to clipboard in JavaScript</a>

The code for the C# part is as follows:

// Encrypts plaintext using AES 128bit key and a Chain Block Cipher and returns a base64 encoded string
       public string Encrypt(String plainText, String key)
       {
           var plainBytes = Encoding.UTF8.GetBytes(plainText);
           return Convert.ToBase64String(Encrypt(plainBytes, GetRijndaelManaged(key)));
       }
    
       public string Decrypt(String encryptedText, String key)
       {
           var encryptedBytes = Convert.FromBase64String(encryptedText);
           return Encoding.UTF8.GetString(Decrypt(encryptedBytes, GetRijndaelManaged(key)));
       }
    
       public byte[] Encrypt(byte[] plainBytes, RijndaelManaged rijndaelManaged)
       {
           return rijndaelManaged.CreateEncryptor()
               .TransformFinalBlock(plainBytes, 0, plainBytes.Length);
       }
    
       public byte[] Decrypt(byte[] encryptedData, RijndaelManaged rijndaelManaged)
       {
           return rijndaelManaged.CreateDecryptor()
               .TransformFinalBlock(encryptedData, 0, encryptedData.Length);
       }
    
       public RijndaelManaged GetRijndaelManaged(String secretKey)
       {
           var keyBytes = new byte[16];
           var secretKeyBytes = Encoding.UTF8.GetBytes(secretKey);
           Array.Copy(secretKeyBytes, keyBytes, Math.Min(keyBytes.Length, secretKeyBytes.Length));
           return new RijndaelManaged
           {
               Mode = CipherMode.CBC,
               Padding = PaddingMode.PKCS7,
               KeySize = 128,
               BlockSize = 128,
               Key = keyBytes,
               IV = keyBytes
           };
       }

With the help of the above code, one can encrypt a string on one platform, and then decrypt it on the other platform, and vice-versa.

Recommended Read: How to see the code of ‘.ctp’ file as colourful as the ‘.php’ file in NetBeans

How to save data to Firebase in Android?

Objectives:

The purpose of this blog is to inform readers on how to save data in Android’s Firebase Realtime database. Simple data kinds, such as strings, can be written to this database, as well as more complicated data types, like Java objects.

Pre-Requisites:

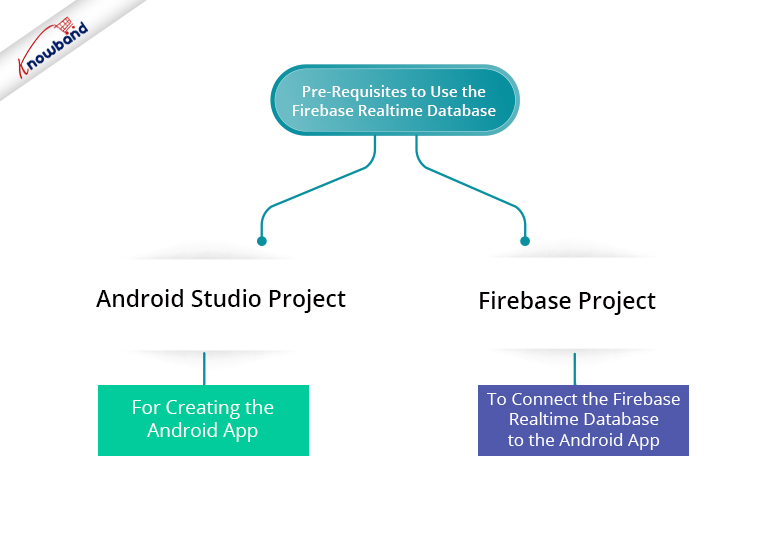
To use the Firebase Realtime Database in Android, we need to have an Android Studio project for creating the android app. Besides that, we need a Firebase project to connect the Firebase real-time database to the Android app.

To create a new Firebase project, follow the below-mentioned steps:-  

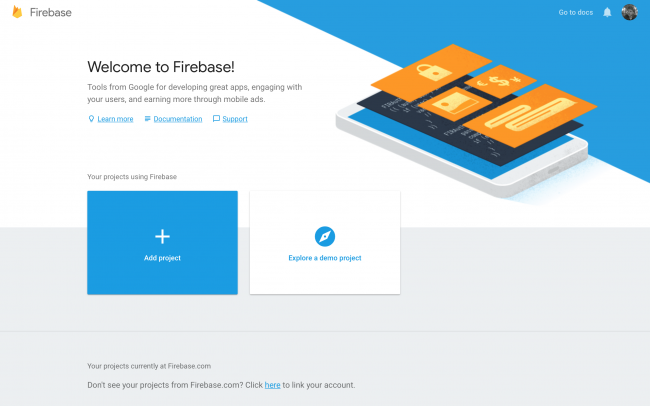
1. Open the URL – https://console.firebase.google.com

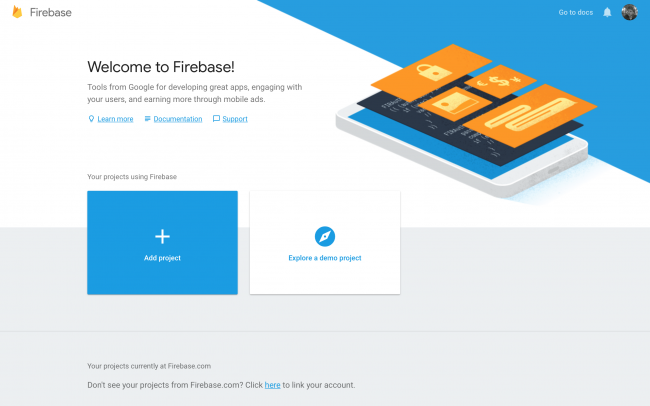
2. Then click on “Add Project”.

3. Next, enter the Firebase Project name and accept the conditions. After that, proceed by clicking on the “Continue” button.

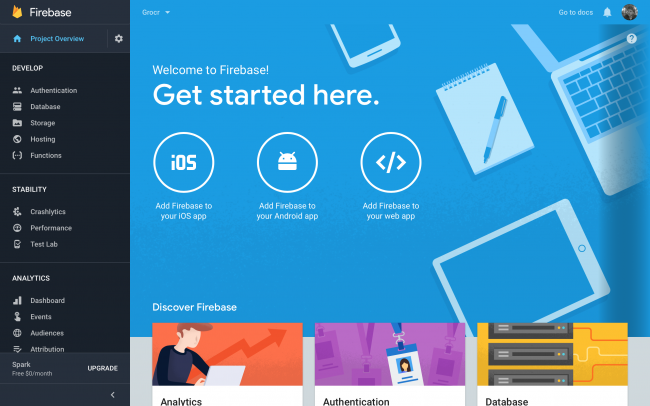
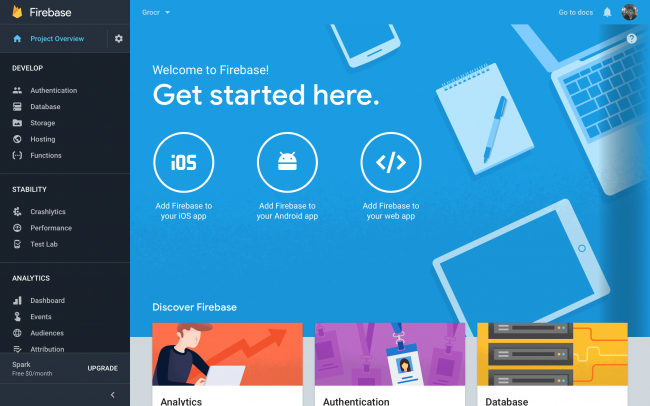
4. Then, on the next Welcome screen, click on “Add Firebase to your Android app“. In the same manner, enter the package name and click on Next.

5. Now, download the google-services.json file to your local system. Then, copy this file to the location in the Android Studio project as specified.

6. Follow the small process in the next step to add 3 lines of code to the build. Gradle files at project-level and app-level.

7. Then, finish adding the Android app to the Firebase project.

8. Open the Database section by clicking on the “Database” option in the left menu. Then, click on the “Create Database” link.

9. Now the process of creating the Firebase project is finished.

Recommended Read: How to fetch data from Firebase in Android?

Add the following line in the app-level build. gradle file to add the library to start using the Firebase Realtime Database.

implementation 'com.google.firebase:firebase-database:16.0.6'

Code Implementation

Before proceeding further, let us understand what is a Firebase reference?

In the Firebase database, the data is stored at a location. Hence, the pointer to that location is known as a Firebase reference. Multiple references point to the same location if they are initiated with the same path.

Create an instance of Firebase Database by writing the following line of code:

private FirebaseDatabase mDatabase = FirebaseDatabase.getInstance();

Now create references of the paths where the data would be stored in the Realtime Database. As the data is stored in the JSON format in the Firebase database, the paths specified in the references are the keys of the JSON object.

Recommended Read: How to fetch data from Firebase in Swift Language (iOS)?

The following line of code has to be added to create a reference to the root node in the database:

private DatabaseReference mDatabaseReference = mDatabase.getReference();

Next, create a child under the root node in the database and use this child key to add the corresponding data. After that, a string can be added to the database by following the below-mentioned lines of code:

mDatabaseReference = mDatabase.getReference().child("name");
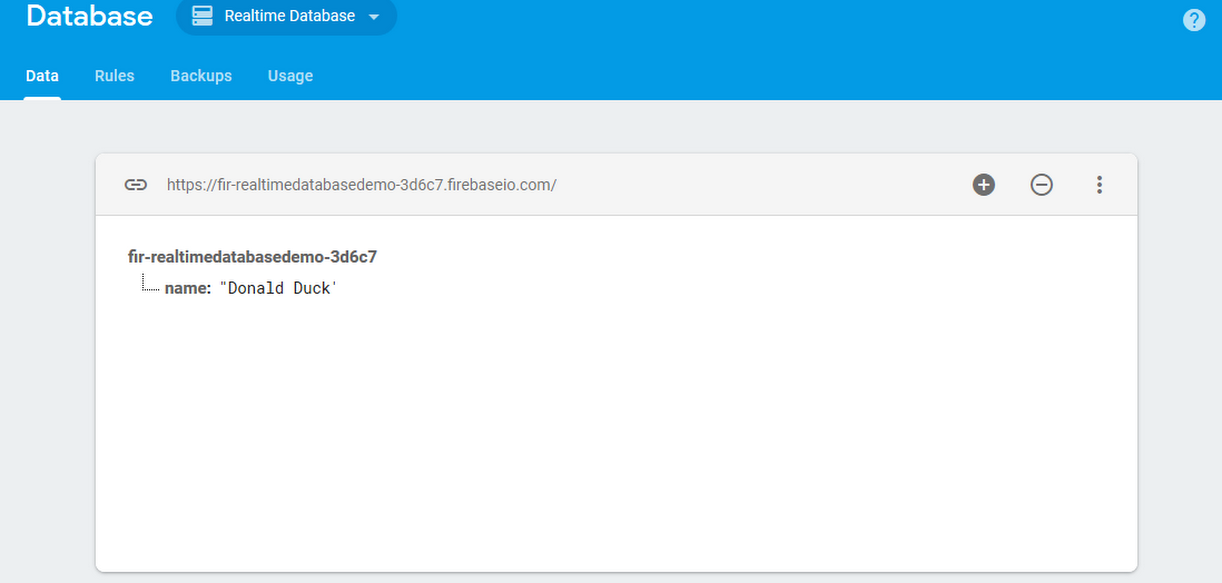
mDatabaseReference.setValue("Donald Duck");

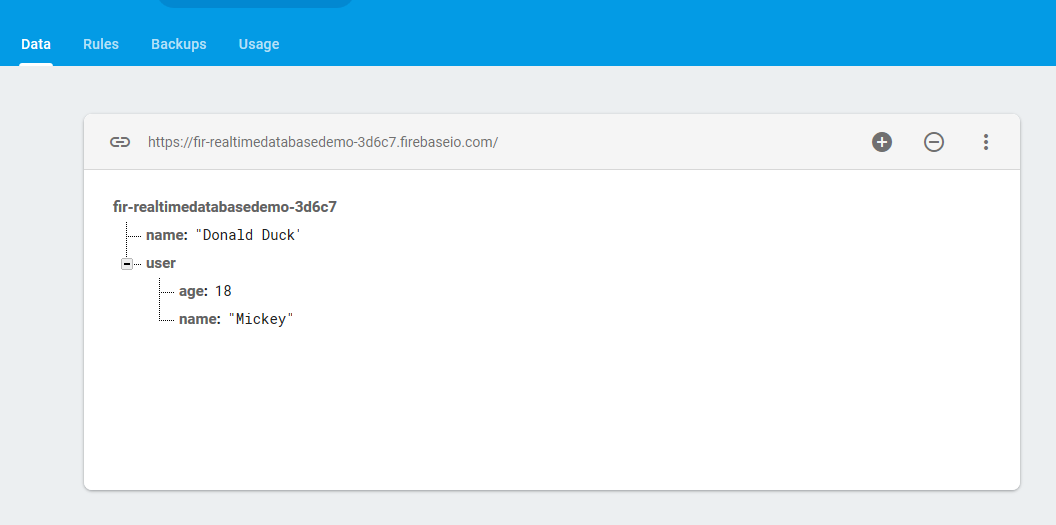
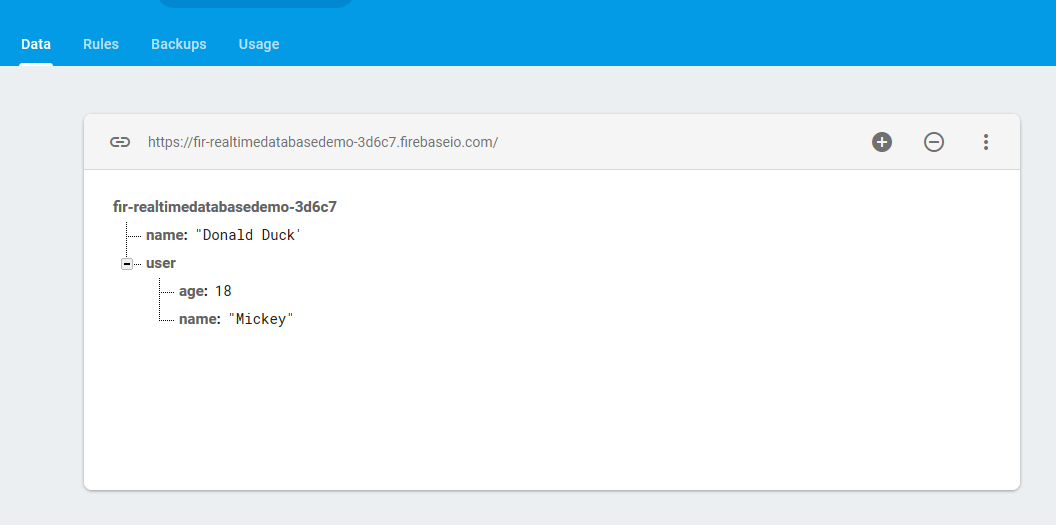
The above lines of code would insert the data into the database. The database in the Firebase project will look as follows:

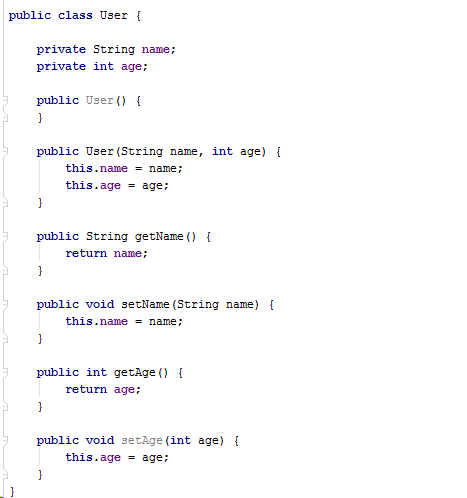
Firebase Realtime database also supports saving complex Java objects. Hence, a model class needs to be created first for saving the Java objects. Also, make sure to add an empty constructor and each attribute’s getters in the class.

Following is the code for a demo model class:

Following is the code to save an object of this class to the Firebase database:

User user = new User("Mickey", 18);
mDatabaseReference = mDatabase.getReference().child("user");
mDatabaseReference.setValue(user);

The above-mentioned code would insert the object data in the  Firebase database as follows:

Recommended Read: How to save data to Firebase in Swift Language (iOS)?

Conclusion:

Now you are knowing how to save data into the Firebase Realtime Database. Also, Knowband offers an eCommerce Mobile App Builder module for online Store owners. So, the mobile app Maker plugin is available for platforms like PrestaShop, OpenCart, WooCommerce and Magento 2. Thus, With just a few clicks and no difficulty, you can create your native, responsive app for smartphones and tablets.

How to fetch data from Firebase in Android?

Objectives of the blog

After reading this blog we will be able to fetch data from Firebase Realtime Database. This data may include simple data types, such as Strings, or complex data types such as Java objects.

Pre-requisites

We need to have a Android Studio project and Firebase project ready in order to use the Firebase Realtime Database. Create a new Android Studio project (or use any existing project). This Android Studio project will be used for working with the realtime database.

Follow the steps given below to create the Firebase project –

1. Go to https://console.firebase.google.com

2. Click on “Add Project” button.

3. Enter the Project name and accept the conditions and click on “Continue” button.


4. Then add Android app to your project. It requires entering the package name of the app. Click on Next.

5. Download the google-services.json file, and move this file to the location in the Android project in Android Studio as specified on the screen.

6. In the next step, there would be a small tutorial to add 3 lines of code in the project-level and app-level build.gradle files. Add them accordingly.

7. Then finish this process of adding the Android app to the project.

8. Then click on “Database” option from the left menu, and click on “Create Database” button.


9. Firebase setup is completed

Now add the Firebase library for using the Firebase Realtime Database in the app-level build.gradle file. This can be done by adding the following line:

implementation 'com.google.firebase:firebase-database:16.0.6'

Code Implementation

A Firebase reference points to a location in Firebase Database where data is stored. Even if you create multiple references, they all share the same connection provided you used the same path while creating the reference from the database instance.

Firstly we need to have an instance of the Firebase Database in order to use it. The instance can be created by the following line of code.


private FirebaseDatabase mDatabase = FirebaseDatabase.getInstance();


Now there is need to create references of the paths where the data is stored in the database. As the data in the Firebase database is stored in the JSON format, the keys of the JSON object are the paths specified in the references.

The reference to the root node can be created by the following line of code:


private DatabaseReference mGetReference = mDatabase.getReference();


After getting the reference of the database, an asynchronous listener has to be attached to the database reference which actively listens to any change done in the database. This listener returns a data snapshot of the database initially for the first time when it is attached. Then the data snapshot is returned when any change is done at the path where the database reference is pointing to.

Usually, the database contains same type of data, but suppose the database contains some data of different types. Below find the screenshot of the database containing some dummy data:


To fetch the database from this database, attach the ValueEventListener to the database reference. The listener can be added by the following code:


mGetReference.addValueEventListener(new ValueEventListener() {
   @Override
   public void onDataChange(@NonNull DataSnapshot dataSnapshot) {
 
       if (dataSnapshot.exists()){
           HashMap<String, Object> dataMap = (HashMap<String, Object>) dataSnapshot.getValue();
 
           for (String key : dataMap.keySet()){
 
               Object data = dataMap.get(key);
 
               try{
                   HashMap<String, Object> userData = (HashMap<String, Object>) data;
 
                   User mUser = new User((String) userData.get("name"), (int) (long) userData.get("age"));
                   addTextToView(mUser.getName() + " - " + Integer.toString(mUser.getAge()));
 
               }catch (ClassCastException cce){
 
// If the object can’t be casted into HashMap, it means that it is of type String.  
 
                   try{
 
                       String mString = String.valueOf(dataMap.get(key));
                       addTextToView(mString);
 
                   }catch (ClassCastException cce2){
 
                   }
               }
 
           }
       }
   }
 
   @Override
   public void onCancelled(@NonNull DatabaseError databaseError) {
 
   }
});

After attaching the listener, it is executed first initially returning all the data in the database at that time. This listener will be later invoked at the time when any change takes place in the database at the path pointed by the reference the listener is attached to.

Summary

After following the above procedure, you will be able to fetch data from the Firebase Realtime database in Android.

If you face any issues, please feel free to reach us at support@knowband.com.  We also provide custom development and modules for major CMS platforms like Prestashop, Opencart, Magento, Magento 2 and Woocommerce.

Take a look at our most popular Woocommerce No Code Mobile App builder:


Put Elements in Linear Fashion and at the Bottom of the Screen in Android

The best way to put any elements in a linear fashion in Android is to use LinearLayout. Specify the attribute ‘orientation‘ of the LinearLayout to ‘vertical‘.

Now any number of elements put inside the LinearLayout will be in vertical order.

To align the elements at the bottom of the screen, use ConstraintLayout and add constraints to the LinearLayout to attach it with the bottom of the screen.

Find the sample code below where there are two TextView(s) placed one below the other and the container LinearLayout is attached to the bottom of the screen.

<?xml version="1.0" encoding="utf-8"?>
<android.support.constraint.ConstraintLayout xmlns:android="https://schemas.android.com/apk/res/android"
xmlns:app="https://schemas.android.com/apk/res-auto"
xmlns:tools="https://schemas.android.com/tools"
android:layout_width="match_parent"
android:layout_height="match_parent"
tools:context=".MainActivity">

<LinearLayout
android:layout_width="match_parent"
android:layout_height="wrap_content"
android:orientation="vertical"
app:layout_constraintBottom_toBottomOf="parent"
app:layout_constraintEnd_toEndOf="parent"
app:layout_constraintStart_toStartOf="parent">

<TextView
android:id="@+id/element1"
android:layout_width="wrap_content"
android:layout_height="wrap_content"
android:text="This is element 1" />

<TextView
android:id="@+id/element2"
android:layout_width="match_parent"
android:layout_height="wrap_content"
android:text="This is element 2" />

</LinearLayout>

</android.support.constraint.ConstraintLayout>

How to Create Alert Dialog box in Android?

The alert dialog box can be used to display a message in a popup dialog box or display a text field for user input or show any custom view in the dialog box.

For the view to be displayed in the popup dialog, the view has to be created programmatically or via XML. Then the view has to be set in the dialog so that this view is visible to the user in the dialog box.

Find the steps below to create a dialog box in which there will be a field for user input.

1. Create a view to be displayed in the dialog box.

final EditText userInput = new EditText(this);

2. Creating and displaying a dialog box.

new AlertDialog.Builder(this)
                .setTitle(“Title of the dialog box goes here”)
                .setView(userInput)
                .setPositiveButton(“Submit”, new DialogInterface.OnClickListener() {
                    @Override
                    public void onClick(DialogInterface dialog, int which) {
                        // Handle your action here when “Submit” button is clicked
                    }
                })
                .setNegativeButton(“Cancel”, new DialogInterface.OnClickListener() {
                    @Override
                    public void onClick(DialogInterface dialog, int which) {
		// Handle your action here when “Cancel” button is clicked 
                    }
                })
                .show();