Using PrestaShop Hooks Effectively in Your Module Development

If you’ve spent any real time building PrestaShop modules, hooks are probably where most of your battles have been fought. They’re how your module speaks to the core — how you plug in functionality without ever cracking open a file you shouldn’t be touching. Knowing they exist is one thing. Using them without shooting yourself in the foot is another.

What a Hook Actually Is

At its simplest, a hook is a moment in PrestaShop’s execution where it pauses and checks whether anyone’s listening. If your module is registered for that hook, it gets a turn to respond.

There are two types worth distinguishing: action hooks and display hooks. Action hooks are for running logic tied to an event,  an order being placed, a product being saved, that sort of thing. Display hooks are for injecting HTML into specific spots on the storefront or back office. The distinction shapes how you write the method. Action hooks process something and usually return nothing meaningful. Display hooks return rendered HTML that PrestaShop slots into the page.

Where Developers Go Wrong with Registration

The most common early mistake is registering hooks in the wrong place or in a disorganized way. Registration belongs in your module’s install() method via $this->registerHook(). You can pass an array of hook names in one call — which is much tidier than stringing together repeated calls.

Just as important: unregister them in uninstall(). It’s easy to skip this and easy to regret. Orphaned hook registrations sitting in the database after a module’s been removed can cause genuinely confusing behavior down the line. A clean pattern looks roughly like this:

public function install()

{

    return parent::install()

        && $this->registerHook(['displayHeader',

           'actionOrderStatusUpdate',

           'displayFooterProduct']);

}


Get the Method Names Right

PrestaShop resolves hook methods by convention: hookHookName(), with the hook name in camelCase. So displayHeader maps to hookDisplayHeader(). Mess up the casing and PrestaShop silently skips your method, no error, no log entry, nothing. 

It’s one of those bugs that can eat an embarrassing amount of debugging time before you spot it.

Every hook method receives a $params array. What’s inside depends entirely on which hook triggered it. During development, dump $params once before writing any real logic. The documentation is a decent starting point but it doesn’t always reflect what actually gets passed in.
 

Handling Display Hooks Properly

For display hooks, the standard approach is to assign variables to Smarty and return the output of $this->display() pointing to a .tpl file. Keep your templates in views/templates/hook/ inside your module,  it’s the conventional structure and makes things easier to navigate as the module grows.

One detail worth emphasizing: always return the output, never echo it. The hook system collects return values and places them where they belong in the layout. If you echo directly, the output ends up at the top of the page regardless of where the hook actually sits.
When Built-In Hooks Aren’t Enough

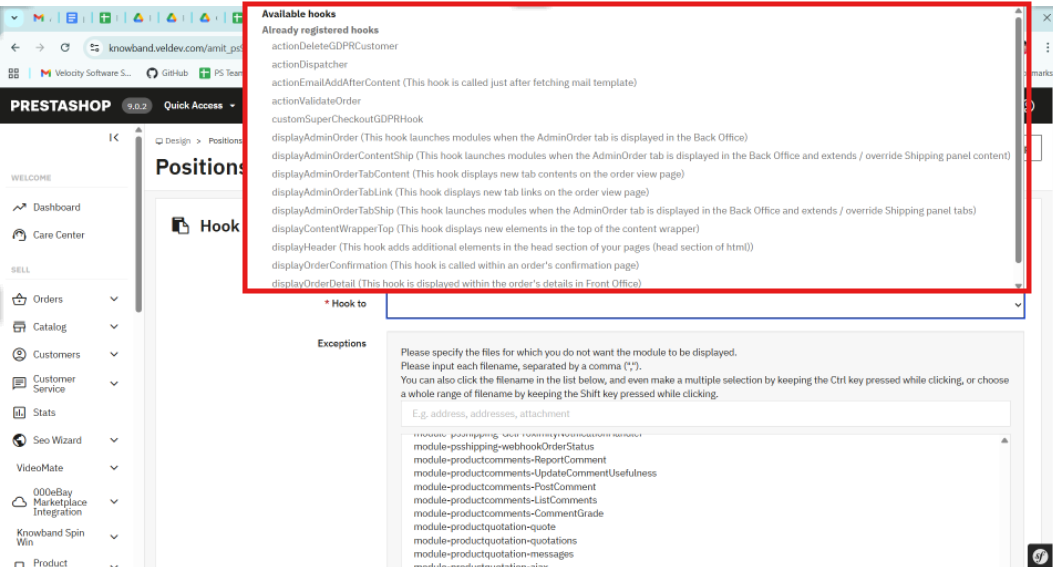
PrestaShop’s native hooks cover a lot of ground, but there are situations — especially when building modules meant to be extended, where you need something more targeted. You can register a custom hook with Hook::register() and fire it using Hook::exec() from anywhere in your codebase.

Custom hooks are particularly useful in multi-module projects. Instead of modules calling each other directly, you expose a hook and let other modules respond independently. It keeps the architecture clean and makes future changes much less painful.

Don’t Ignore the Performance Side

It’s easy to underestimate how much damage a poorly optimized hook method can do. Hooks like displayHeader fire on almost every page load. If your method is hitting the database or calling an external API without any caching, page speed takes a real hit — and your clients will notice before you do.

A few habits help. Cache anything that doesn’t change between requests. Use PrestaShop’s built-in cache layer where it fits. And if your hook logic only applies under certain conditions, check those conditions at the top of the method and return early if they’re not met. Keeps the overhead low and the code readable.

When the Hook Isn’t Firing

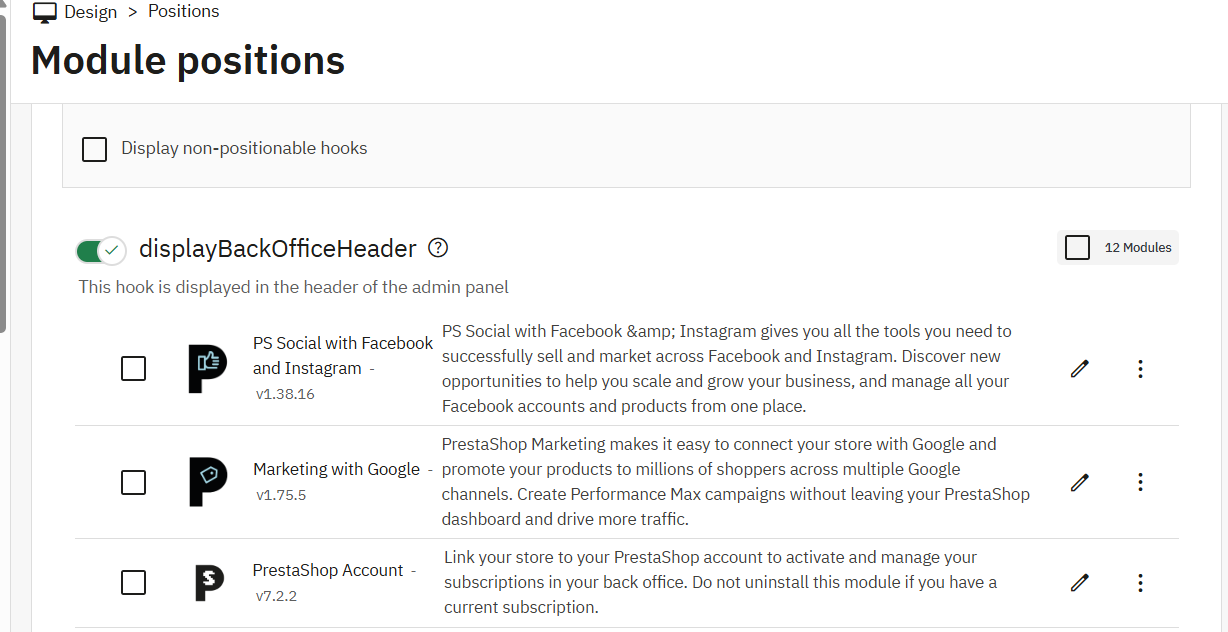
When something isn’t working as expected, the first thing to check is whether the module is actually attached to the hook. Head to Modules > Positions in the back office, or look directly at the hook table in the database. A module can be installed while a hook registration silently failed during setup.

Custom Development Services

Tailored solutions by Knowband for your eCommerce success

Looking for powerful and scalable solutions? Knowband offers expert custom development services to help you build high-performance eCommerce features with ease.

✔ Custom Module Development
✔ eCommerce Plugins
✔ API Integration
✔ Performance Optimization
✔ Third-party Integration

Also worth considering: execution order. If a module earlier in the chain throws an unhandled exception, PrestaShop can stop processing everything else on that hook. The Positions panel lets you adjust the order, and sometimes that’s all it takes to fix what looks like a mysterious disappearing hook.

The Takeaway

Hooks are what make PrestaShop modules actually modular. Used well, they let you build clean integrations that don’t step on the core or on other modules. The fundamentals aren’t complicated: register in install(), name your methods precisely, return from display hooks, cache on high-traffic hooks, and reach for custom hooks when the built-in set falls short.

Once that becomes a habit, the development process gets a lot smoother,  and your codebase stays something you’ll actually want to revisit later

At Knowband, our development team regularly works with complex PrestaShop module architectures, where efficient hook usage becomes critical for performance and scalability. If you’re looking to speed up development or implement advanced functionality, exploring professionally built modules and solutions can save significant time and effort.

How to Use PrestaShop’s Override System Without Breaking Core

PrestaShop’s override system allows you customize core behavior without touching original files. But used carelessly, it creates fragile stores that break on updates. This guide by Knowband covers how overrides work, when to use them, and three critical gotchas every developer should know.

What Is the Override System?

PrestaShop uses PHP inheritance to let you swap in your own version of any core class without touching the originals. Every core class is named with a Core suffix for example, ProductCore. If you create /override/classes/Product.php with a class called Product that extends ProductCore, PrestaShop loads your version instead. The same applies to controllers.

Only override the specific methods you need to change never copy an entire class file. This keeps your override lean and far less likely to conflict with future updates.

Example, exposing the current controller name to your header template:

Where to Put Your Override Files

Overrides can live in two places. The global /override/ directory at the root of your installation is active immediately after clearing the cache. The better approach is bundling overrides inside a module.

Placing an override inside a module (e.g. /modules/mymodule/override/classes/Product.php) causes PrestaShop to copy it to /override/ on installation and remove it cleanly on uninstall. This is the recommended approach.

A quick example of a class override. Say you want to expose the current controller name to your header template:

// /override/classes/controllers/FrontController.php

class FrontController extends FrontControllerCore {

    public function initHeader() {

        self::$smarty->assign('currentController', get_class($this));

        return parent::initHeader();

    } }

Always call the parent method unless you have a deliberate reason not to. Skipping it will silently break core functionality.

Overriding Module Classes and Controllers

Since PrestaShop 1.6, you can override module classes too. Append “Override” to the class name (e.g. BlockUserInfoOverride extending BlockUserInfo) and place it under /override/modules/. The same pattern applies to module controllers. After any override, clear the cache, specifically delete /cache/class_index.php, or it won’t take effect.

When NOT to Use Overrides

Overrides are exclusive — only one per class can exist. They’re also forbidden in marketplace modules and should be reserved for private store customisations. Before reaching for an override, consider one of these alternatives:

  • Hooks: PrestaShop triggers hook events across every page load — you can tap into them from a module to run custom code or push content into the page without going anywhere near a core class.
  • Symfony Service Overrides: Parts of PrestaShop that have been migrated to Symfony give you a cleaner path through the service container. You decorate or replace a service rather than stomping on the class itself.
  • Custom ObjectModel: Need to add fields to a core entity? Build your own ObjectModel with its own table rather than patching the existing one.

Keeping Overrides Safe Through Updates

PrestaShop updates can silently change method signatures, leaving your override running on stale assumptions. Treat every override as something to revisit after each update. Comment what you changed and why, check the changelog, and keep the override as small as possible. A narrow, well-commented override that calls parent methods properly survives upgrades. A full class copy is a bug waiting to surface.

The “Ghost” Cache: Why Your Override Seems Invisible

The number one reason developers think their override is broken: PrestaShop doesn’t scan /override/ on every request. It compiles a class map into /cache/class_index.php, and until that file is deleted and regenerated, your override is invisible, no matter how correct the code. Clearing the Smarty cache is not enough. Delete class_index.php manually via FTP/SSH, through Advanced Parameters > Performance in the back office, or via the Symfony console.

Figure 1: The PrestaShop override system flow and the role of /cache/class_index.php.


The Symfony Wall: Legacy Overrides Don’t Work for Modern Controllers

This legacy PHP system only works on PrestaShop’s older ObjectModel layer. From PS 1.7 onward, key back office areas, including the new Product Page and Order screens — have been rewritten in Symfony. The PHP override system does not affect these Symfony controllers. For those, use Service Decoration, wrapping or replacing a service via your module’s services.yml file. If an override has no effect even after clearing class_index.php, the controller is likely Symfony-migrated.

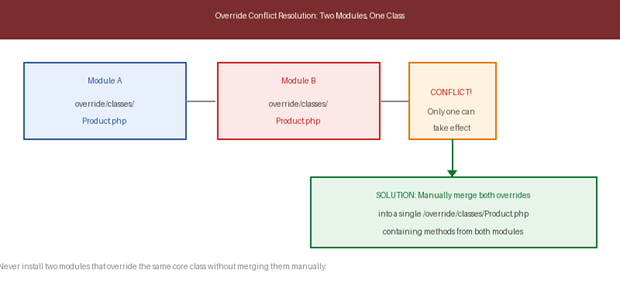
Conflict Resolution: When Two Modules Want the Same Class

When two modules both override the same class, PrestaShop throws an error on the second installation and leaves its override inactive. The fix is manual: open both files, merge all methods into a single /override/ file that extends the Core class, then delete class_index.php. Add comments identifying which module contributed each method. This is why overrides are banned in marketplace modules, conflicts become the merchant’s problem. If building for others, use hooks.

Figure 2: How override conflicts arise when two modules target the same class, and the manual merge resolution.

About Knowband

Knowband is a trusted eCommerce plugin and extension provider with years of experience helping online merchants build faster, smarter, and more feature-rich stores. Whether you run your store on PrestaShop, OpenCart, Shopify, WooCommerce, Magento, or any other major platform, Knowband offers a wide range of ready-to-use plugins and extensions that help you enhance functionality, improve performance, and deliver a better shopping experience, without needing to build from scratch.