1.0 Introduction
Does your website really need a captcha? In this web world where there are new visitors at a frequent rate, it is important that your website must be working with Google captcha. Captchas are important in validating human and suspicious bot activity at your store. With Knowband’s OpenCart Google reCaptcha extension, you can allow your customers to pass human verification test without entering any extra inputs on the website. Like the websites Gmail, Hotmail, Facebook, Twitter, Yahoo, and others, you also offer free registration to your customers. Therefore, it is important to secure the registration and login procedure at your store. By incorporating Opencart Google Captcha, you can make sure that certain activities are actually committed by humans not bots.
1.1 Striking Features of Opencart Google reCaptcha Module
- Opencart human verification extension is easily customizable without requiring any coding skills for implementation or modifications.
- Opencart Google reCaptcha module displays a security captcha to safeguard your website from spam entries or harmful bots.
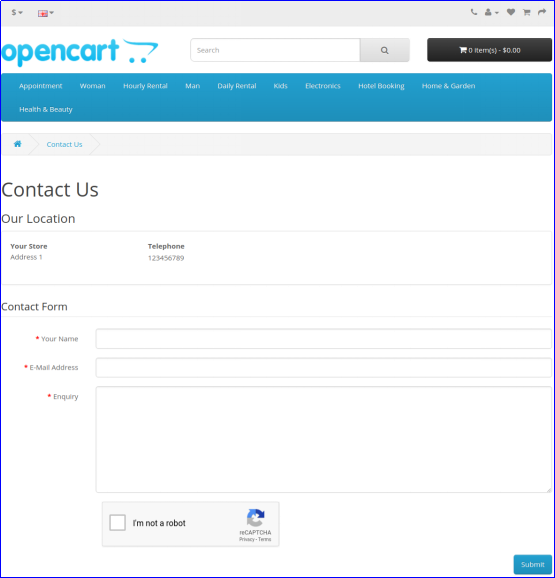
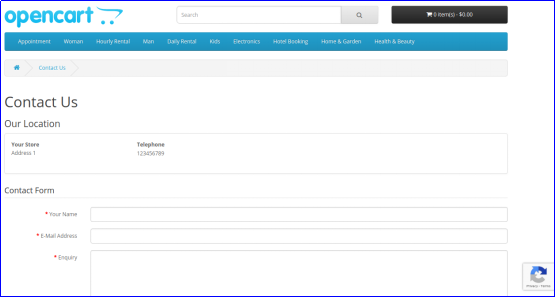
- Opencart Google Captcha can be incorporated to registration page, login page, Contact page or forgot password page at your store.
- You can enable or disable the complete functionality of Opencart Google reCaptcha module without any extra efforts.
- OpenCart Google reCaptcha extension is compatible with both v2 and v3 reCaptcha systems.
- With Opencart Google Captcha module, you can easily set the site key and the secret key for your website domain.
- Opencart human verification allows you the option to select the reCaptcha type for different pages at your website.
- This Opencart Google reCaptcha module is compatible with SSL enabled stores.
- Opencart human verification offers multi-store and multi-lingual compatibility.
2.0 Installation Guide of Opencart Google reCaptcha Module
Before starting the installation process, you have to buy the Opencart Google Captcha module from the Knowband store. Once purchased, you will receive the following files on your registered email.
- Source code of Opencart Google Captcha in zipped file format
- User Manual of Opencart Google Captcha extension
Now in order to install this Google reCaptcha on your website, follow the given steps:
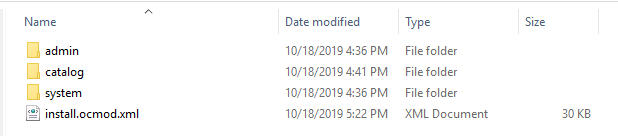
1. Unzip the zip file. You will get the folders as shown in the image below:
2. Copy all the folders of the zip file in the Root Directory of OpenCart setup via FTP manager.
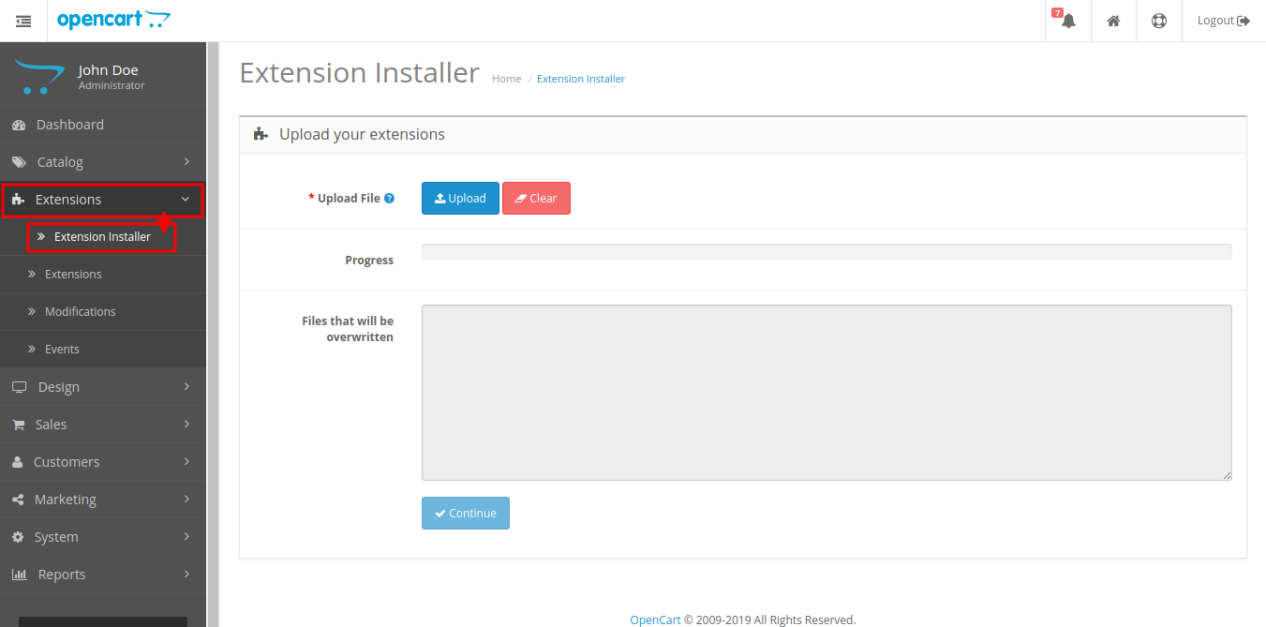
Steps to install Ocmod file using Extension Installer
1. Open the Extension Installer window from the admin panel.
2. Click on Upload button to browse and upload the install.ocmod.xml file.
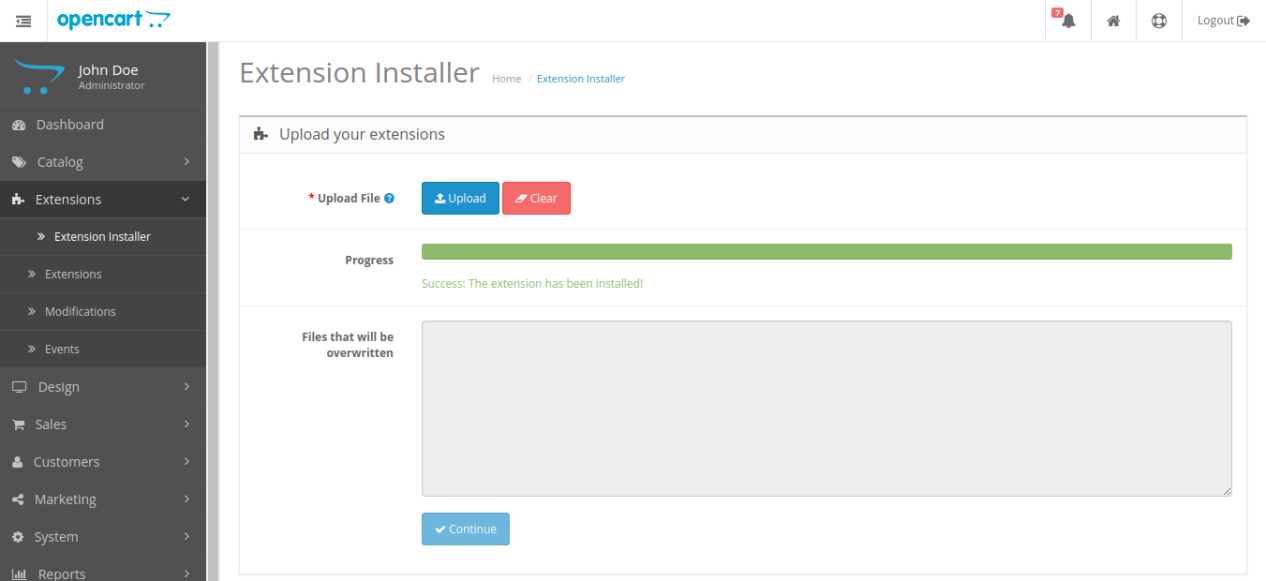
3. Once uploaded, you will see a success message on your screen as shown below.
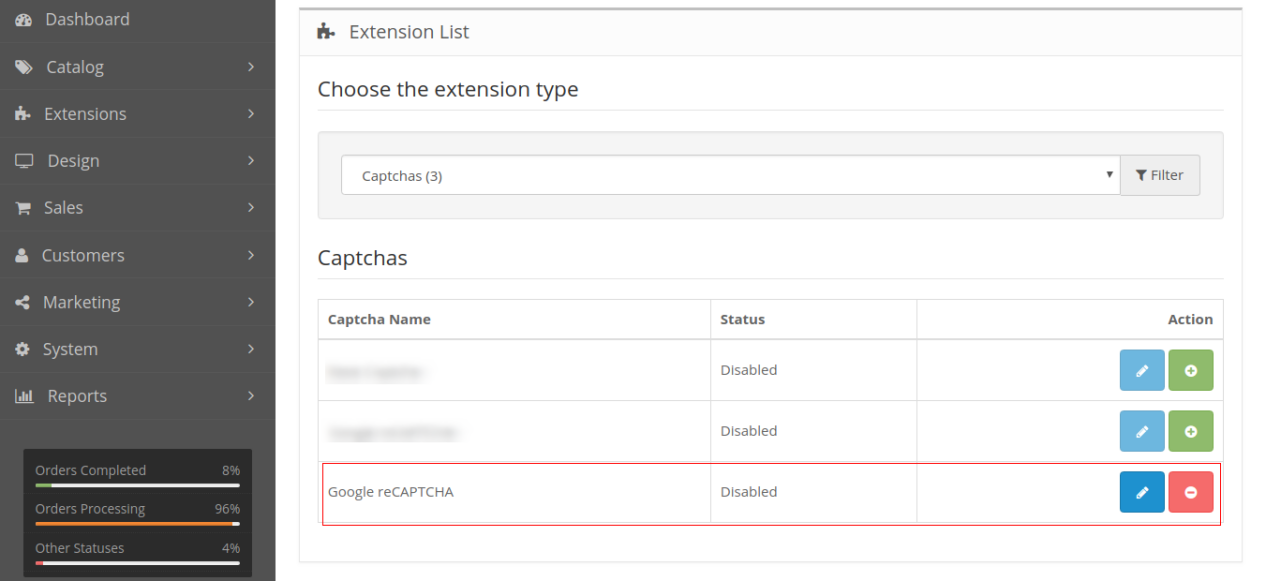
So, Opencart Google Captcha is now installed and is ready to use at your store. Go to the admin menu and click on the extensions. Then, click on Captchas and thereby click on Edit button next to Google reCaptcha.
3.0 Admin Interface of OpenCart Google reCaptcha Extension
After the successful installation of Opencart Google reCaptcha module for your website, you can implement version 2 and version 3 reCaptcha as per your business requirements. Navigate the settings in the given order: Admin Panel > Extensions > Captchas > Google reCaptcha.
The simple to understand admin interface of Opencart human verification extension is divided into three sections as:
1. General Settings
2. v2 reCaptcha Settings
3. v3 reCaptcha Settings
3.1 General Settings
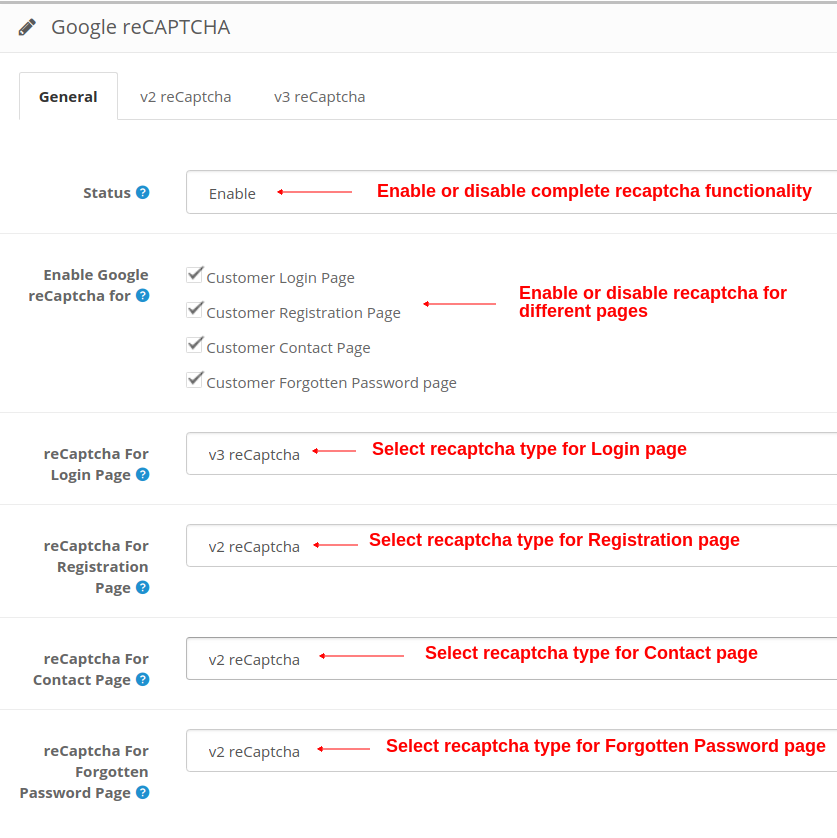
- Status: This option enables or disables the complete reCaptcha system from your website.
- Enable Google reCaptcha for: With this option, you can choose the pages for which you want to enable reCaptcha feature.
- reCaptcha for Login Page: This option allows you to select the type for login page as v2 reCaptcha or v3 reCaptcha.
- reCaptcha for Registration Page: This option allows you to select the type for registration page as v2 reCaptcha or v3 reCaptcha.
- reCaptcha for Contact Page: This option allows you to select the type for contact page as v2 reCaptcha or v3 reCaptcha.
- reCaptcha for Forgotten Password Page: This option allows you to select the type for forgotten password page as v2 reCaptcha or v3 reCaptcha.
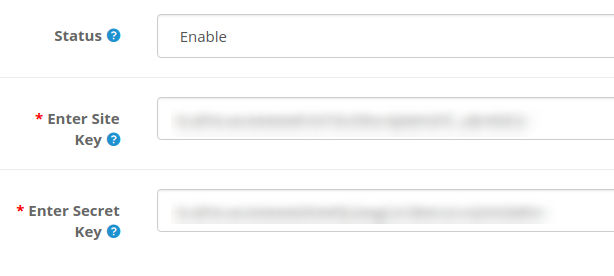
3.2 v2 reCaptcha Settings
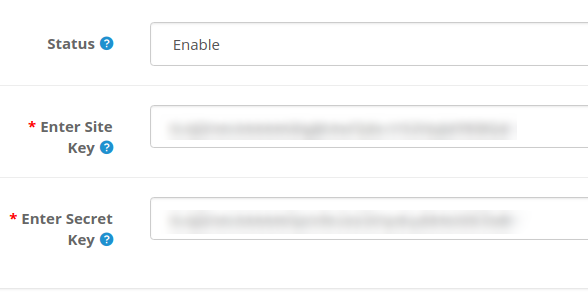
Under this section of Opencart Google Captcha module, you can set the site key and secret key for v2 reCaptcha system.
- Status: You can enable or disable status of reCaptcha version 2 using this option.
- Enter Site Key: This option allows you to enter the key of version 2 reCaptcha.
- Enter Secret Key: With this option, you can enter the secret client ID of version 2 reCaptcha.
In order to get site site key and secret key for v2 reCaptcha, follow the steps discussed in the 3.2.1 section.
3.2.1 Steps to generate API keys for v2 reCaptcha
1. Visit https://www.google.com/recaptcha/intro/v3.html
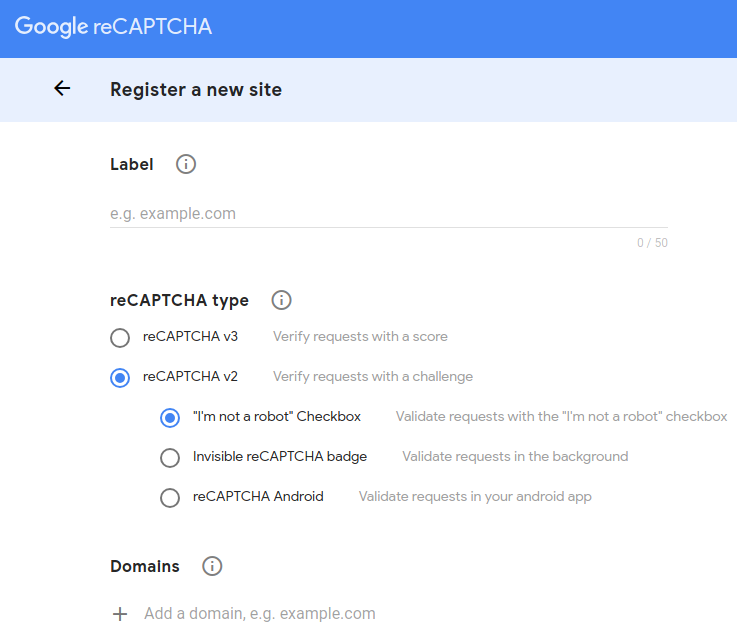
2. At the top ride side, click on “Admin Console”. Here, you can register your own website.
3. Set a desired label which will be used to identify your site in future.
4. Choose the reCAPTCHA type you want to add for your site. Here, you have to select reCAPTCHA v2 and then select the desired sub-type.
5. Enter a valid domain required for reCaptcha registration.
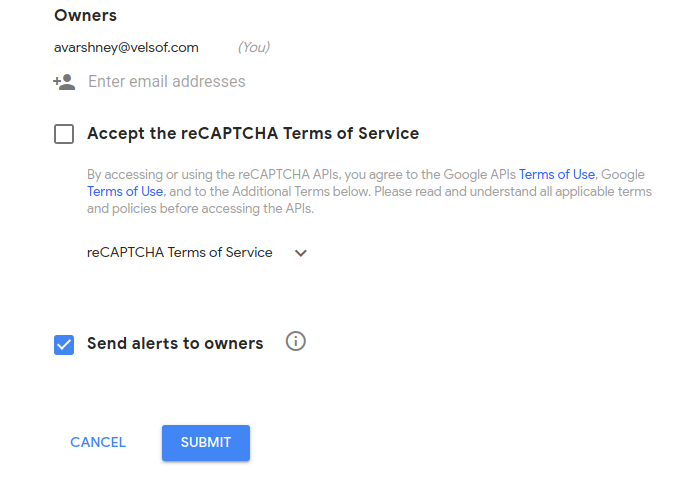
6. You can optionally add other email addresses to manage the site settings.
7. Accept the reCAPTCHA Terms and Conditions and click on “Submit” button.
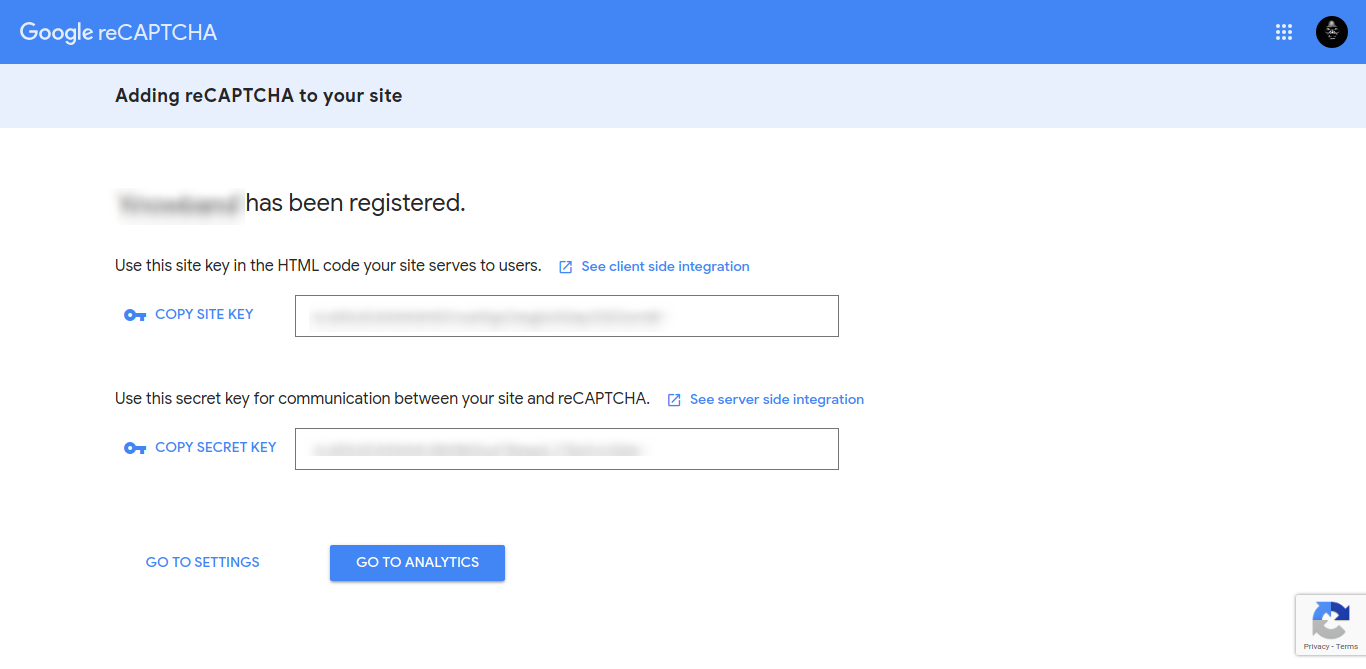
8. You will be redirected to the next page where you will find the Site Key and Secret Key. Copy both the keys to the back-office.
3.3 v3 reCaptcha Settings
Under this section of Opencart Google Captcha module, you can set the site key and secret key for v3 reCaptcha system.
- Status: You can enable or disable status of reCaptcha version 3 using this option.
- Enter Site Key: This option allows you to enter the key of version 3 reCaptcha.
- Enter Secret Key: With this option, you can enter the secret client ID of version 3 reCaptcha.
In order to get site site key and secret key for v3 reCaptcha, follow the steps discussed in the 3.3.1 section.
Note: If you have selected the reCaptcha type as version 2, then site key and secret key for version 2 reCaptcha should be filled into fields, else it gives an error message. Similar thing applies to version 3 reCaptcha.
3.3.1 Steps to generate API keys for v3 reCaptcha
1. Visit https://www.google.com/recaptcha/intro/v3.html
2. At the top ride side, click on “Admin Console”. Here, you can register your own website.
3.Set a desired label which will be used to identify your site in future.
4.Choose the reCAPTCHA type you want to add for your site. Here, you have to select reCAPTCHA v3.
5.Enter a valid domain required for reCaptcha registration.
6.You can optionally add other email addresses to manage the site settings.
7.Accept the reCAPTCHA Terms and Conditions and click on “Submit” button.
8.You will be redirected to the next page where you will find the Site Key and Secret Key. Copy both the keys to the back-office.
4.0 Front Interface of Opencart Google reCaptcha Module
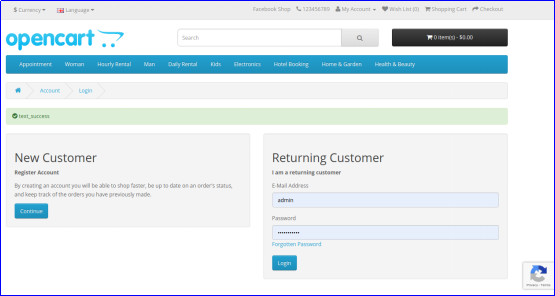
A) Login Page
v2 reCaptcha
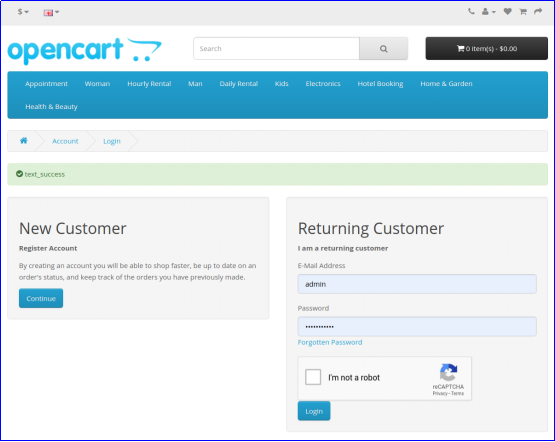
v3 reCaptcha
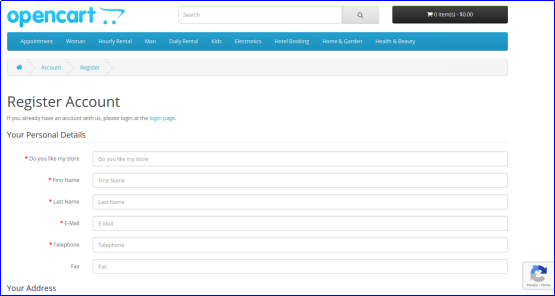
B) Registration Page
v2 reCaptcha
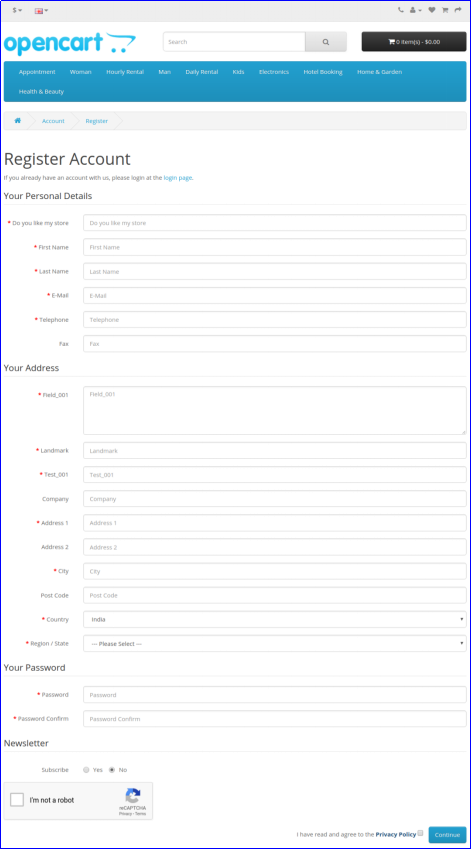
v2 reCaptcha
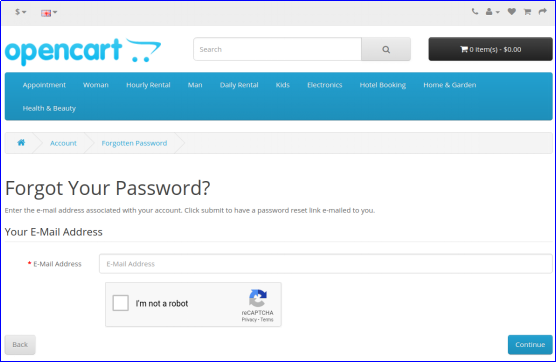
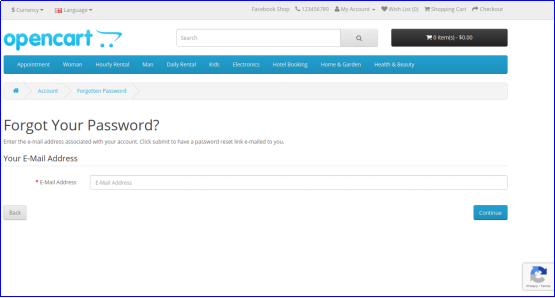
D) Forgot Password Page
v2 reCaptcha