1.0 Introduction
Do you know an effective way to drive sales and engagements for the website? The instant process to boost conversions is to provide compelling reasons to BUY NOW for your visitors. Sales Countdown Timer campaigns seamlessly convert your hesitant buyers into leads for your store. Magento Countdown Sales Timer Extension from Knowband helps e-merchants in convincing their visitors by displaying a Countdown Timer bar on the frontend. Finding the countdown timers, customers will either act fast or will miss the deal forever.
This Countdown Timer extension for Magento is a multi-purpose module offering flexible settings to catch the attention of the customers via attractive sales countdown timers. Being a store owner, you can create unlimited custom looking timers for your store and can display them as per some fixed schedules. Magento Countdown Sales Timer extension not just stimulates purchase levels but also offers an intuitive way to promote products and categories of the store. Hence, Sales Countdown Timer Bar for Magento is an advanced promotion tool to run occasional sales, timed discount deals, boost new arrivals and launches on the store.
1.1 Striking Features of Sales Countdown Extension for Magento
Installing and configuring Magento Countdown Sales Timer extension doesn’t involve any technicalities nor it includes any source code modifications. The in-built features of this Magento module can be effortlessly modified without any assistance. The various features offered by countdown timer campaigns module have been listed below:
- Magento Countdown Sales Timer extension is a quick and easy way to add real-time sale countdown timers to create urgency among store visitors.
- This Sales Countdown Timer Bar for Magento is designed to match up with your store theme and requirements.
- Magento sale countdown module lets you set up and schedules sales campaign between two fixed dates and time.
- Create any number of countdown timers for different store products and categories without any coding efforts.
- Magento Countdown Timer extension allows admin to set the desired name, description for each countdown timer.
- The Countdown Timer extension for Magento allows e-merchants to set the unique priority order for each of the reminders.
- Admin can show a customized button on the Sales Countdown Timer Bar for Magento website. They can set a link on that timer button as per their site requirements.
- Magento Countdown Timer supports compatibility with multiple languages and site themes.
- With Magento sale countdown module, admin can display a custom countdown timer expiration message on the frontend. This information is useful for the visitors to know that the prevailing deal or offer has been expired.
- Using color picker tool, store merchants can also set appealing colors and predefined themes for Sales Countdown Timer Bar for Magento site.
1.2 Magento Countdown Sales Timer Benefits to Customer
- With Magento Countdown Timer, customers are updated with the trending rush alerts and active campaigns on the store.
- Magento sale countdown module features a landing page link which redirects the customer to the main page containing new launches or promotional offers.
1.3 Technology for Development
Language: PHP
Frame Work: Magento
2.0 Installation Guide
The store admin can follow these simple steps for installing the Magento Countdown Sales Timer extension:
1. First of all download the extension package from the Knowband store.
2. You will get a zipped file containing the source code and user manual. Unzip the package on the root folder of your Magento setup via FTP manager (like Filezilla or WinSCP – download here: https://filezilla-project.org/). You’ll find the files and folders as shown in the image below:
The extension is now installed and ready for use. Now the store admin can now use and configure the Sales Countdown Timer Bar for Magento.
3.0 Admin Interface of Sale Countdown Magento Extension
Once after you have successfully installed Magento Countdown Sales Timer extension from Knowband Store, you can now easily configure its different settings and make it ready for your Magento website. To configure the various settings of this module. Open the admin panel, go to System > Knowband Extensions > Countdown Sales Timer
The complete settings of this Countdown Timer extension for Magento is divided into two parts:
1. Basic Configuration
2. Timer Listing
Basic Configuration
The admin interface showing the basic configuration settings of this Magento module is as given below.
1. Enable the Extension: The functionality of Magento Countdown Sales Timer extension can be enabled or disabled using the provided toggle switch.
2. Include jQuery: Admin can include the jQuery library on the store’s front if the library was not present on the client store.
Timer Listing
The admin interface of Magento Countdown Timer consist of a list of timer records along with filter option. The settings for each of the existing timer can be separately deleted or configured.
Add New Timer: Use this option if the admin wants to create a new coundown reminder for their store. To modify the settings for any existing reminder, click on Edit button corresponding to a particlar reminder record. The configuration settings for a particular countdown reminder is divided into three major sections as:
1. General Settings
2. Display Settings
3. Look and Feel Settings
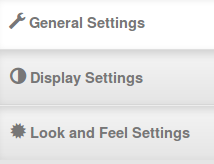
Each Tab under Timer Settings of Magento Countdown Timer module has been discussed below.
3.1 General Settings
On clicking on the General Settings tab, you will see the following options as given below:
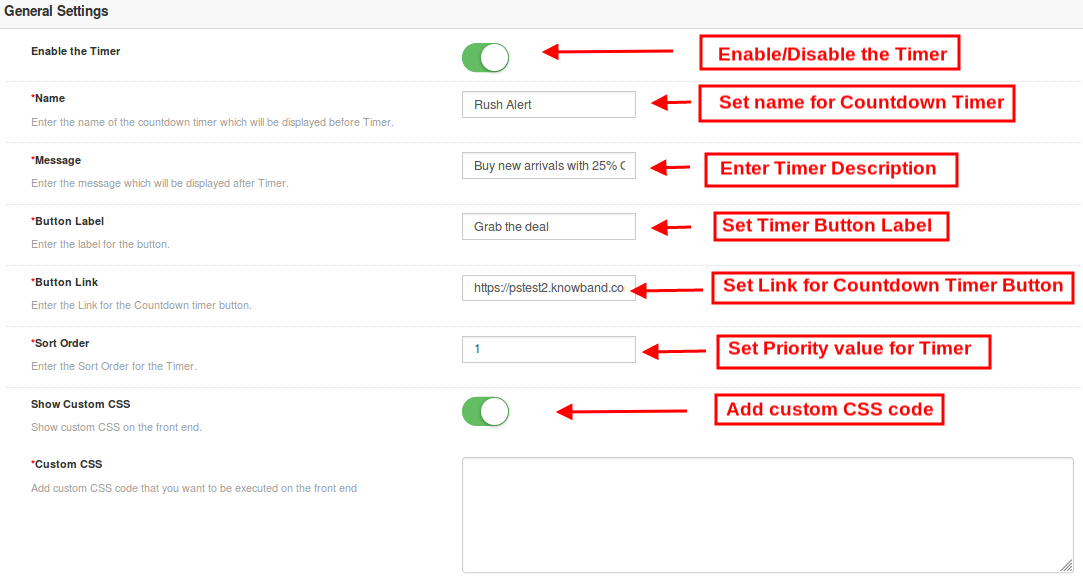
Initially the above fields are set to their default values.
1. Enable the Timer: Admin can enable or disable a selected timer using this toggle switch.
2. Name: Set a custom name for the countdown timer which will be displayed before Timer.
3. Message: Set a desired message which will be displayed after Timer.
4. Button Label: Admin can set a custom label for the button on countdown timer block.
5. Button Link: Admin can set a desired URL on button click. When the user clicks the button, they are redirected to this specific link.
6. Sort Order: Admin can set the sort order or priority value for each of the reminders created for the Magento site. Remember, this priority value should be unique.
7.Show Custom CSS: Admin can add custom CSS code to enhance the frontend functionality of the website.
After this, click on the “Save” button shown at the top right corner of admin panel to save the module settings.
3.2 Display Settings
The display settings of this Magento module control where and how the Magento Countdown Timer will be displayed to the visitors. The various configuration options under this section include:
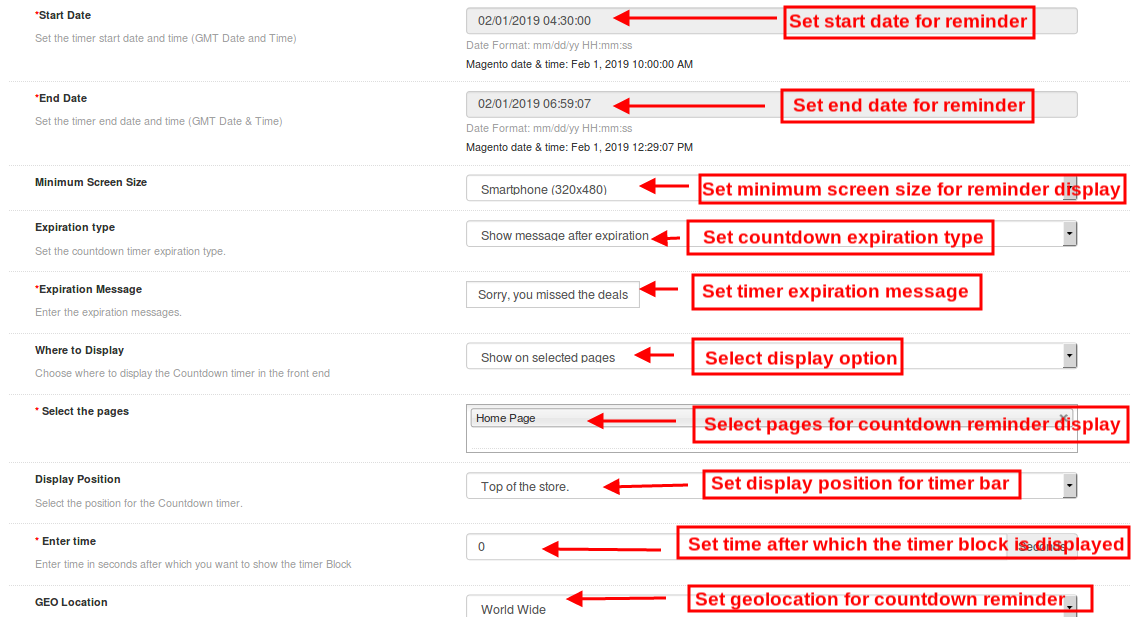
1. Start Date: Admin can set a start date and time(GMT date and time) for the counterdown timer.
2. End Date: Similarly, they can set a end date and time for the counterdown timer.
3. Minimum Screen Size: Admin can select a particular display configuration using this option.
4. Expiration Type: This option allows you to set the countdown timer expiration type.
5. Expiration Message: If the expiration type has been selected as Auto then no message is displayed after the deal expires. But if you have selected Show Message option, then set a custom expiration message in this field.
6. Where to Display: Admin can choose where they want to display the countdown timer block on their website.
7. Select Pages: If the admin wants to display the timer block on selected pages, then they can select the pages here.
8. Display Position: Site admin can fix the display position for the countdown timer block over the website. The three display options include:
Top of the store
Fixed to top of window
Bottom of the store
9. Enter Time: Admin can enter time (in seconds)after which they want to show the timer Block on the frontend. Set 0 if you want to display it immediately to the visitors.
10. Geolocation: This option lets you select the geolocation for the display of sales timer block.
After this, click on the “Save” button shown at the top right corner of admin panel to save the module settings.
3.3 Look and Feel Settings
The look and feel settings of countdown magento extension control the frontend appearance of the countdown timer block. The various configuration options offered are:
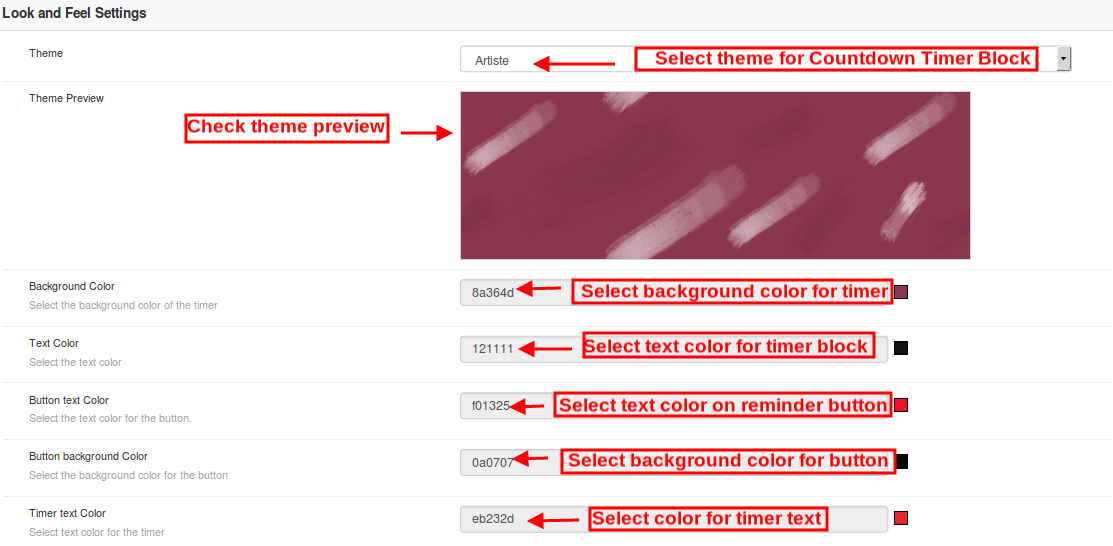
1. Theme: Admin can set a particular theme for the sales timer block from the themes offered by countdown timer campaigns module.
2. Theme Preview: This option allows the admin to preview the theme before the apply the changes to their website.
3. Background Color: Using this option admin can set the background color for the sales countdown timer block.
4. Text Color: The font color of the text shown on countdown timer block can be set using this option.
5. Button text Color: Admin can change the text color on the timer button.
6. Button background color: Admin can set a desired background color for the timer button.
7. Timer Text color: Select text color for the timer text shown in sales countdown block.
After this, click on the “Save” button shown at the top right corner of admin panel to save the module settings.
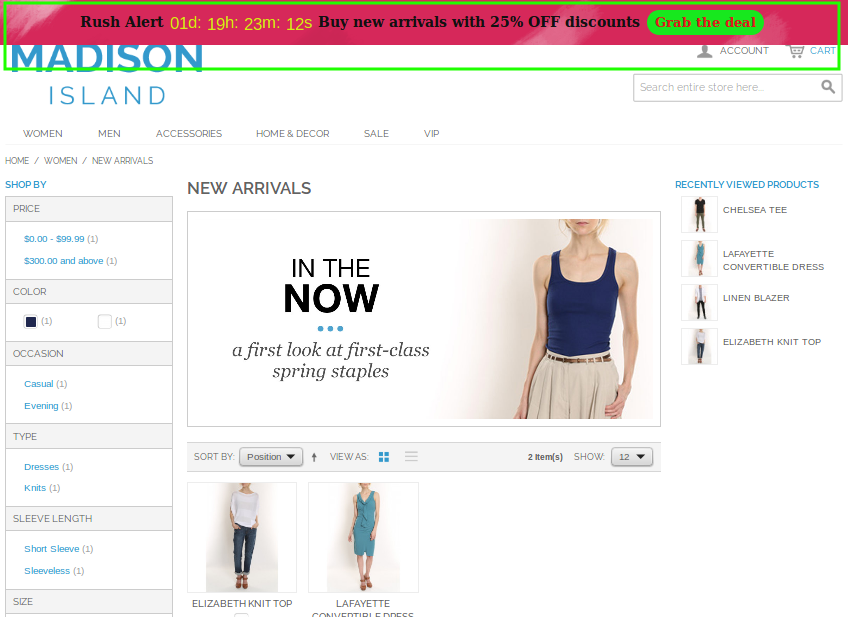
4.0 Front Interface of Magento Countdown Sales Timer extension
After you have successfully configured the settings of magento sale countdown module, you can see Sales Countdown Timer Bar for Magento store in accordance with the selected priority values and time schedule.
Sales Countdown Timer on Category Page
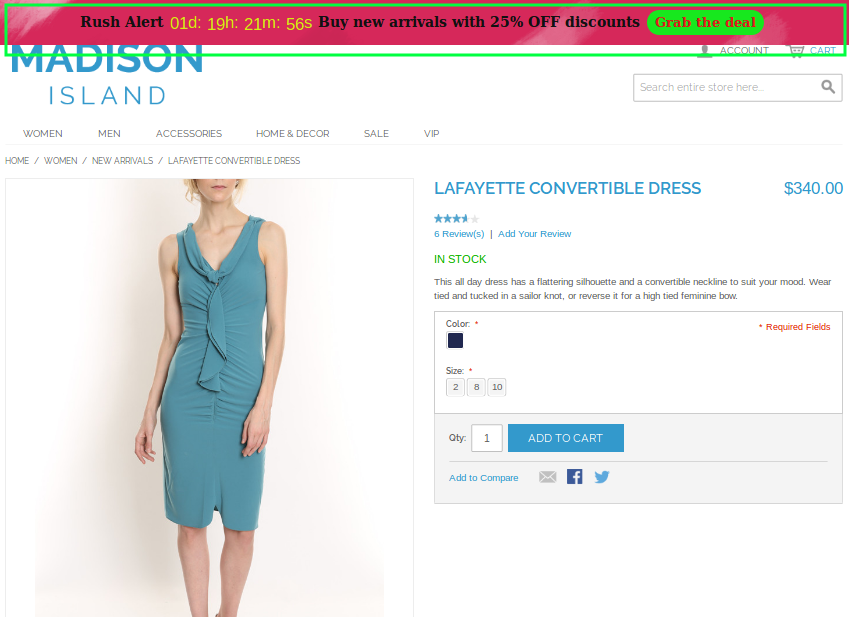
Sales Countdown Timer on Product Page
Sales Countdown Timer on Home Page