1.0 Introduction
Knowband, one of the leading names in the field of eCommerce solution provider, offers the best solution to go for multi-channel selling to the Magento 2-based e-merchants. If you are planning to sell your products on the popular Walmart marketplace, then, Knowband’s Magento 2 Walmart Integrator is the smartest solution for the same. Walmart Magento 2 API integrator connects the two sites and allows automatic inventory, shipment and sales management.
1.1 Admin Features of Magento 2 Walmart Integration Module by Knowband:
- Magento 2 Walmart Integrator is easy to understand and use.
- Walmart Magento 2 integrator offers real-time synchronization and makes inventory and order management a cinch for the store admin.
- Magento 2 Walmart integration module allows the admin to list the products in bulk at the marketplace.
The bulk upload can be done by creating profiles in the back-end of the Magento 2 Walmart integrator. - Via the profiles created in the Walmart Magento 2 integrator, the admin can update the products details and manage the inventory. The cron jobs allows the admin to remove or relist the already listed products.
- The admin can add Number of shipping option or map shipment carrier for the store with that of the marketplace from the back-end of the Magento 2 Walmart API integrator. The sellers can even fix and update the shipping lag time with the help of Walmart Magento 2 synhronization addon.
- Walmart Magento 2 API Integration plugin offers cron jobs with the help of which allows the admin to sync the orders with the Magento 2 store and process them from a single interface.
- Magento 2 Walmart connector even updates the order status the help of cron options.
- Walmart Magento 2 connector even offers an easy interface to manage the feed status.
- The admin can offer promotional deals to the marketplace customers with the help of Walmart Magento 2 API integrator.
- The automated approach of the Magento 2 Walmart Integrator allows the e-merchants to upload the tax code in one go.
- The audit log of Magento 2 Walmart integrator allows the admin to track the status of the various jobs running the back-end.
- The sellers can reprice their products and win the buy box. Magento 2 Walmart integrator offers buy box report to the store admin.
- The admin interface of the Walmart Magento 2 integrator offers complete sales report.
- The admin can easily track the errors occurred while product listing and rectify the same from the admin interface of Magento 2 Walmart Integration extension.
2.0 Installation
Follow the following steps in order to install Magento 2 Walmart Integrator at your store:
- Download the Magento 2 Walmart Integrator from Knowband store.
- You’ll receive a zipped file containing the user manual as well as the source code of Walmart Magento 2 Integration Plugin. Unzip the package.
- Create a folder {Magento root}/app/code/Knowband/Walmart
- Upload the extracted content in the above folder via FTP manager (like Filezilla or WinSCP – download here: https://filezilla-project.org/).
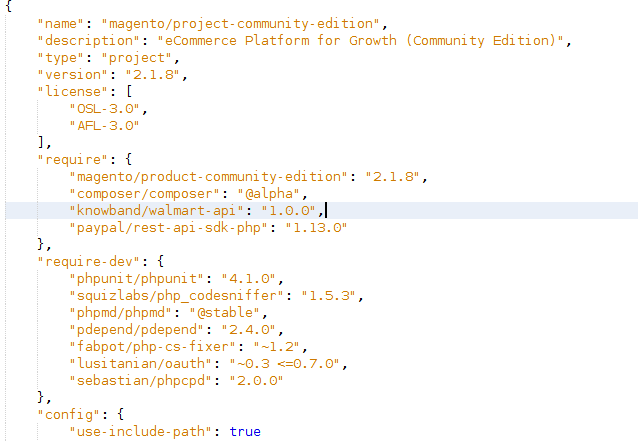
- Add the “knowband/walmart-api”: “1.0.0” in the root composer file.
- php -f bin/magento module:enable –clear-static-content Knowband_Walmart
- php -f bin/magento setup:upgrade
- php -f bin/magento setup:di:compile
- php bin/magento setup:static-content:deploy
6. In Admin Panel go to the main menu -> Knowband -> Walmart Integrator.
7. The Magento 2 Walmart integration extension is now ready for use.
This User Manual will guide the users through the Magento 2 Walmart Integrator configuration and settings.
2.1 How to configure Walmart Magento Integration extension?
To configure the Walmart Marketplace Integrator, store admin needs to get the Client ID and Client Secret. In order to obtain Walmart Client ID, and Client Secret, follow the process given below:
1. Go to https://developer.walmart.com/
2. Select the Login type.
3. Log in using your Credentials.
4. Click on your account and select “API Keys“.
5. Now you can get the New “Client ID” and “Client Secret” from here.
3.0 Admin Interface
The admin interface of Magento 2 Walmart integrator offers 10 configuration tabs as mentioned below:
1. General Settings
2. Profiles Management
3. Shipping Carrier Mapping
4. Promotions
5. Shipping Override
6. Products Listing
7. Manage Lag Time
8. Attributes Mapping
9. Orders Settings
10. Orders Listing
11. Feed Status
12. BuyBox Reports
13. Synchronization
14. Tax Code
15. Audit Log
3.1 General Settings
The connection between the store and the marketplace can be setup from the General Settings Tab of Walmart Magento 2 integration plugin. The various input fields are mentioned below:
1. Enable the Extension
Enable this button in order to establish the connection between the marketplace and the Magento 2 site.
2. Consumer ID
Enter the Walmart Consumer ID obtained from the seller’s account in this section. This will authenticate the connection being established between the Magento store and Walmart Marketplace.
3. Private Key
Copy the Private Key from your Walmart seller’s account and paste it in this section. It is mandatory for authenticating the integration between the Magento store and Walmart Marketplace.
4. Consumer Channel Type
Enter the Consumer Channel Type in the field to complete the setup.
Click on the ‘Save Settings’ to complete the setup.
3.2 Profile Management
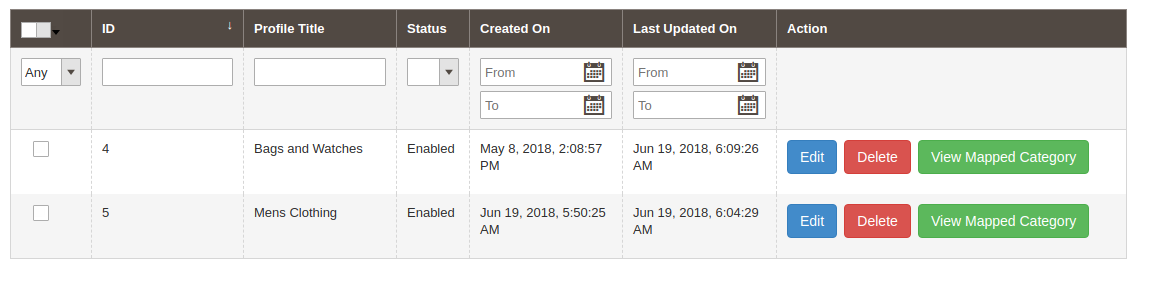
The Magento 2 Walmart Integration extension offers profile-based listing option that enables bulk inventory upload. The Profile Management tab of Walmart Magento 2 integrator offers a user-friendly interface to manage the profiles with ease.
The store admin can view the profiles that are created as shown in the image below:
3.2.1 How to create new profiles?
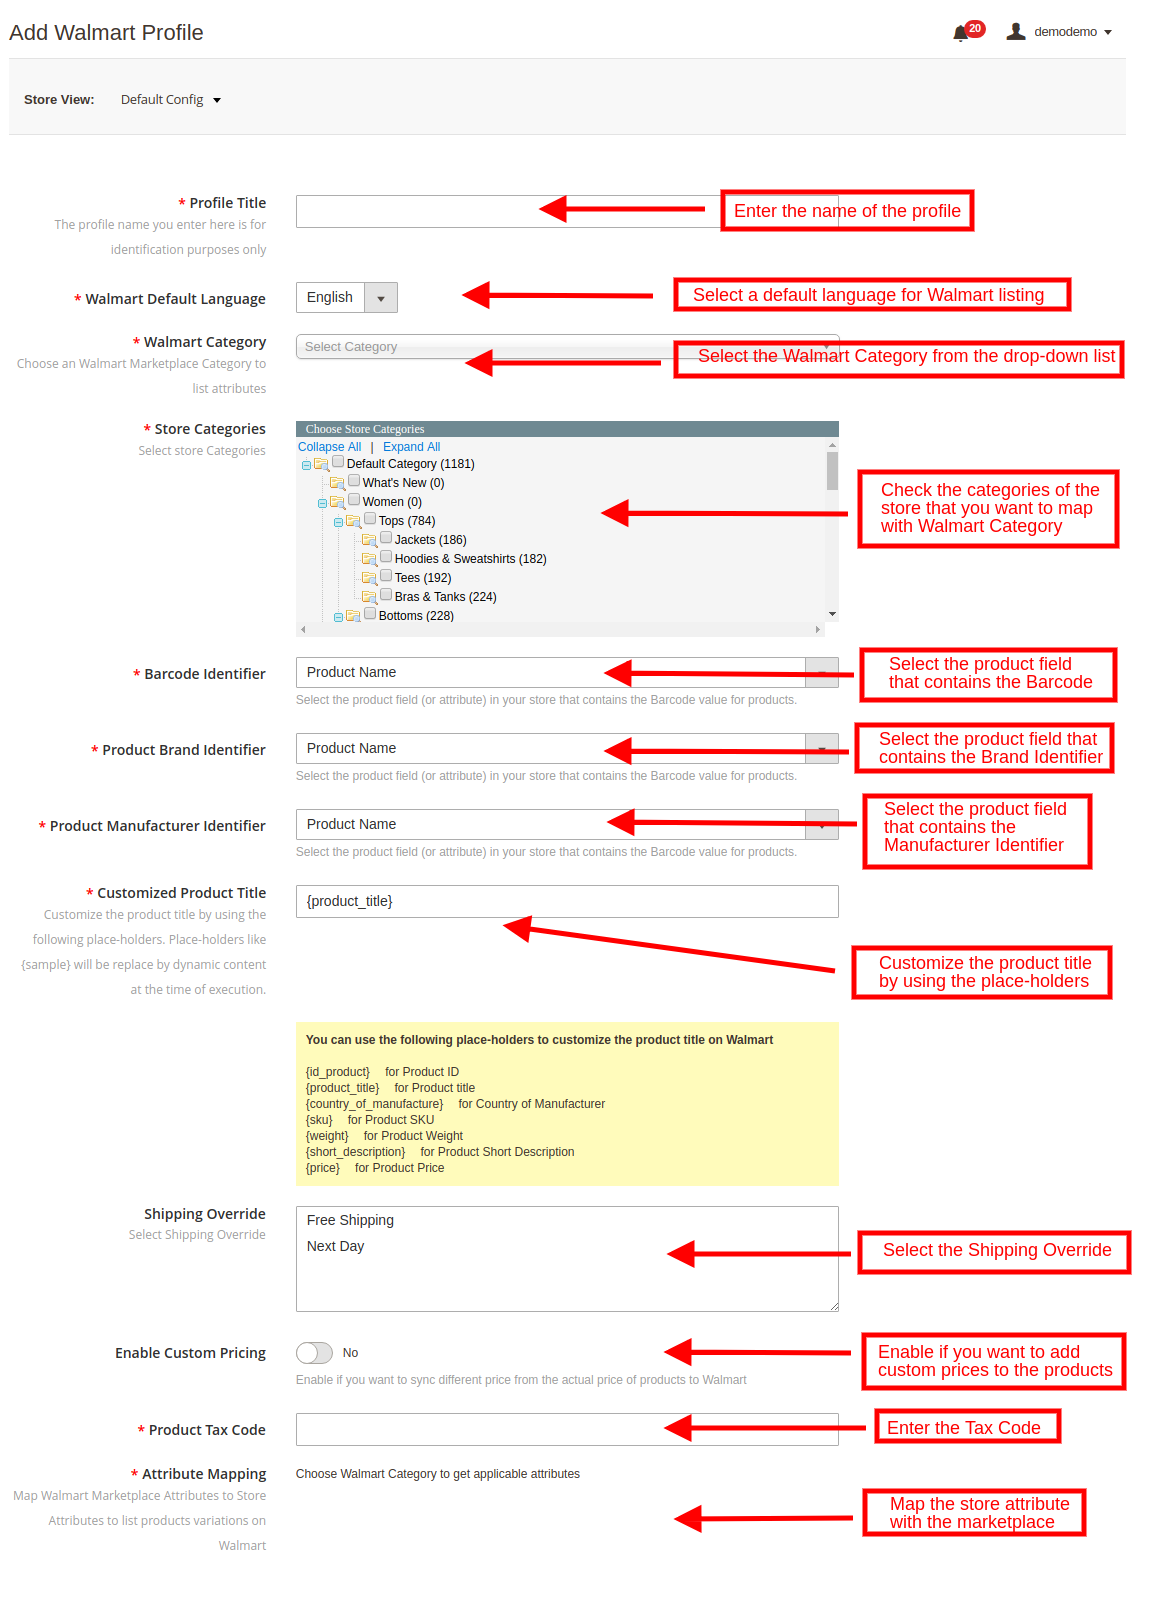
In order to create new profile, click on the ‘Add New’ button at the top right section of Magento 2 Walmart Integrator. This will redirect you to the profile creation tab as shown in the image below:
Profile Title: Input a unique name for the profile.
Walmart Default Language: The Magento 2 Walmart synchronization extension offers multi-lingual compatibility. Select the default language for your Walmart shop from the drop-down menu.
Walmart Category: Select the Walmart category from the drop-down list with which you want to map the Magento 2 store category.
Store Categories: Check the categories of the store that you want to map in the category of Walmart.
Barcode Identifier: Select the product field from the drop-down menu that has Barcode identifier.
Product Brand Identifier: Select the product field from the product field that has brand identifier from the drop-down.
Product Manufacture Identifier: Select the product field from the list that has product manufacturer identifier.
Customized Product Title: Product title can be customized by using the pre-defined place holders.
- {id_product} for Product ID
- {product_title} for Product title
- {country_of_manufacture} for Country of Manufacturer
- {sku} for Product SKU
- {weight} for Product Weight
- {short_description} for Product Short Description
- {price} for Product Price
Shipping Override: Sync the shipping overrides created in the Shipping Overrides tab of the Walmart Magento 2 connector by executing cron (See Section 3.). Enter the shipping overrides in this section that you want to enable with that particular profile.
Custom Pricing: Magento 2 Walmart connector allows the store admin to list the products at custom prices. Enable this button for the changing the price of the product at the marketplace without changing it’s base cost from the eCommerce store.
If enabled, the admin will be able to increase or decrease the cost of the products by a fixed or percentage amount.
Select whether you want to increase or decrease the cost of the products from the drop-down list.
Select whether you want to increase/decrease the price by a Fixed amount or Percentage amount.
Enter the amount by which you want to change the price of the products.
Product Tax Code: Enter the product tax code in this section.
Attribute Mapping: Map Walmart Marketplace Attributes to Store Attributes to list products variations on Walmart. The attribute section include the attributes of the selected category as shown in the image below. Map the ones that you feel is mandatory.
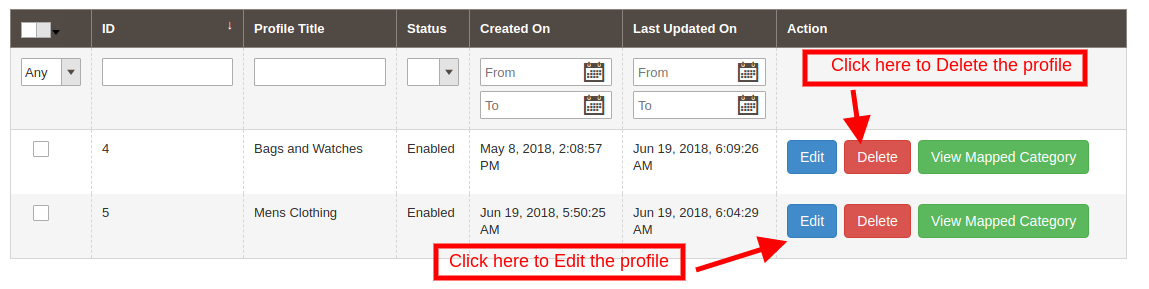
3.2.1 How to Edit/delete the Profiles?
The list of the created profiles will listed in the Profile Management tab of Walmart Magento2 integrator. The admin can edit the profiles by clicking on the ‘Edit’ button corresponding to each profile.
In order to delete the profile, click on the ‘Delete’ button corresponding to each profile.
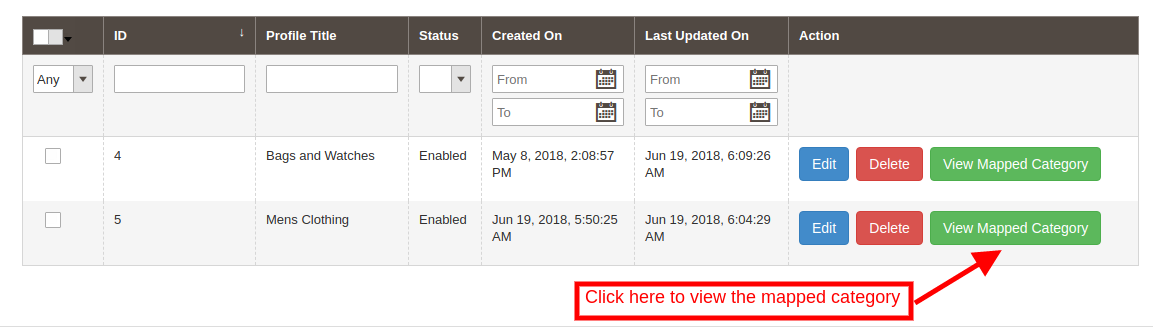
3.2.2 How to View the Mapped Category of the profiles?
In case you want to view the mapped category, click on the ‘View Mapped Category’ link corresponding to each profile as shown in the image below:
This will redirect you to the interface of the Walmart Magento 2 integration module where you can view the entire list of mapped category.
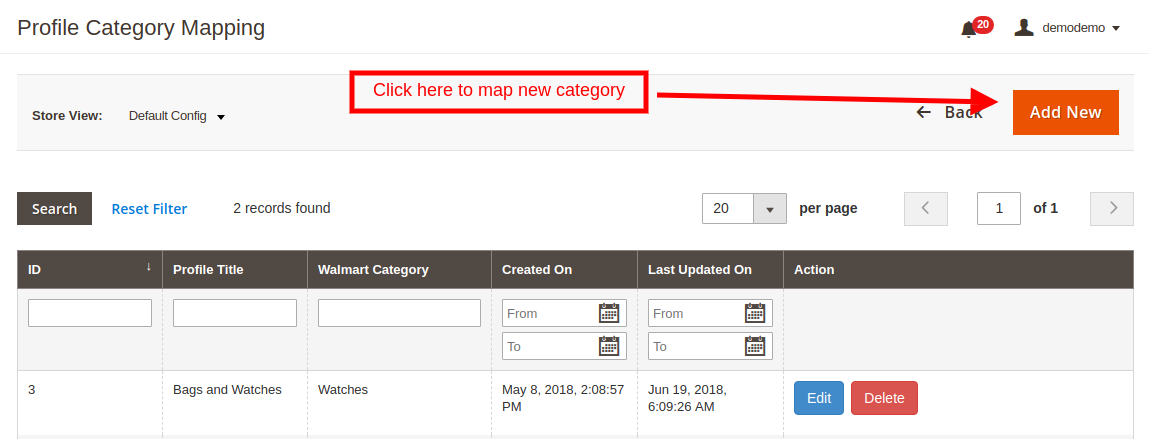
The admin even gets an option to edit or delete the mapping by clicking on the Edit and Delete button respectively as shown in the image below:
3.2.2.1 How to Map New Category in the profile?
Additionally, the store admin even gets an option to map new categories. In order to map new category, click on Add New button at the top right section of Walmart Magento 2 Integrator.
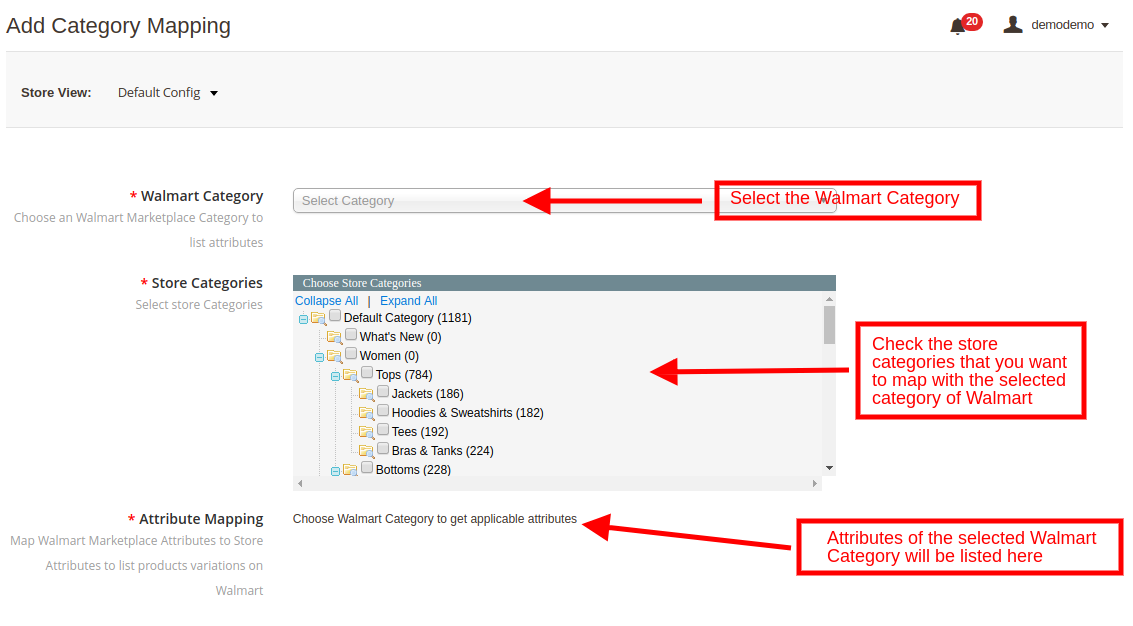
This will redirect you the category mapping page. The various fields of this mentioned below:
Walmart Category: Select the Walmart Category that you want to map with the store’s category from the drop-down menu.
Store Categories: Check the categories that you want to map with the selected category of Walmart.
Attribute Mapping: The attributes of the selected Walmart category will be listed in this section. You can map the attributes as per your business requirement.
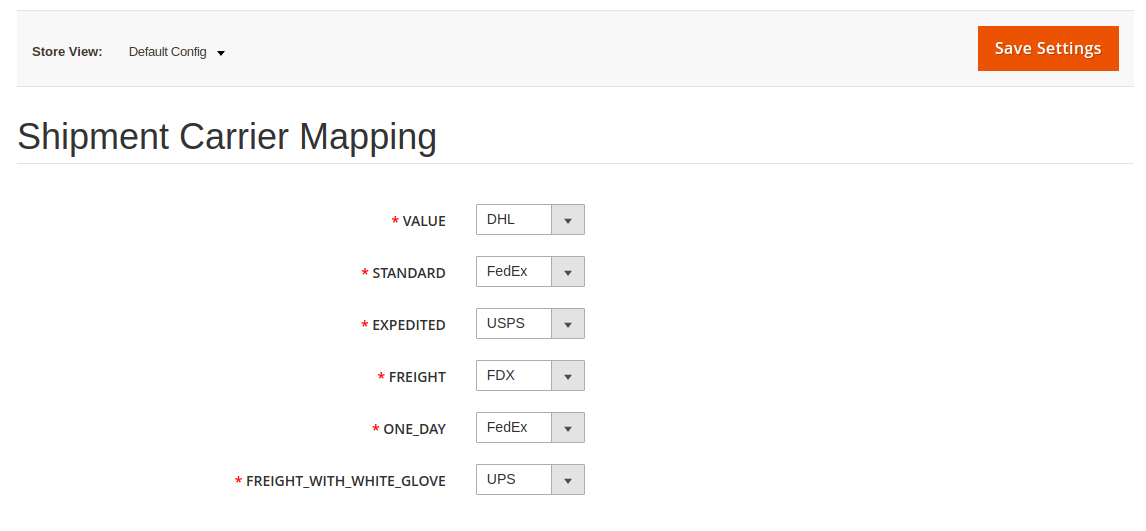
3.3 Shipment Carrier Mapping
The admin can map the shipment carrier of the store with that of the marketplace with the help of Magento 2 Walmart integration module. This can be done just by selecting the options from the drop-down list.
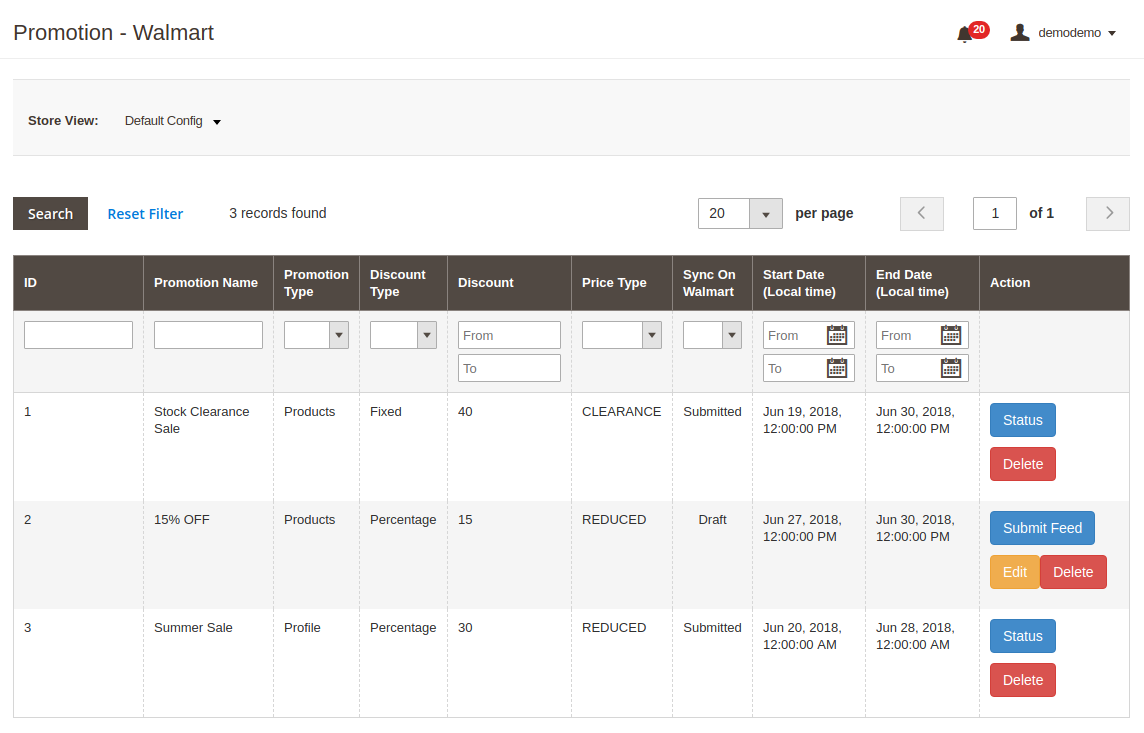
3.4 Promotion
Magento 2 Walmart Integration plugin allows the admin to create promotions for the marketplace customer. The store owner can fix the rule and enable/disable the same from the back-end of the Walmart Magento 2 integration plugin.
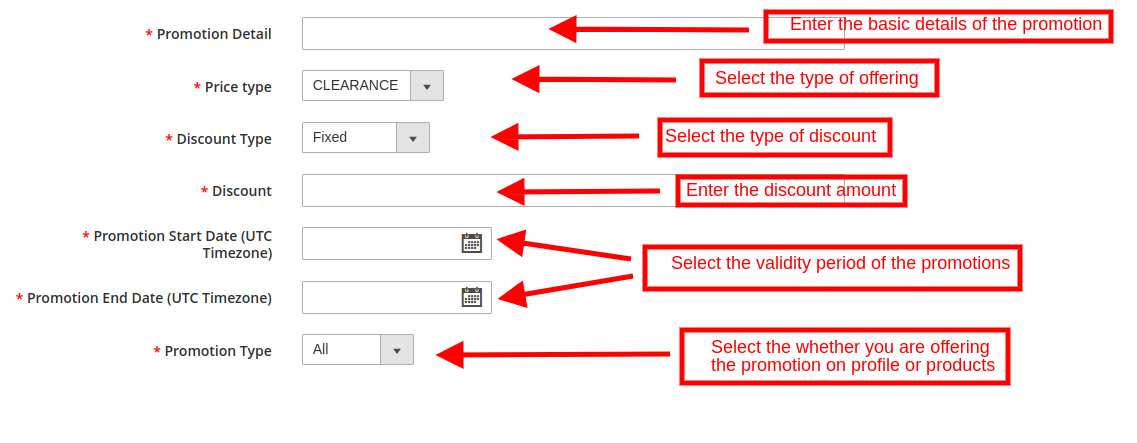
3.4.1 How to create new Promotions for Walmart?
You can create new promotions by clicking on the Add New link at the top right section of the Magento 2 Walmart integrator. This will redirect your to the promotion creation page. The various fields of the tab are discussed below:
Promotions Details: Provide a details of the promotion. This will be displayed as the name of the deal.
Price Type: Select the type of the promotion that you are offering. It may be a clearance sale or price reduction offer.
Discount Type: Select the type of discount that you are offering. It can be a Fixed or Percentage discount.
Discount: Enter the discount amount in this field.
Promotion Start and End Date: Select the start and the end date for the validity of promotion.
Promotion Type: Select the type of promotion that you are offering. You may offer it to all the products, based on profile and products
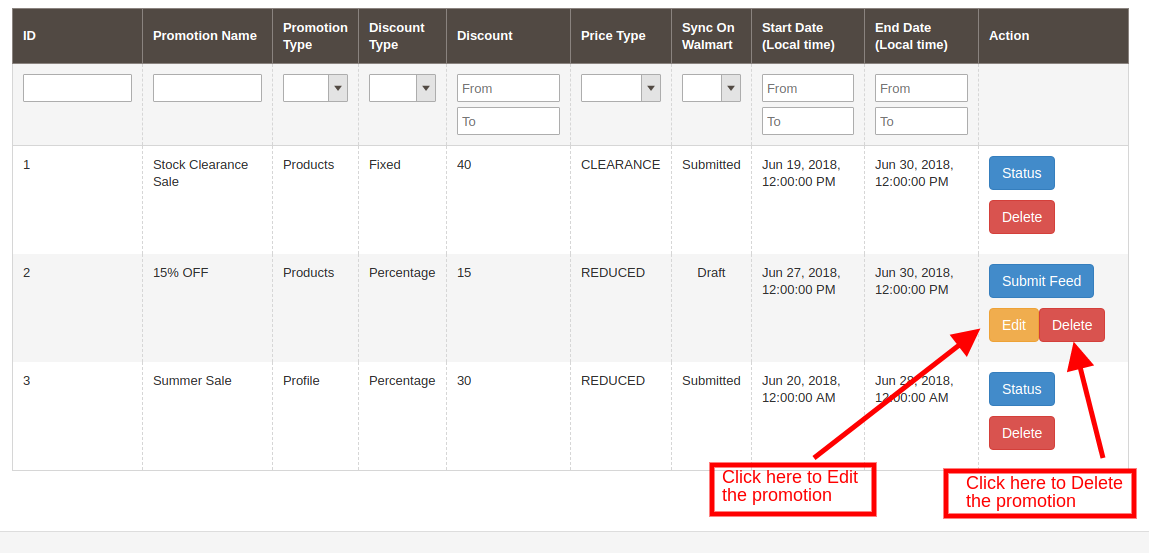
3.4.1 How to edit/delete Promotions for Walmart?
The promotions created by the admin is listed in the Promotions tab of Walmart Magento 2 integrator. The admin can edit or delete the same by clicking on Edit or Delete button respectively as shown below:
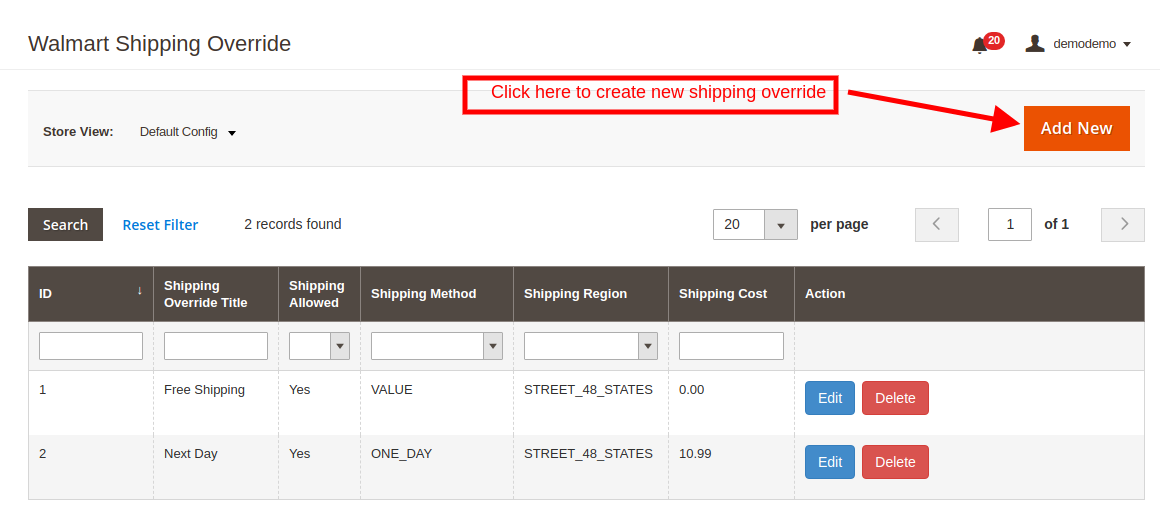
3.5 Shipping Override
The admin gets an option to create N number of shipping overrides in this tab of Walmart Magento 2 synchronization plugin.
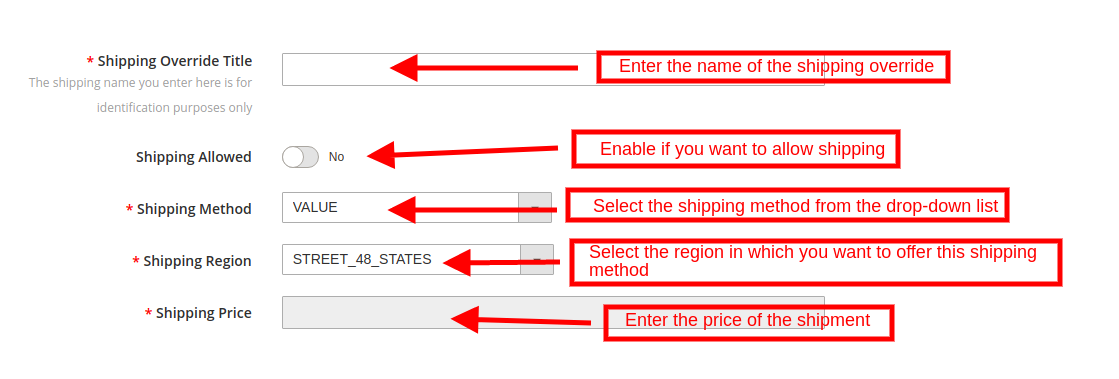
3.5.1 How to add Shipping Templates?
Follow the steps mentioned below to add Shipping Overrides:
To create new shipping override, click on ‘Add New’ at the top right section of Magento 2 Walmart synchronization extension.
The various field of this tab are discussed below
Shipping Override Title: Enter a unique name for the Shipping Override Title in this section.
Shipping Allowed: Enable the button if you want to allow shipping.
Shipping Method: Walmart allows 6 types of shipping methods. Admin can easily configure the shipping methods as per the requirement from the admin panel of the Walmart Integration module. Shipping methods offered by Walmart are – VALUE, STANDARD, EXPEDITED, FREIGHT, ONE_DAY, FRIGHT_WITH_WHITE_GLOVE. Kindly refer to the below article for the details:
Shipping Region: Admin can select the region in which he wants to enable the respective shipping override.
Shipping Price: As per the selected shipping method and shipping region admin can set the shipping cost for the different shipping methods and regions.
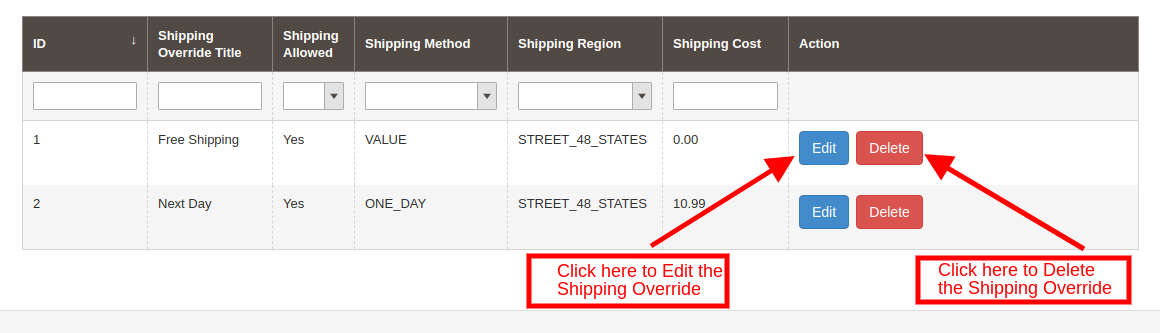
3.5.2 How to Edit/Delete the existing Shipping Override?
Click on the “Edit or Delete” button corresponding to each Shipping Method in order to edit or delete the same.
3.6 Products Listing
The Product Listing tab of Magento 2 Walmart integration module shows the list of all the products listed on Walmart Marketplace along with their statuses. In order to sync the product in the Walmart Marketplace, execute the Product Cron in the Synchronization tab. (See Section 3.15)
The admin can even renew or remove the products from this tab of Walmart Magento 2 integration plugin without visiting walmart.com.
3.6.1 Product Renewal
The admin can renew the expired product on Walmart Marketplace by clicking on the “Renew” action corresponding to each product.
After setting up a product for renewal, action “Renew” will be replaced with “Halt” action. This action is used to stop product renewal in case needed.
3.6.2 Product Listing Deletion
This option allows admin to delete product listing from Walmart Marketplace. Click on “Delete” action given corresponding to each product listing. After setting up a product for deletion, action “Delete” will be replaced with “Relist” action.
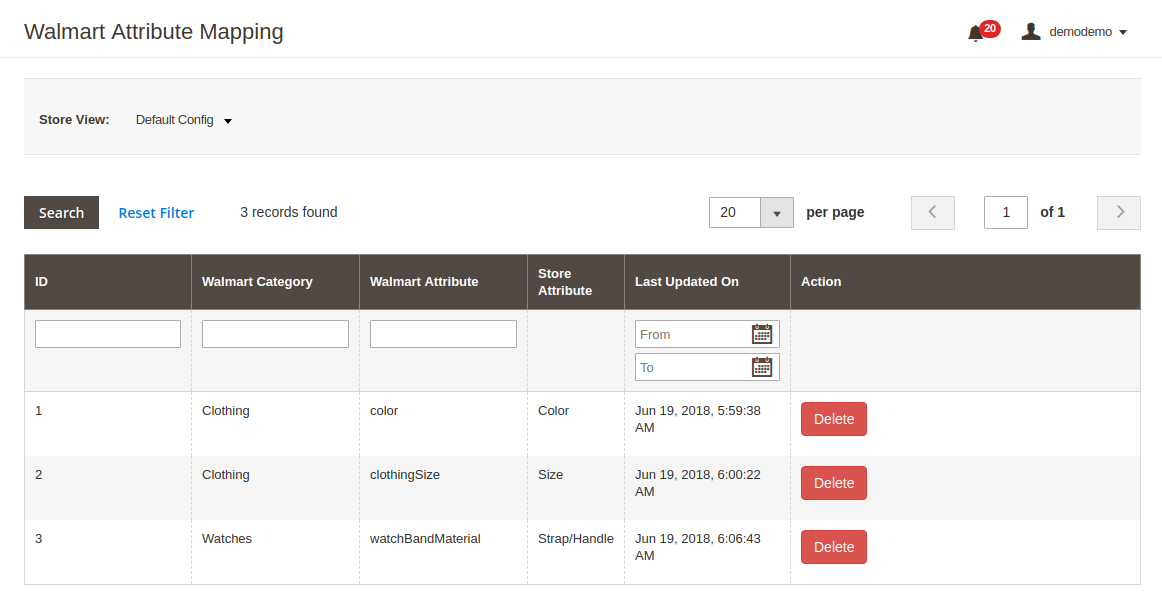
3.7 Attribute Mapping
The Attribute mapping tab of Magento 2 Walmart connector allows the admin to map the attribute of their Magento store attributes with the Walmart marketplace.
The mapped attributes are listed in this tab as shown in the image below:
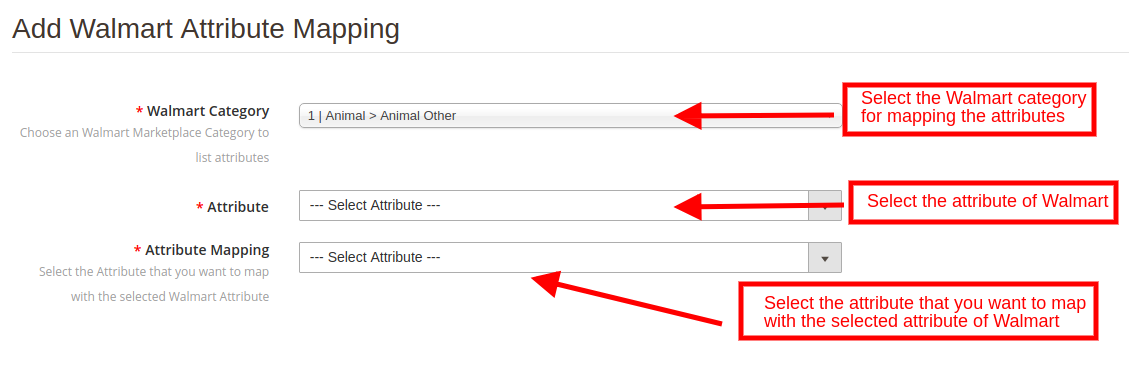
3.7.1 How to Map New Attributes?
In order to map new attributes, click on the Add New button on the top of the page. This will open up attribute mapping tab. The various fields of this tab are discussed below:
Walmart Category: Select a category of Walmart. The attribute mapping will be done for the selected category.
Attribute: Select the attribute of the Walmart that you want to map with the marketplace.
Attribute Mapping: This drop-down list includes the attributes of Magento 2 store. Select the one that you want to map with the selected attribute of the Walmart.
3.7.2 How to Delete Mapped Attributes
In order to delete the mapped attributes, click on the Delete button next to the mapped attributes on the Walmart Attribute Mapping tab.
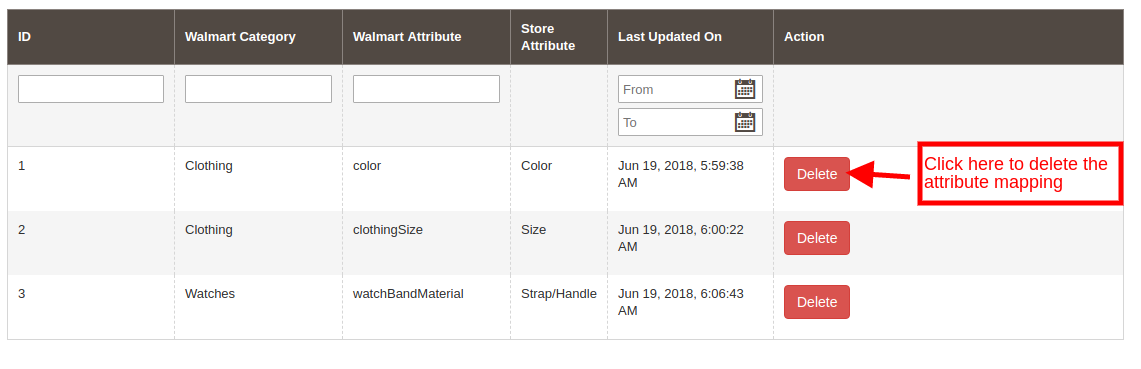
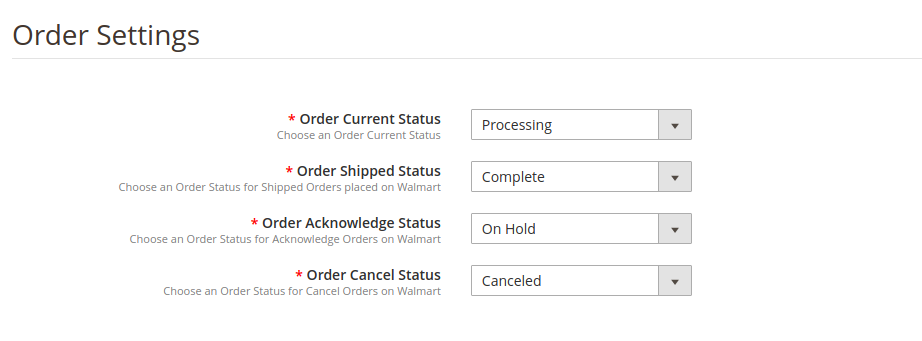
3.8 Order Settings
Order Settings tab of Magento 2 Walmart integration plugin helps the admin fix the order statuses and sync the same with Walmart Marketplace. This is done by capturing orders details from Walmart Marketplace. For mapping the orders from the Walmart Marketplace to the Magento store, you need to execute the Order cron in the Synchronization tab. (See section 3.15.)
The various fields are discussed below:
Order Current State: Choose a default status of the order from the drop-down.
Order Shipped State: Select an order state for the orders that are shipped. Select the order status from the drop-down list.
Order Acknowledge State: Select the order status once the order is acknowledged by the admin of the Magento store.
Order Cancel State: In case of order cancellation admin can sync the order status by using the Order Cancel state.
Note – Once the status of the order is changed in the Magento store, run the ‘Update Order Status to Walmart’ cron. This will sync all the changes to the marketplace.
3.9 Order Listing
The orders received from the Walmart store can be sync with Magento 2 store by executing cron in the back-end of the Magento 2 Walmart integration extension. The received orders can be viewed in the Order Listing tab of the admin interface of Walmart Magento 2 integration extension. For this, the store owner needs to run the ‘Sync Order Listing from Walmart’ cron from the Synchronization tab. (See Section 3.15)
Once the cron is executed, the entire orders will be synced to the Magento store. These orders can then be processed by clicking on the ‘View Order’ button as shown below:
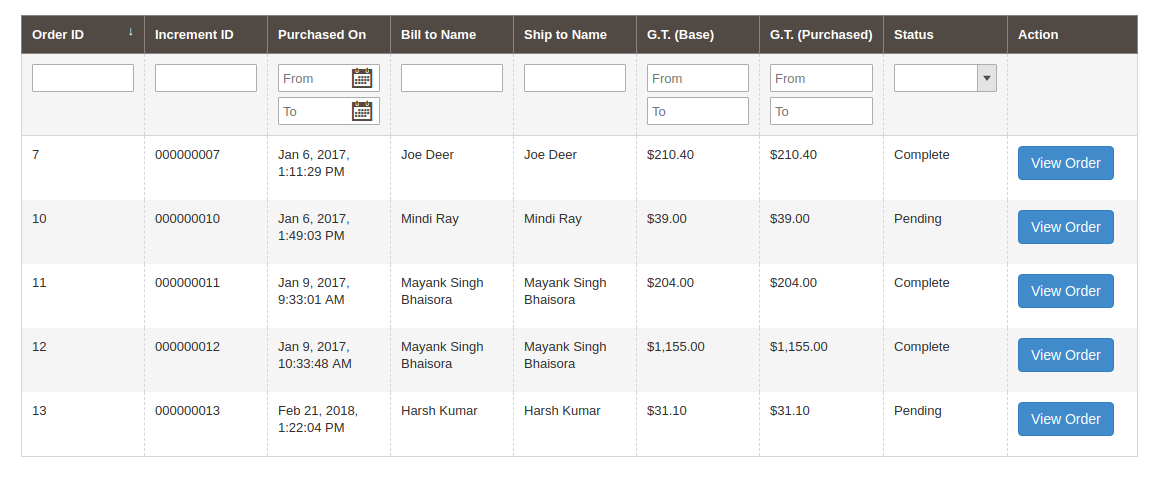
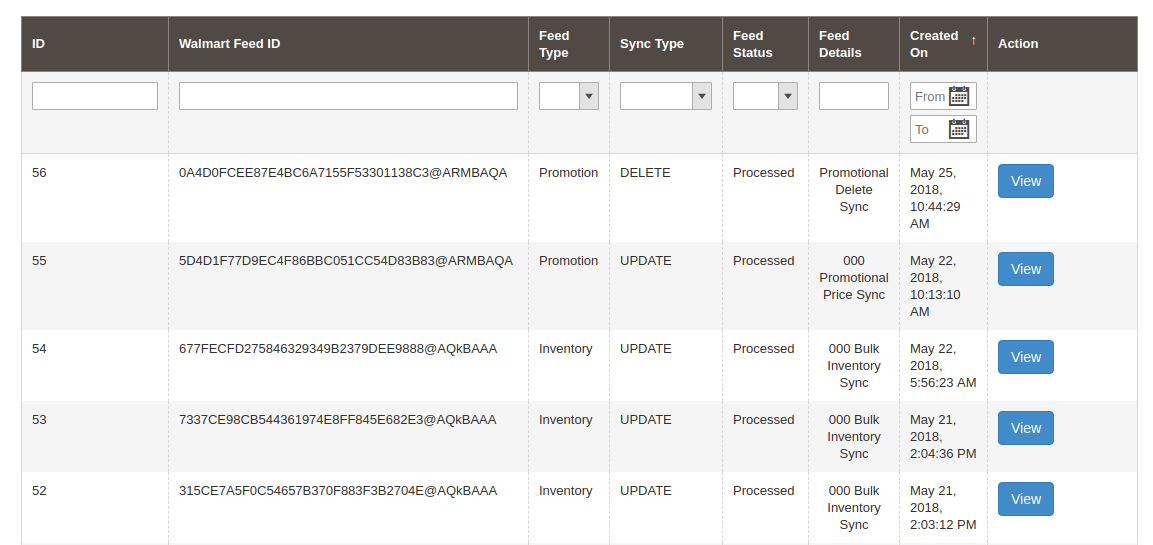
3.10. Feed Status
For every cron is executed in the back-end of the Magento 2 Walmart integration module, a Feed will be created in this tab. You can view the status of the feeds by clicking on the ‘View’ button as shown in the image below:
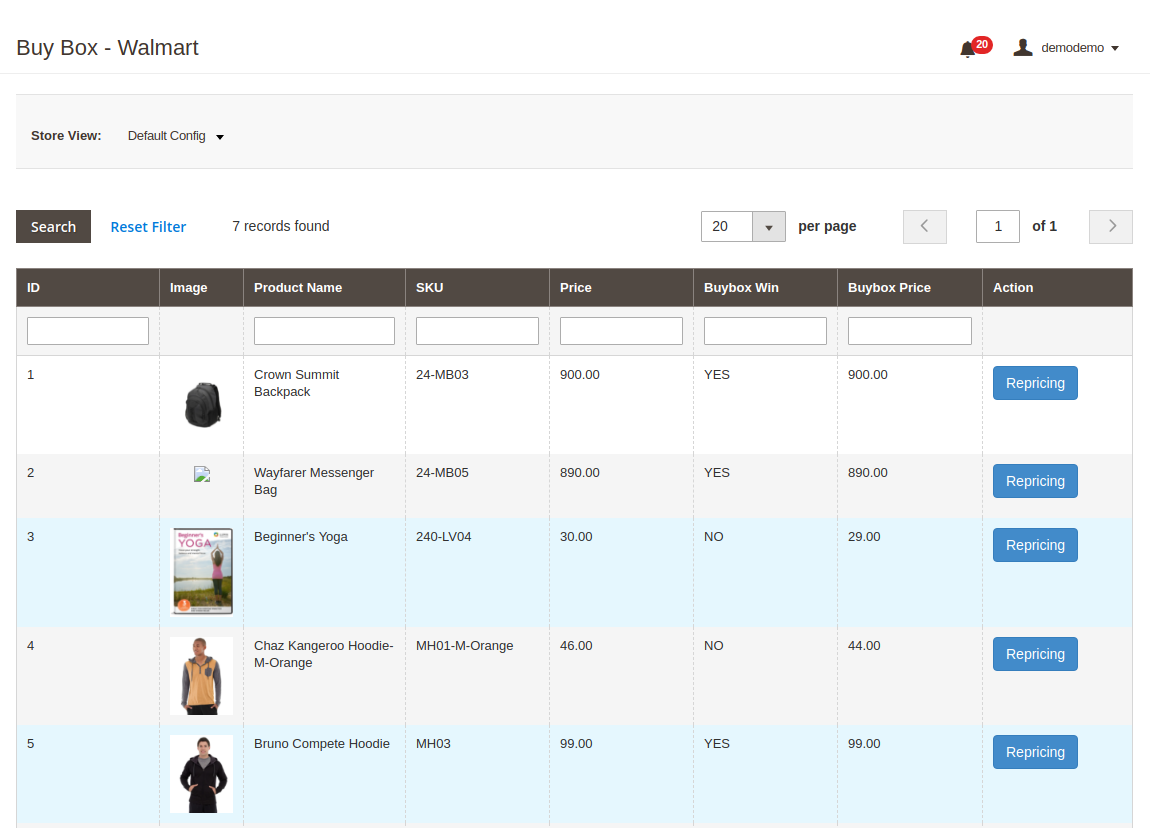
3.11. BuyBox Report
This tab of the Walmart Magento 2 Integration includes the BuyBox report of Walmart. The store owners can get the BuyBox report by executing cron in the admin interface of Walmart Magento integrator. See Section 3.15, in order to sync the Buy Box report from the walmart.com.
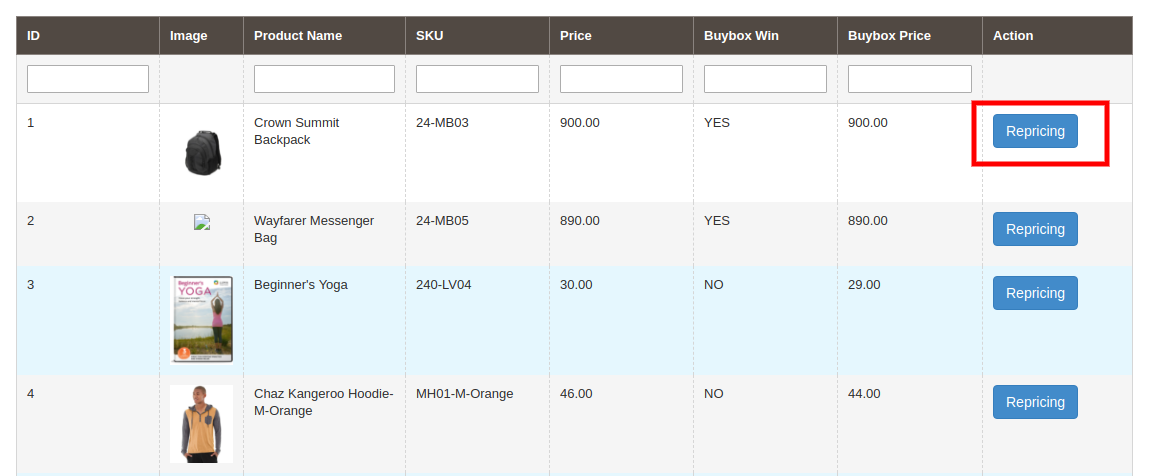
The Walmart Magento 2 integrator even allows the e-merchants to reprice the products in order to win the Buy Box.
To reprice the product, click on ‘Repricing’ option corresponding to the respective product as shown in the image below:
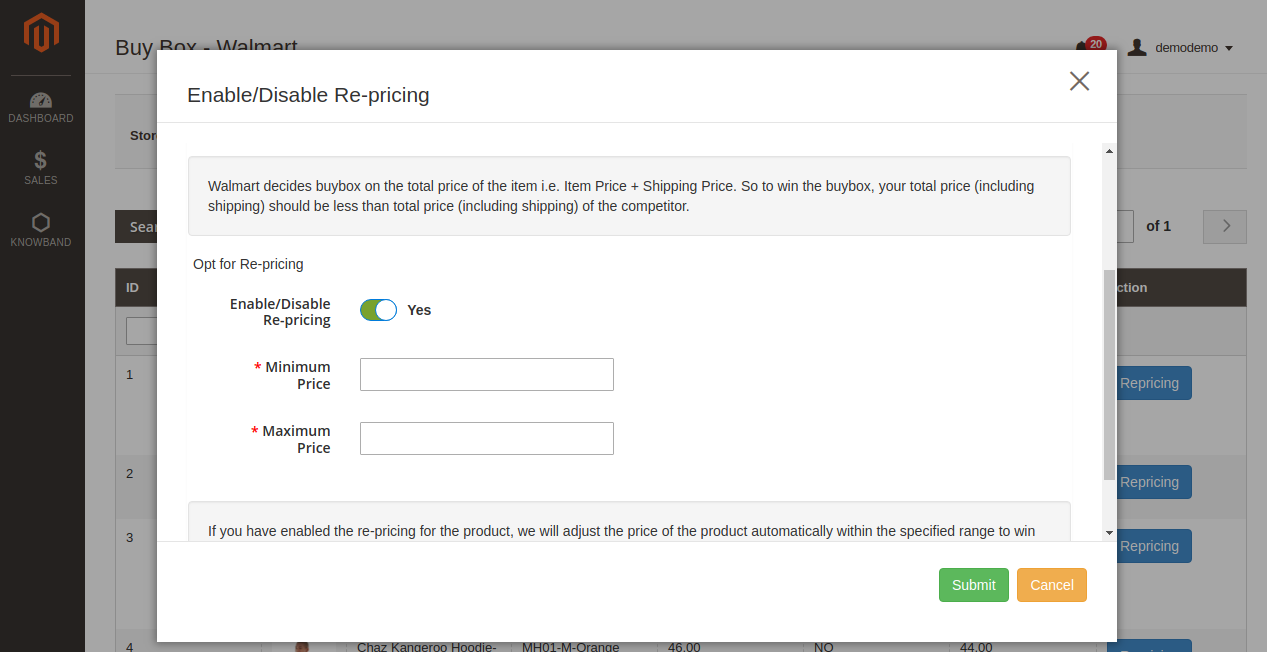
As you click here, a popup will appear. Here are the fields offered in the popup.
Enable Repricing: Select ‘Yes’ from the drop-down menu if you want to reprice the product.
Minimum and Maximum Price: Enter the minimum and maximum price of the product in the respective sections.
Once the repricing is done, sync the same with the marketplace by executing cron in the back-end of the Magento 2 Walmart Integrator. (See section 3.15)
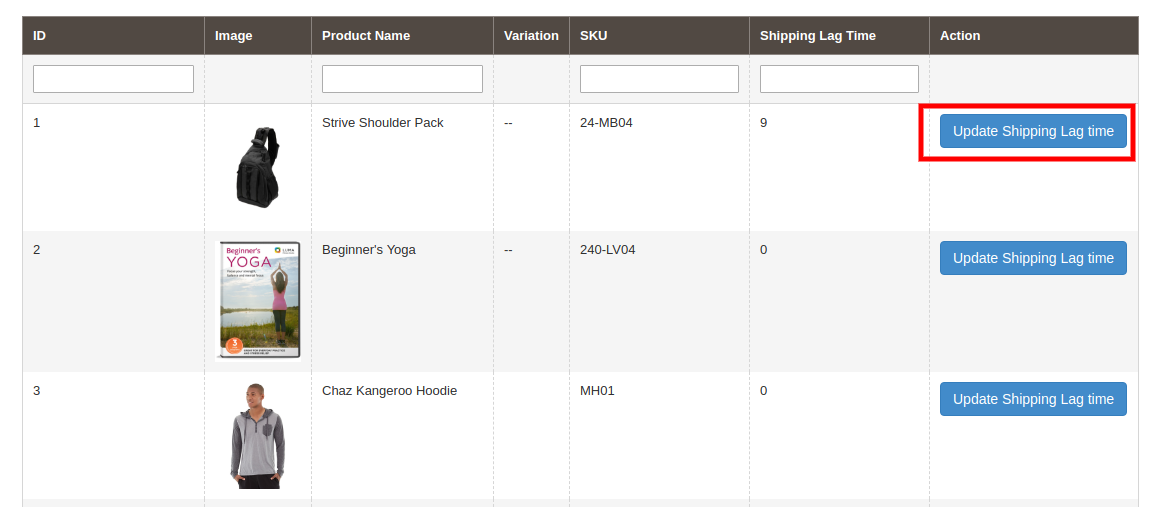
3.12 Manage Lag Time
Lag time refers to the time between the order placement and order shipment. The admin can update the lag time of the products and sync it with the marketplace with the help of the cron offered by Walmart Magento 2 API integration. In order to fix the lag time, click on the Update Shipping Lag Time button as shown in the image below:
As you click on the link, a popup will appear as shown below:
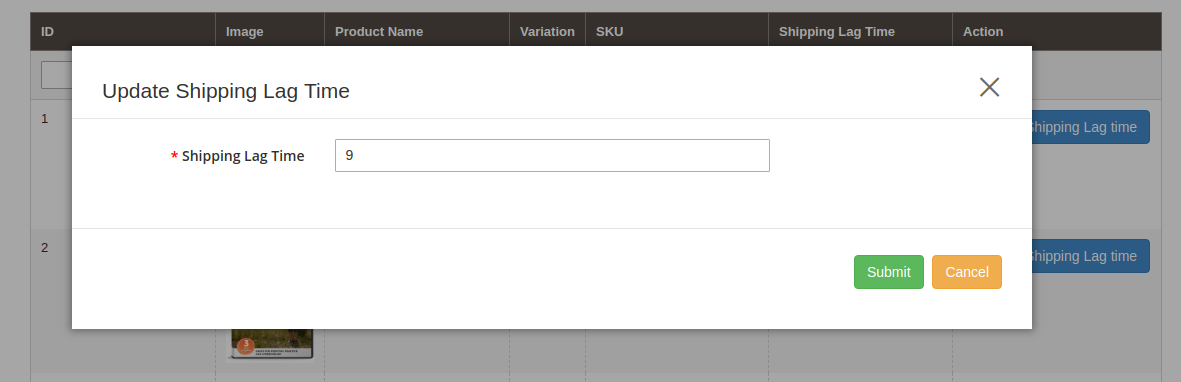
Enter the lag time in days and click on the Update button. This will update the shipping lag time at walmart.com.
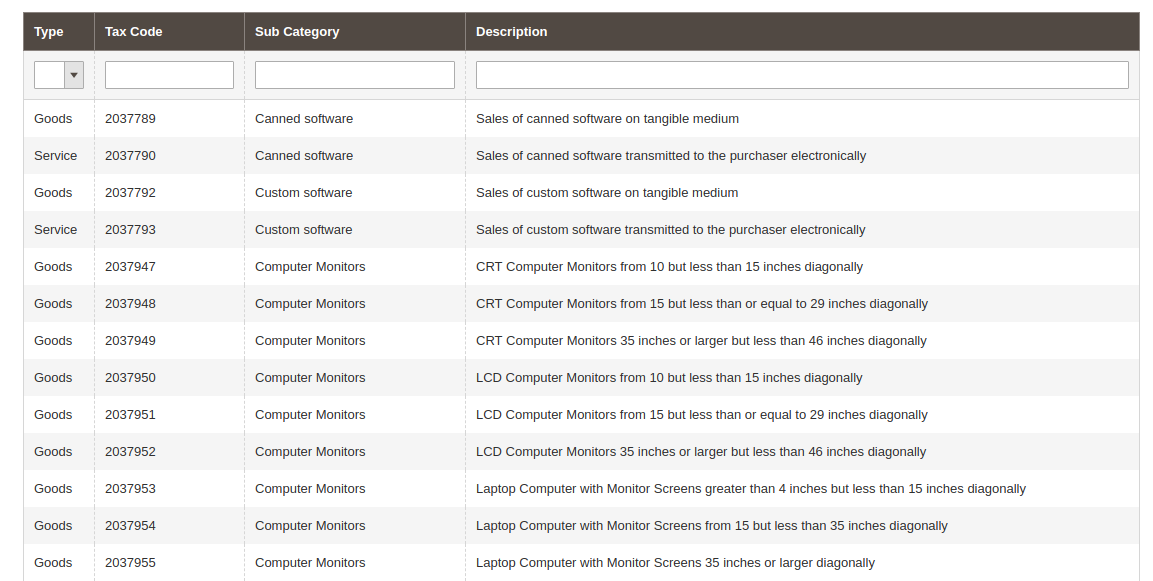
3.13 Tax Code
This tab of Magento 2 Walmart API integrator lists out the tax code of all the products listed at the marketplace.
3.14. Sales Report
This section of Walmart Magento 2 API integrator offers the complete sales report of the Walmart shop in both graphical and tabular form as shown in the image below:
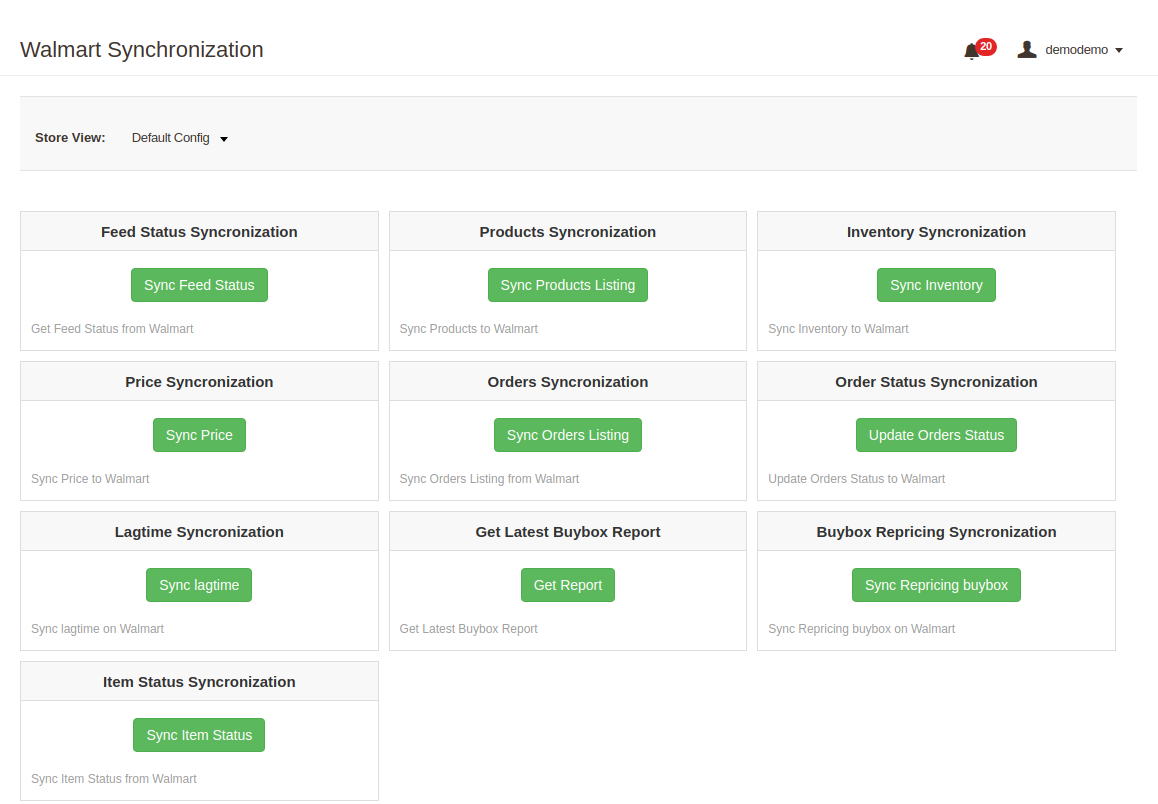
3.15. Synchronization
This tab synchronizes all the settings and changes done in the other tabs of the Module. The synchronization between the Magento 2 Store and Walmart Marketplace and vice-versa can be done from the ‘Synchronization‘tab.
The various cron jobs to synchronize the settings between Magento Store and Walmart Marketplace are shown below:
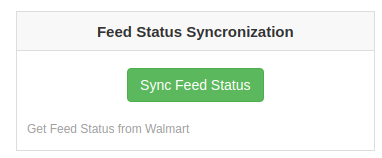
3.15.1 How to sync Feed Status from Walmart Marketplace to Magento store?
The status of the feeds can be synced with the Magento 2 store by clicking on the ‘Sync Feed Status’ in this tab of Magento 2 Walmart Integration Extension.
It would perform following actions –
- Every time a cron is executed, a feed is created. This cron updates the feeds.
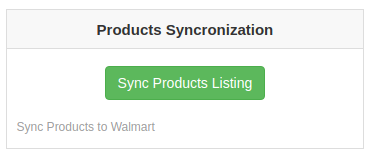
3.15.2 How to list the Products at Walmart Marketplace?
The product listed in the Products Listings tab will be synced with Walmart by clicking on ‘Sync Products Listing’ cron options offered by Magento 2 Walmart Integrator.
It would perform following actions –
- The cron will list the products to the Walmart marketplace.
- It will add products on the Walmart Marketplace with the mandatory product details like Description, Price, Quantity, Image etc.
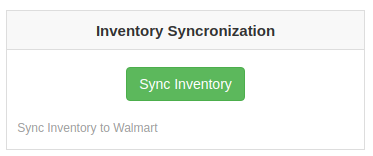
3.15.3 How to sync Inventory to Walmart Marketplace?
The inventory or product quantity can be updated at walmart.com by executing the ‘Sync Inventory’ cron.
It would perform following actions –
- This action will update the quantity of each product listed on Walmart Marketplace.
- The change in the product quantity at the Magento 2 store is synced with the marketplace by executing this cron.
3.15.4 How to sync price of the products with Walmart Marketplace?
The Sync product price cron allows the store admin to sync the updated product prices to the Walmart marketplace.
It would perform following actions –
- The cron job changes the price of the products at the marketplace.
- The change in the price at the eCommerce site is reflected at the marketplace with the help of this cron.
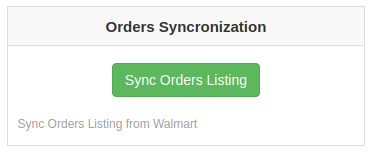
3.15.5 How to sync Walmart Orders with Magento 2 store?
This cron will sync the Orders from Walmart Marketplace to Magento store.
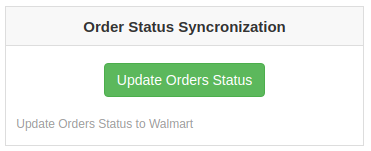
3.15.6 How to Update Order Status at walmart.com?
The ‘Sync Order Status’ cron will update the order status as per the changes made from the Magento store on Walmart marketplace.
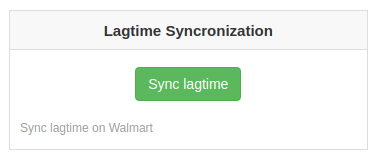
3.15.7 How to Synchronize the Shipping Lag Time?
Click on ‘Sync Shipping Lag Time’ of the synchronization tab of Magento 2 Walmart Integrator. This will sync the respective lag time of the products with walmart.com.
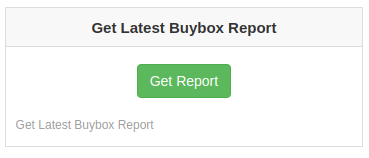
3.15.8 How to Synchronize the Buy Box status from Walmart?
The admin can sync the buy box status from Walmart by clicking on ‘Sync Walmart BuyBox’. This will update the status of the BuyBox for the respective products.
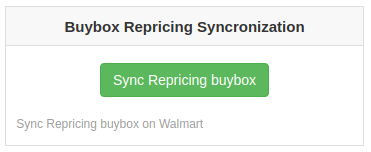
3.15.9 How to Synchronize the change in price of the Buy Box items on Walmart?
The admin can reprice the products and sync the revised products at the marketplace by executing Sync Repricingcron in this tab of Magento 2 Walmart Integrator.
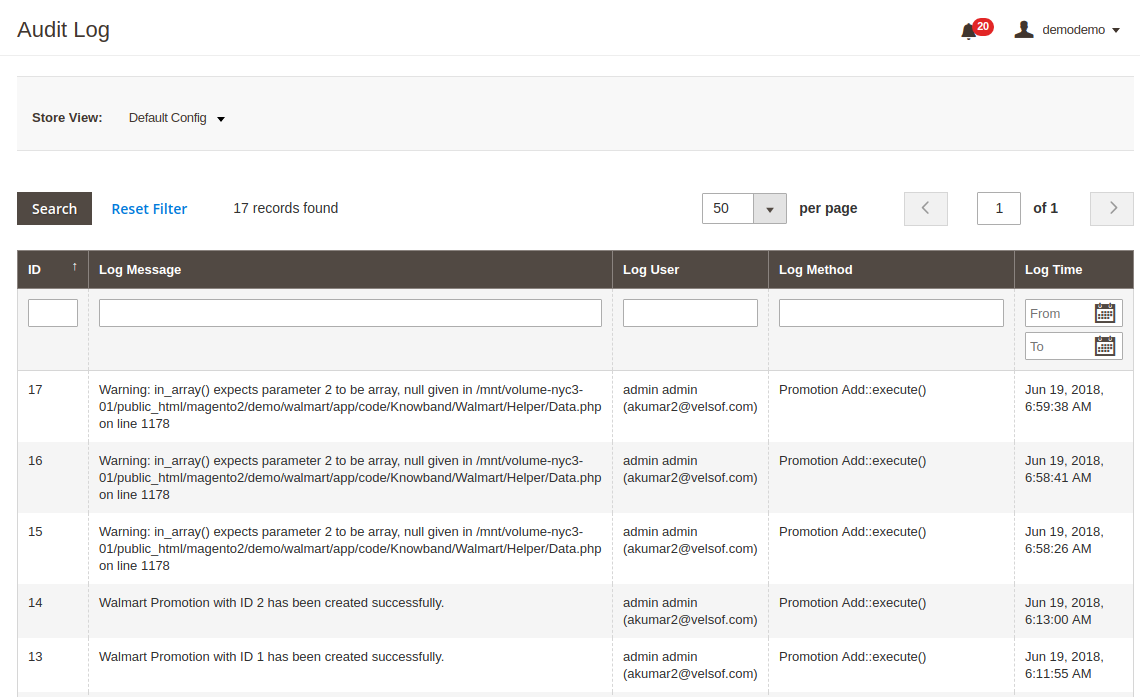
3.16 Audit Log
The admin can view all the jobs occurred in the Audit Log tab of Magento 2 Walmart Integrator. The status of the jobs can be viewed in this tab.