1.0 Introduction
Etsy Magento 2 Integrator offered by Knowband is the fastest means to integrate the store with the marketplace. The Etsy Magento 2 Integration extension offers a bi-direction synchronization between the store and the marketplace.
If you own a Magento 2 eCommerce site and are looking to expand the reach of your business that listing your products on popular marketplaces is inevitable. The Magento 2 Etsy marketplace Integrator extension automates the process of store integration. The admin can easily list the products along with their details and make changes in the same from the back-end of the Magento 2 Etsy Connector module. The orders received from the marketplace syncs with the orders of the store by executing cron in the admin interface of the Magento 2 Etsy integrator by Knowband.
Note: “The term ‘Etsy‘ is a trademark of Etsy, Inc. This application uses the Etsy API but is not endorsed or certified by Etsy, Inc.”
1.1 Merchant Benefits of Magento 2 Etsy Connector:
- Magento 2 Etsy Integration plugin offers automatic synchronization.
- The profile-based listing of the Etsy Magento 2 integrator module allows the admin to list the products in bulk.
- The Magento 2 Etsy connector offers an option of the second language to the admin. The multi-lingual compatibility adds to the ease of trading.
- The Magento2 Etsy Connector extension offers multi-currency compatibility as well.
- The admin can add shipping methods as per their convenience and sync the same with the marketplace with the help of the Magento 2 Etsy API integration plugin.
- The Etsy Magento 2 API integration extension even allows the admin to add N number of shipping entries with each shipping template.
- Profile-based listing of Etsy Magento 2 connector plugin allows the admin to upload and then edit the products in bulk.
- The real-time synchronization of the Etsy Magento 2 Integrator allows the admin to manage the inventory with ease.
- The admin can easily upload the product variation, renew, edit or remove the products with the help of the Etsy Magento 2 integration extension.
- The Magento 2 Etsy integrator module creates orders in the store as per the orders received from the marketplace. The orders can be processed from a single interface.
- Even the order status is changeable. Moreover, syncs with Magento 2 Etsy integrator.
- The error occurred while product listing or cron execution can be easily tracked from the back-end of the Magento 2 Etsy integration module.
1.2 Installation
Follow the following steps to install the Magento 2 Etsy integrator extension in your store:
1. Download the Magento 2 Etsy Connector module package from the Knowband store.
2. You’ll receive a zipped file containing the user manual and the source code of the Magento 2 Etsy Integration plugin. Further, unzip the package.
3. Create a folder {Magento root}/app/code/Knowband/Etsy
4. Upload the extracted content in the above folder via FTP manager (like Filezilla or WinSCP – download here: https://filezilla-project.org/).
5. Now run the below commands to install the plugin:
- php -f bin/magento module:enable –clear-static-content Knowband_Etsy
- Next, php -f bin/magento setup:upgrade
- php -f bin/magento setup:di:compile
- php bin/magento setup:static-content:deploy
6. In Admin Panel go to the main menu -> Knowband -> Etsy.
7.The Magento 2 Etsy Marketplace integrator extension is now ready for use.
At last, this User Manual will guide the users through the Etsy Magento2 Integrator extension configuration and settings.
2.0 Etsy Marketplace Connector- Seller Account Setup
To start selling on Etsy Marketplace you need to have a seller account on Etsy. In fact, in this section, we are listing all the steps to create a seller account on Etsy. Further, please find them below –
- Go to the link
- Further, click on the “Open your Etsy Shop” button on the page you are visiting now by following the link given in the first step above or you can refer to the screenshot given below.
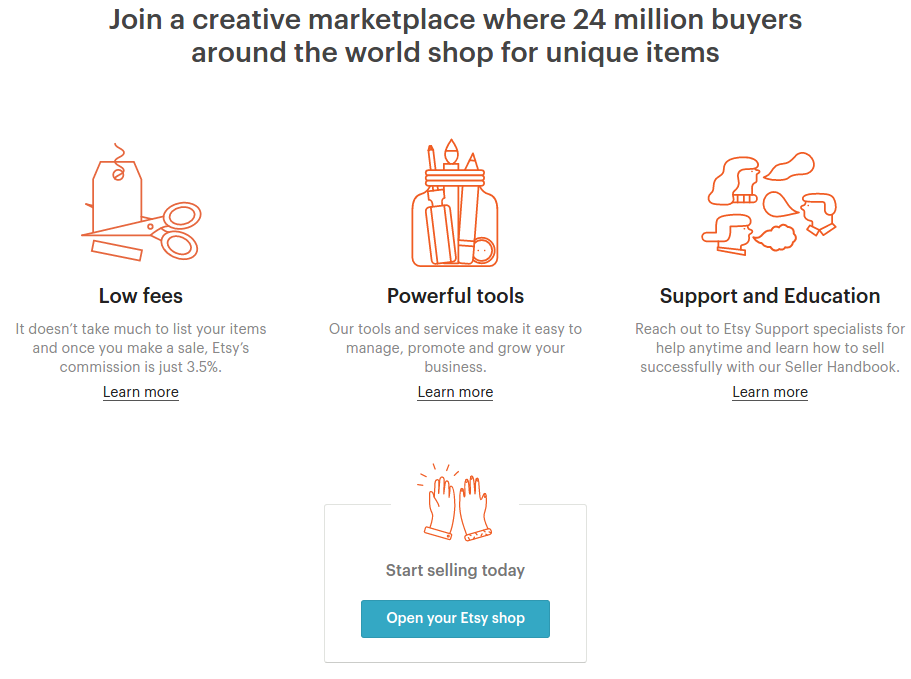
- It would open a pop-up as shown below. Furthermore, click on the “Register” tab.
- After filling up the registration form, click on the “Register” button. In fact, it would create your seller account and send a verification email to the provided email address. Further, it would also redirect you to another page as shown below.
Now, it is asking for the setup of your shop preferences. Furthermore, complete all the highlighted sections. For instance, Shop Preferences and Name your shop, Stock your shop, How you will get paid, and Set up Billing.
That is it.
2.2.1 Etsy Marketplace Integration- Setup an App
To start communication between Magento Store and Etsy Seller Account, you need to create an App on Etsy Marketplace. Further, following are the steps to create an App on Etsy –
- Go to the link
- It would open a page where a form will be shown with a few input fields as shown below.
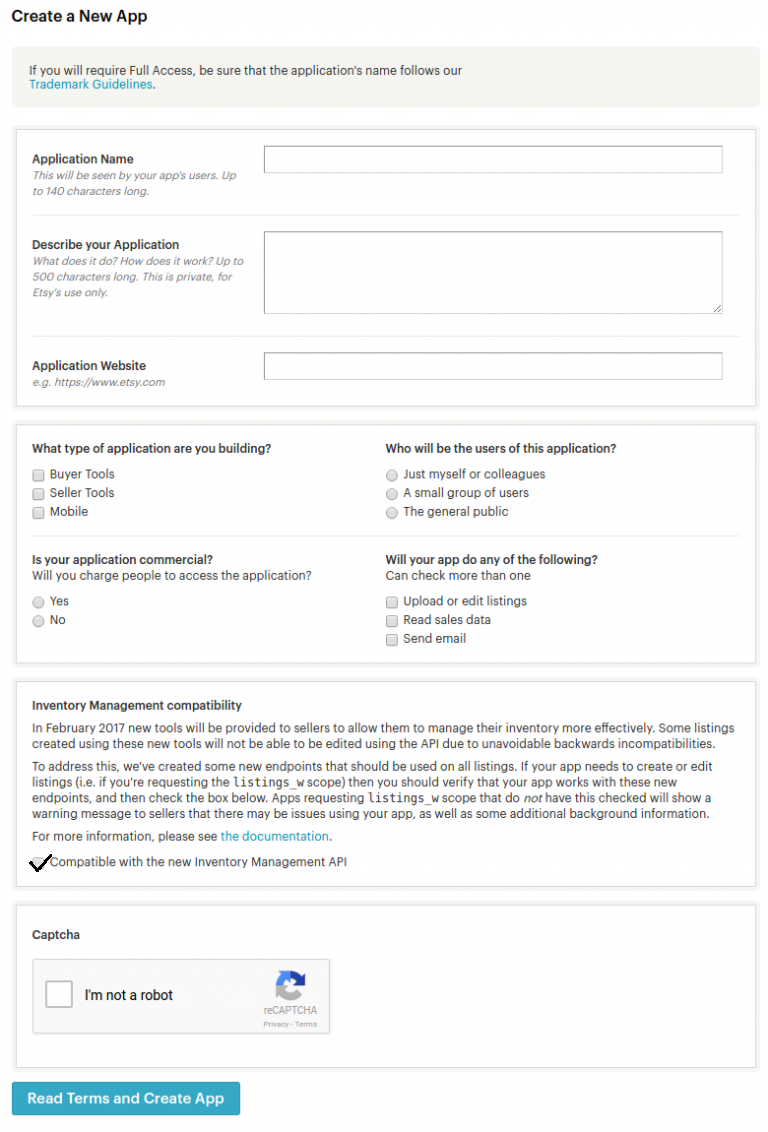
- Fill up the form and click on “Read Terms and Create App”. Furthermore, please make sure that you left the “Inventory Management Compatibility” checkbox is checked.
- It would ask to accept “terms and conditions”. In fact, accept and click on the “Create App” button.
- At last, it would register your App on Etsy Marketplace and provide API details as shown below.
3.0 Admin Interface
The admin panel of the Magento 2 Etsy Connector module contains the 9 tabs for settings.
- General Settings
- Shipping Templates
- Shipping Templates Entries
- Profile Management
- Product Listing
- Order Setting
- Order Listing
- Synchronization
- Audit Log
3.1. General Settings
The connection between the Etsy marketplace and the Magento 2 store is established in the General Settings tab of the Magento 2 Etsy API integration extension. Further, the various input fields are below:
1. Enable the Extension
Toggle this button to enable the Etsy Magento 2 API integration extension. In fact, if enabled, the module and all its settings will be working on the store.
2. Etsy API Key
Enter the obtained Etsy API Key in this section. Further, this will authenticate the connection between the Magento 2 store and Etsy Marketplace.
3. Etsy API Secret
Enter Etsy API Secret Key here. Further, it is mandatory for authenticating the integration between the site and the marketplace.
4. Etsy Default Language
Select the default language from the drop-down menu. In fact, to retrieve the language in this section execute the ‘Language Synchronization’ cron. (See Section 3.8)
5. Languages to Sync
Magento 2 Etsy Integrator extension is multi-lingual compatible and offers an option to choose the secondary language. Further, choose the language used for synchronizing the product. In fact, the selected language should be anything other than the default language.
Once you have filled all the required fields, click on the ‘Save Settings’. Furthermore, a ‘Connect’ button will appear once the changes are saved. In fact, to establish the connection between the site and the marketplace, click on the “Connect” button. Further, it would redirect admin to Etsy Marketplace to allow the App Access to the store. At last, click on the “Allow Access” button as shown below.
Follow the above-mentioned steps and the connection will be established between the store and the Etsy Marketplace.
The user will then be redirected to the admin interface of the Magento 2 Etsy Marketplace Connector module. In fact, the ‘Connect’ button will replace with the “Disconnect” button.
Note: Once the connection is set up, execute the Country/Region cron in the synchronization tab of the Magento 2 Etsy Integrator. Further, the cron job will sync the country list in the database. (See section 3.8.)
3.2 Shipping Template Settings
Magento 2 Etsy Connector allows the sellers to add shipping templates as per their requirements. Likewise, the admin can manage, edit or add new shipping options in the Shipping Templates tab of the Magento 2 Etsy Synchronization extension.
3.2.1 How to add Shipping Templates?
Here, click on ‘Add New’ to create new shipping templates as shown below:
The shipping template creation page of Magento 2 Etsy integration includes the following input fields:
Shipping Template Title: Here, enter a unique name or title for the Shipping Template.
Origin Country: Choose a country from the list that you want to set as the origin country of the shipment.
Primary Cost: Here, enter the primary cost for the order shipment. Further, you can set it only once.
Secondary Cost: Secondary cost will change on every additional item that is to be shipped. In fact, enter the shipping cost for each additional item. Thus, you can set it only once.
Minimum Processing Days: Here, enter the minimum number of days after the order places when the shipment will be initiated.
Maximum Processing Days: Here, enter the maximum number of days after the order places when the shipment will be initiated.
3.2.2 How to Edit/Delete the existing Shipping Templates?
The admin can edit or delete the shipping templates from this tab of the Magento 2 Etsy Integrator module. Further, the created shipping templates will list as shown below. Here, click on the Edit or Delete button corresponding to each shipping template for performing the respective action.
3.2.3 How to Add the Shipping Entries?
Each shipping template can have multiple shipping entries. Further, to see the shipping entries in a particular shipping template, click on the ‘View Shipping Entries’ button.
This will redirect you to the shipping entries page as shown below.
The admin can even add new shipping template entries by clicking on the ‘Add Shipping Template Entry’ button.
Here, click on the Add New Entries button to create new entries.
This will redirect you to the shipping entry creation page of the Magento 2 Etsy Connector module.
Shipping Template Title: The template title in which you want to add the entries will display in this section.
Origin Country: It will remain the same as selected in the shipping template.
Destination Type: Select the destination type of the shipment. In fact, it can be a Country or a Region.
Destination Country: Select the destination place of the shipment here.
Primary Cost: Enter the primary cost of the shipment.
Secondary Cost: Enter the secondary cost that will be charged for each additional item.
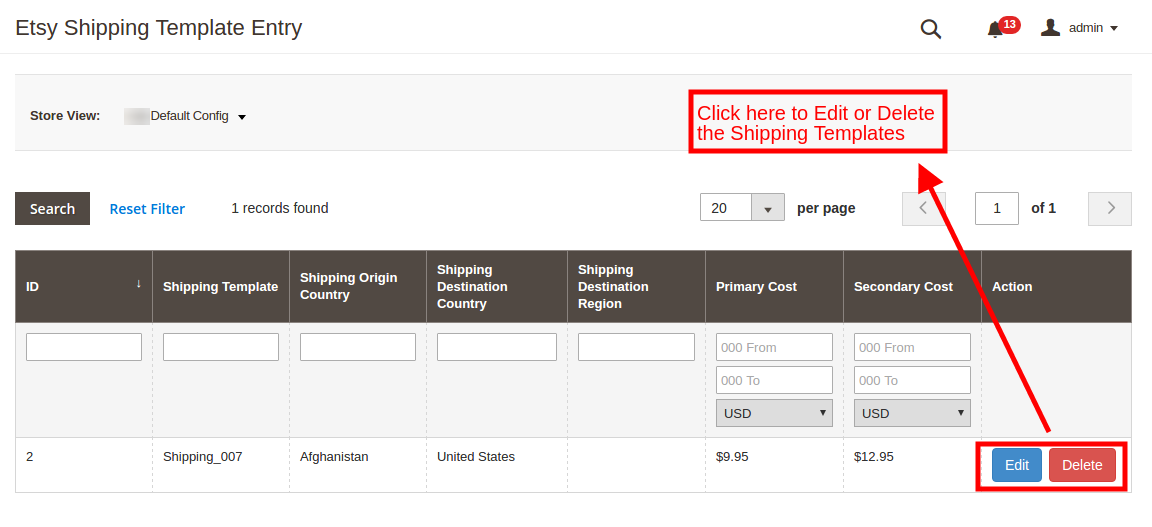
3.3 Shipping Template Entry
Here, the admin gets an option to see all the shipping entries in the shipping templates in this tab of the Etsy Magento 2 Connector extension.
To edit or delete the shipping entries, click on the Edit or Delete button respectively corresponding to each shipping template.
3.4 Profile Management
Magento 2 Etsy integrator allows the admin to list the products in bulk with the help of profiles. Thus, the admin can create profiles in this tab of the Magento 2 Etsy connector. Further, the profile-based listing allows easy attribute and category mapping.
3.4.1 How to add a new profile?
To add new profiles, click on the ‘Add New’ link as shown in the image below.
The link will redirect you to the profile creation page. Thus, the various fields are below:
Profile Title: Enter a unique name for the profile.
Etsy Category: Here, select an Etsy Marketplace Category to list the attributes. Furthermore, the Magento 2 Etsy Marketplace connector allows the admin to map a single category of Etsy with multiple categories of the store.
Attribute Mapping: Here, map the selected Etsy Marketplace attributes to the store’s attributes to list the variations on the marketplace.
Store Categories: Check the category of the store that you want to map with the selected category of the Etsy Marketplace.
Shipping Template: Choose a Shipping Template from the drop-down list. Furthermore, the customer can avail of the selected shipping options. In fact, to list the shipping templates execute the cron job in the Synchronization tab of the Etsy Magento 2 Integrator extension.
Select Shop Section: The store admin can choose the shop section from the list of added shop sections.
Enable Custom Pricing: Here, toggle this button to set a custom price for products at the Etsy store.
Custom Price: Store owners can set different values of the product available at the Etsy shop. Further, the admin has the flexibility to increase or decrease the custom price of Etsy Products. In fact, the changes can be set either as fixed or a percentage value.
Etsy Currency: This currency should be the same as the currency of your Etsy Admin panel, you can check the Etsy currency in Finances -> Payment Settings -> Currency.
Customized Product Title: Here, you can customize the product title by using the following place-holders. Further, place-holders like {sample} will replace by dynamic content at the time of execution.
- {id_product} for Product ID
- {product_title} for Product title
- {country_of_manufacture} for Country of Manufacturer
- {sku} for Product SKU
- {weight} for Product Weight
- {short_description} for Product Short Description
- {price} for Product Price
Sync Property: Here, select the properties to sync with the Etsy Marketplace. Thus, this will work while updating the product and its variations.
Enable to enter a minimum quantity: If enabled, the item will not list if the quantity is below the specified limit.
Enable to enter a maximum quantity: If enabled, the quantity of the item will display as the specified limit even if it’s higher.
Is the product customizable?: Enable if the product is customizable.
Who Made: Here, specify who made the products. The options list in the drop-down list.
When Made: Here, select when this product was made.
Is Supply?: Here, specify if the product is the product is supply product or not.
Recipient: Here, select the Recipient of the product
Occasion: Here, specify the Occasion (if any) for which the product is intended.
3.4.2 How to Edit/delete a new profile?
Here, the admin can edit or delete the profile from this section of the Magento 2 Etsy Integration module by clicking on the Edit or Delete button respectively.
3.5 Product Listing
This section of the Magento 2 Etsy Integration plugin shows the list of all the products available on Etsy Marketplace with their statuses. Hence, to sync the product in the Etsy Marketplace, execute the Product Synchronization Cron in the Synchronization tab (See section 3.8.). Further, the variations of the products sync with the marketplace by executing Product variations Synchronization.
Along with the listed product, this section offers several other options to the store admin. They are below:
Renew the Products
Here, the admin can renew the expired products by clicking on the “Renew” action corresponding to each product.
After setting up a product for renewal, the action “Renew” will replace with the “Halt” action. Thus, this action is used to stop product renewal in case needed.
Delete the Products
Here, click on the “Delete” action given corresponding to each product listing to remove the product from the listing. In fact, after setting up a product for deletion, the action “Delete” will replace with the “Relist” action.
View Error
The admin can view the error that occurred in listing the product. Further, for this, click on the ‘View Error’ action. In fact, if any error is encountered while product listing, then, the same is shown in the popup. Otherwise, the message, ‘No Listing Error Found’ will be flashed.
3.6 Order Settings
Order Settings tab of the Etsy Magento 2 Integration extension allows the admin to map the order statuses with Etsy Marketplace order statuses. Further, the admin can select the order statuses and sync the same with the marketplace by executing the Order Status cron in the Synchronization tab. (See section 3.8)
The various fields are below:
Order Default State: Choose an order default status from the drop-down menu.
Order Paid State: Choose the order state for the paid orders placed on the Etsy marketplace. In fact, the selected option will display in the marketplace as well.
Order Shipped Status: Choose an ordered state for the shipped orders on the Etsy marketplace.
Note –
- The default status is the first status of the order when it is placed in the store.
- Paid status means that payment for the order has been made and accepted.
- Shipped status means that ordered items have been shipped.
Map Etsy Orders with Store Carrier: Now store admin can map the Etsy orders with the Magento 2 store carrier.
Select Shipping Methods for Etsy Orders: Now map the imported order from Etsy with the selected carrier.
Etsy Carrier Name for Tracking Url: Store owners can choose the carrier used for tracking Etsy orders on orders received at Etsy.
Show Tax Breakup in Etsy Orders: The store admin can display the tax breakups for orders received at Etsy.
3.7 Order Listing
The order listing tab of Magento 2 Etsy displays the list of orders placed received from the marketplace. Further, to obtain the list of the order, execute the Order Synchronization cron. (See Section 3.8)
To check the order, click on ‘View Order’.
The admin gets to see the following details of each order.
It offers basic information. For instance, the order date, status, billing and shipping address, payment information, gift options, item ordered, comment history.
The default order view page is shown below:
- Invoice: The admin can generate the invoice for the orders received from here. Thus, this will initiate the processing of the order. Further, execute the Update Order Status on Etsy cron. Moreover, the status of that order will be updated in the Etsy Marketplace.
- Credit Memos: Change the status of the credit here.
- Shipments: The admin can update the shipment details. For instance, the name of the shipment, date, and the quantity of Shipment.
3.8 Synchronization
Magento 2 Etsy Synchronization extension offers a bi-directional connection between the store and the marketplace. Further, the products, shipping options, and their details can list on the marketplace. Thus, the admin can sync the order from the marketplace to Magento 2 eCommerce site.
This section of the Magento 2 Etsy API integration module offers various cron options. In fact, store synchronization can be carried out by executing cron.
At last, the various jobs to synchronize content between Store and Etsy Marketplace are shown below –
3.8.1 How to sync Countries/Region?
Follow the steps below to synchronize Countries/Region on Etsy Marketplace –
- Goto the Etsy Marketplace -> Synchronization tab (Main Menu)
- Further, click on the “Sync Countries/Region” button shown below.
It would perform the following actions –
- The cron will get all the countries with their country ID and ISO code and save them into the database.
- Once the cron executes, the countries and regions in the database. In addition, the admin can select the countries accordingly.
3.8.2 How to sync Shipping Template on Etsy Marketplace?
Follow the steps mentioned below to synchronize Shipping Templates on Etsy Marketplace –
- Goto the Etsy Marketplace ->Synchronization tab (Main Menu)
- Further, click on the “Shipping Template Synchronization” button shown below.
It would perform the following actions –
- It will sync new shipping templates along with their Entries on Etsy.
- The plugin will update the modifications made in the Shipping Templates and their entries on Etsy
- It will remove the deleted shipping templates and their entries from Etsy.
3.8.3 How to sync Products on Etsy Marketplace?
Following are the steps to synchronize Products on Etsy Marketplace –
- Goto the Etsy Marketplace ->Synchronization tab (Main Menu)
- Further, click on the “Sync Products” button shown below.
It would perform the following actions –
- The cron will update the profile-based product listing.
- It will add products on the Etsy Marketplace with the respective product details (e.g. Price, Quantity, Image, etc.).
- Next, it will update the changes made in the products that are already available on the Etsy marketplace.
- It will renew the expired products on Etsy Marketplace for the items in which the ‘Renew’ action is initiated.
- Likewise, it will remove the products from Etsy Marketplace which mark as deleted on Store.
- At last, it updates the Listing Status of each product available on Etsy Marketplace.
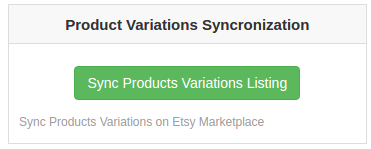
3.8.4 How to sync Products Variation on Etsy Marketplace?
Following are the steps to synchronize Products Variation on Etsy Marketplace –
- Goto the Etsy Marketplace ->Synchronization tab (Main Menu)
- Further, click on the “Sync Products Variation Listing” button shown below.
It would perform the following actions –
- The cron execution will add Products Variations on Etsy Marketplace.
- Second, it will update Products Variations that are already listed on Etsy Marketplace.
- Next, it will remove the Products Variations on Etsy Marketplace that mark as deleted on the Store.
3.8.5 How to sync Orders received from Etsy Marketplace?
Follow the steps below to synchronize Orders from Etsy Marketplace –
- Goto the Etsy Marketplace ->Synchronization tab (Main Menu)
- Further, click on the “Sync Orders” button shown below.
It would perform the following actions –
- The orders and their details received from the marketplace sync with the Magento 2 store by executing this cron.
- It creates Shipping Carrier options into the store as per the details of the order coming from Etsy Marketplace.
- In fact, it creates Orders into the store as per the details coming from the Etsy Marketplace.
- In addition, it sets the order status as per the configuration settings updated in the “Order Settings” tab of this Magento 2 Etsy Marketplace Integrator module.
3.8.6 How to sync Order Status with Etsy Marketplace?
To sync the order status, follow the steps below:
- Goto the Etsy Marketplace ->Synchronization tab (Main Menu)
- Further, click on the “Update Order Status on Etsy” button shown below.
It would perform the following actions –
- Here, the action syncs the order statuses as specified by the admin with the marketplace.
- Here, the cron checks if there is any status update recorded by the Etsy Marketplace Connector for any Etsy Order. Thus, the updates are then synchronized accordingly.
3.8.7 How to sync Language on Etsy Marketplace?
Following are the steps to synchronize Language to Etsy Marketplace:
Go to the Etsy Marketplace ->Synchronization tab (Main Menu)
Further, click on the “Sync Translations” button shown below.
It would perform the following actions:
In case there are any product or category details in different languages, then, the same will be synchronized in the Etsy marketplace. Hence, the Magento 2 Etsy Marketplace Connector offers multi-lingual support.
Note:
Once the synchronization completes successfully, then, a message will display – “Synchronization completed” else “Synchronization failed” will be flashed.
3.9 Audit Log
The Audit Log section of the Magento 2 Etsy connector extension contains the list of the tasks. Further, the status of the same can be viewed here. Thus, the errors (if any) that occurred while executing the jobs can be checked here.
Module Link: https://www.knowband.com/magento-2-etsy-marketplace-integration
Admin Demo Link: